|
|
|
Porsche, and the Porsche crest are registered trademarks of Dr. Ing. h.c. F. Porsche AG.
This site is not affiliated with Porsche in any way. Its only purpose is to provide an online forum for car enthusiasts. All other trademarks are property of their respective owners. |
|
|

  |

| friethmiller |
 Aug 31 2025, 06:27 PM Aug 31 2025, 06:27 PM
Post
#601
|
|
Senior Member  Group: Members Posts: 1,130 Joined: 10-February 19 From: Austin, TX Member No.: 22,863 Region Association: Southwest Region |
Bumper Restoration - Part 2 (8/11 - 8/24/2025)
After painting the bumpers with 2 quick coats of epoxy and letting the panels sit out in the Texas sun for a few days, I then moved on to the next steps. With 100-grit sandpaper, I prep'd each bumper for body filler. For the front bumper, this meant almost a complete skim-coat where as the rear only required filler in areas around the bumper guards. 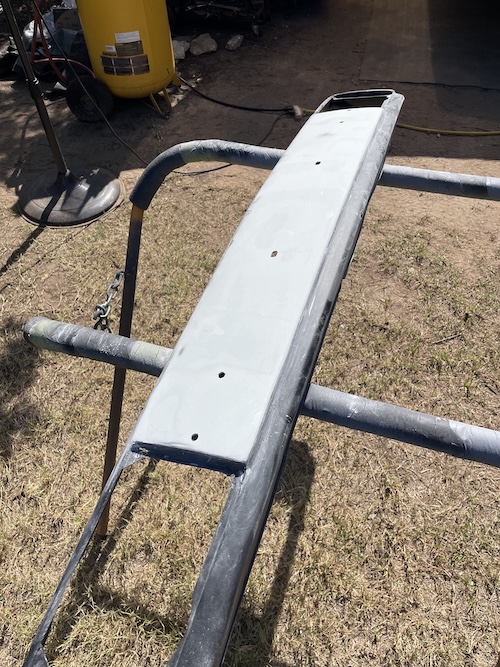 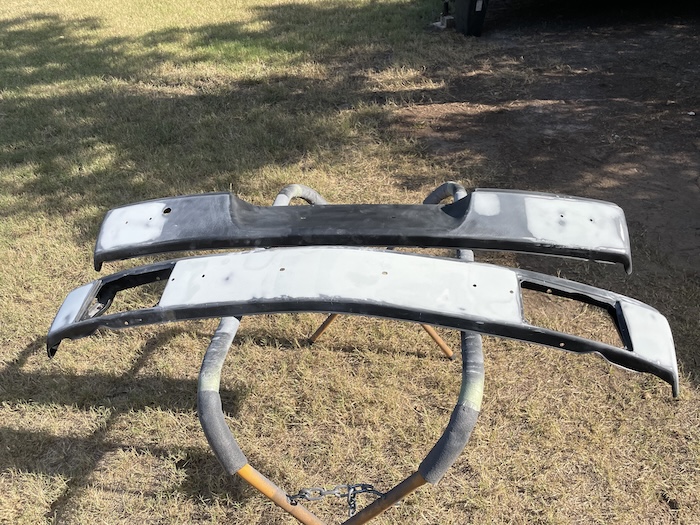 This work was done over 2-3 days and resulted in another light coat of epoxy to cover the exposed metal spots. 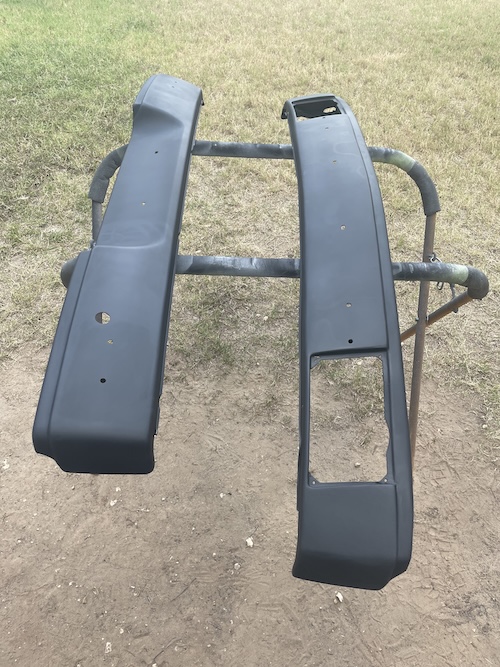 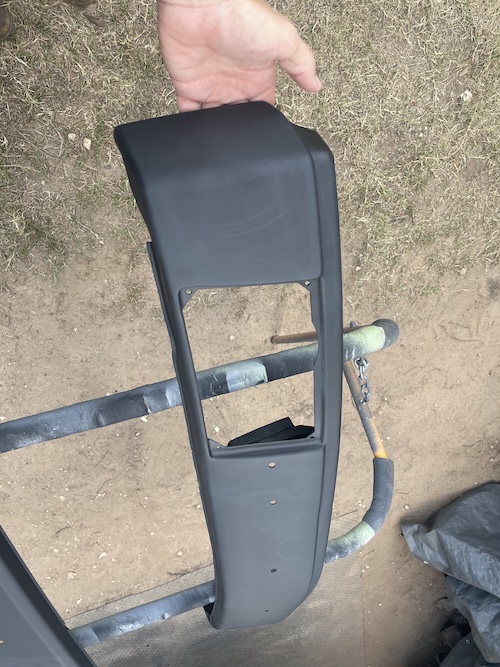 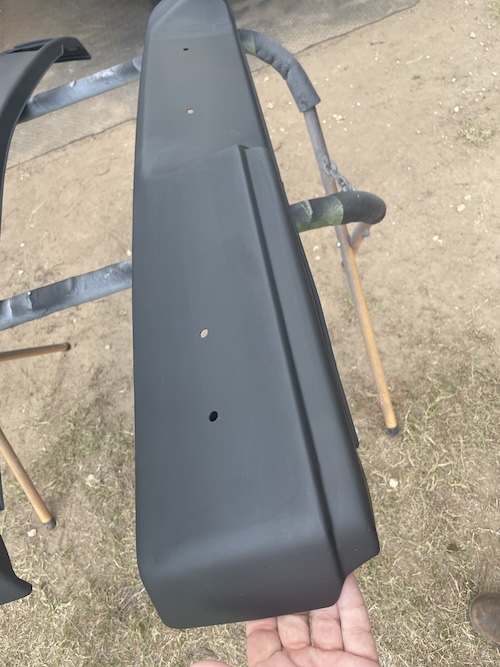 After examining my work, I decided the rear bumper was good enough but the front required additional work. After filling/sanding a few stubborn low spots, the panel was deemed ready for the next step. Note: I used a slightly stiffer sanding block here. This acted to flatten the main area more, allowing me to eliminate the lows. 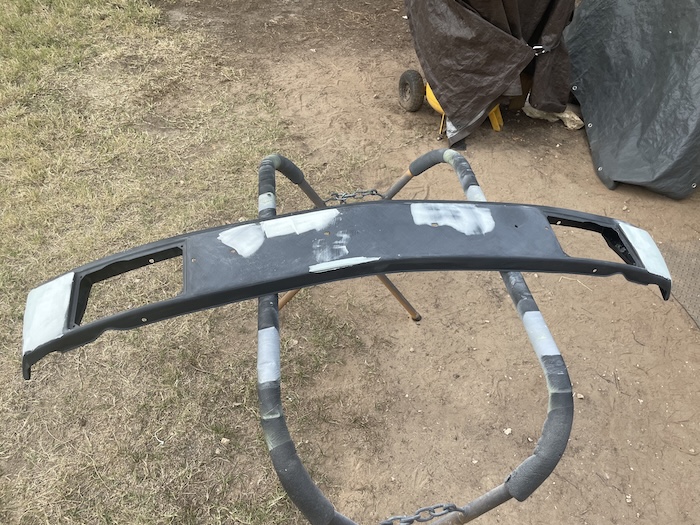 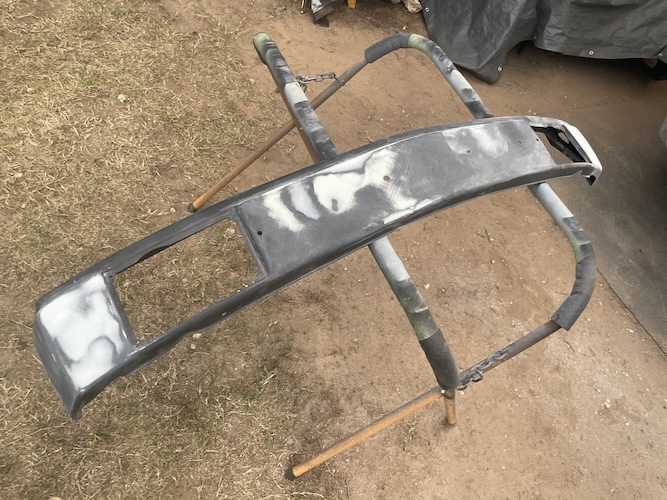 After a few more days of drying and with the gray primer on-hand, a final epoxy coat was applied over each bumper. I didn't get a photo of the front but here's the rear ready for dry-fit. Note: you will see plenty of the front in the next post. Cheers to continued progress! (IMG:style_emoticons/default/beerchug.gif) 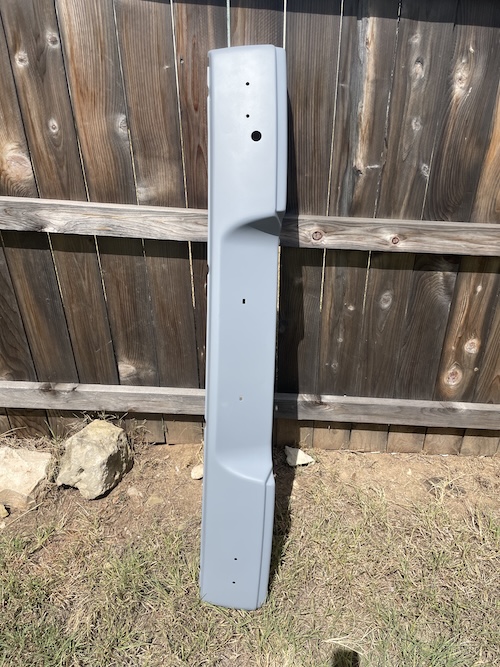 |
   |

 
|
| Montreal914 |
Aug 31 2025, 06:35 PM
Post
#602
|
|
Advanced Member Group: Members Posts: 2,003 Joined: 8-August 10 From: Claremont, CA Member No.: 12,023 Region Association: Southern California |
|
|
|
|
| friethmiller |
Sep 1 2025, 02:47 PM
Post
#603
|
|
Senior Member Group: Members Posts: 1,130 Joined: 10-February 19 From: Austin, TX Member No.: 22,863 Region Association: Southwest Region |
QUOTE(Montreal914 @ Aug 31 2025, 07:35 PM)  Thanks, Eric! Weather went south this afternoon so I might as well post my recent work. Post coming soon. |
|
|
|
| friethmiller |
Sep 1 2025, 03:06 PM
Post
#604
|
|
Senior Member Group: Members Posts: 1,130 Joined: 10-February 19 From: Austin, TX Member No.: 22,863 Region Association: Southwest Region |
Side Quest - Headlight Covers and Eyebrows (8/30/2025)
Some pics of the work involved in removing about 10 layers of paint off these parts. I don't know why people think it's ok to just keep layering it on (IMG:style_emoticons/default/blink.gif) I had already sandblasted the backsides but needed to strip off the outside paint. As you can see here, I used a paint removing disk on the edges and then scrapped off the majority of the paint with a razor blade. I used the disk again to take it down to bare steel. I cleaned and prep'd all the parts before hitting it with 2 coats of black epoxy. 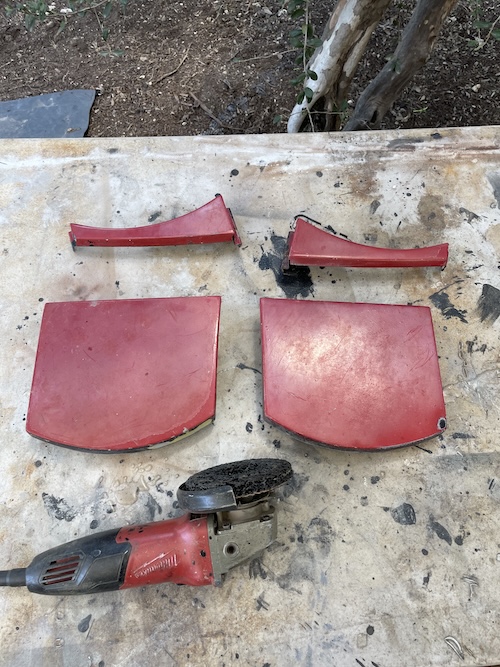 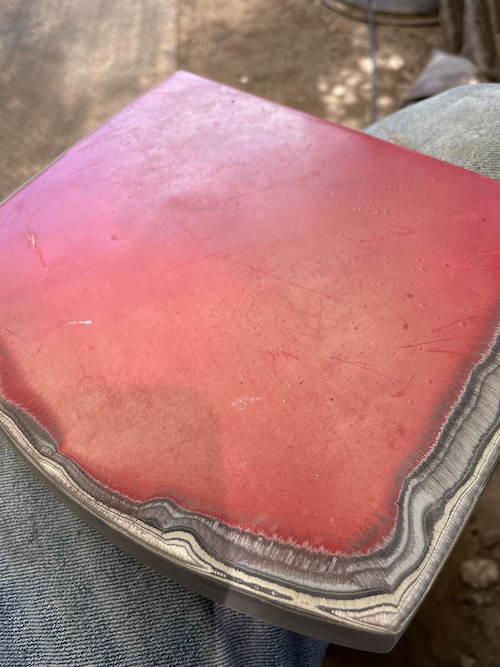 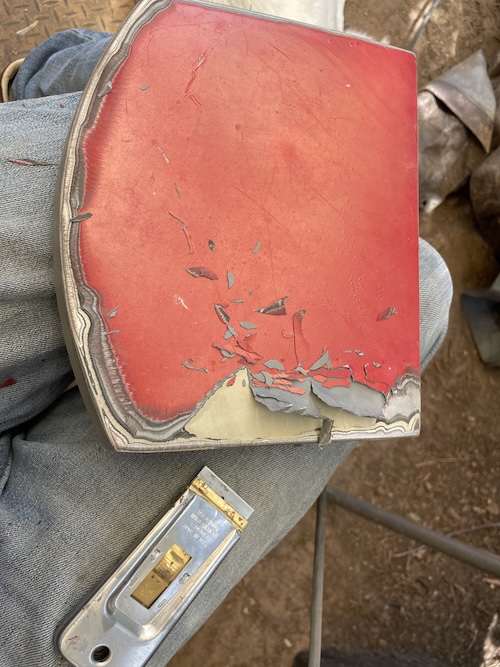  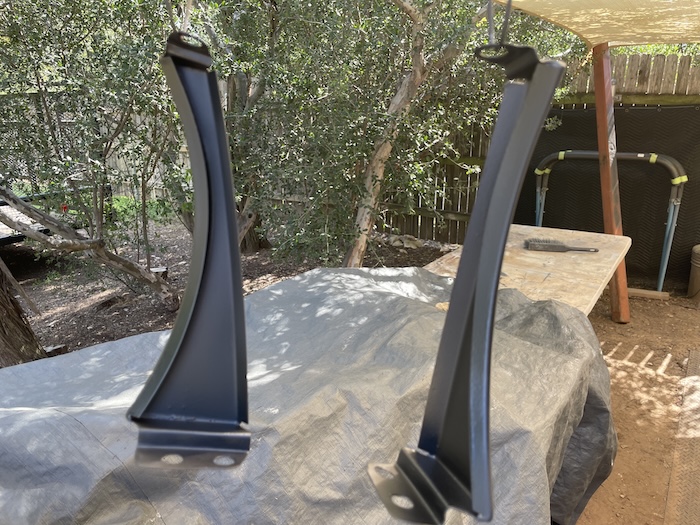 |
|
|
|
| friethmiller |
Sep 1 2025, 03:29 PM
Post
#605
|
|
Senior Member Group: Members Posts: 1,130 Joined: 10-February 19 From: Austin, TX Member No.: 22,863 Region Association: Southwest Region |
Dry Fit - Frontend Only (8/30/2025)
With all the parts ready to go, it was finally time to see how every goes together. Knowing this car had cleared out a few ditches in its lifetime, I figured this might be a bit of a challenge. After mounting the bumper, the headlight frames, covers, and eyebrows the shape of the car was finally revealed. Things weren't perfect but after a few adjustments here and there [mainly to the bumperI was finally able to get it [fairly] close. The arrows in the second photo show how the passenger side of the front hood is just a little short. Granted I don't have the hood latch working yet but I would have liked to have seen the gap a little more even. With the seals in place and the car being black you would likely not even notice but I'm not satisfied with what I see, yet. I will consider possibly adding a welding rod to this edge but will hold off for now. 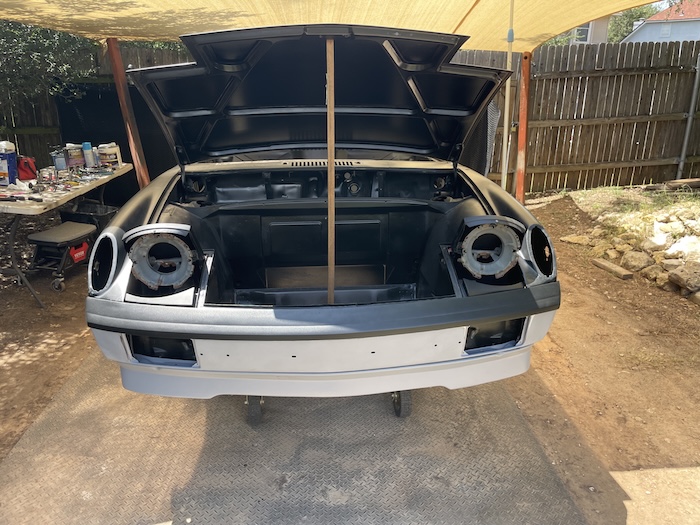 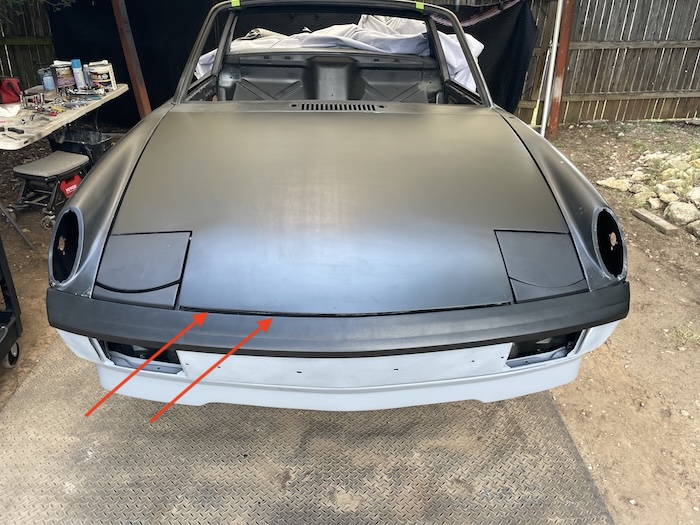 More photos of the front hood gap. Not exactly happy (IMG:style_emoticons/default/dry.gif)  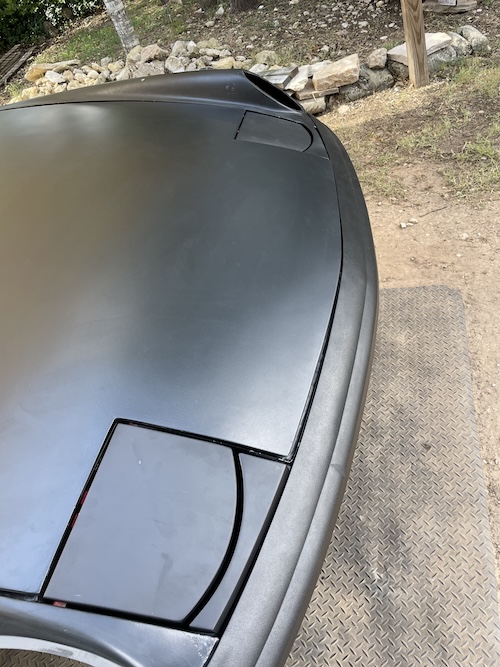 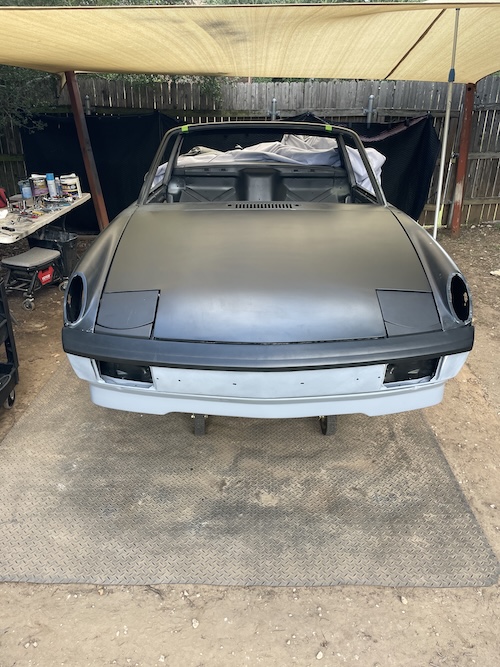 |
|
|
|
| 930cabman |
Sep 1 2025, 04:57 PM
Post
#606
|
|
Advanced Member Group: Members Posts: 4,441 Joined: 12-November 20 From: Buffalo Member No.: 24,877 Region Association: North East States |
|
|
|
|
| Puebloswatcop |
Sep 2 2025, 04:45 AM
Post
#607
|
|
Senior Member Group: Members Posts: 1,691 Joined: 27-December 14 From: Mineola, Texas Member No.: 18,258 Region Association: Southwest Region |
Wow Fred, You have come so far since I last checked in on your progress. The car looks great. The bumpers came out awesome. She is a work of art, thats for sure. I can't wait to see it when it is complete. Did I count correctly, 8 layers of paint on the headlight covers..... Not sure what people are thinking. (IMG:style_emoticons/default/beerchug.gif) (IMG:style_emoticons/default/smilie_pokal.gif)
|
|
|
|
| Cairo94507 |
Sep 2 2025, 07:19 AM
Post
#608
|
|
Michael Group: Members Posts: 10,541 Joined: 1-November 08 From: Auburn, CA Member No.: 9,712 Region Association: Northern California |
Amazing workmanship; car is looking great. (IMG:style_emoticons/default/beerchug.gif)
|
|
|
|
| friethmiller |
Sep 2 2025, 08:53 AM
Post
#609
|
|
Senior Member Group: Members Posts: 1,130 Joined: 10-February 19 From: Austin, TX Member No.: 22,863 Region Association: Southwest Region |
Hood Pull Assembly (9/1/2025)
Since I had to replace the metal that the front hood pull assembly attached to, it was finally time to somehow figure out how to remount it. First pic shows the repaired area with the dashed box & arrow. Second photo shows how I outlined where I wanted to mount it. From here it was just a matter of using tape to establish where to put the holes. The poor allen head screws had to be heated to be removed and will definitely be replaced. After mounting the assembly I was finally able to get the front hood latch to work. It did require some penetrating oil but it worked great. The restoration of this entire assembly will be for another day. For now, at least, I have the holes where I need them. Next up, is additional work to the front valance. Hoping to have all the "yellow parts" ready for paint soon. (IMG:style_emoticons/default/aktion035.gif) 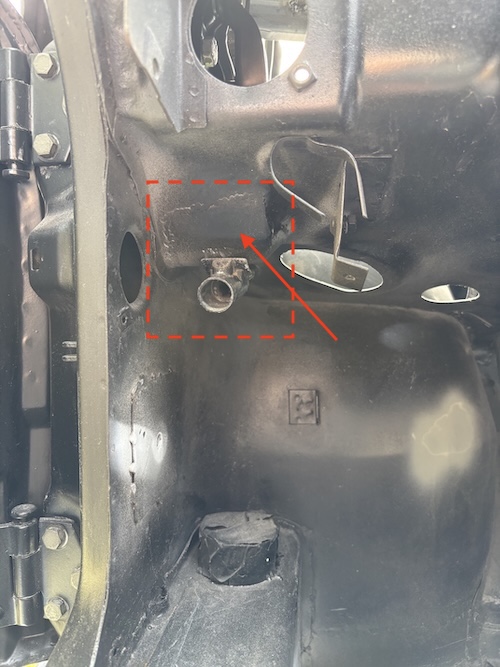 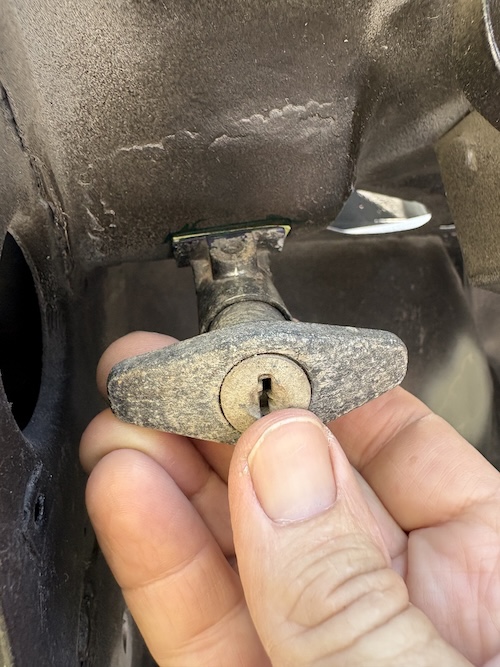 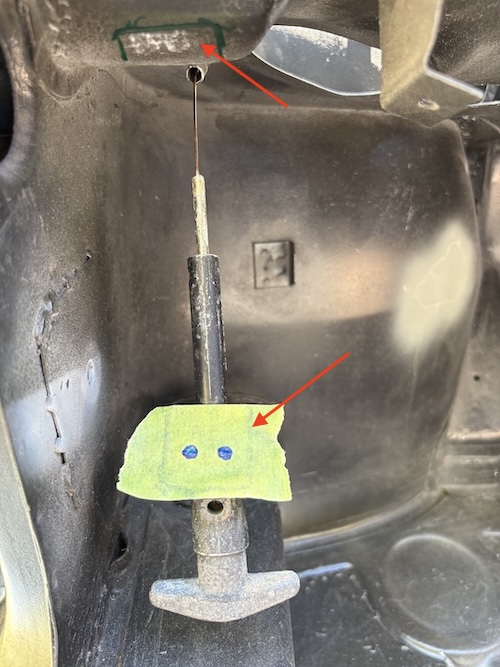  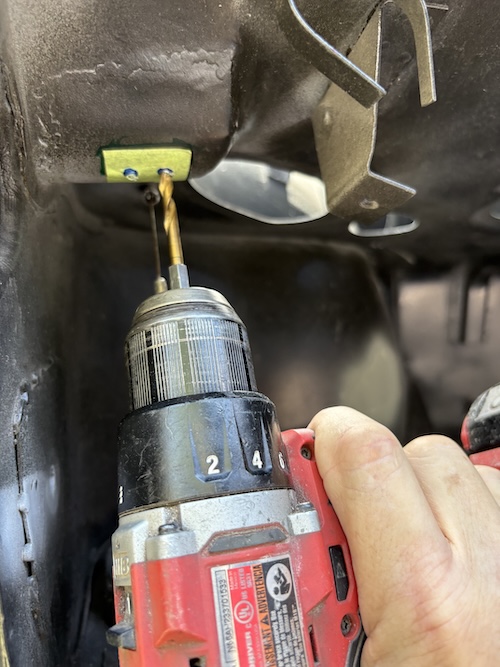 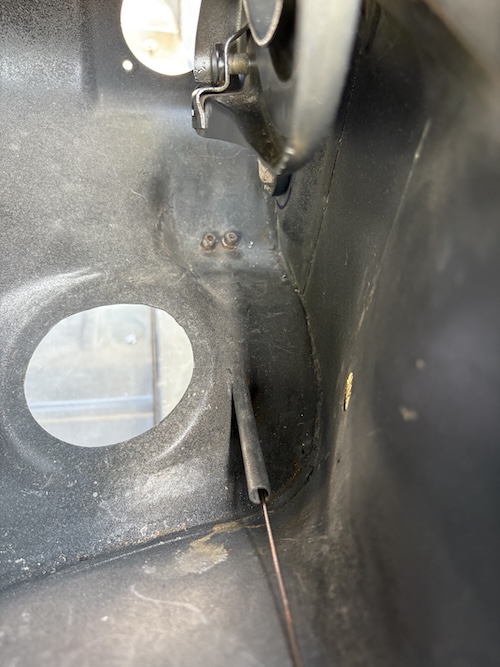 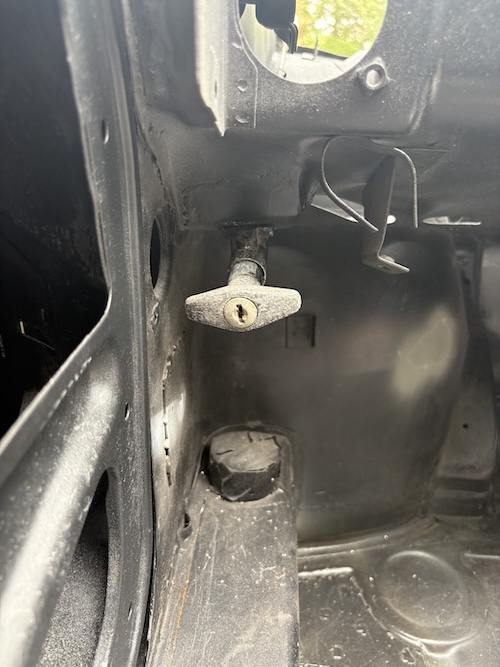 |
|
|
|
| friethmiller |
Sep 2 2025, 12:29 PM
Post
#610
|
|
Senior Member Group: Members Posts: 1,130 Joined: 10-February 19 From: Austin, TX Member No.: 22,863 Region Association: Southwest Region |
QUOTE(930cabman @ Sep 1 2025, 05:57 PM) QUOTE(Puebloswatcop @ Sep 2 2025, 05:45 AM) Wow Fred, You have come so far since I last checked in on your progress. The car looks great. The bumpers came out awesome. She is a work of art, thats for sure. I can't wait to see it when it is complete. Did I count correctly, 8 layers of paint on the headlight covers..... Not sure what people are thinking. (IMG:style_emoticons/default/beerchug.gif) (IMG:style_emoticons/default/smilie_pokal.gif) QUOTE(Cairo94507 @ Sep 2 2025, 08:19 AM) Thanks guys! Kevin, I counted 8 to 9 layers on the rear trunk so you're probably right. Amazing! |
|
|
|
| friethmiller |
Sep 4 2025, 01:21 PM
Post
#611
|
|
Senior Member Group: Members Posts: 1,130 Joined: 10-February 19 From: Austin, TX Member No.: 22,863 Region Association: Southwest Region |
Additional Work/Paint on the Front Valance/Front Bumper (9/1 - 9/3/2025)
Best part of a dry fit is that you see all the little issues. Here I'm using a square file to "box" the round hole to allow the original bottom bolt properly recess into the panel. 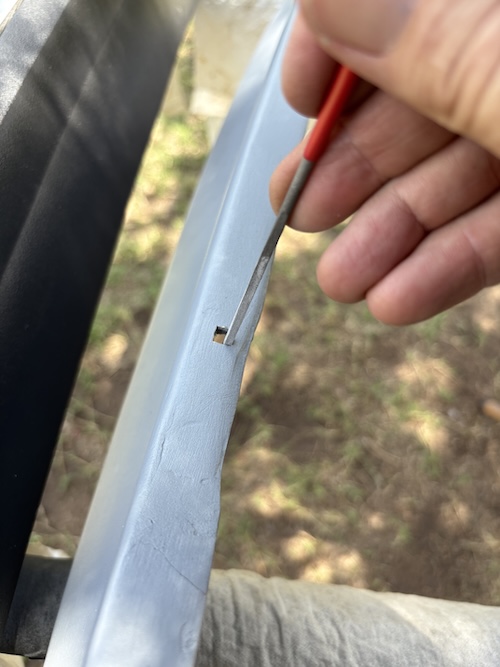 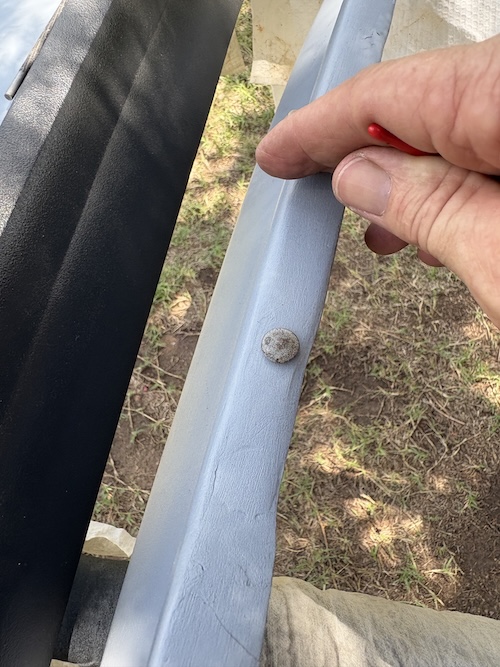 Next was figuring out a way to close the ends of the valance. Since I really liked how that JB Weld epoxy worked, I decided to get more and see if I could at least get it to hold shape for a follow-on coat of fiberglass. To make this work, I created a template out of cardboard from tracing the profile. Cutting out about an inch around this pattern allowed me to create a form that I could tape in-place. Once secure, I would then lay in some epoxy and let it cure. Here's some photos of the process. Note: I had to take my work into the shed due to a passing rain storm. 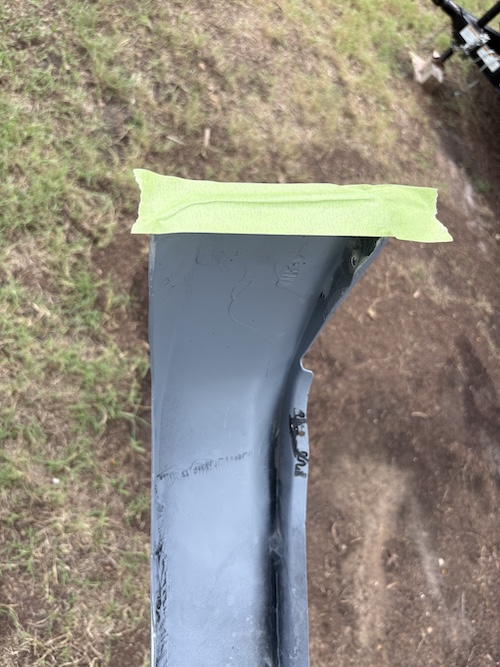 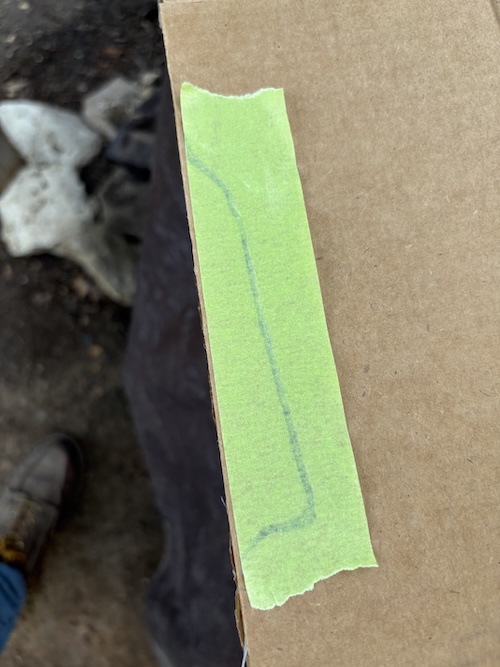 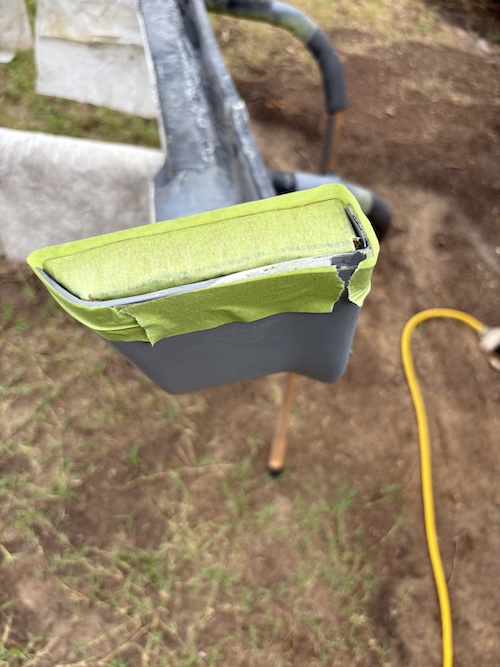 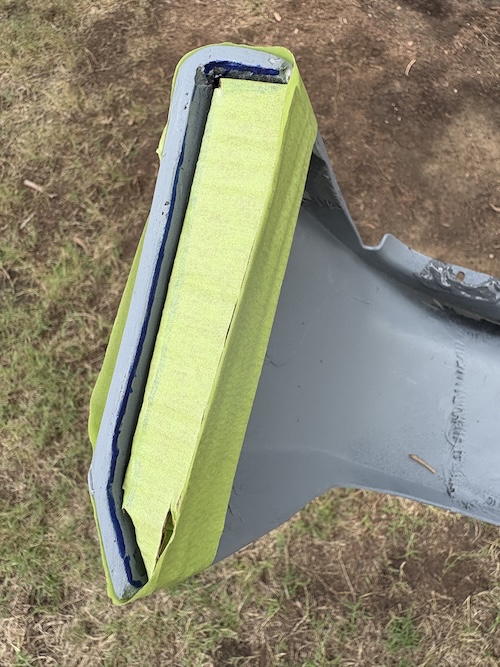 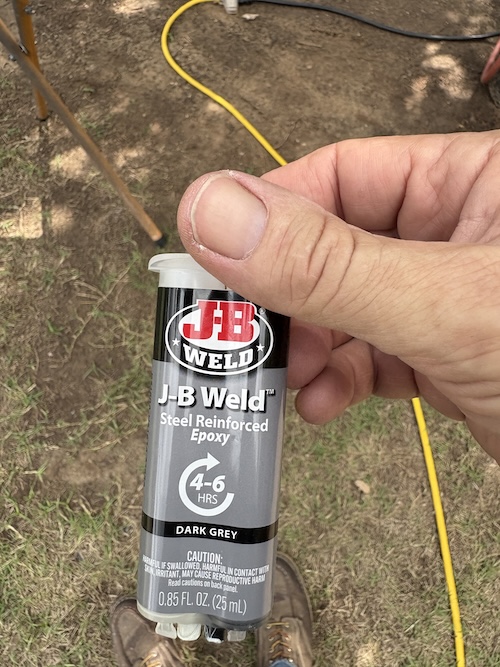 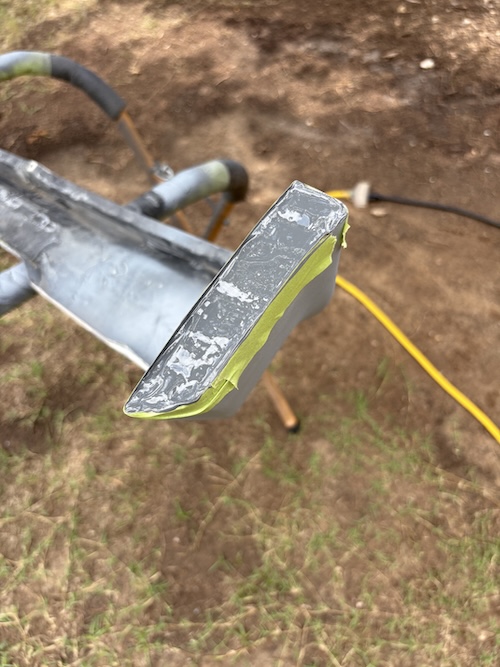 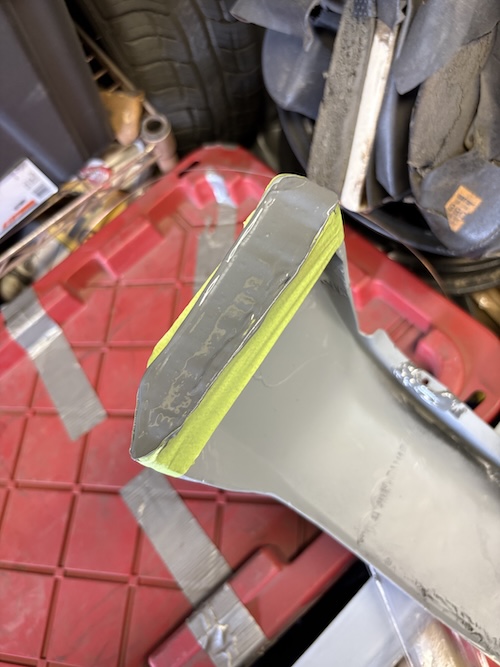 After a few hours of dry time, I was finally able remove the tape and get a first look at the results. It actually worked! (IMG:style_emoticons/default/aktion035.gif) Here you can see the side view of the cardboard and how it was just lightly taped in place. I decided at this point to just let it harden overnight. 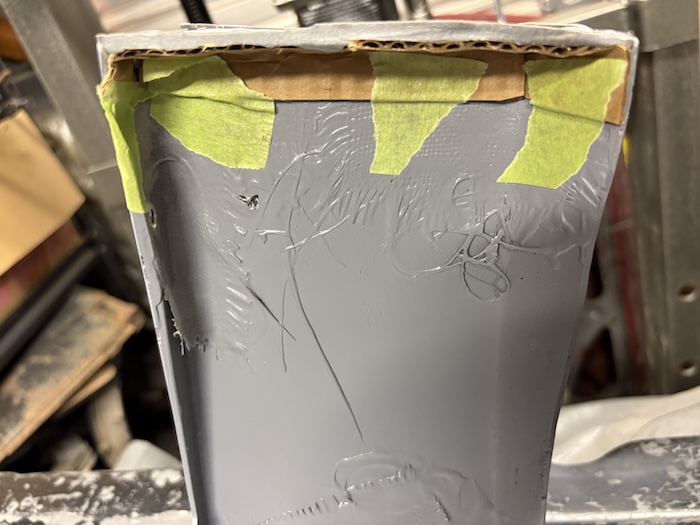 The next day I returned and added a little body filler to each end to start flattening the ends down. I also started removing as much of the cardboard as I could. Last photo here shows one of the ends with the excess cardboard removed. 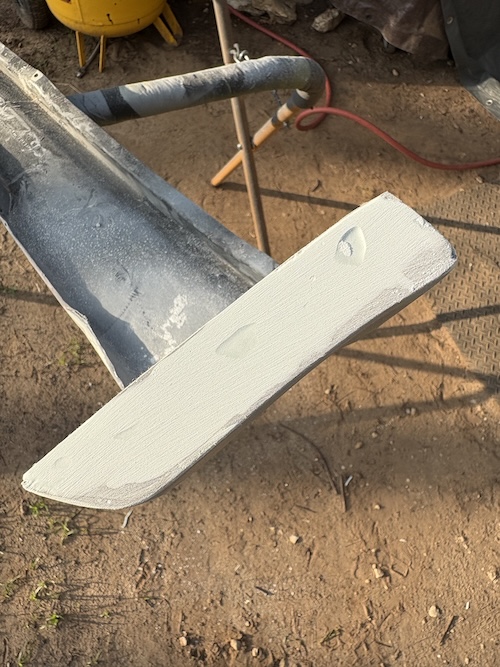  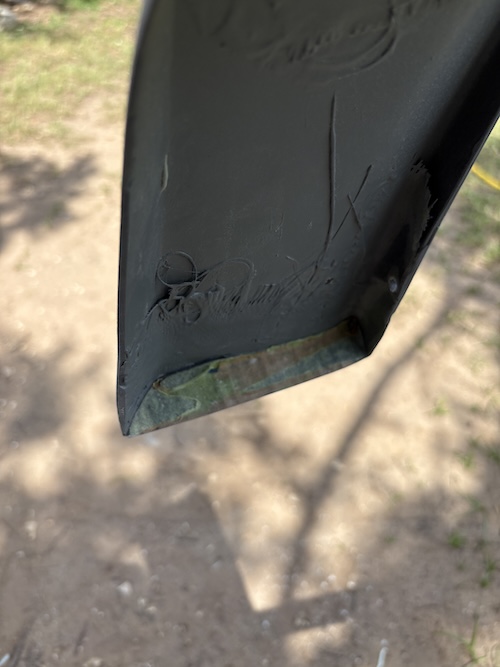 After this, I used more JB Weld epoxy and layered it into the inside. This resulted in a very solid repair without the need for fiberglass (IMG:style_emoticons/default/biggrin.gif) The following photos show the results of this work. 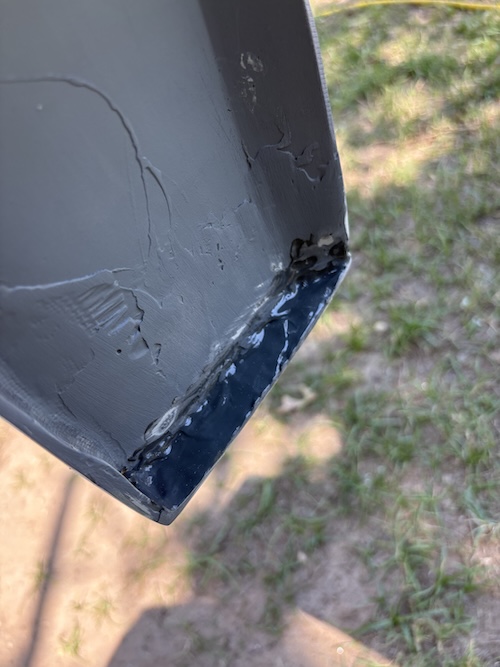 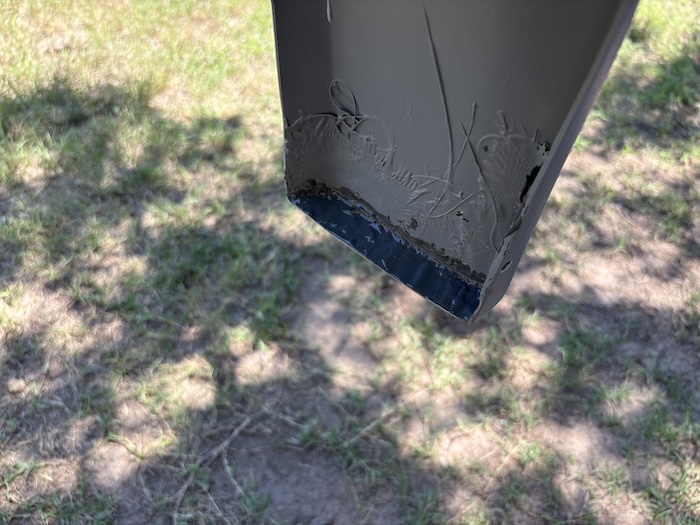 And then, of course, more body filler... more sanding... 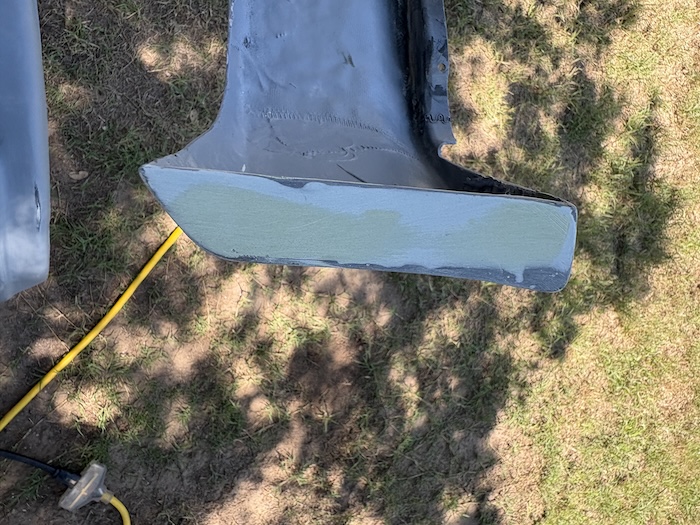 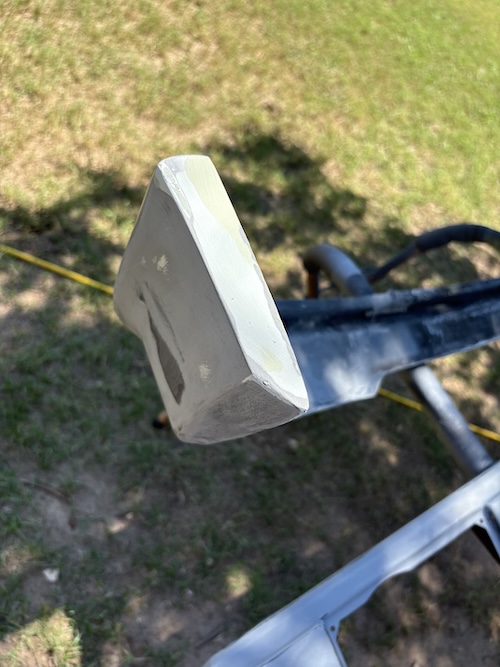 And then after even more sanding and cleaning of the bumper and valance.... more epoxy!! Last photo shows one of the new ends in primer. Once these panels dry completely, they will return to the shed and the body work on the main part of the car will resume. Till then... Cheers! (IMG:style_emoticons/default/beerchug.gif) 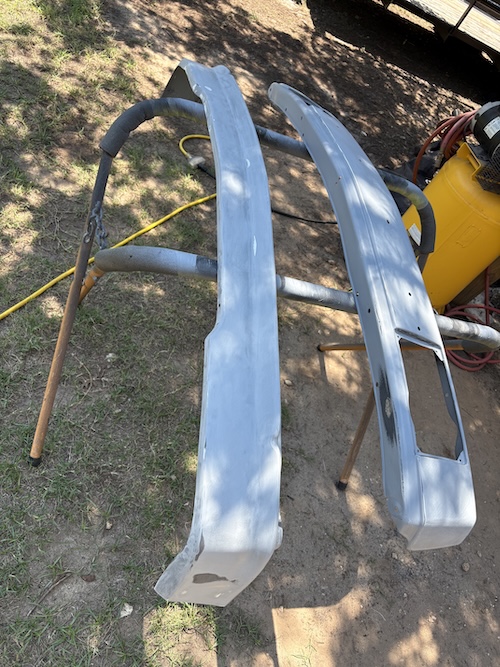 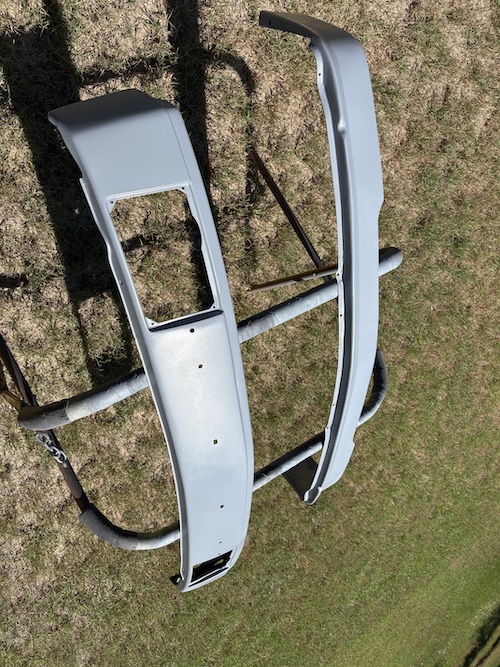 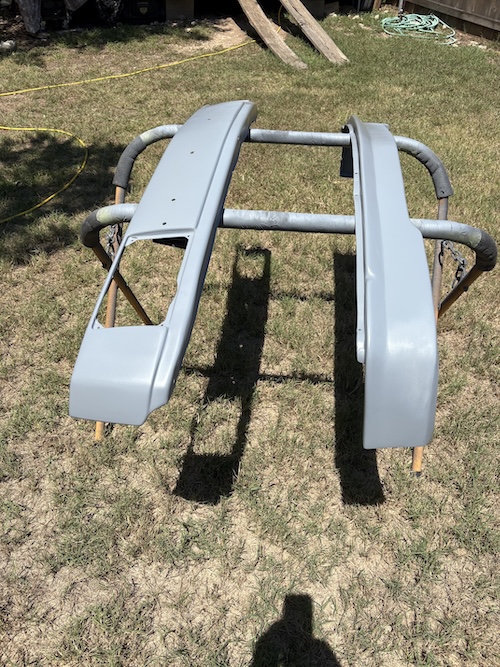 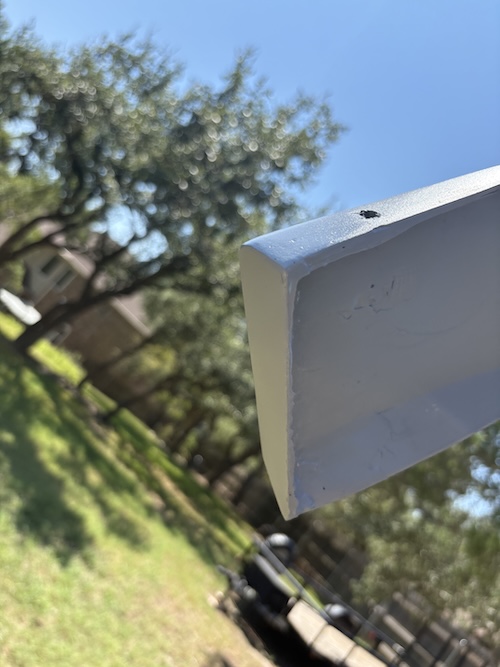 |
|
|
|
| 930cabman |
Sep 4 2025, 05:43 PM
Post
#612
|
|
Advanced Member Group: Members Posts: 4,441 Joined: 12-November 20 From: Buffalo Member No.: 24,877 Region Association: North East States |
curious, were you behind the wheel during one of the "ditch cleaning" efforts ?
|
|
|
|
| Puebloswatcop |
Sep 4 2025, 06:54 PM
Post
#613
|
|
Senior Member Group: Members Posts: 1,691 Joined: 27-December 14 From: Mineola, Texas Member No.: 18,258 Region Association: Southwest Region |
Fred, that fill on the valance looks awesome, like it should have come from the factory.
(IMG:style_emoticons/default/smash.gif) |
|
|
|
| friethmiller |
Sep 4 2025, 08:08 PM
Post
#614
|
|
Senior Member Group: Members Posts: 1,130 Joined: 10-February 19 From: Austin, TX Member No.: 22,863 Region Association: Southwest Region |
QUOTE(930cabman @ Sep 4 2025, 06:43 PM) curious, were you behind the wheel during one of the "ditch cleaning" efforts ? Too funny! (IMG:style_emoticons/default/lol-2.gif) No, not with this car. I haven’t driven it… yet!! (IMG:style_emoticons/default/driving.gif) |
|
|
|
| 930cabman |
Sep 6 2025, 05:53 AM
Post
#615
|
|
Advanced Member Group: Members Posts: 4,441 Joined: 12-November 20 From: Buffalo Member No.: 24,877 Region Association: North East States |
QUOTE(friethmiller @ Sep 4 2025, 08:08 PM) QUOTE(930cabman @ Sep 4 2025, 06:43 PM) curious, were you behind the wheel during one of the "ditch cleaning" efforts ? Too funny! (IMG:style_emoticons/default/lol-2.gif) No, not with this car. I haven’t driven it… yet!! (IMG:style_emoticons/default/driving.gif) "not with this car" soo you have experience with this maneuver? (IMG:style_emoticons/default/lol-2.gif) great progress, hats off to Fred for sure |
|
|
|
| Artfrombama |
Sep 6 2025, 02:41 PM
Post
#616
|
|
Artfrombama Group: Members Posts: 416 Joined: 21-January 24 From: North Alabama Member No.: 27,870 Region Association: South East States |
Nice work restoring the fiberglass parts.
Always look forward to your updates. |
|
|
|
| friethmiller |
Sep 7 2025, 09:28 PM
Post
#617
|
|
Senior Member Group: Members Posts: 1,130 Joined: 10-February 19 From: Austin, TX Member No.: 22,863 Region Association: Southwest Region |
Body Work - Cowl and Passenger Fender (9/6 - 9/7/2025)
I started the body work on Saturday with the cowl and eventually made it over to the passenger side front fender. The weather this weekend was not great with on and off rain so I wasn't able to get a lot done. Here's a few shots of the work on the cowl. It took many application and sanding to get this panel flat.  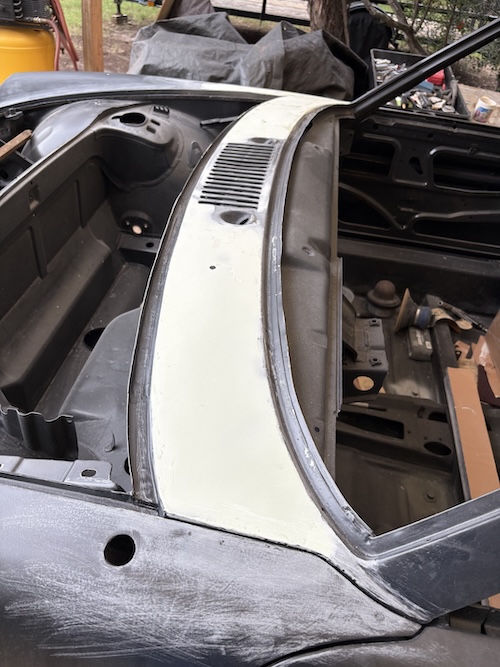 Moving on to the fender, I began applying filler to the top back end. Arrows point to low spots that needed additional filler. I ended up penciling these areas so I could scuff the filler skin and then lay on another round. Last photo shows the use of guide coat to verify everything is flat. Again this is very labor intensive work but this panels will need to be straight for the black paint. 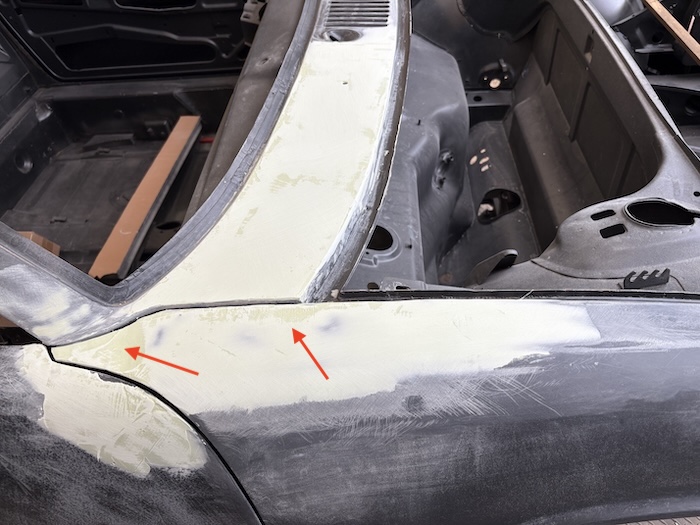 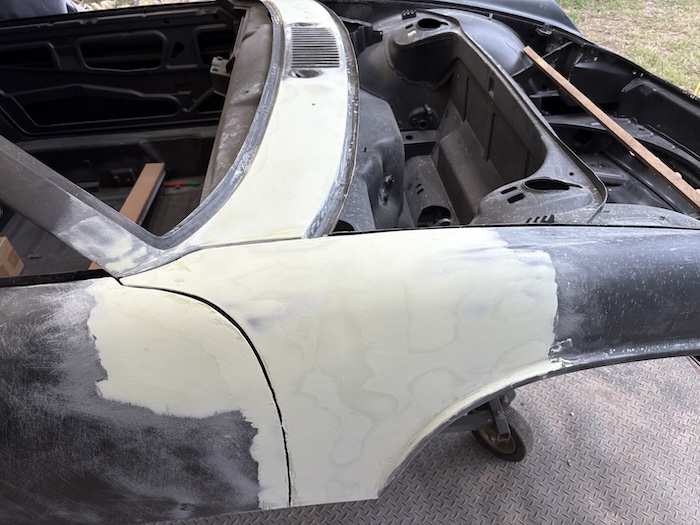 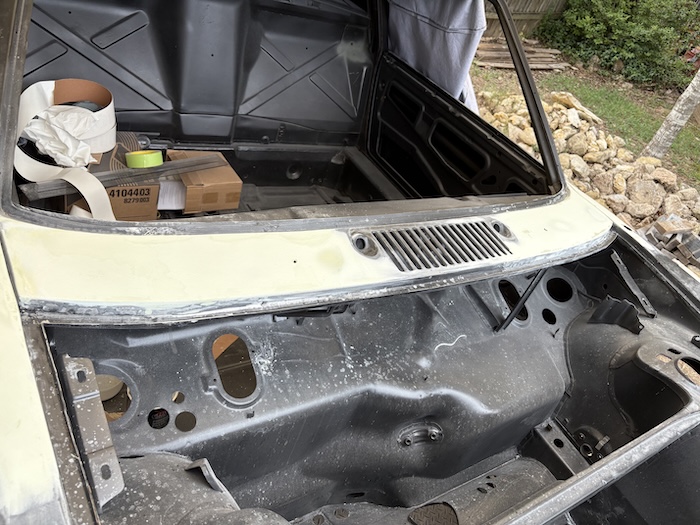 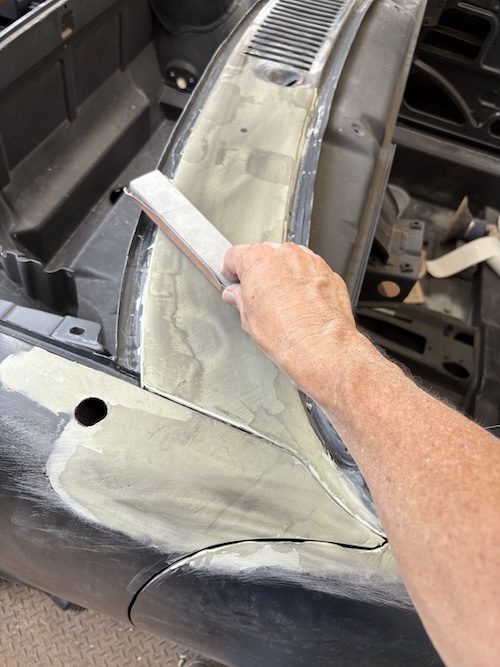 Moving on to the main part of the passenger fender, I was able to lay down a full skin coat over the rest of the panel. Second photo shows the filler I'm using. This is Evercoat Rage Ultra that has been mixed 50/50 with their Rage Ultra Extra, which has a slower cure time and is perfect for a guy working outside in the heat. Luckily the weather was below 90 so I had plenty of time to lay this stuff down. 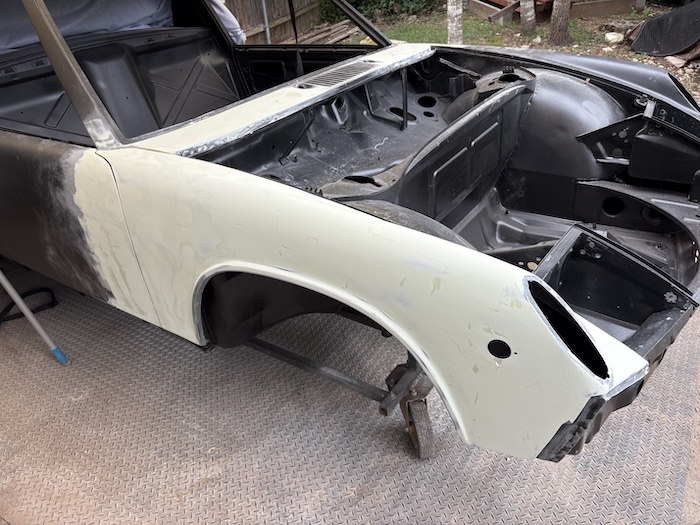 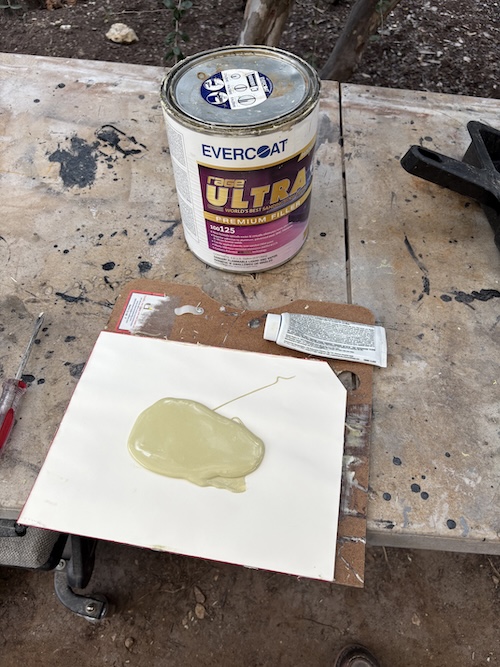 Here I am using guide coat to help flatten the panel. Note the use of the round block here on the top of the fender. This is rolled as I move in a 45 degree motion to help prevent digging in too much. Arrows in the 2nd photo point to lows revealed by the guide coat. 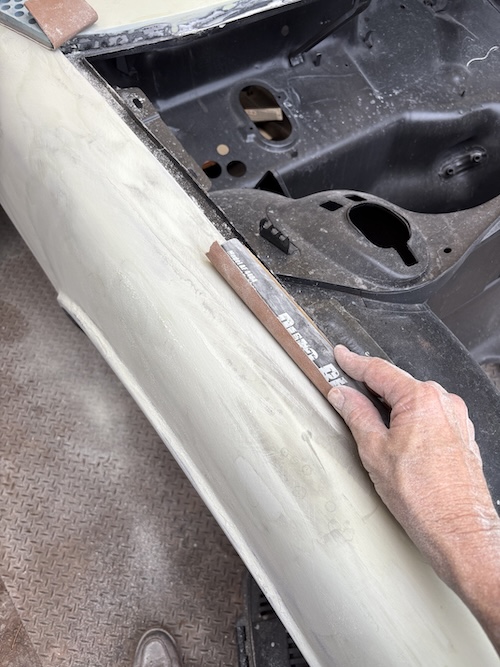 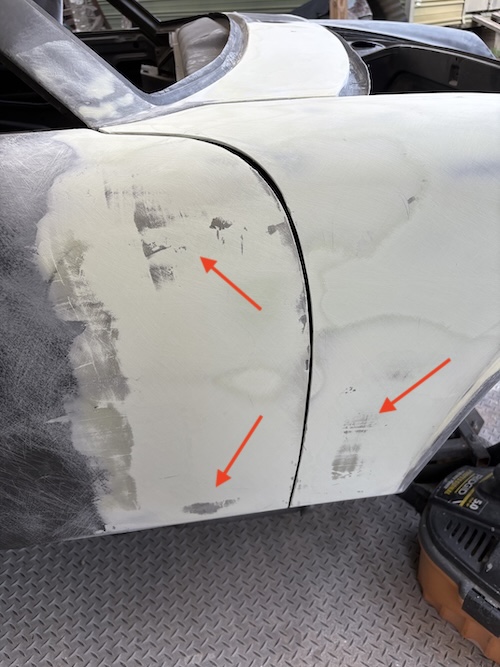 Trying to get the transition from the door to the fender flat here. And, I was starting to see progress as I was sanding things down when the rain started again. I had to stop everything, my filler half-sanded, and cover everything up for the day. Hoping for dryer weather next time. 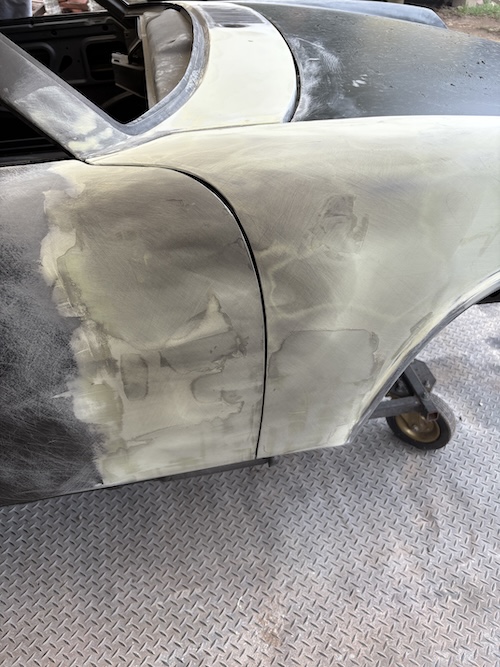 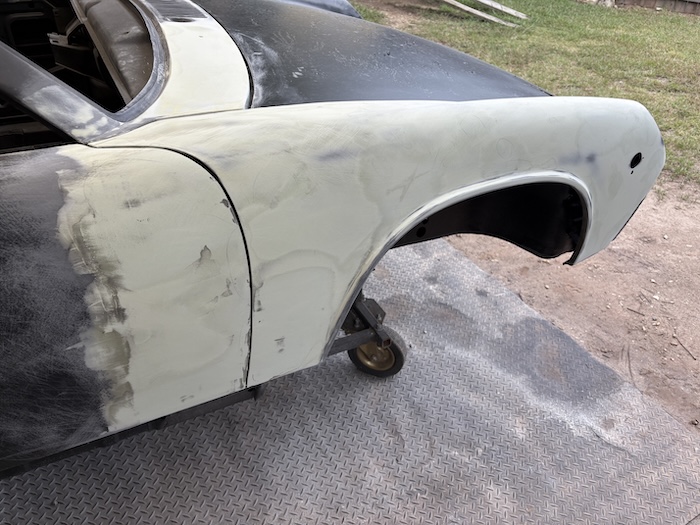 This sorry, old driver's front fender that I had to hammer out and weld-on a few weeks ago is next. I did spend a few minutes scuffing the panel to reveal all the low spots. I'll hammer and dolly what I can before applying filler. Until next time, cheers! (IMG:style_emoticons/default/beerchug.gif) 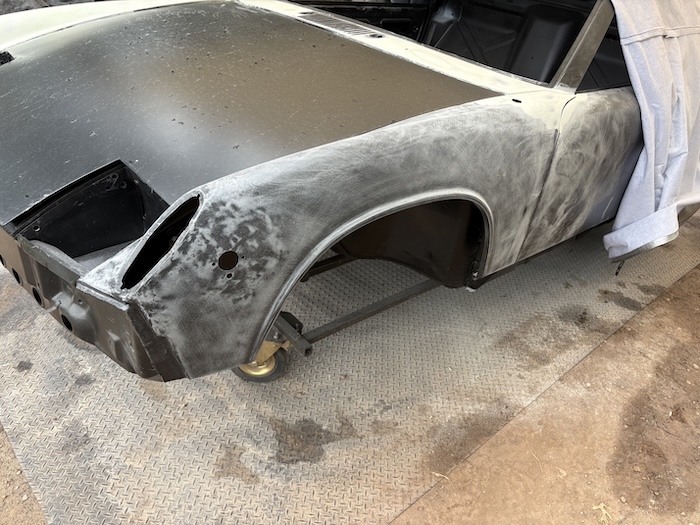 |
|
|
|
| Montreal914 |
Sep 8 2025, 12:16 AM
Post
#618
|
|
Advanced Member Group: Members Posts: 2,003 Joined: 8-August 10 From: Claremont, CA Member No.: 12,023 Region Association: Southern California |
Watching (and learning) with great interest. (IMG:style_emoticons/default/smilie_pokal.gif)
Very inspiring! (IMG:style_emoticons/default/pray.gif) |
|
|
|
| friethmiller |
Sep 8 2025, 07:26 AM
Post
#619
|
|
Senior Member Group: Members Posts: 1,130 Joined: 10-February 19 From: Austin, TX Member No.: 22,863 Region Association: Southwest Region |
QUOTE(Montreal914 @ Sep 8 2025, 01:16 AM) Watching (and learning) with great interest. (IMG:style_emoticons/default/smilie_pokal.gif) Very inspiring! (IMG:style_emoticons/default/pray.gif) Thanks Eric. Just getting ramped back up on the bodywork. I caught myself a few times yesterday using the wrong block or sanding a bit too much. This art-form, and what I know of it, is one of patience, effort, and reward. Getting these panels "laser-straight" for black, which I've never painted before, is what has me motivated. @930cabman -> between the bumper, valance, and the driver side fender, the PO definitely cleared out a ditch. This is what happens when you go "left of center" (IMG:style_emoticons/default/biggrin.gif) |
|
|
|
| friethmiller |
Sep 15 2025, 08:34 AM
Post
#620
|
|
Senior Member Group: Members Posts: 1,130 Joined: 10-February 19 From: Austin, TX Member No.: 22,863 Region Association: Southwest Region |
Passenger Side Bodywork (9/8 - 9/15)
Going to save a lot of words and just show pictures here. Many hours of work went into getting this side of the car closer to straight. Used a pencil to mark lows, scuffed filler, and reapplied. Repeat this 40 times with a bunch of block sanding in between. I had burn through on the edges here and there so, once I was happy with the filler work, I shot the car with two light coats of epoxy. I'll post some additional photos shortly showing the results and the door to fender gaps. 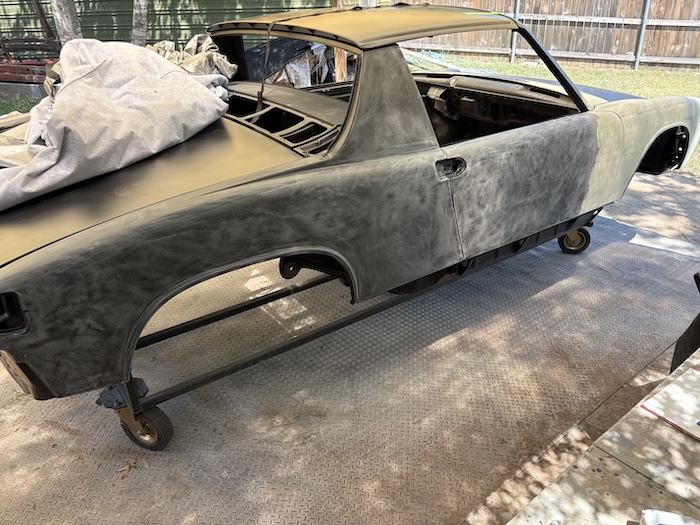 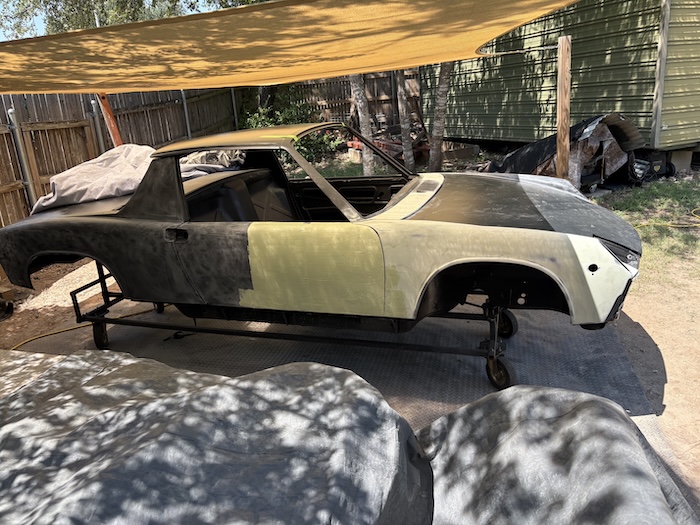 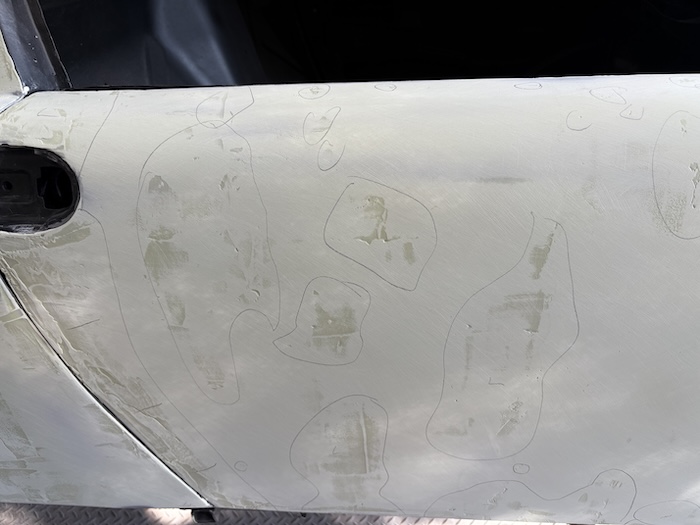 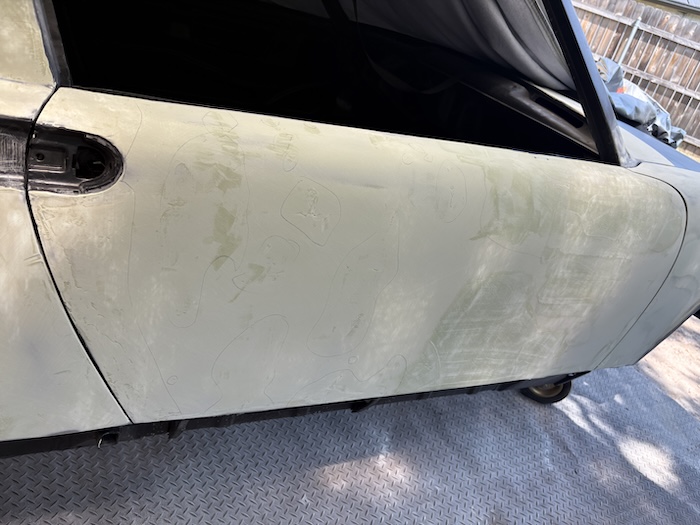 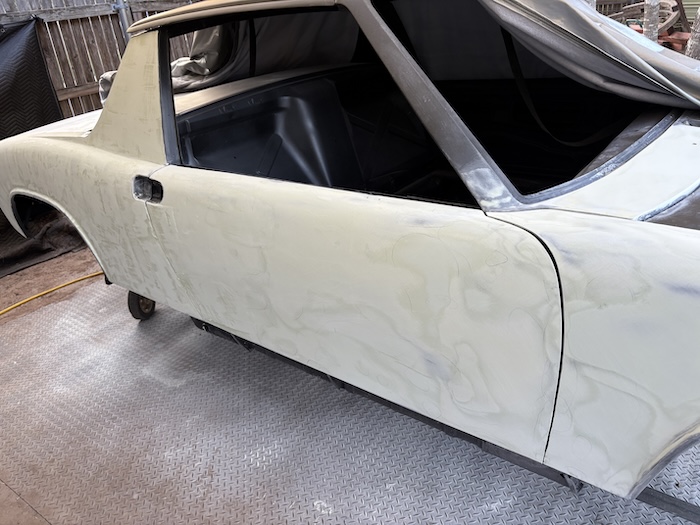 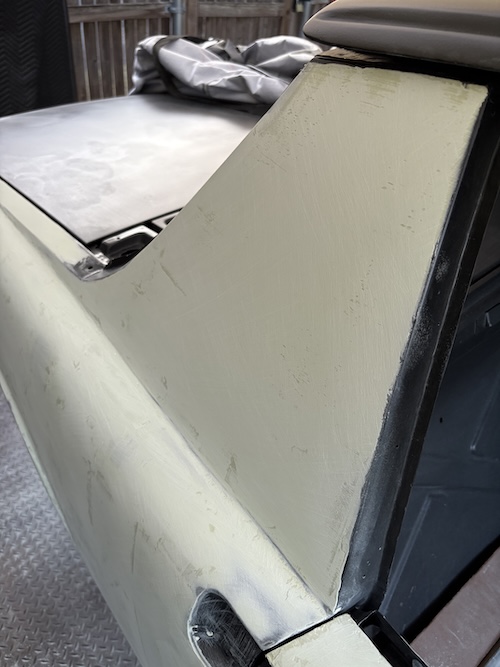 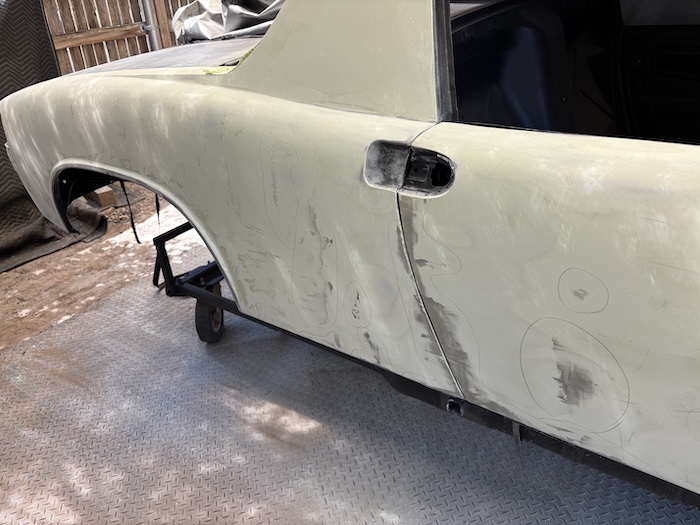 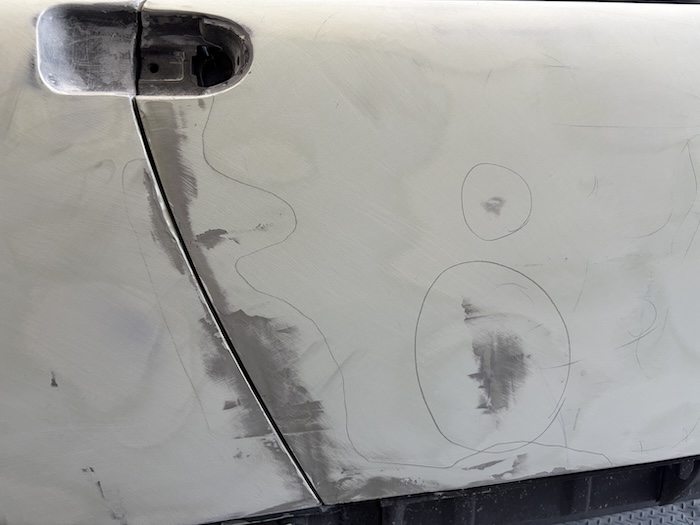 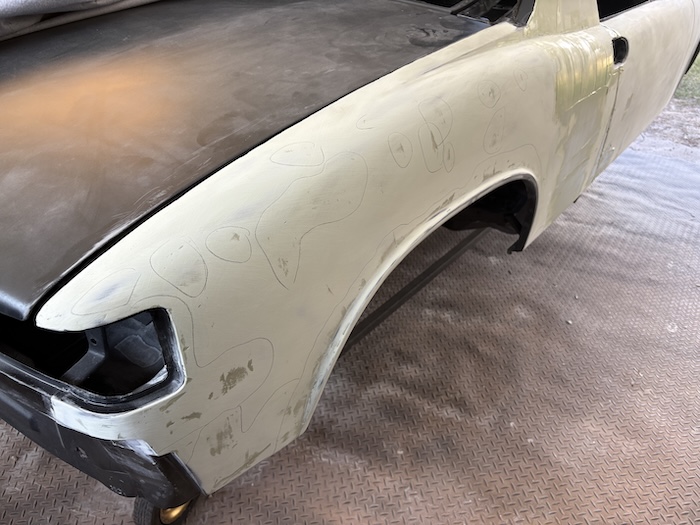 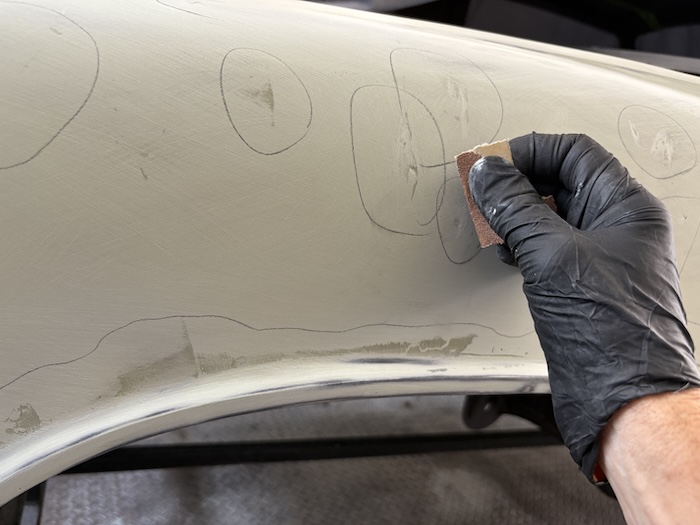 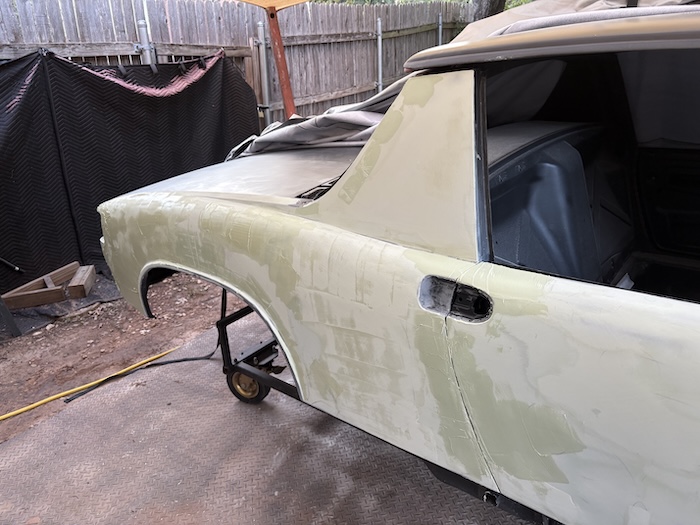 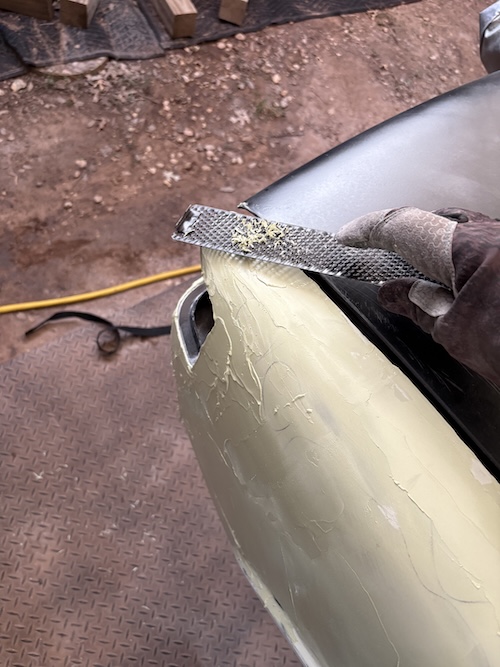 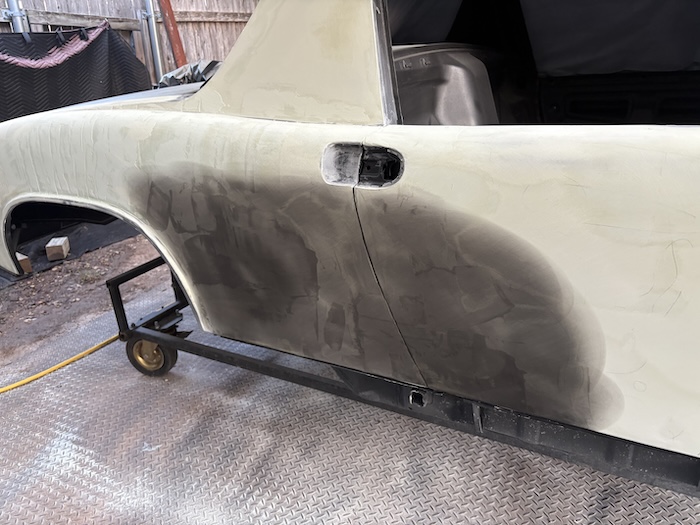  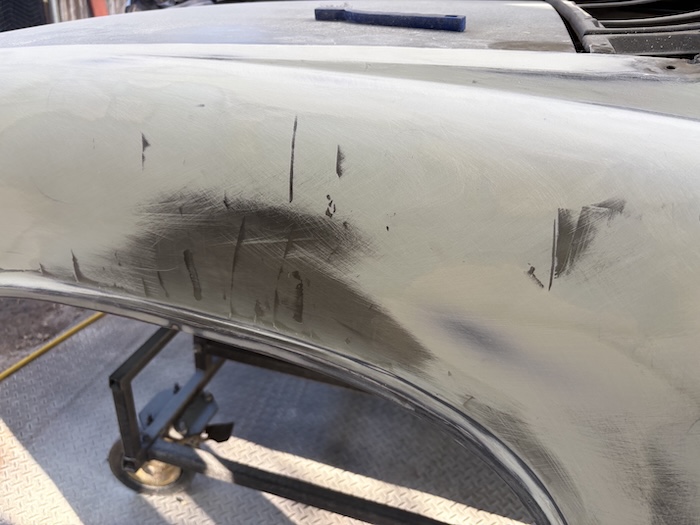 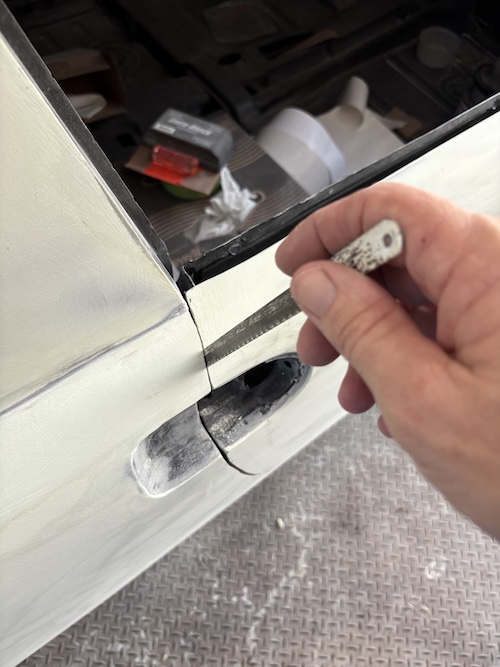 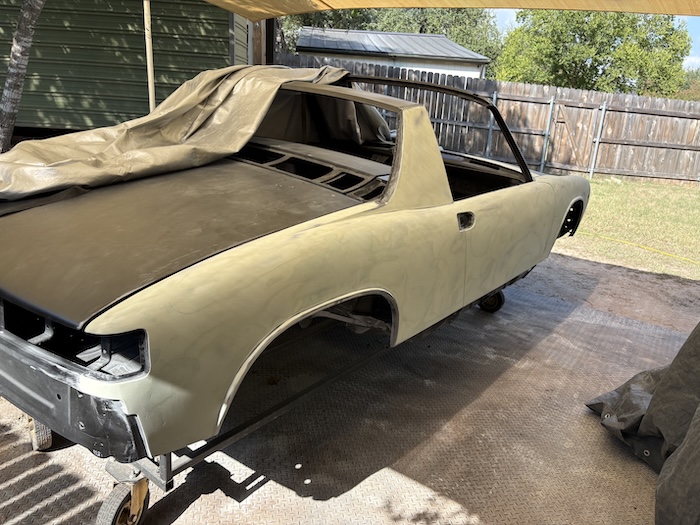 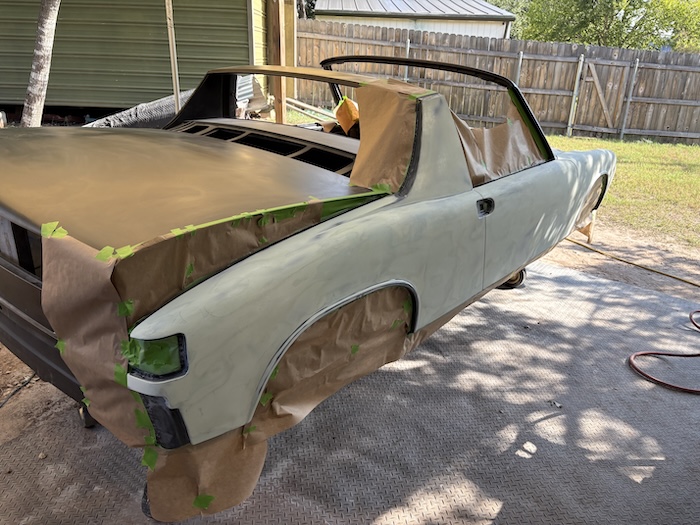 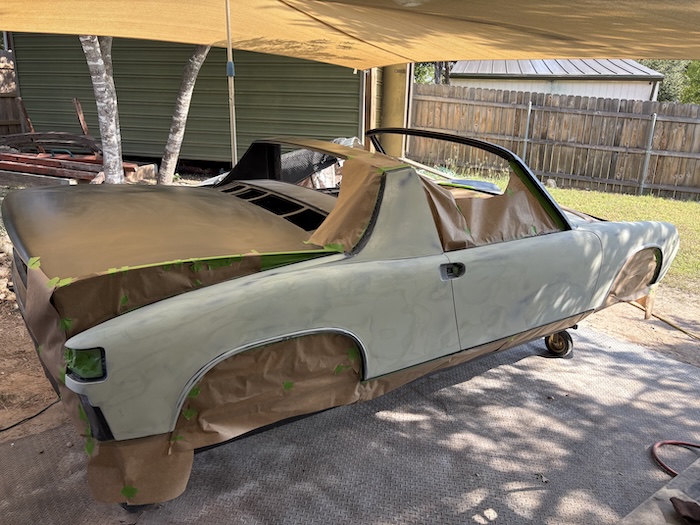 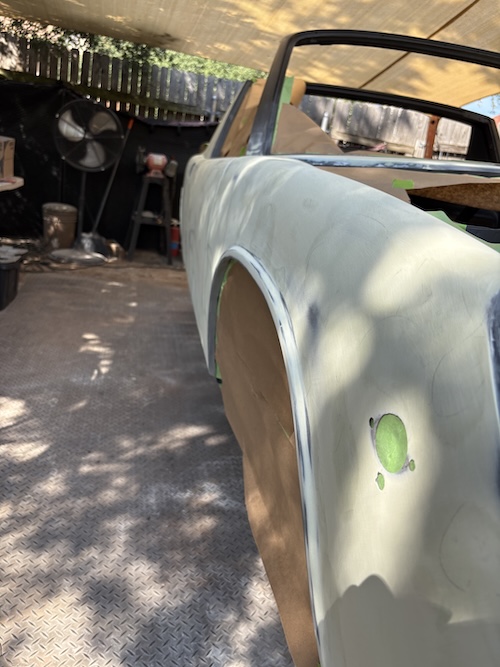  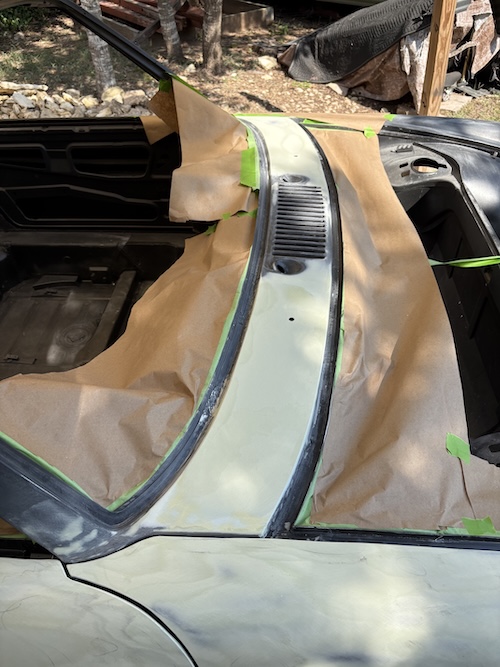 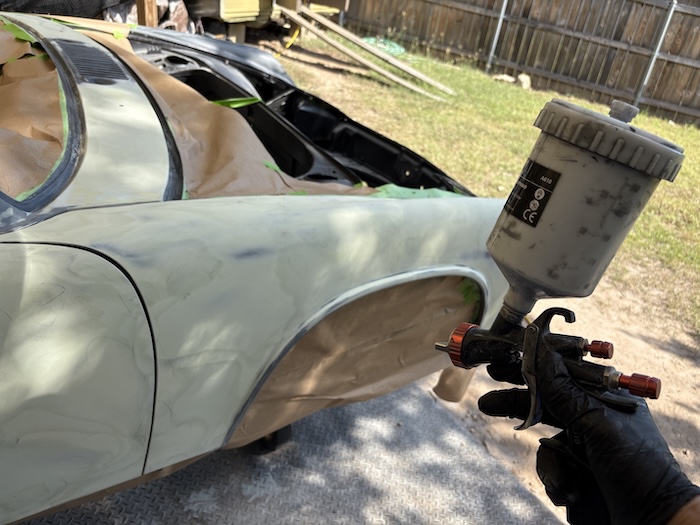 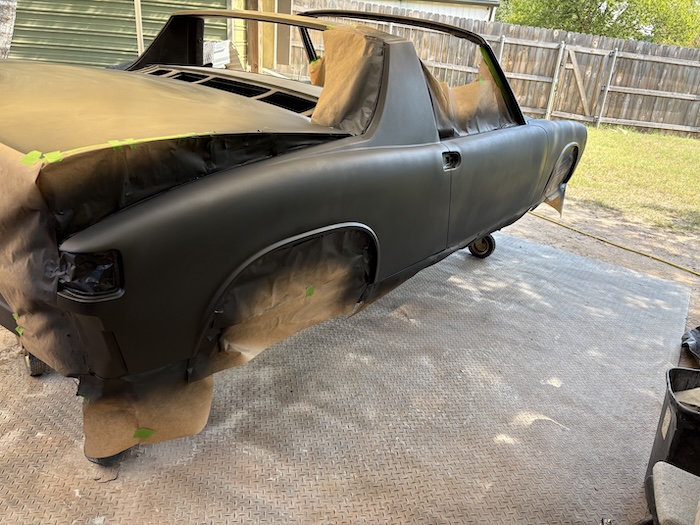 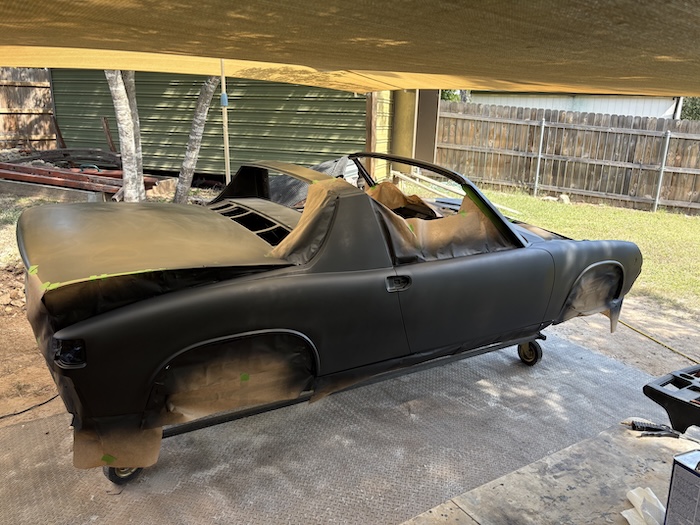 |
|
|
|
|
1 User(s) are reading this topic (1 Guests and 0 Anonymous Users)
0 Members:

|
Lo-Fi Version | Time is now: 11th January 2026 - 01:41 AM |
Invision Power Board
v9.1.4 © 2026 IPS, Inc.