|
|
|
Porsche, and the Porsche crest are registered trademarks of Dr. Ing. h.c. F. Porsche AG.
This site is not affiliated with Porsche in any way. Its only purpose is to provide an online forum for car enthusiasts. All other trademarks are property of their respective owners. |
|
|

  |

| Artfrombama |
 Sep 23 2025, 04:35 PM Sep 23 2025, 04:35 PM
Post
#641
|
|
Artfrombama  Group: Members Posts: 416 Joined: 21-January 24 From: North Alabama Member No.: 27,870 Region Association: South East States |
QUOTE(JeffBowlsby @ Sep 23 2025, 01:22 PM)  (IMG:style_emoticons/default/thumb3d.gif) Fred. Looks great! Maybe consider offer a Targa Top restoration service... (IMG:style_emoticons/default/agree.gif) |
   |

 
|
| slowrodent |
Sep 23 2025, 05:36 PM
Post
#642
|
|
Member Group: Members Posts: 218 Joined: 29-February 20 From: Tucson/Oro Valley Member No.: 23,981 Region Association: Southwest Region |
Bodywork pics and description shows you really know what you’re doing. Nice stuff. (IMG:style_emoticons/default/drooley.gif) (IMG:style_emoticons/default/drooley.gif)
|
 |
|
| bkrantz |
Sep 23 2025, 08:20 PM
Post
#643
|
|
914 Guru Group: Members Posts: 8,567 Joined: 3-August 19 From: SW Colorado Member No.: 23,343 Region Association: Rocky Mountains |
Fred, great work on that front fender. But you could have deleted the wart! (IMG:style_emoticons/default/smash.gif)
|
|
|
|
| friethmiller |
Sep 23 2025, 09:04 PM
Post
#644
|
|
Senior Member Group: Members Posts: 1,130 Joined: 10-February 19 From: Austin, TX Member No.: 22,863 Region Association: Southwest Region |
QUOTE(bkrantz @ Sep 23 2025, 09:20 PM) Fred, great work on that front fender. But you could have deleted the wart! (IMG:style_emoticons/default/smash.gif) Ha! I might have if it wasn’t an LE |
|
|
|
| friethmiller |
Sep 24 2025, 07:54 AM
Post
#645
|
|
Senior Member Group: Members Posts: 1,130 Joined: 10-February 19 From: Austin, TX Member No.: 22,863 Region Association: Southwest Region |
Door Jams & Sills, Roll bar, and Rear Cross Panel - Part 1 (9/24/2025)
Just the initial shots of the prep, masking, and skimming to some of the areas of the car that I want to complete before moving to the hoods - and all that fun (IMG:style_emoticons/default/blink.gif). I actually prep'd yesterday evening and spread filler this morning before work. I'm trying to keep constant forward momentum. My engine at the machine shop is going to be completed in a few weeks, which will be a full-stop on the LE till the other 914 is running again. 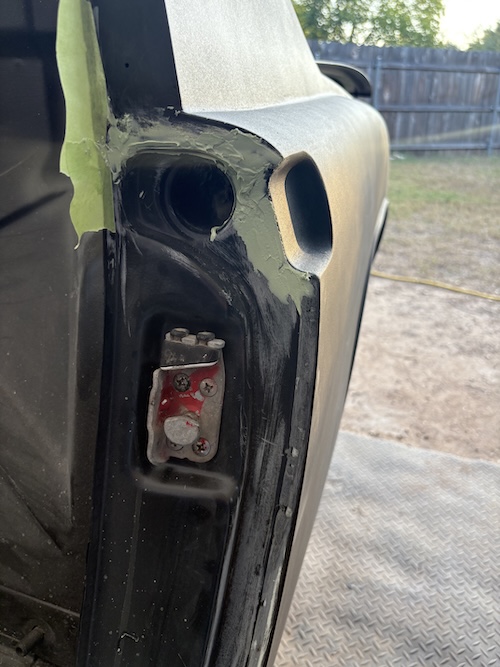 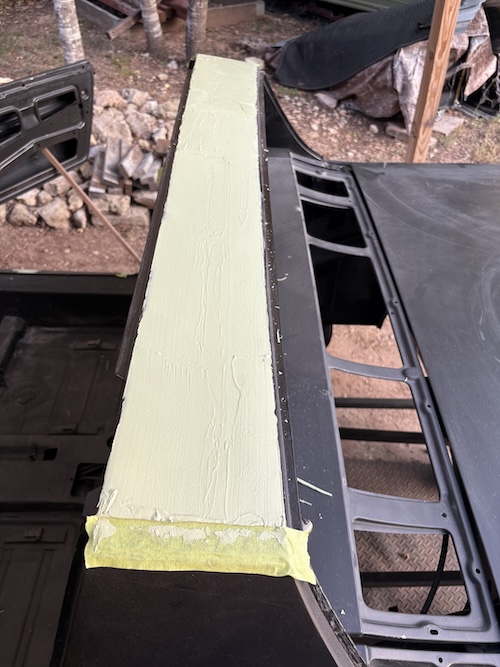  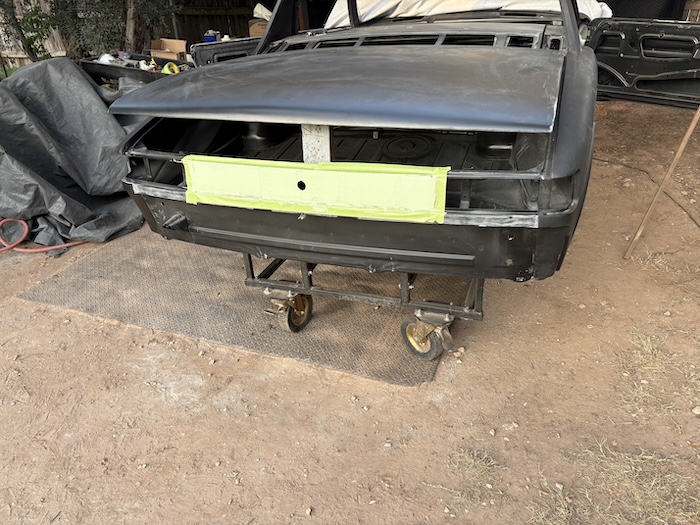   |
|
|
|
| friethmiller |
Sep 26 2025, 02:55 PM
Post
#646
|
|
Senior Member Group: Members Posts: 1,130 Joined: 10-February 19 From: Austin, TX Member No.: 22,863 Region Association: Southwest Region |
Finishing the Roll bar, Rear Cross Panel to 180-grit + the Rear Decklid (9/25-9/26/2025)
Some photos of work done on the roll bar and rear cross panel as I filled, blocked, re-filled, guide-coated, and re-blocked, etc. using 100-grit. Once flat, I guide-coated again removing scratches with a block using 180-grit. Roll bar: First photo shows the use of glazing putty to help out in a few areas. Second photo shows the roll bar complete to 180grit. 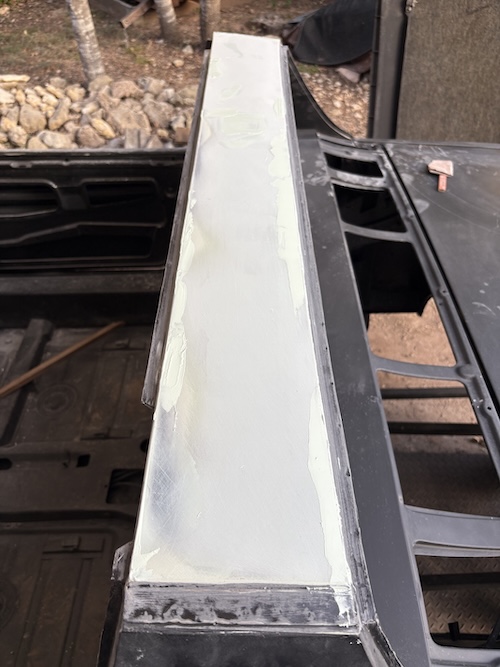  Rear Cross Panel While not perfectly flat, this excellent replacement panel was purchased from Restoration Design. Same process here but bottom of this flat section was difficult to sand and took a good bit of time. Second photo shows the panel in 180-grit. Note: I still need to drill out the small holes for the emblems on the right-hand side. 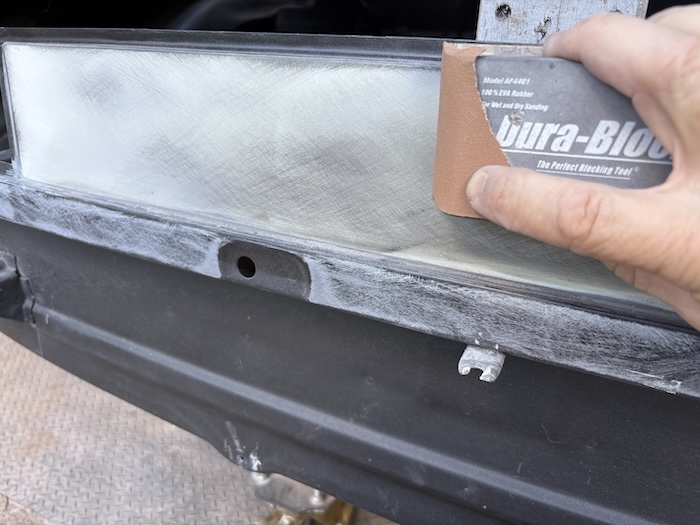 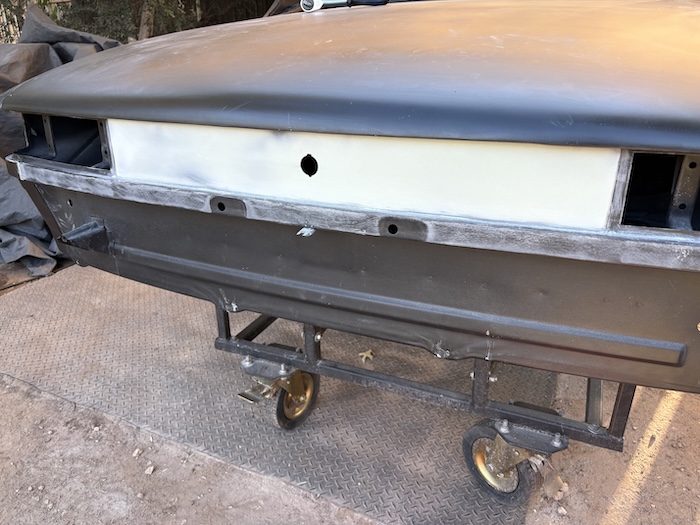 Engine Decklid Moving on to one of the three hoods (can't believe it). Here are the steps taken and some action photos taken along the way. 1) Sand the epoxy. Using 80 - 120 grit, sand the epoxy with an appropriate sized block. Somebody used the decklid as a shelf (IMG:style_emoticons/default/confused24.gif). Once you see the issues, you need to continue to sand out all the lows. This is best done with a D/A sander. 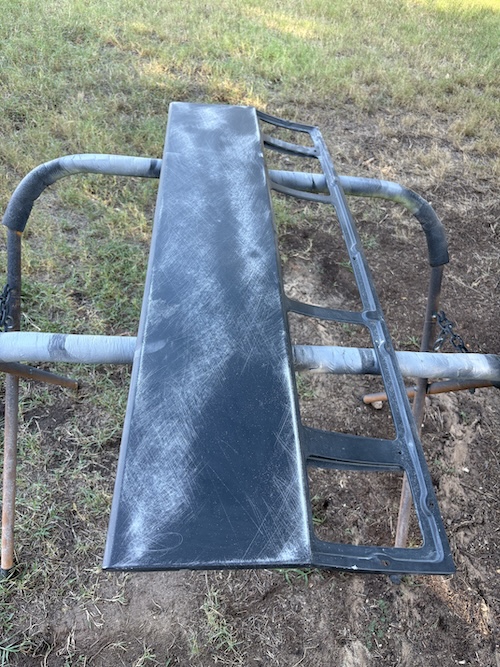 2) Initial Fill. I'm using Rage Ultra and Ultra Extra - approx. 60/40 ratio since it's above 90 degrees. This turned out to be just the right amount of filler. Got lucky. 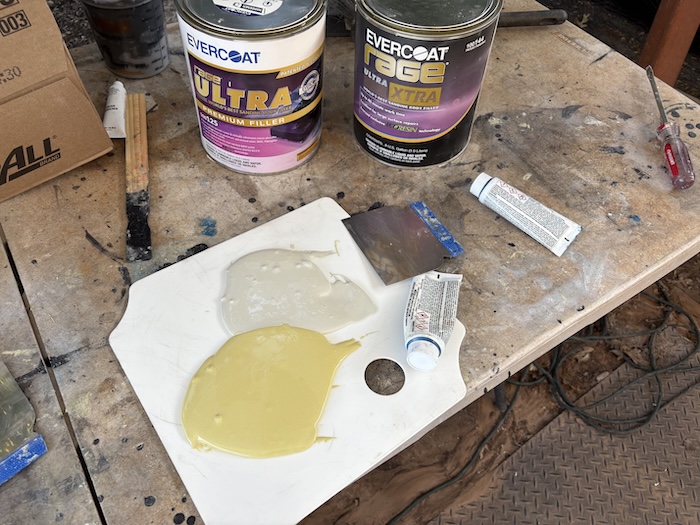 3) Cheese Grater on the Heavy. Using the grater to get off the excess is key but you can't wait too long to get started on this task. Got to hit it when its semi-hard. This just saves time/sand paper. 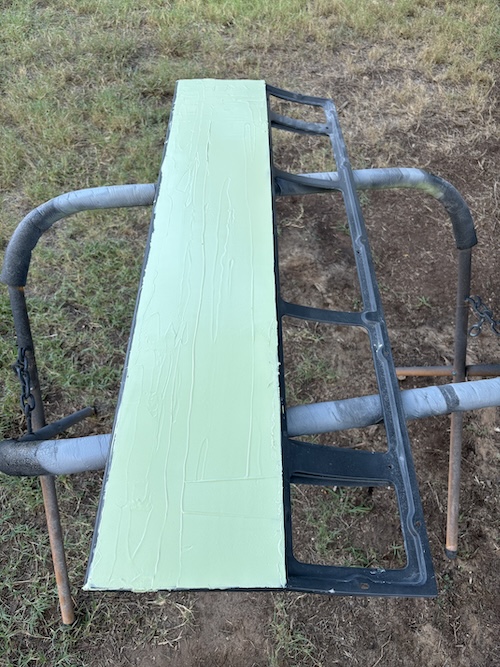 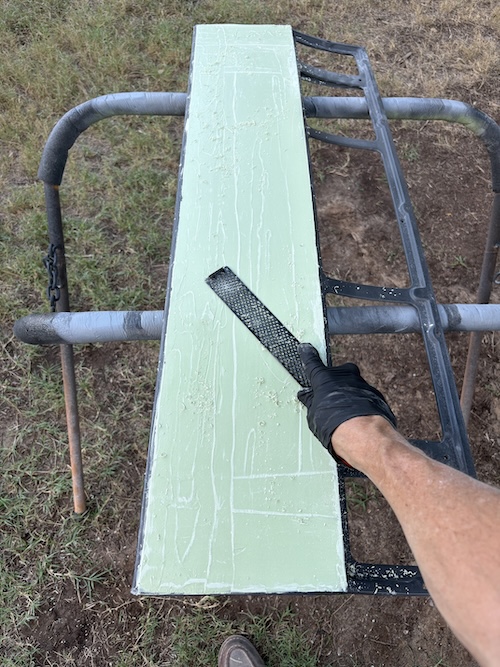 4) Initial Blocking. Getting out the correct blocks/grit paper is next. The photo below shows my selection. Note: the small block was only used to jam under one side of the decklid to keep it from rocking on the stand (IMG:style_emoticons/default/biggrin.gif) . Main job here is to bust through the skin of the filler. 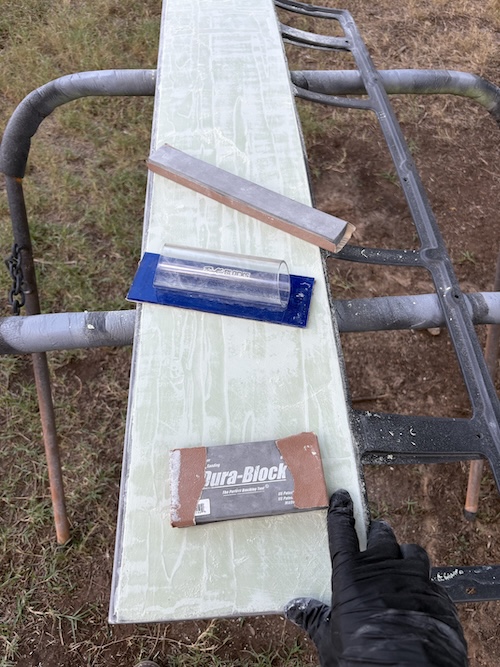 5) Using Guide Coat. I really appreciate how much the guide coat helps guide me when sanding a panel flat. The following photos show the progression. 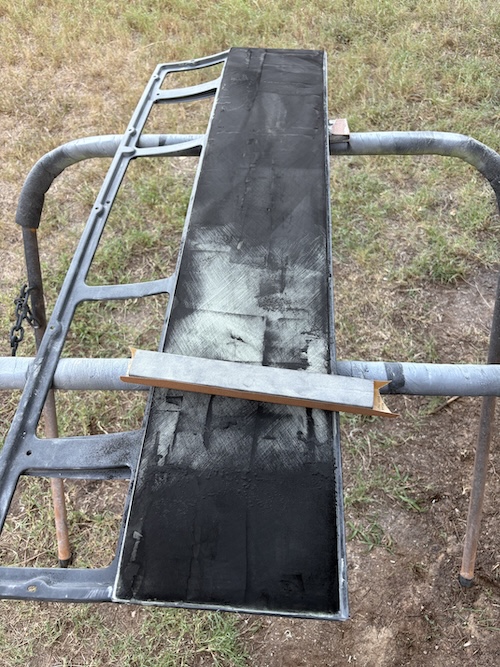 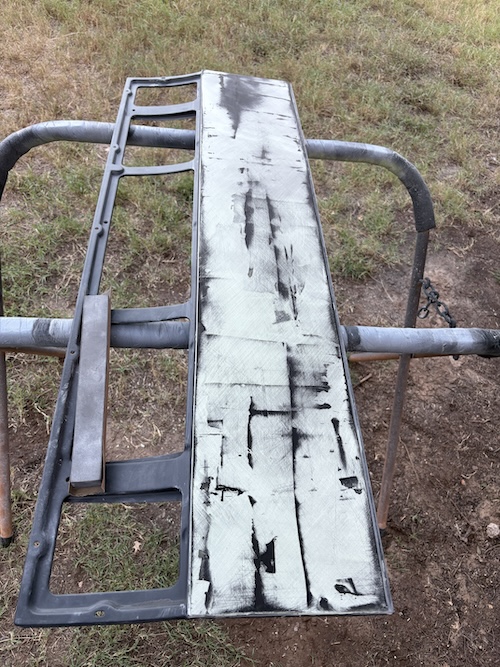 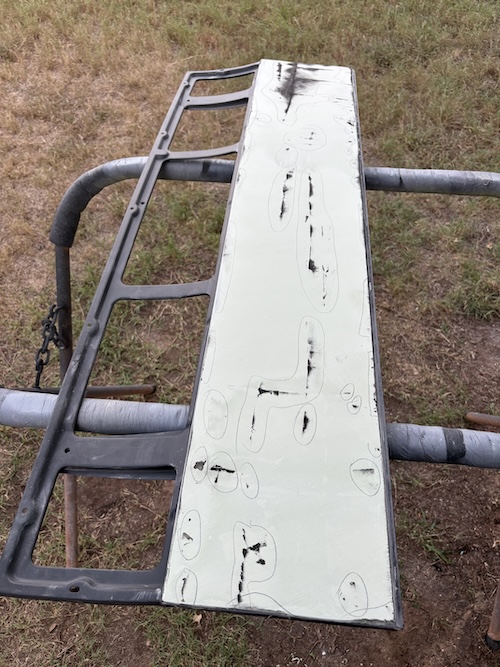 6) Marking the Lows. Once you get down a bit and you feel you getting a little thin on the highs it's a good time to stop, mark the low areas with a pencil. Biggest thing here is knowing when to stop. 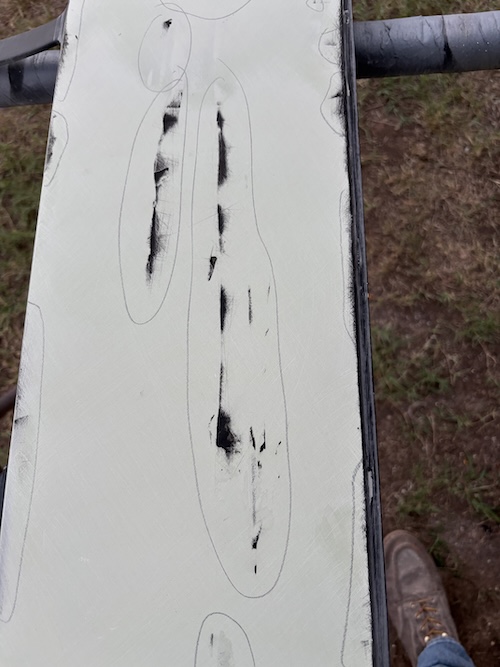 7) Clear Out and Refill. Once you mark the lows, I then use an old piece of sand paper to clear out all the guide coat. Next, I use compressed air to remove all the dust. Finally, I mix up another batch of filler (or glaze) and fill all the lows. This process is repeated till the panel is completely flat. 2nd photo shows another round of marking lows - getting ready to refill 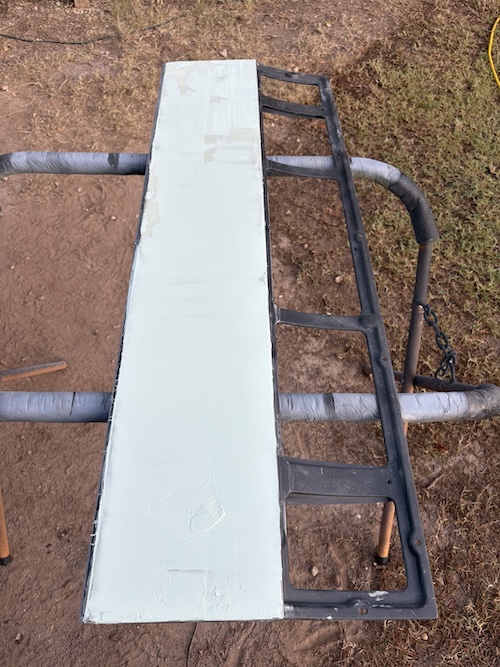 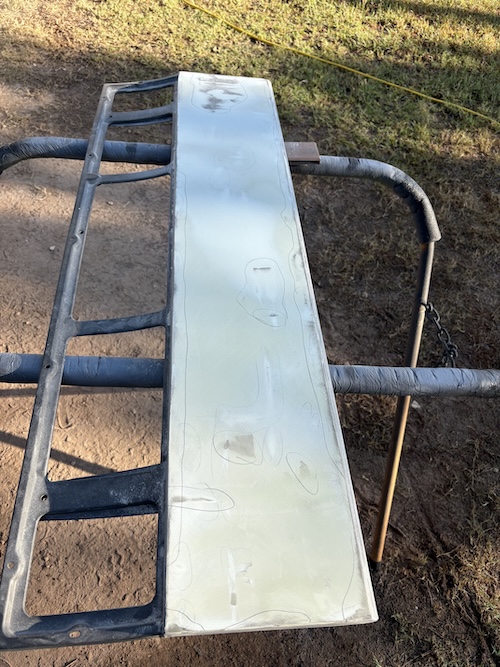 8) Let it Sit. The easiest step. Just let it sit for days/weeks - in the sun is preferred. Photos show my panel at 120-grit. Will use guide coat to take it to 180 next. 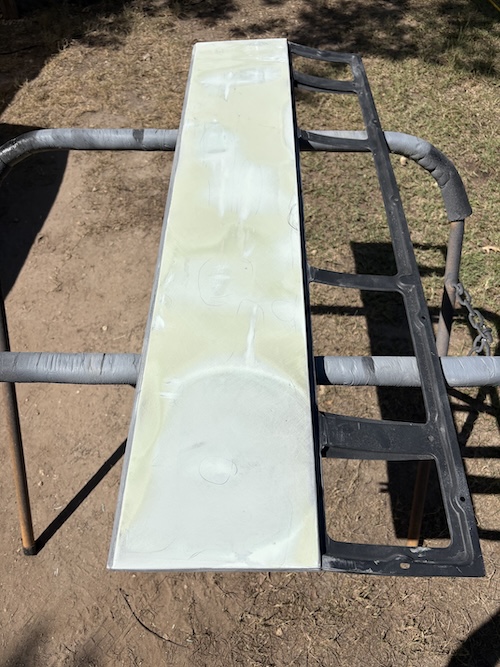 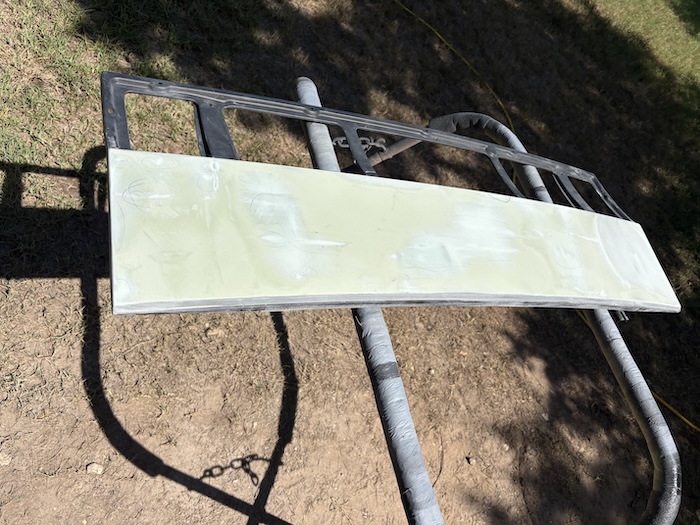 |
|
|
|
| friethmiller |
Sep 29 2025, 08:13 AM
Post
#647
|
|
Senior Member Group: Members Posts: 1,130 Joined: 10-February 19 From: Austin, TX Member No.: 22,863 Region Association: Southwest Region |
Prep and Priming the Odds and Ends with Epoxy (9/27-9/28/2025)
Just finishing up the sanding on the sill and jams here. Note: in the 3rd/4th photos, the red arrows are pointing to a bit of a roll in the sheet metal that I didn't notice till reviewing these photos (IMG:style_emoticons/default/blink.gif) These are RD door jams and I should have look at them closer. No worries, I'll be up and down these panels several more times making sure everything is straight. Final photo in the set shows me reestablishing the holes for the emblems prior to paint. Everything here is in 180-grit. 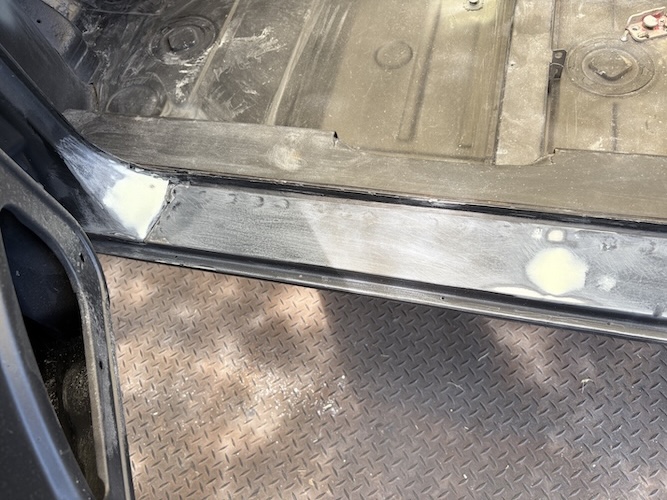 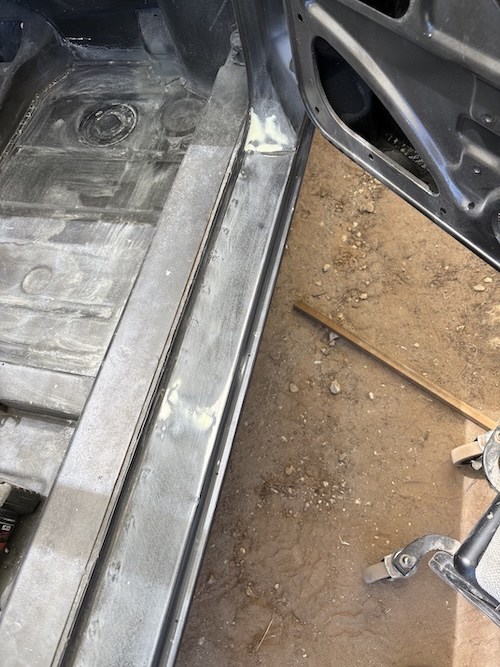 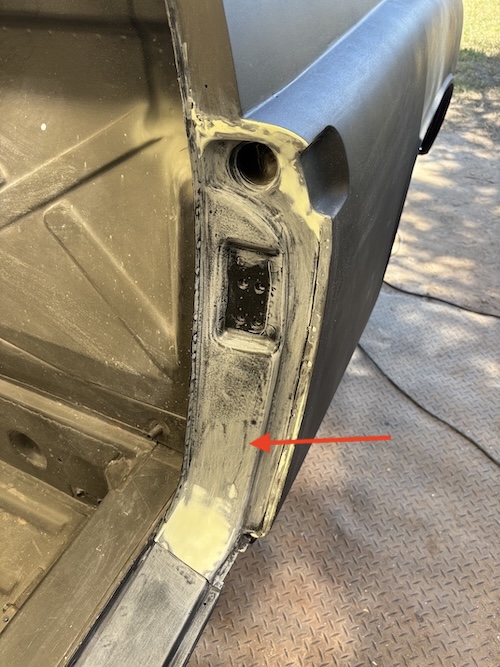 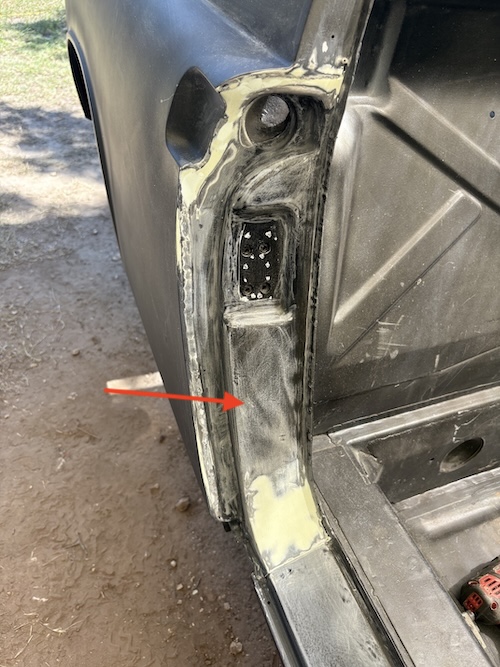 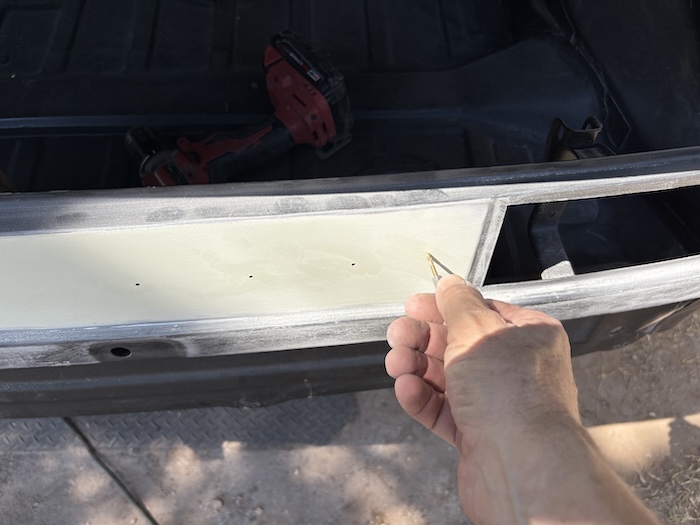 2 Quick coats of Epoxy Not trying to layer it on thick at all. I just need light coverage. Painting the rear deck lid, top of the roll bar, and the door jams/sills. Sorry for the lighting on some of these pictures. The sun shade above the car is yellow. Next up, is the rear trunk. 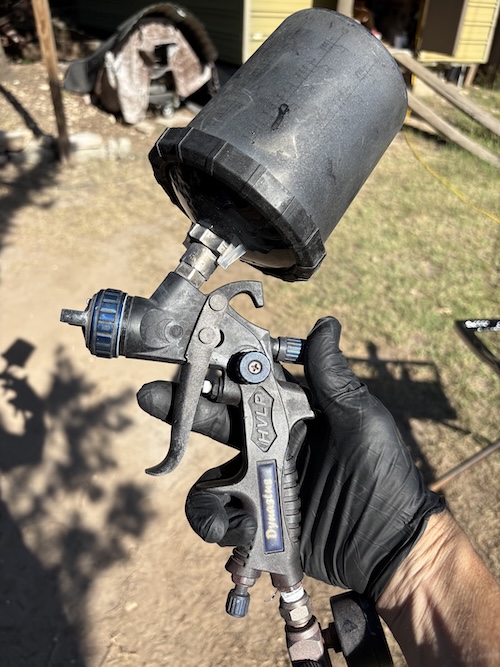 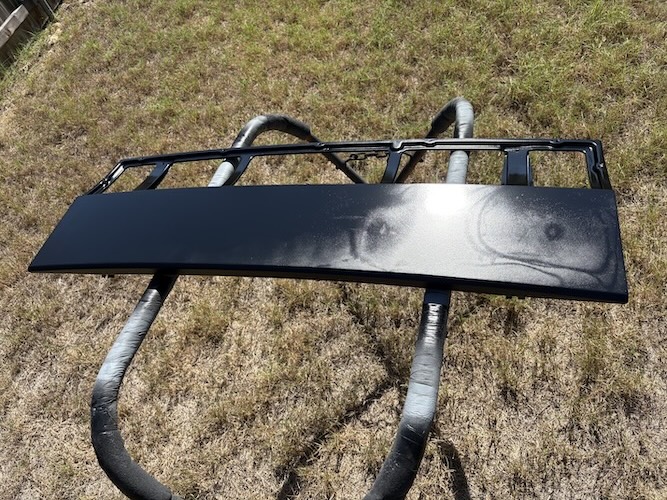 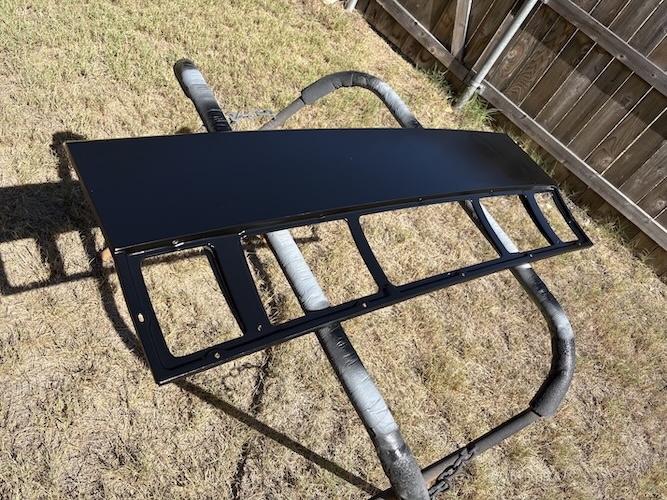 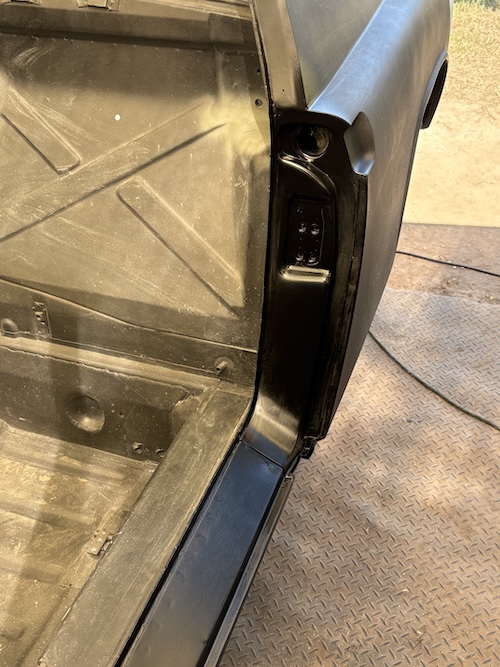 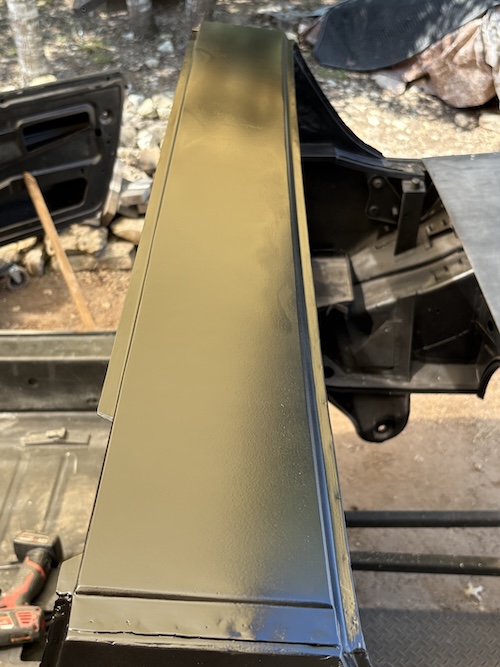 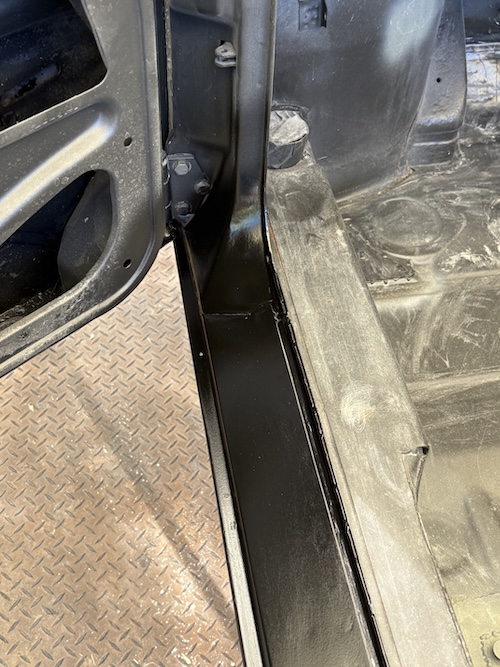  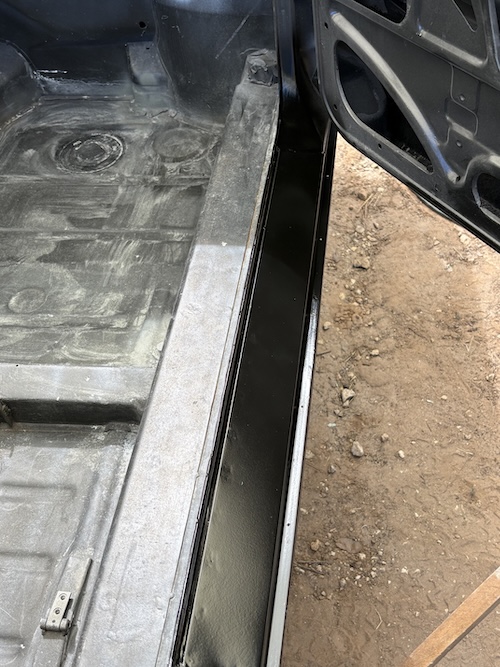 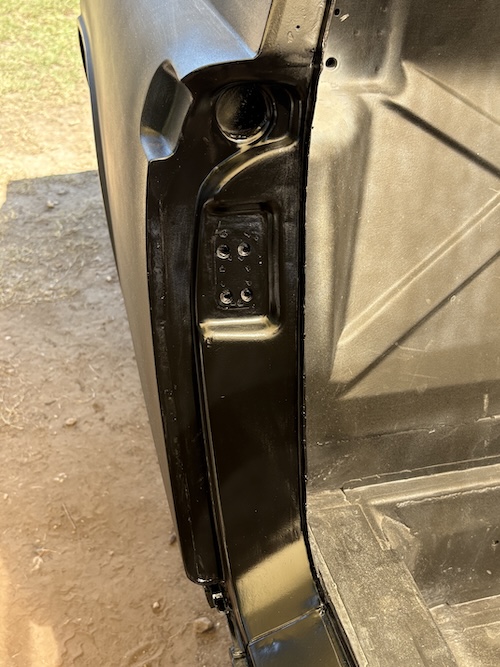 |
|
|
|
| friethmiller |
Sep 29 2025, 08:40 AM
Post
#648
|
|
Senior Member Group: Members Posts: 1,130 Joined: 10-February 19 From: Austin, TX Member No.: 22,863 Region Association: Southwest Region |
Rear Trunk: Part 1 (9/29/2025)
Skim-coating the entire panel here today. This is a lot of surface area to get straight and the long boards will be out (IMG:style_emoticons/default/biggrin.gif) First two photos show the top 1/3 being prep'd with 80-grit with a good skim coat. This is about all the filler I care to mix up at one time. 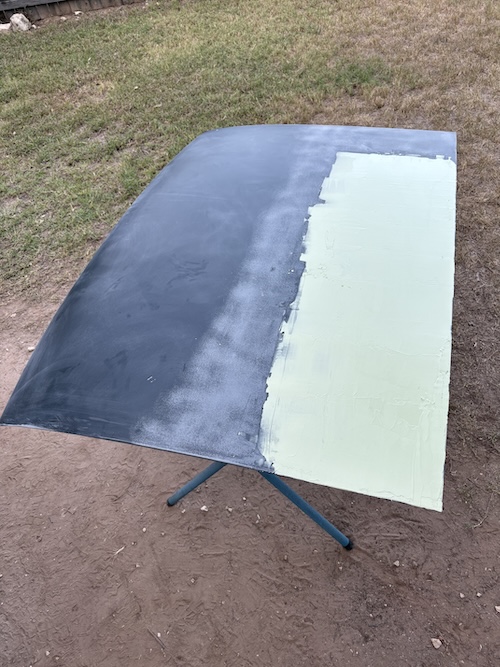 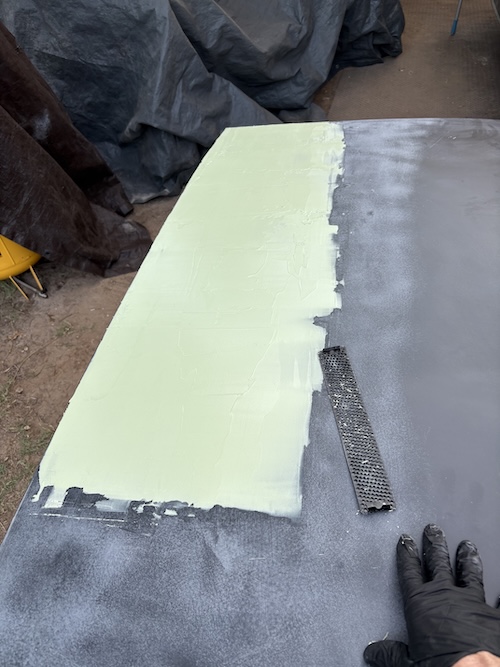 Repeating the process a few more times and you finally have a full first coat. Using the long Durablock with 80-grit to quickly cut through the skin then followed up with a quide coat and 100-grit. 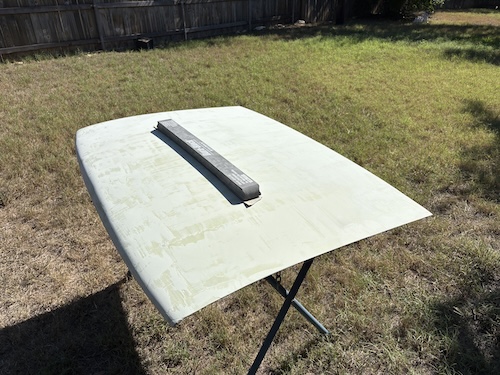 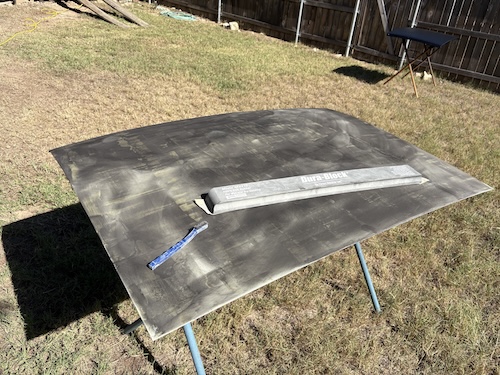 I had to move into the shade, sun was really heating up. First photo shows my other option for a long block. This Big Kid block is great but it's too long/rigid for this panel's slight curvature. Maybe it will be useful on the front hood (IMG:style_emoticons/default/confused24.gif) 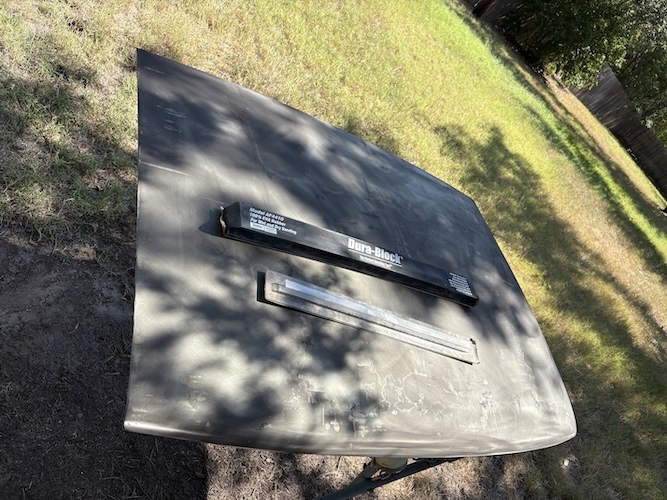 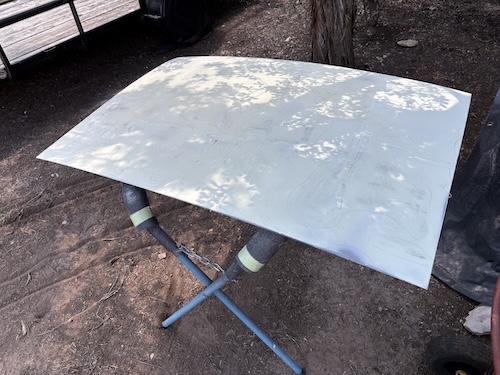 Second coat of filler went down next but I didn't have time to use the grater. Pulled out the "Bondo-Hog". It's a 4" d/a sander with a foam interface pad. Love this thing! It makes a special noise too. I don't think the neighbors appreciated it as much as I did. Anyways, just broke the skin and then put it away for next time. Second photos shows a third round being applied but this time it's glazing putty. This stuff dries quick in 90+ degree heat so it took several small batches to cover all the marked low areas. 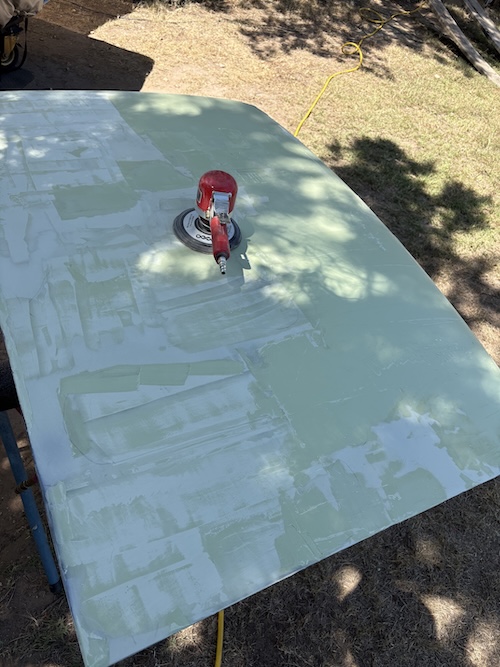 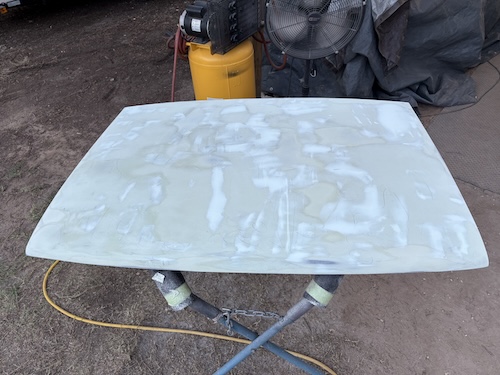 Last two photos show the work to get the panel flat in 120-grit almost complete. It needs additional putty/sanding in a few places. I've spent a total of 10 hours on this hood so far. It'll take a few more to get it complete in 180-grit. Hoping to finish this up during the week so I can start the front hood next weekend. Here's to forward progress (IMG:style_emoticons/default/beerchug.gif) 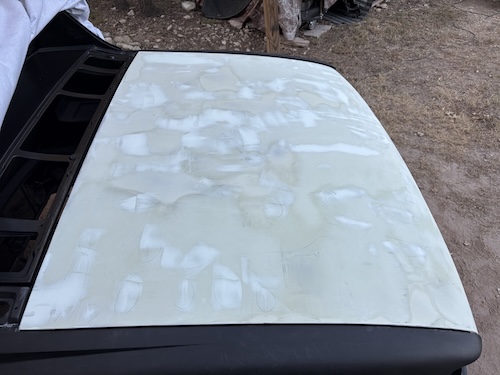 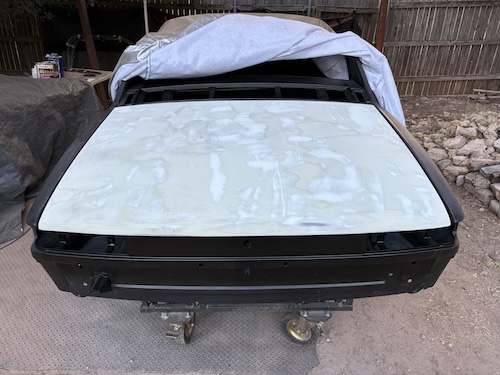 |
|
|
|
| friethmiller |
Oct 4 2025, 06:02 PM
Post
#649
|
|
Senior Member Group: Members Posts: 1,130 Joined: 10-February 19 From: Austin, TX Member No.: 22,863 Region Association: Southwest Region |
Rear Trunk - Part 2 & Front Hood - Part 1 (10/1 -10/4/2025):
Rear Trunk Continuing my work on sanding the skim coat flat on this panel. After several rounds of filler, guide coat and sanding, I finally reached a point where I needed to just skim the entire panel again. I was starting to burn through in a few areas and I had so many pencil markings everywhere. I felt I was chasing my tail a bit. Good time to reload and give it another go. Note: the white filler is glazing putty. Thought I try it out to see how it compares with the normal filler. It spread so fast which is great but it's a little harder to sand. The other drawback with using putty for this is the dry time. It cures up a lot quicker. And, with this final skim coat, I was finally able to fully flatten this panel (IMG:style_emoticons/default/aktion035.gif) 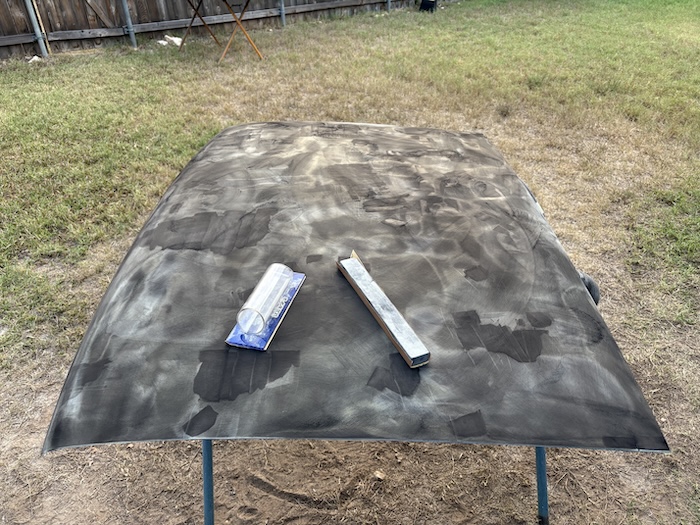 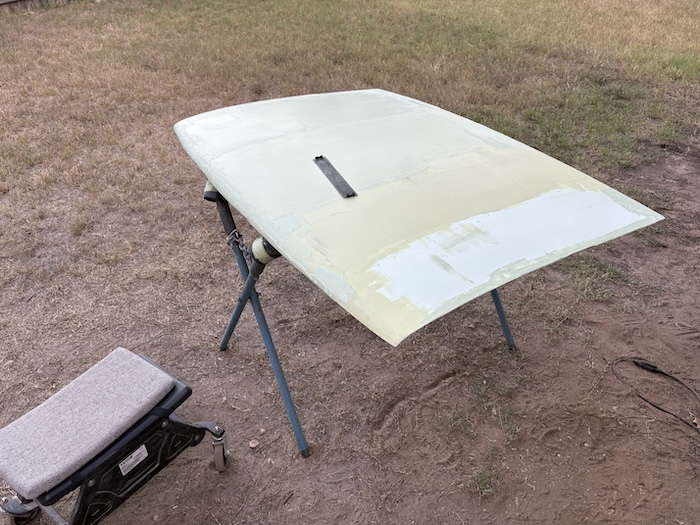 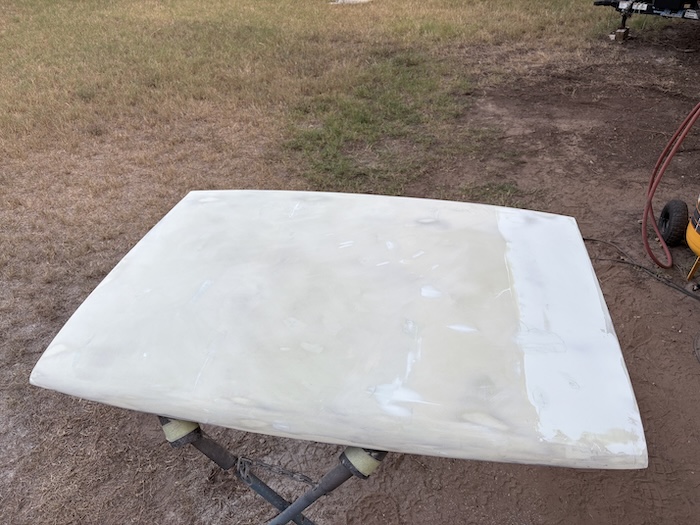 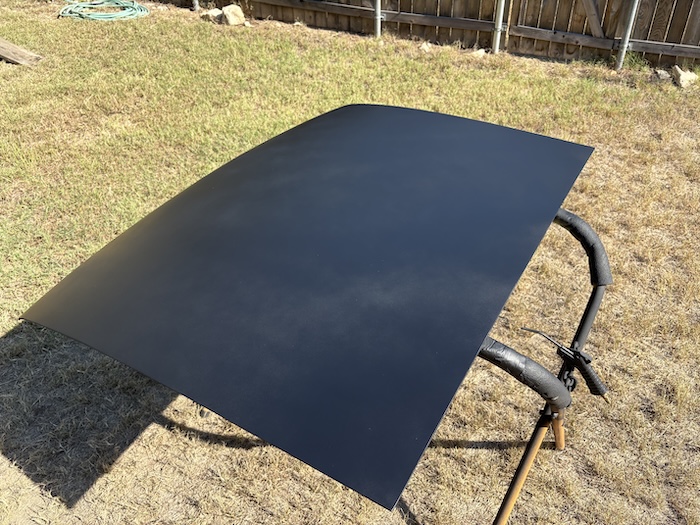 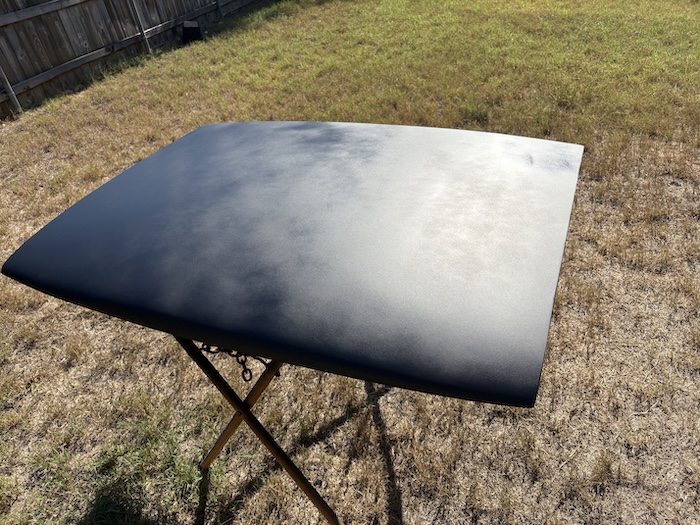 Came out on Saturday morning to finish prep'n the rear trunk for a quick coat of epoxy. I had decided to redo this trunk a while back when I got a sand-blaster. Aside from the severe rust pitting, this area also has a large welding seam from the PO trunk replacement, which I tried to salvage the best I could. Regardless, I will likely shoot a high-build polyester filler in here to help things out. 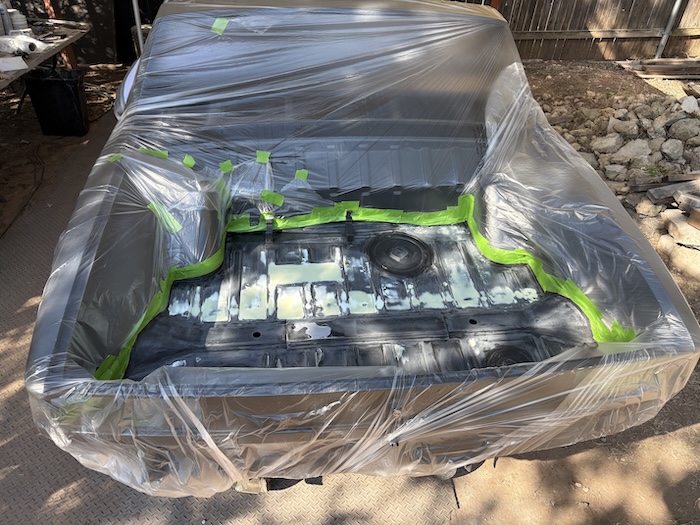 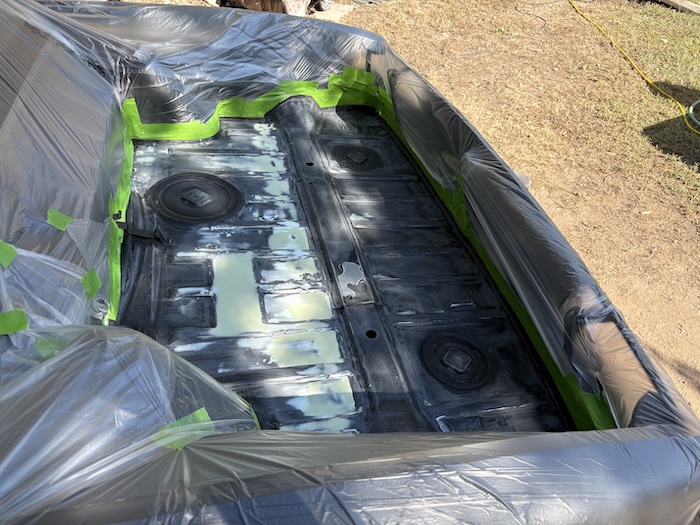 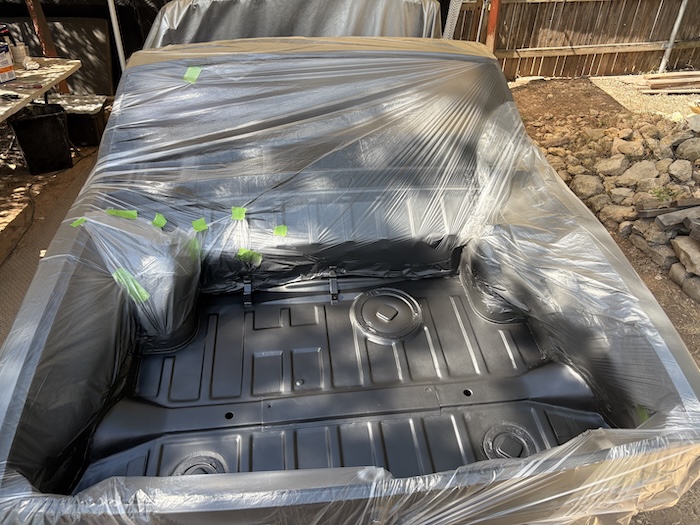 Front Hood With the trunk painted I was finally ready to start on the front hood. First up was a final alignment check. I needed to make a decision on the gaps. After making a few measurements around the hood, I decided that the gap on the front right [at top of the fender and headlight bucket] was good but that I really needed to extend the front left edge a mm or 2 to help the hood come up closer to the front bumper. To do this, I removed the flux off of 2 welding rods and welded them from the left-front edge to just past the mid-point of the hood. The right edge was good so I just needed to tapper the rod with the grinder once it was welded on. 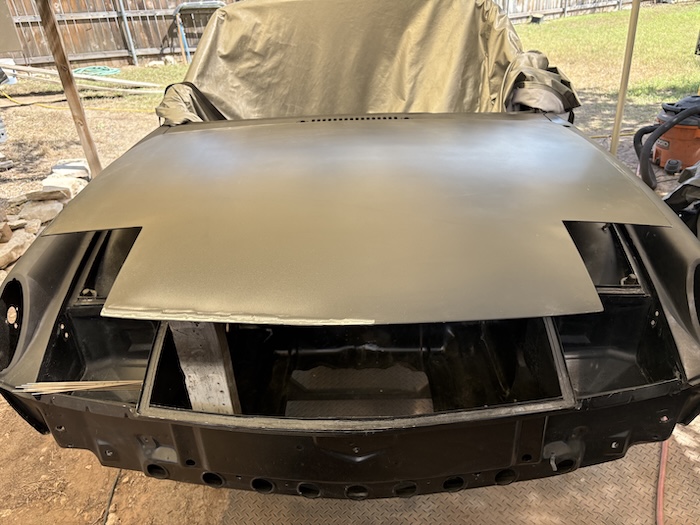 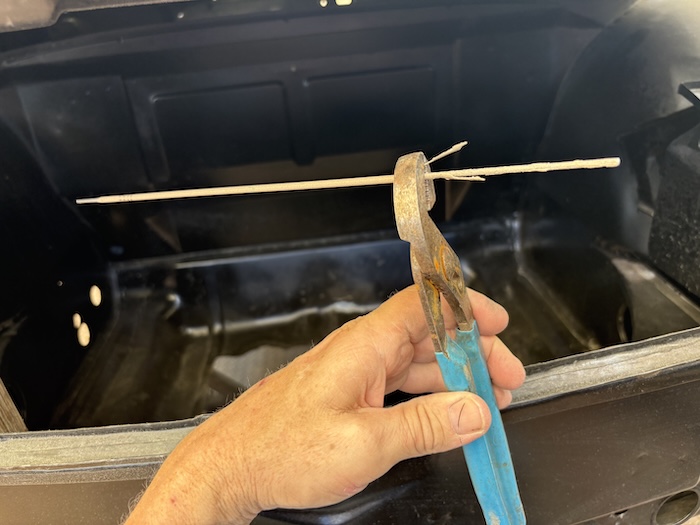 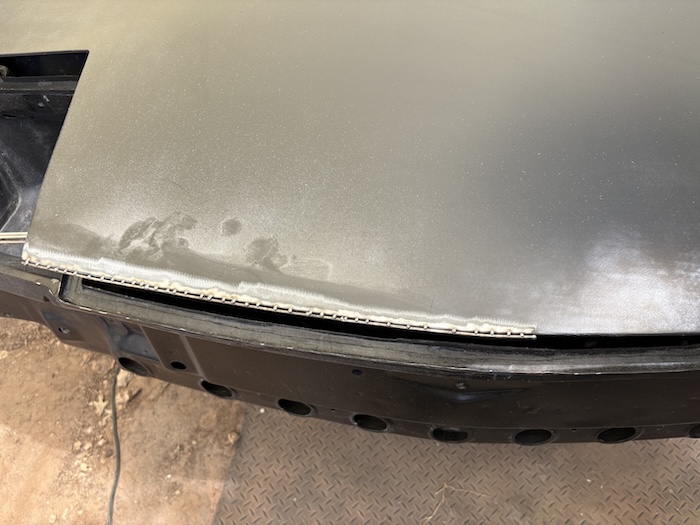 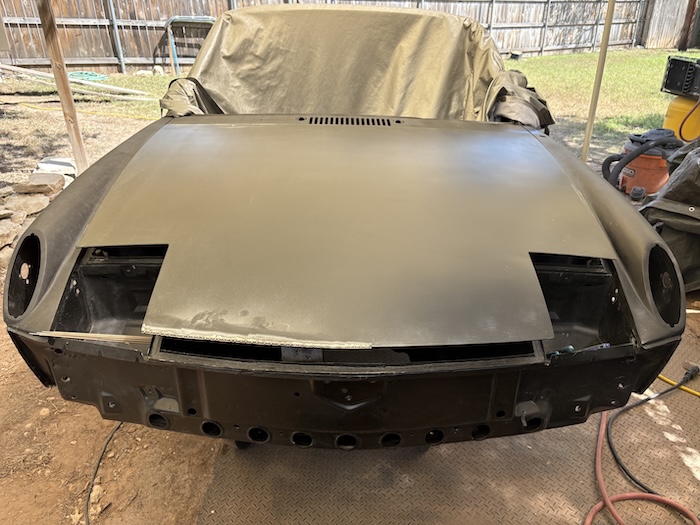 After welding on 1 1/2 rods, I decided to use the reminder to keep going past the mid-point. The following photos capture the process of welding the rods to the hood. Keep in mind this is only one side of the work required. I will later flip it over and weld the rod from the other side. Compressed air and small wire brush was used to keep things clean and cool as I jumped around zapping 3-4 welds at a time. 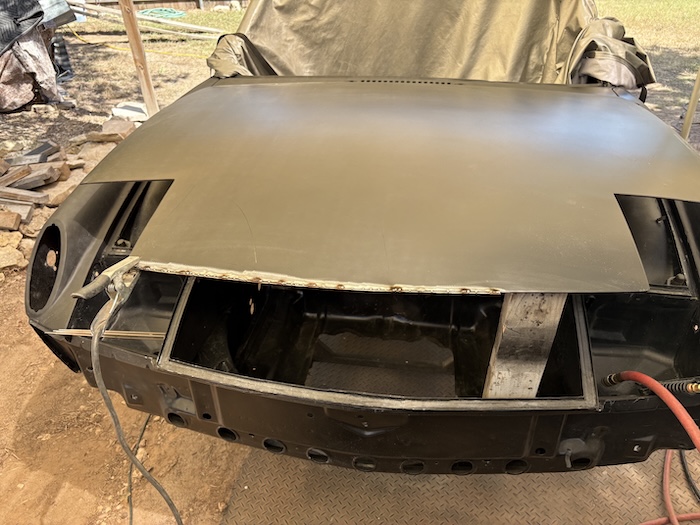 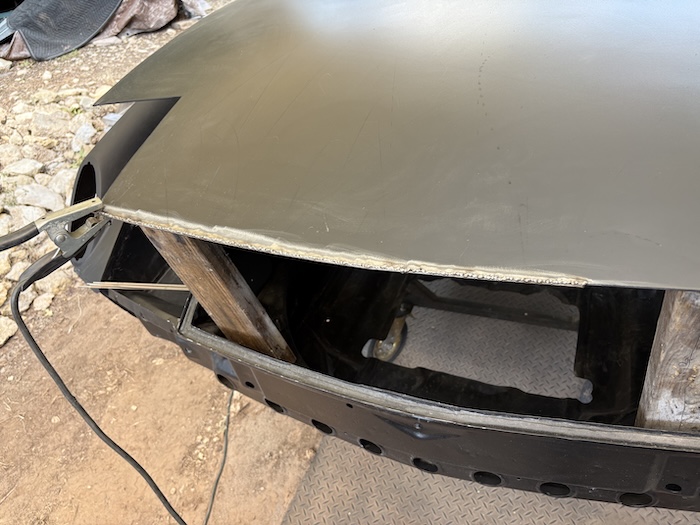 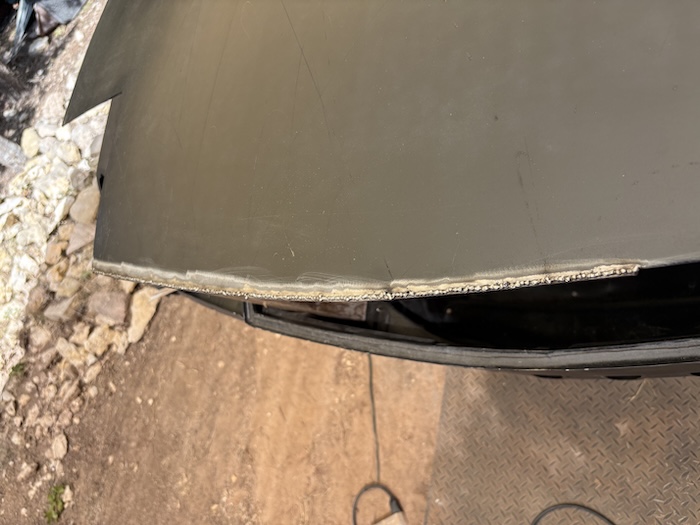 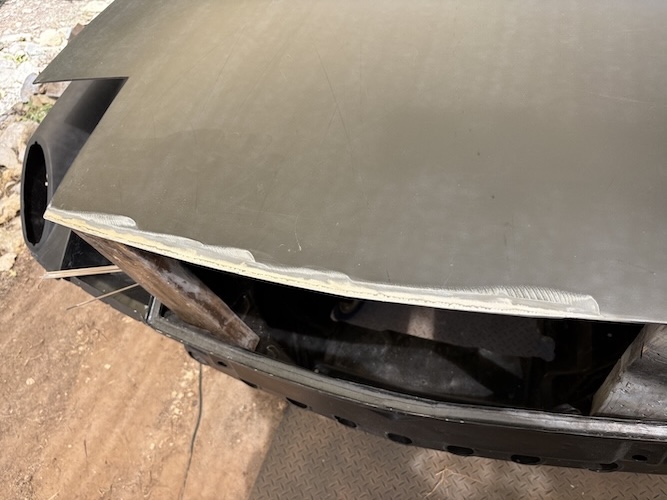 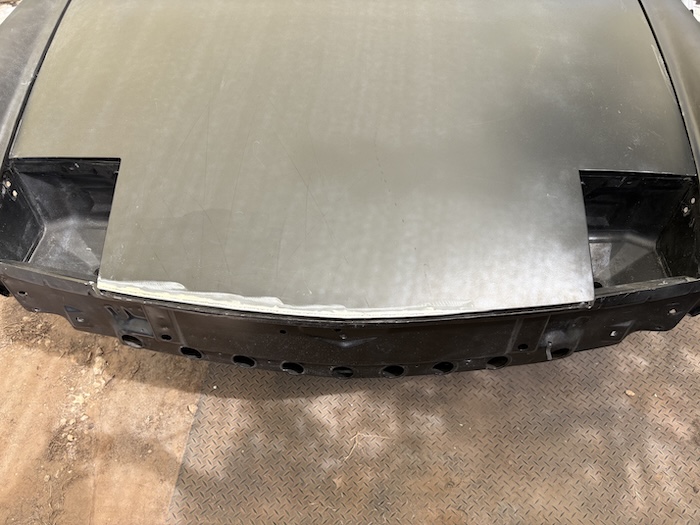 After removing the hood from the car, I placed it upside down on the stand and repeated the process for the backside. A 4inch angle grinder with a 40-grit flap disk was used to grind the welds down on both sides. I also used the finger sander a bit here and there, as needed. Final photo shows the hood flipped back over and ready for a full skim coat of filler. 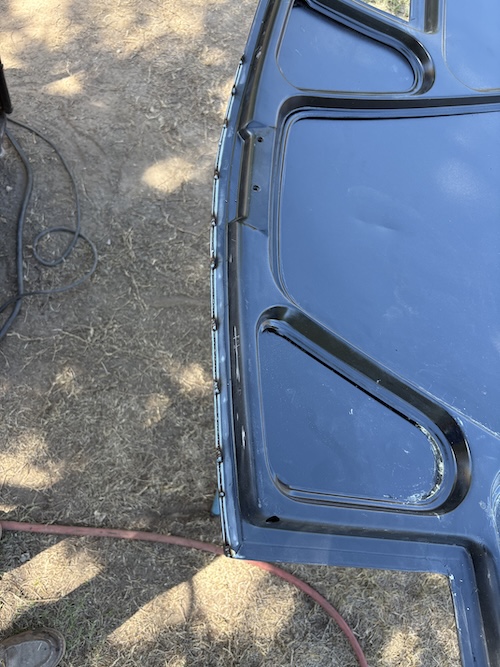 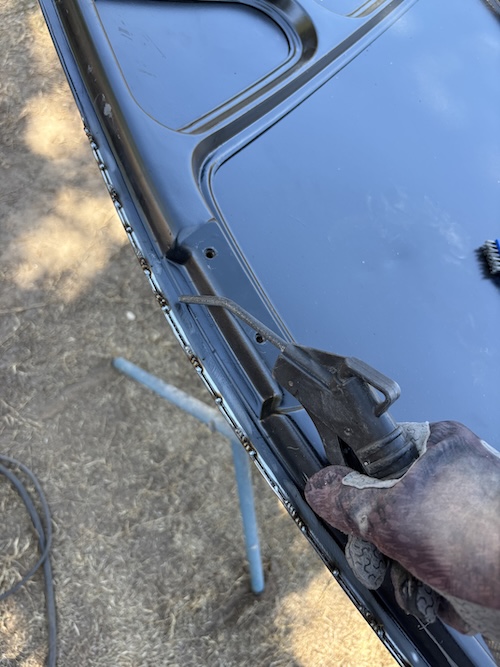 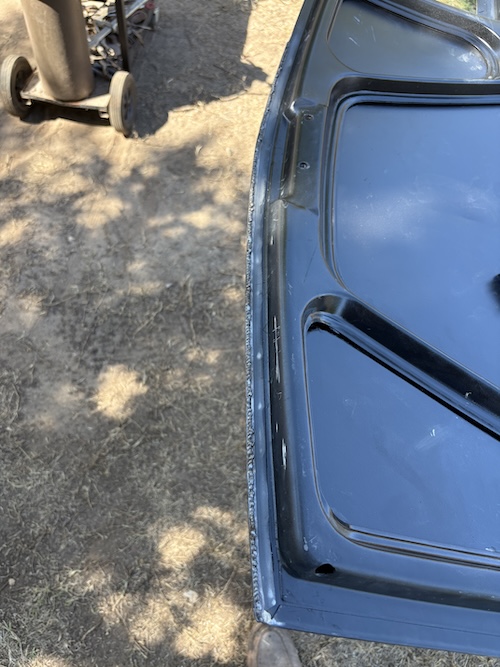 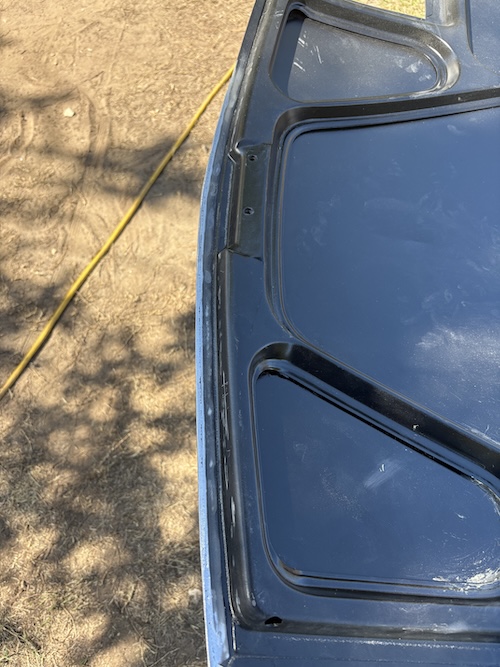 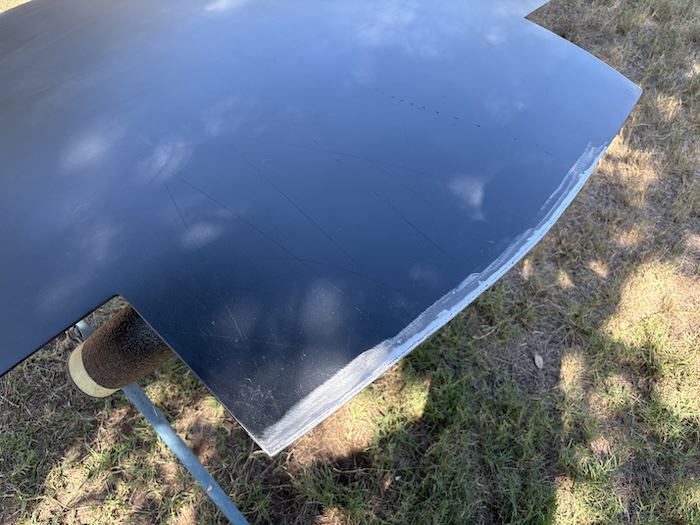 Last two photos show one of four large filler mixes being prepared to go on the hood. This was all done in about an hour and half. I used the large metal spreaders to help get things flat fast. With it being in the 90s today, I was really moving to get everything down quickly before the filler started to harden. Last photo shows the hood completely covered and ready for sanding tomorrow. Here we go again (IMG:style_emoticons/default/blink.gif) This is the last body panel that I will need to do like this. Cheers to progress!! (IMG:style_emoticons/default/beerchug.gif) 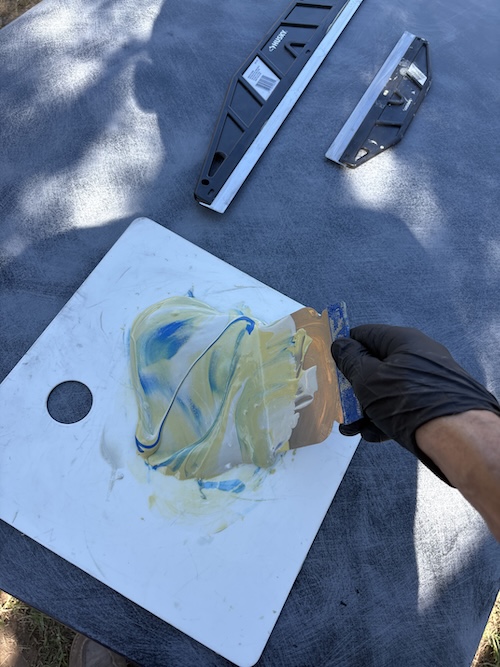 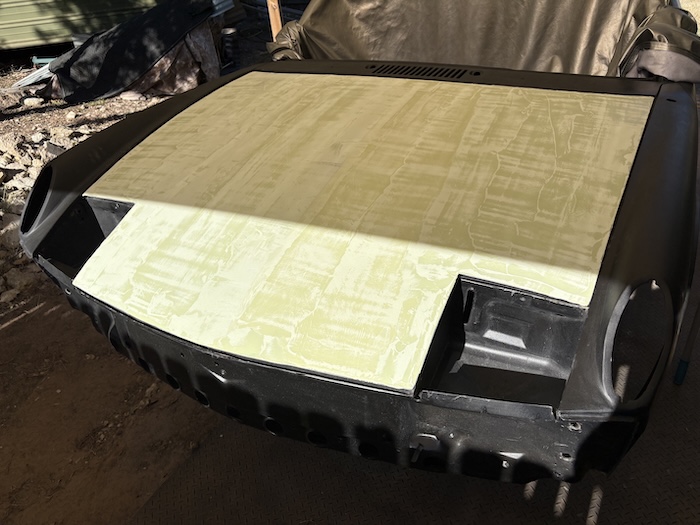 |
|
|
|
| wonkipop |
Oct 5 2025, 02:21 PM
Post
#650
|
|
914 Guru Group: Members Posts: 5,341 Joined: 6-May 20 From: north antarctica Member No.: 24,231 Region Association: NineFourteenerVille |
amazing. (IMG:style_emoticons/default/beerchug.gif)
|
|
|
|
| friethmiller |
Oct 5 2025, 05:29 PM
Post
#651
|
|
Senior Member Group: Members Posts: 1,130 Joined: 10-February 19 From: Austin, TX Member No.: 22,863 Region Association: Southwest Region |
More Trunk Work (10/5/2025):
A little coffee to start things off this morning! (IMG:style_emoticons/default/flag.gif) 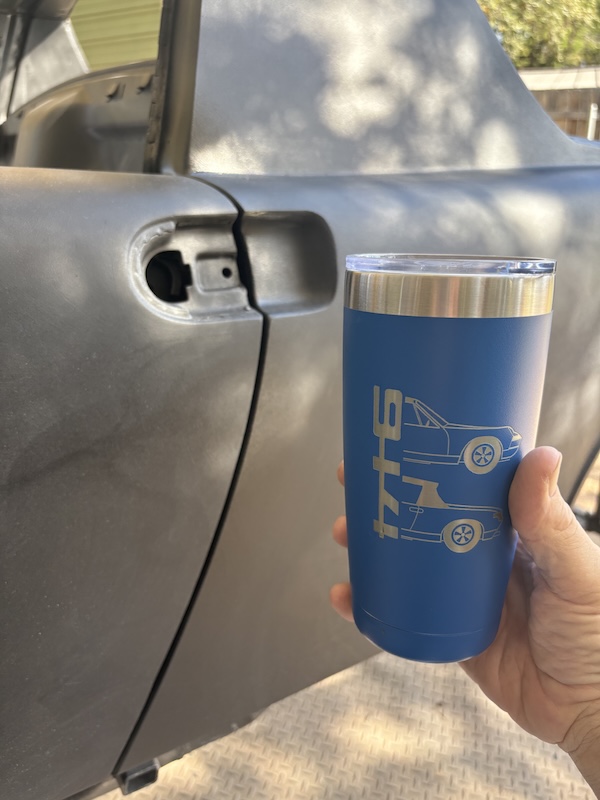 With everything still masked off from yesterday, I was able to shoot 2 coats of Featherfill G2 to the bottom of the trunk and also the topside of the trunk lid. Had to work fast to get all this down in time before this stuff started to setup. I ended up cleaning my gun between the coats just to make sure we didn't have any issues. Normally I would never think of using a polyester filler on a trunk but in this case it might be beneficial. If you haven't figured it out yet, my plan is use 2x coats of this stuff over the entire car to provide a solid base for blocking everything flat. 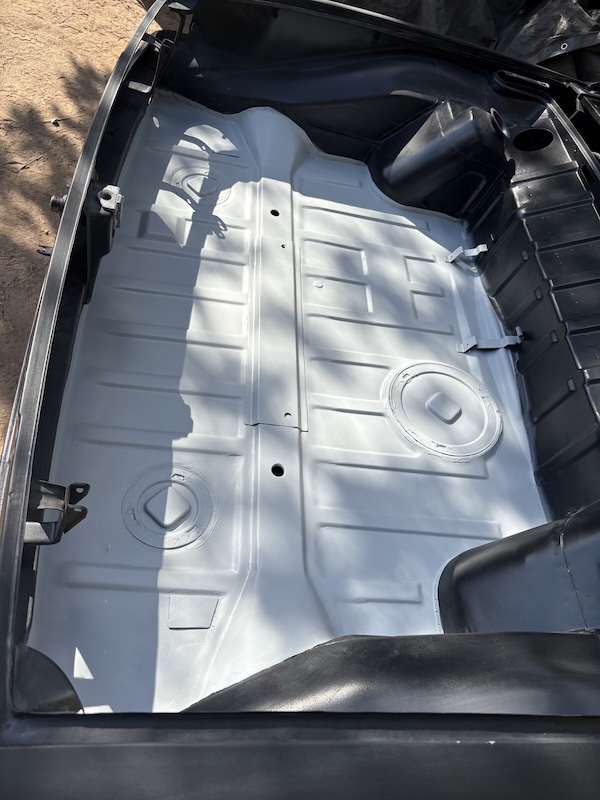  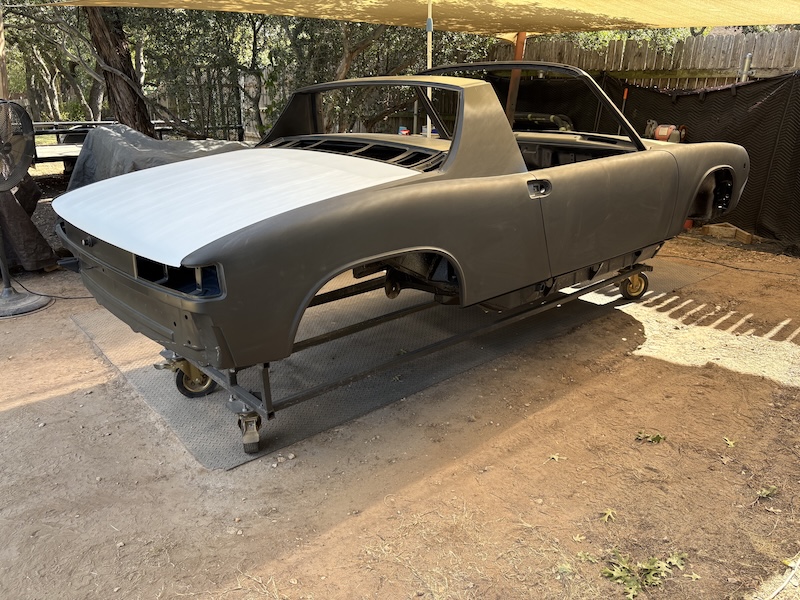 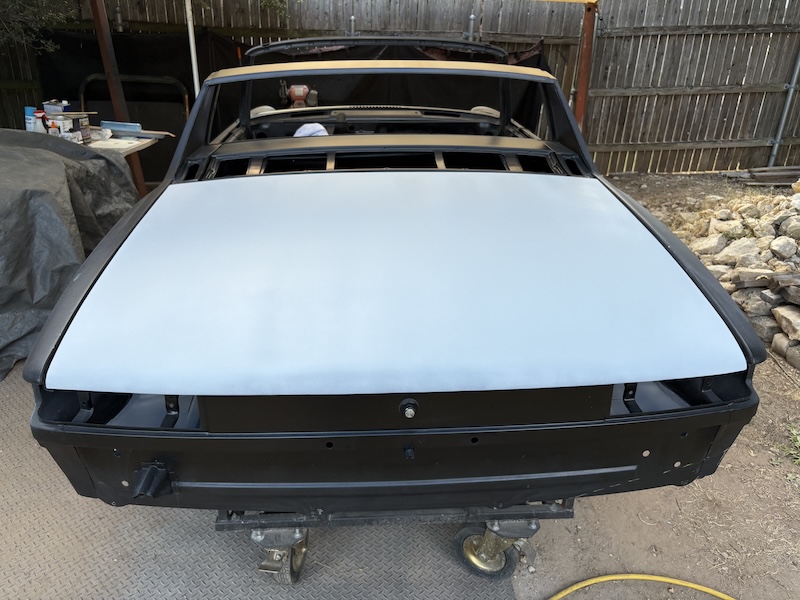 Moving back to the front hood after lunch, I spent about 3 hours blocking and filling low spots with glazing putty. Here's a few photos of the progress. More of the same... filling, guide coating, sanding, etc. The 30 inch Dura block was just the right size and shape for this job! Did use a 12' flexible block in a few spots where needed. Stopped around 4pm - after preparing the entire hood for another skim coat. It will be many more hours before this panel is ready to go. My plan is to mask and shoot Featherfill over the rest of the car next weekend. More to come soon... Cheers (IMG:style_emoticons/default/beer.gif) 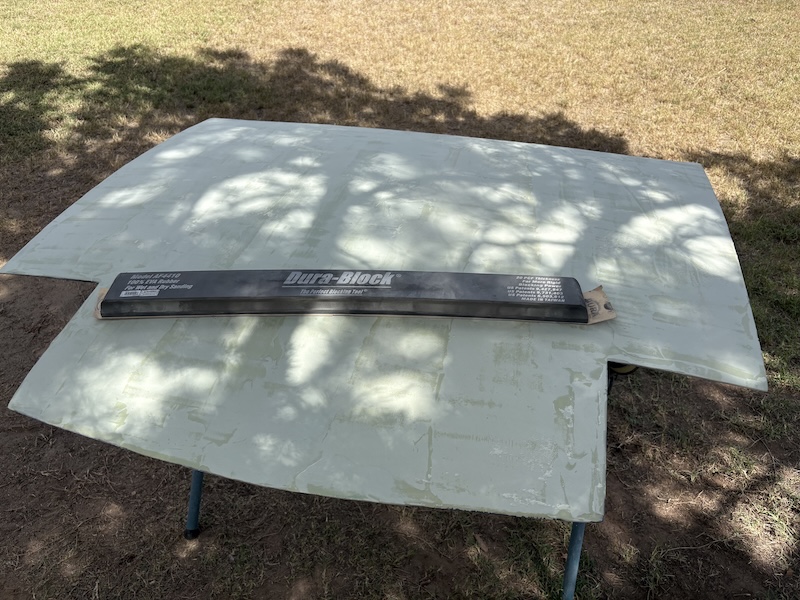 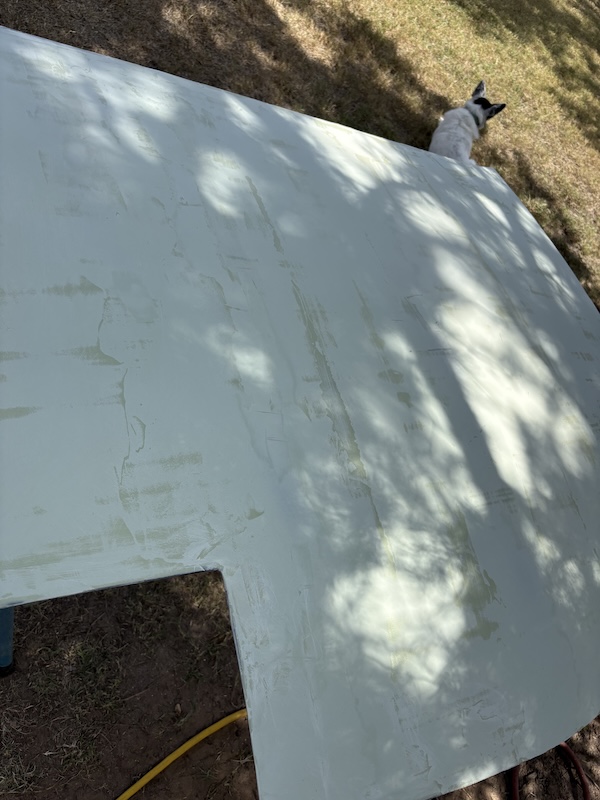 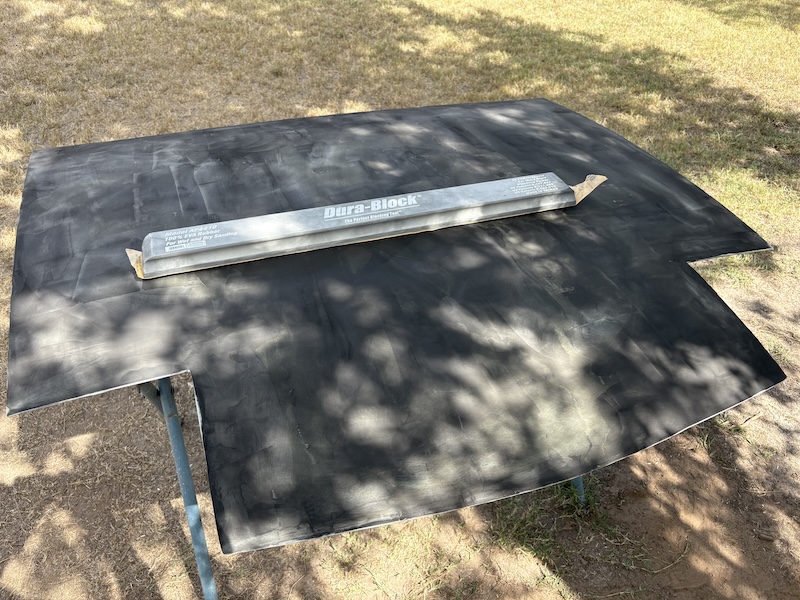 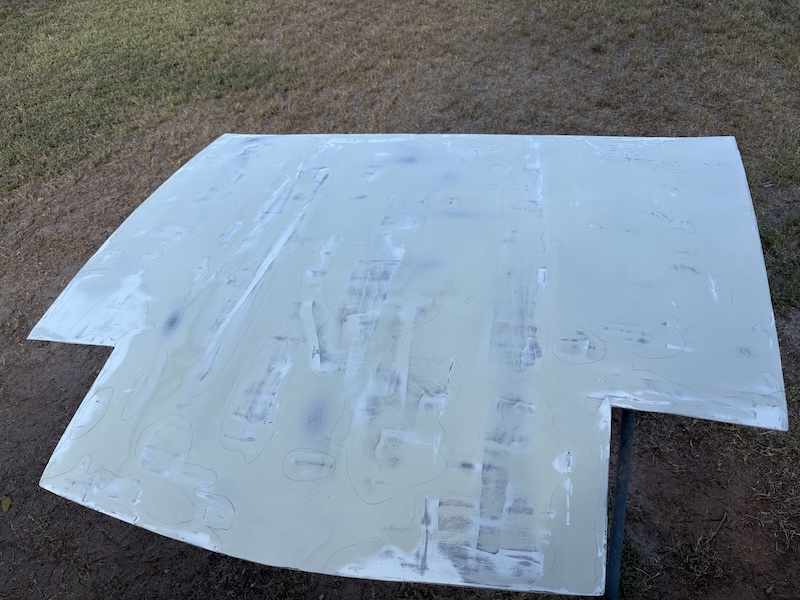 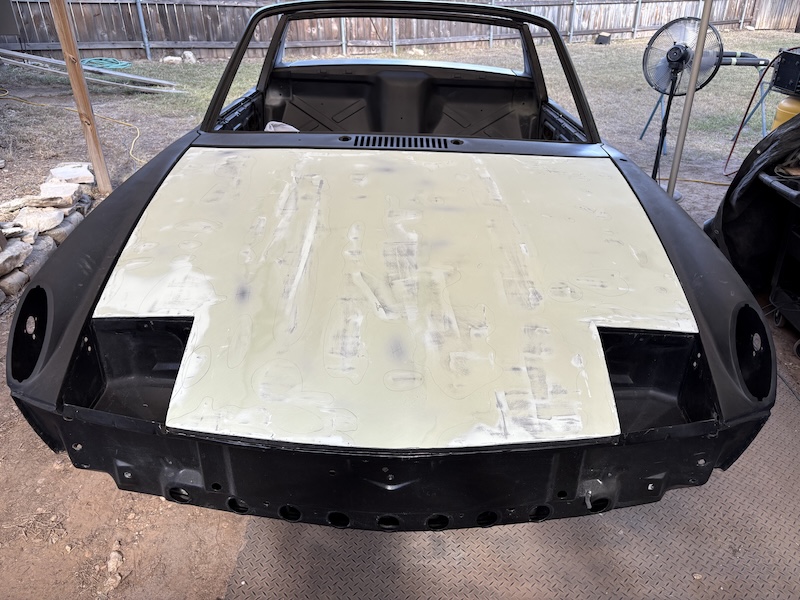 |
|
|
|
| friethmiller |
Oct 6 2025, 08:03 AM
Post
#652
|
|
Senior Member Group: Members Posts: 1,130 Joined: 10-February 19 From: Austin, TX Member No.: 22,863 Region Association: Southwest Region |
QUOTE(wonkipop @ Oct 5 2025, 03:21 PM) Thanks man! I'm trying to power through the laborious parts of this bodywork phase. At some point this Fall the engine parts to my other car will be machined and ready. I'll have to switch over to that for a month or two. I'm hoping to get the LE to a point where I can leave the body ready for blocking [at a minimum]. |
|
|
|
| Root_Werks |
Oct 6 2025, 05:55 PM
Post
#653
|
|
Village Idiot Group: Members Posts: 8,876 Joined: 25-May 04 From: About 5NM from Canada Member No.: 2,105 Region Association: Pacific Northwest |
Awesome progress Fred! Gawd, don't envy all that sanding, yuck.
Maybe paint before end of the year? |
|
|
|
| friethmiller |
Oct 6 2025, 08:53 PM
Post
#654
|
|
Senior Member Group: Members Posts: 1,130 Joined: 10-February 19 From: Austin, TX Member No.: 22,863 Region Association: Southwest Region |
QUOTE(Root_Werks @ Oct 6 2025, 06:55 PM) Awesome progress Fred! Gawd, don't envy all that sanding, yuck. Maybe paint before end of the year? Thanks, Dan! Yeah, not sure about painting yet. Once the other 914 has it's engine running/installed, I can clear it out and start painting the LE. Or, I could build a quick paint booth in the backyard, or buy an inflatable one. Or, I could buy for time and start with the suspension and glass. Despite having a waterproof cover, I don't like the thought of it sitting out there, in the rain, in a high-build primer. (IMG:style_emoticons/default/confused24.gif) I'll take any ideas into consideration, of course (IMG:style_emoticons/default/biggrin.gif) |
|
|
|
| friethmiller |
Oct 6 2025, 08:58 PM
Post
#655
|
|
Senior Member Group: Members Posts: 1,130 Joined: 10-February 19 From: Austin, TX Member No.: 22,863 Region Association: Southwest Region |
Bonus Photo (10/6/2025):
Went out early this morning in the dark and then again just before sunset this evening to lay down a 2nd skim coat. This appears to be sufficient. I should be able to sand this flat without having to burn through anywhere. Getting mentally prepared for more sanding (IMG:style_emoticons/default/blink.gif) 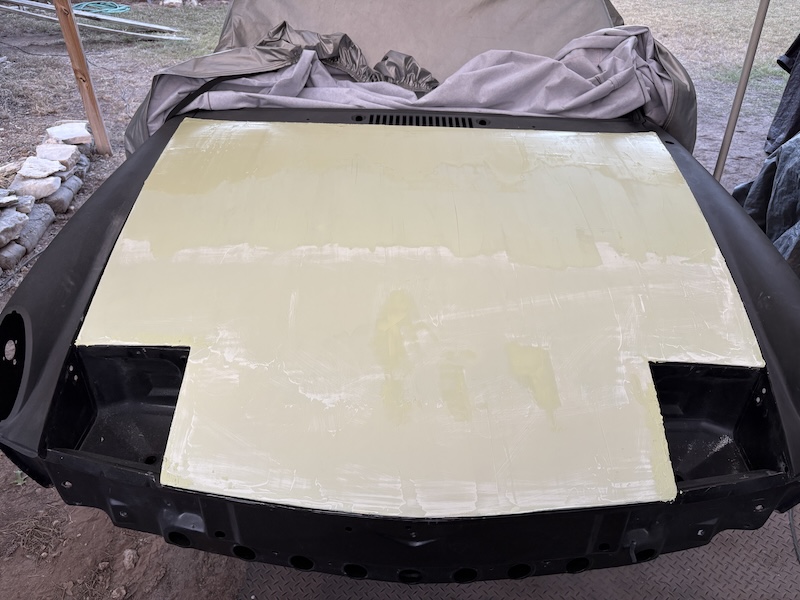 |
|
|
|
| friethmiller |
Oct 9 2025, 06:25 PM
Post
#656
|
|
Senior Member Group: Members Posts: 1,130 Joined: 10-February 19 From: Austin, TX Member No.: 22,863 Region Association: Southwest Region |
Finishing the Hood (10/7 - 10/9/2025):
Worked in the mornings and evening for the past couple of days to finally finish sanding the hood from 120 -> 180 grit. The second skim coat that I put on a few days ago was mostly gone but it did the trick. With that said, I did have a few spots where the glazing putty was needed but it all went pretty well. Of course, my arms and shoulders are a bit sore. 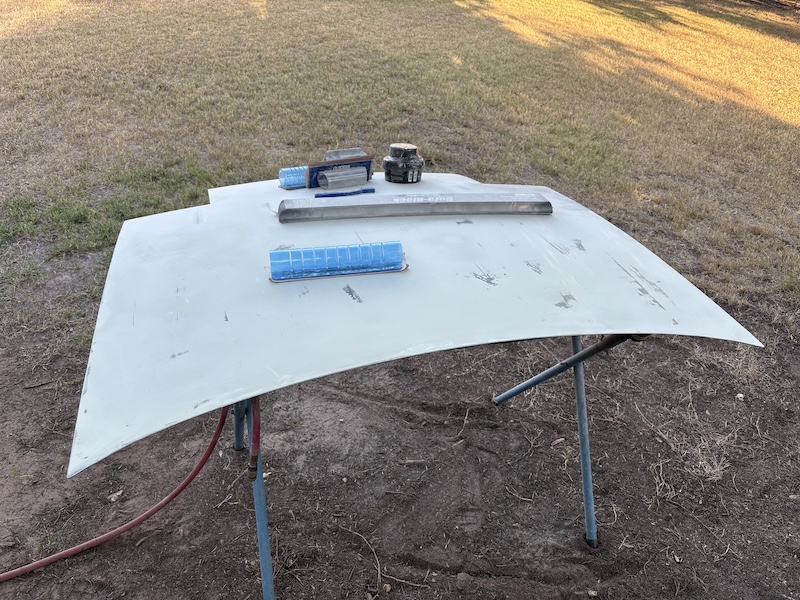 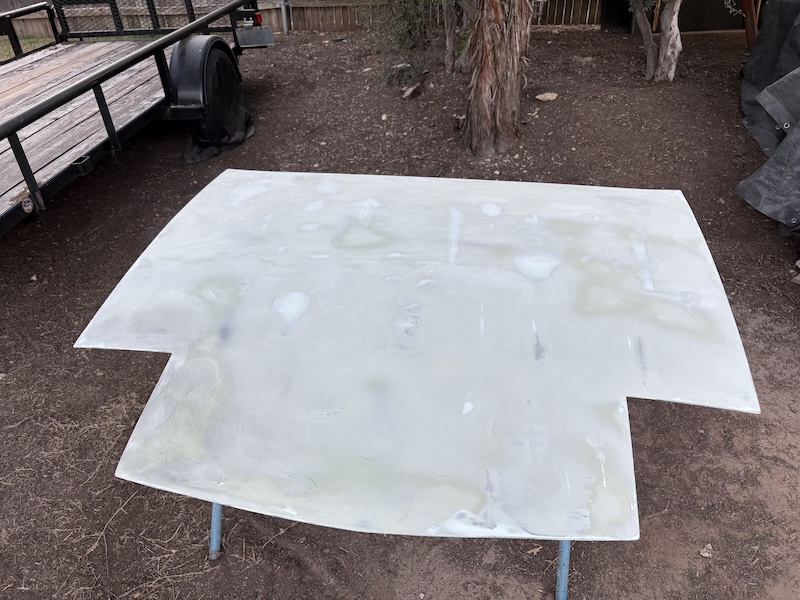 Went with the remainder of the black Speedokote epoxy I had on-hand but was forced to add in some gray to have enough to cover the hood with one full coat. Call it a dark-gray, I guess. It'll work! It just needed it to be a different color than the Feather Fill G2 (gray) that will be going on over the entire car this Sunday. Till then, cheers! (IMG:style_emoticons/default/beerchug.gif) 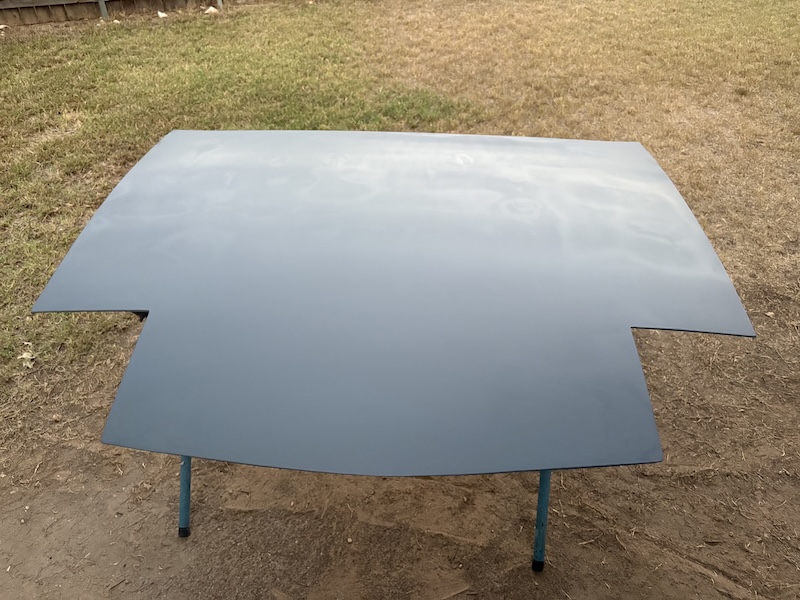 |
|
|
|
| bkrantz |
Oct 9 2025, 07:02 PM
Post
#657
|
|
914 Guru Group: Members Posts: 8,567 Joined: 3-August 19 From: SW Colorado Member No.: 23,343 Region Association: Rocky Mountains |
OK, Fred. We need to see that in glossy paint, and some reflections to know if it's super-awesome, or just awesome. (IMG:style_emoticons/default/beer.gif)
|
|
|
|
| friethmiller |
Oct 9 2025, 08:19 PM
Post
#658
|
|
Senior Member Group: Members Posts: 1,130 Joined: 10-February 19 From: Austin, TX Member No.: 22,863 Region Association: Southwest Region |
QUOTE(bkrantz @ Oct 9 2025, 08:02 PM) OK, Fred. We need to see that in glossy paint, and some reflections to know if it's super-awesome, or just awesome. (IMG:style_emoticons/default/beer.gif) Yes! I guess we’ll see some of that with a few “wet checks” as we go from 220 -> 400 & possibly even 600-grit. |
|
|
|
| 930cabman |
Oct 10 2025, 04:58 AM
Post
#659
|
|
Advanced Member Group: Members Posts: 4,443 Joined: 12-November 20 From: Buffalo Member No.: 24,877 Region Association: North East States |
QUOTE(bkrantz @ Oct 9 2025, 07:02 PM) OK, Fred. We need to see that in glossy paint, and some reflections to know if it's super-awesome, or just awesome. (IMG:style_emoticons/default/beer.gif) my bet is the former (IMG:style_emoticons/default/beerchug.gif) |
|
|
|
| friethmiller |
Oct 15 2025, 12:46 PM
Post
#660
|
|
Senior Member Group: Members Posts: 1,130 Joined: 10-February 19 From: Austin, TX Member No.: 22,863 Region Association: Southwest Region |
Polyester Filler Primer (10/10 - 10/14/2025):
Taped up the entire car and hit all outside surfaces with 2-3 coats of Evercoat's Feather Fill G2. I put down a total of a 1/2 gallon of primer, mixing 16oz at a time. This was sprayed over a single coat of epoxy, which was over a complete skim coat of body filler. My intent was to use gray primer but when 3 out of 3 attempts failed to deliver the paint from Amazon due to shipping damage, I decided to go ahead and use the black I had on hand. Here are a few shots of the masking job: 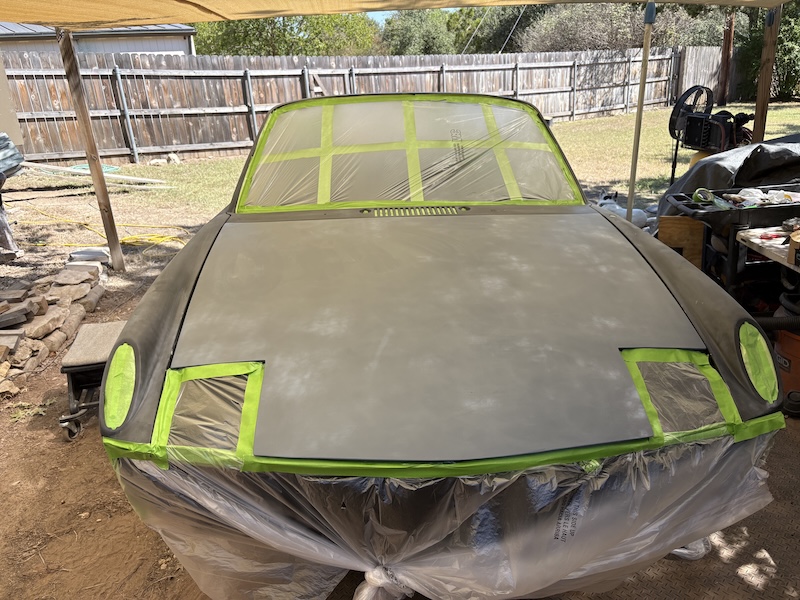 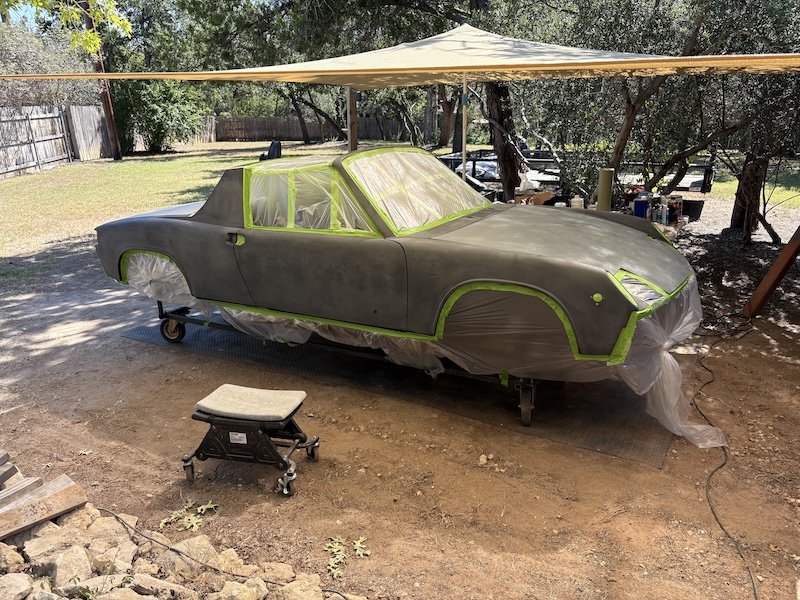 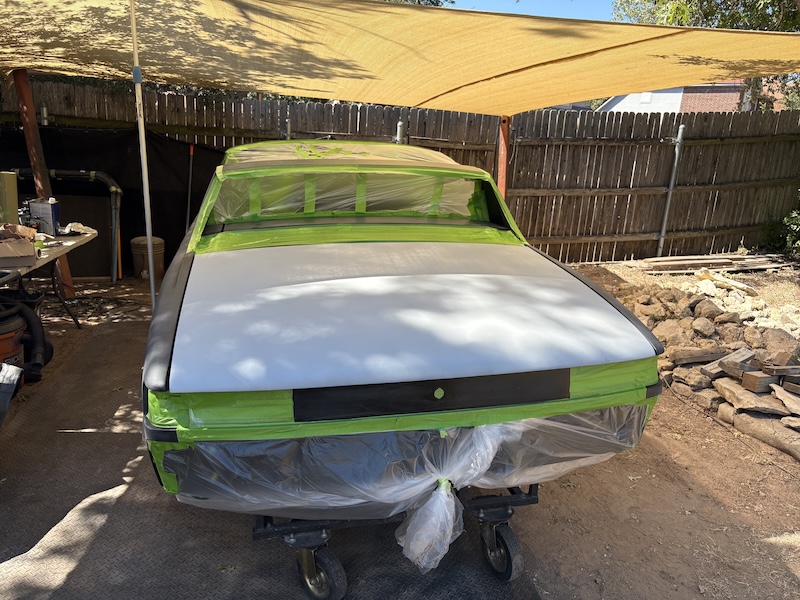 And, a few photos showing the results of applying the filler-primer. This primer will be allowed to sit for a week or two to fully cure before I start blocking the panels out. This will allow time for me to get started on other tasks such as painting the insides of the vehicle (IMG:style_emoticons/default/aktion035.gif) Stay tuned... 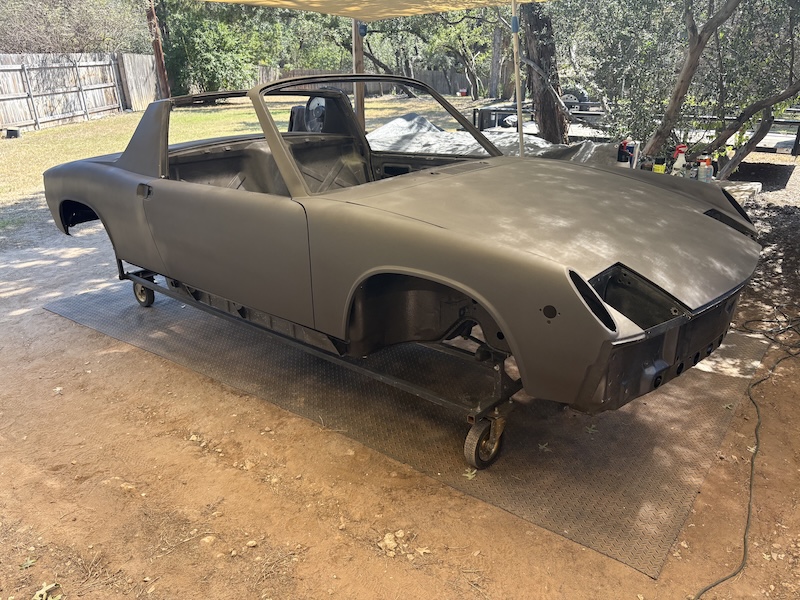 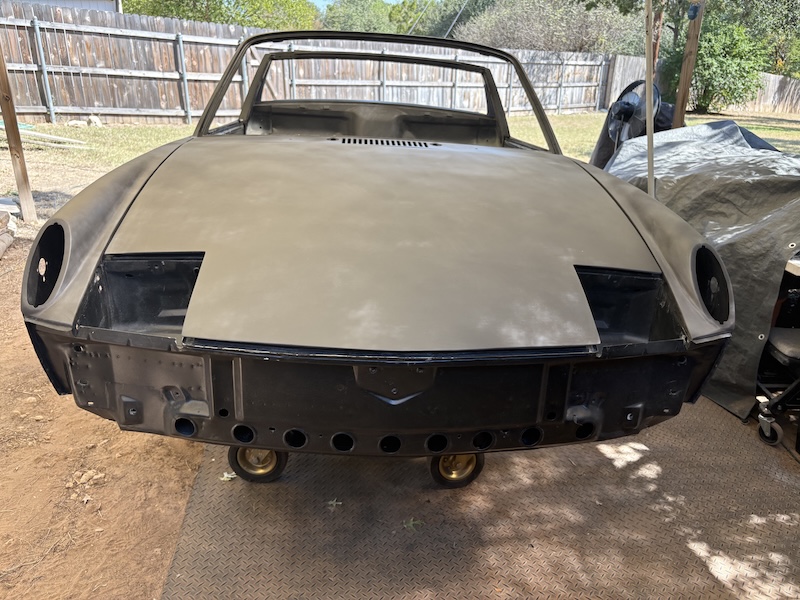 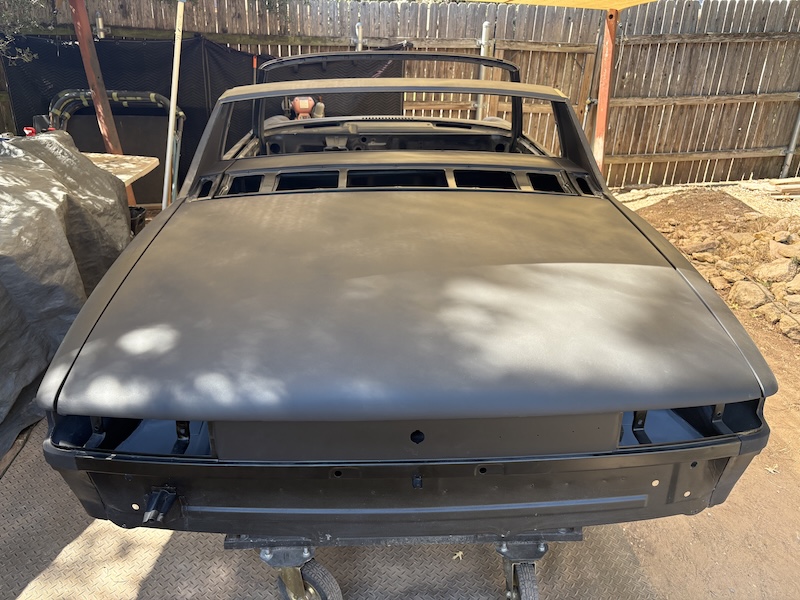 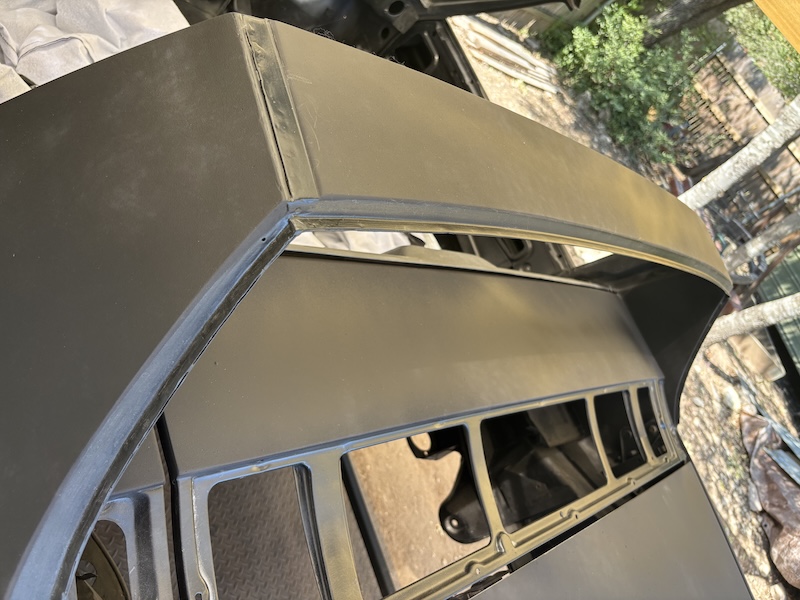 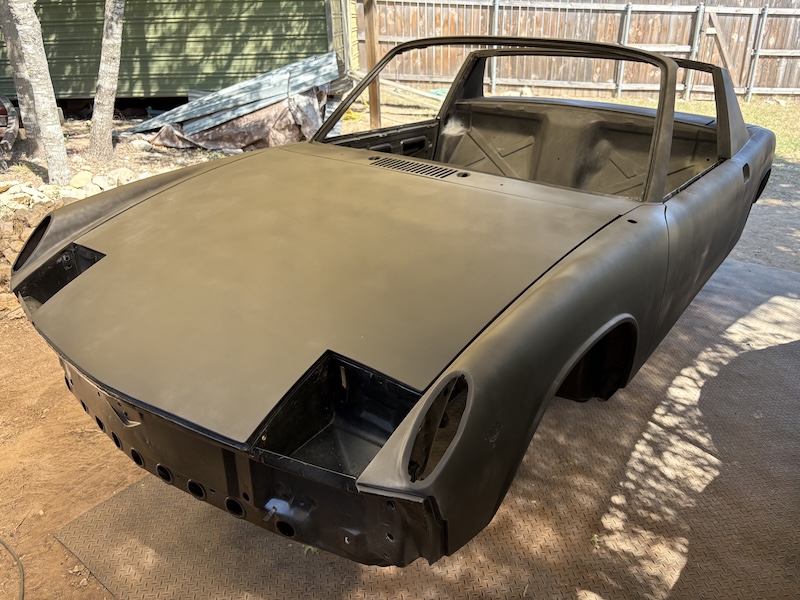 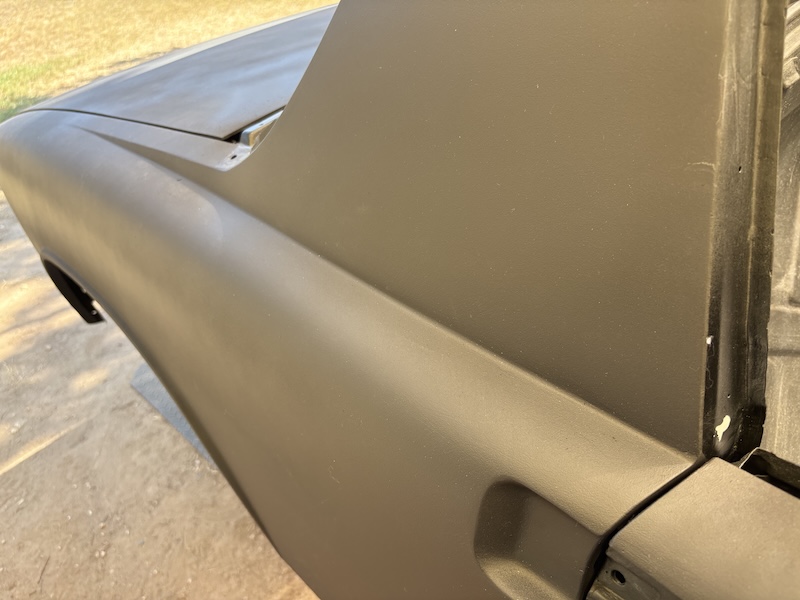 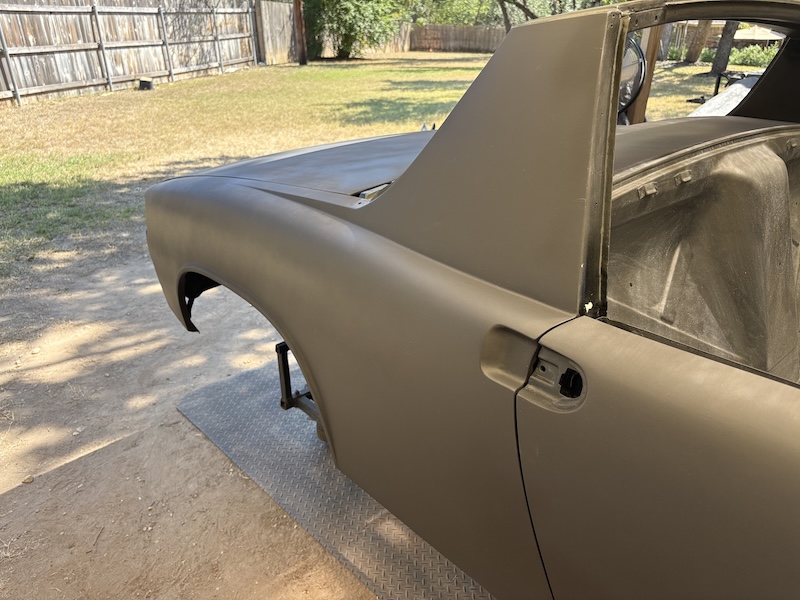 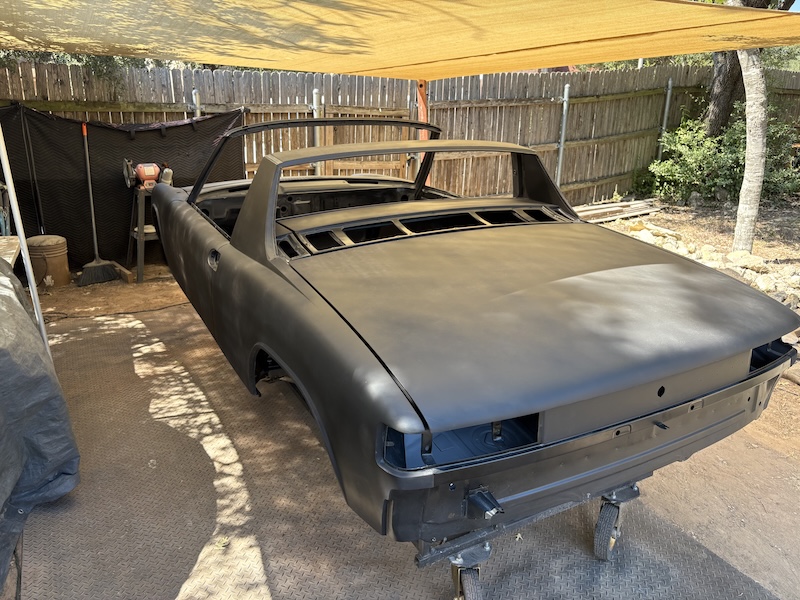 |
|
|
|
|
2 User(s) are reading this topic (2 Guests and 0 Anonymous Users)
0 Members:

|
Lo-Fi Version | Time is now: 11th January 2026 - 09:30 AM |
Invision Power Board
v9.1.4 © 2026 IPS, Inc.