|
|
|
Porsche, and the Porsche crest are registered trademarks of Dr. Ing. h.c. F. Porsche AG.
This site is not affiliated with Porsche in any way. Its only purpose is to provide an online forum for car enthusiasts. All other trademarks are property of their respective owners. |
|
|

  |

| TRP |
 Oct 15 2025, 01:03 PM Oct 15 2025, 01:03 PM
Post
#661
|
|
Member  Group: Members Posts: 178 Joined: 2-September 23 From: Morgan Hill, CA Member No.: 27,559 Region Association: None |
WOW. That looks great. You're putting in a ton of work and it shows in the results.
Keep after it! |
   |

 
|
| friethmiller |
Oct 19 2025, 08:39 PM
Post
#662
|
|
Senior Member Group: Members Posts: 1,130 Joined: 10-February 19 From: Austin, TX Member No.: 22,863 Region Association: Southwest Region |
QUOTE(TRP @ Oct 15 2025, 02:03 PM)  WOW. That looks great. You're putting in a ton of work and it shows in the results. Keep after it! Thanks man! Got some other things going on over the next few months but will continue to work as much as possible on the car. |
|
|
|
| friethmiller |
Oct 19 2025, 08:50 PM
Post
#663
|
|
Senior Member Group: Members Posts: 1,130 Joined: 10-February 19 From: Austin, TX Member No.: 22,863 Region Association: Southwest Region |
Sanding Interior Spaces (10/19/2025)
Got a kid in marching band so I was out all day on Saturday for a band competition. Back at it on Sunday, though. Nothing too exciting here but progress was made. Got the the trunk, engine bay, the interior, and part of the frunk sanded in preparation for paint. Used a small block with 220-grit and did a good bit of hand sanding. This job is time-consuming and tiring but has to be completed. I was also able to drill out the broken charcoal canister stud in the engine bay, as well. This has been on the todo list for a while so it was good to get that done. I also brushed in seam-sealer in the interior, engine bay, and rear trunk. I'll post those picture later. Here's some of the photos from today's sanding work - enjoy! (IMG:style_emoticons/default/beerchug.gif) 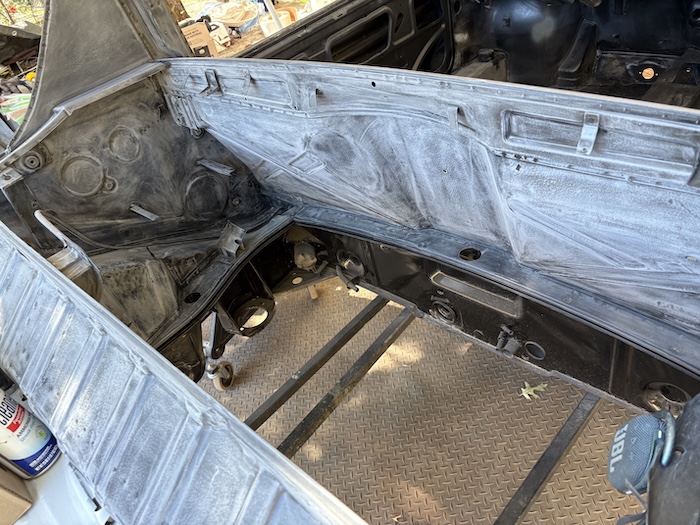 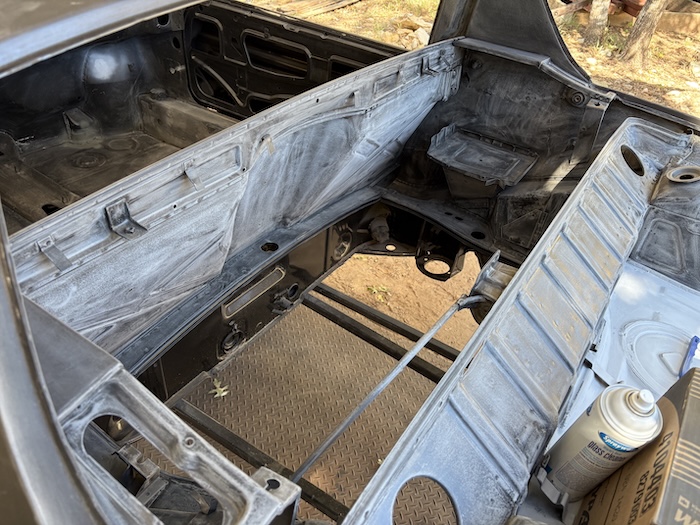 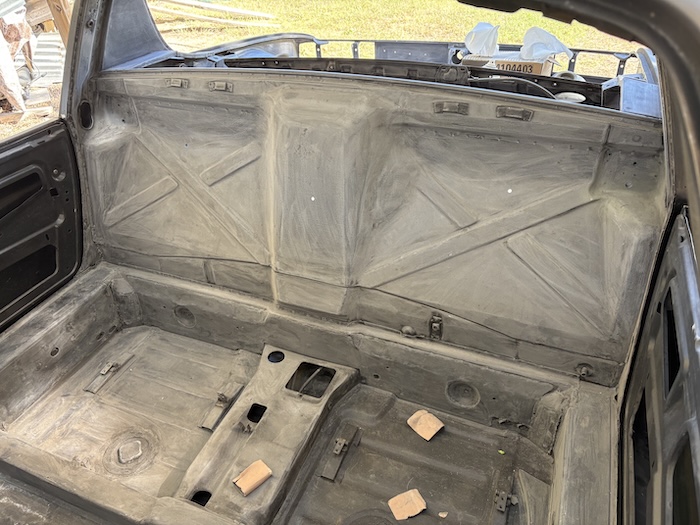 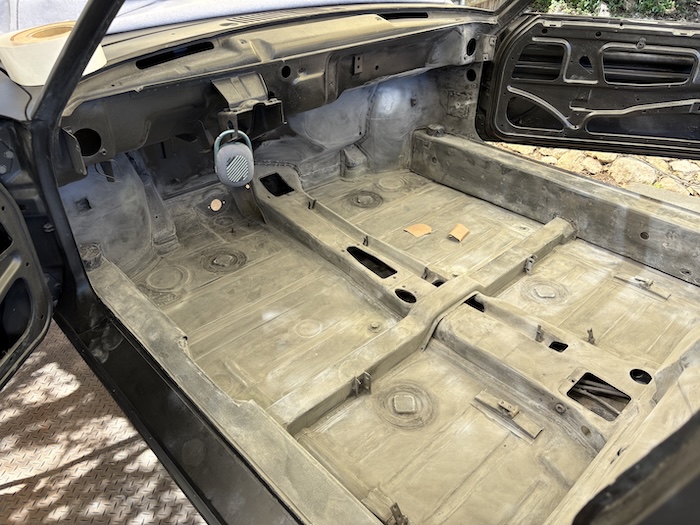 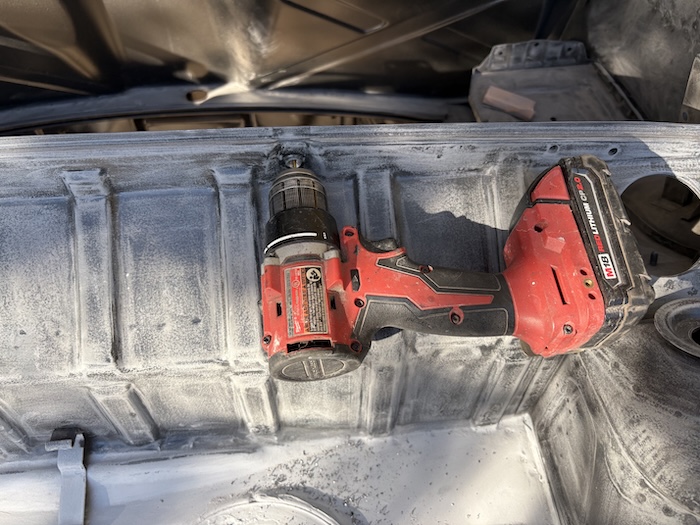  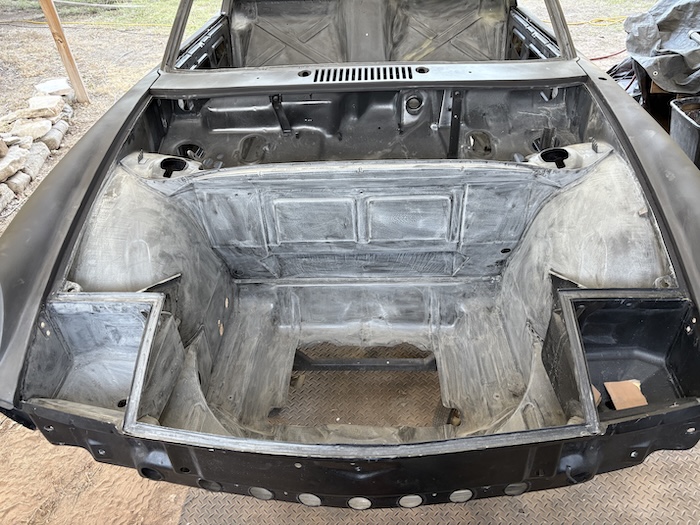 |
|
|
|
| friethmiller |
Oct 23 2025, 03:19 PM
Post
#664
|
|
Senior Member Group: Members Posts: 1,130 Joined: 10-February 19 From: Austin, TX Member No.: 22,863 Region Association: Southwest Region |
Sealant (10/20 - 10/22/2025):
Even though my pneumatic sealant gun in in-op, I decided to start the process of laying in sealant. I had two different kinds on-hand. One was a gray "brushable" sealant and the other was a black sealant made for use with a chalking gun. Ended up using everything I had available. Can't finish up the frunk without a delivery of additional product. Till then, here's some pics of the process. Note the use of compressed air and brush to mimic the sprayed in factory look. It's not 100% by any means but it's pretty close. These first few photo show the initial brush in on the seams. 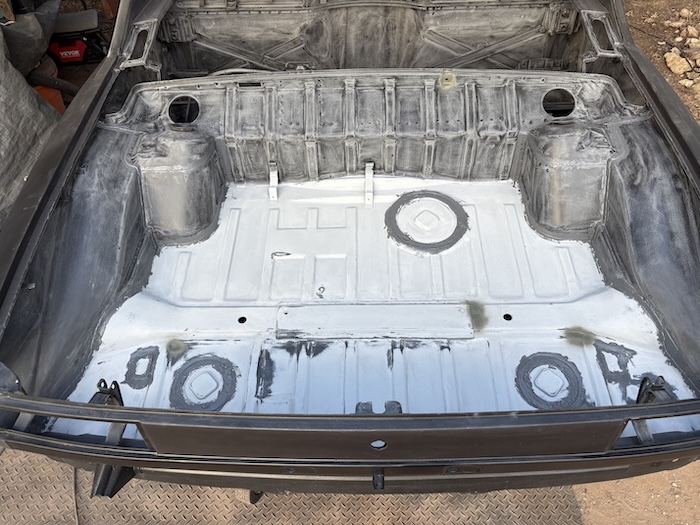 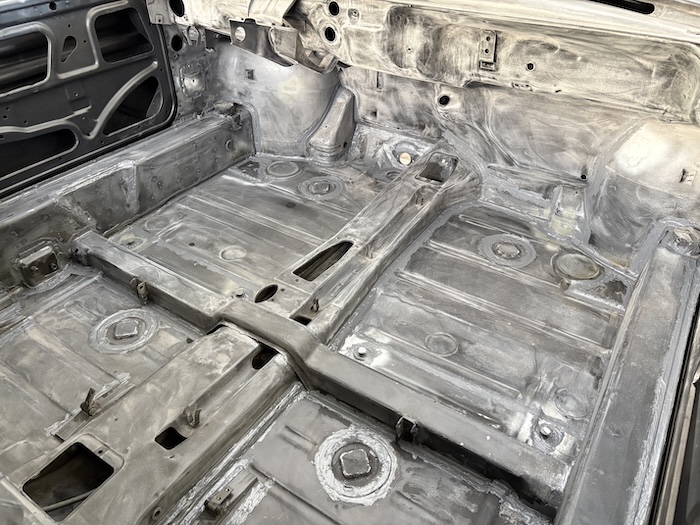 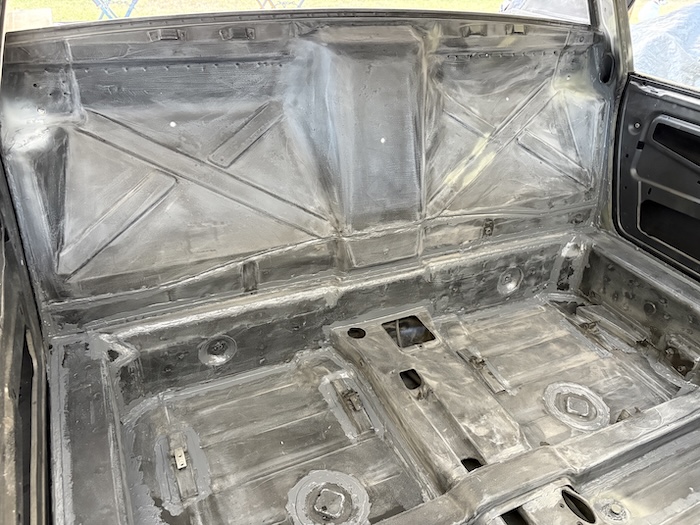 Next, are photos of additional gray sealant going on with a brush and then hit with compressed air. 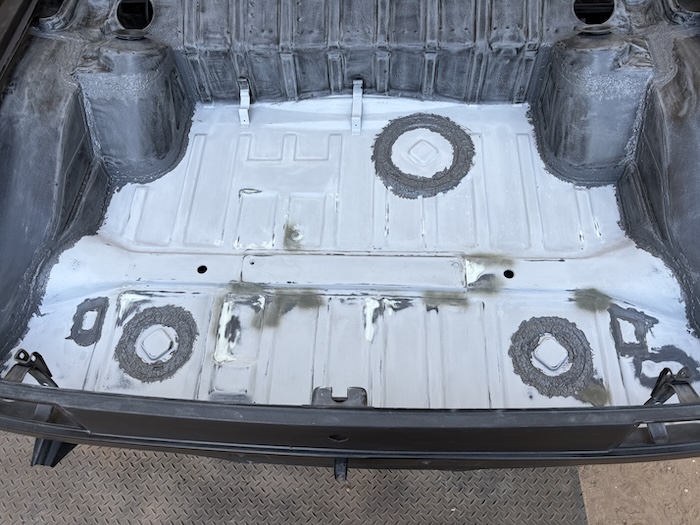 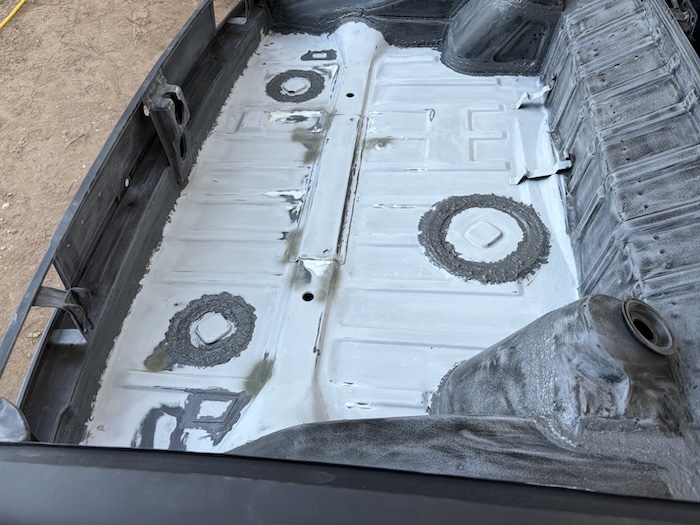 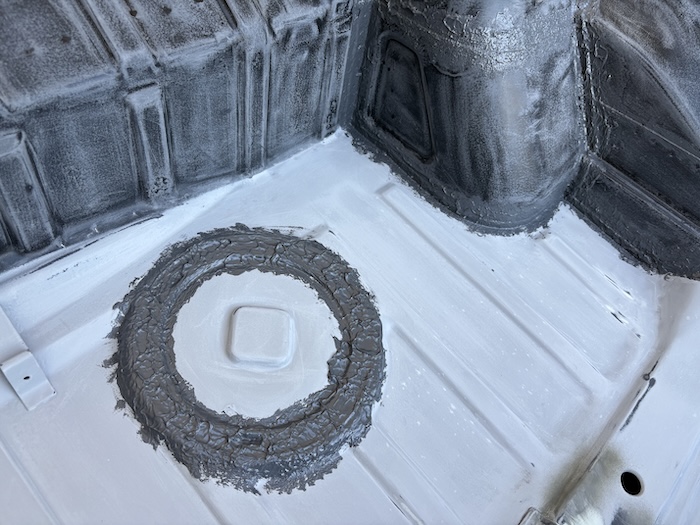 Ran out of gray, switched to black: 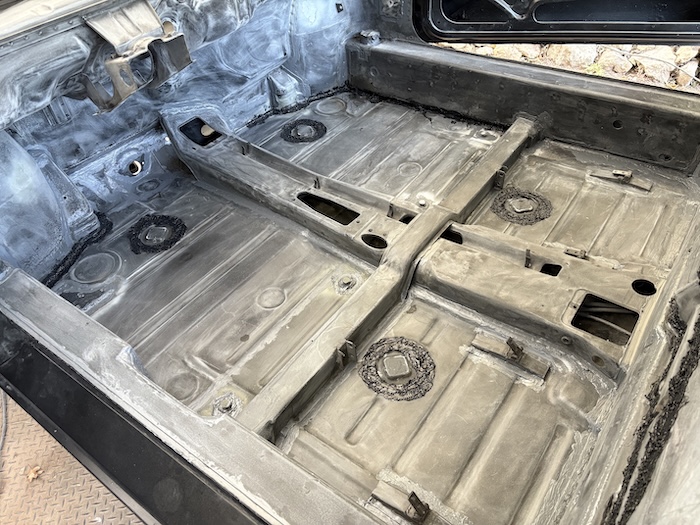 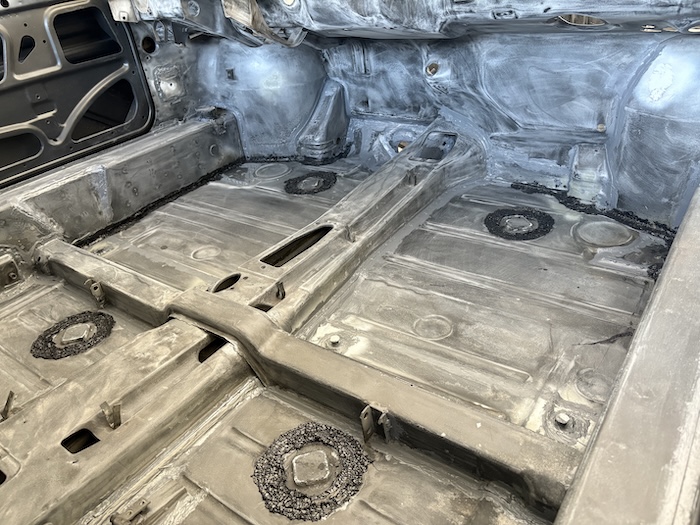 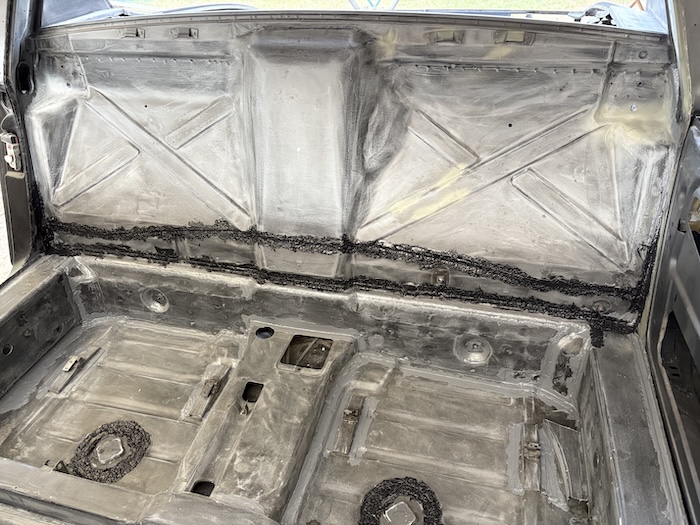 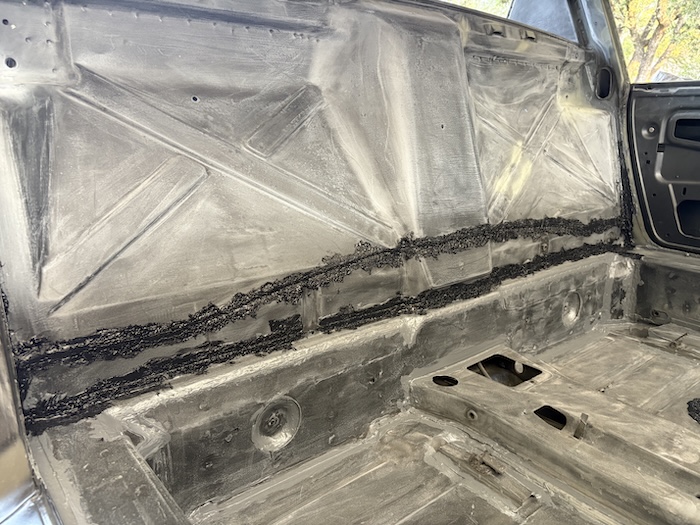 My work to start the front trunk before running out of black sealant. 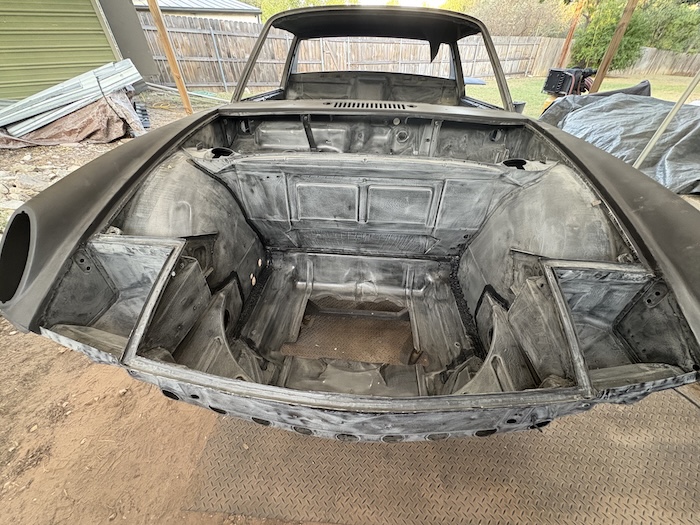  Headed to CO this weekend but will be back at it next weekend. Stay tuned for painting single stage L41 black into the interior spaces. I personally can't wait! |
|
|
|
| Cairo94507 |
Oct 24 2025, 07:16 AM
Post
#665
|
|
Michael Group: Members Posts: 10,541 Joined: 1-November 08 From: Auburn, CA Member No.: 9,712 Region Association: Northern California |
Wow, after all that metal & body work, finally getting to apply sealant is huge. It looks so nice. Can't wait to see color being applied - a 914 chassis in fresh paint looks awesome. (IMG:style_emoticons/default/beerchug.gif)
|
|
|
|
| didenpx |
Oct 24 2025, 07:45 AM
Post
#666
|
|
Member Group: Members Posts: 109 Joined: 1-September 23 From: Usa Member No.: 27,556 Region Association: North East States |
Looks great. Must be so satisfying to be this close to paint!
|
|
|
|
| wonkipop |
Oct 24 2025, 04:03 PM
Post
#667
|
|
914 Guru Group: Members Posts: 5,341 Joined: 6-May 20 From: north antarctica Member No.: 24,231 Region Association: NineFourteenerVille |
very cool technique for imitating original sealant look. (IMG:style_emoticons/default/beerchug.gif) (IMG:style_emoticons/default/beerchug.gif)
|
|
|
|
| didenpx |
Oct 24 2025, 05:12 PM
Post
#668
|
|
Member Group: Members Posts: 109 Joined: 1-September 23 From: Usa Member No.: 27,556 Region Association: North East States |
Adding post to get the number of posts off the sign of the beast. YW everyone.
|
|
|
|
| bkrantz |
Oct 24 2025, 08:34 PM
Post
#669
|
|
914 Guru Group: Members Posts: 8,567 Joined: 3-August 19 From: SW Colorado Member No.: 23,343 Region Association: Rocky Mountains |
Congrats on reaching the milestone where stuff starts consistently going on instead of coming off!
|
|
|
|
| Tim17 |
Oct 25 2025, 04:41 AM
Post
#670
|
|
Member Group: Members Posts: 67 Joined: 3-December 23 From: Newburyport, Massachusetts Member No.: 27,769 Region Association: North East States |
Looks awesome, nice work as always!
|
|
|
|
| friethmiller |
Oct 25 2025, 11:37 AM
Post
#671
|
|
Senior Member Group: Members Posts: 1,130 Joined: 10-February 19 From: Austin, TX Member No.: 22,863 Region Association: Southwest Region |
QUOTE(didenpx @ Oct 24 2025, 06:12 PM) Adding post to get the number of posts off the sign of the beast. YW everyone. (IMG:style_emoticons/default/lol-2.gif) Nice! We all appreciate your efforts in the matter. |
|
|
|
| Dion |
Oct 30 2025, 04:31 PM
Post
#672
|
|
RN Group: Members Posts: 2,922 Joined: 16-September 04 From: Audubon,PA Member No.: 2,766 Region Association: MidAtlantic Region |
Just incredible Fred. Car looks awesome. That will sure be satisfying getting the paint started.
Agree with Wonkipop as well regarding the seam sealer technique. Looking forward. |
|
|
|
| friethmiller |
Nov 2 2025, 08:07 PM
Post
#673
|
|
Senior Member Group: Members Posts: 1,130 Joined: 10-February 19 From: Austin, TX Member No.: 22,863 Region Association: Southwest Region |
Prep'n & Painting Interior Spaces (11/1 - 11/2/2025):
Securing the Engine Hood Tube Final task to do before preparing the engine compartment for paint was to weld down the release wire tube to secure it properly. I used a dumbbell to help hold it down. Nothing too pretty here, I just didn't want the tube flexing like it was. 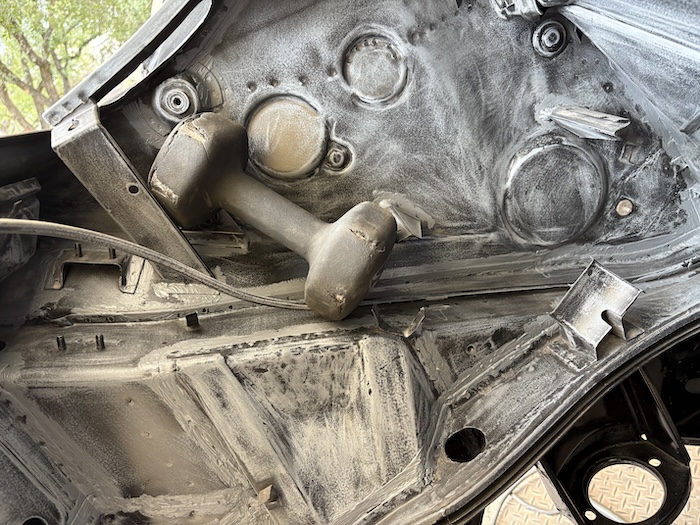 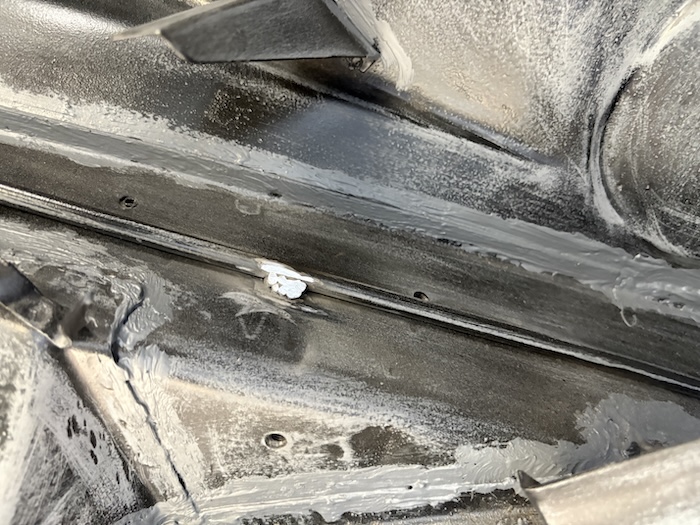 Masking the Body After thoroughly cleaning all surfaces with soap and water on Thursday evening, I needed to mask off a portion of the exterior around the interior compartment and engine bay to mitigate any overspray. The only problem was the weather. It kept raining on and off all day on Saturday and after several attempts, I was finally able to get everything done, before covering the car for what turned out to be a rainy evening. Thankfully Sunday was a beautiful day with a high in the mid-70s and almost no wind. Just about perfect conditions to paint. (IMG:style_emoticons/default/biggrin.gif) The following photos show the car masked off, the surfaces cleaned, and ready for paint. 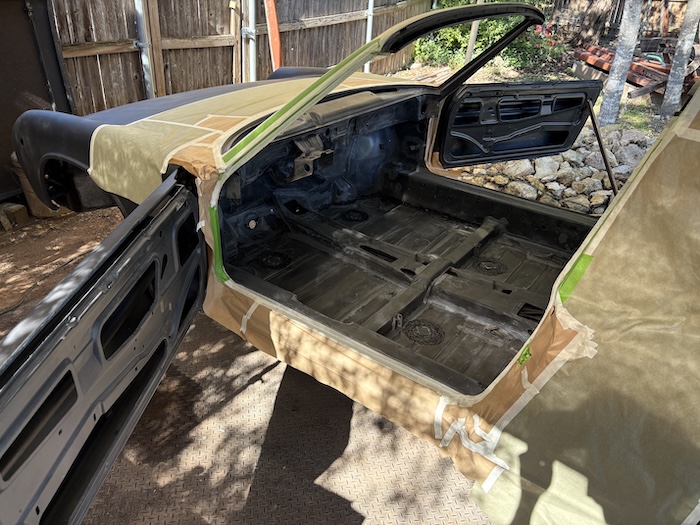 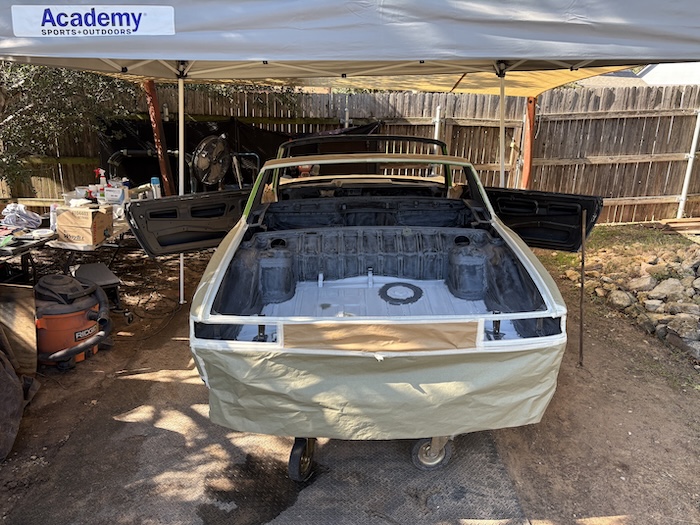 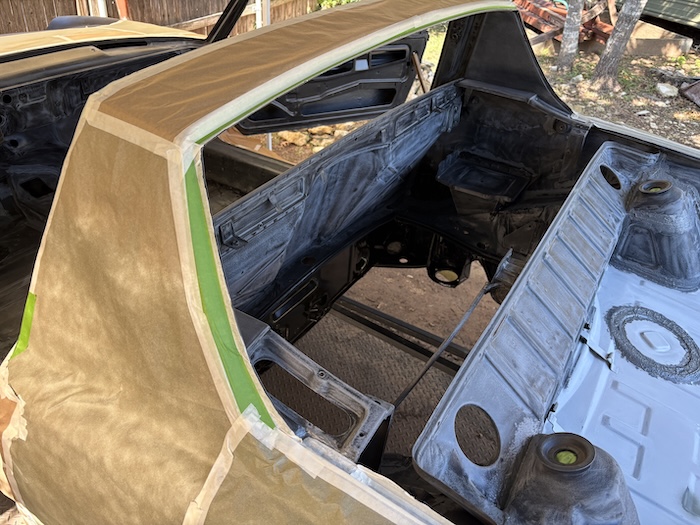 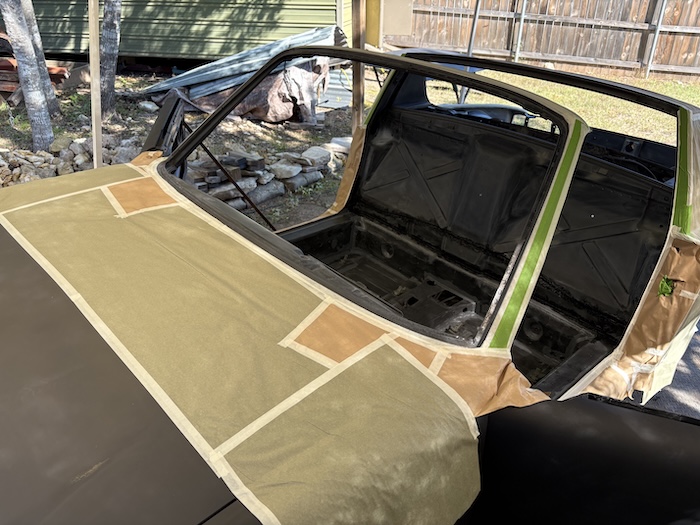 Painting the Passenger Compartment I was using a PPG single stage paint, tinted to L041, mixing 4:1:1 with hardener and reducer. My gun was a LPLV set at 28psi and I used a 1.3mm tip. Things went fairly well but I did create a few runs on the rear firewall. Nothing too serious but it took me a bit to adjust my technique after shooting that Feather Fill a few weeks ago. I should have gone lighter on my first coat. All in all, I'm very happy with the paint and I was happy with the application. I was able to get up the dash pretty well and got a lot of the hard to reach area too. 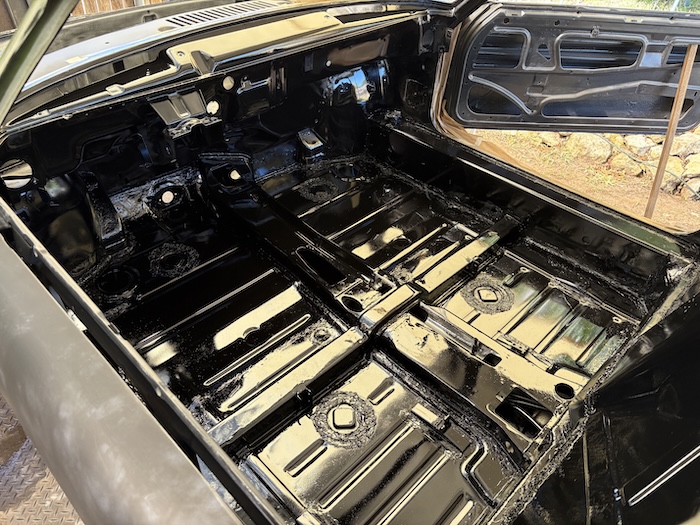 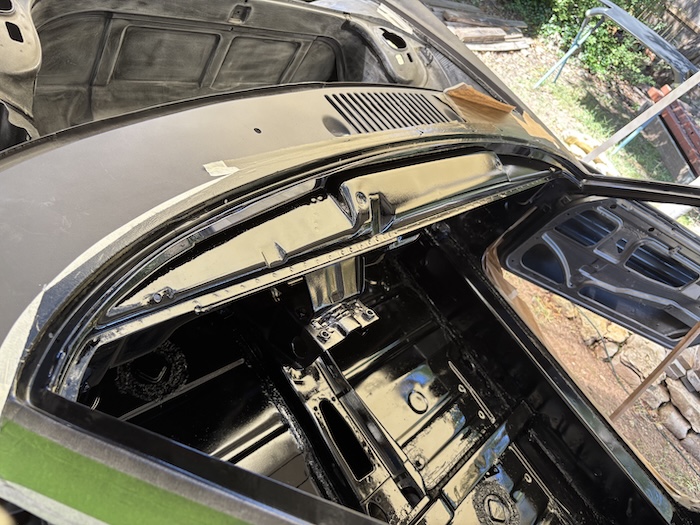 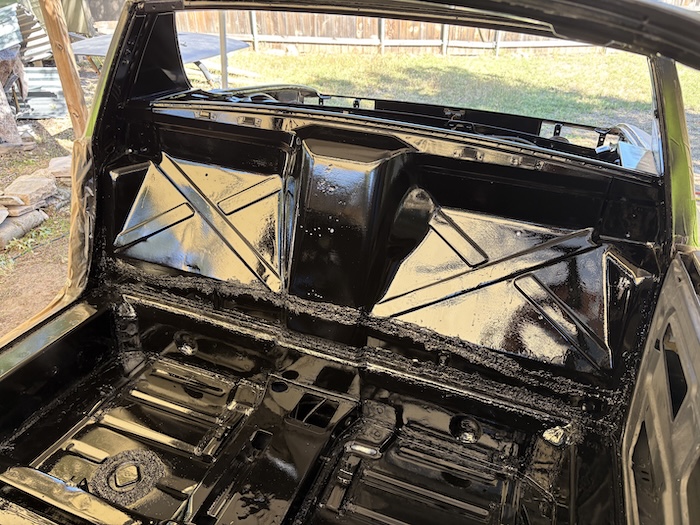 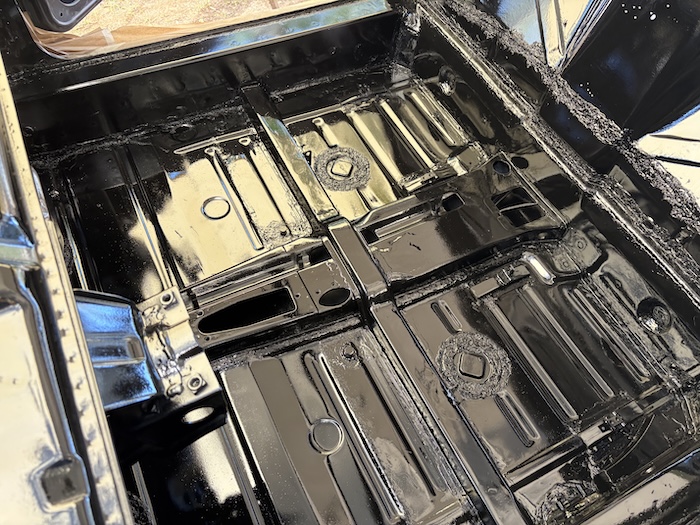 Painting the Engine Compartment After donning a full protective paint suit and crawling up into the engine bay, I shot 2 coats of black. Being in a cloud of paint is never fun so I was glad to get this area completed. Here's a few photos of the engine compartment. 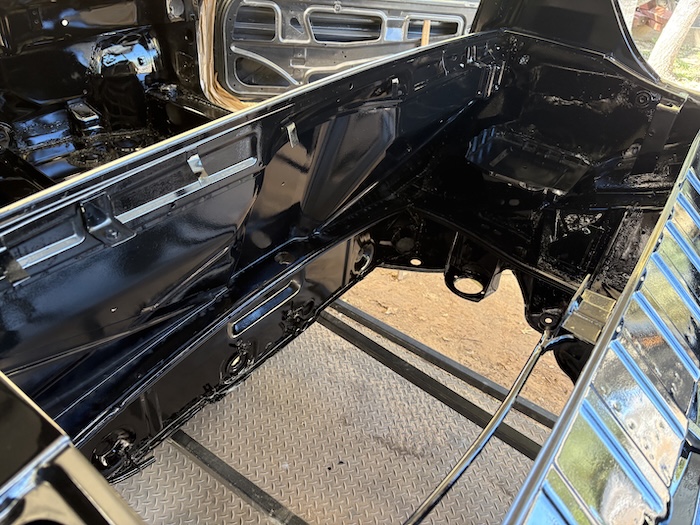 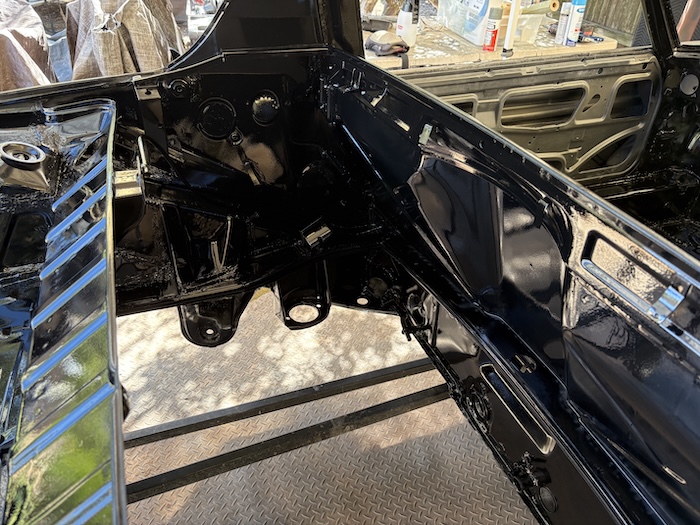 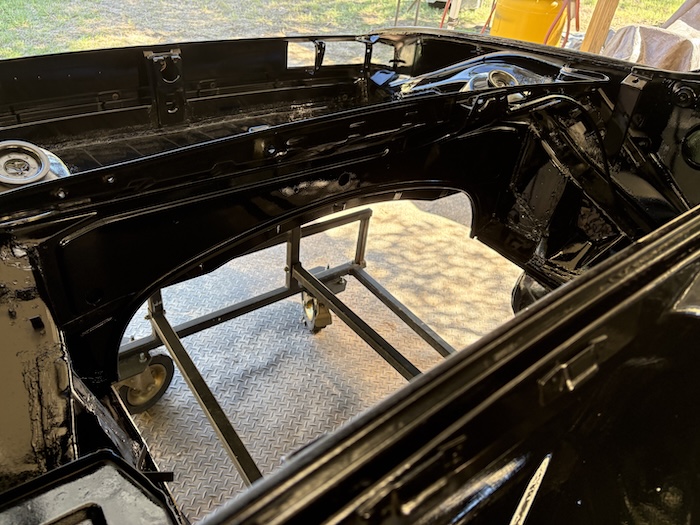 Painting the Rear Trunk Learning from my errors in the interior but not wanting to paint too dry, I applied a light 1st coat followed by 2 med-wet coats. I'm super happy with the way the trunk turned out. (IMG:style_emoticons/default/biggrin.gif) I'll post additional photos later. 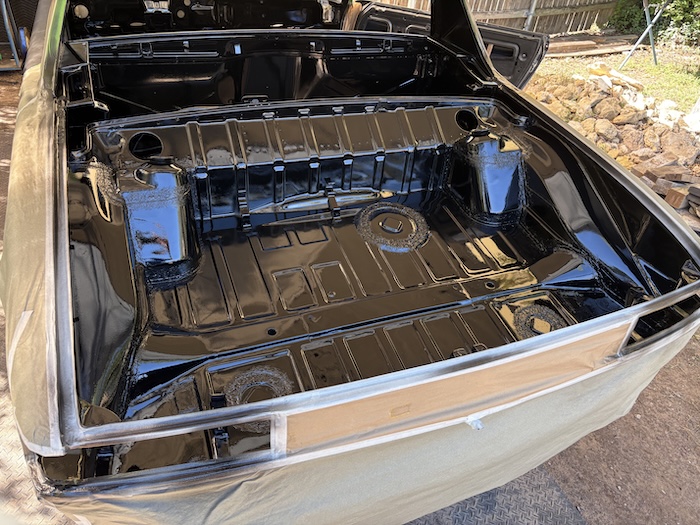 |
|
|
|
| Montreal914 |
Nov 2 2025, 08:16 PM
Post
#674
|
|
Advanced Member Group: Members Posts: 2,004 Joined: 8-August 10 From: Claremont, CA Member No.: 12,023 Region Association: Southern California |
|
|
|
|
| friethmiller |
Nov 2 2025, 09:05 PM
Post
#675
|
|
Senior Member Group: Members Posts: 1,130 Joined: 10-February 19 From: Austin, TX Member No.: 22,863 Region Association: Southwest Region |
Prep'n & Painting Interior Spaces - Part 2 (11/2/2025):
Painting the Front Trunk Had to deal with the VIN number before painting the trunk. I started by removing the paint surrounding the numbers and used a small wire brush to clean things up a bit. I thought about floating some black paint into the numbers but based on the condition of the metal here, I decided to just go with a protective coat of clear. The following photos show this process that was completed on Thursday evening.  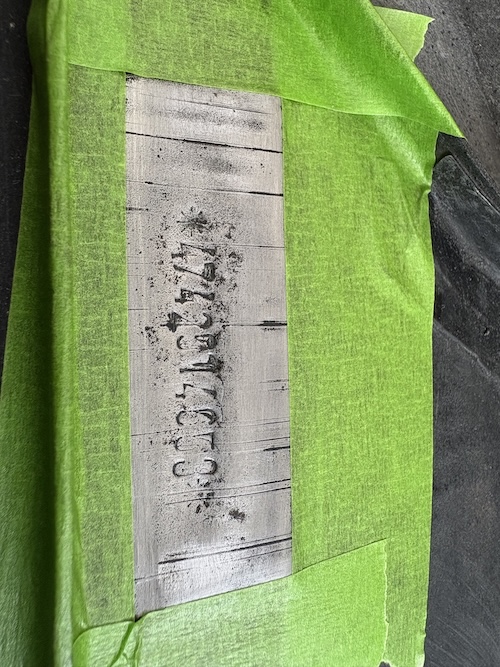 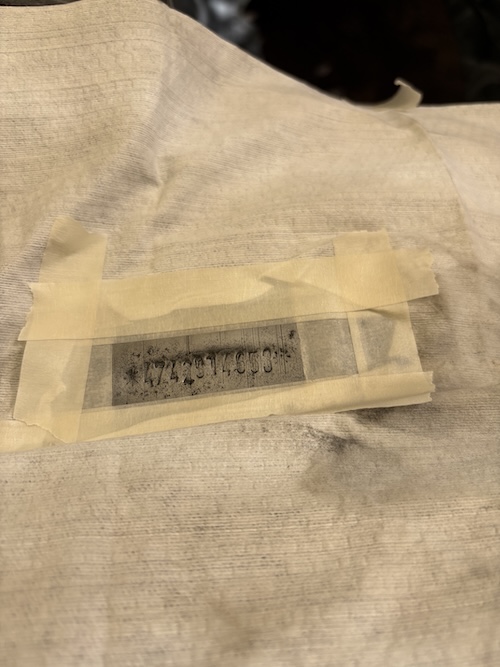 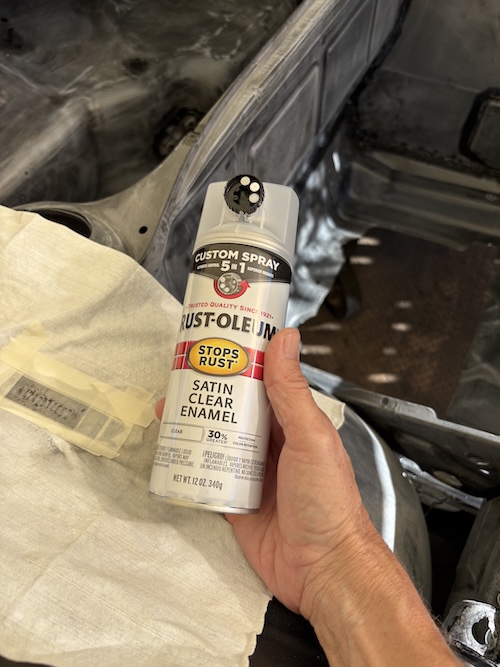 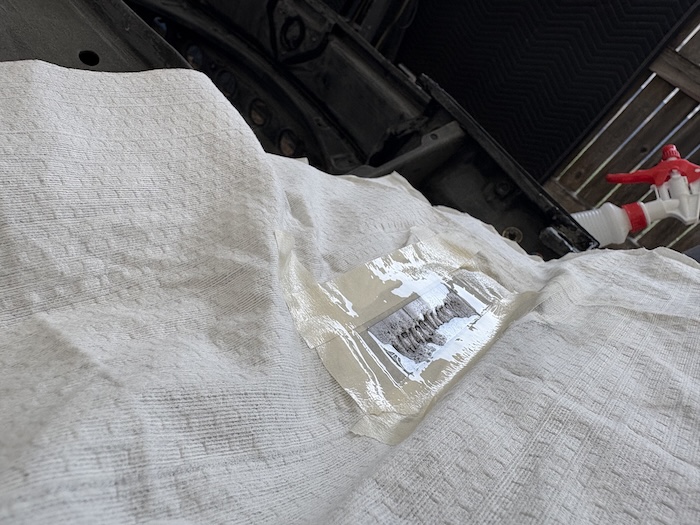 On Sunday, prior to painting the front trunk I taped directly over the VIN with the clear coat making sure to cut the tape precisely. The second photo shows the tape over the numbers. I then hit the bare metal with some primer and began the process of taping off the area around the front trunk for paint. 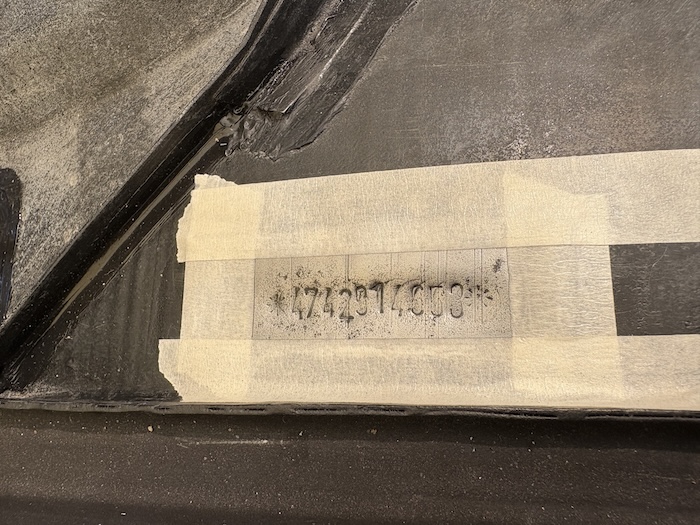 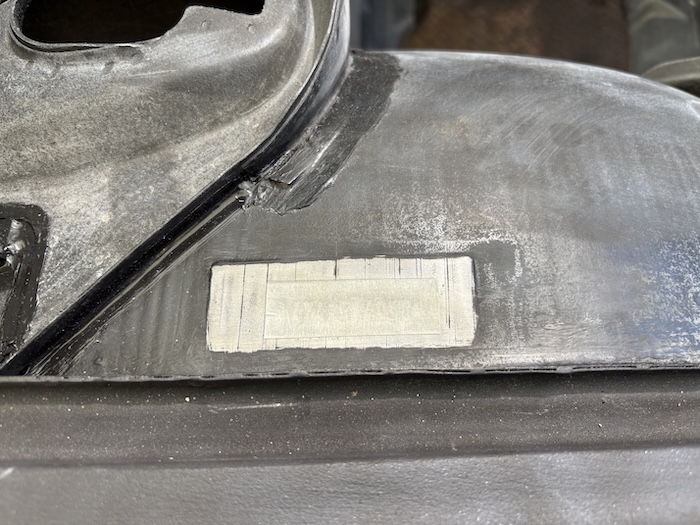 I snapped a few pictures of the front trunk after the 1st coat of paint. While the coverage was good, you can still see that a second coat is definitely needed to get even color and bring out the gloss. 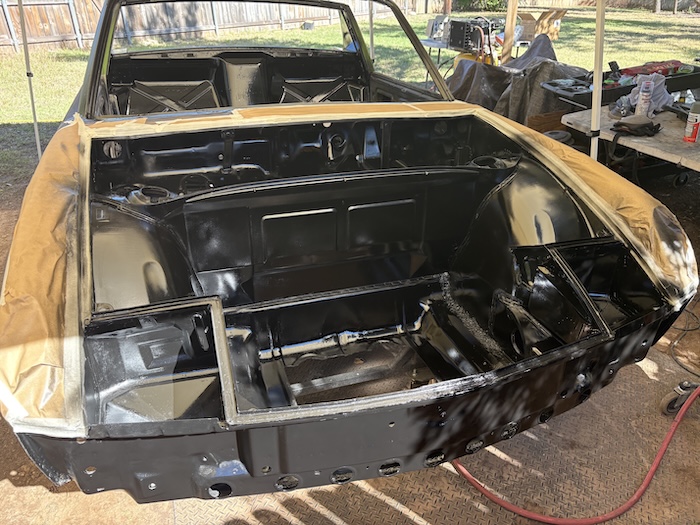 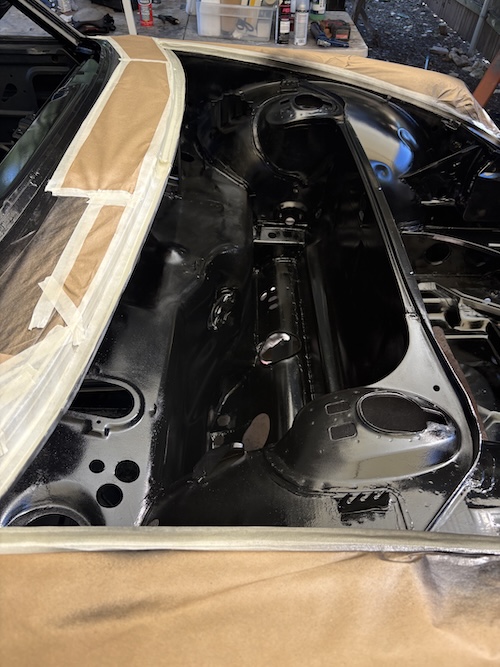 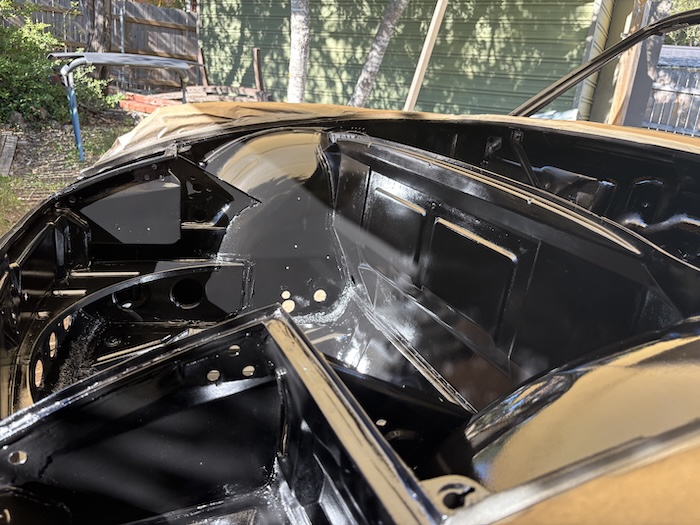 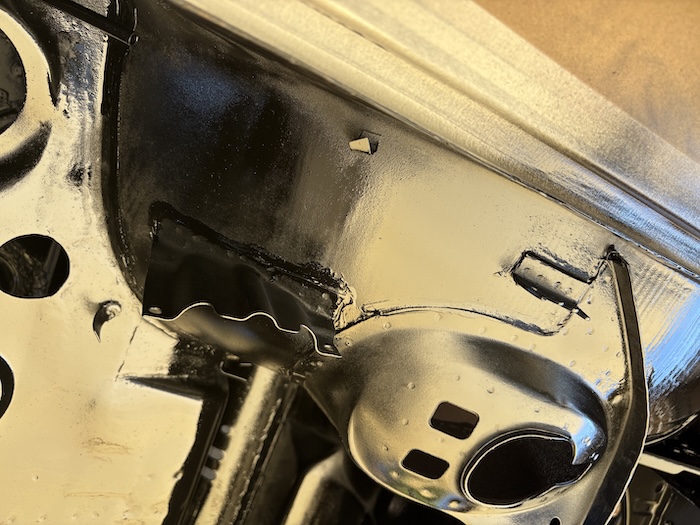 Here's a few shots after 2 coats of L041 black: 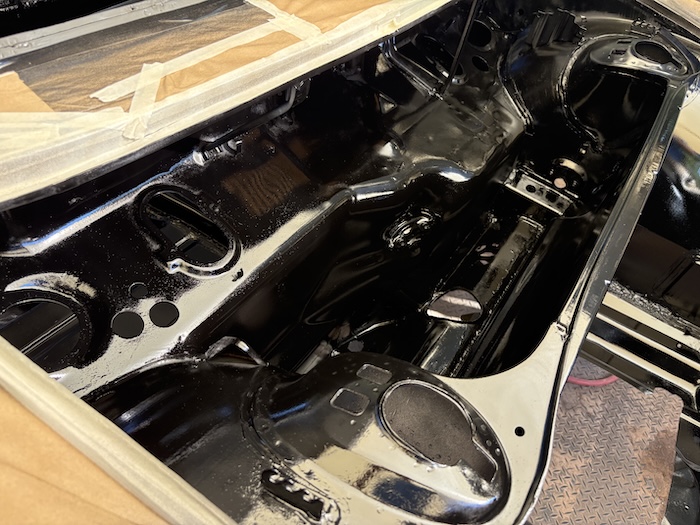 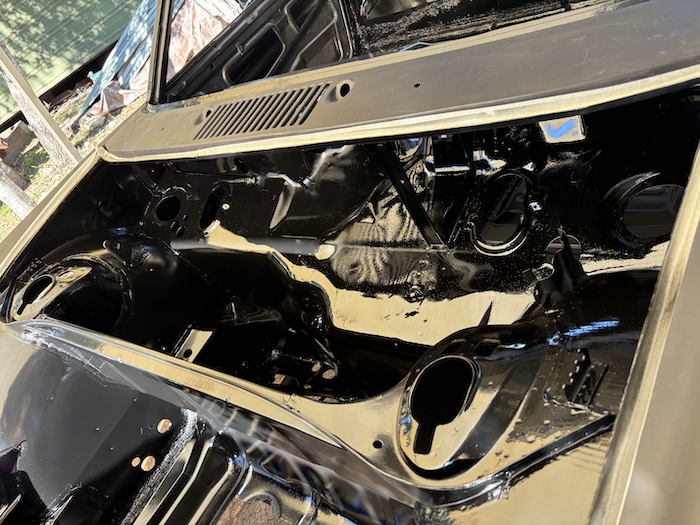  And finally, the removal of the tape covering the serial number. Think it turned out pretty well (IMG:style_emoticons/default/smile.gif) 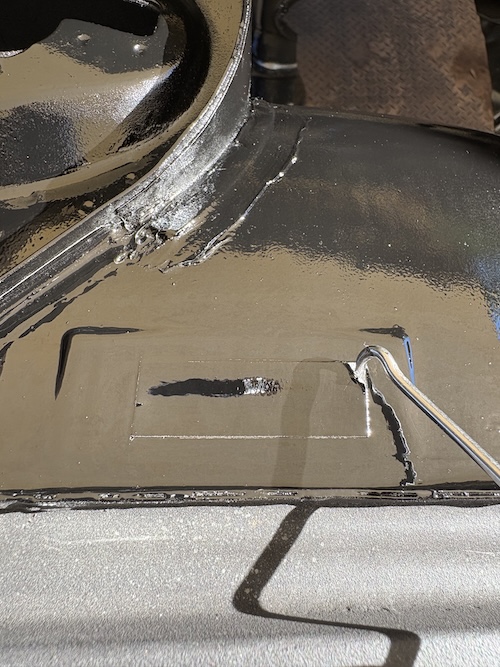 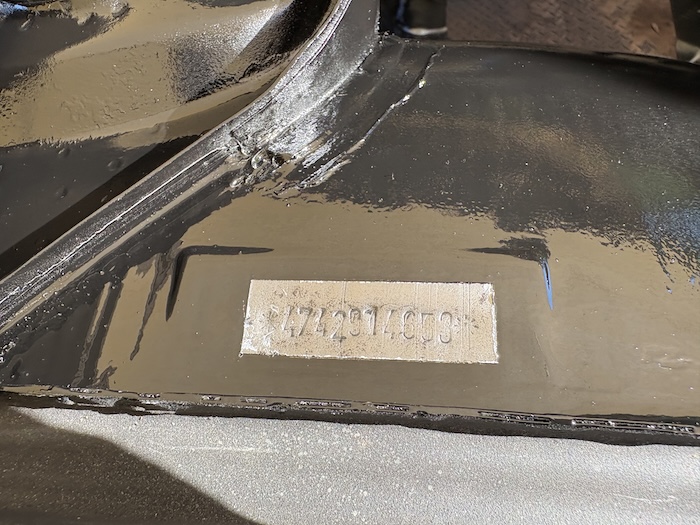 |
|
|
|
| Mitox |
Nov 2 2025, 09:32 PM
Post
#676
|
|
Senior Member Group: Members Posts: 500 Joined: 26-October 15 From: SW Virginia Member No.: 19,302 Region Association: South East States |
Impressive work!
|
 |
|
| friethmiller |
Nov 2 2025, 09:34 PM
Post
#677
|
|
Senior Member Group: Members Posts: 1,130 Joined: 10-February 19 From: Austin, TX Member No.: 22,863 Region Association: Southwest Region |
More Photos (11/2/2025):
Well, it's not perfect but pretty good considering I'm painting this outside in the open. Enjoy! (IMG:style_emoticons/default/beerchug.gif) 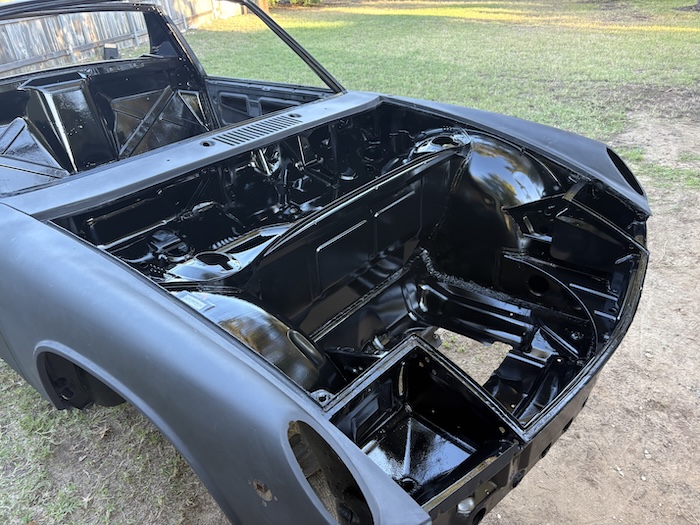 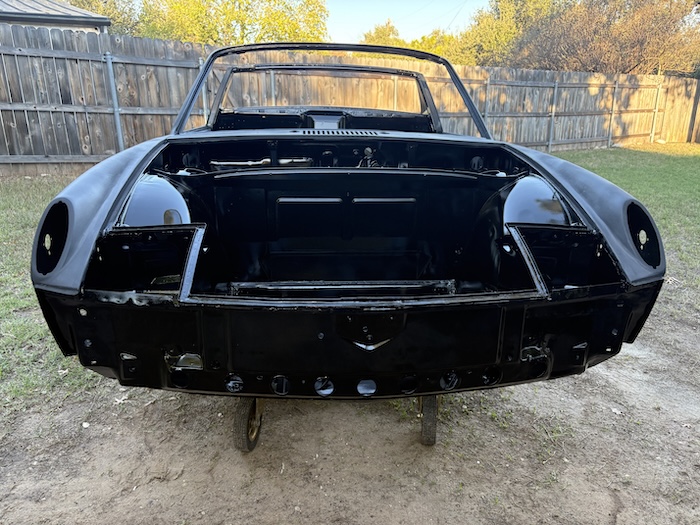 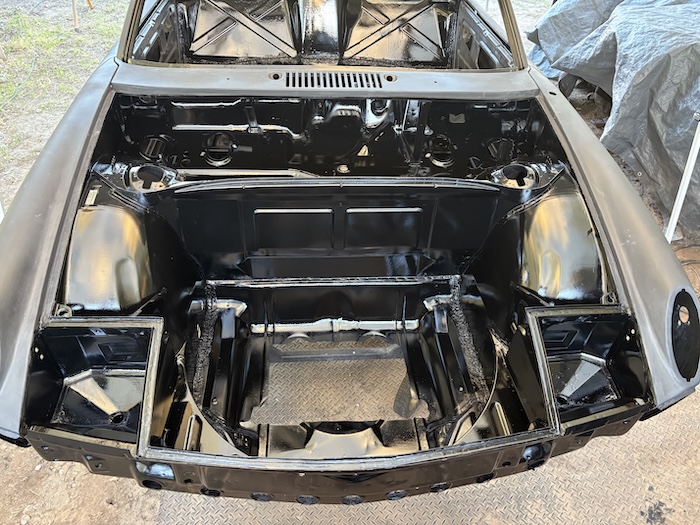 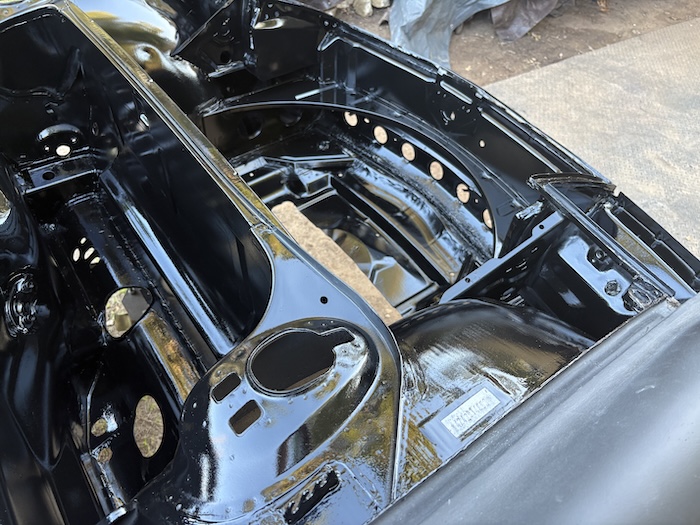  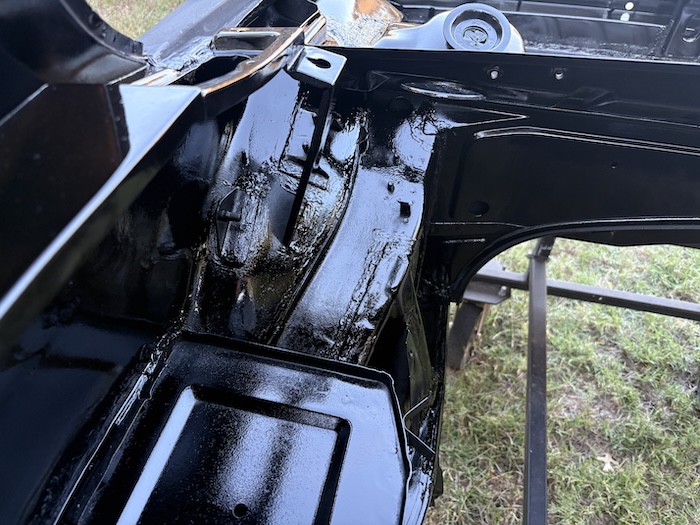 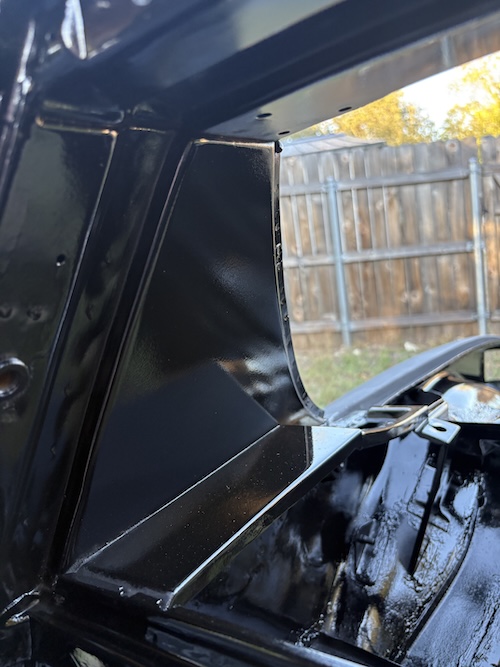 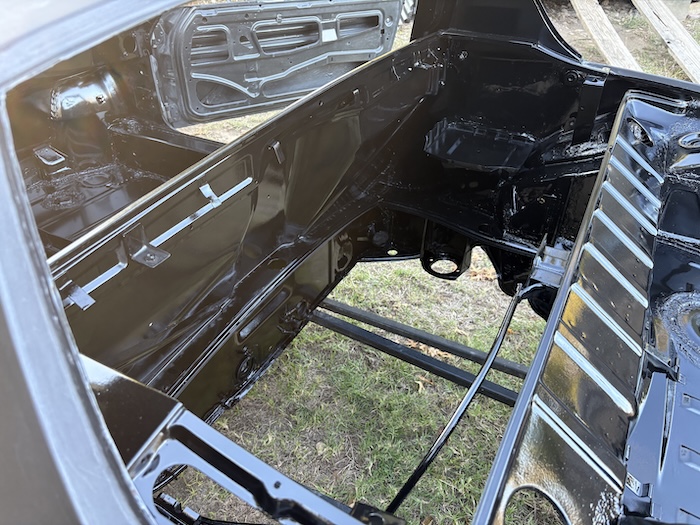 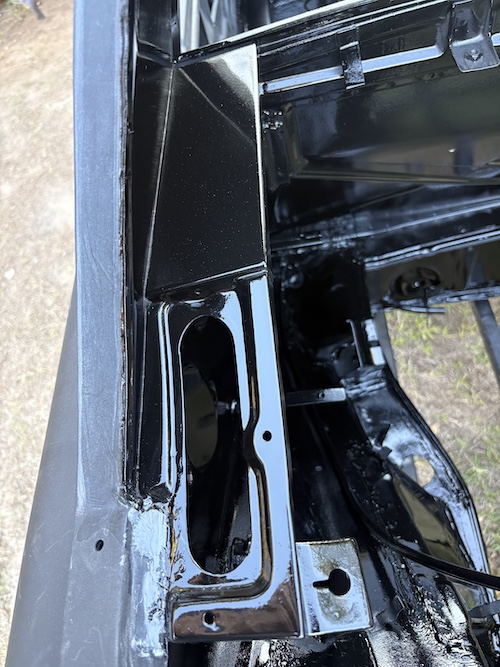 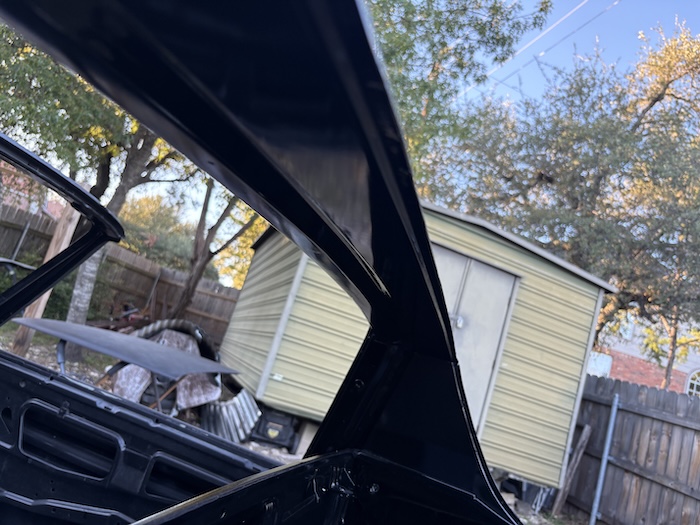 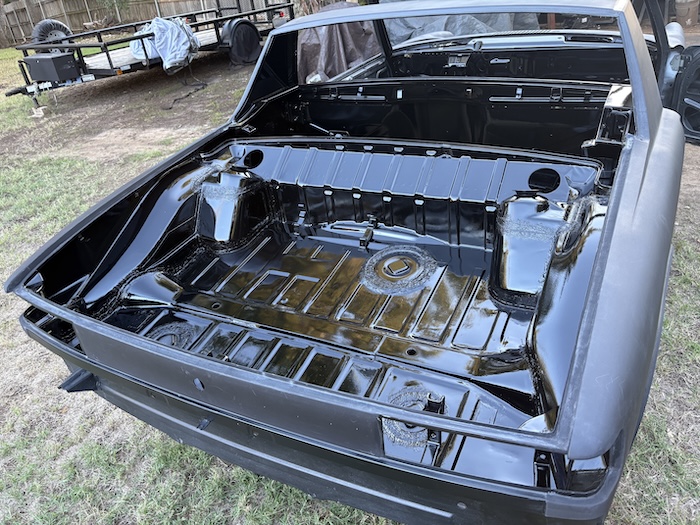 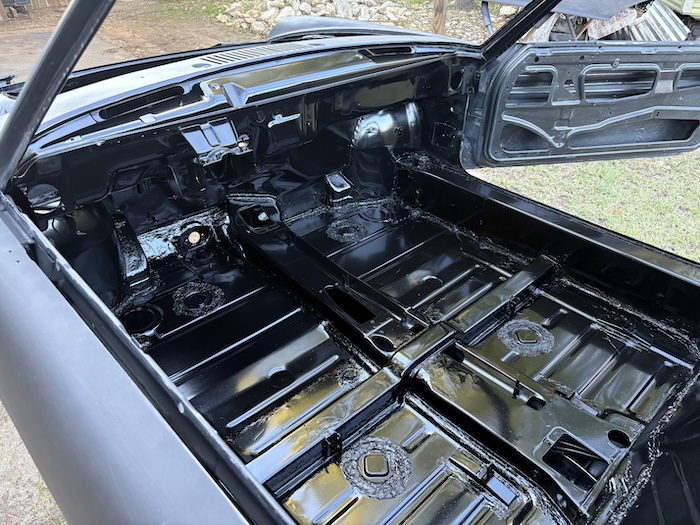 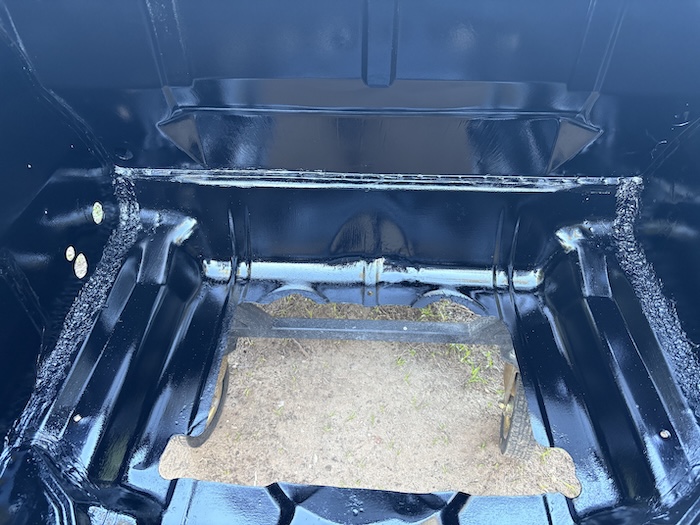 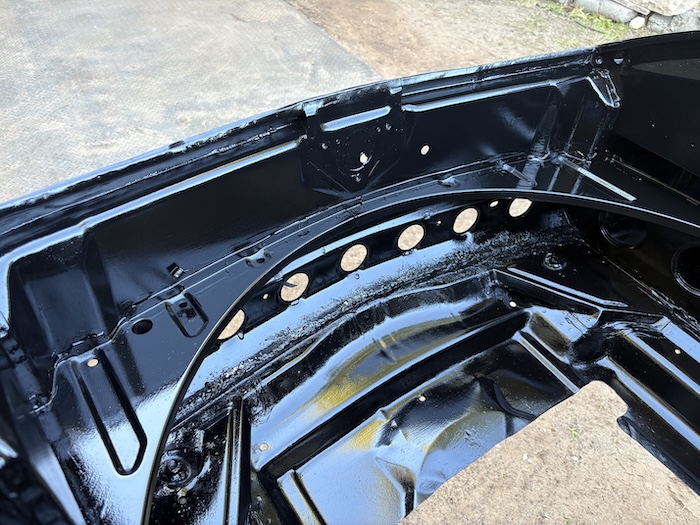  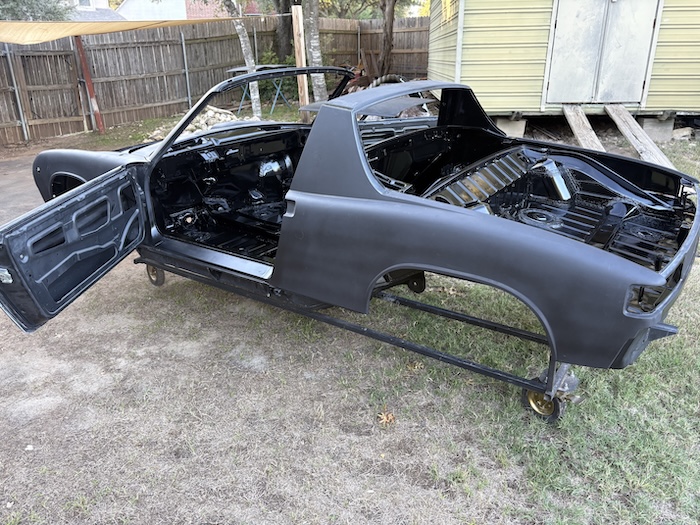 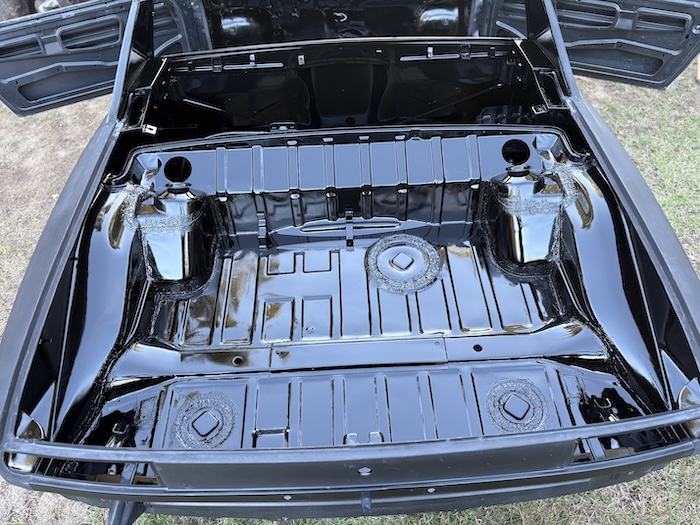 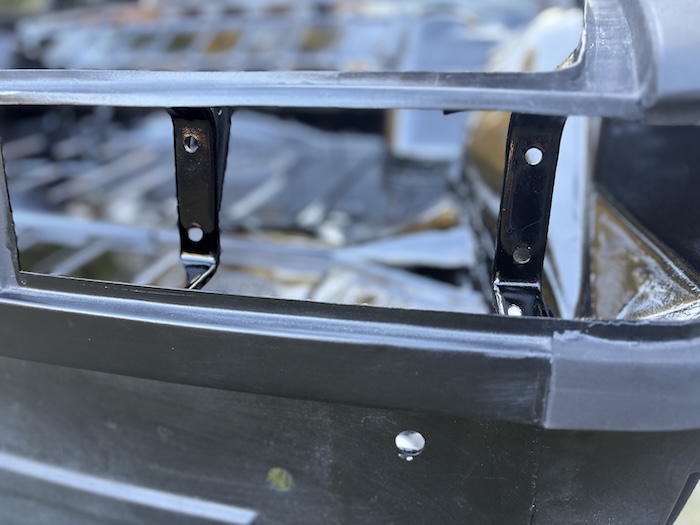 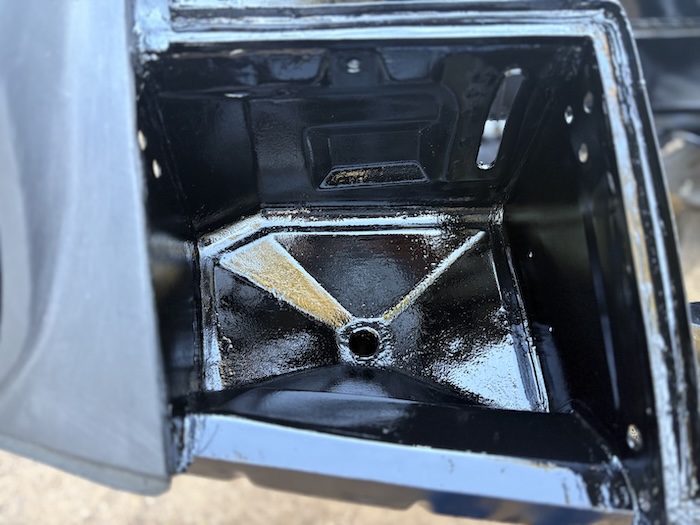 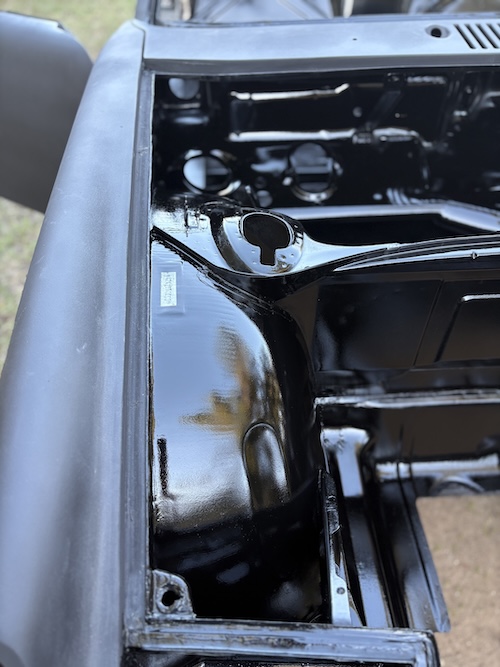 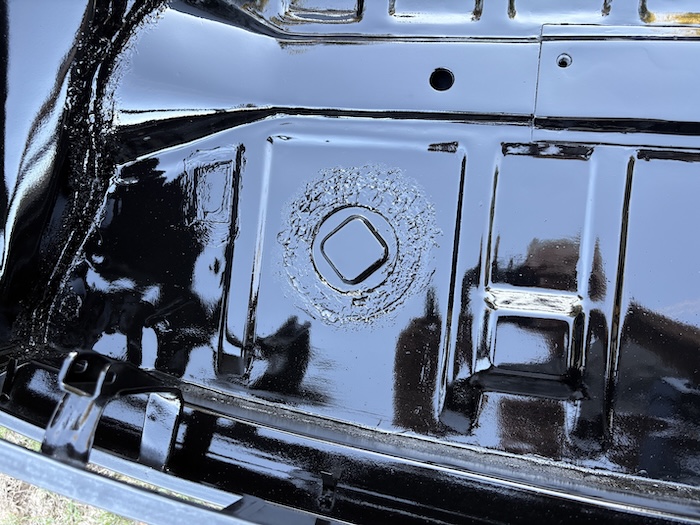 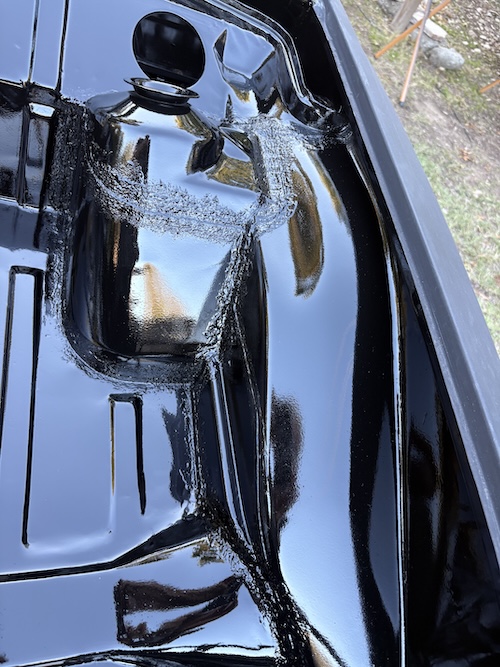 |
|
|
|
| Cairo94507 |
Nov 3 2025, 07:57 AM
Post
#678
|
|
Michael Group: Members Posts: 10,541 Joined: 1-November 08 From: Auburn, CA Member No.: 9,712 Region Association: Northern California |
Great work and attention to detail. Looking forward to seeing color on the exterior. (IMG:style_emoticons/default/beerchug.gif)
|
|
|
|
| friethmiller |
Nov 3 2025, 08:48 AM
Post
#679
|
|
Senior Member Group: Members Posts: 1,130 Joined: 10-February 19 From: Austin, TX Member No.: 22,863 Region Association: Southwest Region |
QUOTE(Cairo94507 @ Nov 3 2025, 07:57 AM) Great work and attention to detail. Looking forward to seeing color on the exterior. (IMG:style_emoticons/default/beerchug.gif) Thanks! You and me both! I need to game out how I'm going to paint this rig. My plan right now is to shoot the body separate from the hoods/doors. I might need to fabricate/purchase a stand for the doors as I only have two fender stands for the hoods at the moment. This is all several weeks out. I need to block out the entire car first. I've got a lot of sanding in my future. (IMG:style_emoticons/default/blink.gif) We'll see if all that body work/prep pays off. |
|
|
|
| Root_Werks |
Nov 3 2025, 10:57 AM
Post
#680
|
|
Village Idiot Group: Members Posts: 8,876 Joined: 25-May 04 From: About 5NM from Canada Member No.: 2,105 Region Association: Pacific Northwest |
Better than new! (IMG:style_emoticons/default/smilie_pokal.gif)
|
|
|
|
|
3 User(s) are reading this topic (3 Guests and 0 Anonymous Users)
0 Members:

|
Lo-Fi Version | Time is now: 11th January 2026 - 02:19 PM |
Invision Power Board
v9.1.4 © 2026 IPS, Inc.