|
|
|
Porsche, and the Porsche crest are registered trademarks of Dr. Ing. h.c. F. Porsche AG.
This site is not affiliated with Porsche in any way. Its only purpose is to provide an online forum for car enthusiasts. All other trademarks are property of their respective owners. |
|
|

  |

| friethmiller |
 Nov 28 2025, 05:09 PM Nov 28 2025, 05:09 PM
Post
#721
|
|
Senior Member  Group: Members Posts: 1,157 Joined: 10-February 19 From: Austin, TX Member No.: 22,863 Region Association: Southwest Region |
Block-sanding Part 2 (11/28/2025):
With the glass in, I was ready to tape things up for block sanding. So, I spent a few hours this morning getting everything masked off. The afternoon was all about the passenger side. Got to use my new Next-Level blocks as well as some of my missing Durablocks that my wife found in the garage (IMG:style_emoticons/default/cheer.gif) Just like the other side... guide coat, sand, clean, check, repeat for over 4 hours. Good news, I was able to get most of the highs to block-out. I found a few places that will need just a bit of glazing putty. This is expected. There are spots on the driver side too. I'll mark all of these and plan to go over the entire car at the end of this process. Here's some of the pics. Note my implementation of air slots in the paper. It was pretty windy today and I didn't want to have go back and re-tape. Hopefully tomorrow I'll get a chance to do some more "wet-checking" to see where I stand on "straightness". (IMG:style_emoticons/default/unsure.gif) More to come... 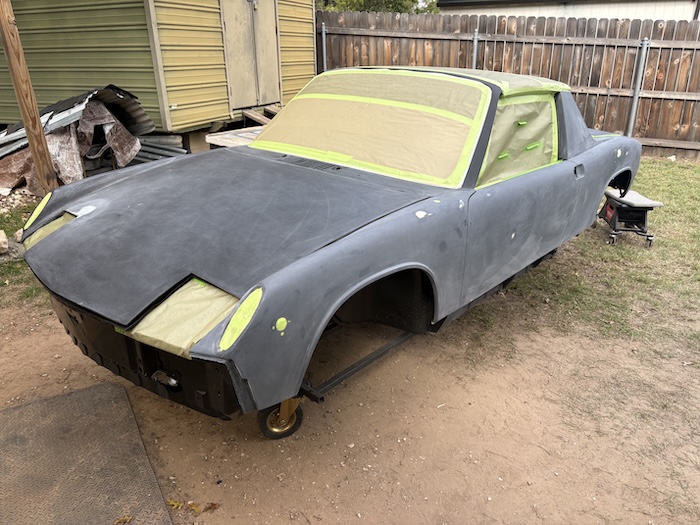 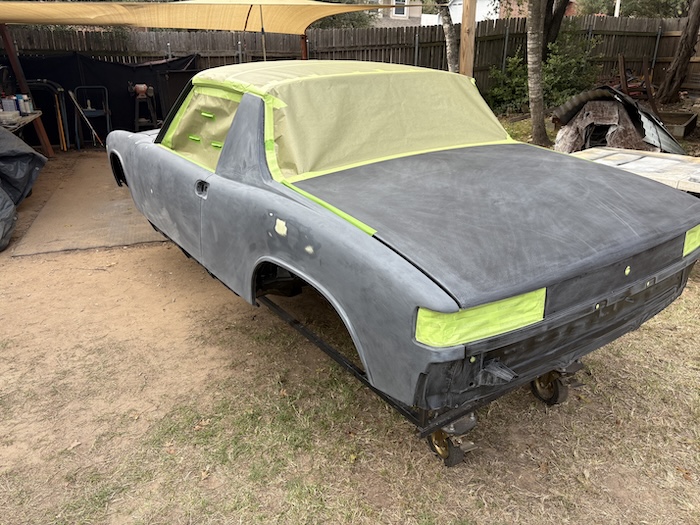 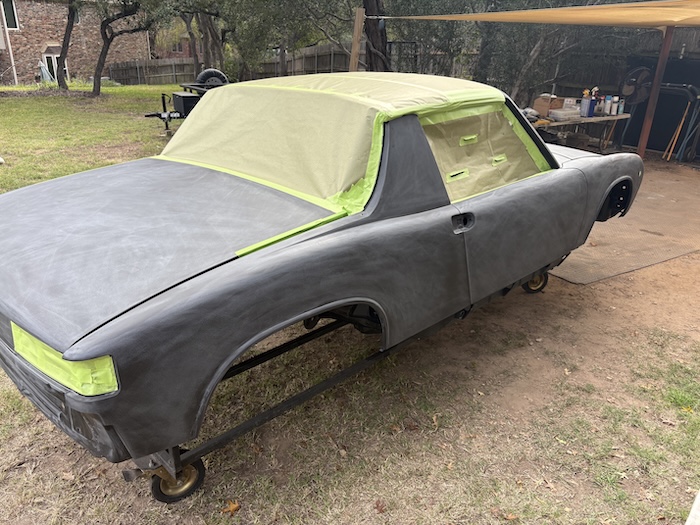 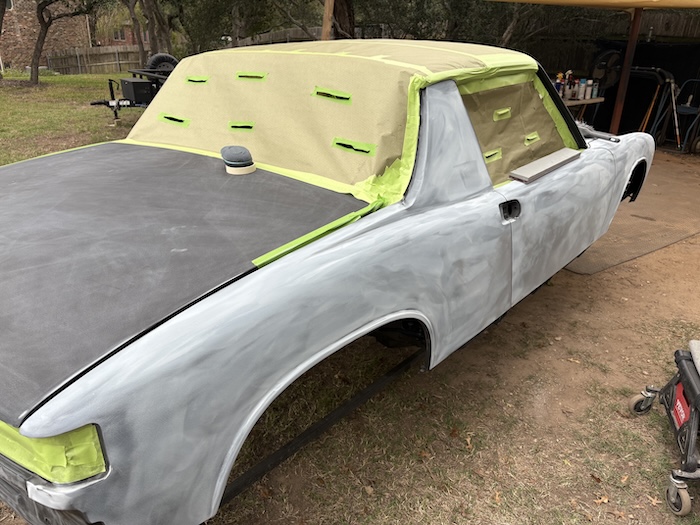 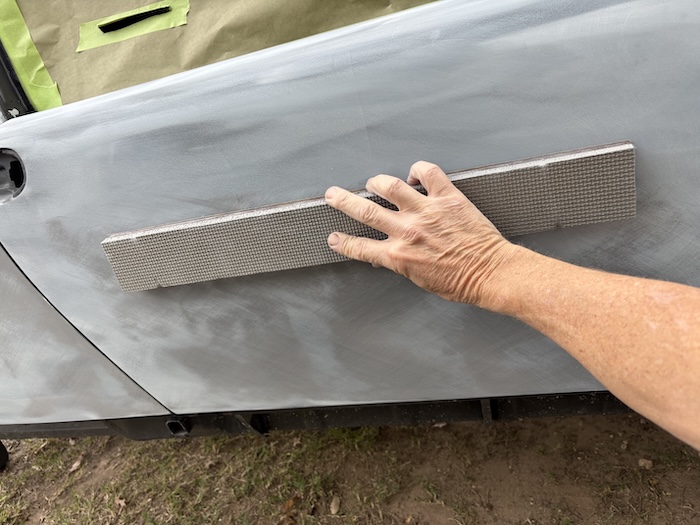 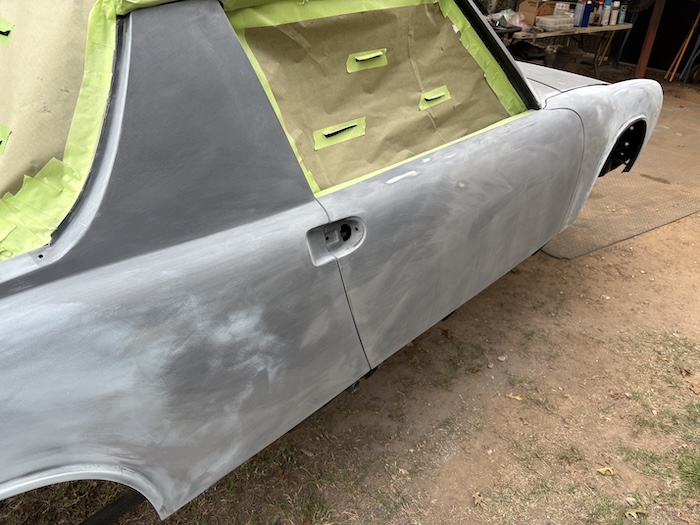 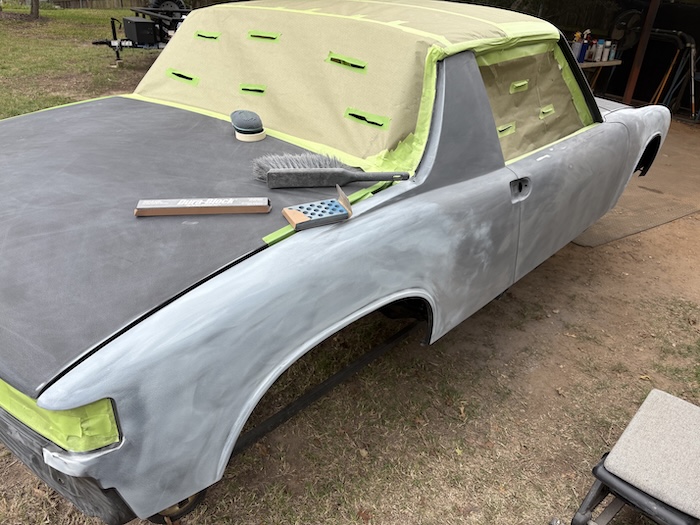 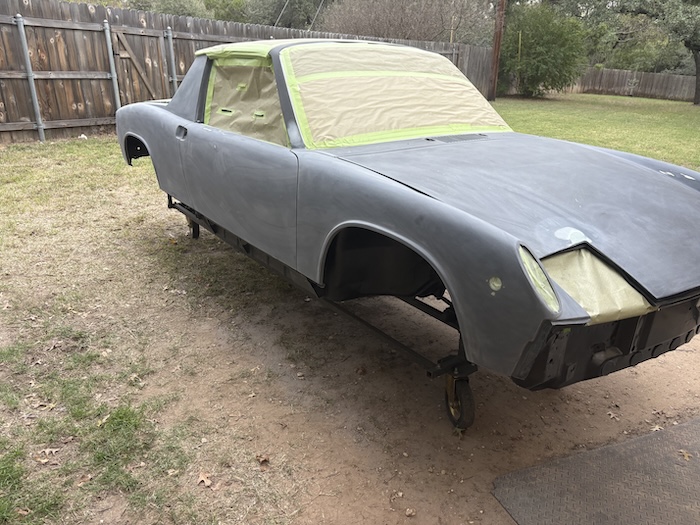 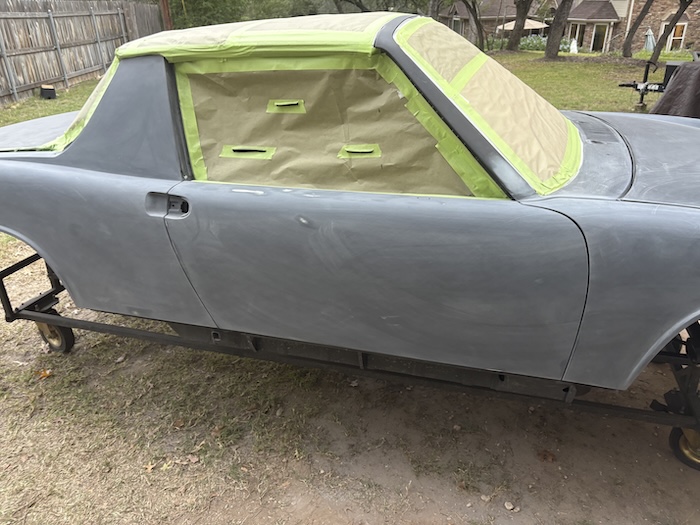 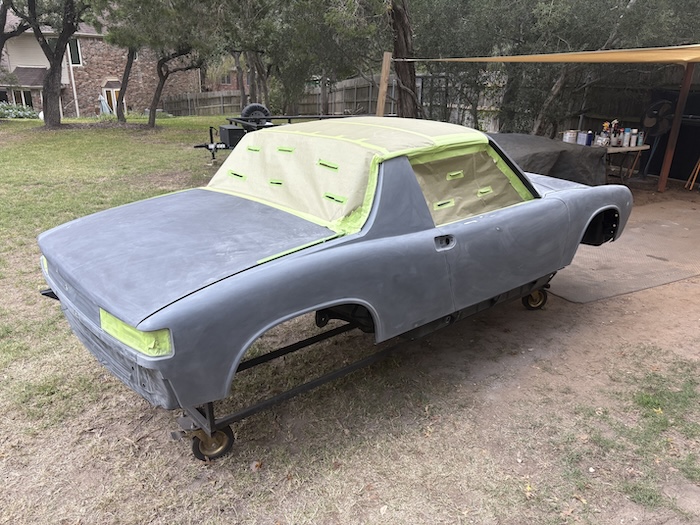 |
   |

 
|
| friethmiller |
Dec 7 2025, 04:48 PM
Post
#722
|
|
Senior Member Group: Members Posts: 1,157 Joined: 10-February 19 From: Austin, TX Member No.: 22,863 Region Association: Southwest Region |
Block-sanding - Part 3 (11/30 - 12/7/2025):
Front Hood To keep things rolling along with the rest of the car, I'm moved the front and rear hoods to fender stands. I began by applying a good coat of white guide-coat to the front hood. I then started blocking using both a 12" and a 24" DuraBlock, with 220-grit paper. You can see I'm addressing a known issue in the front corner. I carefully lowered the high areas around what I felt to be a pretty noticeable low. You can see how I got to a point where I could pin point the low spot but just couldn't bring everything around it down without the risk of burning through to metal. So, I pulled out the glazing putty and applied a little filler to the panel. After sanding it down to verify flatness, I hit the area with some 2K high-build primer. This hood will be blocked again later to make sure everything is good to go. 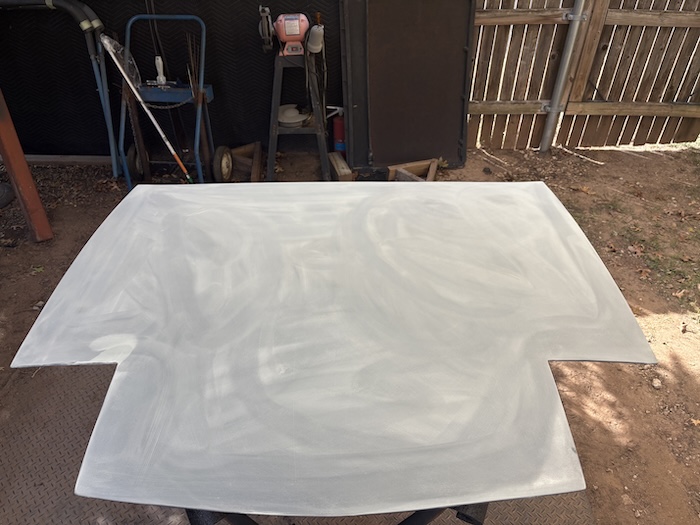  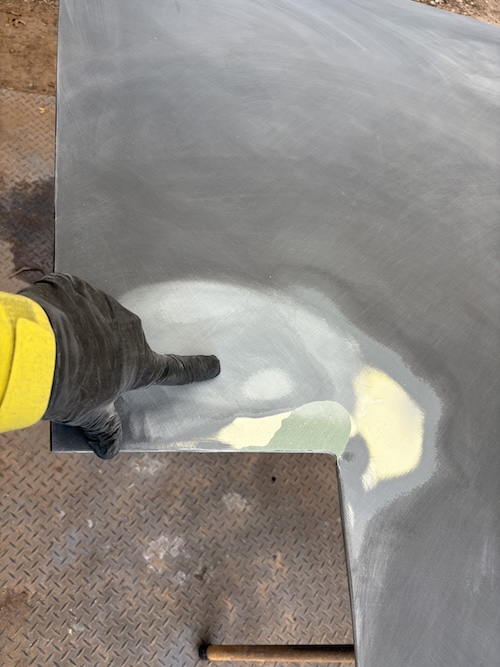 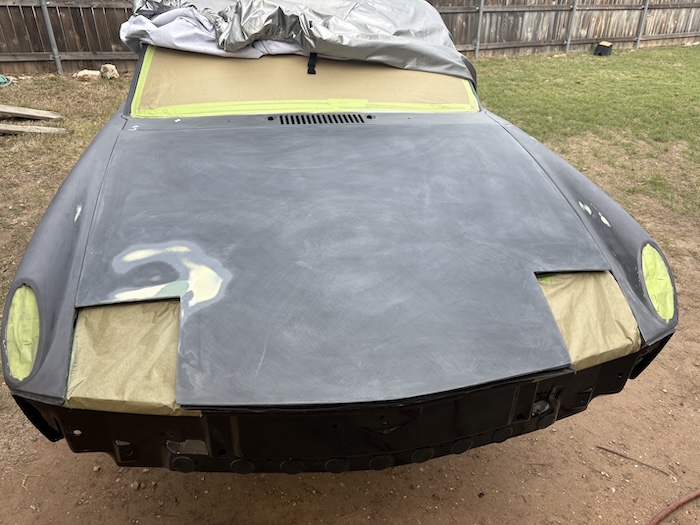 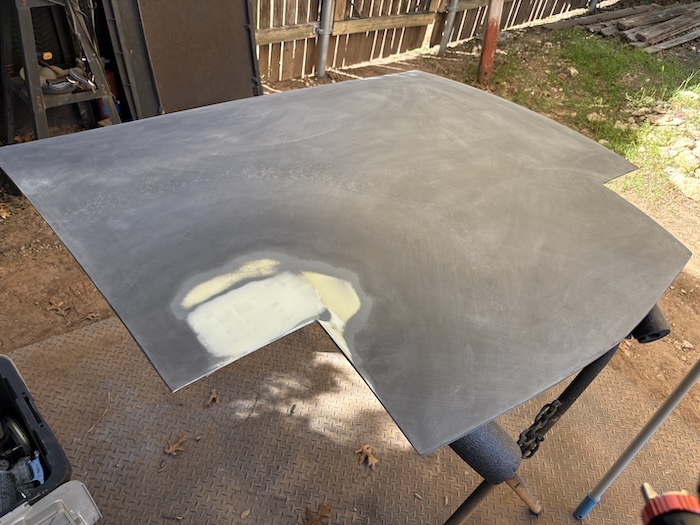 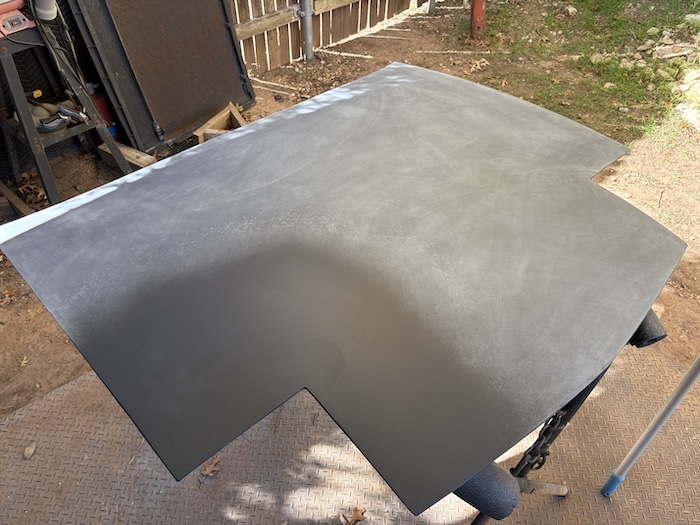 Rear Trunk In the following photos, you can see me underway blocking the rear trunk with a Next Level 23" block using 220-grit. I could only use this long stiff block on the top half of the panel. I switched to a 12" dura block to finish the bottom off. After that, I went ahead and hit the entire trunk with wet 320-grit It is ready for an additional coat of high-build primer next. Another post coming soon on the passenger side panels. Stay tuned. (IMG:style_emoticons/default/beerchug.gif) Note: the white layer I'm burning through to here is actually the gray Evercoat G2 polyester primer. 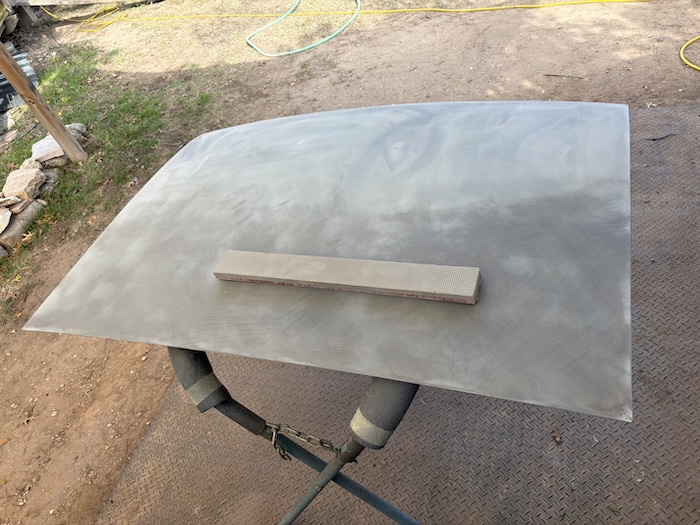 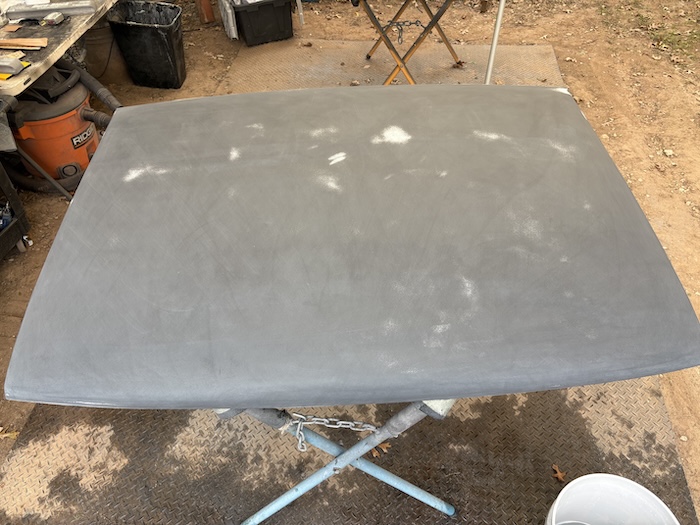 |
|
|
|
| friethmiller |
Dec 7 2025, 05:25 PM
Post
#723
|
|
Senior Member Group: Members Posts: 1,157 Joined: 10-February 19 From: Austin, TX Member No.: 22,863 Region Association: Southwest Region |
Block-sanding - Part 4 (12/6 - 12/7/2025):
On Saturday, I began by using glazing putty to fill several pin holes, small lows, and a troubled spot that I identified when I 'wet-checked' the driver side rear quarter panel several days ago. While tedious, this work is really important and the sanding is pretty easy to do. After working my way around the entire car, I then prep'd the car for 2 coats of high build primer. 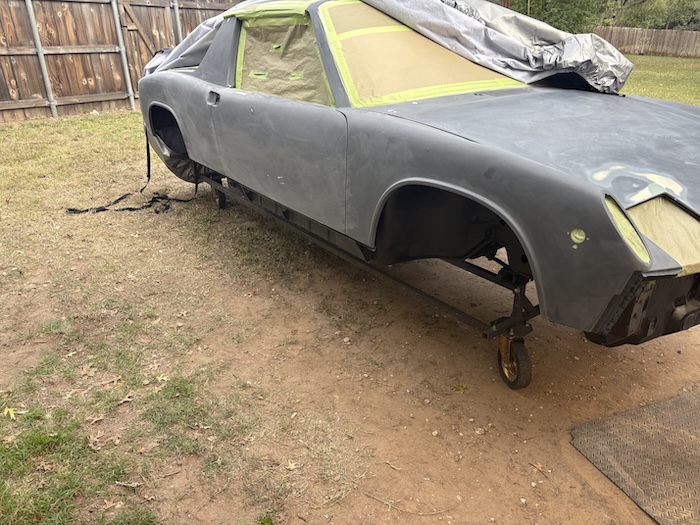 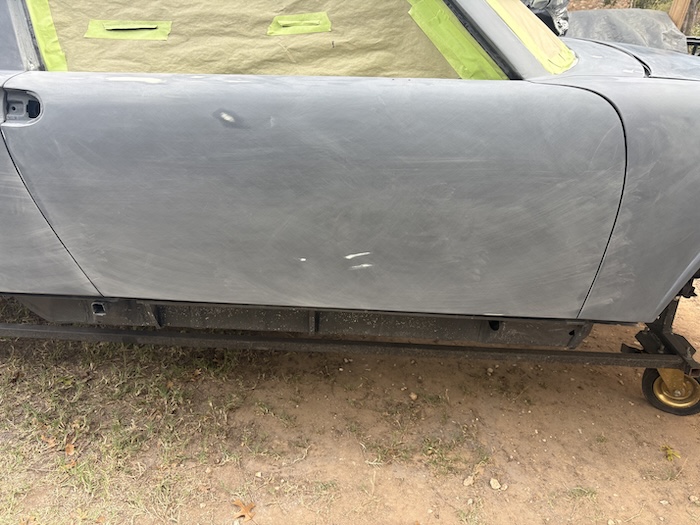 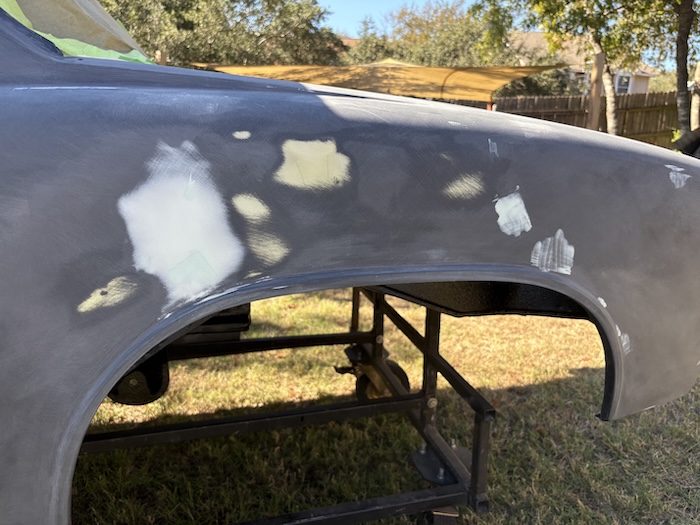 After masking everything off and prep'ing all the panels, I used Speedokotes 2K High Build primer. I was able to lay down 2 good coats of primer in 65 degree weather. (IMG:style_emoticons/default/shades.gif) 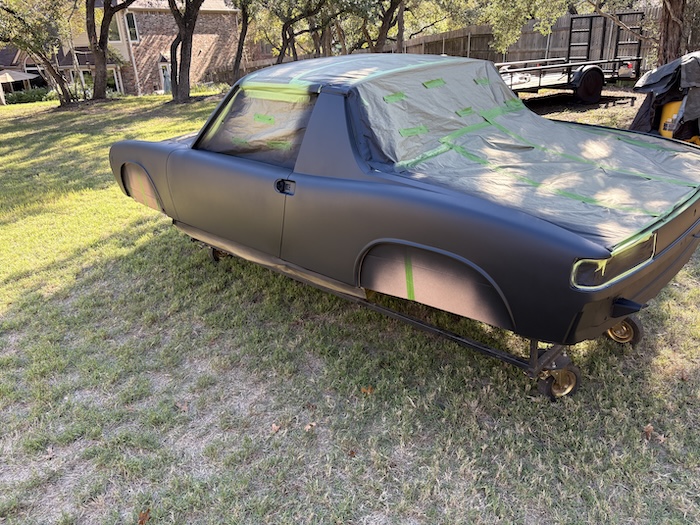 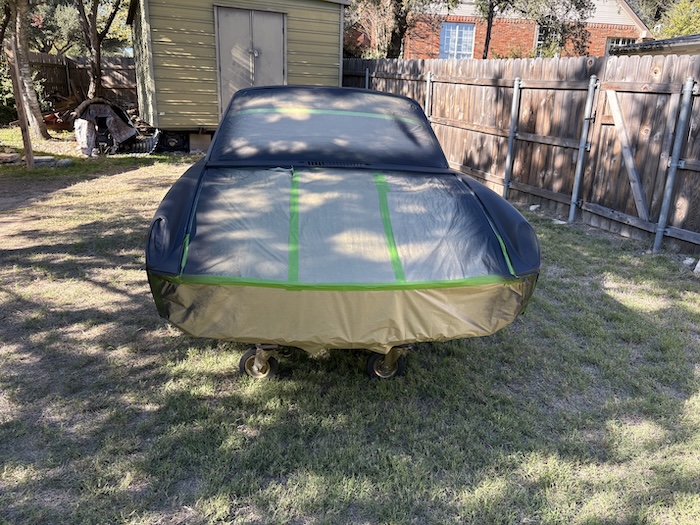 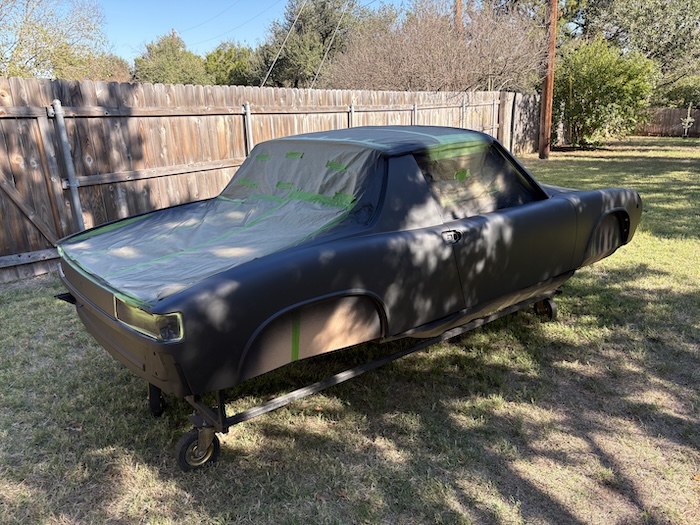 Next, I started by wet sanding the passenger side rear quarter with 320-grit paper on a 6" block. I noticed a few low spots just above the wheel arch and decided to apply just a little bit of glazing putty, sand, clean, and respray the area with primer. After that, I continued down the length of the car from back to front. This laborious process took several hours to do on Sunday. The following photos show some of the wet-sanding action. Having direct sun on the panel for this job actually really helped! Note: the first photo shows the 3 very narrow low spots just around the wheel arch. 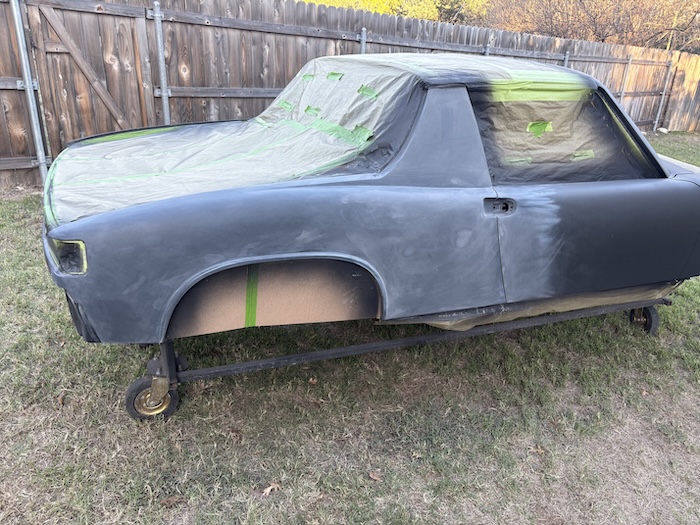 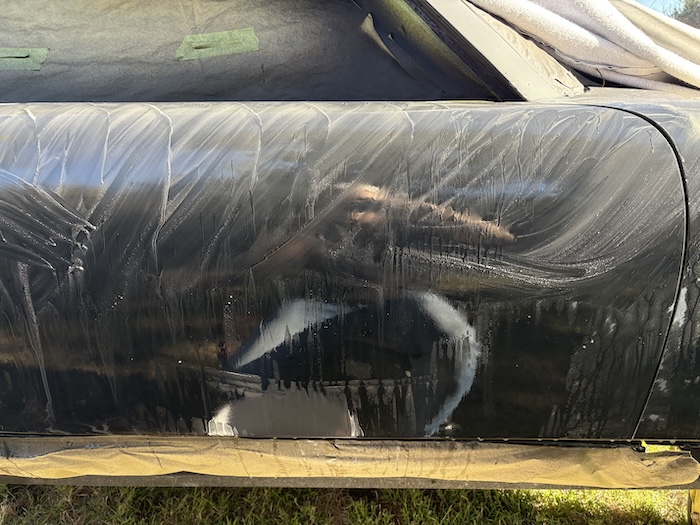  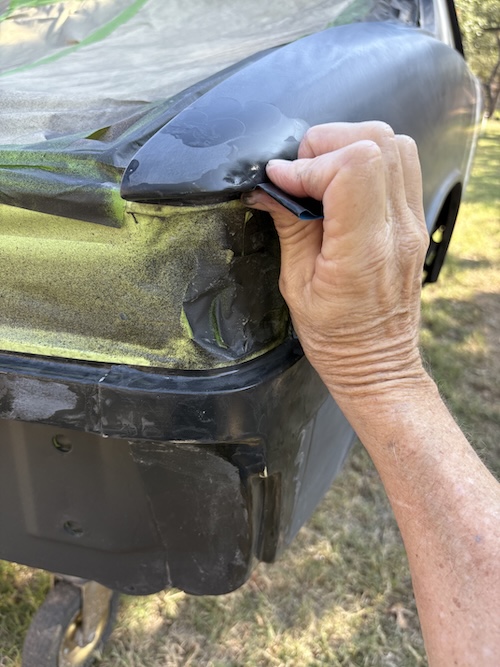 With the entire side of the car sanded with 320-grit and everything cleaned with soap and water, I decided to do it all again, but this time with 400-grit (IMG:style_emoticons/default/aktion035.gif) 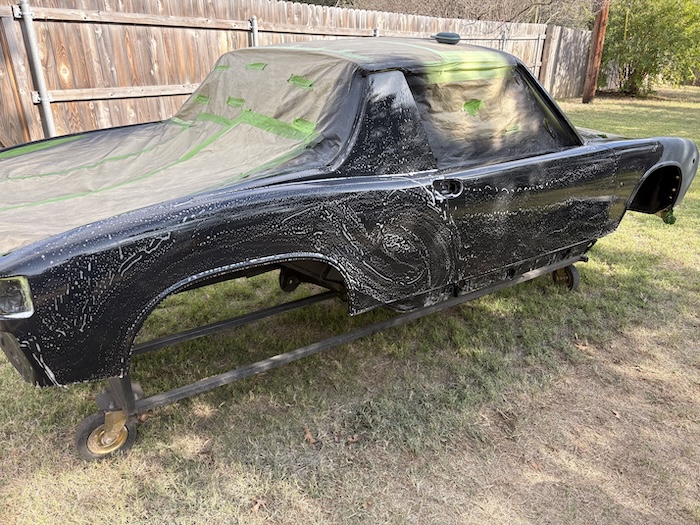 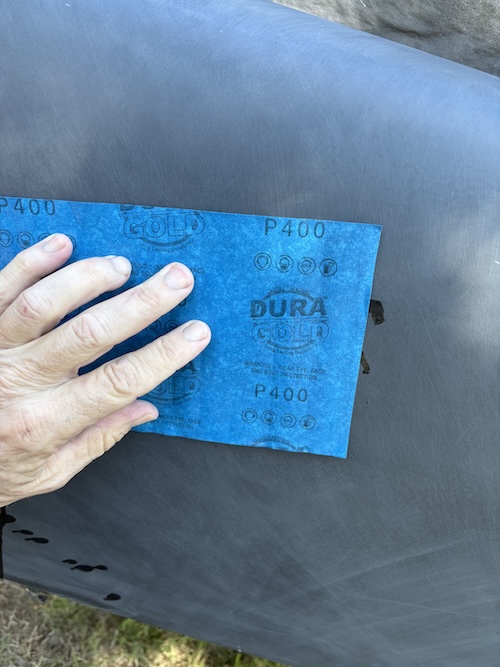 Wet Check!! With the passenger side at 400-grit, I decided it would be a good time to hit the panels with a little "wet-check" spray and see how she looks. The panels are really smoothing out now and the reflections look pretty good. FYI, I'm out next weekend but will be back at it before Christmas. Cheers (IMG:style_emoticons/default/beer3.gif) 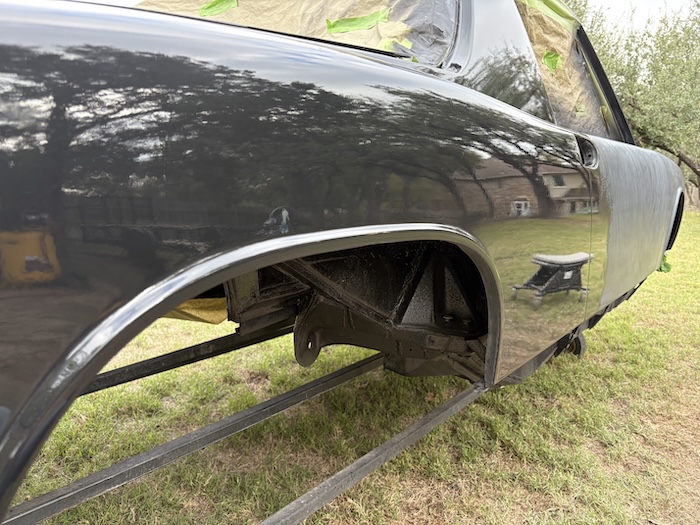 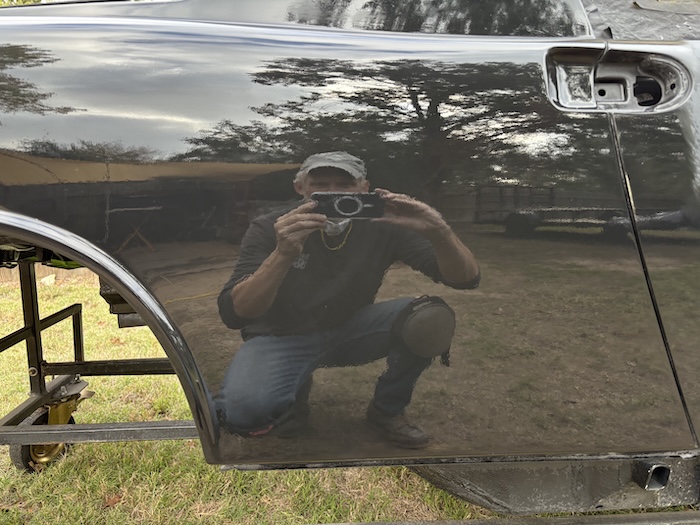 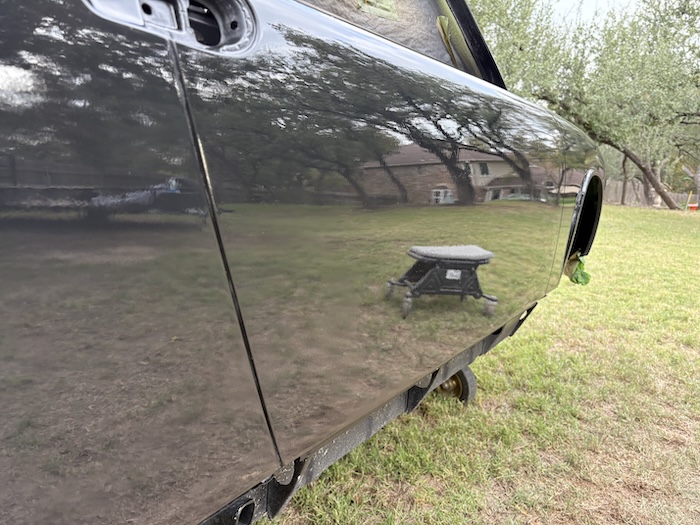 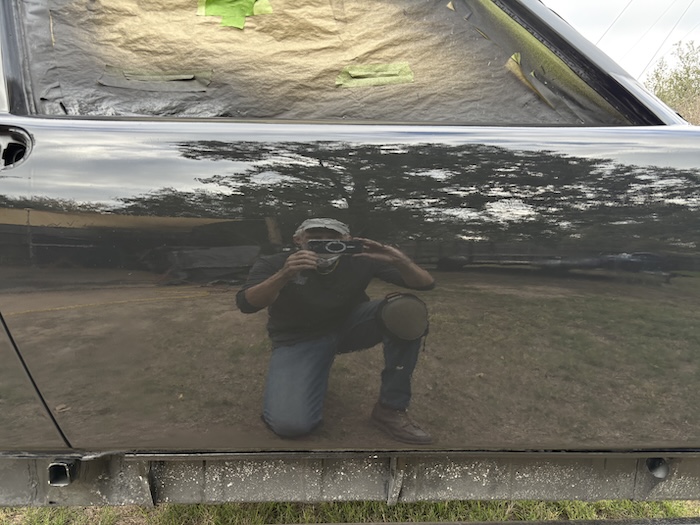 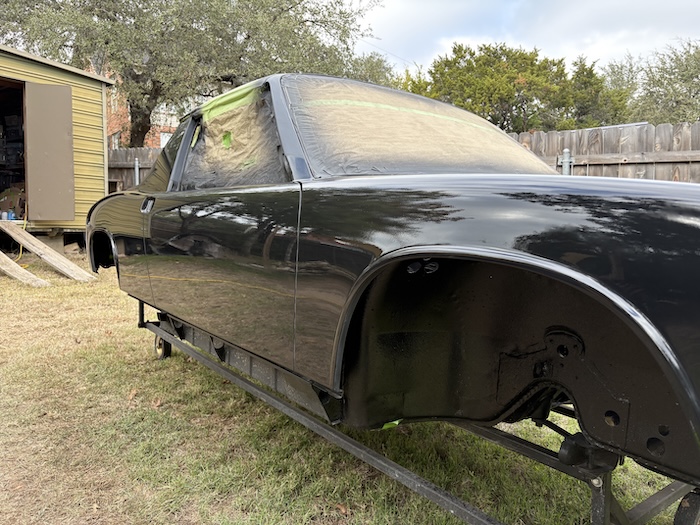 |
|
|
|
| 930cabman |
Dec 7 2025, 05:25 PM
Post
#724
|
|
Advanced Member Group: Members Posts: 4,480 Joined: 12-November 20 From: Buffalo Member No.: 24,877 Region Association: North East States |
all while working outdoors
Q: why the glass install prior to paint? Looks beyond great |
|
|
|
| friethmiller |
Dec 7 2025, 05:33 PM
Post
#725
|
|
Senior Member Group: Members Posts: 1,157 Joined: 10-February 19 From: Austin, TX Member No.: 22,863 Region Association: Southwest Region |
QUOTE(930cabman @ Dec 7 2025, 05:25 PM)  all while working outdoors Q: why the glass install prior to paint? Looks beyond great A: I actually like the glass in, it makes masking everything off a lot easier. Plus I can start working on the install of the interior components independent of the paint work going on outside (IMG:style_emoticons/default/biggrin.gif) |
|
|
|
| bkrantz |
Dec 7 2025, 08:38 PM
Post
#726
|
|
914 Guru Group: Members Posts: 8,593 Joined: 3-August 19 From: SW Colorado Member No.: 23,343 Region Association: Rocky Mountains |
QUOTE(930cabman @ Dec 7 2025, 04:25 PM) all while working outdoors Q: why the glass install prior to paint? Looks beyond great Yeah, this work quality is too good. I bet this is a Hoax, and Fred has a full shop with a dozen expert body and paint guys. (IMG:style_emoticons/default/biggrin.gif) |
|
|
|
| friethmiller |
Dec 8 2025, 04:41 AM
Post
#727
|
|
Senior Member Group: Members Posts: 1,157 Joined: 10-February 19 From: Austin, TX Member No.: 22,863 Region Association: Southwest Region |
QUOTE(bkrantz @ Dec 7 2025, 08:38 PM) Yeah, this work quality is too good. I bet this is a Hoax, and Fred has a full shop with a dozen expert body and paint guys. (IMG:style_emoticons/default/biggrin.gif) Ha! I wish! I would have had them “knock out” the driver side why they were at it. Still lots to do (IMG:style_emoticons/default/sad.gif) |
|
|
|
| Cairo94507 |
Dec 8 2025, 08:20 AM
Post
#728
|
|
Michael Group: Members Posts: 10,566 Joined: 1-November 08 From: Auburn, CA Member No.: 9,712 Region Association: Northern California |
Amazing work Fred! (IMG:style_emoticons/default/smilie_pokal.gif) (IMG:style_emoticons/default/beerchug.gif)
|
|
|
|
| Puebloswatcop |
Dec 8 2025, 09:41 AM
Post
#729
|
|
Senior Member Group: Members Posts: 1,696 Joined: 27-December 14 From: Mineola, Texas Member No.: 18,258 Region Association: Southwest Region |
Wow Fred, I cant believe that is even the same car that I saw when I was there earlier this year. Your work is absolutely Top notch. (IMG:style_emoticons/default/smash.gif) (IMG:style_emoticons/default/beerchug.gif)
|
|
|
|
| friethmiller |
Dec 8 2025, 09:59 AM
Post
#730
|
|
Senior Member Group: Members Posts: 1,157 Joined: 10-February 19 From: Austin, TX Member No.: 22,863 Region Association: Southwest Region |
Thanks y'all!
Just moving along the process here. If it's half as shinny as this "gloss simulator", I'll be a happy man (IMG:style_emoticons/default/biggrin.gif) |
|
|
|
| Literati914 |
Dec 8 2025, 11:34 AM
Post
#731
|
|
Advanced Member Group: Members Posts: 2,203 Joined: 16-November 06 From: Dallas, TX Member No.: 7,222 Region Association: Southwest Region |
Good stuff Fred, I'm picking up all kinds of pointers from your build that I'm gonna be copying on this next build of mine. Question - have you used the Speedokote primers before? I've been considering what I was gonna use.. your choices seems to worked out well so far. What kind, and brand of paint are you planning on using on the exterior?
|
|
|
|
| Aayala |
Dec 8 2025, 11:38 AM
Post
#732
|
|
Member Group: Members Posts: 57 Joined: 7-July 25 From: Austin Tx Member No.: 28,874 Region Association: South East States |
Immaculate work Fred! Looking like a showroom car!
|
|
|
|
| friethmiller |
Dec 8 2025, 11:57 AM
Post
#733
|
|
Senior Member Group: Members Posts: 1,157 Joined: 10-February 19 From: Austin, TX Member No.: 22,863 Region Association: Southwest Region |
QUOTE(Literati914 @ Dec 8 2025, 11:34 AM) Good stuff Fred, I'm picking up all kinds of pointers from your build that I'm gonna be copying on this next build of mine. Question - have you used the Speedokote primers before? I've been considering what I was gonna use.. your choices seems to worked out well so far. What kind, and brand of paint are you planning on using on the exterior? Yes, I've used both their epoxy and 2k high-build primers before and had good results. Both are excellent, IMO. To be safe, I'd suggest using the sealer that is recommended for the specific paint you choose. I'm no paint expert but on my last 914 I went with a 2-stage PPG Shop Line paint using the recommended PPG sealer. I will do the same on the LE but using their single stage (JP Line?) paint system. I'm bias to PPG since I'm a stock owner (IMG:style_emoticons/default/biggrin.gif) . |
|
|
|
| Dlee6205 |
Dec 8 2025, 02:33 PM
Post
#734
|
|
Member Group: Members Posts: 86 Joined: 9-December 22 From: Burnsville, NC Member No.: 27,017 Region Association: South East States |
Nice work Fred!
I started using the gloss simulator on my last build and it was a game changer to ensure perfection. |
|
|
|
| friethmiller |
Dec 8 2025, 03:03 PM
Post
#735
|
|
Senior Member Group: Members Posts: 1,157 Joined: 10-February 19 From: Austin, TX Member No.: 22,863 Region Association: Southwest Region |
QUOTE(Dlee6205 @ Dec 8 2025, 02:33 PM) Nice work Fred! I started using the gloss simulator on my last build and it was a game changer to ensure perfection. Doug, great to hear. I was curious if anyone else had used this. Awesome (IMG:style_emoticons/default/first.gif) |
|
|
|
| Artfrombama |
Dec 8 2025, 06:19 PM
Post
#736
|
|
Artfrombama Group: Members Posts: 424 Joined: 21-January 24 From: One of the chosen few Member No.: 27,870 Region Association: South East States |
Gloss simulator, what a great idea! New one on me. Thanks Fred...
|
|
|
|
| friethmiller |
Dec 9 2025, 01:28 PM
Post
#737
|
|
Senior Member Group: Members Posts: 1,157 Joined: 10-February 19 From: Austin, TX Member No.: 22,863 Region Association: Southwest Region |
QUOTE(Artfrombama @ Dec 8 2025, 06:19 PM) Awesome! I really enjoy learning new techniques and strategies from others on this forum and YouTube. I have received a lot of questions on my decision to throw in the glass prior to paint. Everyone has been very respectful and I think many are just curious, which is super cool. My way is just “a way”. It may not make sense or be considered “wrong” but the end goal is the same - she’s going to drive again and look good doing it! (IMG:style_emoticons/default/biggrin.gif) |
|
|
|
| friethmiller |
Dec 16 2025, 08:17 AM
Post
#738
|
|
Senior Member Group: Members Posts: 1,157 Joined: 10-February 19 From: Austin, TX Member No.: 22,863 Region Association: Southwest Region |
Beast of the East 100 Mile race (12/13 - 12/14/2025):
Took a break from working on the LE this weekend and flew out to Charlotte, NC for a fun race in the mountains. Got it done under 29 hours - before the really cold weather blew in. Hot soup got me through the night! (IMG:style_emoticons/default/biggrin.gif) Should be back on the car this weekend. Cheers! (IMG:style_emoticons/default/beerchug.gif) 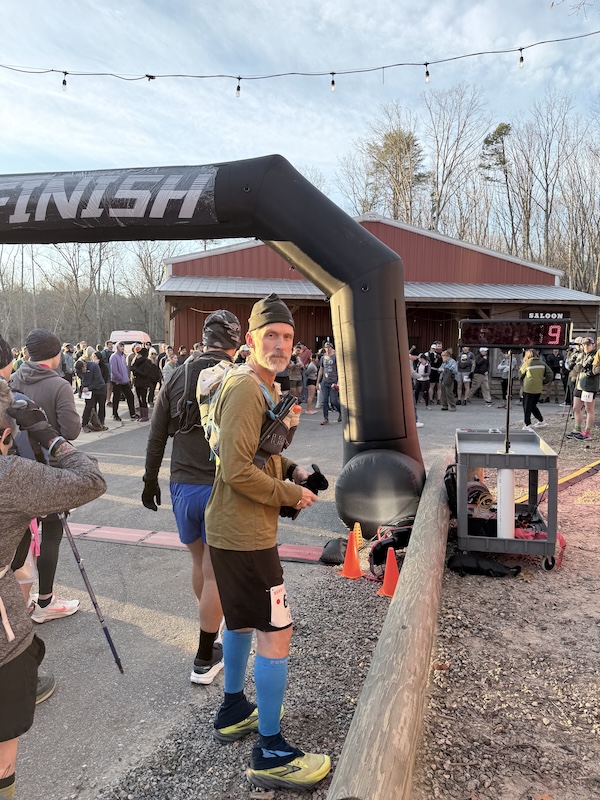 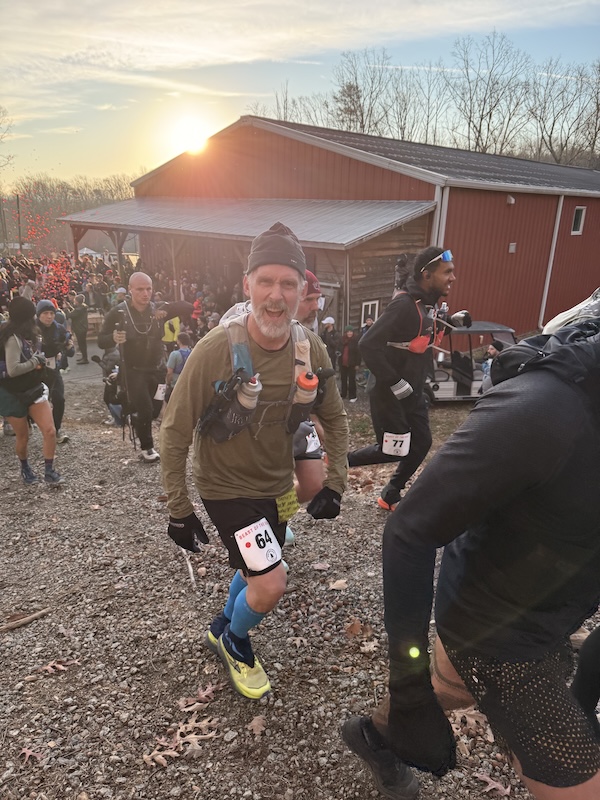  |
|
|
|
| Root_Werks |
Dec 16 2025, 12:26 PM
Post
#739
|
|
Village Idiot Group: Members Posts: 8,887 Joined: 25-May 04 From: About 5NM from Canada Member No.: 2,105 Region Association: Pacific Northwest |
That run looks like a blast! I miss running, darn knees.
|
|
|
|
| morehills |
Dec 16 2025, 08:03 PM
Post
#740
|
|
Member Group: Members Posts: 132 Joined: 2-March 23 From: Great Barrington, MA Member No.: 27,202 Region Association: North East States |
Fred. That's beastly stuff. Well done! I rode Paris/Brest two years ago. 745 miles on the bike in 83 hours. Very little sleep. I wasn't thinking about my 914 out there.
|
|
|
|
|
8 User(s) are reading this topic (7 Guests and 0 Anonymous Users)
1 Members: Jack Standz

|
Lo-Fi Version | Time is now: 8th February 2026 - 01:10 PM |
Invision Power Board
v9.1.4 © 2026 IPS, Inc.