|
|
|
Porsche, and the Porsche crest are registered trademarks of Dr. Ing. h.c. F. Porsche AG.
This site is not affiliated with Porsche in any way. Its only purpose is to provide an online forum for car enthusiasts. All other trademarks are property of their respective owners. |
|
|

  |

| friethmiller |
 Dec 28 2023, 10:32 AM Dec 28 2023, 10:32 AM
Post
#81
|
|
Senior Member  Group: Members Posts: 1,358 Joined: 10-February 19 From: Austin, TX Member No.: 22,863 Region Association: Southwest Region |
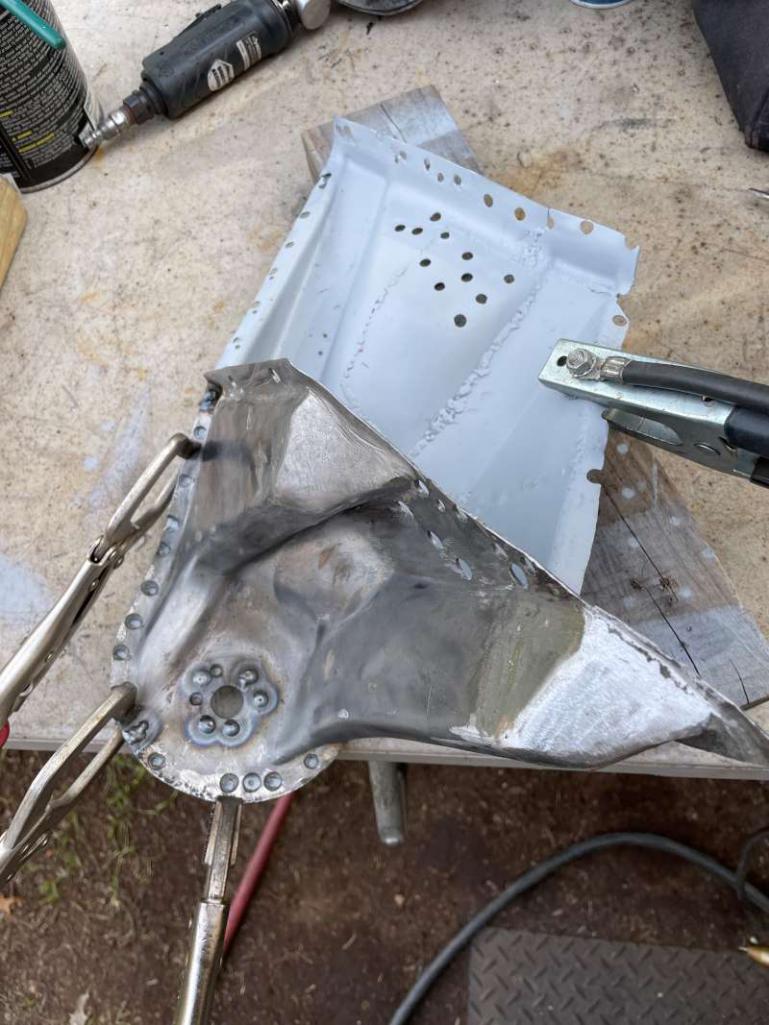
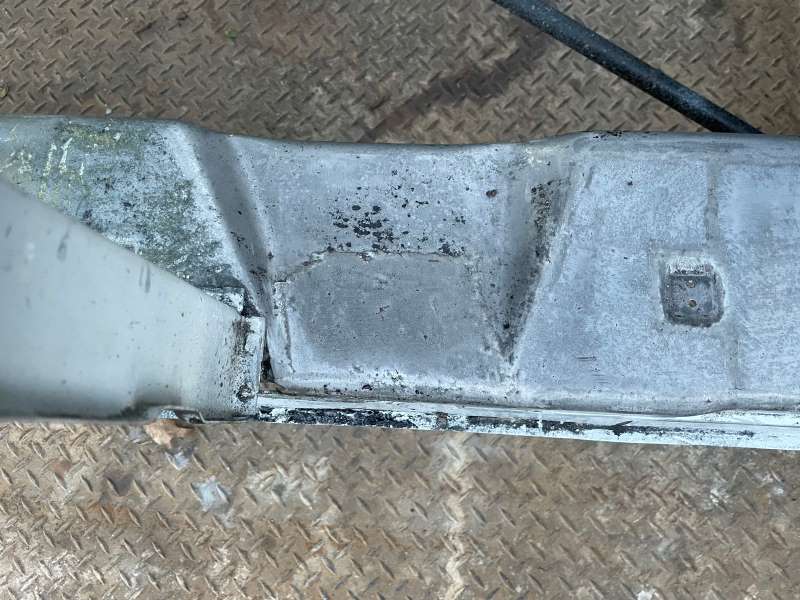
Passenger Inner Suspension Console Replacement - Part 2 (11/2023): The first thing to do is remove the remainder of the original inner console and then prep the new/used donor part for install. Once I removed the donor part from its parent frame rail section I was able to get a good look at its condition. While its not great, it is in better shape than my existing console.
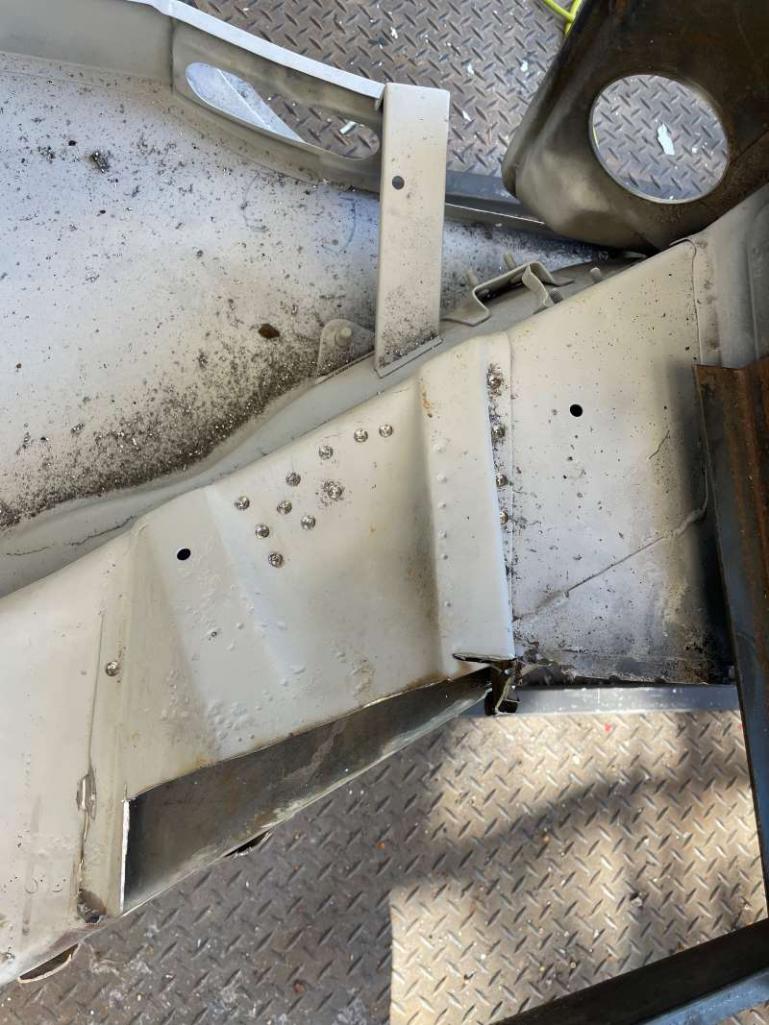 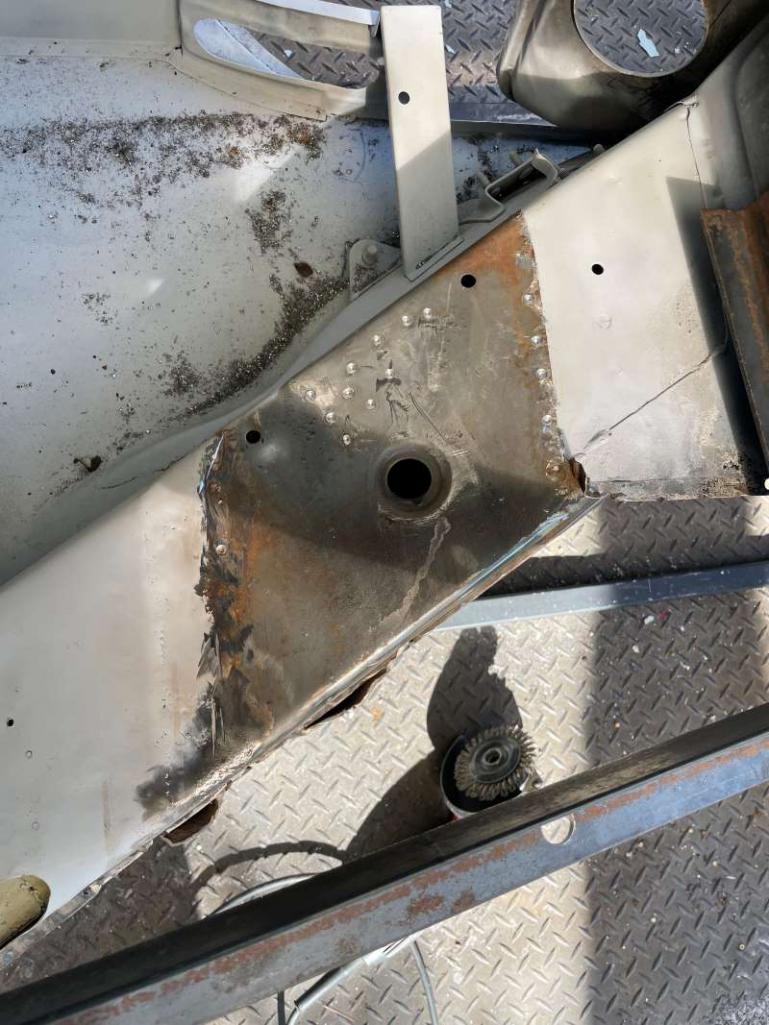 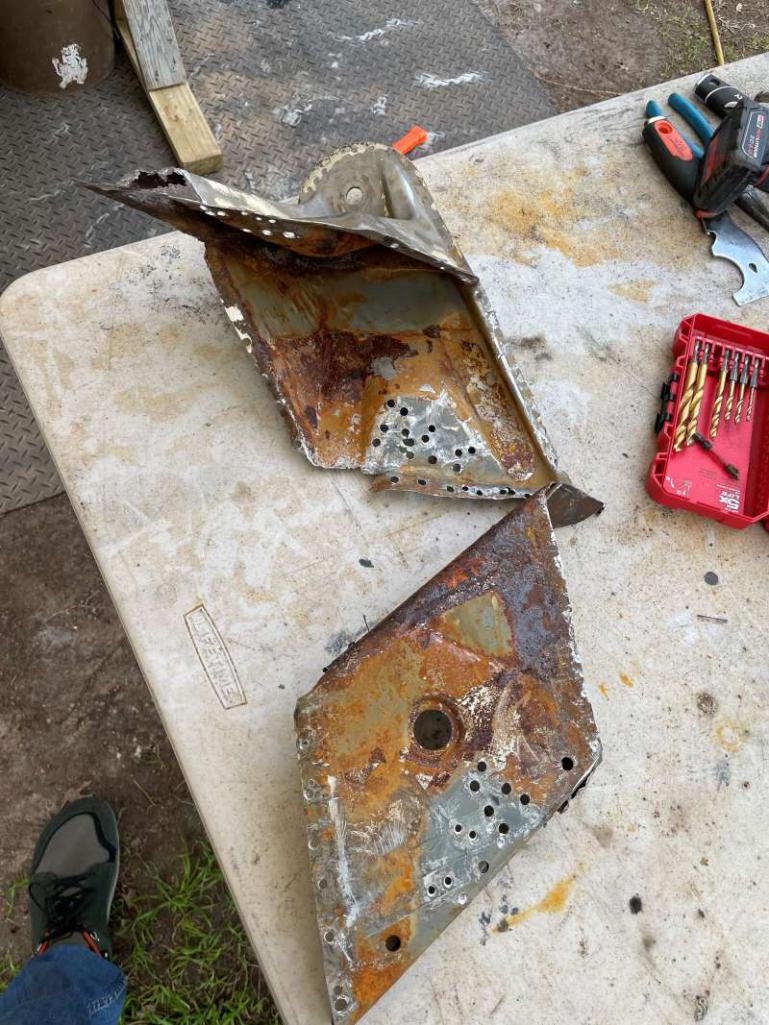 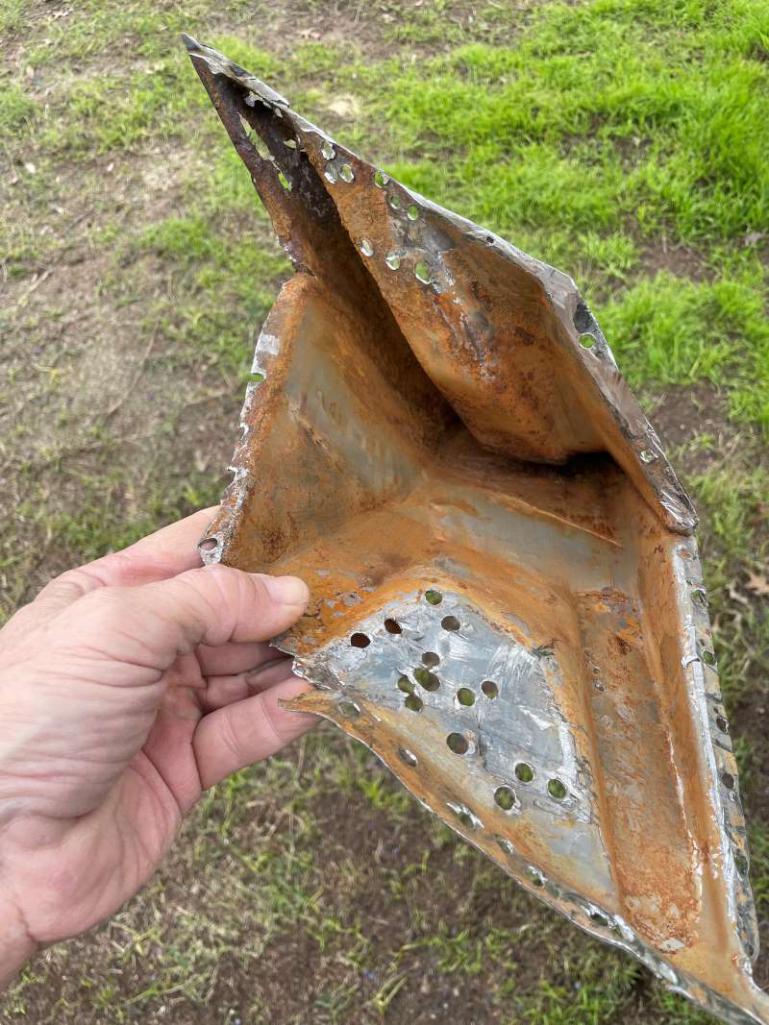 After a quick inspection, I decided to separate the console into its pieces in order to properly rust treat prior to install. These photos show the "before" and the "after" It took several days of rust treatment and a bit of wire-wheeling. While not perfect, it will do for now. My plan is to spray in rust treatment at the end once the part is secured on the car. 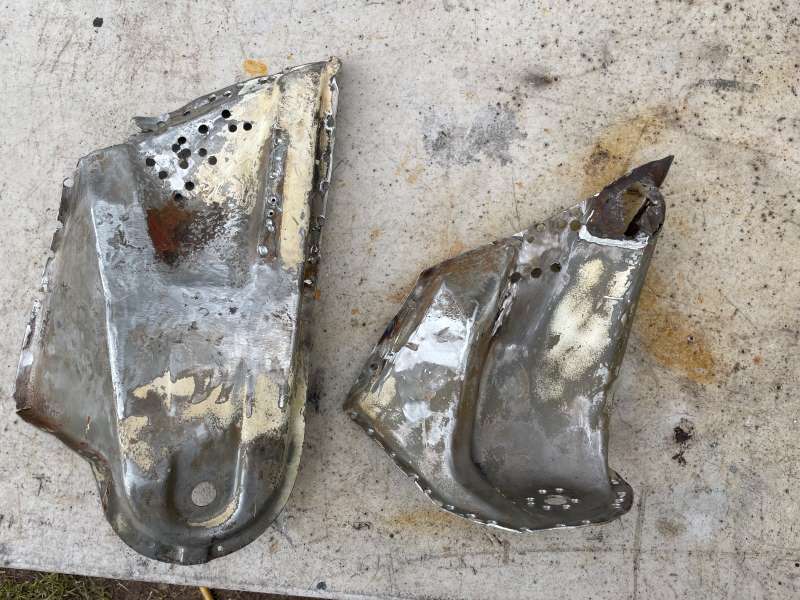 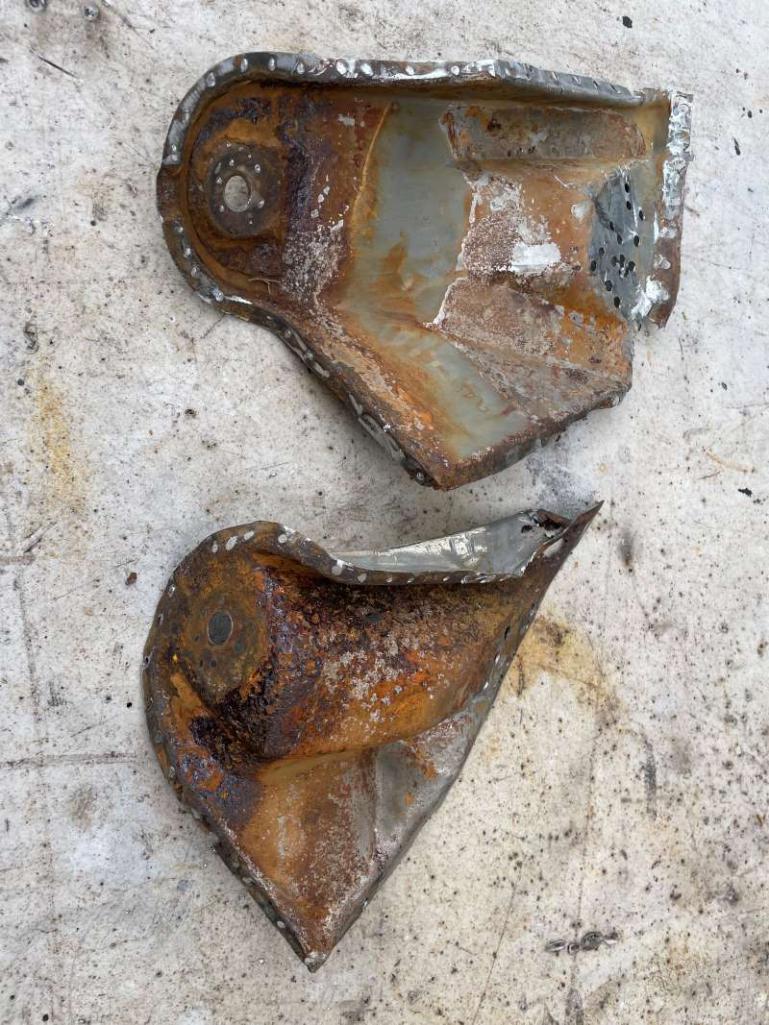 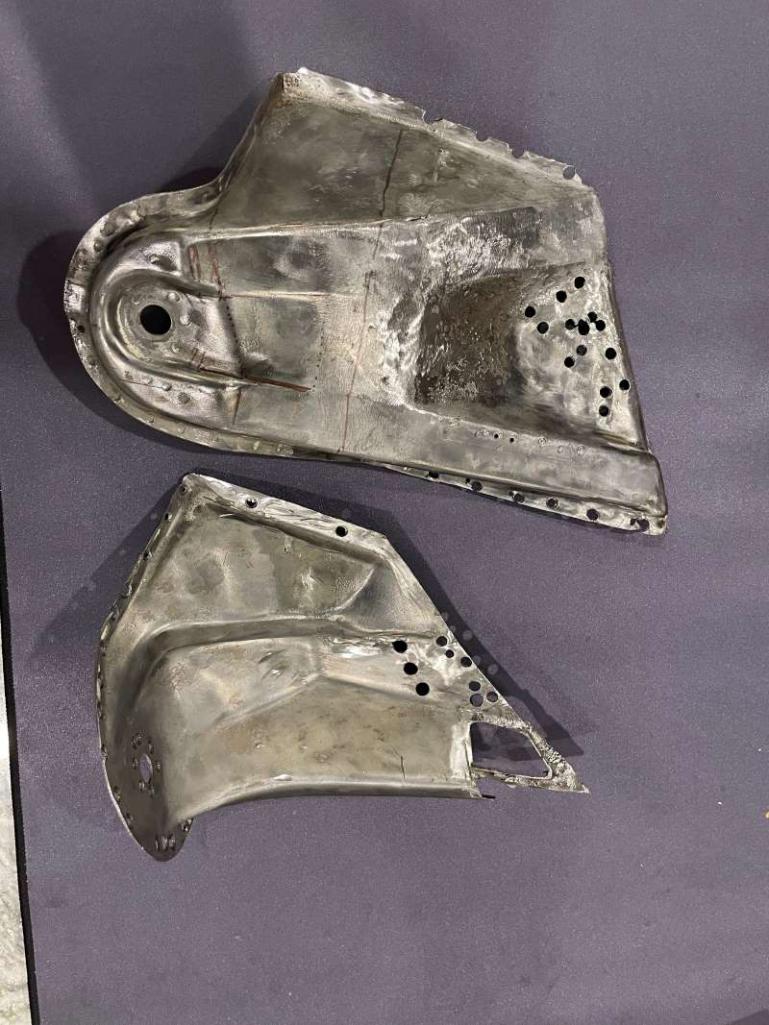 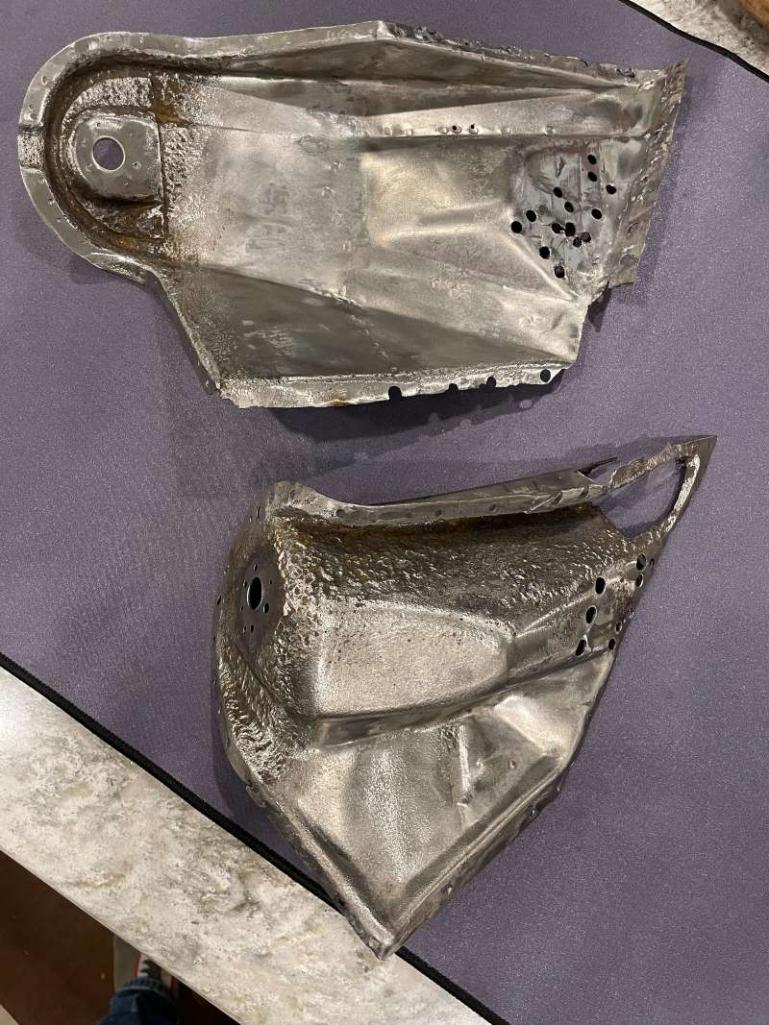 Knowing the condition of the metal, I decided to go ahead and reinforce the part. Based on what Tangerine racing offers for this, I was tempted to just order the kit. However, I happen to have 16 gauge sheet metal laying around and thought I'd give it a go. Here's a few photos of the process. I created one piece for either console. This was a pretty straight forward. It would have been easier with some nibs (as suggest in this thread earlier). My next posts will show how all of this is fitted and welded to the console. 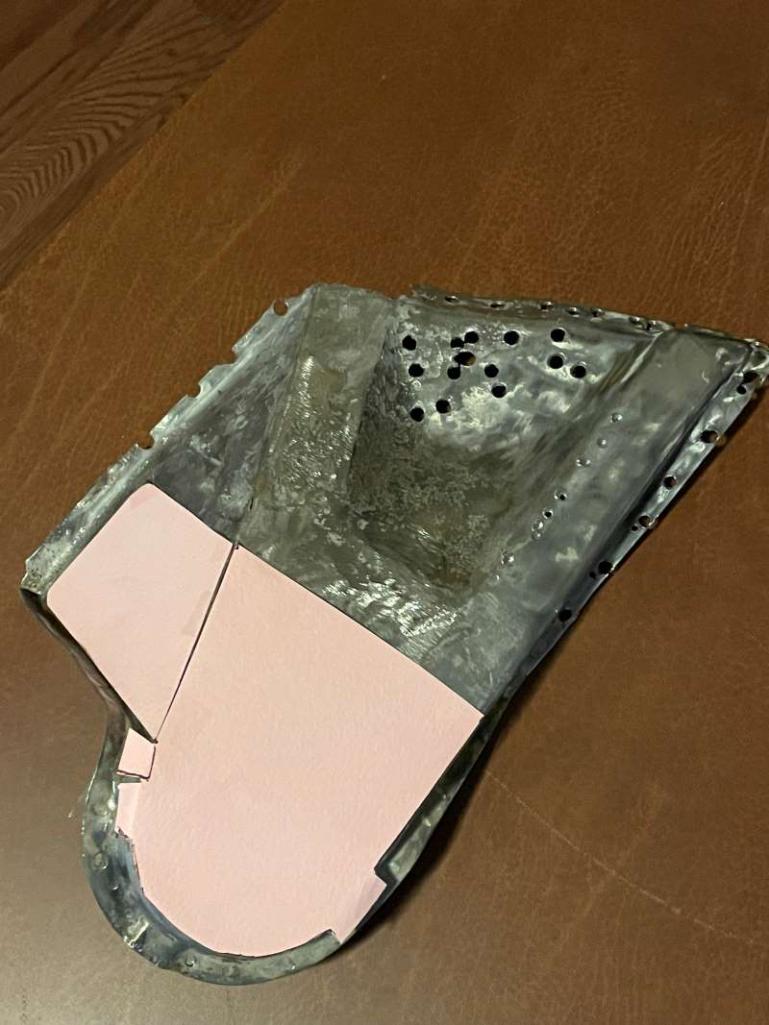 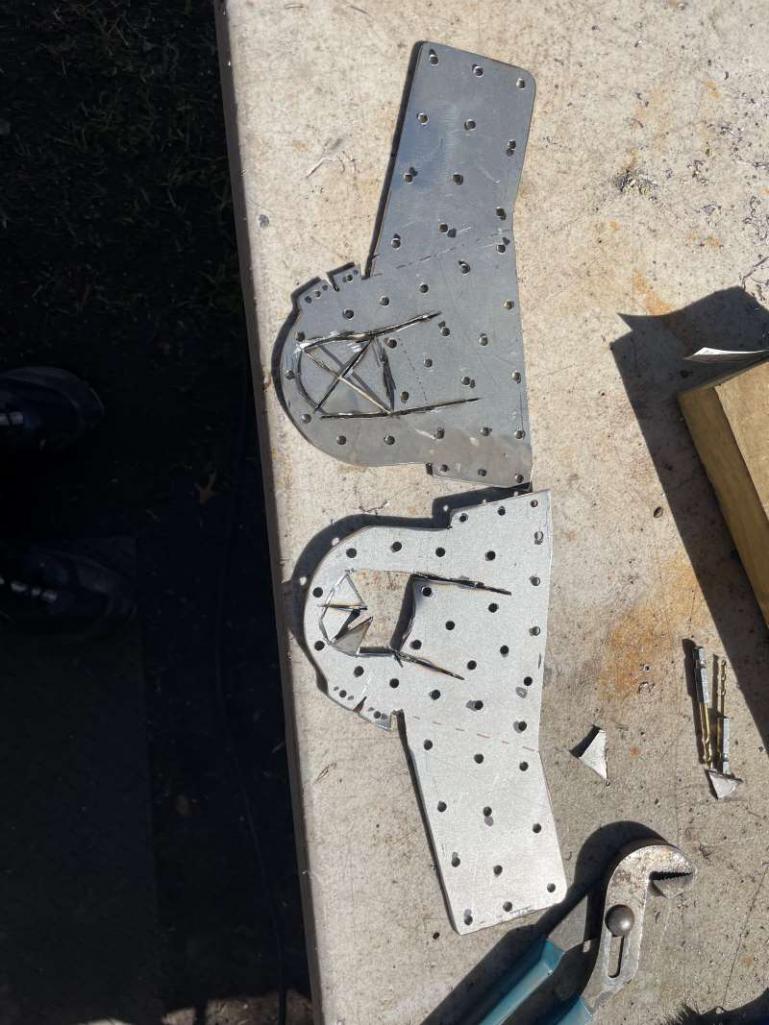 Before the part would be ready I had to fix the rust damage at the one end and then weld the two half together. I also fitted the reinforcement piece. I found it much easier to do the bending with the console half with me at the metal break. The following photo show this process. 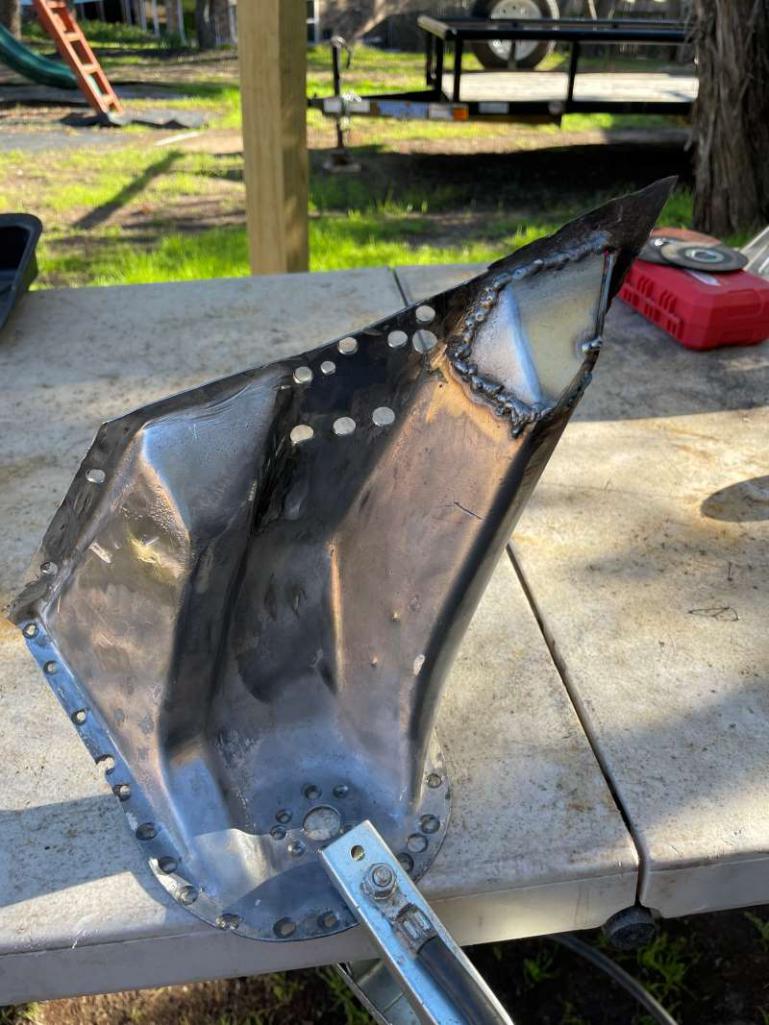  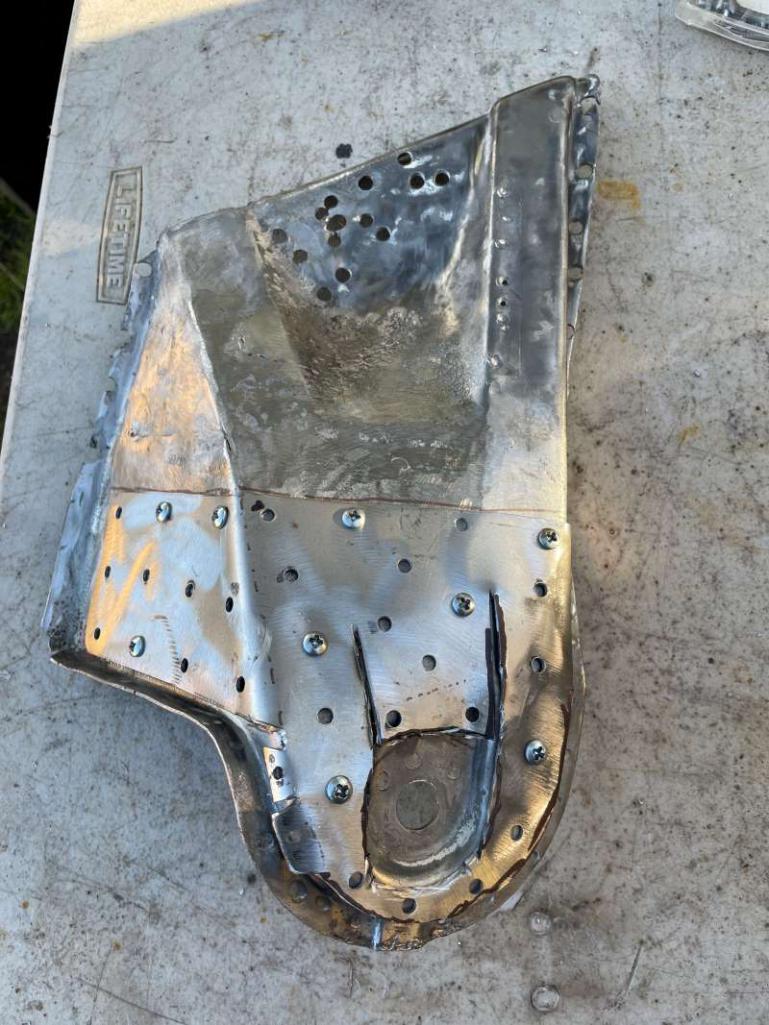 I didn't like the looks of the metal in the recess on the replacement console so I used a piece from my original console to make a quick repair. Finally, I had to deal with the missing ear at the top of the replacement console. Unfortunately, my original console was rusted out here, as well. I decided to use the ear from the other side of my original piece. I figured I could fashion it to look the same. I only need the portion at the top to match. I can grind the edge here to straighten everything out. 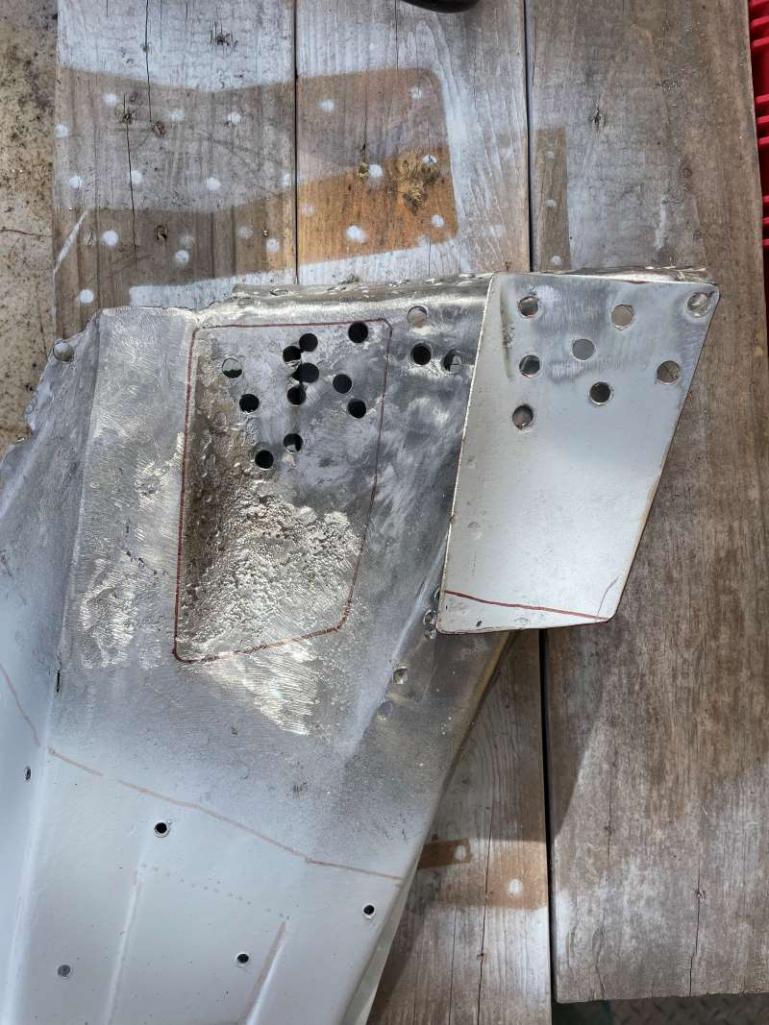 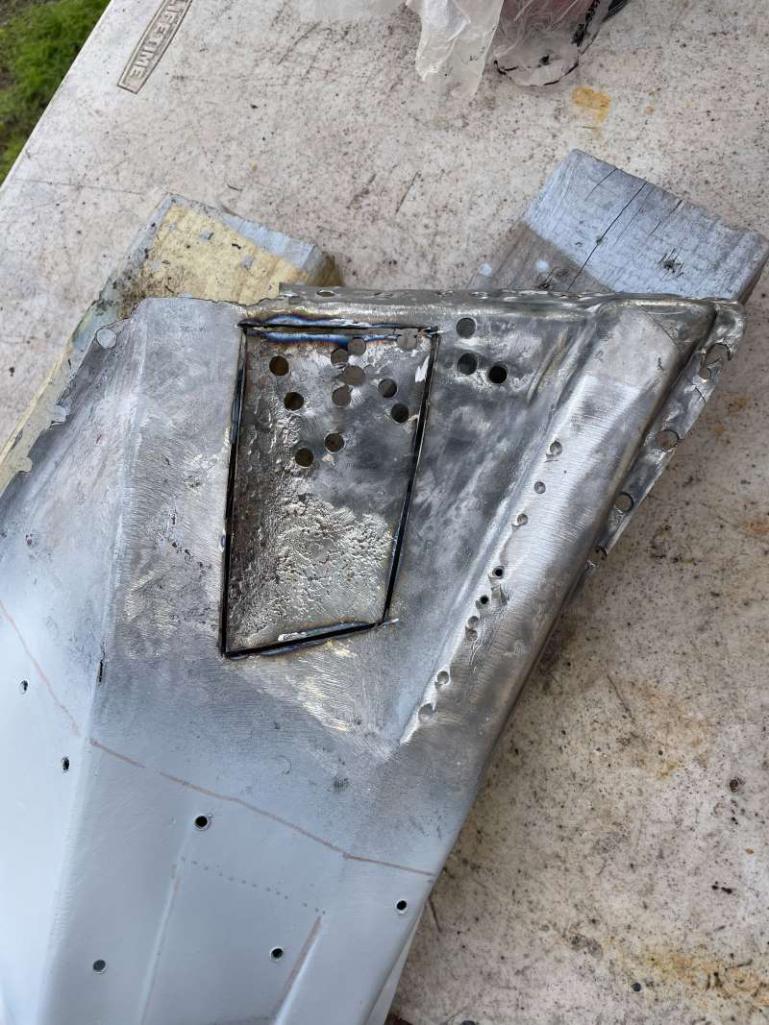 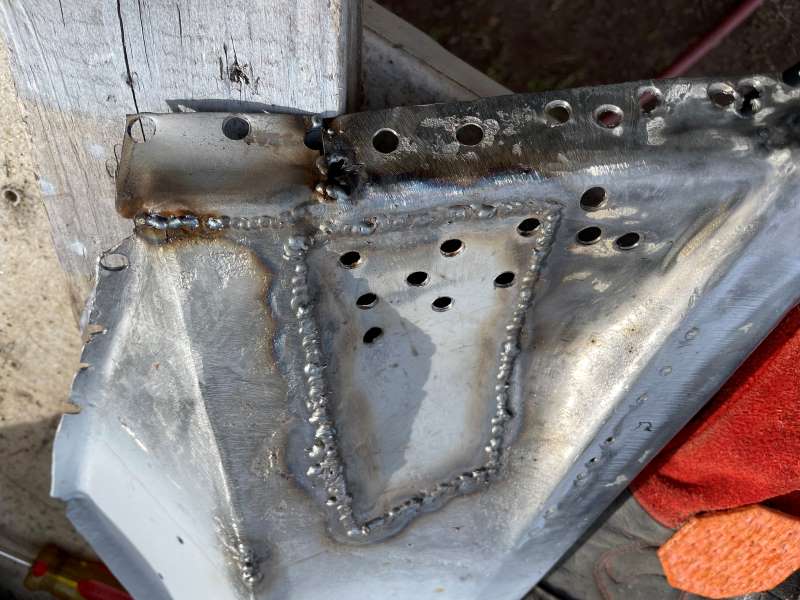 |
   |

 
|
| friethmiller |
Dec 28 2023, 10:50 AM
Post
#82
|
|
Senior Member Group: Members Posts: 1,358 Joined: 10-February 19 From: Austin, TX Member No.: 22,863 Region Association: Southwest Region |
Passenger Inner Suspension Console Replacement - Part 3 (11/2023): With the metal repairs completed, it's time to assemble the replacement console and get it installed on the car. The following photos show this process. Note: see how I forgot to properly drill out my spot weld holes. While not the end of the world, and I have a pretty good hole for each weld, it still bothers me that I didn't even notice it. Too much focus, I guess. I will show the use of my spot weld tool that I employed to help strengthen this seam later in a separate post.
      Next, I added the bracket for the MPS sensor (I think that's correct) and welded in my reinforcement piece. Note: the bottom of the reinforcement piece isn't completely welded in but I'll show that in my next post. 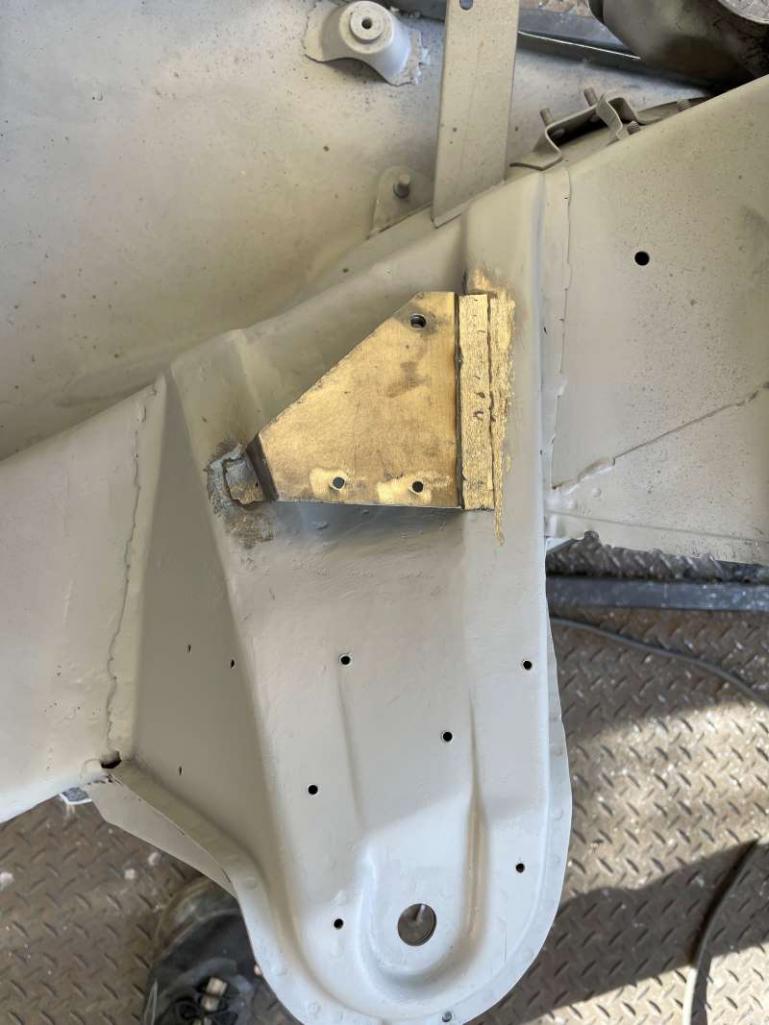 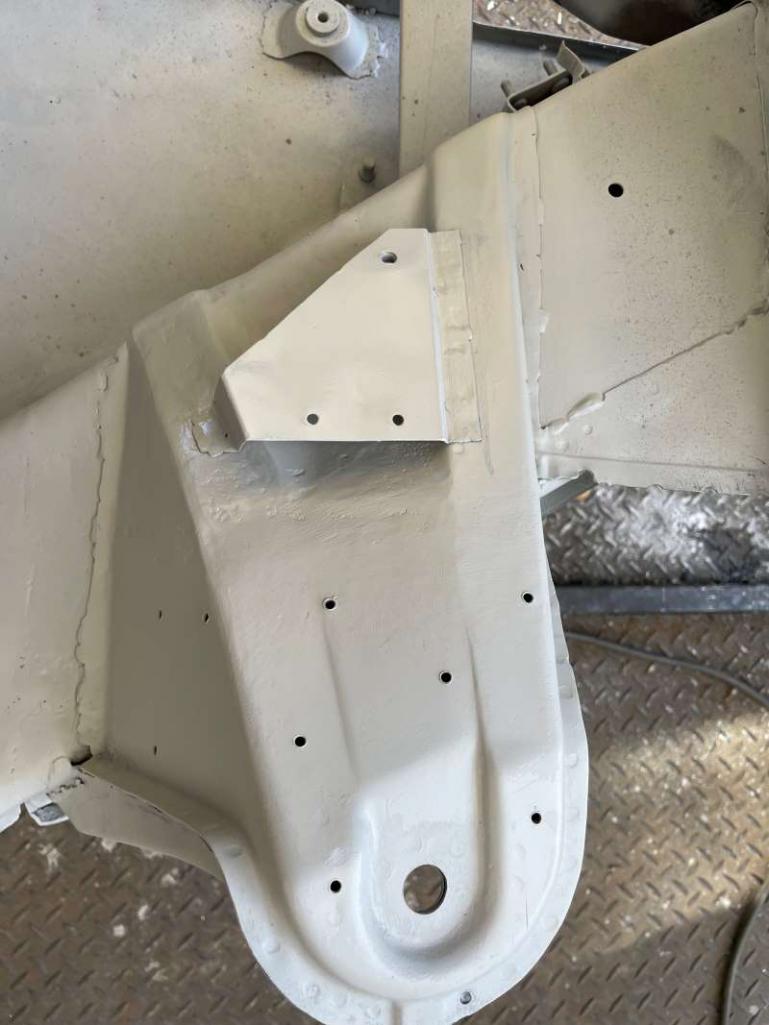 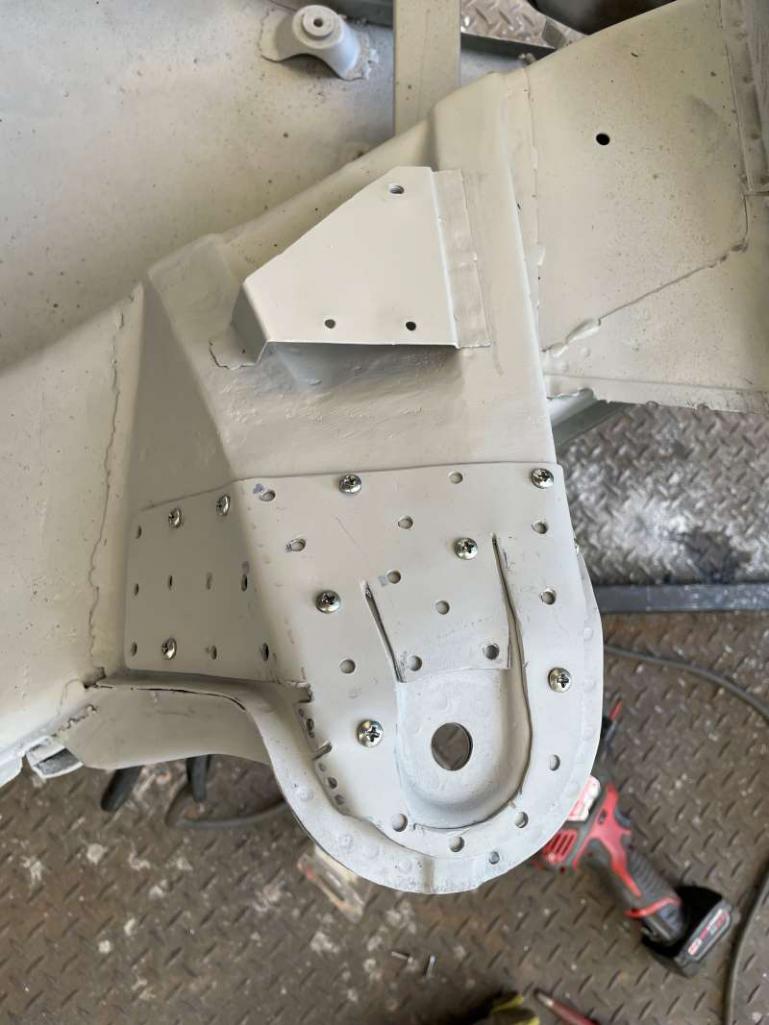 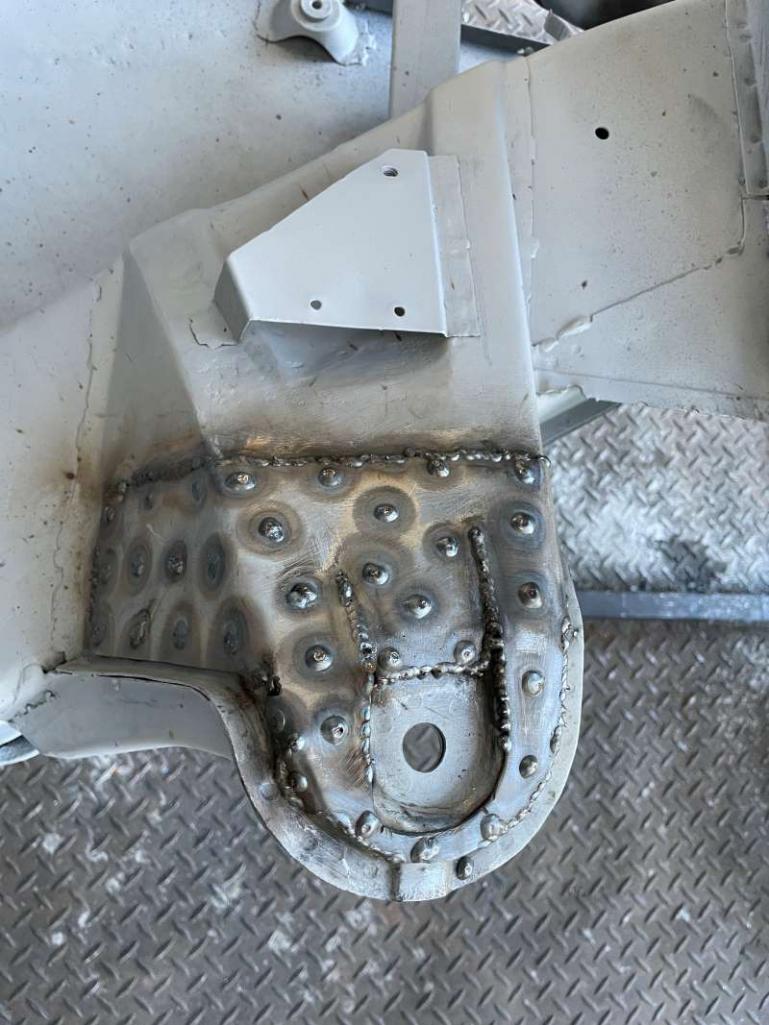 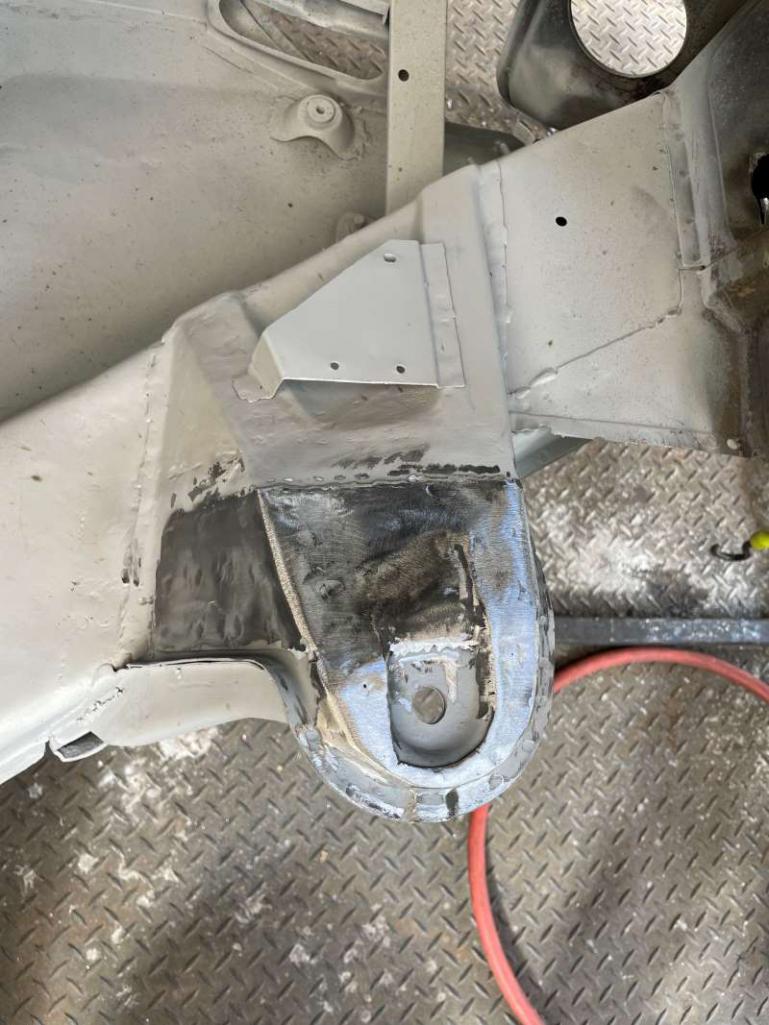 |
|
|
|
| friethmiller |
Dec 28 2023, 09:45 PM
Post
#83
|
|
Senior Member Group: Members Posts: 1,358 Joined: 10-February 19 From: Austin, TX Member No.: 22,863 Region Association: Southwest Region |
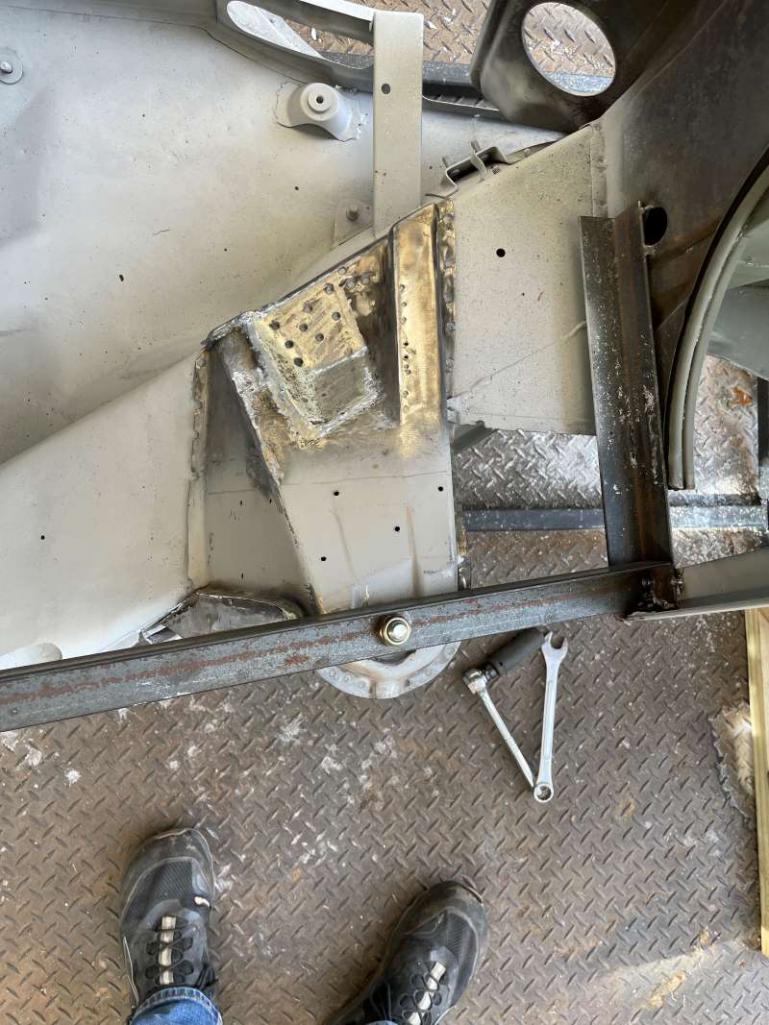
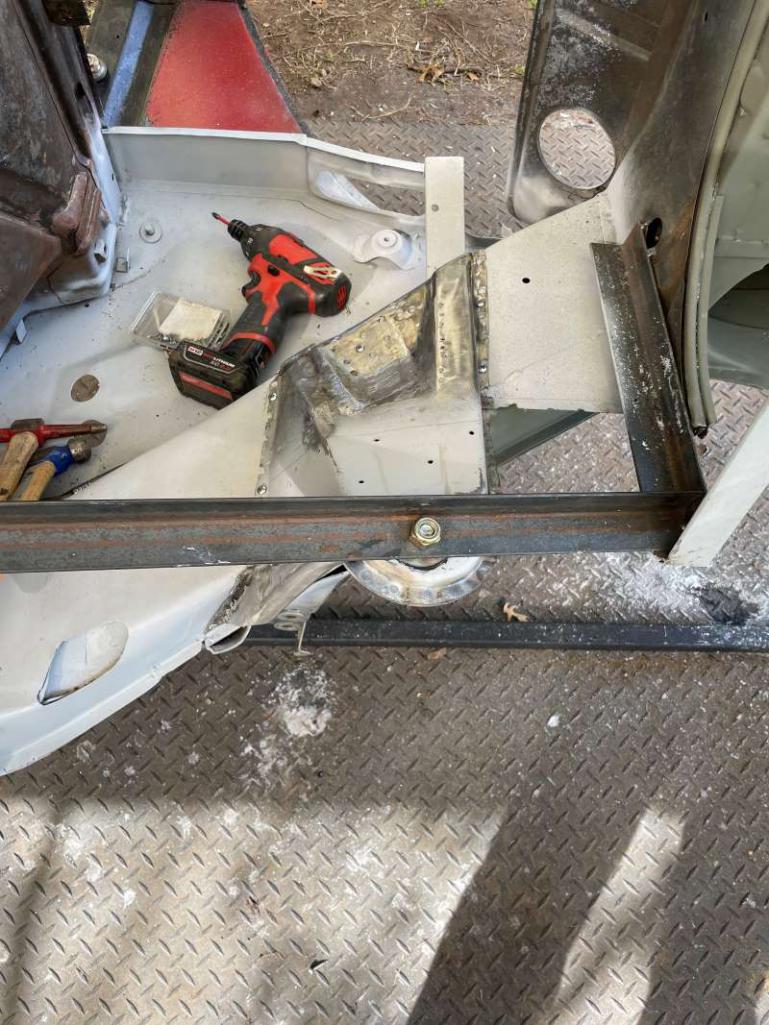
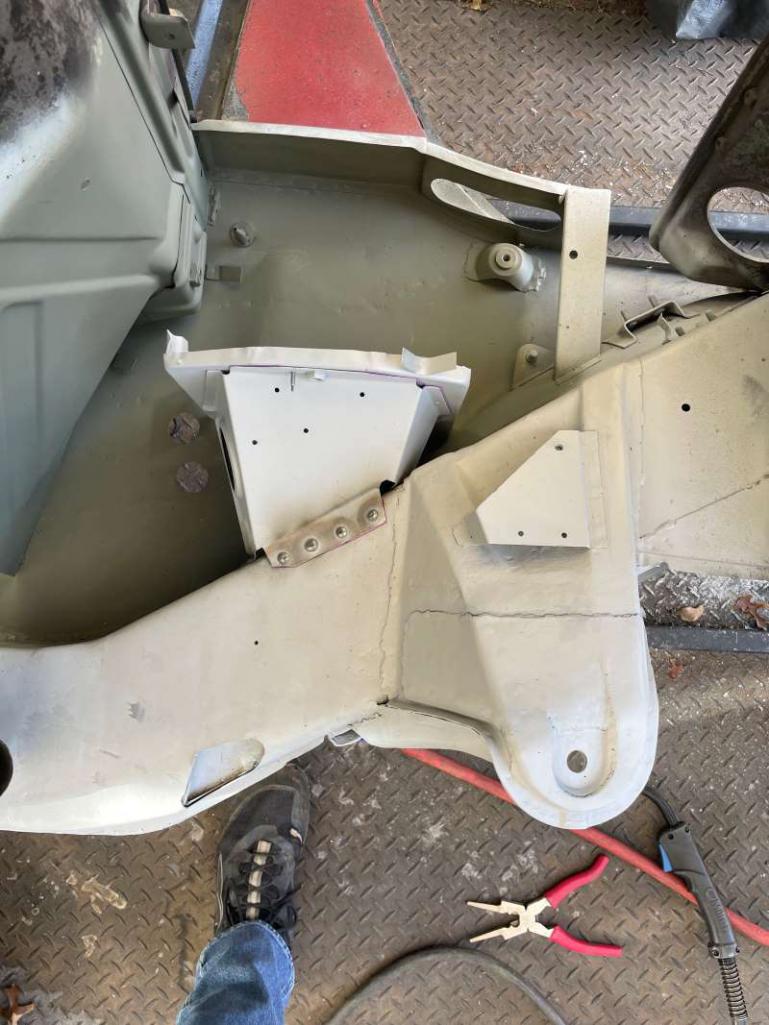
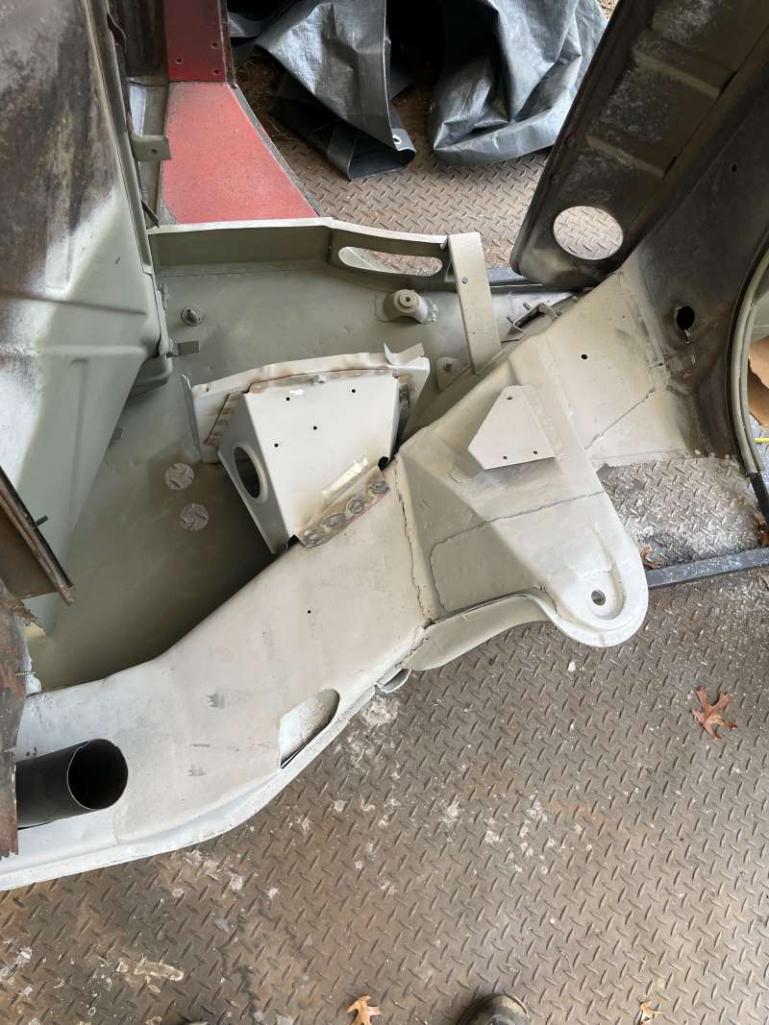
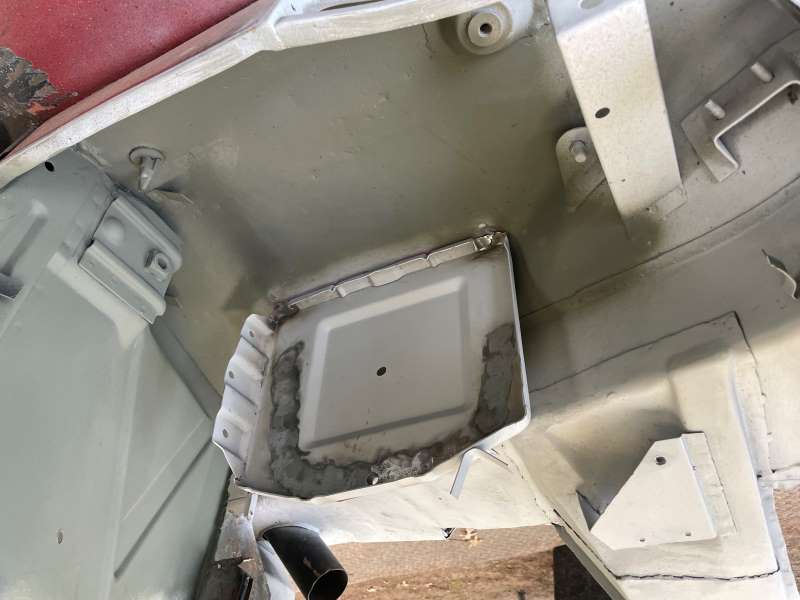
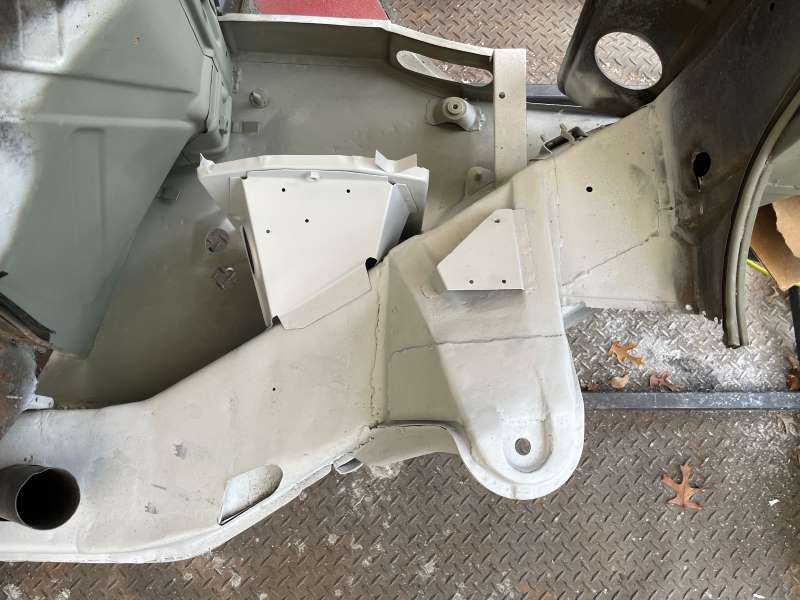
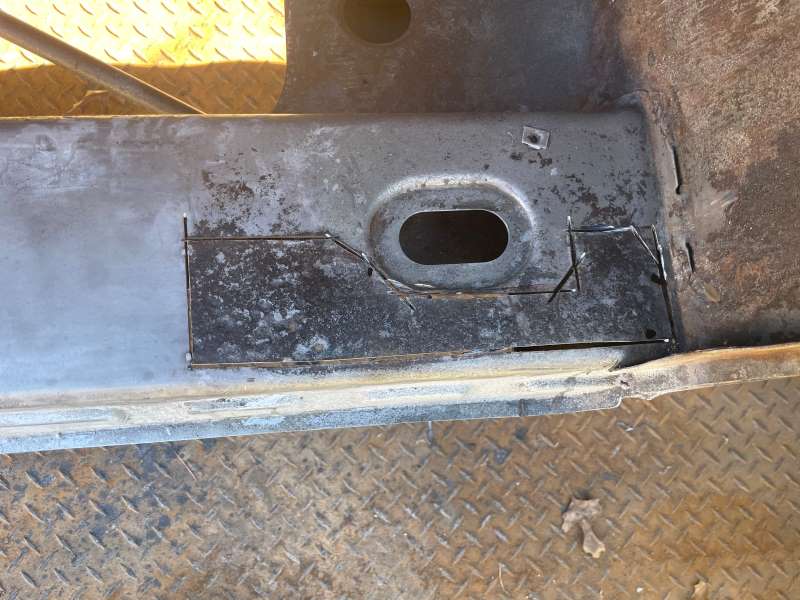
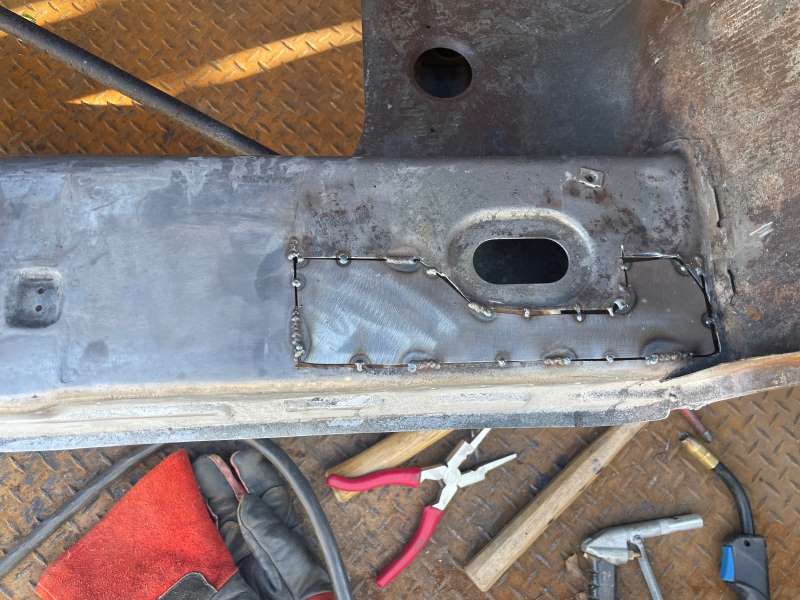
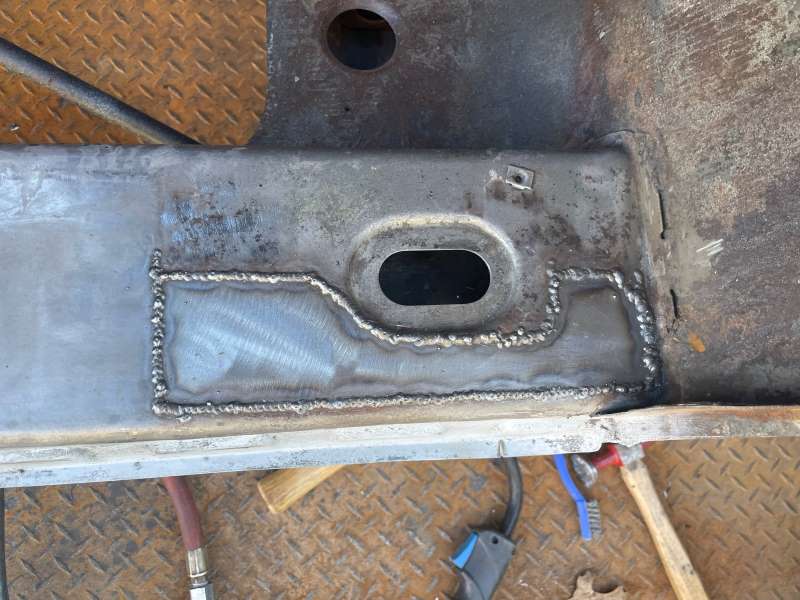
New Battery Tray Install (12/2023): While I had the car flipped at the 90, I decided to go ahead and install the new battery tray. There's no exact spot here but it must be positioned such that the battery (when installed) doesn't hit the seat belt bolts on the firewall. After fitting/positioning the two pieces in the car, I then welded the base to the support rail. This allowed me access to internal tab where I had punched holes for two rosette welds (not pictured). I then shot additional primer over the cleaned welds and screwed in the tray. This was welded to the inner fender on one side and down to the base in several prepared holes (rosettes). The final picture was taken later with the car on at a 45 degree angle. Again, the prepared holes where plug welded to secure the tray to the inner fender. Grinding the welds on this side is much easier then in the recesses of the battery tray.
     |
|
|
|
| friethmiller |
Dec 29 2023, 09:08 AM
Post
#84
|
|
Senior Member Group: Members Posts: 1,358 Joined: 10-February 19 From: Austin, TX Member No.: 22,863 Region Association: Southwest Region |
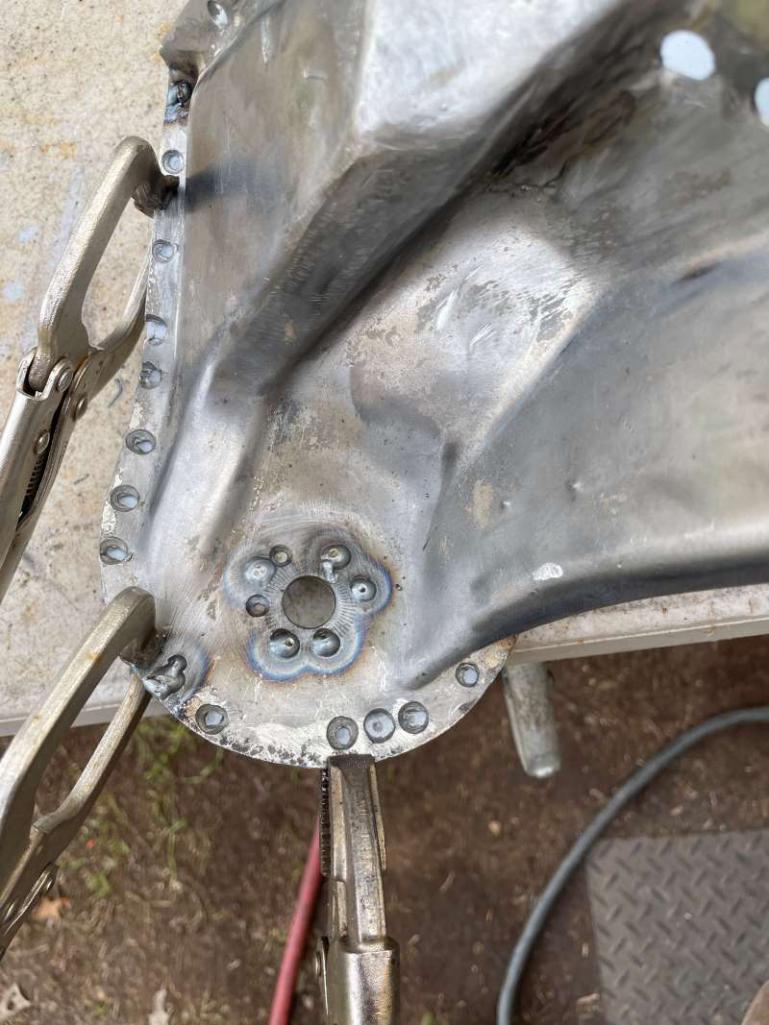
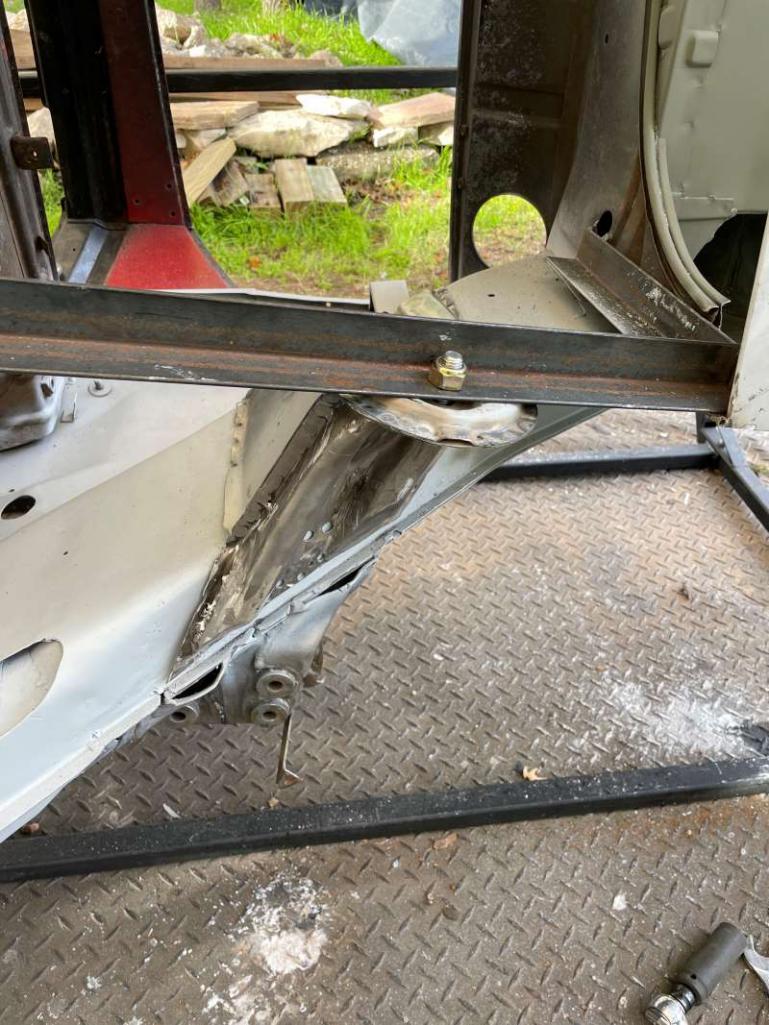
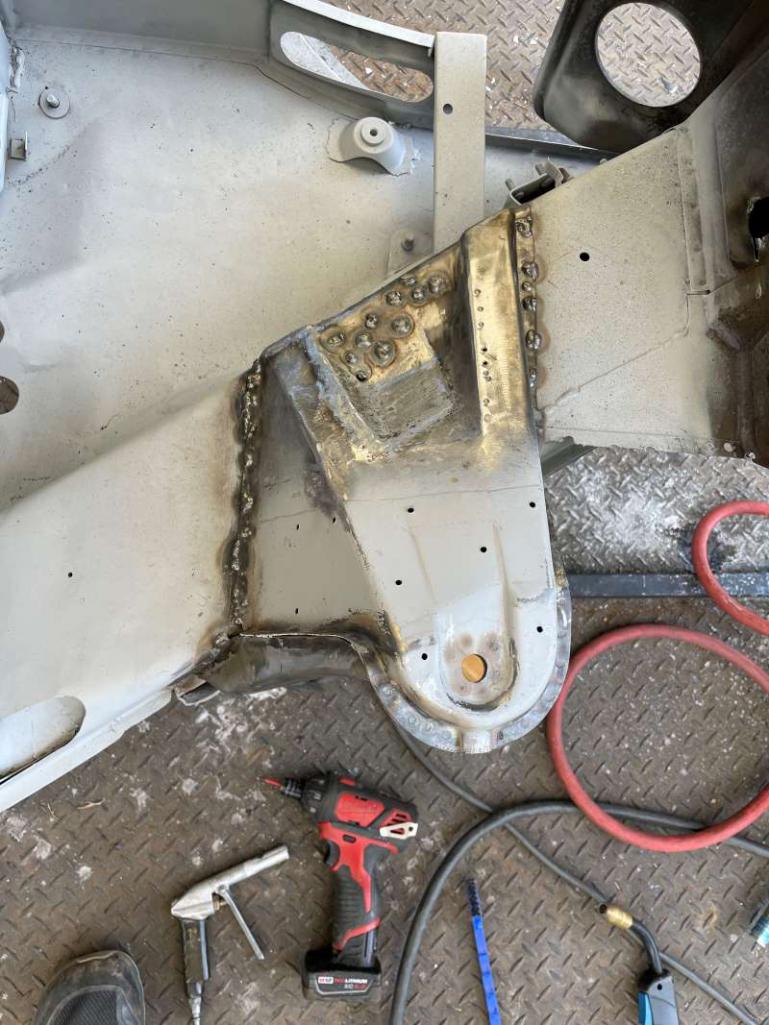
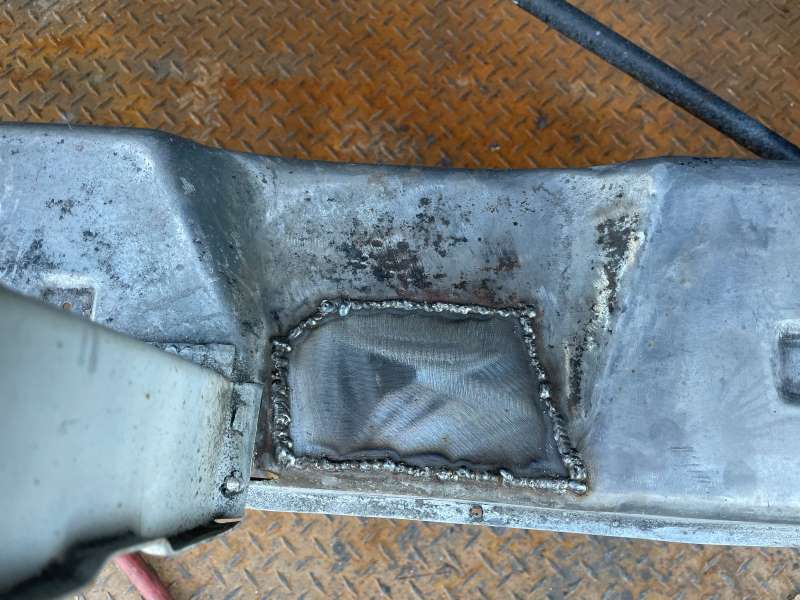
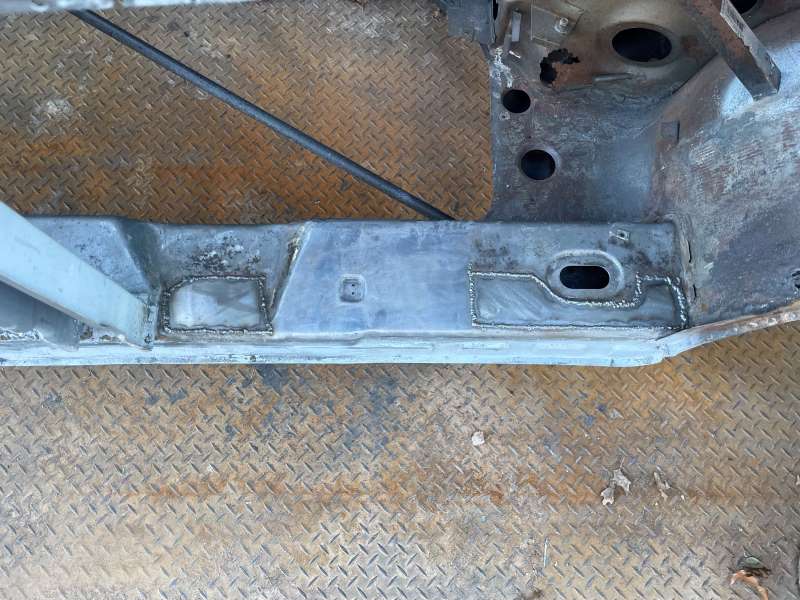
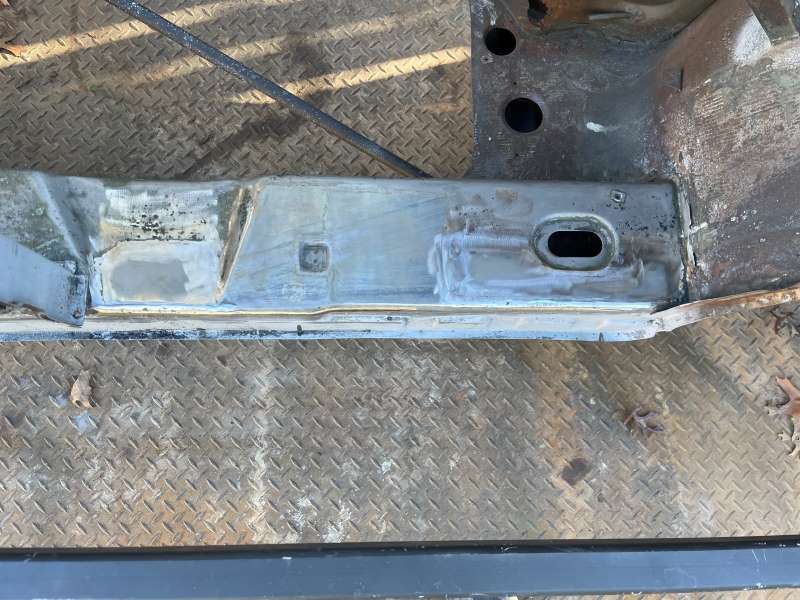
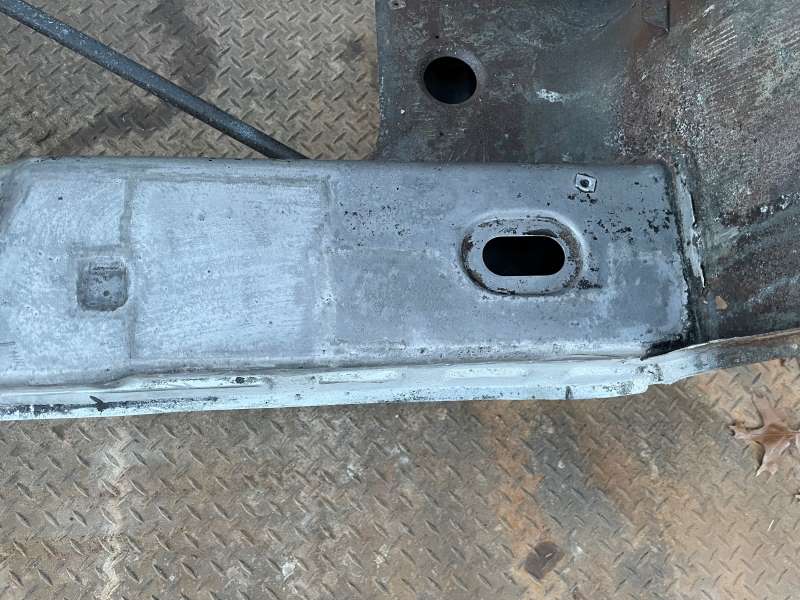
Gusset Reinstall and Engine Mount (12/2023): With the replacement of the inner console, it's time to weld the gussets back in place and finish the job. In the process of doing this I also rewelded the rebuilt engine mount. There's a thread detailing the restoration of this part (with photos) that I posted earlier this year: http://www.914world.com/bbs2/index.php?sho...=365096&hl=.
Note: the yellow substance is the CRC Marine Wax. I've cleaned the internals of the front of each gussets and am just giving it a bit of additional protection before it all gets welded close. Another Note: I took my time doing this welding and used a ton of compressed air throughout the process. It isn't very pretty but I think it'll do. 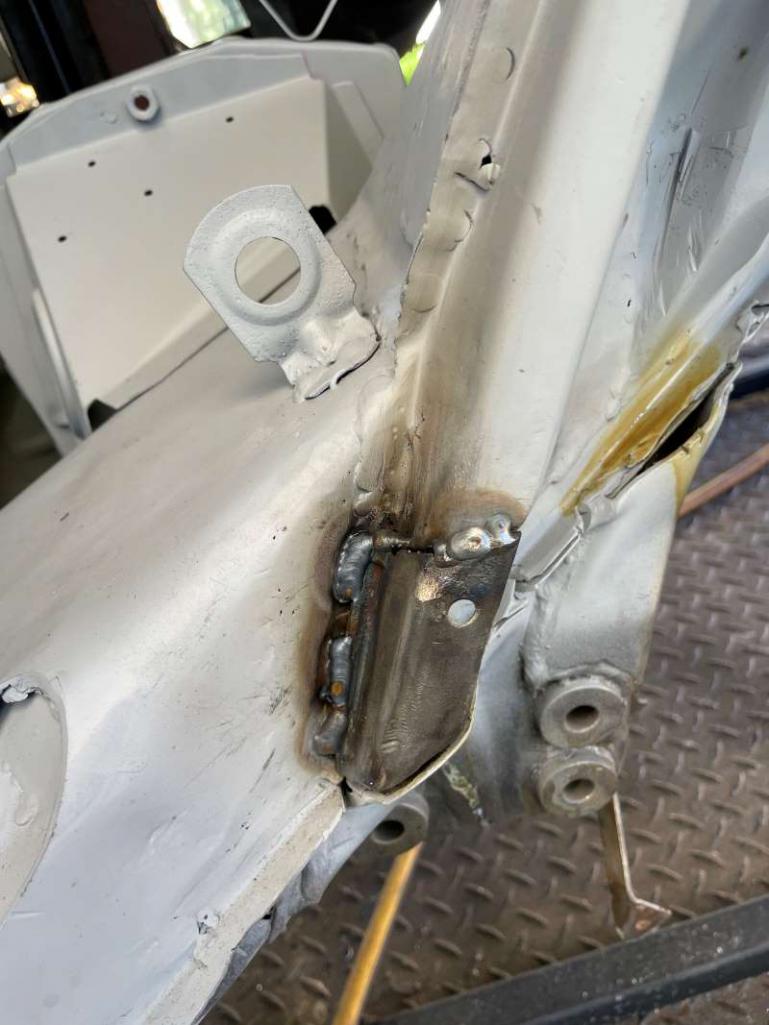 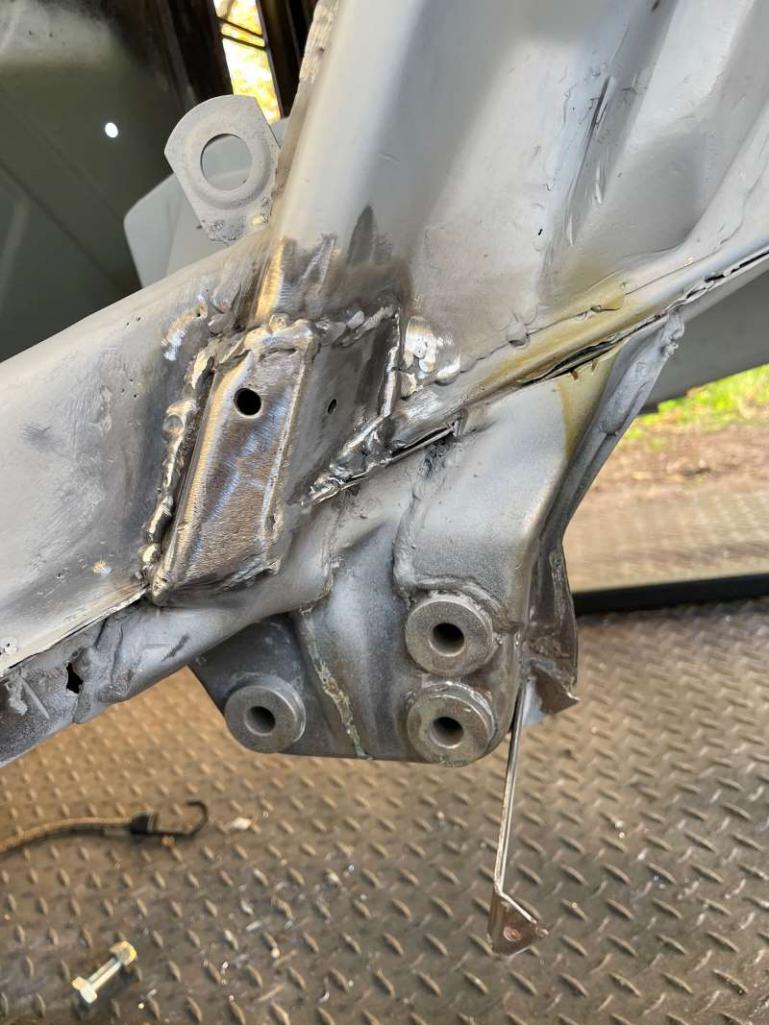 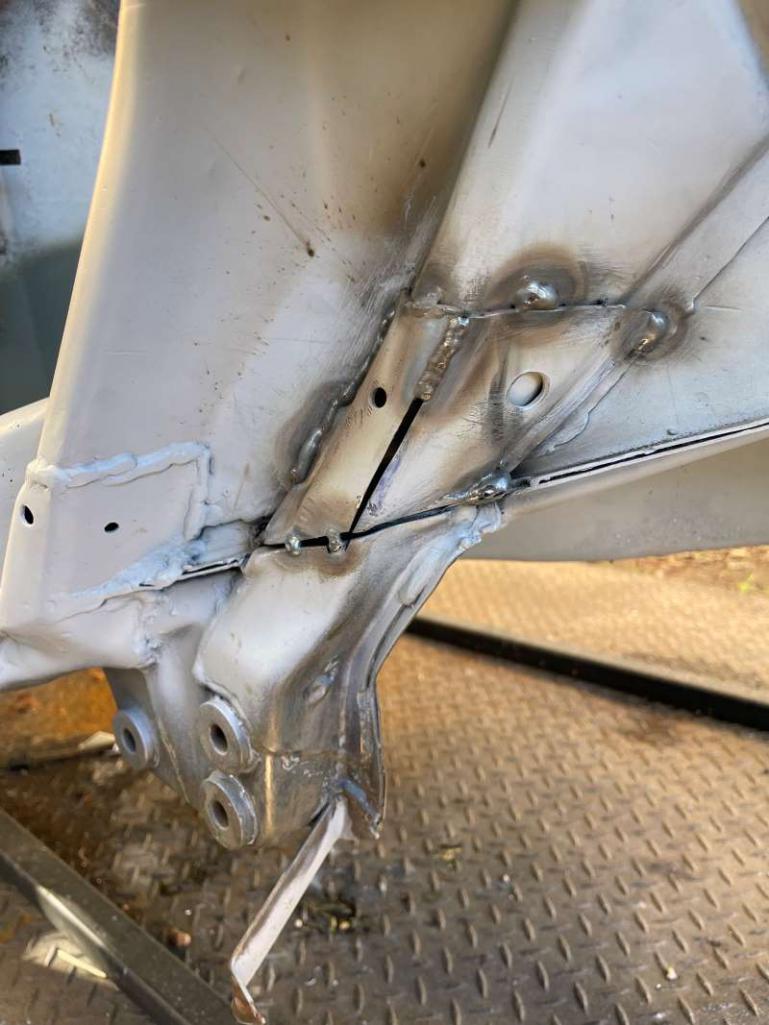 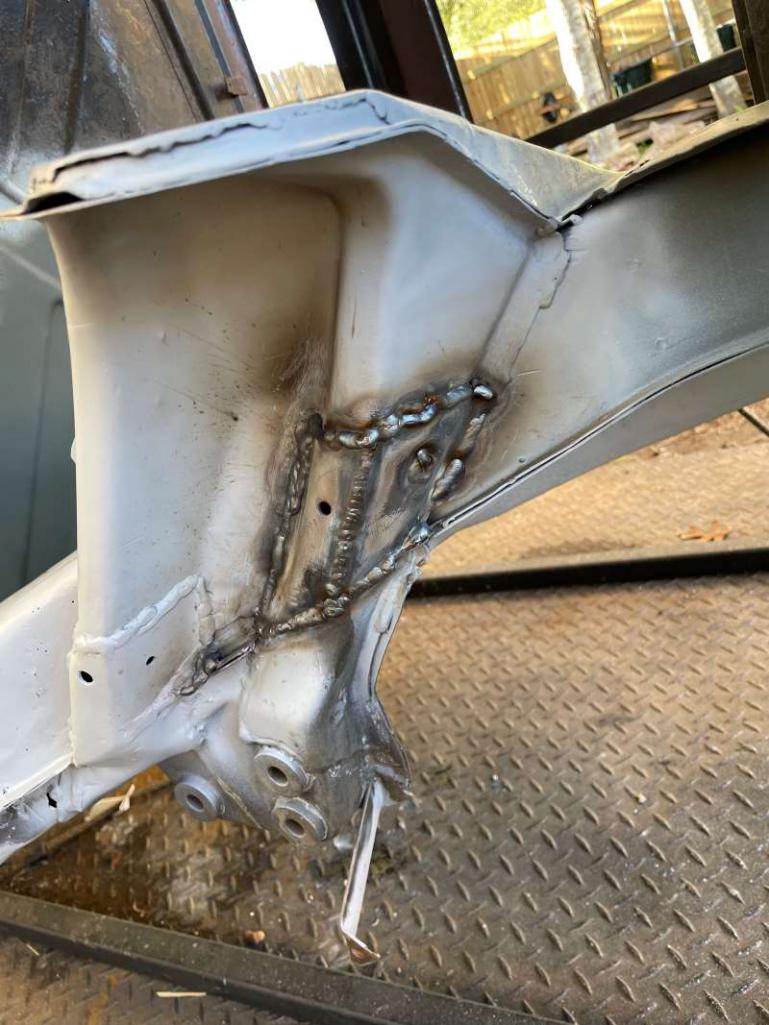 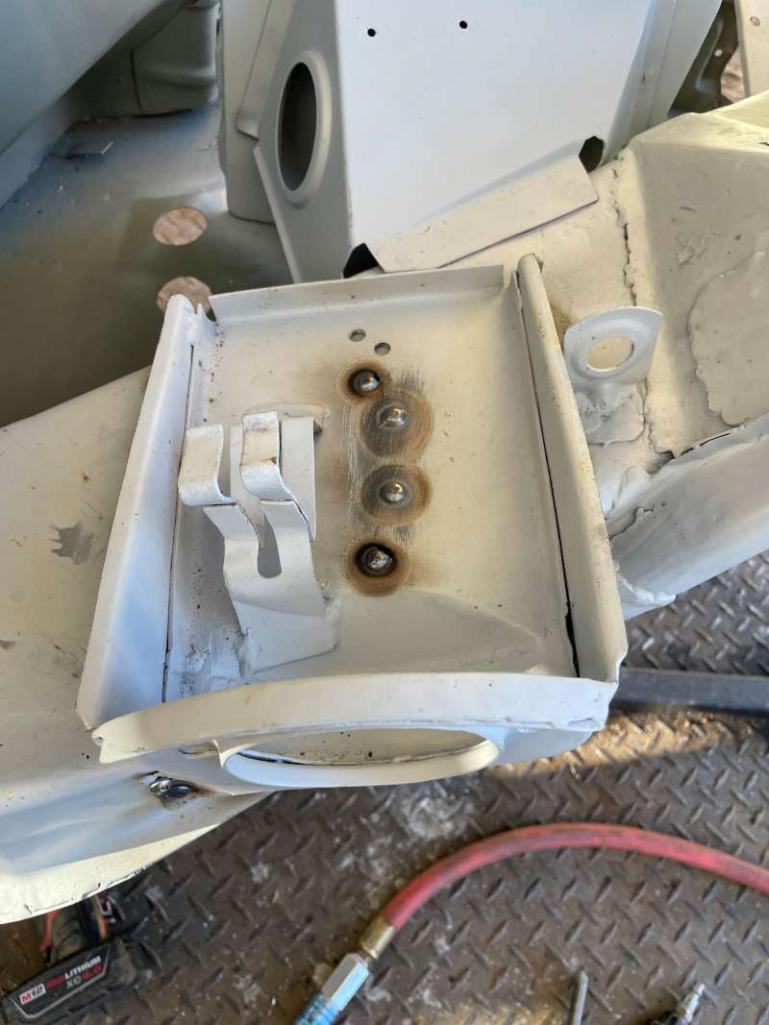 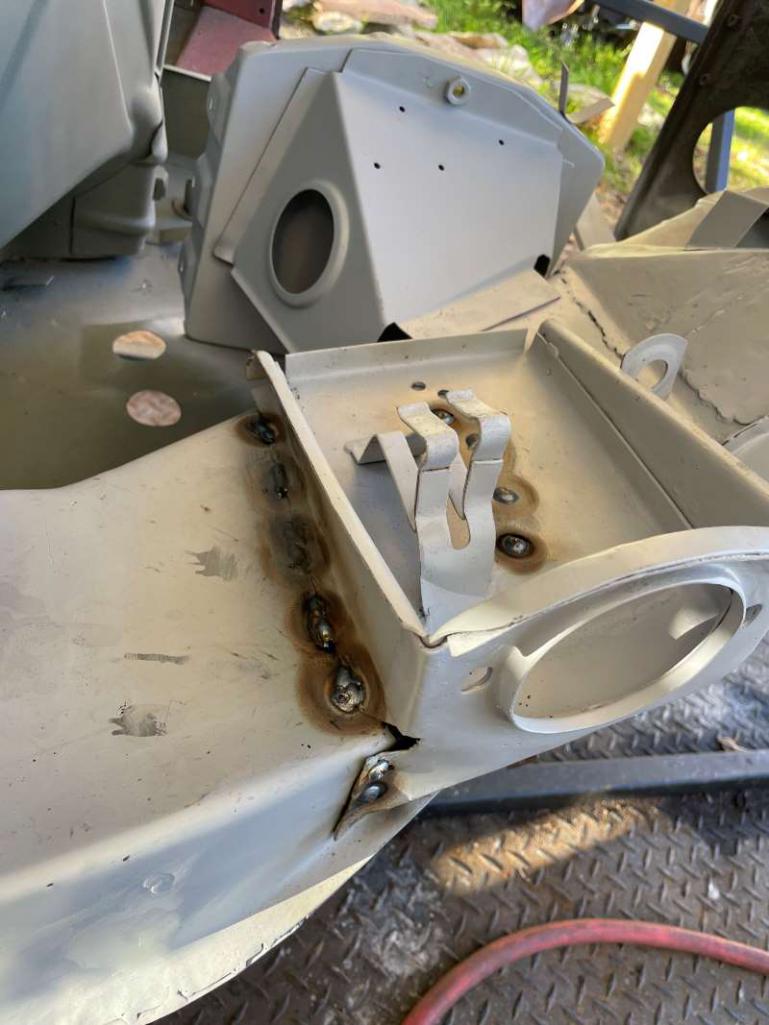 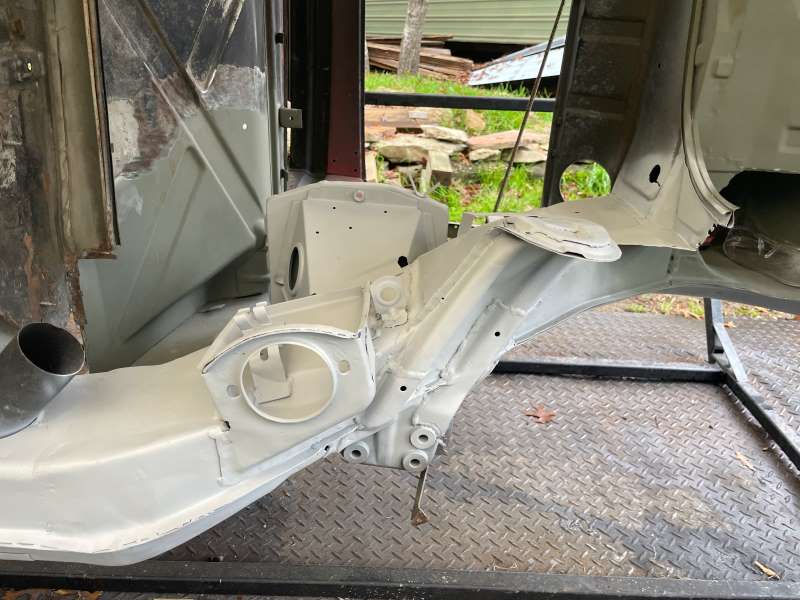 Now it's time to flip the car around and complete any additional welds so it all looks good. I also took this opportunity to add an extra piece of reinforcement that I had left over from my 914 GT kit. I didn't install this piece on my other 914 due to the fact that I used Restoration Design's Frame Stiffeners (https://www.restoration-design.com/store/product/PP346R). 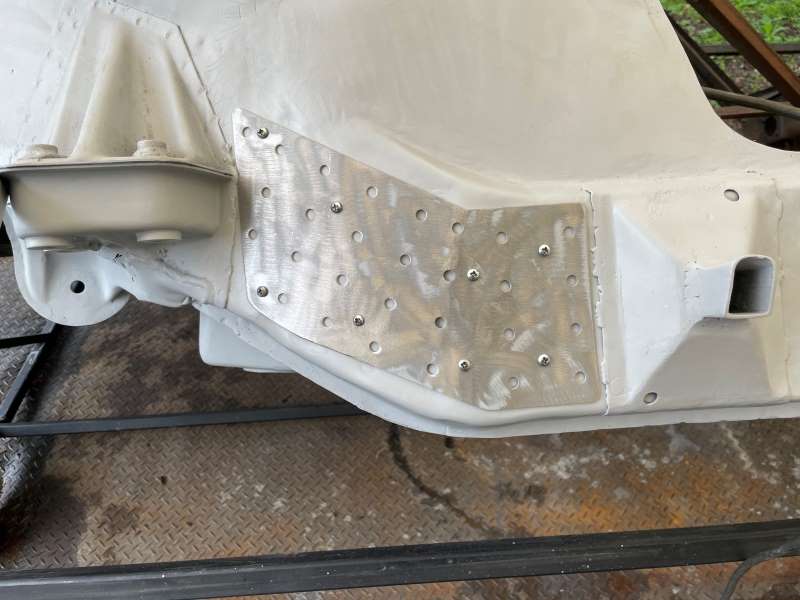 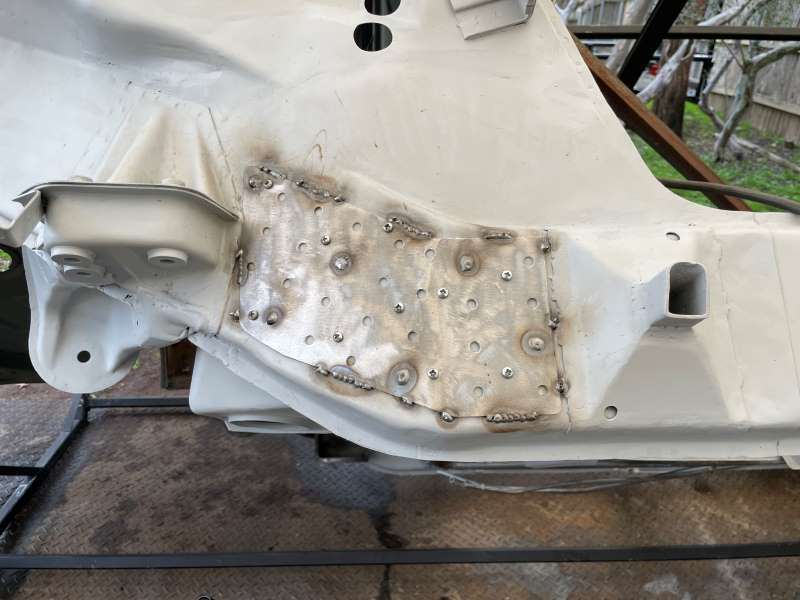 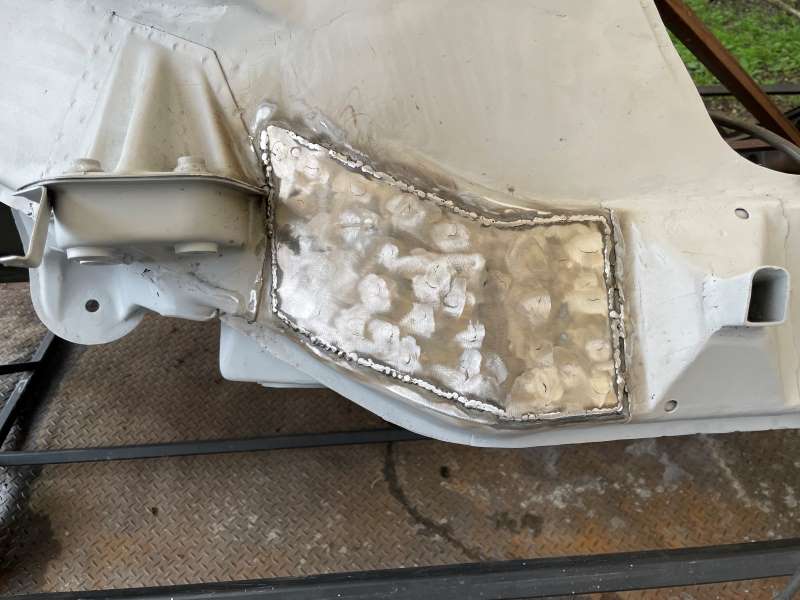 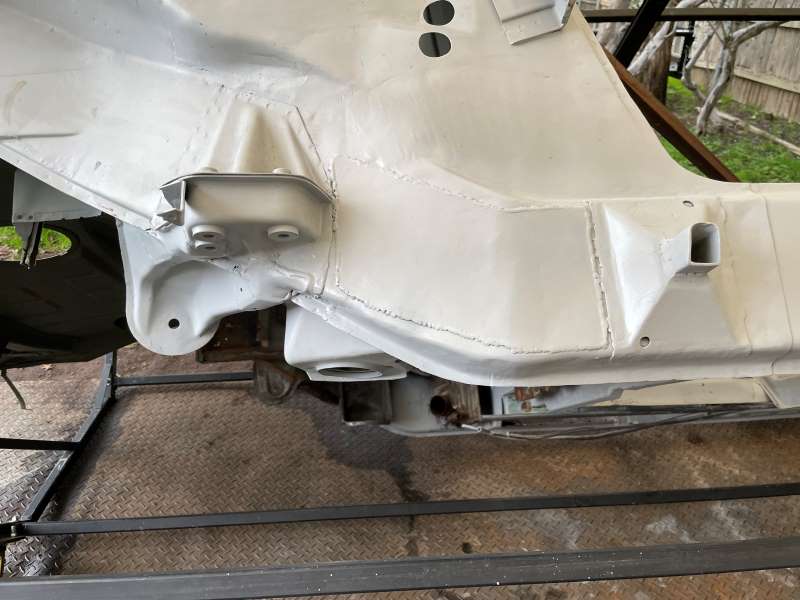 Additional photos taken after welding up a few small holes and cut marks. Not too bad. In the coming weeks, I will be replacing the driver side inner suspension console. 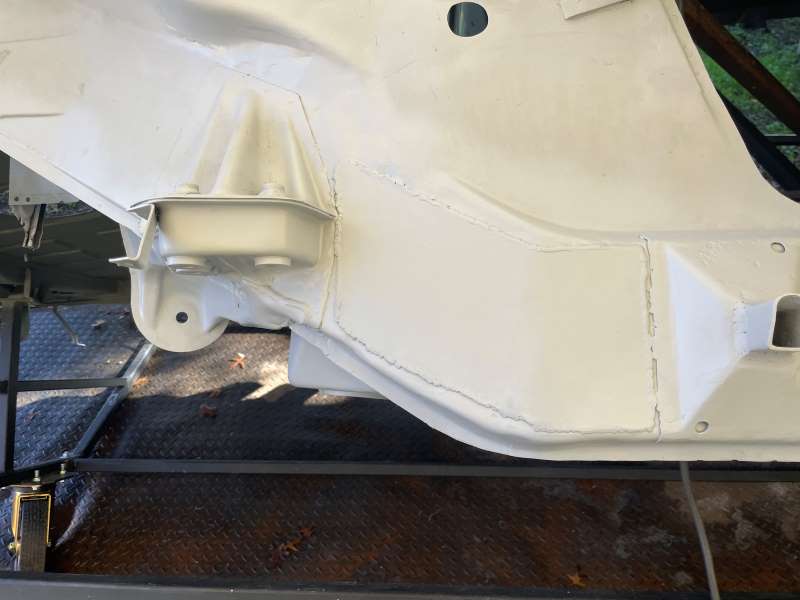 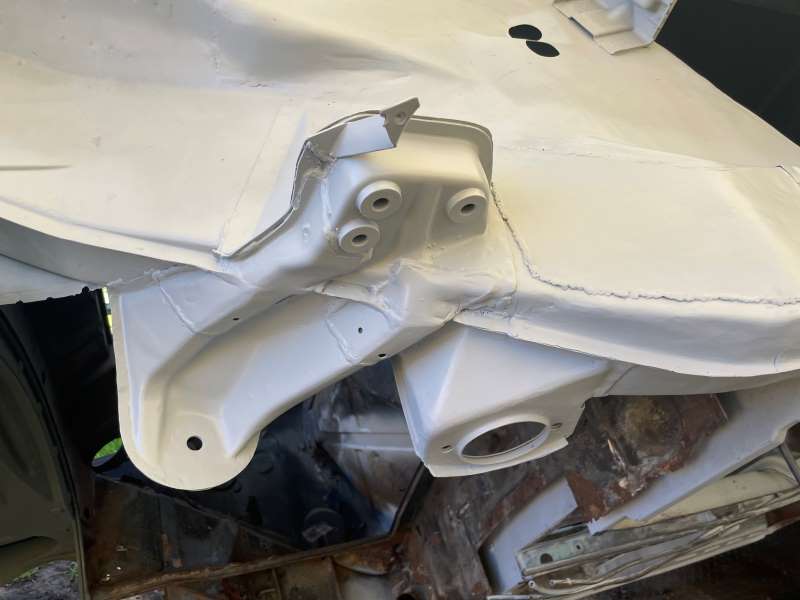 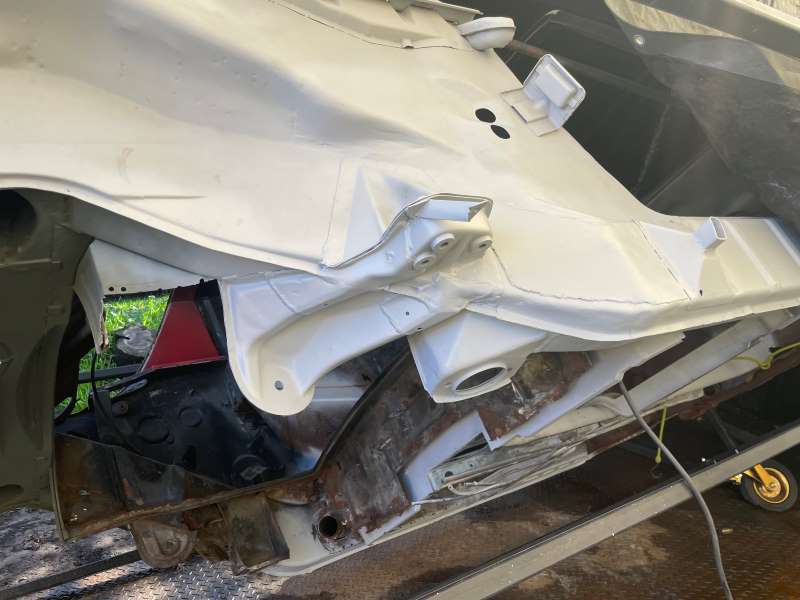 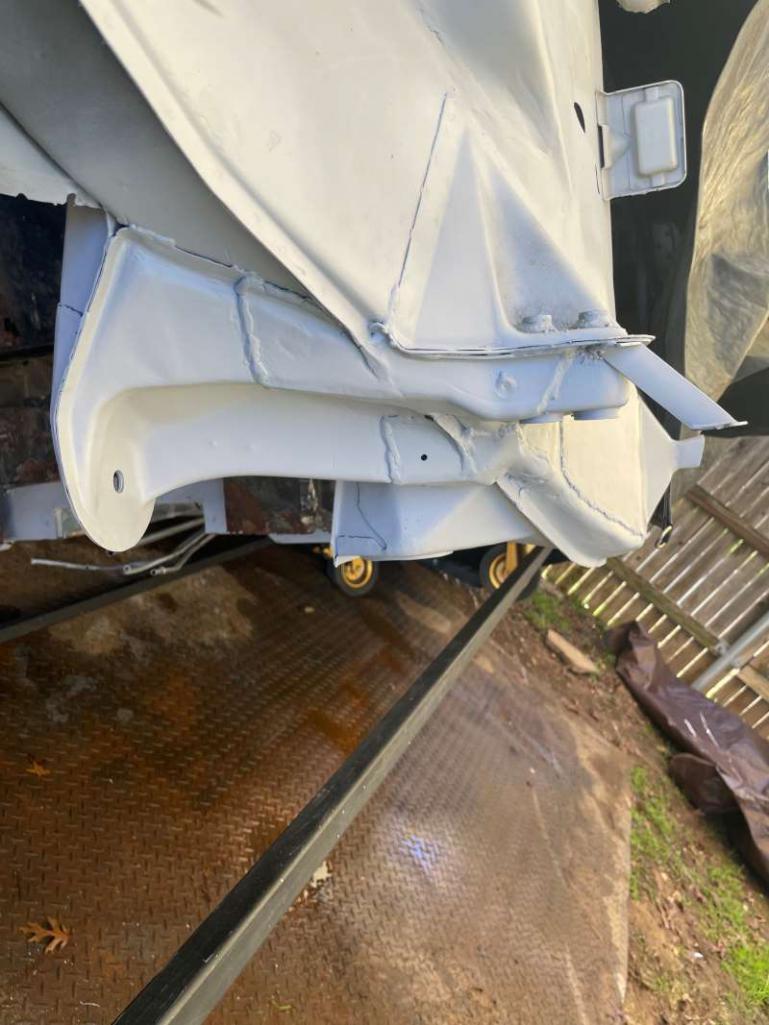 |
|
|
|
| friethmiller |
Dec 29 2023, 10:20 AM
Post
#85
|
|
Senior Member Group: Members Posts: 1,358 Joined: 10-February 19 From: Austin, TX Member No.: 22,863 Region Association: Southwest Region |
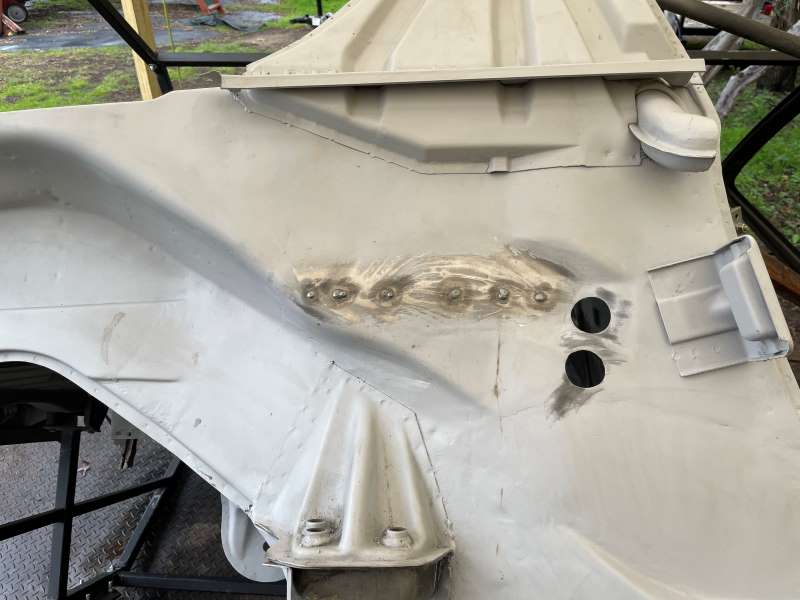
Trunk Bottom (12/2023): Another area that received attention with the car flipped on its side was the bottom of the trunk. This greasy, rusty area had to get cleaned and stripped of old paint. Moreover, I also needed to grind down the welds that I made during the trunk pan replacement.
I will say that this area took a bit of time to do. The transmission mount area in particular was extremely hard to get to with it mounted to the rotisserie. I used a putty knife to get most of the heavy off, followed by a wire wheel, and finally a sand blaster to get the hard to reach places around the mounts and sway bar tabs. I also worked a bit up into each of the strut towers to remove the paint and sealant to get at the surface rust. 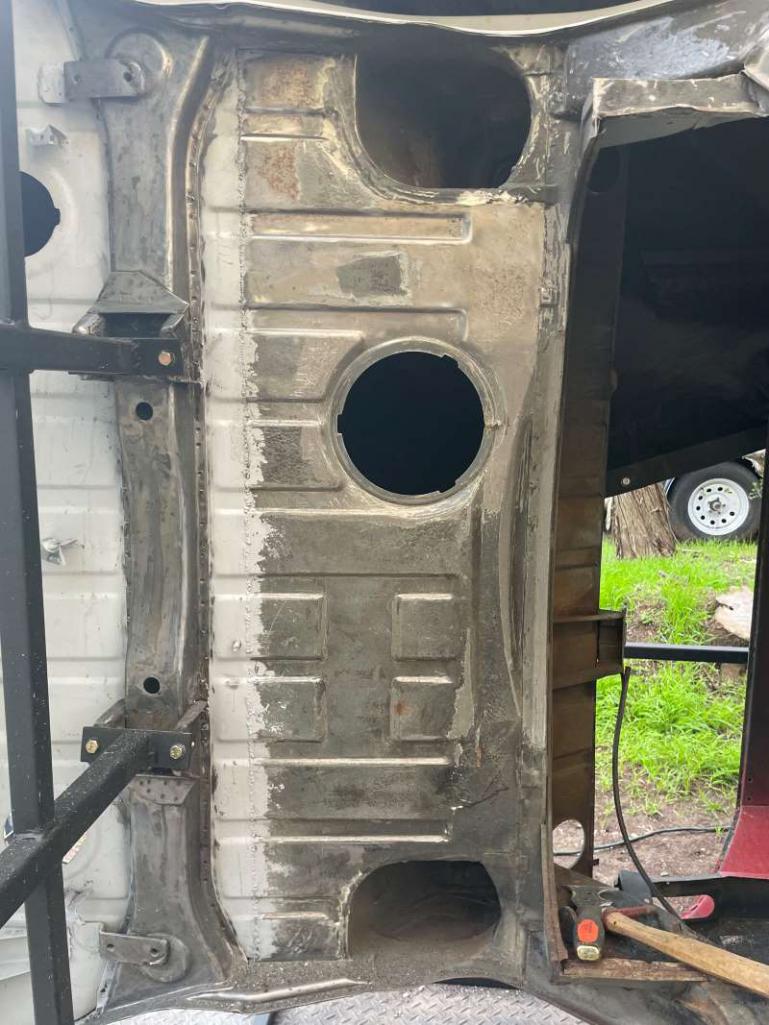 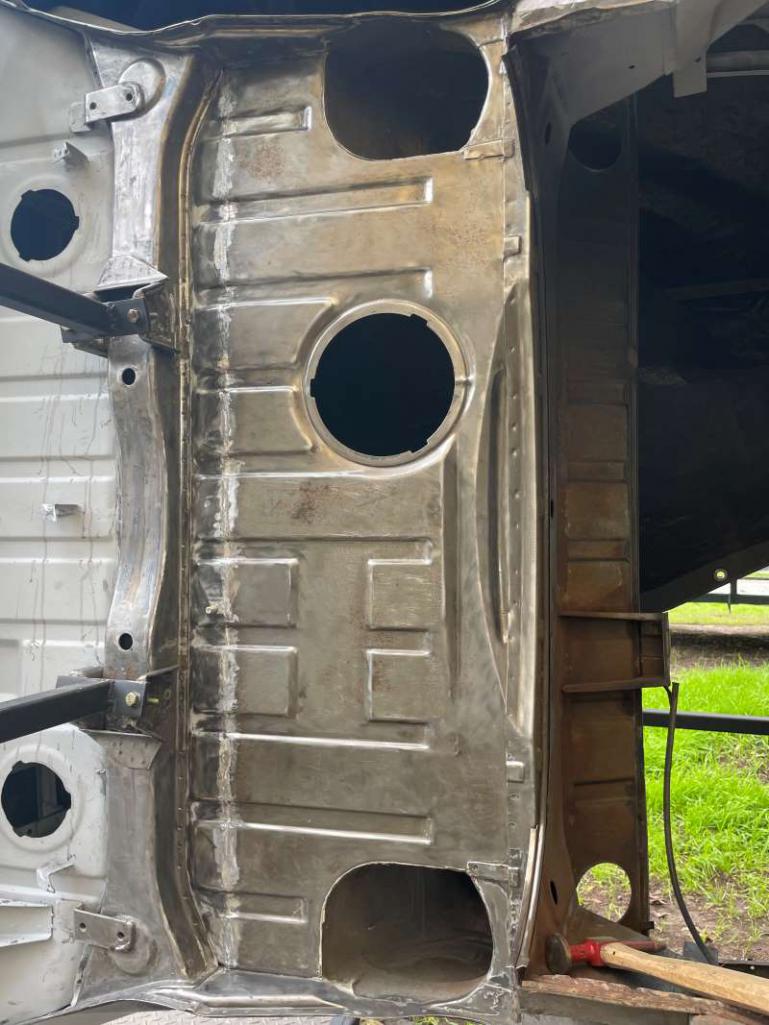 I then worked the entire area with metal etching for 30 minutes using a 3M scuff pad. This process removed all the rust and contaminants and prepare the surface for primer. I decided to go with a cheaper, non-weld thru primer as a temporary coating. I will likely remove it later and lay down a DTM epoxy once the majority of the bottom part of this car is ready. 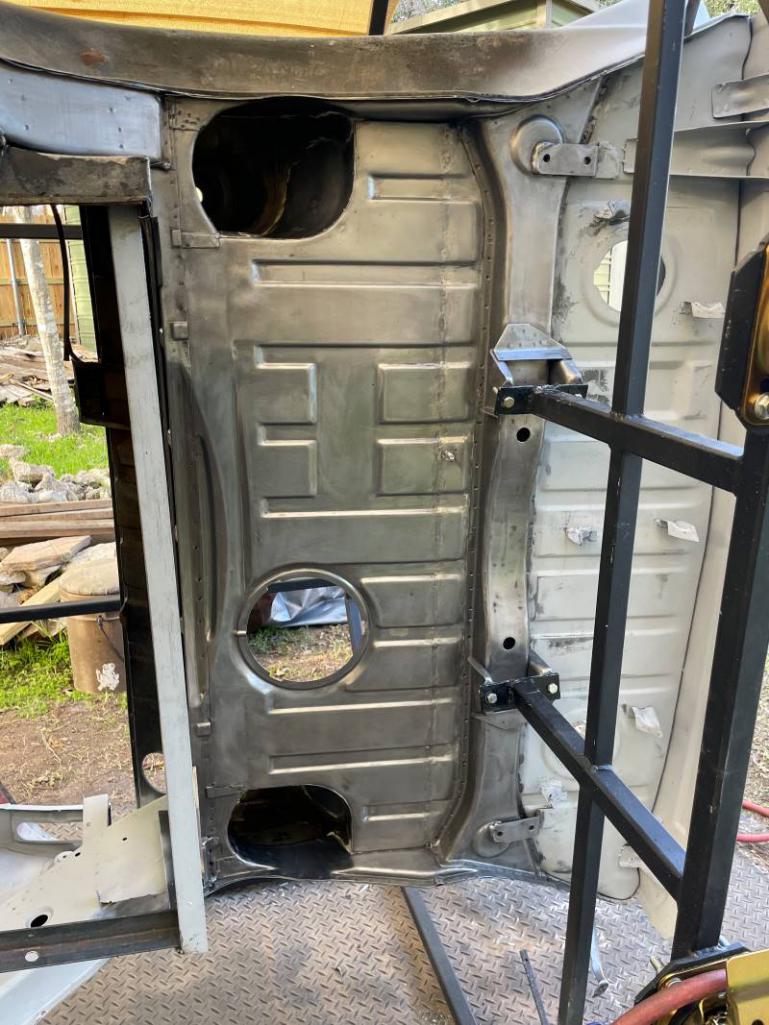 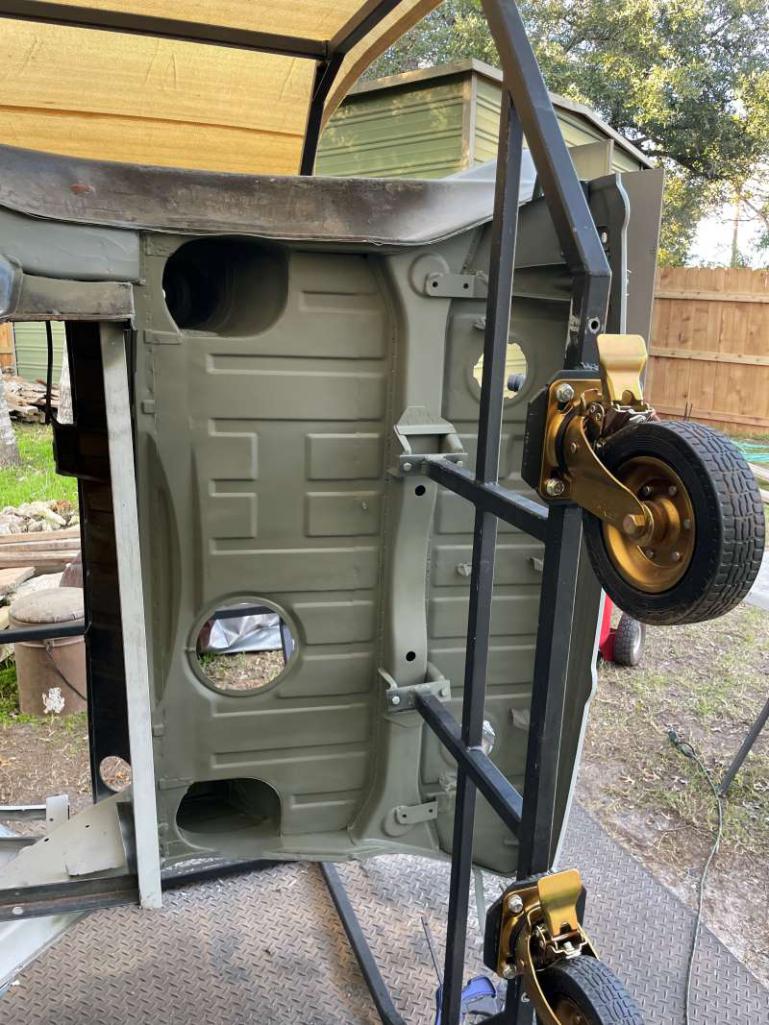 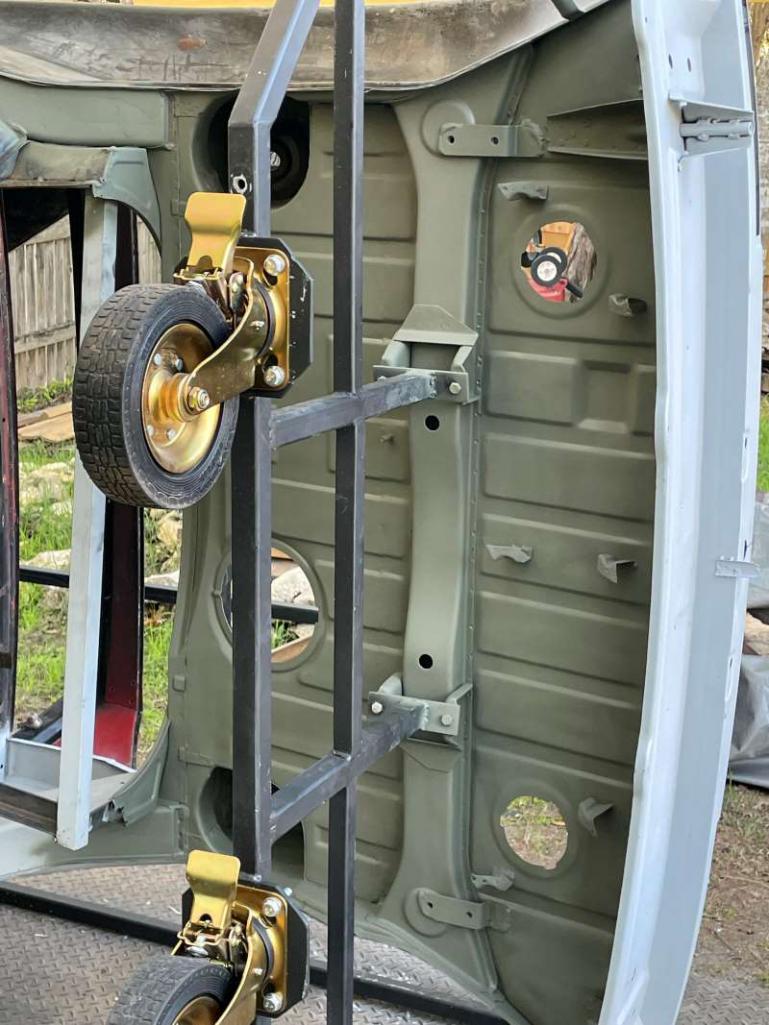 |
|
|
|
| East coaster |
Dec 29 2023, 06:00 PM
Post
#86
|
|
Senior Member Group: Members Posts: 1,949 Joined: 28-March 03 From: Millville, NJ Member No.: 487 Region Association: None |
Great work!
|
|
|
|
| friethmiller |
Dec 29 2023, 08:05 PM
Post
#87
|
|
Senior Member Group: Members Posts: 1,358 Joined: 10-February 19 From: Austin, TX Member No.: 22,863 Region Association: Southwest Region |
QUOTE(East coaster @ Dec 29 2023, 06:00 PM)  Great work! Hey thanks! Stay tuned. I just started the drivers side longitudinal yesterday. Will post pics soon. |
|
|
|
| technicalninja |
Dec 29 2023, 08:32 PM
Post
#88
|
|
Advanced Member Group: Members Posts: 2,531 Joined: 31-January 23 From: Granbury Texas Member No.: 27,135 Region Association: Southwest Region |
Truely impressive!
(IMG:style_emoticons/default/popcorn[1].gif) (IMG:style_emoticons/default/popcorn[1].gif) (IMG:style_emoticons/default/popcorn[1].gif) (IMG:style_emoticons/default/popcorn[1].gif) Hey, I just had a thought! You're going to need a place to store that rotisserie when you're done. I know of a really good spot... Bout 40' from where I'm sitting right now. |
|
|
|
| friethmiller |
Dec 29 2023, 08:49 PM
Post
#89
|
|
Senior Member Group: Members Posts: 1,358 Joined: 10-February 19 From: Austin, TX Member No.: 22,863 Region Association: Southwest Region |
QUOTE(technicalninja @ Dec 29 2023, 08:32 PM) Truely impressive! (IMG:style_emoticons/default/popcorn[1].gif) (IMG:style_emoticons/default/popcorn[1].gif) (IMG:style_emoticons/default/popcorn[1].gif) (IMG:style_emoticons/default/popcorn[1].gif) Hey, I just had a thought! You're going to need a place to store that rotisserie when you're done. I know of a really good spot... Bout 40' from where I'm sitting right now. Sure! You are welcome to borrow it when I’m done. It might be a little while. Still have a lot of rust damage to repair (IMG:style_emoticons/default/blink.gif) |
|
|
|
| friethmiller |
Jan 1 2024, 11:02 AM
Post
#90
|
|
Senior Member Group: Members Posts: 1,358 Joined: 10-February 19 From: Austin, TX Member No.: 22,863 Region Association: Southwest Region |
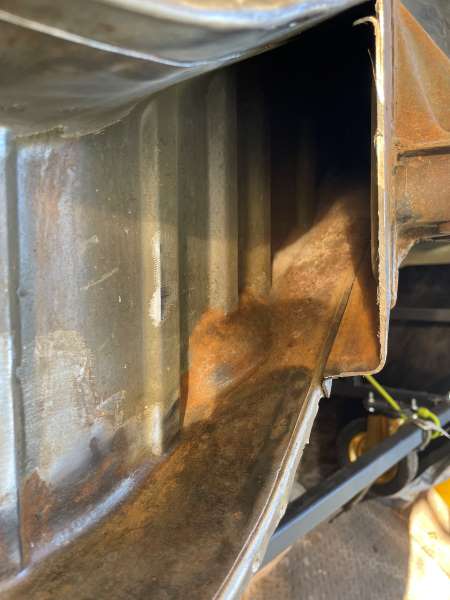
Drivers Side Longitudinal - Part 1 (12/30/2023): Here we go on the other side! Snapped some good photos on Saturday showing the disassembly and removal of the inner rocker panel and part of the rear inner fender. This is my 4th longitudinal repair and I'm starting to get a little more efficient. Since the rocker is in good shape and I will likely reuse the part, I will attempt to remove the rocker with the inner fender that includes the jack post and the area up to the outer suspension console.
I start by drilling out the spot welds. This is a very tedious process that works best with sharp drill bits and oil. I used a cap full of chain saw oil since it's what I had available. The following photos show the process of removing components, making strategic cuts to eventually free the metal and expose the longitudinal. 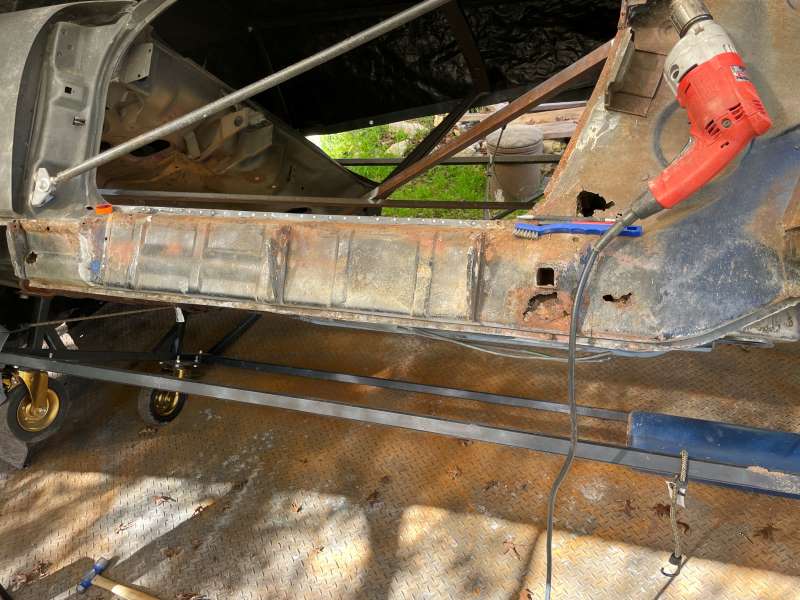 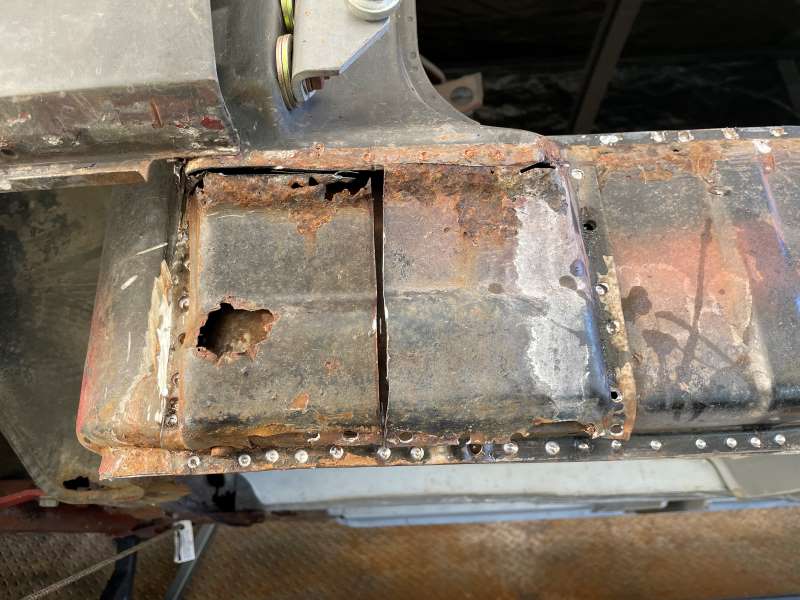 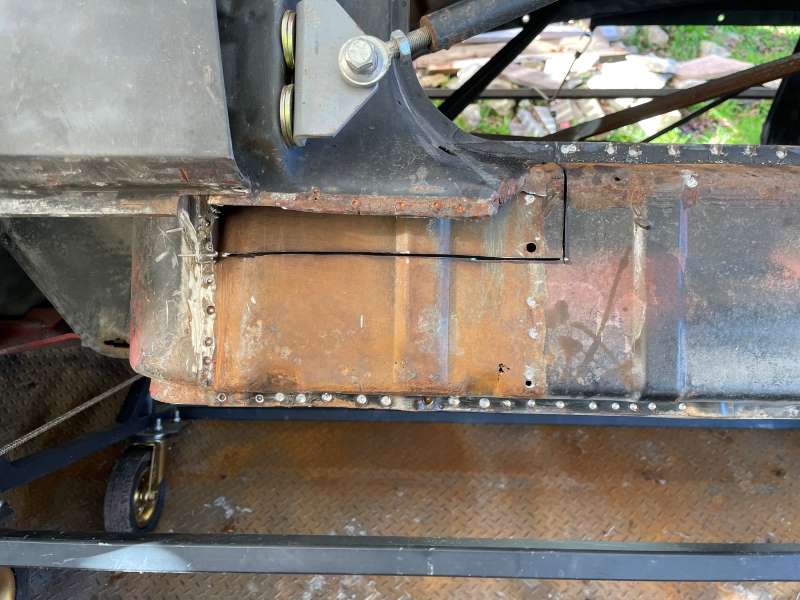 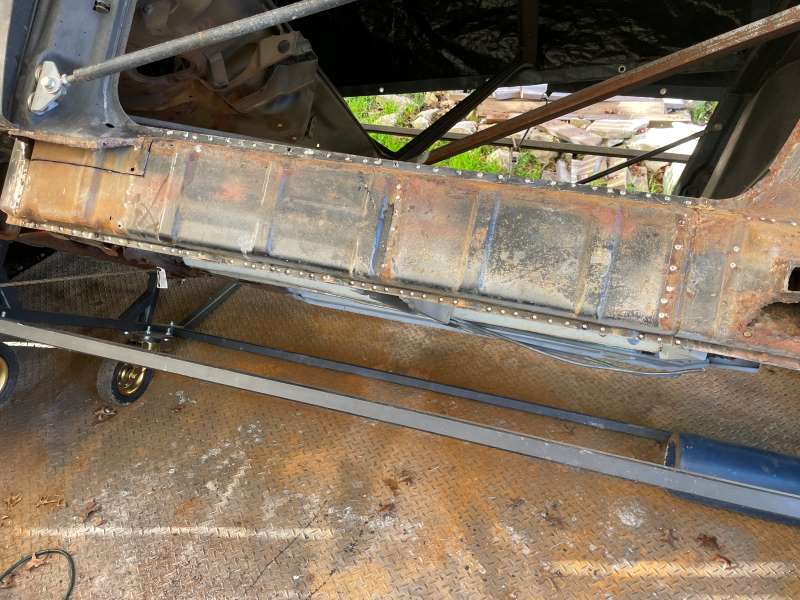 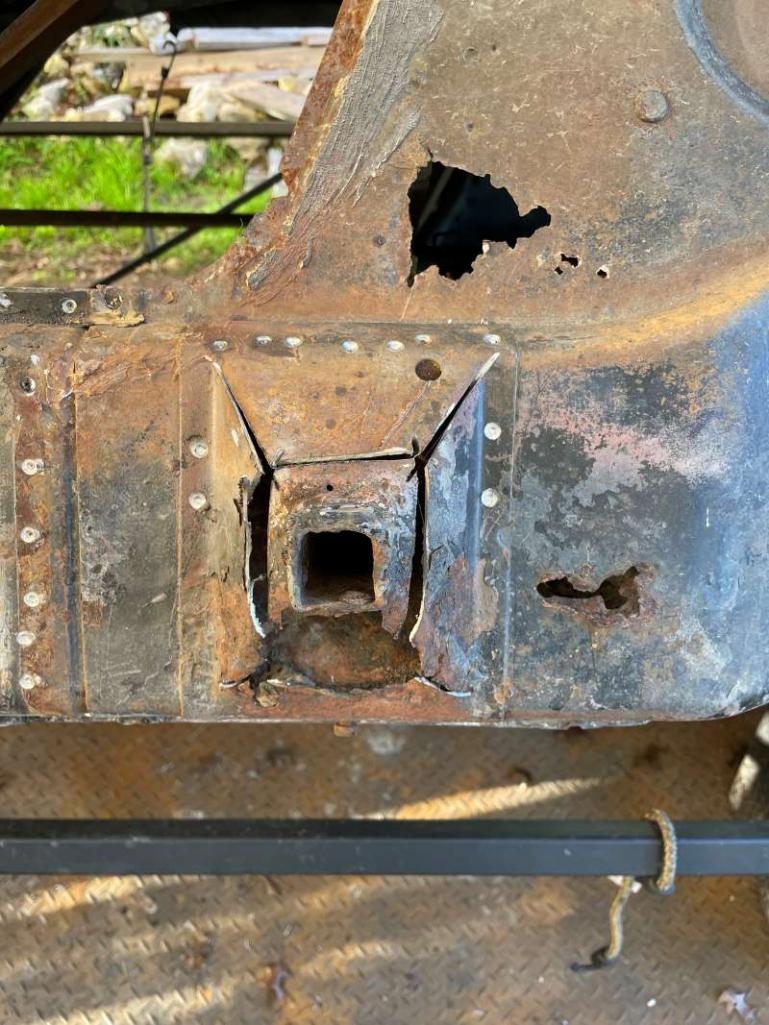 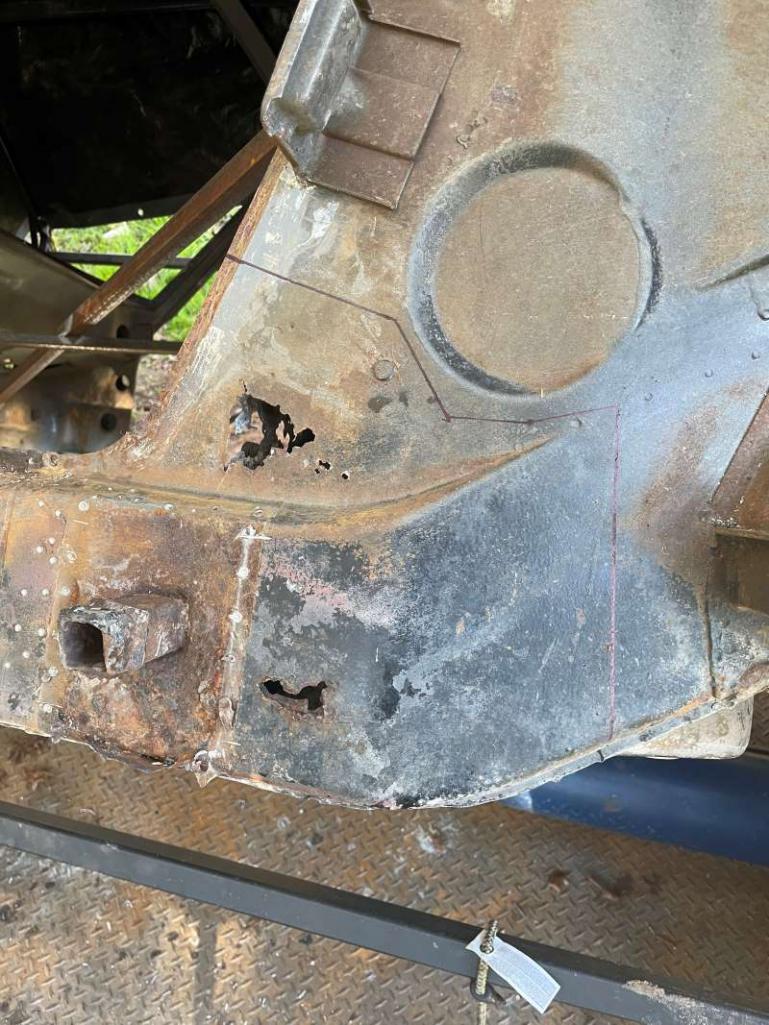 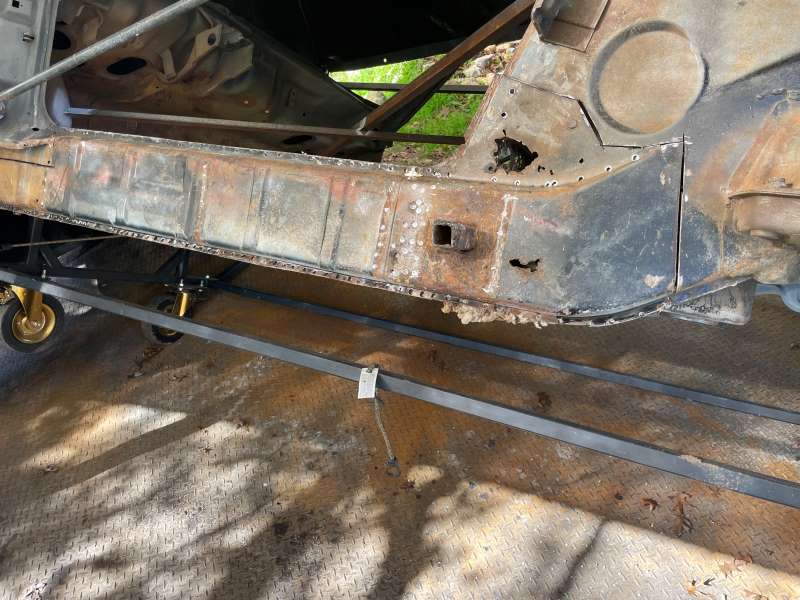 With the metal removed, you can now see the large mouse nest. Nice! With my PPE still on I removed it and started the process to remove the heater pipe, clips, and the back section of the front inner fender. Next, I drilled out the retainers for the two heater elbow pipes (a real PIA), which finally exposed the entire longitudinal. This one is by far the best one I've ever seen! 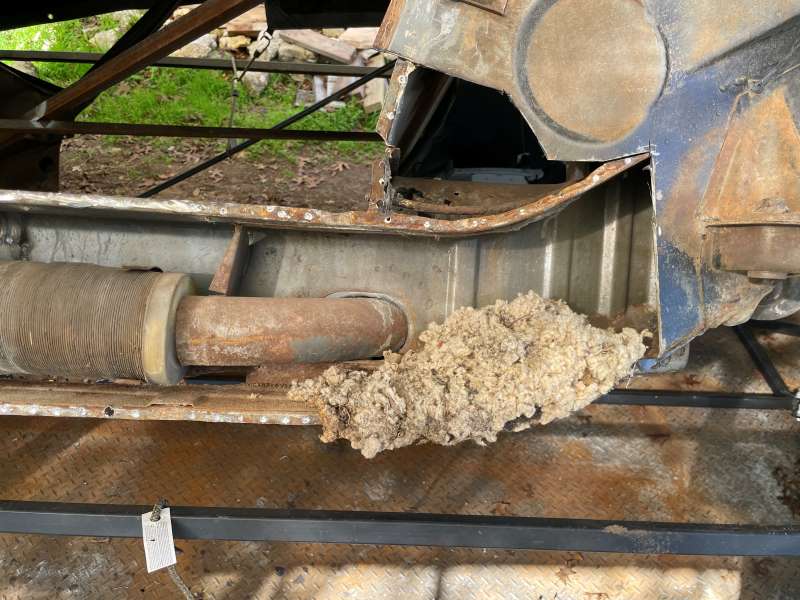  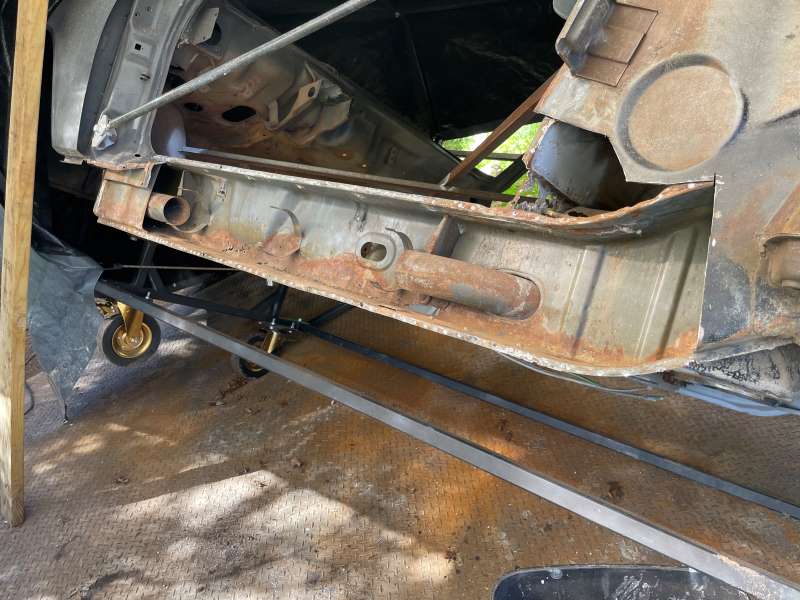 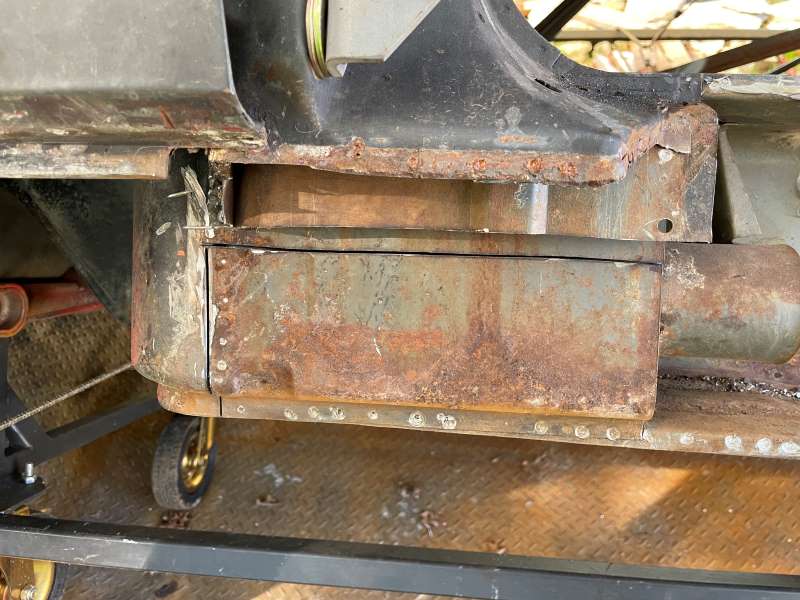 Final shot at the longitudinal, which will be my starting point, and a lovely pic of me with my PPE. 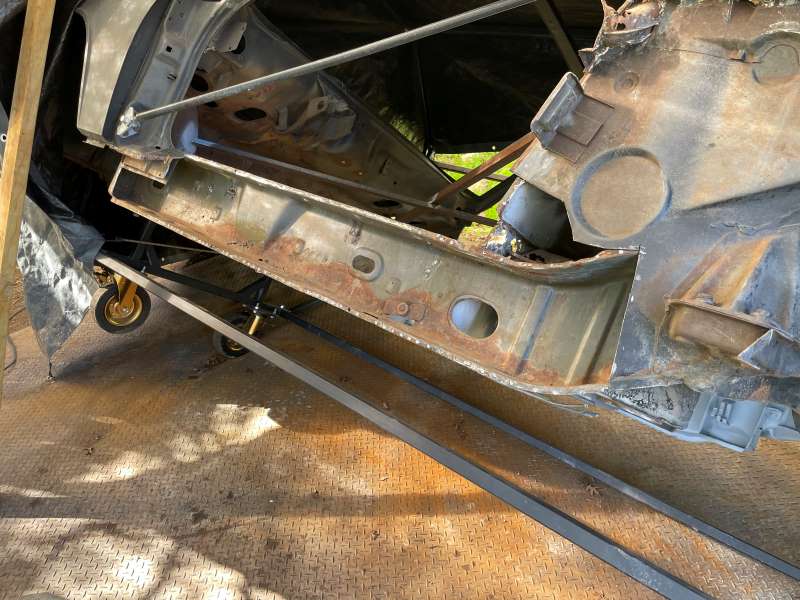 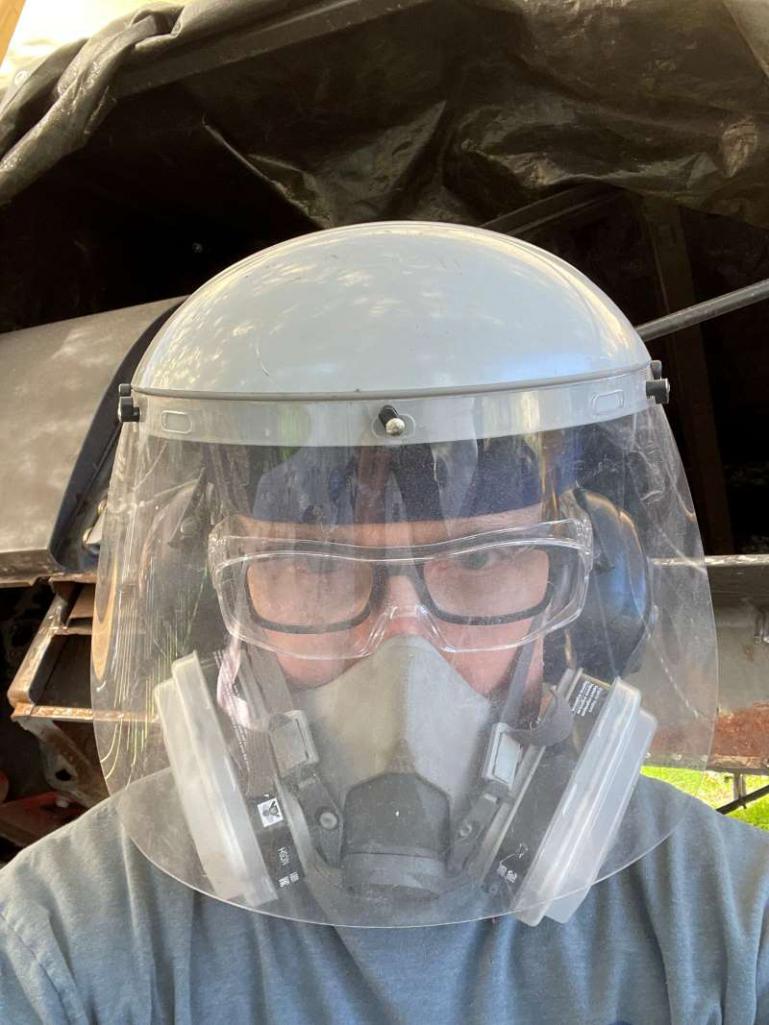 |
|
|
|
| SirAndy |
Jan 1 2024, 12:41 PM
Post
#91
|
|
Resident German Group: Admin Posts: 42,486 Joined: 21-January 03 From: Oakland, Kalifornia Member No.: 179 Region Association: Northern California |
|
|
|
|
| JeffBowlsby |
Jan 1 2024, 12:58 PM
Post
#92
|
|
914 Wiring Harnesses & Beekeeper Group: Members Posts: 9,301 Joined: 7-January 03 From: San Ramon CA Member No.: 104 Region Association: None |
Those heat duct mufflers are available new if you need to replace them. PN 91157202502
|
|
|
|
| technicalninja |
Jan 1 2024, 03:42 PM
Post
#93
|
|
Advanced Member Group: Members Posts: 2,531 Joined: 31-January 23 From: Granbury Texas Member No.: 27,135 Region Association: Southwest Region |
What you are accomplishing with this thread has changed my opinion about you...
The sheet metal restoration you have "in progress" is one of the HARDER jobs for any tech out there. You're VAPORIZING it! I pray I can do work to your quality level, and I will be your "student" regarding this type of work. When you come up to have me check out/recharge the 914 you will be the student. We will do the work with inexpensive tools that you can afford. I will show you the "tricks", give you an 'understanding of how refrigerant systems work'. Give you most of the knowledge and sources you will need. When we finish, I will EXPECT you to do your AC work YOURSELF from that point on... I will not give you any slack about that. Weather you know it or not, you are a FULL tech and will be treated as such. This is both a blessing and a CURSE! I have a "nice filter" that I use on the forums and with my customers. For my buddies, my friends, my equals I DO NOT. You screw up, like filling your diesel gas tank with DEF, I will never let it go... From now on my friend Leonard will hear "Piss in the gas tank again?" You're in that group now! Most customers I have wait in the office, you will be expected to be in the shop actually working on your own car. I'm POSITIVE that it will not phase you at all. You'll end up saying "Damn, that's easier than I thought. There's nothing to it..." I will need multiple hours of instruction and assistance in my metalwork progression. You'll get the AC stuff down in a couple of hours tops! The AC knowledge will apply to everything you own in the future. If you're not doing the work yourself, you will be able to tell if the shop that is doing the work has a clue about what they are doing (this is a HUGE problem) and is honest. Happy New Year! |
|
|
|
| friethmiller |
Jan 1 2024, 05:53 PM
Post
#94
|
|
Senior Member Group: Members Posts: 1,358 Joined: 10-February 19 From: Austin, TX Member No.: 22,863 Region Association: Southwest Region |
QUOTE(technicalninja @ Jan 1 2024, 03:42 PM) What you are accomplishing with this thread has changed my opinion about you... The sheet metal restoration you have "in progress" is one of the HARDER jobs for any tech out there. You're VAPORIZING it! I pray I can do work to your quality level, and I will be your "student" regarding this type of work. When you come up to have me check out/recharge the 914 you will be the student. We will do the work with inexpensive tools that you can afford. I will show you the "tricks", give you an 'understanding of how refrigerant systems work'. Give you most of the knowledge and sources you will need. When we finish, I will EXPECT you to do your AC work YOURSELF from that point on... I will not give you any slack about that. Weather you know it or not, you are a FULL tech and will be treated as such. This is both a blessing and a CURSE! I have a "nice filter" that I use on the forums and with my customers. For my buddies, my friends, my equals I DO NOT. You screw up, like filling your diesel gas tank with DEF, I will never let it go... From now on my friend Leonard will hear "Piss in the gas tank again?" You're in that group now! Most customers I have wait in the office, you will be expected to be in the shop actually working on your own car. I'm POSITIVE that it will not phase you at all. You'll end up saying "Damn, that's easier than I thought. There's nothing to it..." I will need multiple hours of instruction and assistance in my metalwork progression. You'll get the AC stuff down in a couple of hours tops! The AC knowledge will apply to everything you own in the future. If you're not doing the work yourself, you will be able to tell if the shop that is doing the work has a clue about what they are doing (this is a HUGE problem) and is honest. Happy New Year! Wow! This is the nicest compliment I’ve ever received on any of my “sheet metal” work. Thank you ☺️. My wife and I will be heading up your way sometime before March. I’ll DM you. I look forward to learning all that A/C stuff. I only know the basics and what each component does but that’s about it. I had a great weekend working on the Porsche. More progress to post this evening. |
|
|
|
| friethmiller |
Jan 1 2024, 06:37 PM
Post
#95
|
|
Senior Member Group: Members Posts: 1,358 Joined: 10-February 19 From: Austin, TX Member No.: 22,863 Region Association: Southwest Region |
QUOTE(JeffBowlsby @ Jan 1 2024, 12:58 PM) Those heat duct mufflers are available new if you need to replace them. PN 91157202502 Thanks Jeff! |
|
|
|
| friethmiller |
Jan 1 2024, 08:49 PM
Post
#96
|
|
Senior Member Group: Members Posts: 1,358 Joined: 10-February 19 From: Austin, TX Member No.: 22,863 Region Association: Southwest Region |
Drivers Side Longitudinal - Part 2 (12/31/2023): After a quick wire wheel of the longitudinal, you can see that the metal is in good shape. However, there are several small holes down the rail and a few larger holes through both skin and support metal around the seat belt bolt area. Unlike most I've seen, this longitudinal looks like it has rusted from the outside -> in. Note: the upper rail around the rear suspension really looks good. I don't see any holes.
 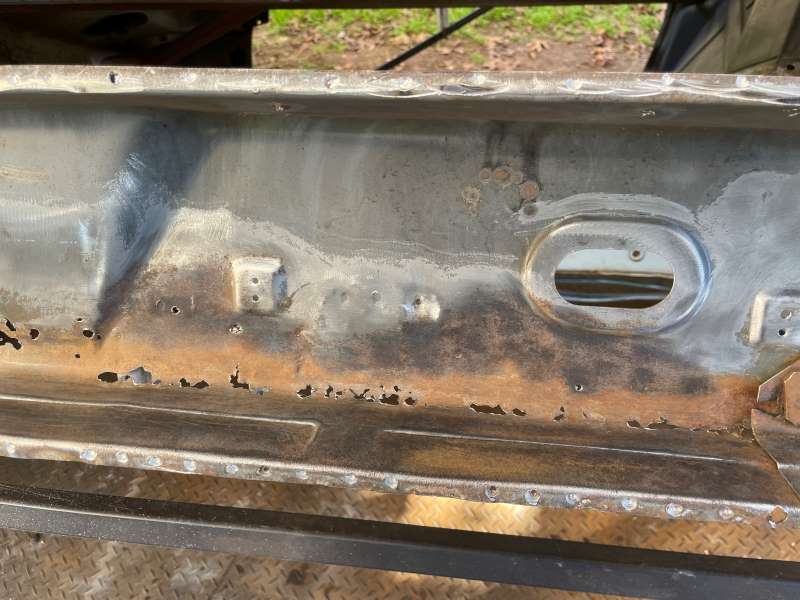 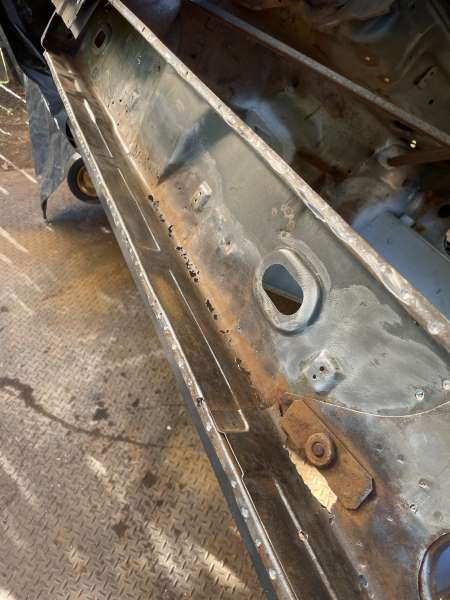  Knowing that this car sat exposed in a field with a bed of leaves in the floor makes sense from what I'm was seeing from other side of the longitudinal. Here I have flipped the car on its side to attack the damage. My plan was to treat the rust in order to identify the troubled areas, and then replace the metal showing the deep pits. Note the cuts around the heater clip attachment point and how I pass this from one patch to the other. 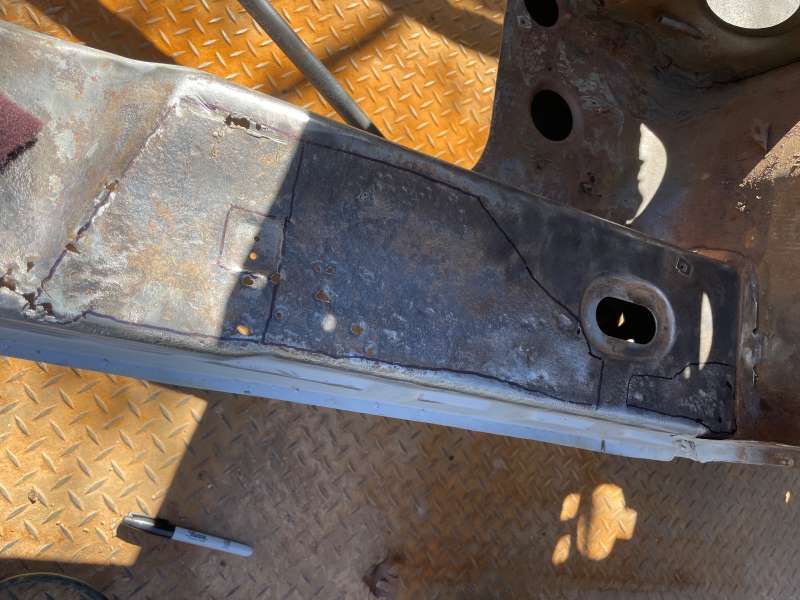 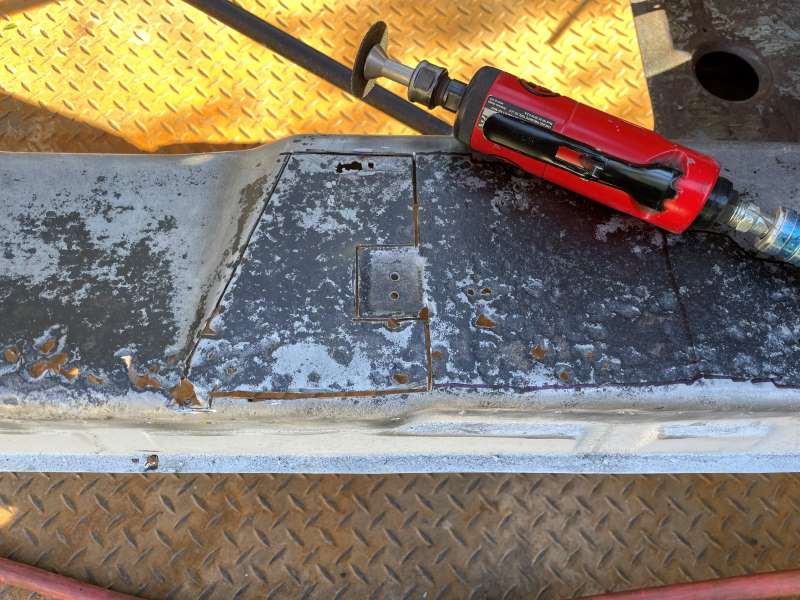 Next photos show how the first and second patches were welded into place. The blue panel clamps really help when butt welding. The last two images show the patches complete just as I was losing the light of day. 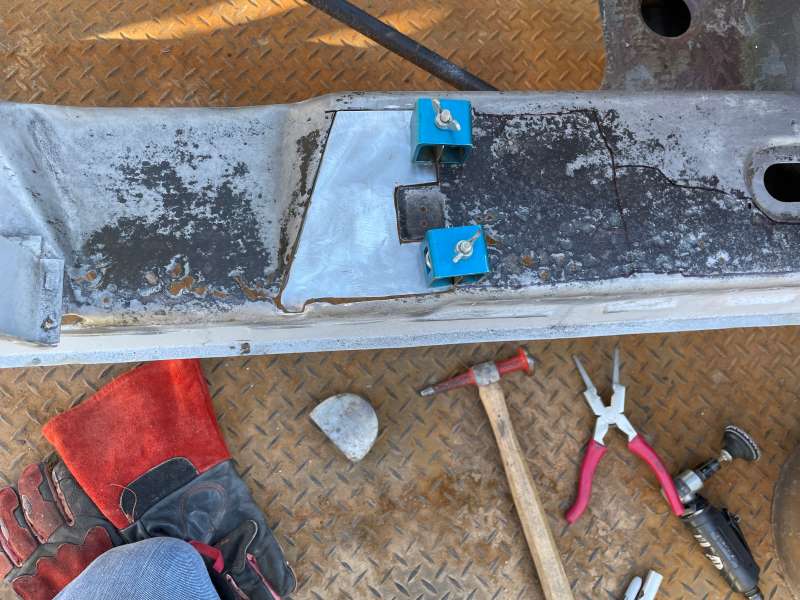 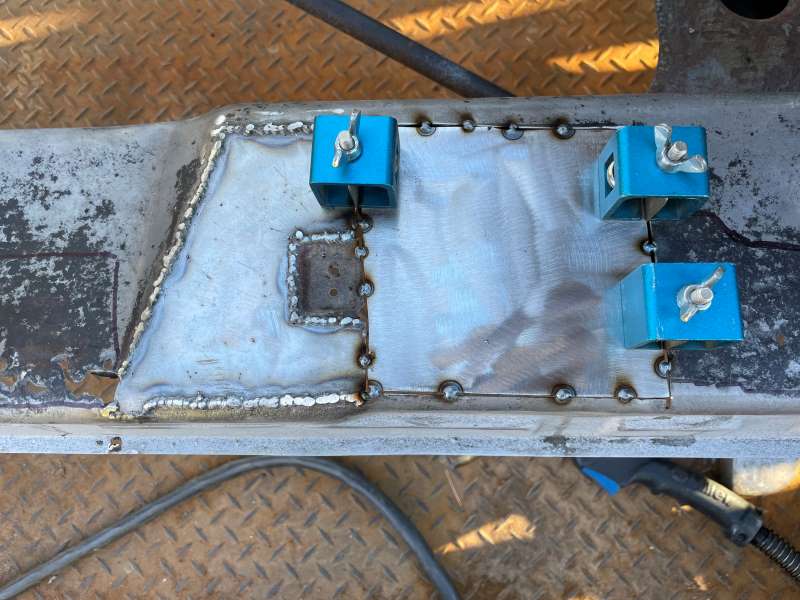 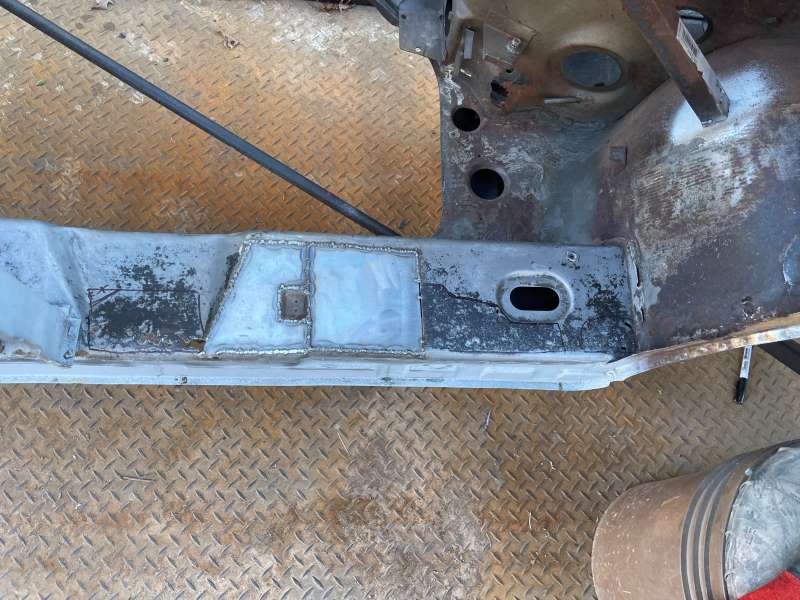 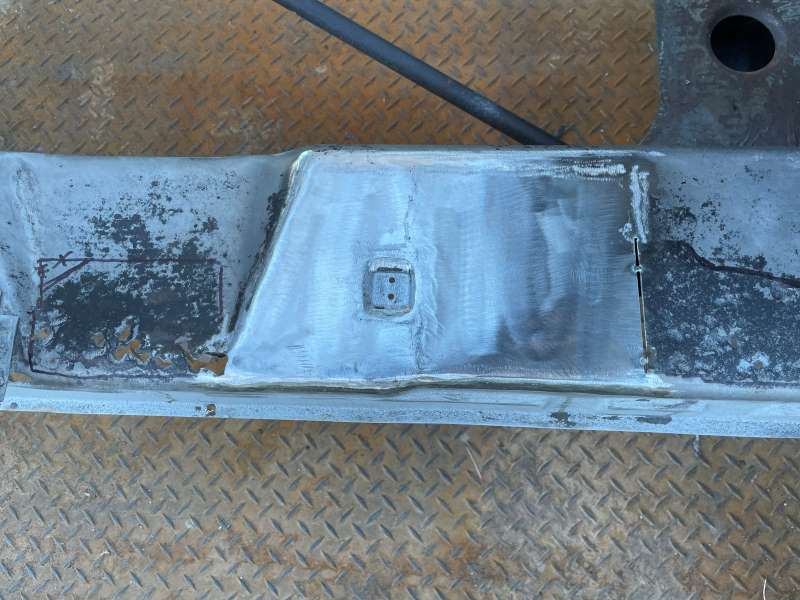 |
|
|
|
| friethmiller |
Jan 2 2024, 10:19 AM
Post
#97
|
|
Senior Member Group: Members Posts: 1,358 Joined: 10-February 19 From: Austin, TX Member No.: 22,863 Region Association: Southwest Region |
Drivers Side Longitudinal - Part 3 (1/1/2024): Most of my day was spent taking down Christmas lights but I did manage to weld in two more patches. Light was fading on me so I quit before grinding my welds. Note: I over cut my first patch, which left a bit of a gap along the top edge. Not ideal but made it work. Just a few photos.
    |
|
|
|
| friethmiller |
Jan 7 2024, 08:10 PM
Post
#98
|
|
Senior Member Group: Members Posts: 1,358 Joined: 10-February 19 From: Austin, TX Member No.: 22,863 Region Association: Southwest Region |
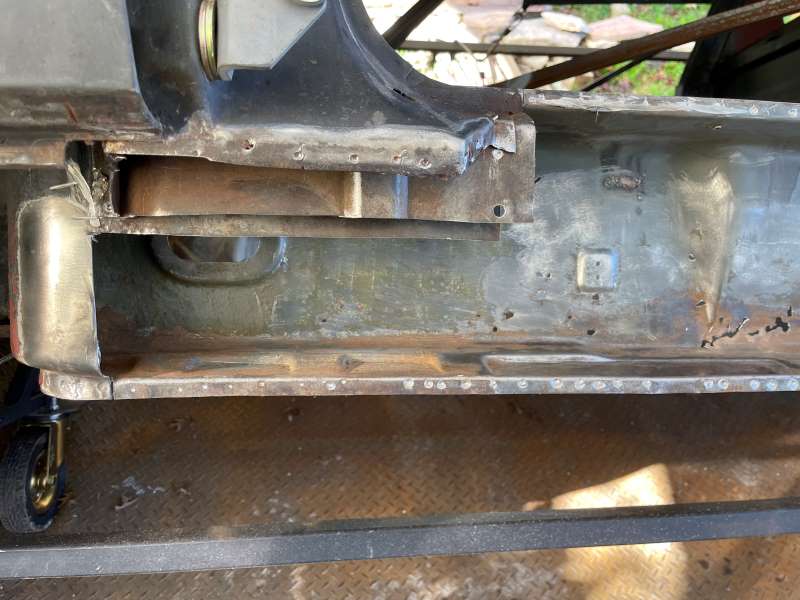
Drivers Side Longitudinal - Part 4 (1/6 - 1/7/2024): Made decent progress on the longitudinal this weekend. I started where I left off with the two patches that needed to be ground down a bit. Nothing too fancy here, I just needed the repaired section treated so it doesn't flash-rust. We've had a bit of rain lately and being outside isn't ideal for bare metal.
    A quick look at the remaining damage on the longitudinal. After some thought, I decided it would be easier to do the next part of the repair from the other side. 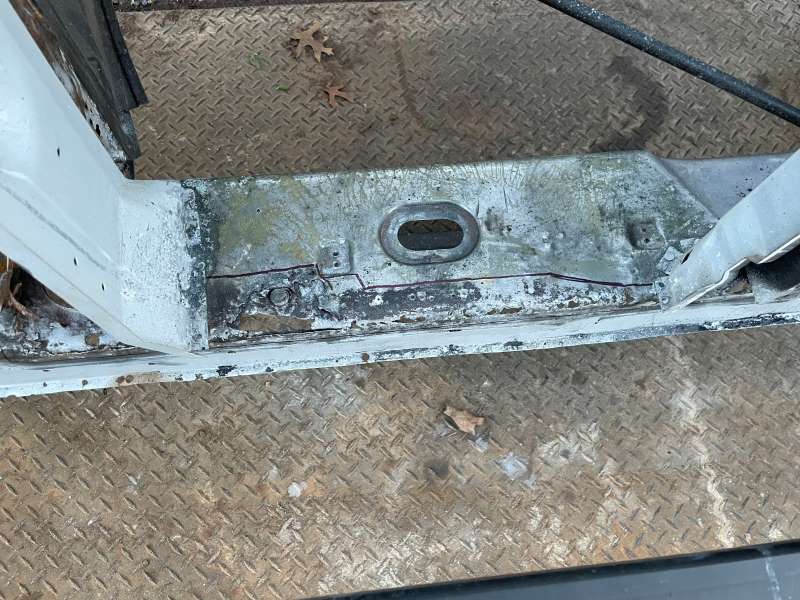 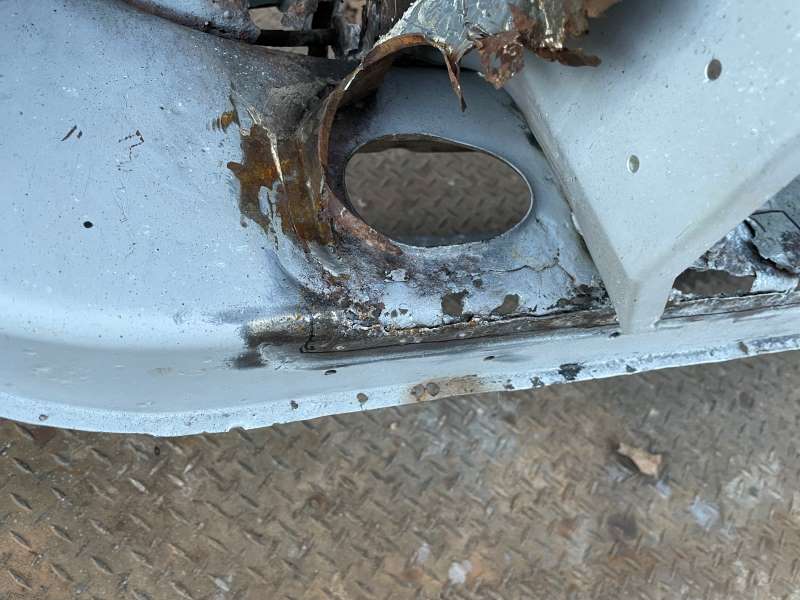 So, I rotated the car around to the 45 on the drivers side and removed the inner support metal, since it was in the way. This support metal will be restored off the car and welded back in later. Here you can see the repairs to the front and the remaining rust holes in the rear of the longitudinal. You can also see the marks where I plan to cut the bad metal. 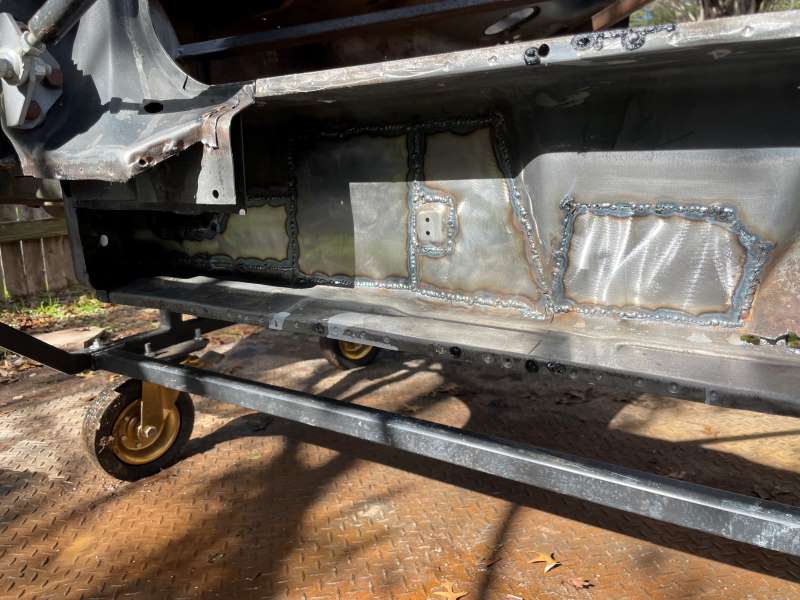 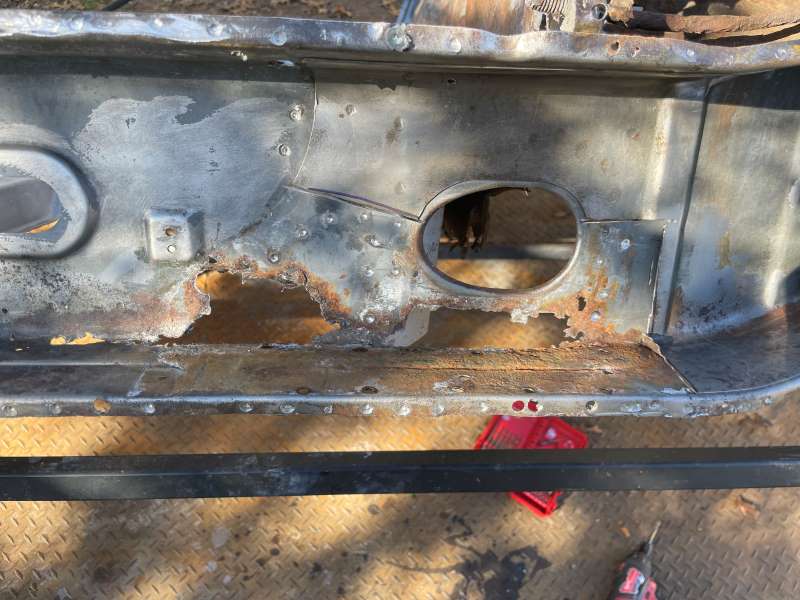 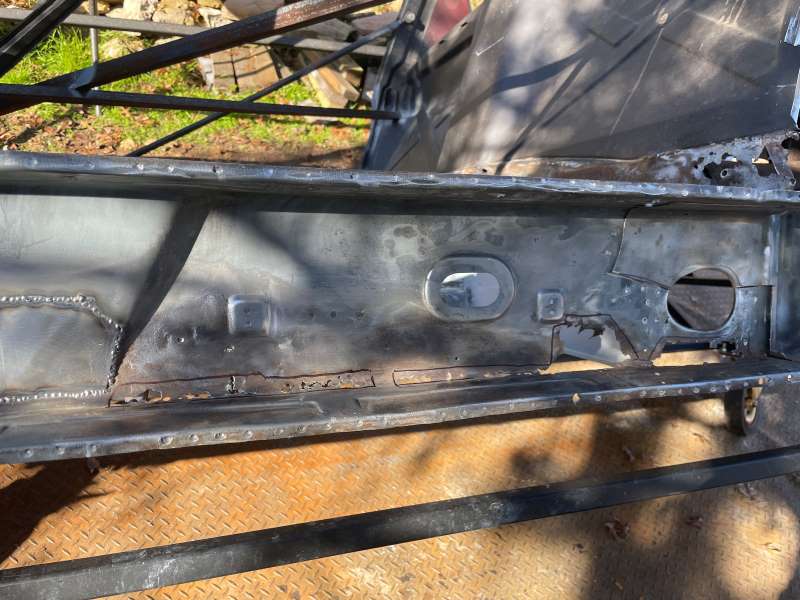 After working a good while on the fit, I started tacking in each patch. It took several passes, stitch-welding around the perimeter of the repair, to get it all done. Note: I had to use a lot of compressed air to keep the metal from getting too hot. You may notice the slight warp in the longitudinal edge in a few of the photos. This is due to me removing internal bend of the longitudinal and not from me over-heating it. I did have to make several minor adjustments with my hands as I went along to make sure I had the correct width to the opening of the longitudinal in the end. 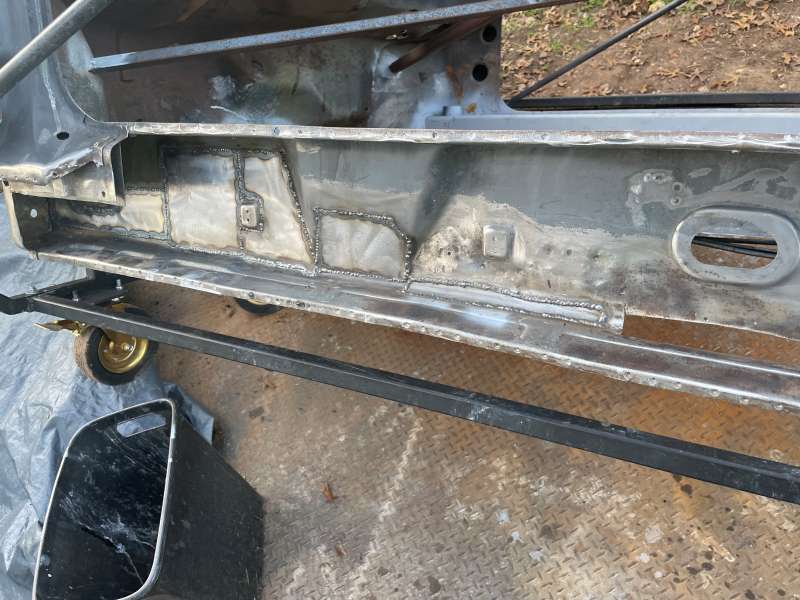 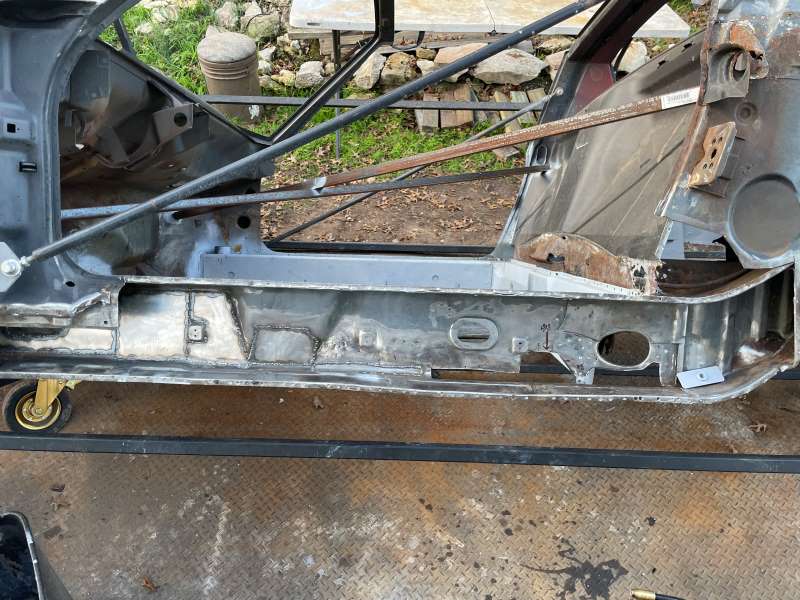 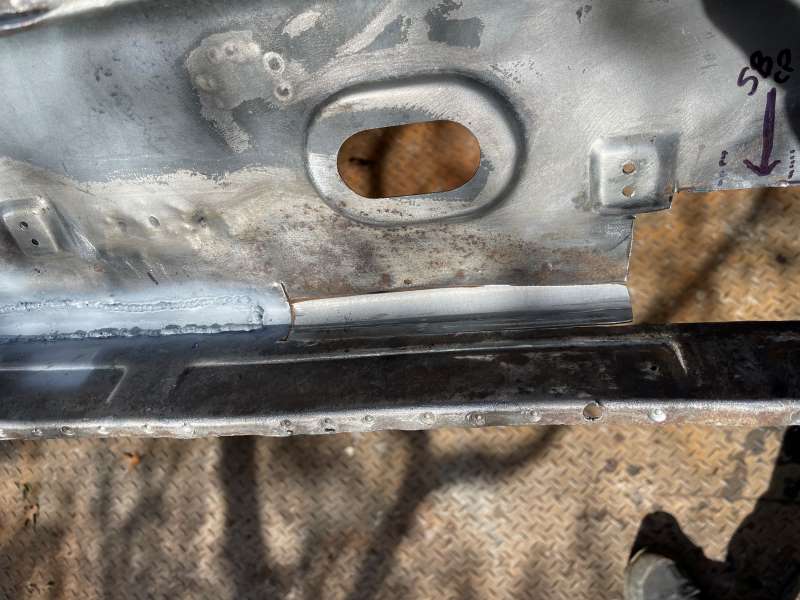 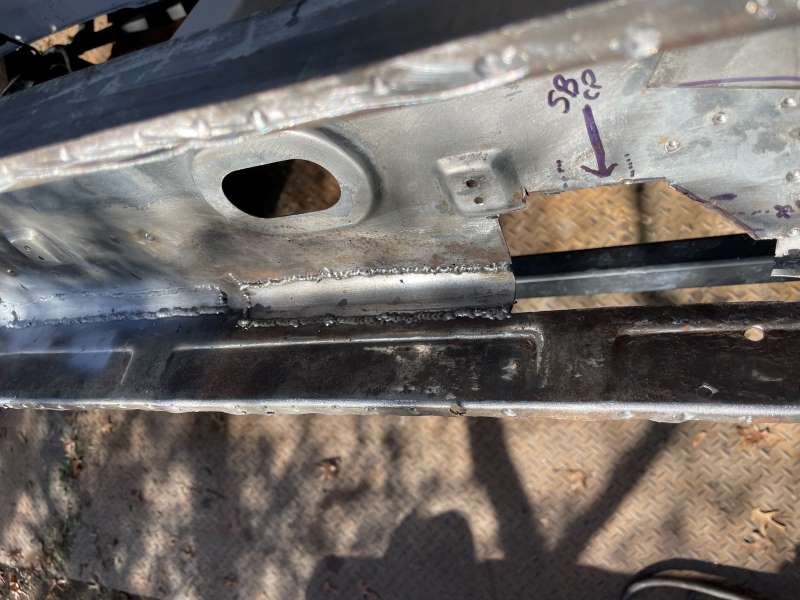 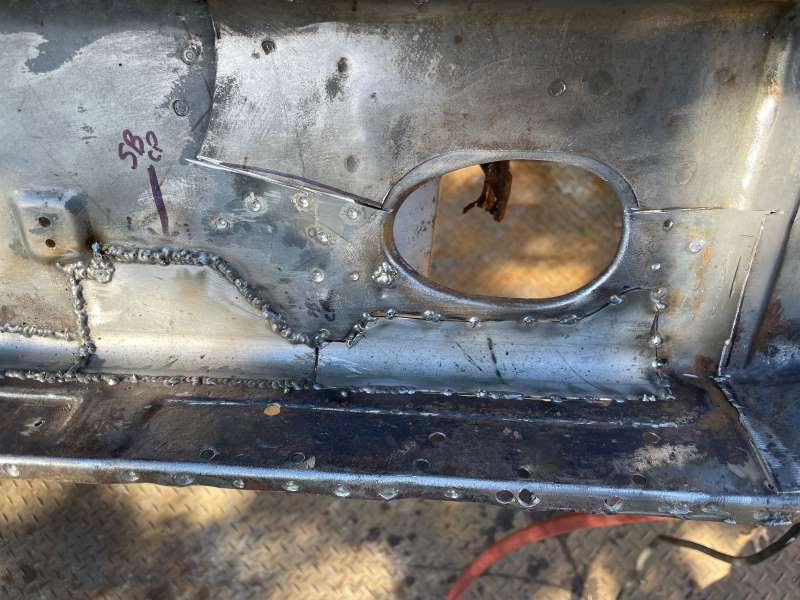 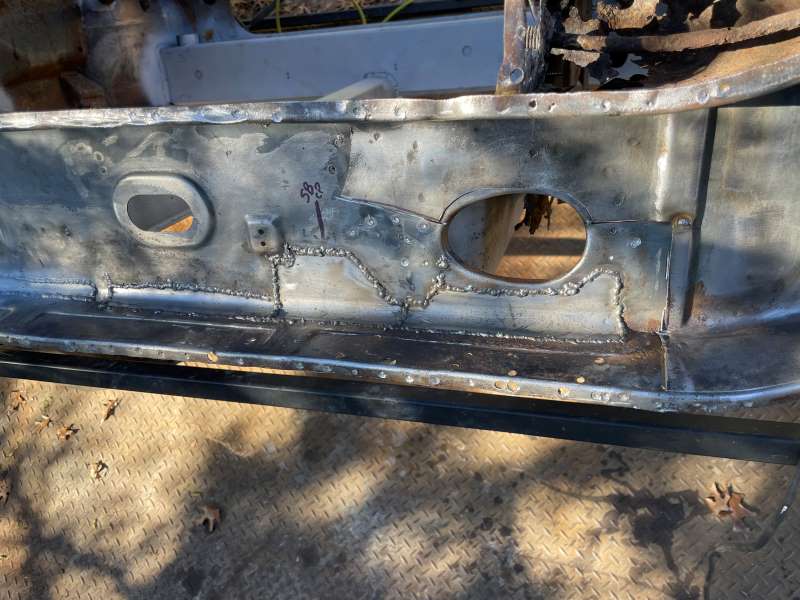 After all four patches were finished, I took a "first pass" at grinding down the welds that will need to be flush for the support metal to lay flat. Not done with all of this yet but it's getting there (IMG:style_emoticons/default/biggrin.gif) With rain expect tomorrow, I did a quick etch along the entire inside of the longitudinal and then covered the car.  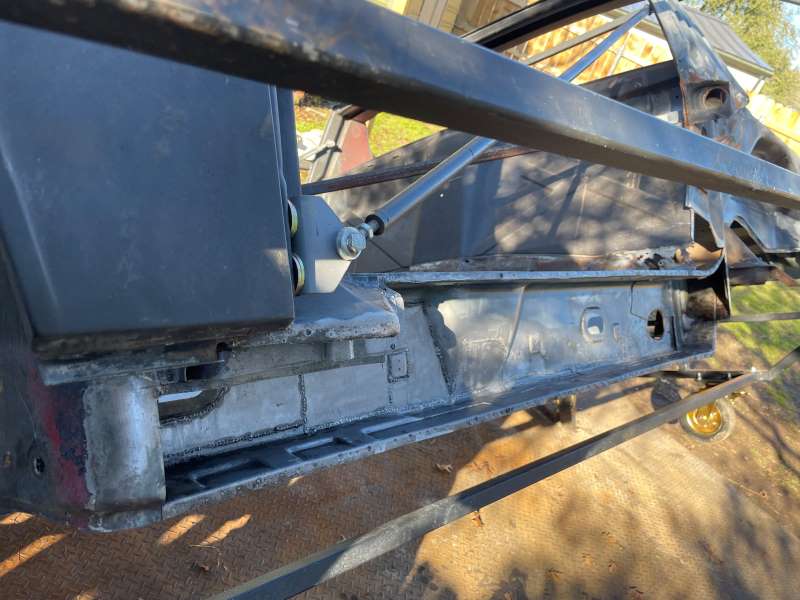 |
|
|
|
| Dion |
Jan 8 2024, 08:15 AM
Post
#99
|
|
RN Group: Members Posts: 2,931 Joined: 16-September 04 From: Shepherdstown, WV Member No.: 2,766 Region Association: MidAtlantic Region |
Just catching up on this thread. Simply amazing. What a rescue!
Following for sure. Well done sir. (IMG:style_emoticons/default/beerchug.gif) |
|
|
|
| friethmiller |
Jan 8 2024, 10:02 AM
Post
#100
|
|
Senior Member Group: Members Posts: 1,358 Joined: 10-February 19 From: Austin, TX Member No.: 22,863 Region Association: Southwest Region |
QUOTE(Dion @ Jan 8 2024, 08:15 AM) Just catching up on this thread. Simply amazing. What a rescue! Following for sure. Well done sir. (IMG:style_emoticons/default/beerchug.gif) @Dion - Thanks! I know you know all about this type of repair. I've seen your build thread (IMG:style_emoticons/default/welder.gif) |
|
|
|
|
3 User(s) are reading this topic (3 Guests and 0 Anonymous Users)
0 Members:

|
Lo-Fi Version | Time is now: 4th July 2026 - 02:51 AM |
Invision Power Board
v9.1.4 © 2026 IPS, Inc.