|
|
|
Porsche, and the Porsche crest are registered trademarks of Dr. Ing. h.c. F. Porsche AG.
This site is not affiliated with Porsche in any way. Its only purpose is to provide an online forum for car enthusiasts. All other trademarks are property of their respective owners. |
|
|

  |

| friethmiller |
 May 15 2026, 01:36 PM May 15 2026, 01:36 PM
Post
#921
|
|
Senior Member  Group: Members Posts: 1,266 Joined: 10-February 19 From: Austin, TX Member No.: 22,863 Region Association: Southwest Region |
ToDo List for this Weekend (5/16 - 5/17/2026):
Get ready... there's a lot to be done! Painting
On Car
Engine
|
   |

 
|
| 930cabman |
May 16 2026, 12:33 PM
Post
#922
|
|
Advanced Member Group: Members Posts: 4,664 Joined: 12-November 20 From: Buffalo Member No.: 24,877 Region Association: North East States |
QUOTE(friethmiller @ May 15 2026, 01:36 PM)  ToDo List for this Weekend (5/16 - 5/17/2026): Get ready... there's a lot to be done! Painting
Fred must have several hands (IMG:style_emoticons/default/aktion035.gif) |
|
|
|
| friethmiller |
May 17 2026, 05:39 PM
Post
#923
|
|
Senior Member Group: Members Posts: 1,266 Joined: 10-February 19 From: Austin, TX Member No.: 22,863 Region Association: Southwest Region |
Here's what I actually got done this weekend. I had to adjust the tasks based on the situation. Items in bold were added to the task sheet on Saturday. Detailed posts coming shortly...
Painting
On Car
|
|
|
|
| friethmiller |
May 17 2026, 05:52 PM
Post
#924
|
|
Senior Member Group: Members Posts: 1,266 Joined: 10-February 19 From: Austin, TX Member No.: 22,863 Region Association: Southwest Region |
Rotor Painting and Install (5/15 - 5/16/2026):
I ordered a small can of gray RustBullet to paint these almost brand new rotors that I had in the shed. I ended up painting the tops, insides, and also the edge. I think it came out pretty good. After the paint dried, I just used brake cleaner and #0000 steel wool to clean off the rust and grease. 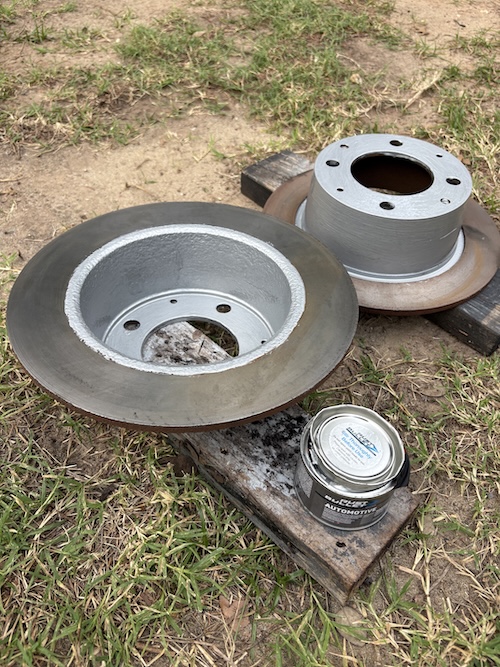 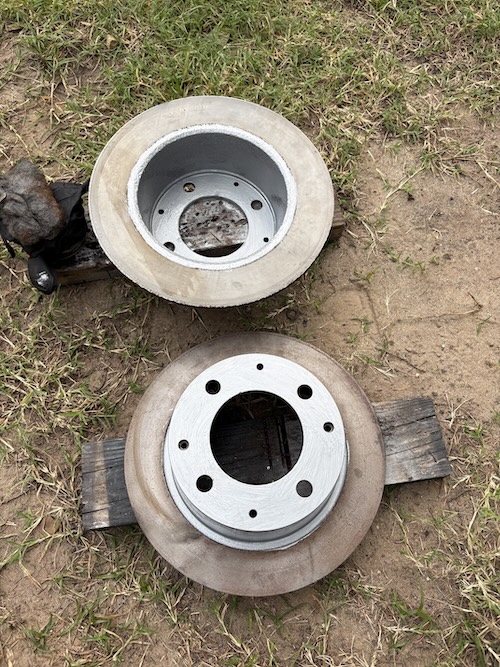 These photos show the dust shields and rotors going on the car. 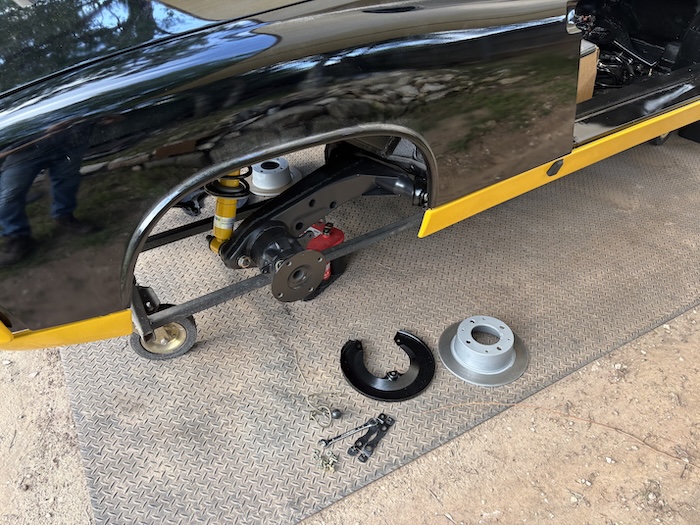 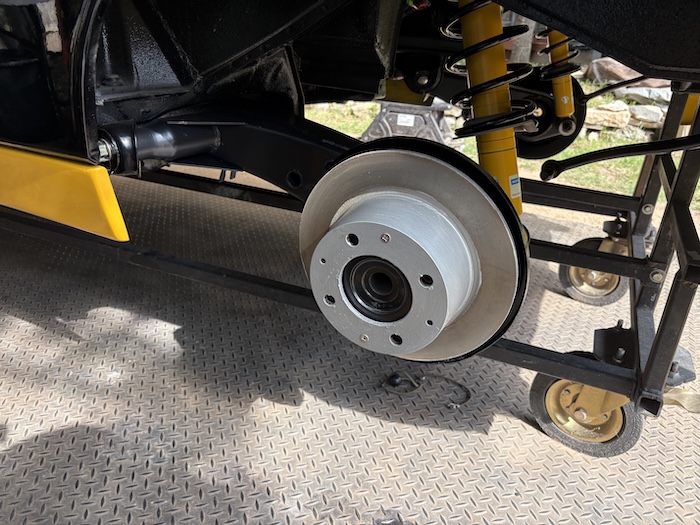 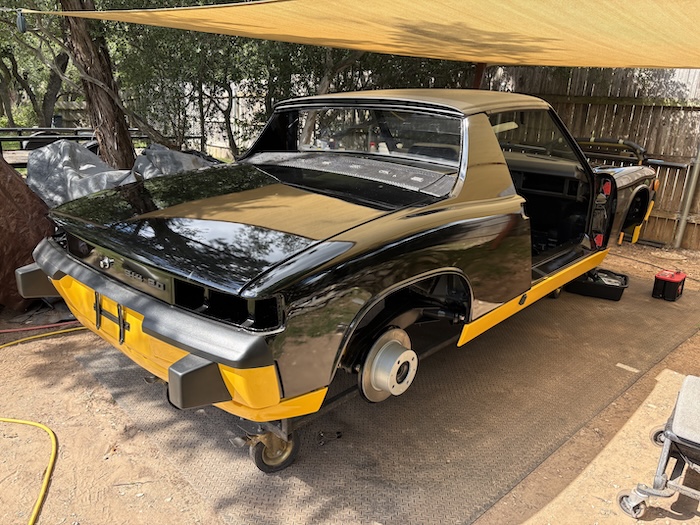 Including this photo to show what's about to be sent out to PMB for a little renovation. More posts/photos coming soon. 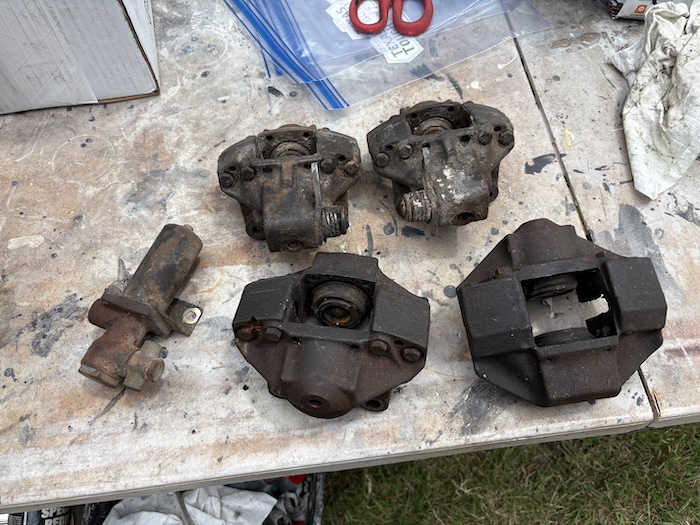 |
|
|
|
| friethmiller |
May 17 2026, 06:25 PM
Post
#925
|
|
Senior Member Group: Members Posts: 1,266 Joined: 10-February 19 From: Austin, TX Member No.: 22,863 Region Association: Southwest Region |
CVs and Half-shafts (5/12 - 5/16/2026):
Leading up to this weekend, I worked on getting the drive shafts and CVs disassembled, cleaned-up, and ready for restoration. First set of photos show the process of removing the bolts and retaining C clips to pull the CVs clear of the shafts. Hard to tell the condition of the parts until all the grease is properly removed. 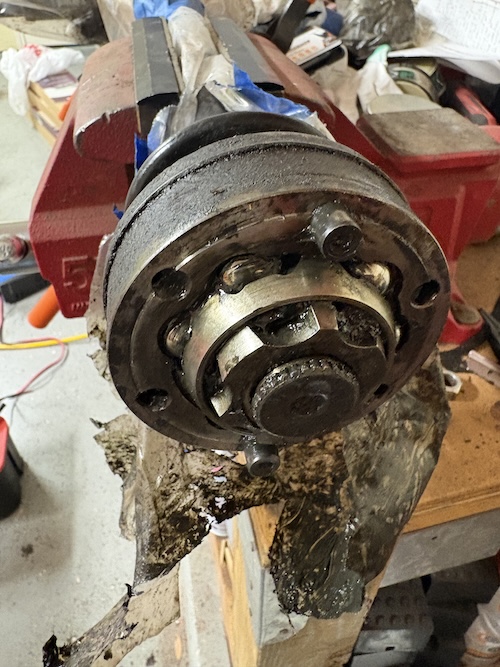 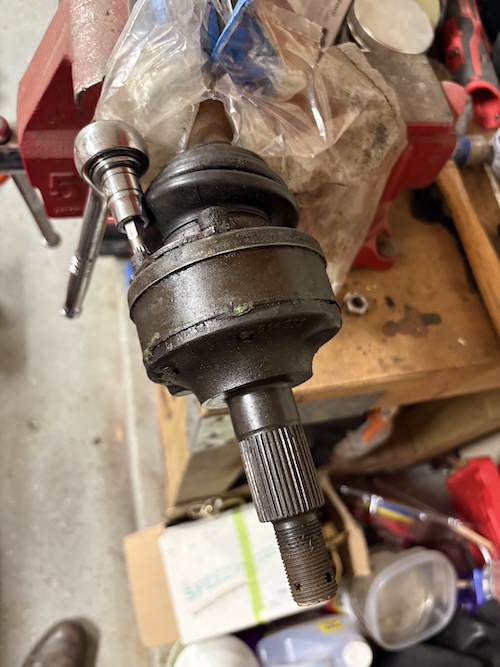 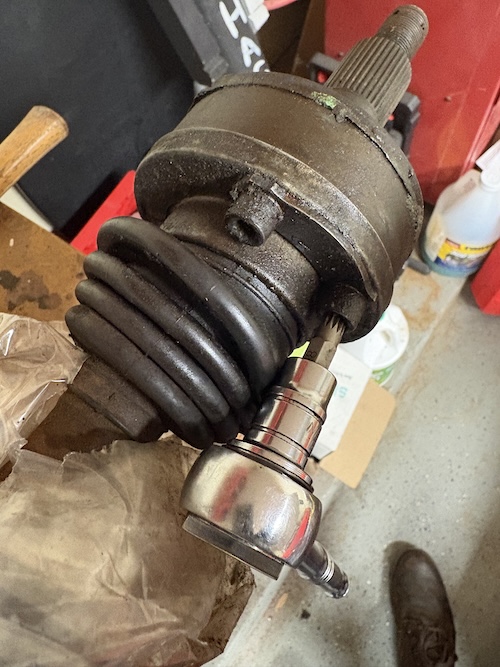 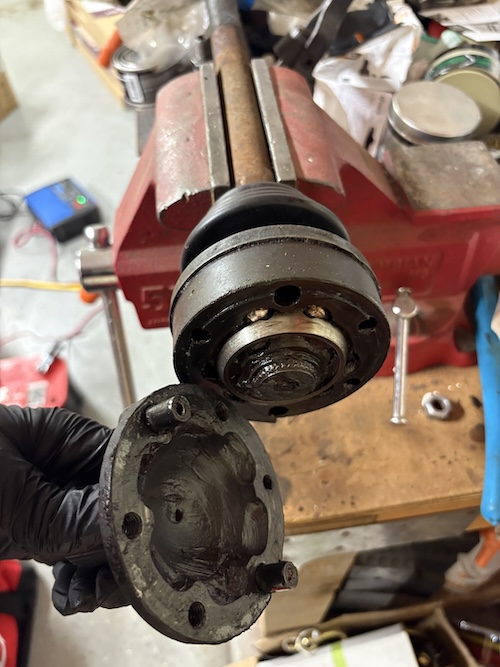 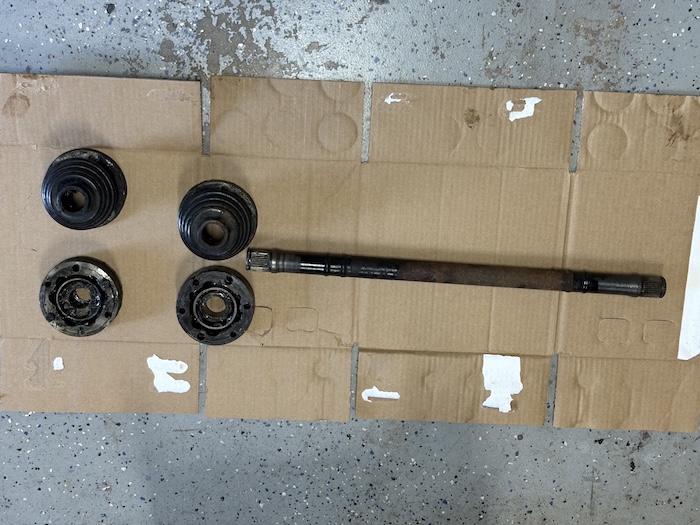 I'm using EcoLabs Degreaser here which was left over from the electro-plating that I did last month. I found this stuff very effect, even when diluted with water. I ended up doing separate "soaking rounds", one for the passenger side and the other for the driver side. I kept the parts from getting all mixed up, which is easy to do. Last photo shows the shafts side by side. The passenger side (on left) had more rust than the other and much easier to remove the paint. 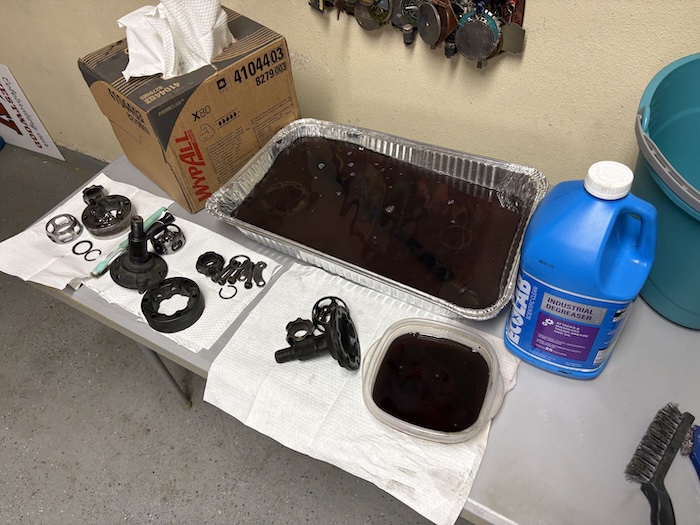 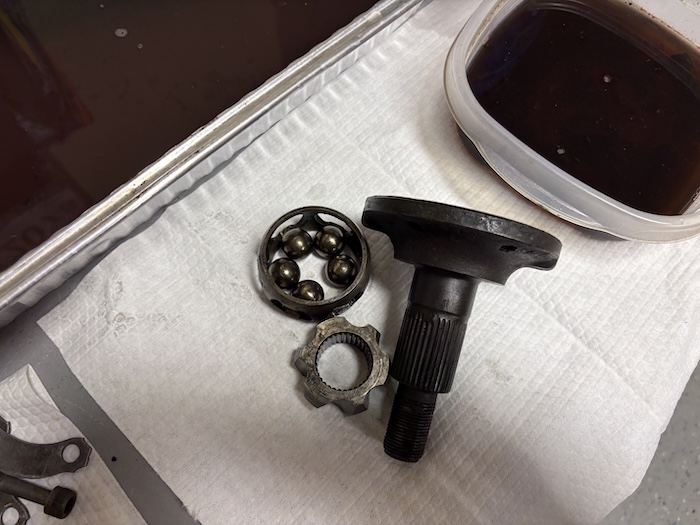 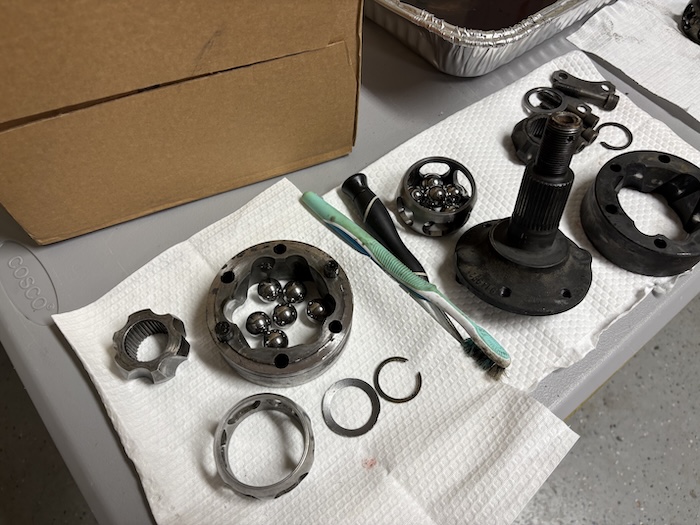 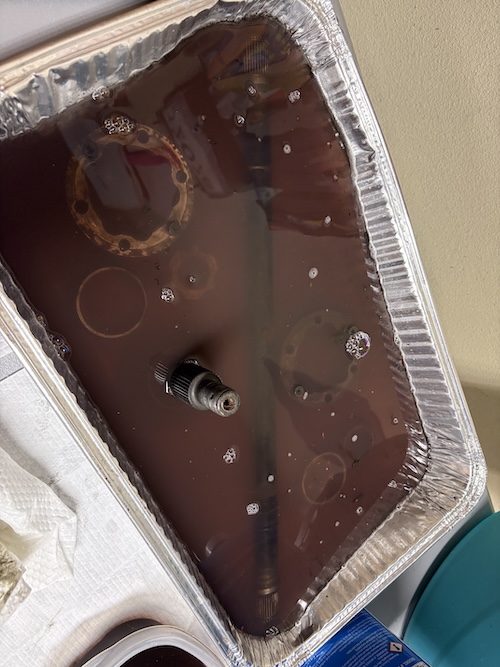 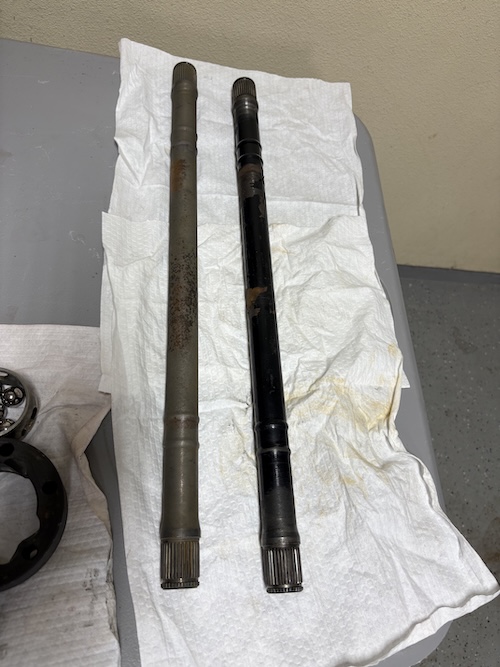 Once everything was cleaned and all the grease was gone, I was finally able to evaluate each CV for wear and determined which ones were good and bad. Basically, I had one CV from each side that had wear that I could feel with my finger nail. These were set a side, the good ones assembled dry, and two spares pulled for cleaning. After another degreasing cycle, I was able to verify each of the spares good. Final photo shows the CVs ready to go. 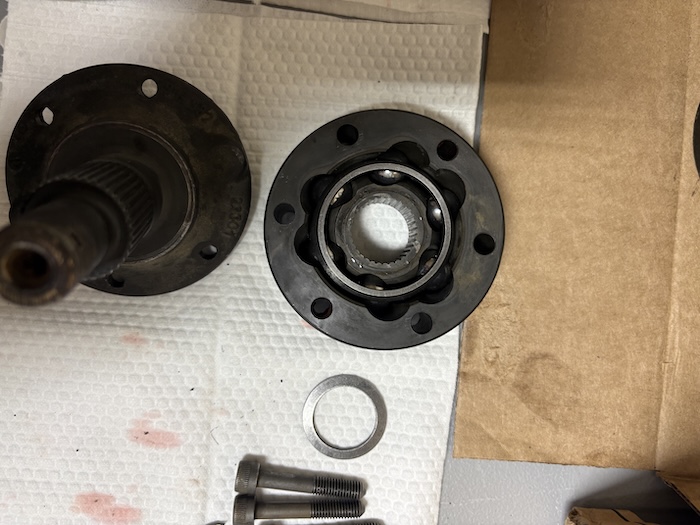  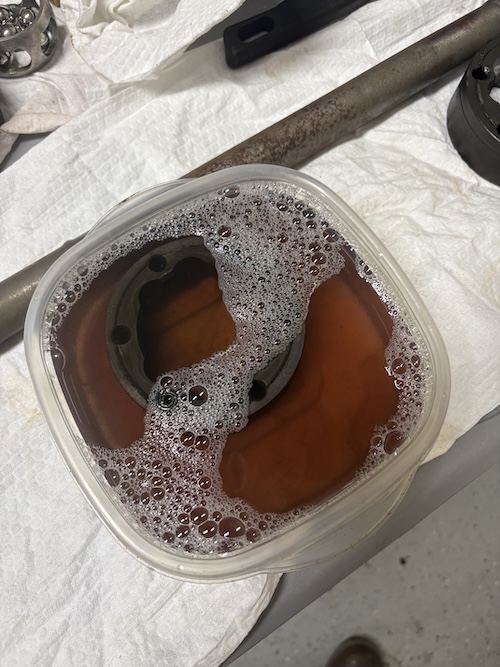 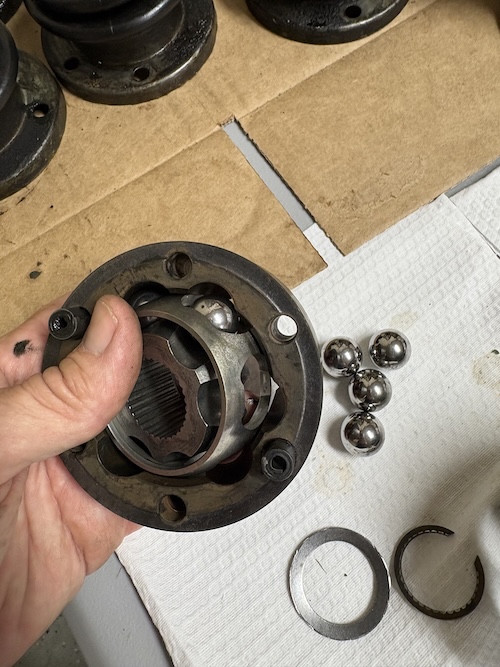 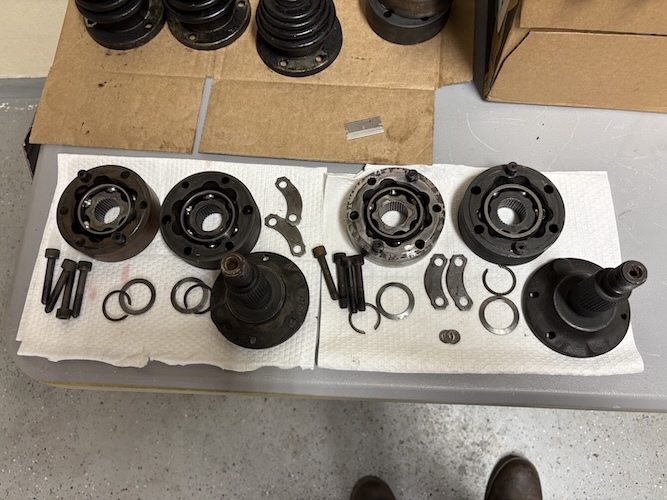 On Saturday, I used the new painting tent and hit the half-shafts with a few coats of satin black Rust-oleum and 2 coats of satin clear. Finally, I degreased all my remaining / unused parts [for next time]. I'm currently waiting on new CV boots and paper gaskets. More coming on this soon... 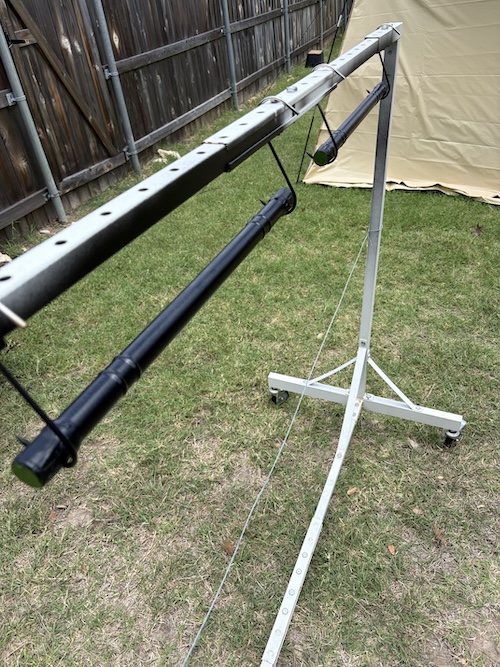 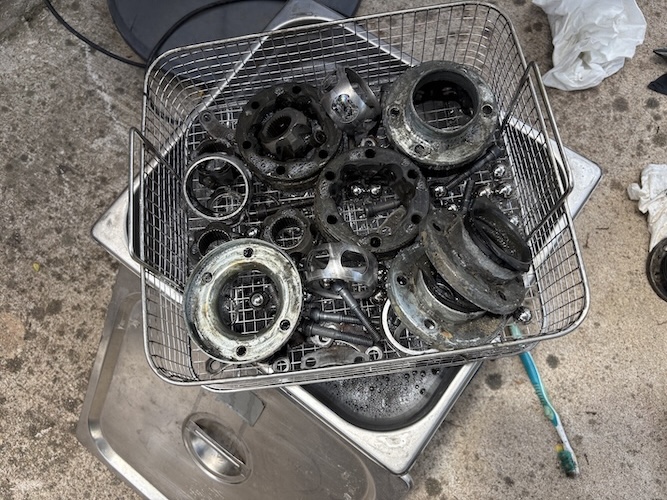 |
|
|
|
| friethmiller |
May 17 2026, 07:25 PM
Post
#926
|
|
Senior Member Group: Members Posts: 1,266 Joined: 10-February 19 From: Austin, TX Member No.: 22,863 Region Association: Southwest Region |
Testing the Engine (5/16 - 5/17/2026):
On Saturday afternoon it was pushing high 80s, so I found some shade on my patio and cut eight 4ft sections of 2x4. Using screws I created a square on the flat concrete. I then, did it again making a 2nd, identical square. Next, I cut several 16" 2x4s that were used as legs/supports, separating the two squares to make the base of my engine stand. Out in the backyard, I leveled off and then cut a 5'x5' square of some mat that I had laying around. This served as the flooring under my test stand. 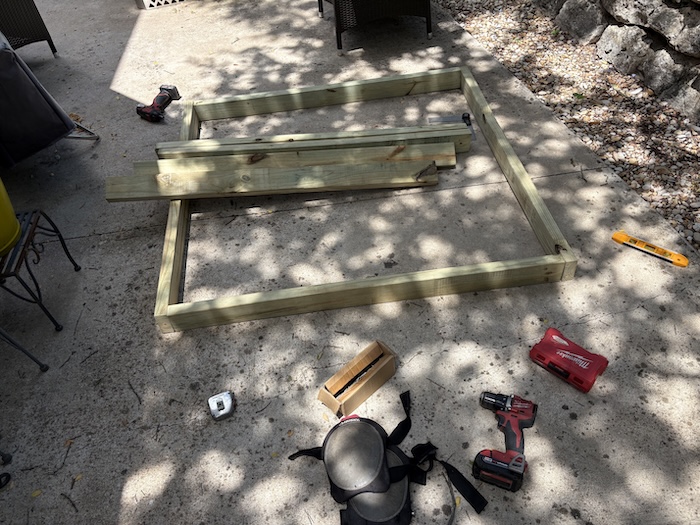 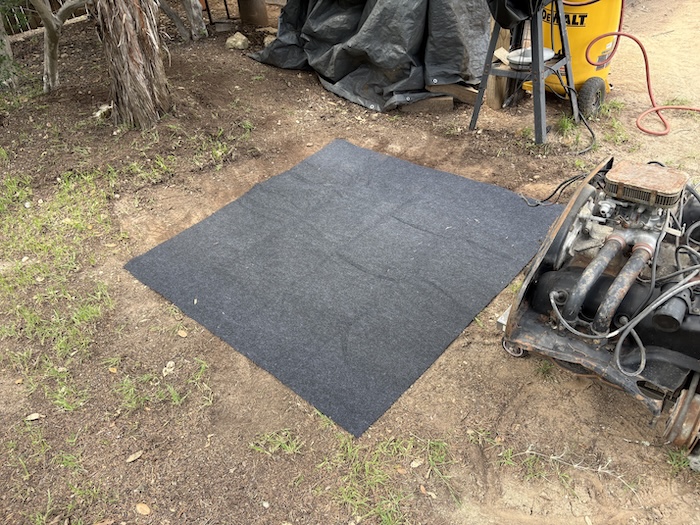 Next, I pushed the engine cart into the center and placed my crazy-painted test stand over the engine. I'm not a Seahawks fan, I was just using up some very old, ugly spray paint. (IMG:style_emoticons/default/cheer.gif) Next was cutting/positioning the engine bar supports. Here is where I started to use some of the wood from my kids old playscape that I had saved (IMG:style_emoticons/default/biggrin.gif) 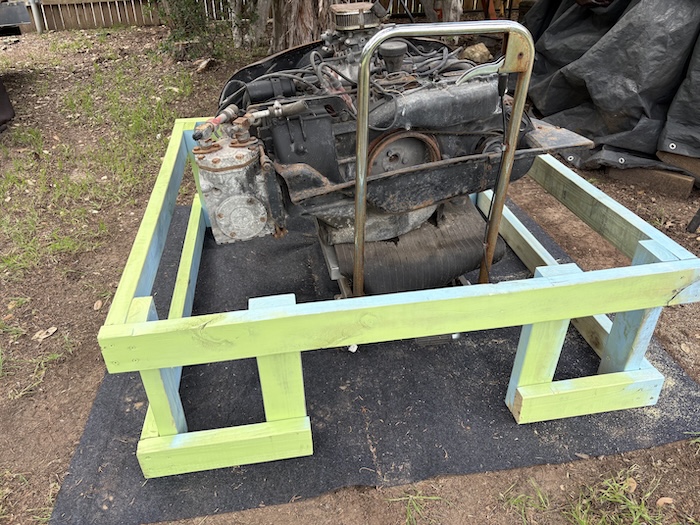 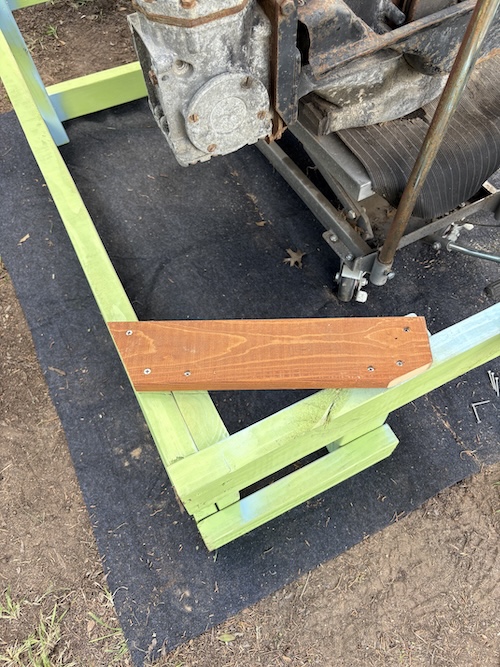 You can see in the next two photos how I used the engine bar to get the correct placement, drill holes, and then mount the engine bar onto the engine. 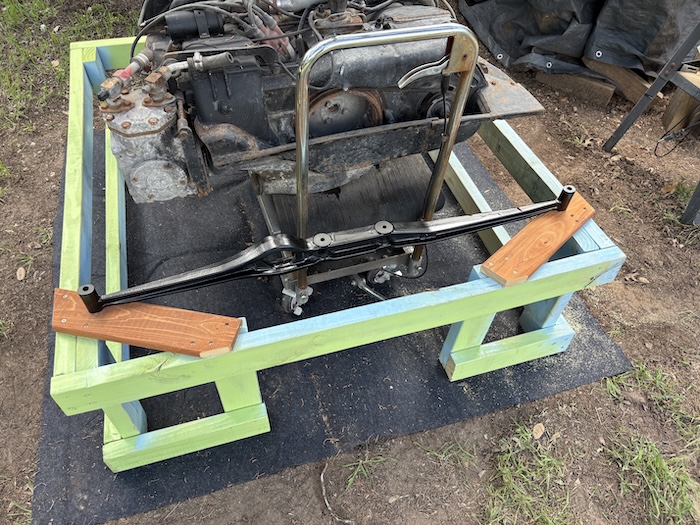 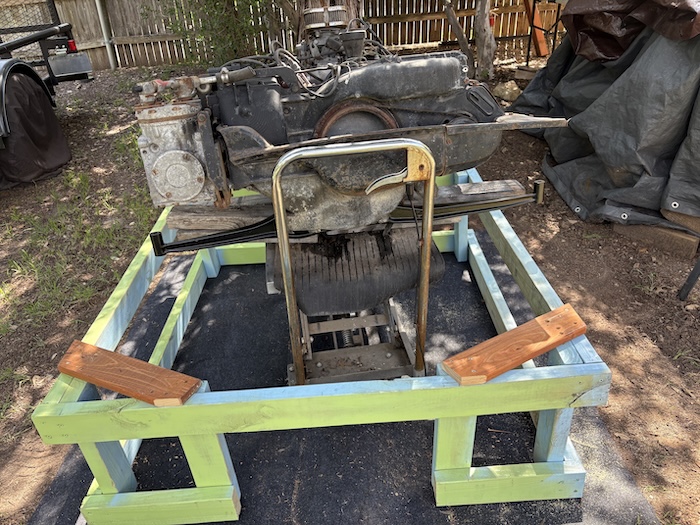 Next, with the engine bar mounted, I then cut the the top crossing board so I could pull the engine cart forward to then lower it down onto the stand. The second photo shows some sketchy support wood that I used to hold and center up the transmission. 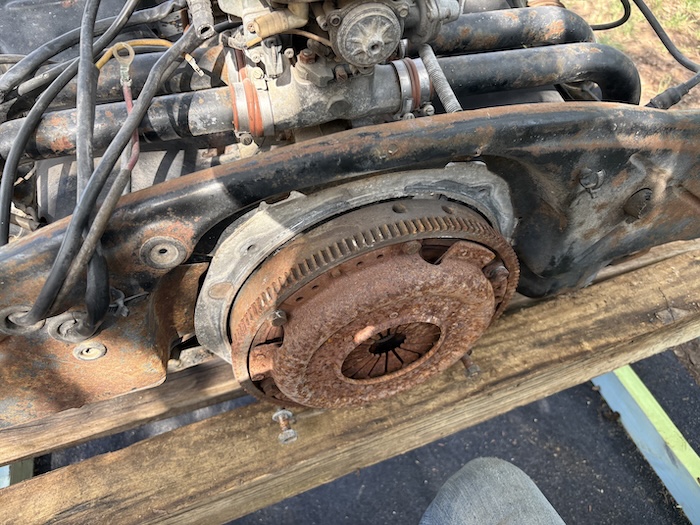 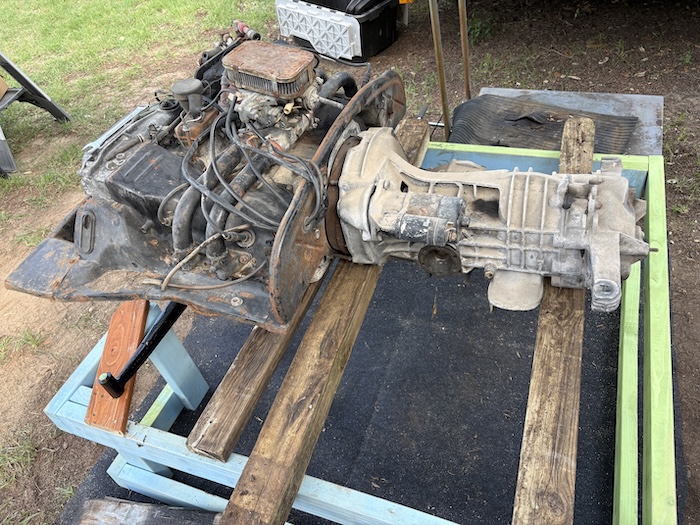 After removing the wood support and man-handling the transmission, I was finally able to get the bolts started and a good support piece set closer to the back of the transmission. Having 4x4s from the playscape came in really handy for cutting transmission supports. Once these wood pieces were secured, I used some of the large wood bolts that I had saved [from the playscape] to secure everything in place. 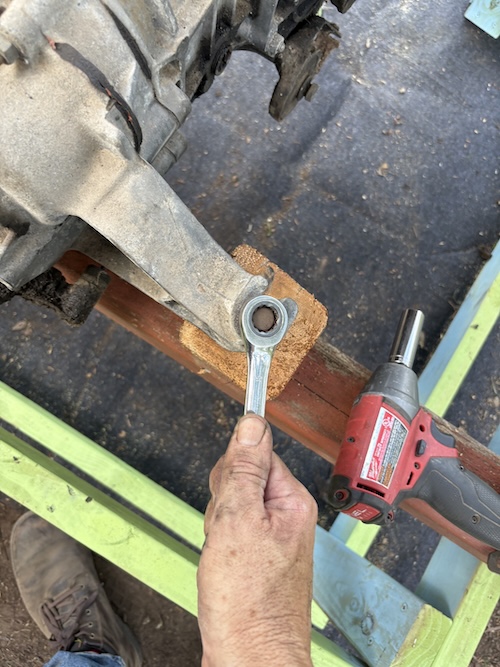 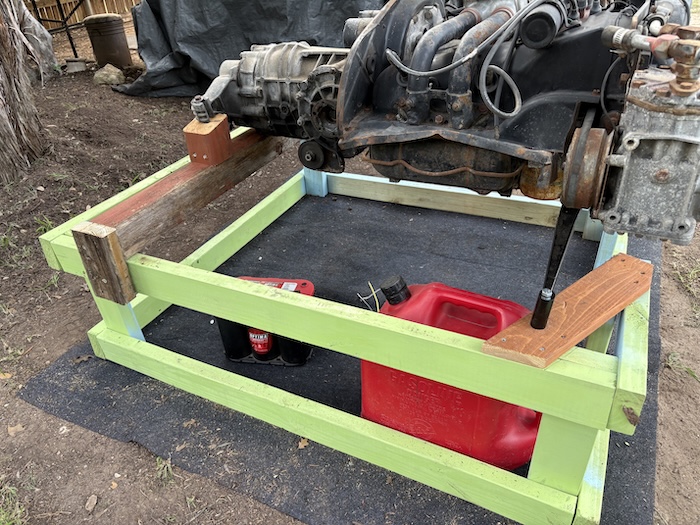 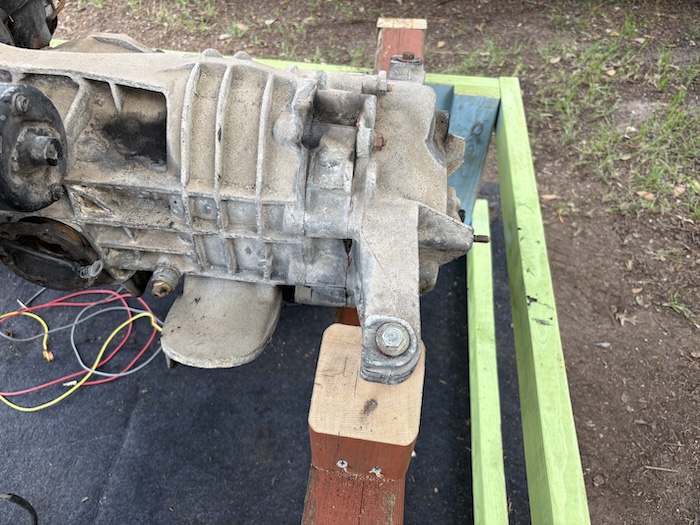 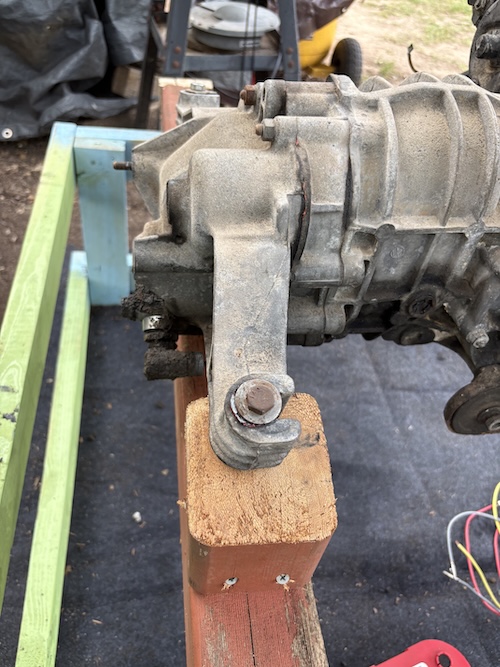 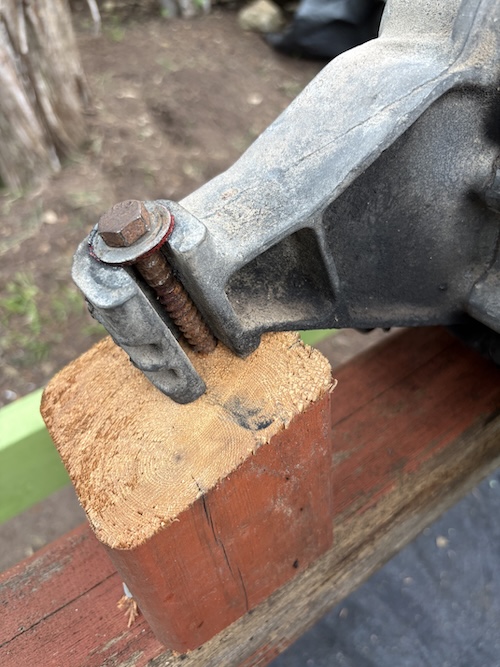 Photo here shows how the design allows for the use of the engine cart. This is where I left things on Saturday evening.  On Sunday the weather wasn't great. We had high-humidity and even a little rain here and there. Undeterred, I was bound and determined to see if I could get this engine to turn over and possibly even run. (IMG:style_emoticons/default/huh.gif) Here's a few photos of the carburetor, which AI said was likely a Carter (not a weber). No surprise there (IMG:style_emoticons/default/bootyshake.gif) 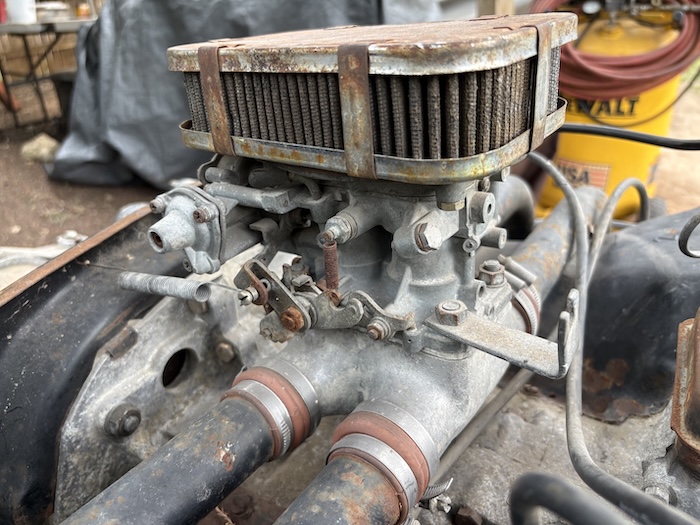 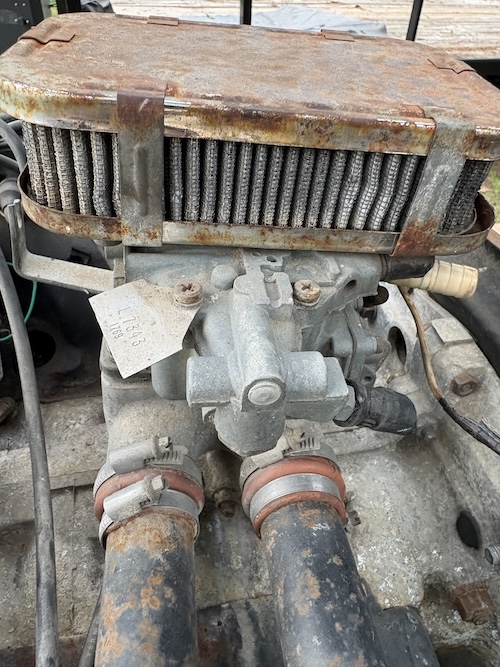 After wiring up everything to my test stand and running new fuel line, I was actually able to get the engine to start. I didn't run it very long but I was able to get it to idle. It's a little loud without any exhausts and it sounds like it has a bit of a vacuum leak. But she's a runner! (IMG:style_emoticons/default/first.gif) 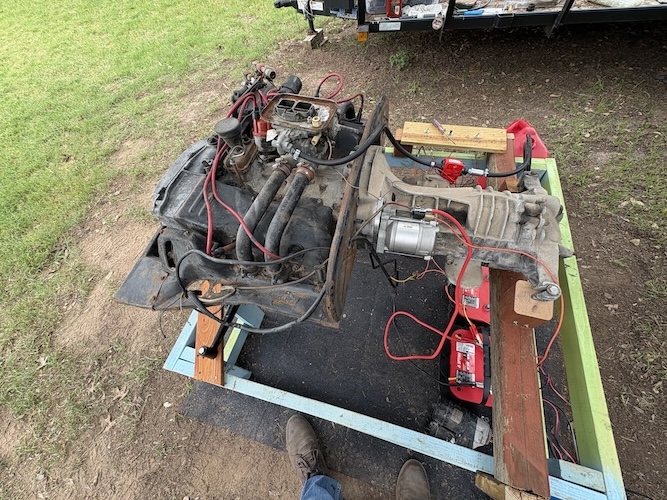 |
|
|
|
| friethmiller |
May 17 2026, 07:33 PM
Post
#927
|
|
Senior Member Group: Members Posts: 1,266 Joined: 10-February 19 From: Austin, TX Member No.: 22,863 Region Association: Southwest Region |
Click here to view a few seconds of the LE's engine running after sitting for at least 20 years. Did very little work. I sanded the points, and replaced the spark plug wires with a new[er] set. That was it! Here’s to a little success! (IMG:style_emoticons/default/beerchug.gif)
Engine Run Video |
|
|
|
| Montreal914 |
May 17 2026, 08:14 PM
Post
#928
|
|
Advanced Member Group: Members Posts: 2,107 Joined: 8-August 10 From: Claremont, CA Member No.: 12,023 Region Association: Southern California |
|
 |
|
| Cairo94507 |
May 18 2026, 07:12 AM
Post
#929
|
|
Michael Group: Members Posts: 10,636 Joined: 1-November 08 From: Auburn, CA Member No.: 9,712 Region Association: Northern California |
Man, that baby seems to run decent and idle well. Very cool. (IMG:style_emoticons/default/beerchug.gif)
|
|
|
|
| friethmiller |
May 18 2026, 07:57 AM
Post
#930
|
|
Senior Member Group: Members Posts: 1,266 Joined: 10-February 19 From: Austin, TX Member No.: 22,863 Region Association: Southwest Region |
QUOTE(Montreal914 @ May 17 2026, 09:14 PM) QUOTE(Cairo94507 @ May 18 2026, 08:12 AM) Man, that baby seems to run decent and idle well. Very cool. (IMG:style_emoticons/default/beerchug.gif) Yeah but what do I do next? (IMG:style_emoticons/default/smile.gif) I think I'd better hook-up an oil pressure gauge to make sure she won't implode. If it checks out, I may do a cosmetic overhaul and then run it in my other 914 for a little while. There's a lot of "ifs" in there, of course. Question: Short of splitting the case, does anyone know if it's possible to check to see if an engine is still running its factory FI cam? |
|
|
|
| Montreal914 |
May 18 2026, 08:22 AM
Post
#931
|
|
Advanced Member Group: Members Posts: 2,107 Joined: 8-August 10 From: Claremont, CA Member No.: 12,023 Region Association: Southern California |
Is there an issue in running an engine without it's exhaust manifold? I was under the impression that once the engine is shut off, the ambiant air being cold relative to the exhaust valves could damage them (thermal shock)?
Cam: I guess if one knows the stock cam curve, one could remove the valve cover, the rockers and one pushrod and engineer (you are good at that (IMG:style_emoticons/default/smile.gif) ) a pushrod linked to a dial indicator. With a degree wheel printed on a paper and set on the crank pulley, then you can measure the lift every 5 degrees and plot it on a graph and compare to the stock cam. Again, this requires the stock curve. (IMG:style_emoticons/default/dry.gif) |
|
|
|
| friethmiller |
May 18 2026, 08:31 AM
Post
#932
|
|
Senior Member Group: Members Posts: 1,266 Joined: 10-February 19 From: Austin, TX Member No.: 22,863 Region Association: Southwest Region |
QUOTE(Montreal914 @ May 18 2026, 09:22 AM) Is there an issue in running an engine without it's exhaust manifold? Perhaps... I've never heard of that. (IMG:style_emoticons/default/idea.gif) |
|
|
|
| BillC |
May 18 2026, 11:33 AM
Post
#933
|
|
Senior Member Group: Members Posts: 722 Joined: 24-April 15 From: Silver Spring, MD Member No.: 18,667 Region Association: MidAtlantic Region |
QUOTE(friethmiller @ May 18 2026, 10:31 AM) QUOTE(Montreal914 @ May 18 2026, 09:22 AM) Is there an issue in running an engine without it's exhaust manifold? Perhaps... I've never heard of that. (IMG:style_emoticons/default/idea.gif) Actually, yes there is a risk to running without the exhaust manifolds, well, not so much while running but afterward. The problem is the lack of exhaust manifolds allows cold air to get to the exhaust valves very quickly, after the engine is shut off. This causes the stem to cool much faster than the rest of the valve (which is inside the head), which will eventually lead to the valve breaking. This became a big problem with Porsche Motorsports a few years ago, because those cars had very short exhausts and customers were losing exhaust valves. They resolved the issue by either adding longer manifolds and/or closing the bypass/dump valves when the car was turned off (on cars that had exhaust dump valves). So, for your quick testing, probably no harm done. But, you won't want to make a habit of it. |
|
|
|
| friethmiller |
May 18 2026, 01:41 PM
Post
#934
|
|
Senior Member Group: Members Posts: 1,266 Joined: 10-February 19 From: Austin, TX Member No.: 22,863 Region Association: Southwest Region |
QUOTE(BillC @ May 18 2026, 12:33 PM) ... So, for your quick testing, probably no harm done. But, you won't want to make a habit of it. Nice! Good info. I actually tried putting on the exhaust yesterday. Unfortunately, the 4x4 in the back was in the way. I'm sure things can be "modified" on my homemade test stand. Even if I cut off the muffler on this rusty set-up, I'd still have several feet of piping to mitigate any issues. |
|
|
|
| Jack Standz |
May 18 2026, 02:51 PM
Post
#935
|
|
Senior Member Group: Members Posts: 797 Joined: 15-November 19 From: Happy Place (& surrounding area) Member No.: 23,644 Region Association: None |
QUOTE(friethmiller @ May 18 2026, 08:57 PM) QUOTE(Montreal914 @ May 17 2026, 09:14 PM) QUOTE(Cairo94507 @ May 18 2026, 08:12 AM) Man, that baby seems to run decent and idle well. Very cool. (IMG:style_emoticons/default/beerchug.gif) Yeah but what do I do next? (IMG:style_emoticons/default/smile.gif) I think I'd better hook-up an oil pressure gauge to make sure she won't implode. If it checks out, I may do a cosmetic overhaul and then run it in my other 914 for a little while. There's a lot of "ifs" in there, of course. Question: Short of splitting the case, does anyone know if it's possible to check to see if an engine is still running its factory FI cam? Hi Fred, If you don't have one, get one of these oil pump pullers: https://www.amazon.com/Puller-Aircooled-Mot...C212&sr=8-3 Then after you pull the oil pump, see if the cam gear is bolted on. If not, you are most likely looking at an original FI cam. The second 914 We got had one of those style carbs on it with the original FI cam and we ran it that way for maybe 15 years without any complaints (maybe due to ignorance?, but still no complaints (IMG:style_emoticons/default/biggrin.gif) ). Sometimes the manufacturers would put identifying marks on the end of the cam here (i.e. C25 for a Scat C25 grind). |
|
|
|
| BillC |
May 18 2026, 04:23 PM
Post
#936
|
|
Senior Member Group: Members Posts: 722 Joined: 24-April 15 From: Silver Spring, MD Member No.: 18,667 Region Association: MidAtlantic Region |
QUOTE(friethmiller @ May 18 2026, 03:41 PM) QUOTE(BillC @ May 18 2026, 12:33 PM) ... So, for your quick testing, probably no harm done. But, you won't want to make a habit of it. Nice! Good info. I actually tried putting on the exhaust yesterday. Unfortunately, the 4x4 in the back was in the way. I'm sure things can be "modified" on my homemade test stand. Even if I cut off the muffler on this rusty set-up, I'd still have several feet of piping to mitigate any issues. That should work fine -- the headers by themselves are long enough to prevent the problem |
|
|
|
| friethmiller |
May 18 2026, 08:23 PM
Post
#937
|
|
Senior Member Group: Members Posts: 1,266 Joined: 10-February 19 From: Austin, TX Member No.: 22,863 Region Association: Southwest Region |
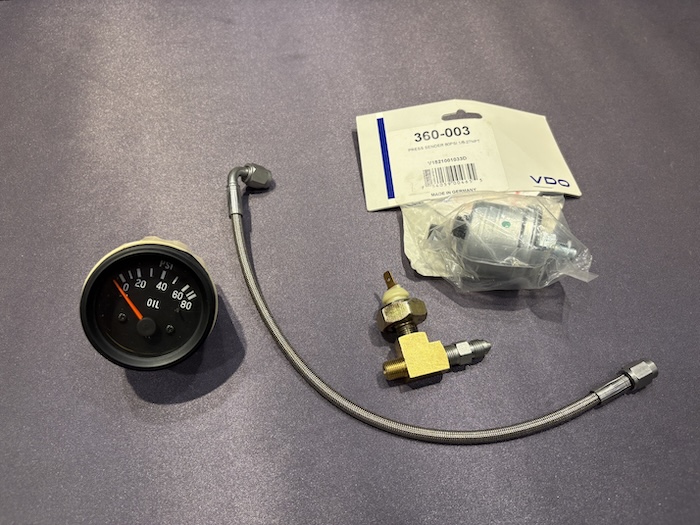
Excellent! I've got several 914 specific engine tools but not this oil pump puller. It's on order now. Thanks on the recommendation. Just found my oil pressure gauge set-up that I was going to employ on my other engine. With the pipes on and the gauge hooked up, I'll run the engine longer and verify things even more. BTW, I'm still missing a connector for this dual gauge set-up. The stock sender doesn't screw into any of these fittings very far. I'll try and figure it out as I work on this engine.
 |
|
|
|
|
3 User(s) are reading this topic (3 Guests and 0 Anonymous Users)
0 Members:

|
Lo-Fi Version | Time is now: 18th May 2026 - 11:14 PM |
Invision Power Board
v9.1.4 © 2026 IPS, Inc.