|
|
|
Porsche, and the Porsche crest are registered trademarks of Dr. Ing. h.c. F. Porsche AG.
This site is not affiliated with Porsche in any way. Its only purpose is to provide an online forum for car enthusiasts. All other trademarks are property of their respective owners. |
|
|

  |

| _stickykitty79_ |
 Jan 1 2026, 08:15 PM Jan 1 2026, 08:15 PM
Post
#41
|
|
Newbie  Group: Members Posts: 38 Joined: 20-August 24 From: socal Member No.: 28,302 Region Association: None |
QUOTE(bkrantz @ Oct 22 2024, 05:52 PM)  I used this tool a lot to get the right spacing and curves. Compare the good side to what you are working on. https://www.amazon.com/Big-Horn-19062-Plast...C169&sr=8-9 we use these on our clay models for automotive design, works well, good reminder for me to pick one up for my resto also |
   |

 
|
| seanpaulmc |
Jan 3 2026, 03:57 PM
Post
#42
|
|
Member Group: Members Posts: 458 Joined: 6-December 16 From: Orlando, FL Member No.: 20,649 Region Association: South East States |
QUOTE(bkrantz @ Oct 22 2024, 07:52 PM) I used this tool a lot to get the right spacing and curves. Compare the good side to what you are working on. https://www.amazon.com/Big-Horn-19062-Plast...C169&sr=8-9 Thanks, Bob. This tool was super helpful with my CAD designs. I picked it up shortly after seeing you post about in your build but it’s taken me a while to get to it. 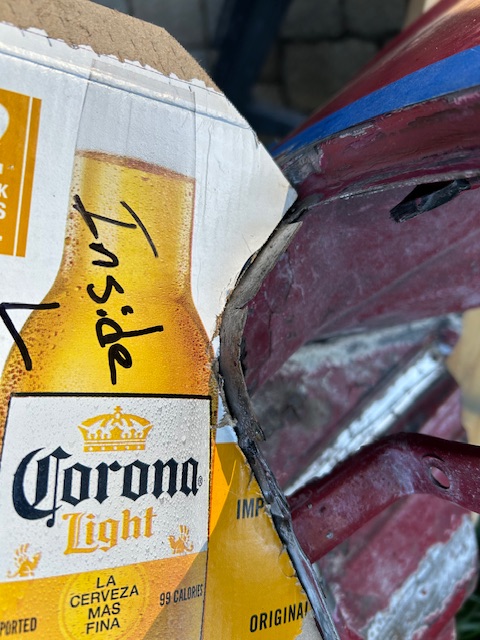 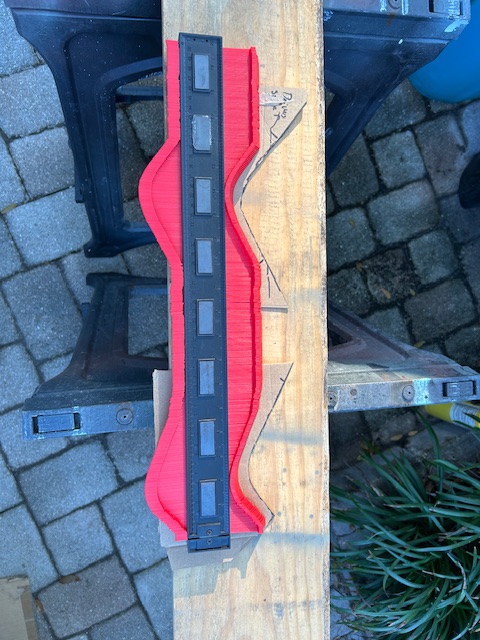 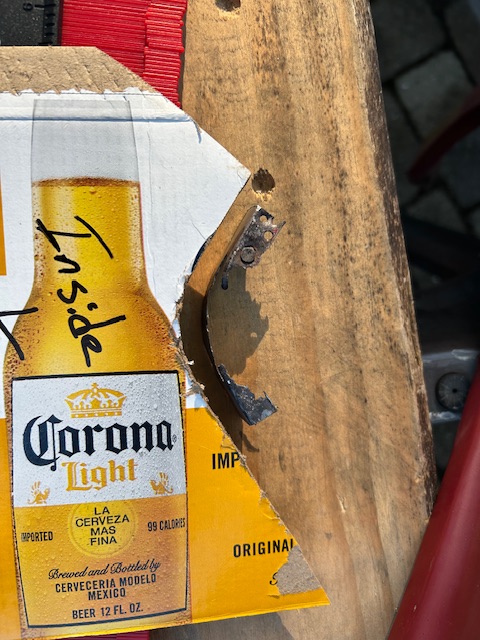 The fit on the hammer formed patch seems pretty good. I’m pleased to move forward with it. 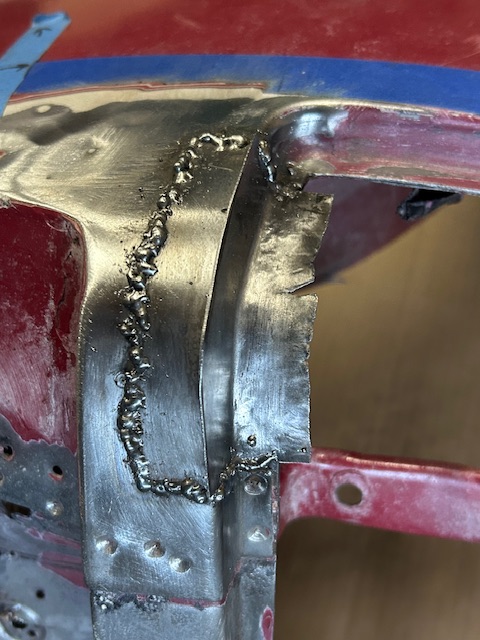 |
|
|
|
| seanpaulmc |
Jan 3 2026, 04:02 PM
Post
#43
|
|
Member Group: Members Posts: 458 Joined: 6-December 16 From: Orlando, FL Member No.: 20,649 Region Association: South East States |
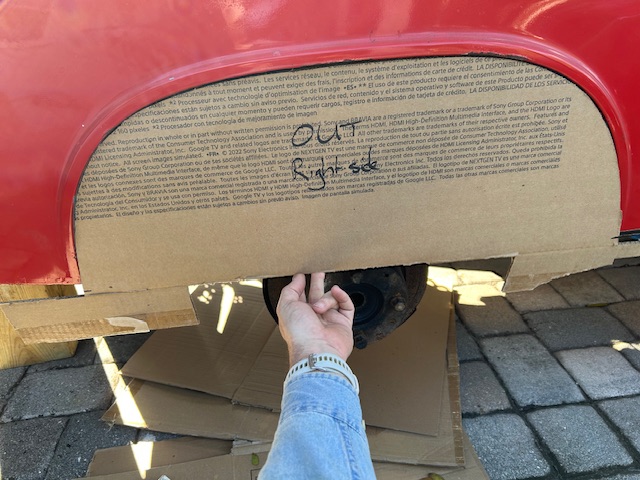
And like Bob said, take measurements from the good side and use on the bad side, so I did some additional CAD work today in preparation for the future fender grafting.
 |
|
|
|
| Montreal914 |
Jan 3 2026, 04:08 PM
Post
#44
|
|
Advanced Member Group: Members Posts: 2,179 Joined: 8-August 10 From: Claremont, CA Member No.: 12,023 Region Association: Southern California |
Looking good! (IMG:style_emoticons/default/popcorn[1].gif)
|
|
|
|
| 930cabman |
Jan 4 2026, 06:54 AM
Post
#45
|
|
Advanced Member Group: Members Posts: 4,773 Joined: 12-November 20 From: Buffalo Member No.: 24,877 Region Association: North East States |
I am also in this boat with the drivers rear quarter. Looking good, I would recommend taking your time to get things correct. Theres alot coming together in this location
|
|
|
|
| friethmiller |
Jan 4 2026, 08:41 AM
Post
#46
|
|
Senior Member Group: Members Posts: 1,436 Joined: 10-February 19 From: Austin, TX Member No.: 22,863 Region Association: Southwest Region |
QUOTE(seanpaulmc @ Jan 3 2026, 03:57 PM) Sean, what kind of welder are you using? It looks like it might be flux core. I know the metal is thin but try bumping up your heat just a bit to get better penetration. |
|
|
|
| volksaddict |
Jan 4 2026, 09:24 AM
Post
#47
|
|
Newbie Group: Members Posts: 40 Joined: 29-January 11 From: southwest Member No.: 12,645 Region Association: Southwest Region |
CAD = Cardboard Aided Design? (IMG:style_emoticons/default/biggrin.gif)
Just kidding, your attention to detail is great! |
|
|
|
| seanpaulmc |
Jan 4 2026, 06:05 PM
Post
#48
|
|
Member Group: Members Posts: 458 Joined: 6-December 16 From: Orlando, FL Member No.: 20,649 Region Association: South East States |
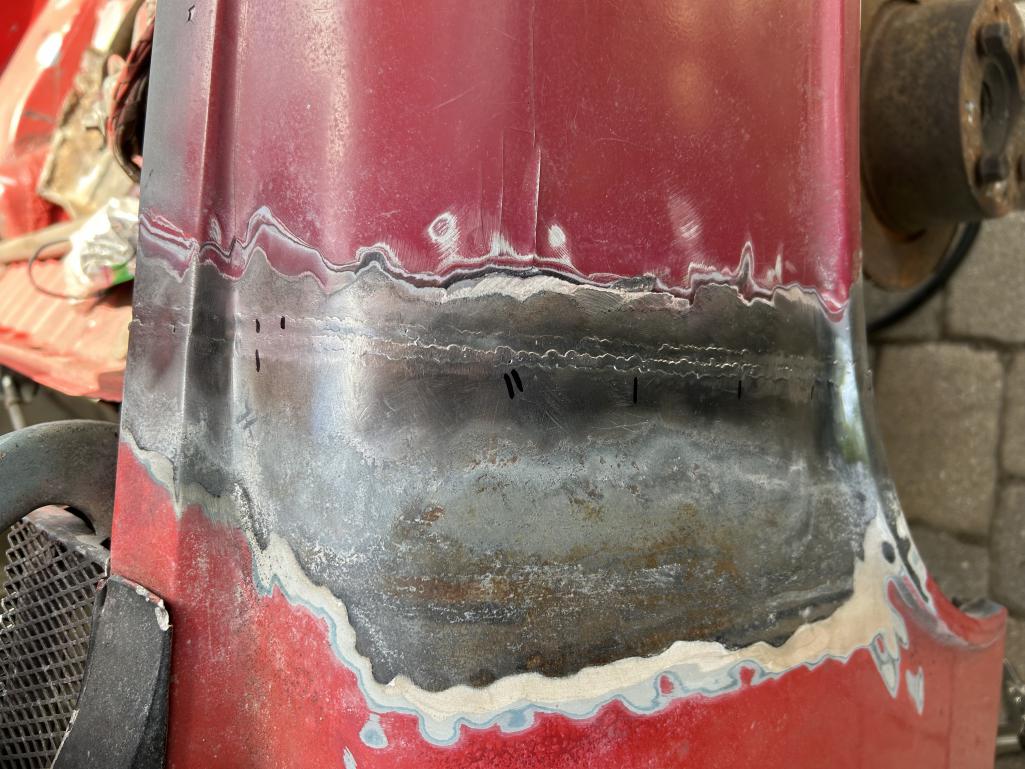
QUOTE(friethmiller @ Jan 4 2026, 09:41 AM) QUOTE(seanpaulmc @ Jan 3 2026, 03:57 PM) Sean, what kind of welder are you using? It looks like it might be flux core. I know the metal is thin but try bumping up your heat just a bit to get better penetration. Fred, you are too right, but it’s not welder, it’s the ‘welder’. User error for sure! To confirm your astute observation here is what the back of this patch looks like now that the donor has been disassembled… 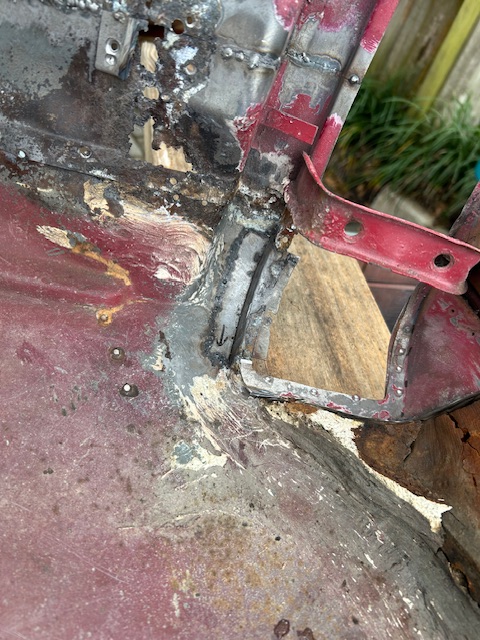 I haven’t been welding in a few months and was having difficulty getting it right. After blowing a few holes in it I turned it down and wound up with the snot seen in the first picture. I’m grateful for your feedback and advice on how to make it better. There’s plenty of practice ahead in repairing the donor pieces. I’ll take all the feedback I can get. Cheers, Sean |
|
|
|
| friethmiller |
Jan 4 2026, 07:43 PM
Post
#49
|
|
Senior Member Group: Members Posts: 1,436 Joined: 10-February 19 From: Austin, TX Member No.: 22,863 Region Association: Southwest Region |
Yep, I could say the same thing about some of my work from my last build. Hell, you can see this in a few of the pics I posted on this thread. I’ve learned to use a metal gauge to verify thickness, setup the welder based on its recommendations, and then make small adjustments till I get the desired results. Also, the gap between the metal is very important. You can’t expect good penetration if there is not a gap. Things shift and expand once you start tacking the patch in place, too. I use a cutting blade to re-establish that gap when that happens - before continuing on. Keep at it. Keep trying to get better, learn from others, use YouTube, etc.
|
|
|
|
| seanpaulmc |
Jan 18 2026, 05:09 PM
Post
#50
|
|
Member Group: Members Posts: 458 Joined: 6-December 16 From: Orlando, FL Member No.: 20,649 Region Association: South East States |
QUOTE friethmiller[/s]' date='Jan 4 2026, 08:43 PM' post='3239523'] Yep, I could say the same thing about some of my work from my last build. Hell, you can see this in a few of the pics I posted on this thread. I’ve learned to use a metal gauge to verify thickness, setup the welder based on its recommendations, and then make small adjustments till I get the desired results. Also, the gap between the metal is very important. You can’t expect good penetration if there is not a gap. Things shift and expand once you start tacking the patch in place, too. I use a cutting blade to re-establish that gap when that happens - before continuing on. Keep at it. Keep trying to get better, learn from others, use YouTube, etc. My 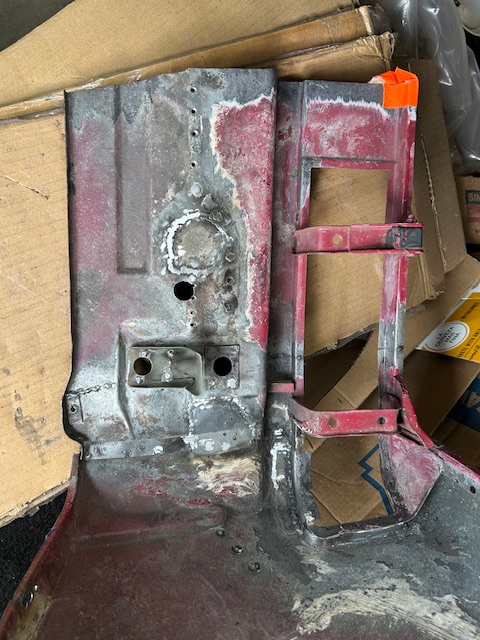 Thanks again for the advice. |
|
|
|
| friethmiller |
Jan 18 2026, 09:39 PM
Post
#51
|
|
Senior Member Group: Members Posts: 1,436 Joined: 10-February 19 From: Austin, TX Member No.: 22,863 Region Association: Southwest Region |
QUOTE(seanpaulmc @ Jan 18 2026, 05:09 PM) Thanks again for the advice. You bet! I enjoy watching your progress. (IMG:style_emoticons/default/beerchug.gif) |
|
|
|
| seanpaulmc |
Feb 16 2026, 06:32 PM
Post
#52
|
|
Member Group: Members Posts: 458 Joined: 6-December 16 From: Orlando, FL Member No.: 20,649 Region Association: South East States |
Progress has been made. Mistakes have also been made. Would like your advice before I try putting this quarter panel back on.
See pictures. 1. Should I try to weld both vertical seams with the panel in place on the car? Or, 2. Should I weld and dress the patch off the car before attempting to reattach the quarter panel? 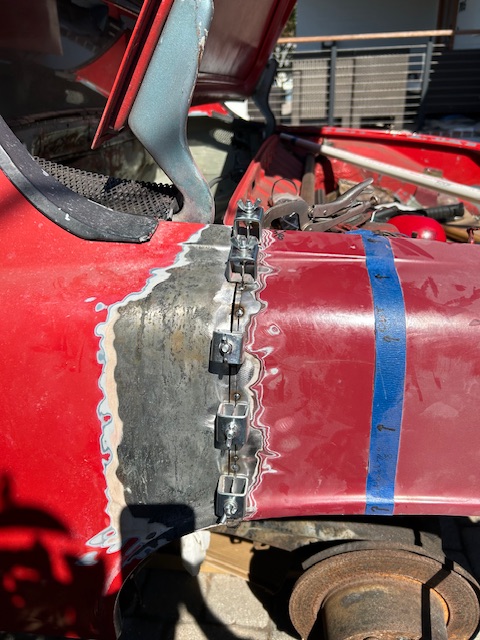 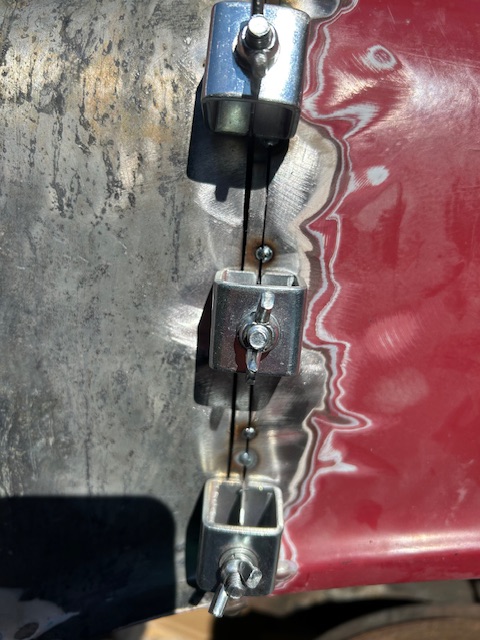 With option 2 I realize I’ll have to have a really good finish on the patch in order to to use the panel alignment clamps. Thanks in advance for your feedback. |
|
|
|
| Montreal914 |
Feb 16 2026, 07:28 PM
Post
#53
|
|
Advanced Member Group: Members Posts: 2,179 Joined: 8-August 10 From: Claremont, CA Member No.: 12,023 Region Association: Southern California |
So, I am not a pro, far from it... (IMG:style_emoticons/default/rolleyes.gif)
If I was in this situation, I would attache the slim piece to the rear piece on a bench. I would clamp a copper block as backing and for local flatness (colinear) joint. Obviously, gazillions of one clic spot welds with full cooling after each weld. Now, I am sure the real pros will give you the good advices. Good luck! (IMG:style_emoticons/default/smash.gif) |
|
|
|
| friethmiller |
Feb 16 2026, 08:11 PM
Post
#54
|
|
Senior Member Group: Members Posts: 1,436 Joined: 10-February 19 From: Austin, TX Member No.: 22,863 Region Association: Southwest Region |
I’ve done this sorta thing before. Either option if fine. If it were me, I’d only tack the small sliver on the patch and then tack the patch to the rear quarter. It’s a matter of heat distribution to me. Once the patch is tacked to the rest of the fender, you now have a greater area to take the heat. Another thing I’d recommend for a fender would be to go slowly and allow the welds to cool without a bunch of compressed air. Rapid cooling will cause the butt weld to pull inward. It’s not the end of the world if this happens where you can hammer/dolly it back but there can be places where access is limited and it’ll take addition work/tools to pull out these lows. Think “slow finesse” not “brute force” here and you have a shot at good results. Good luck!
|
|
|
|
| seanpaulmc |
Feb 17 2026, 06:18 PM
Post
#55
|
|
Member Group: Members Posts: 458 Joined: 6-December 16 From: Orlando, FL Member No.: 20,649 Region Association: South East States |
Thanks Eric and Fred. Good feedback.
Hopefully I’ll get to play with it this weekend. |
|
|
|
| seanpaulmc |
Apr 10 2026, 04:30 PM
Post
#56
|
|
Member Group: Members Posts: 458 Joined: 6-December 16 From: Orlando, FL Member No.: 20,649 Region Association: South East States |
With a little help from my friends (you all), we got it done.
 It’s not done, done, done, done, but for the purposes of this side thread I’m gonna call it. Thanks guys! |
|
|
|
| bkrantz |
Apr 10 2026, 08:47 PM
Post
#57
|
|
914 Guru Group: Members Posts: 8,746 Joined: 3-August 19 From: SW Colorado Member No.: 23,343 Region Association: Rocky Mountains |
That looks great. Well done!
|
|
|
|
|
2 User(s) are reading this topic (2 Guests and 0 Anonymous Users)
0 Members:

|
Lo-Fi Version | Time is now: 31st July 2026 - 11:48 PM |
Invision Power Board
v9.1.4 © 2026 IPS, Inc.