|
|
|
Porsche, and the Porsche crest are registered trademarks of Dr. Ing. h.c. F. Porsche AG.
This site is not affiliated with Porsche in any way. Its only purpose is to provide an online forum for car enthusiasts. All other trademarks are property of their respective owners. |
|
|

  |

| ctc911ctc |
 Mar 11 2025, 06:44 PM Mar 11 2025, 06:44 PM
Post
#61
|
|
Senior Member  Group: Members Posts: 1,331 Joined: 9-June 18 From: boston Member No.: 22,206 Region Association: North East States |
Today Did the leak down test, only could do one side - and the meter I bought is CRAP, very difficult to get the system to set to zero, estimating
#4 - 28 #5 - 27 #6 - 23 Engine ran strong this fall - not going in any deeper on this side.... ; ) I got the fan out and it now looks like this: I plan on having it vapro blasted, seems that the stuff I have been using (came with the ultrasonic cleaning machine) is salt based - perhaps that is all of the white crust.....sigh...... NOTE: One blade is cleaner, spent 20 minutes on it with steel wool, hence my decision to vapor blast  My shroud/tin bolts after cleaning look like this: 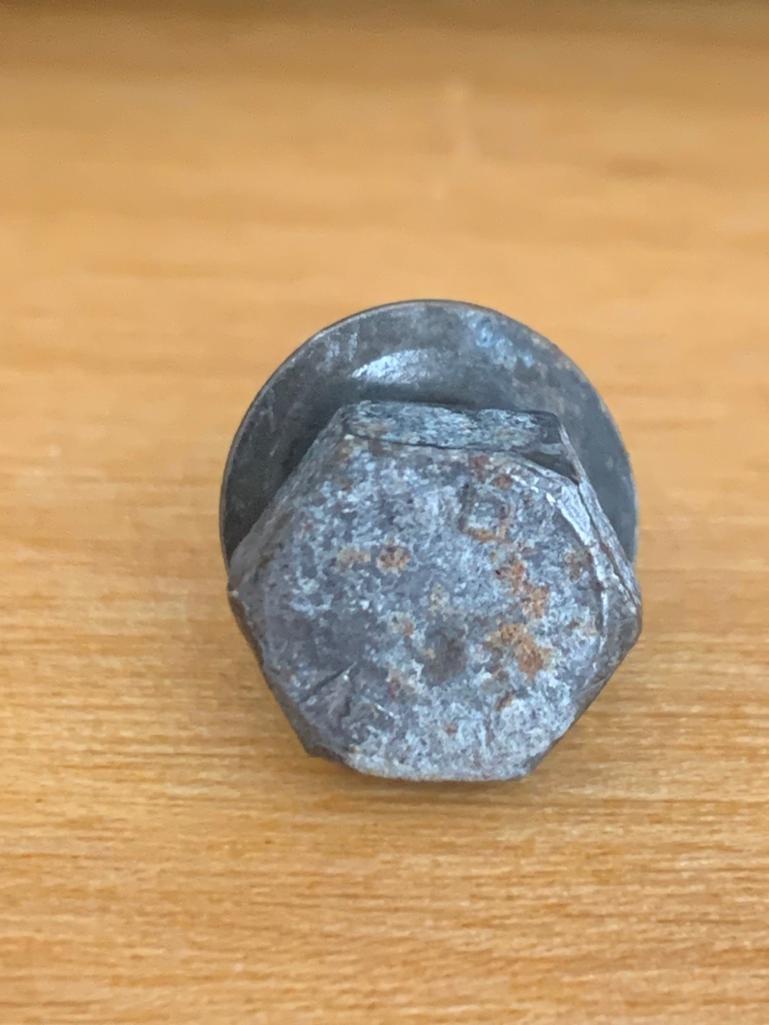 Next thing to clean! 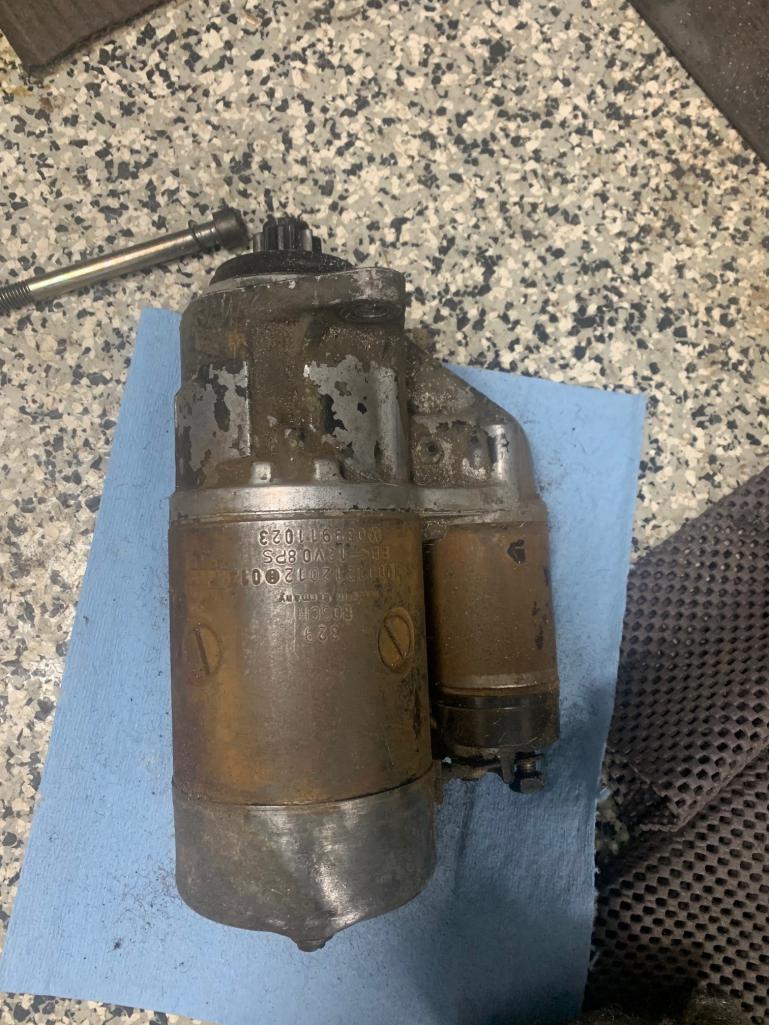 |
   |

 
|
| ctc911ctc |
Mar 31 2025, 08:26 AM
Post
#62
|
|
Senior Member Group: Members Posts: 1,331 Joined: 9-June 18 From: boston Member No.: 22,206 Region Association: North East States |
******UPDATE*******
Transmission parts arrived here are some updates: P226 Tool needed to be re-tooled  Needed to be faced a mil and the ring reduced .33mil  Once the dimensions of the Tool were correct for a 901 box, things started to work with the now correct P226 ****Note the DogTeeth are missing a tooth - never did find it.... 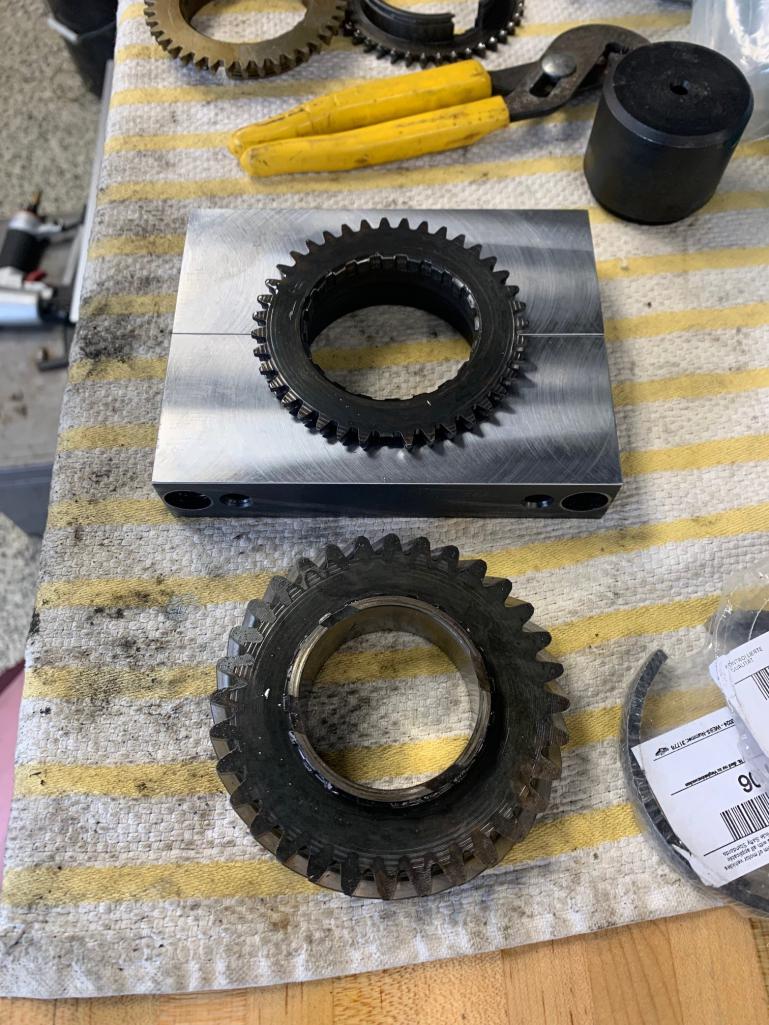 New 2nd gear Sync and Teeth! 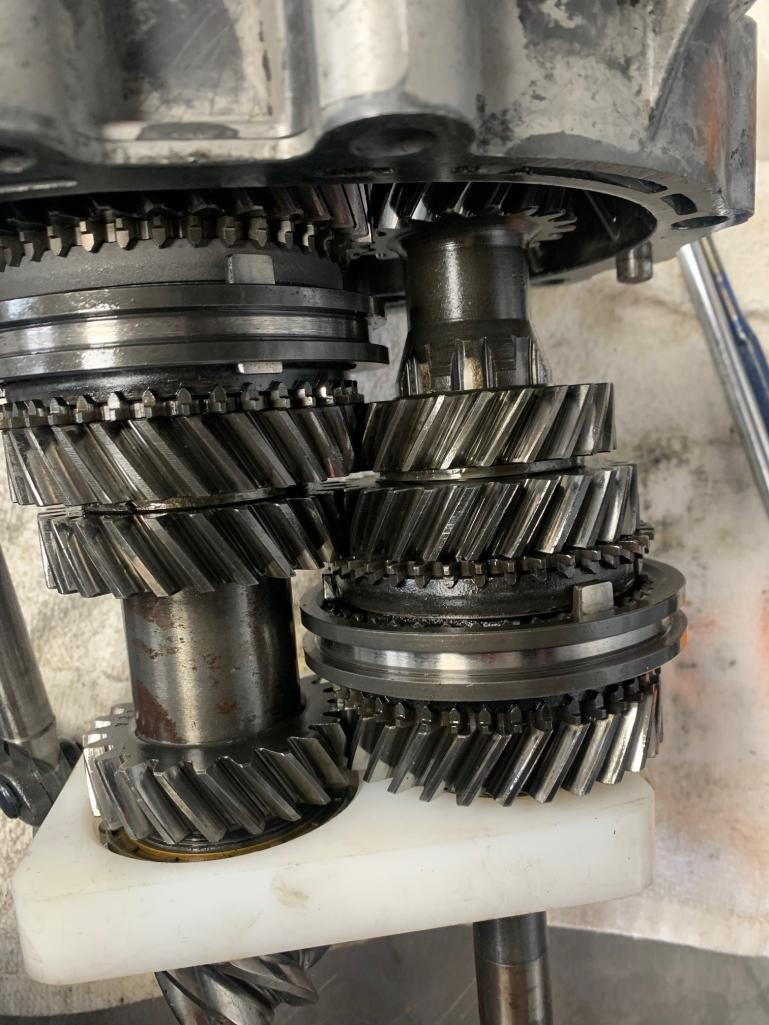 First Slider was coated with a wax/kosmaline stuff - hard to get off - Brake Cleaner (5 coats finely got it done 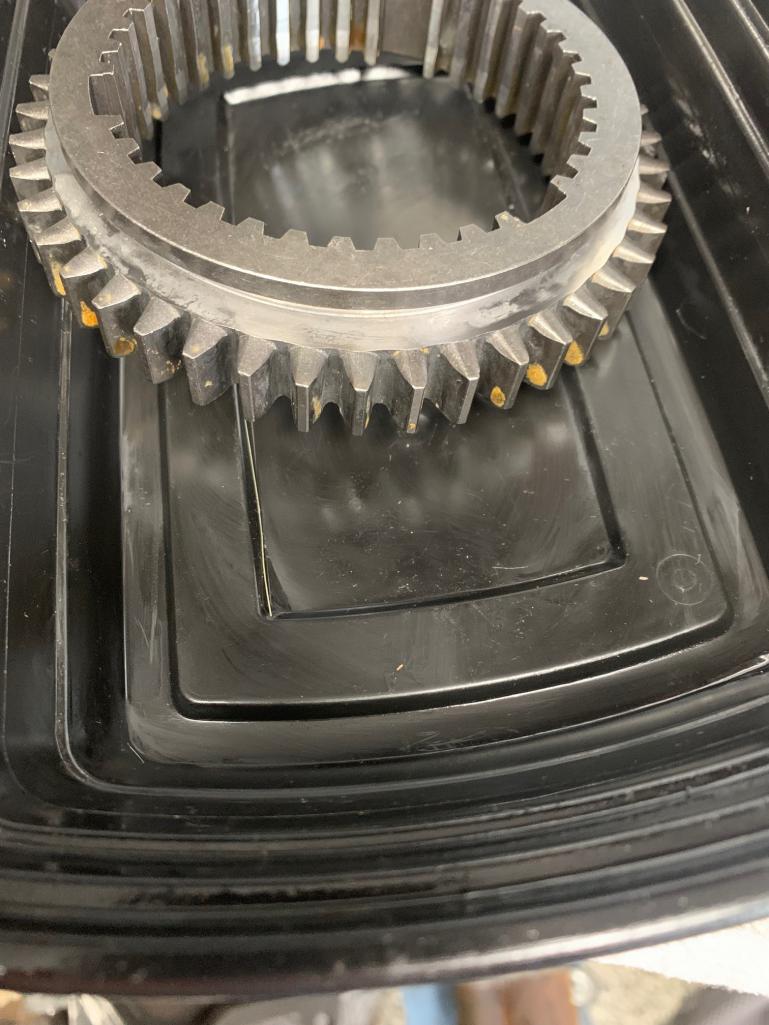 |
|
|
|
| ctc911ctc |
Apr 1 2025, 07:16 PM
Post
#63
|
|
Senior Member Group: Members Posts: 1,331 Joined: 9-June 18 From: boston Member No.: 22,206 Region Association: North East States |
****UPDATE*****
Pulley Seal came, time to remove the pulley, get to use my favorite tool - this one saved me 100 times in the past, holds everything and distributed the counter torque evenly, no mar marks on the pulley. 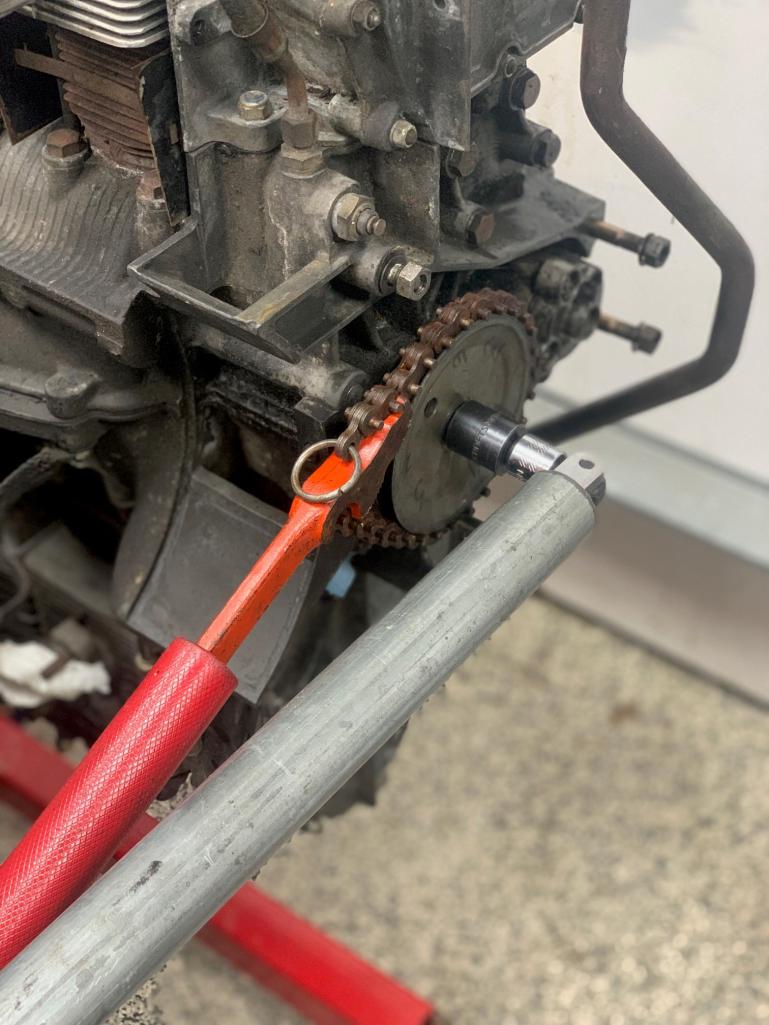 Hmmmm, not sure the seal is leaky, the triangle of death is/was VERY leaky,  DANG!!!! Caught the lip, will try again when the new seal comes - fortunately there is a $300 version and a $12 version - I bought two of the $12......just in case (IMG:style_emoticons/default/shades.gif) 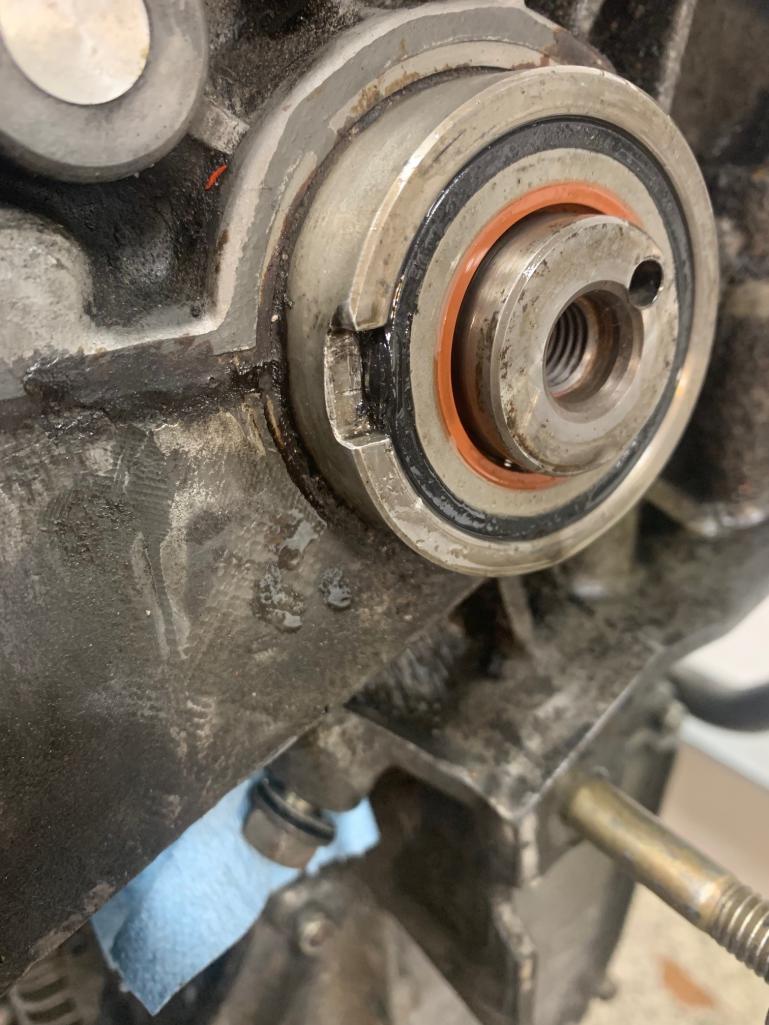 |
|
|
|
| Luke M |
Apr 2 2025, 05:13 AM
Post
#64
|
|
Senior Member Group: Members Posts: 1,546 Joined: 8-February 05 From: WNY Member No.: 3,574 Region Association: North East States |
You will want to replace the ims cover gasket.
The other thing you may want to do is put some jb weld on the oil gal plugs. There's a few of these plugs on a 911 engine and they all should be sealed. If you have the Bruce A or Wayne D engine book it'll show you the locations. Hopefully it's not the nose bearing o-ring causing the leak. |
|
|
|
| ctc911ctc |
Apr 2 2025, 10:58 AM
Post
#65
|
|
Senior Member Group: Members Posts: 1,331 Joined: 9-June 18 From: boston Member No.: 22,206 Region Association: North East States |
Yes, I have this covered, working on flattening the cover and inspecting the fit with Prussian Blue. If I cannot get a proper fit I will use factory recommended Locktight 574 as a bit of added insurance.
QUOTE(Luke M @ Apr 2 2025, 05:13 AM)  You will want to replace the ims cover gasket. The other thing you may want to do is put some jb weld on the oil gal plugs. There's a few of these plugs on a 911 engine and they all should be sealed. If you have the Bruce A or Wayne D engine book it'll show you the locations. Hopefully it's not the nose bearing o-ring causing the leak. |
|
|
|
| ctc911ctc |
Apr 11 2025, 11:06 AM
Post
#66
|
|
Senior Member Group: Members Posts: 1,331 Joined: 9-June 18 From: boston Member No.: 22,206 Region Association: North East States |
*******UPDATE*******
I pulled the plugs and performed a leak down, all cylinders less than 20% Compression reading is: 1 - 162 2 - 167 3 - 166 4 - 165 5 - 166 6 - 161 Here are the plugs: 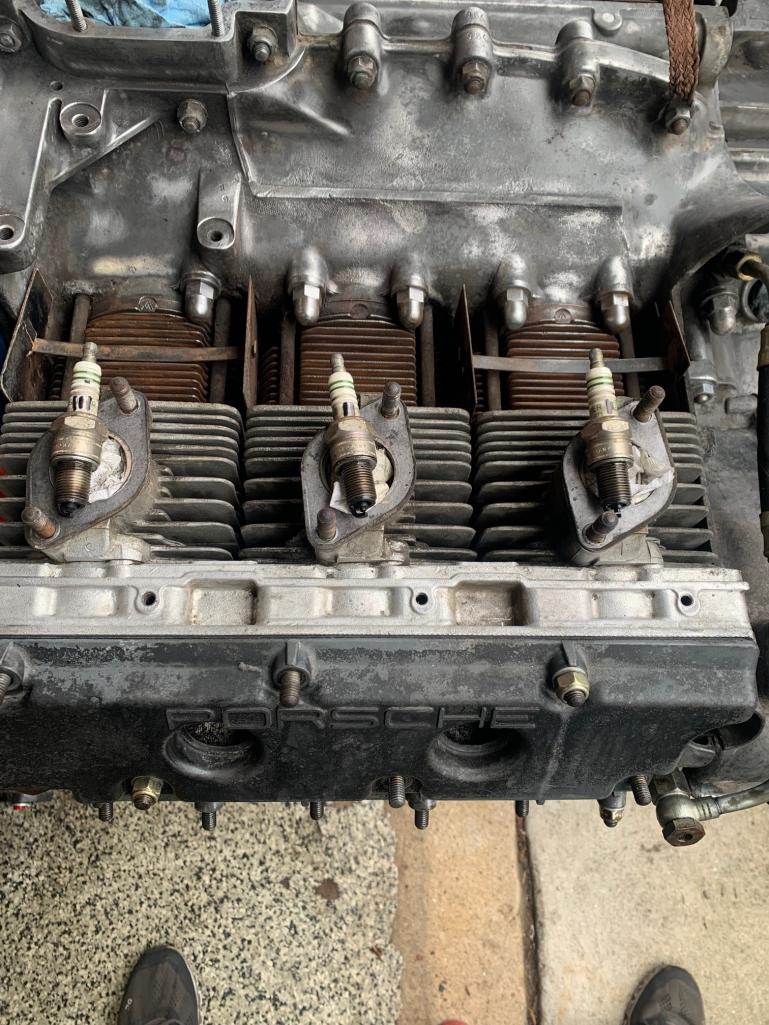 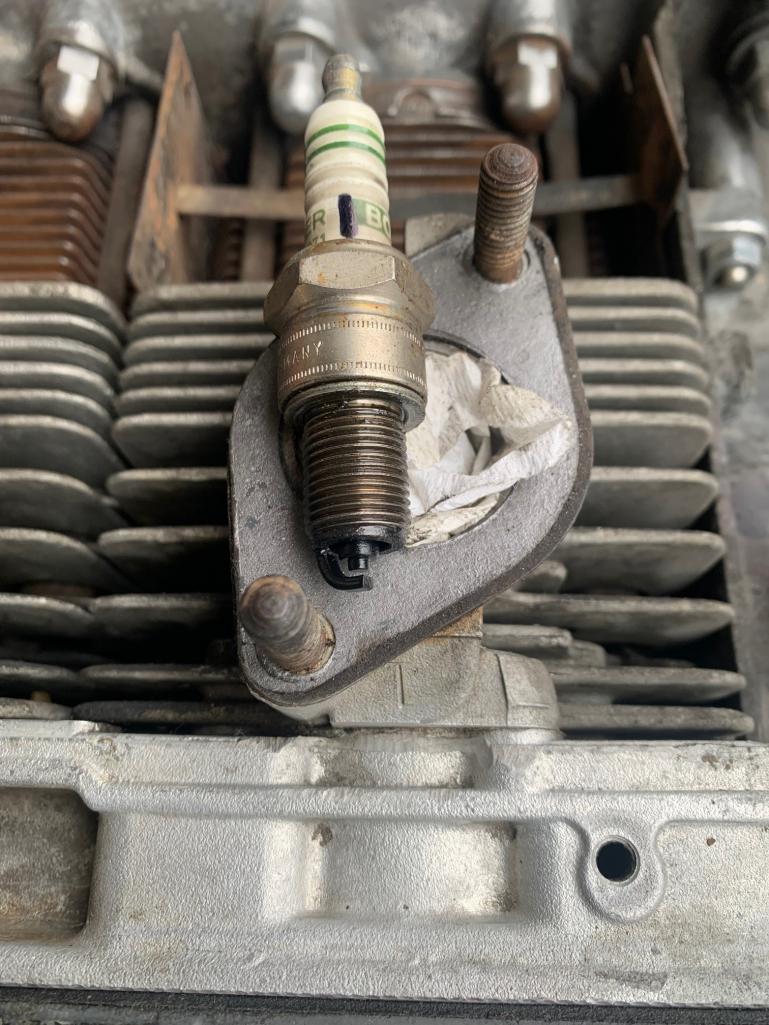 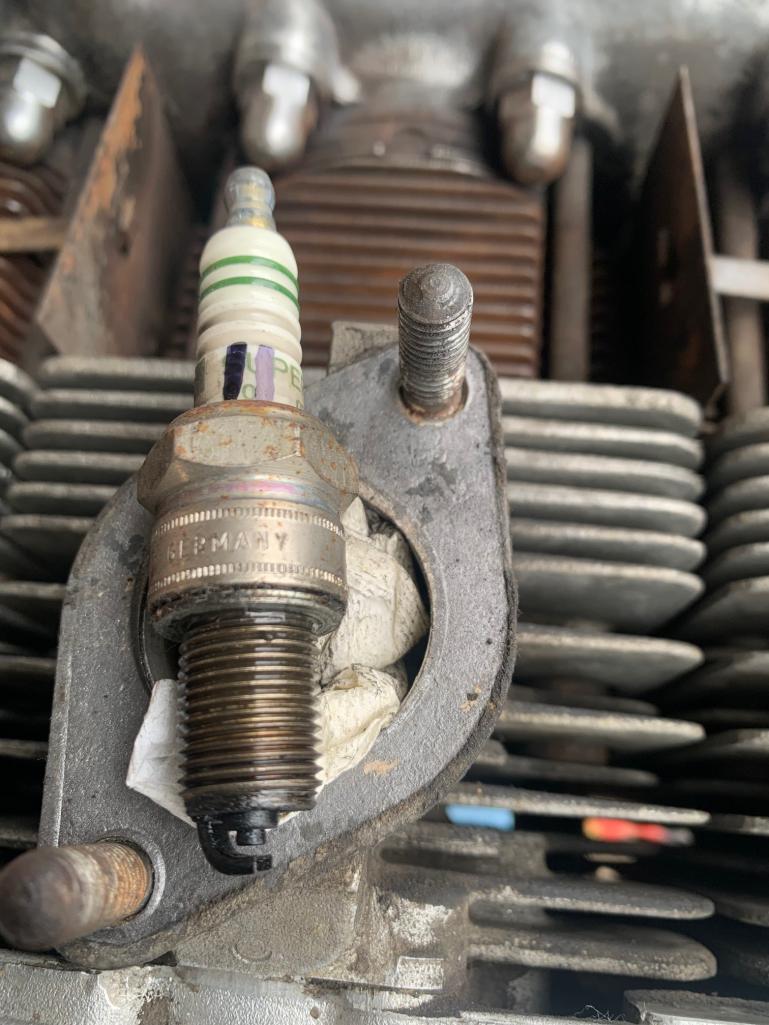  |
|
|
|
| ctc911ctc |
Apr 11 2025, 11:09 AM
Post
#67
|
|
Senior Member Group: Members Posts: 1,331 Joined: 9-June 18 From: boston Member No.: 22,206 Region Association: North East States |
QUOTE(ctc911ctc @ Apr 11 2025, 11:06 AM) *******UPDATE******* I pulled the plugs and performed a leak down, all cylinders less than 20% Compression reading is: 1 - 162 2 - 167 3 - 166 4 - 165 5 - 166 6 - 161 Here are the plugs: AND the other Side 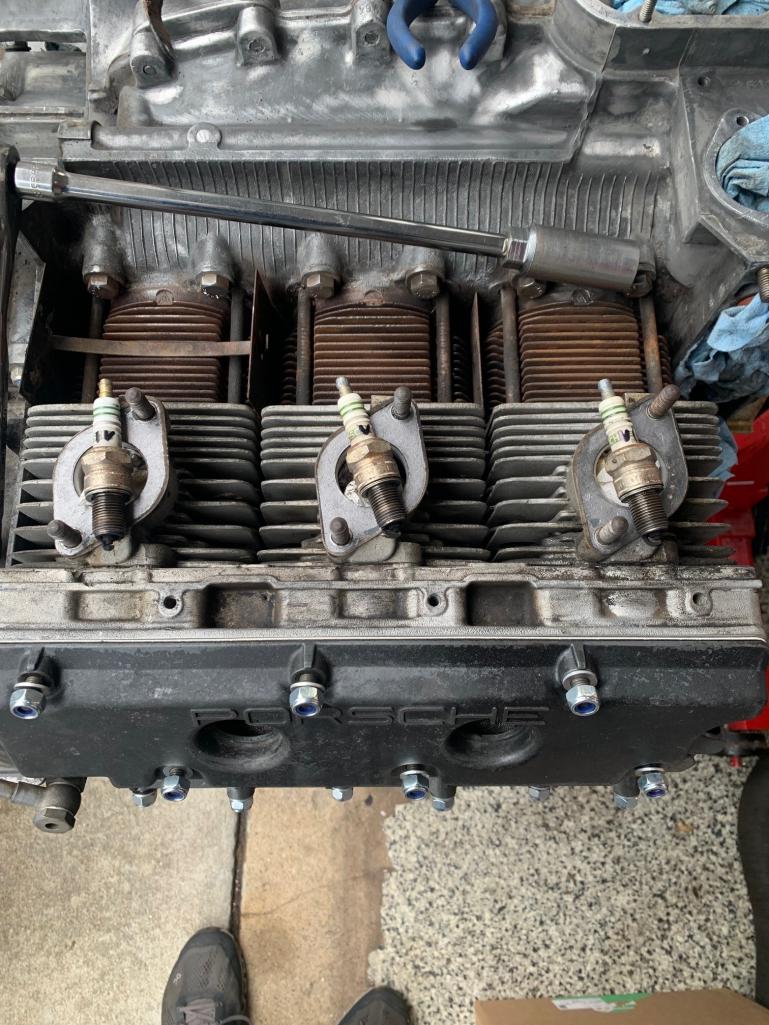 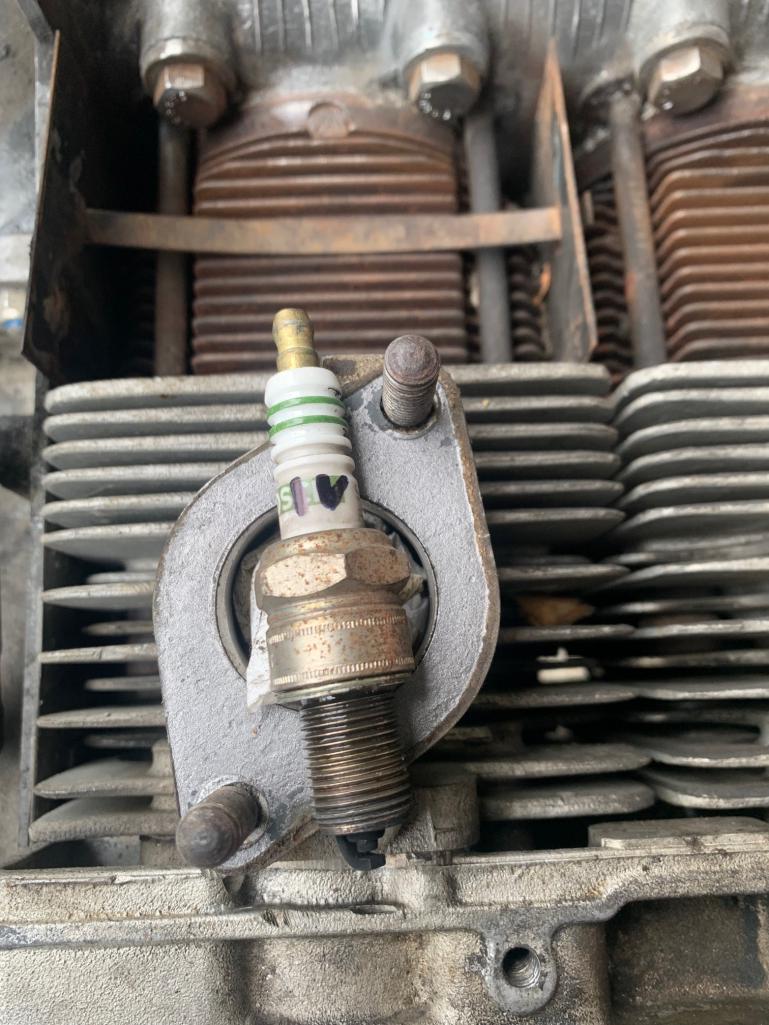 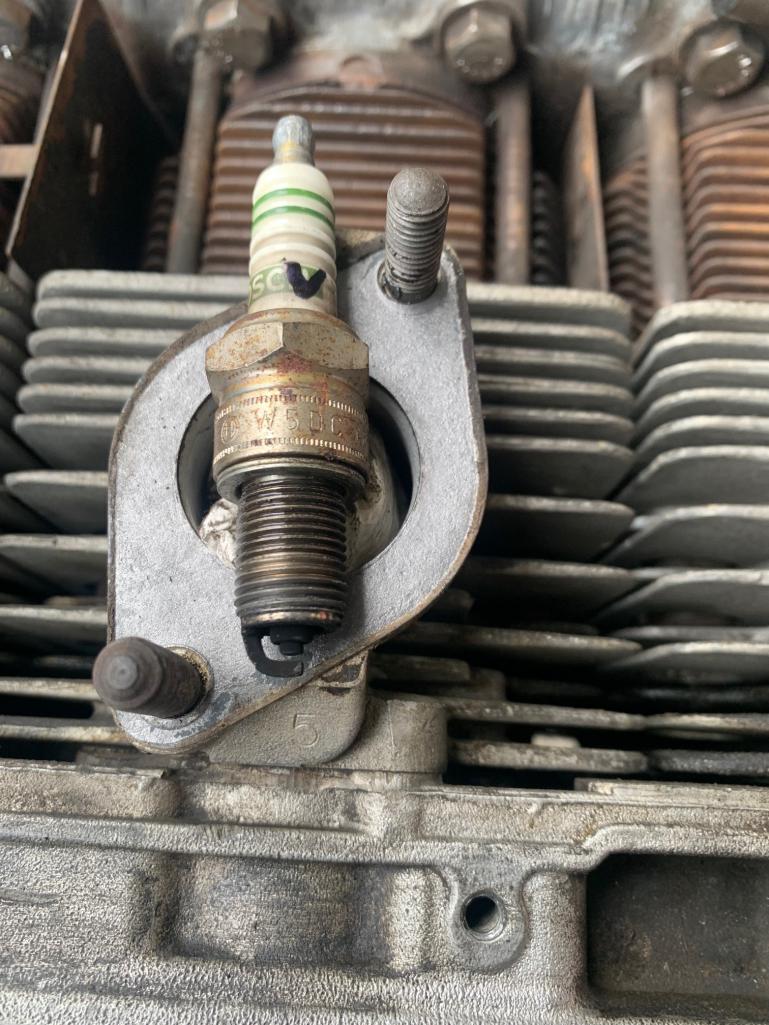 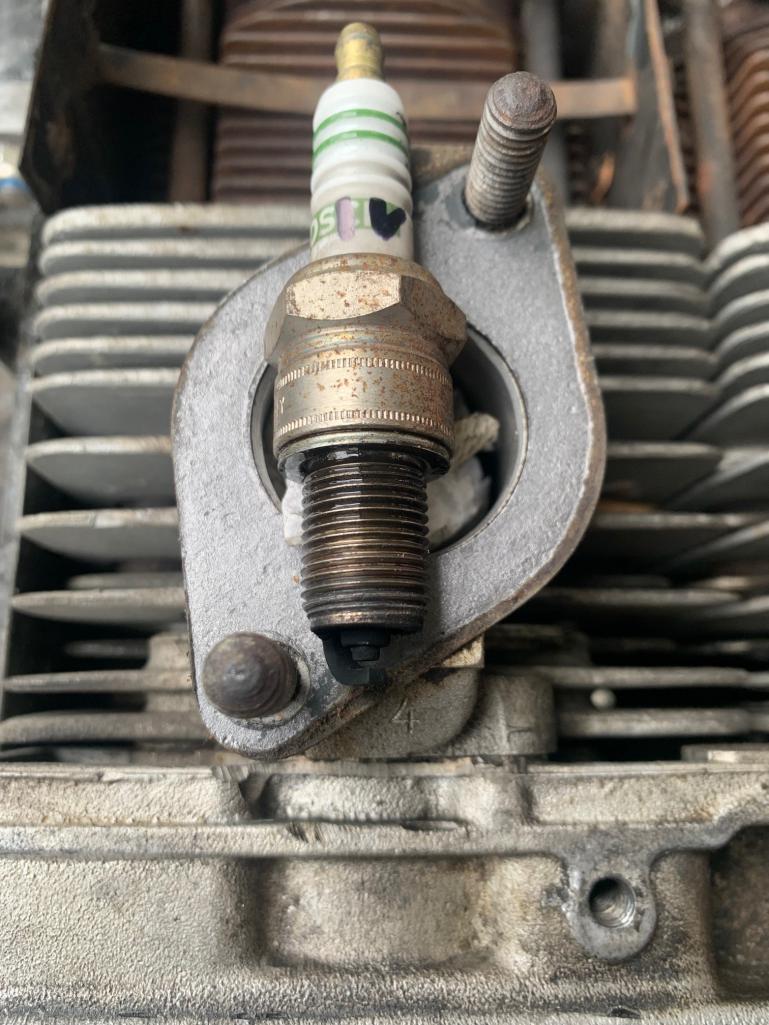 Looks very rich, any other observations from the Teener Team? |
|
|
|
| rgalla9146 |
Apr 11 2025, 01:16 PM
Post
#68
|
|
Advanced Member Group: Members Posts: 4,972 Joined: 23-November 05 From: Paramus NJ Member No.: 5,176 Region Association: None |
Very stout numbers for an engine that has been basically dormant for twenty five
years (that I know of). It was freshened as evidenced by number stamped in cyl. head. and invoices that you have. I'll take leaks and cleaning over rust and wrecks anytime. Enjoy. |
|
|
|
| ctc911ctc |
Apr 14 2025, 11:39 AM
Post
#69
|
|
Senior Member Group: Members Posts: 1,331 Joined: 9-June 18 From: boston Member No.: 22,206 Region Association: North East States |
This weekend I have been prepping to put things back together,
There were 2 friction holes on the cowling - not sure what from, filled and sanded 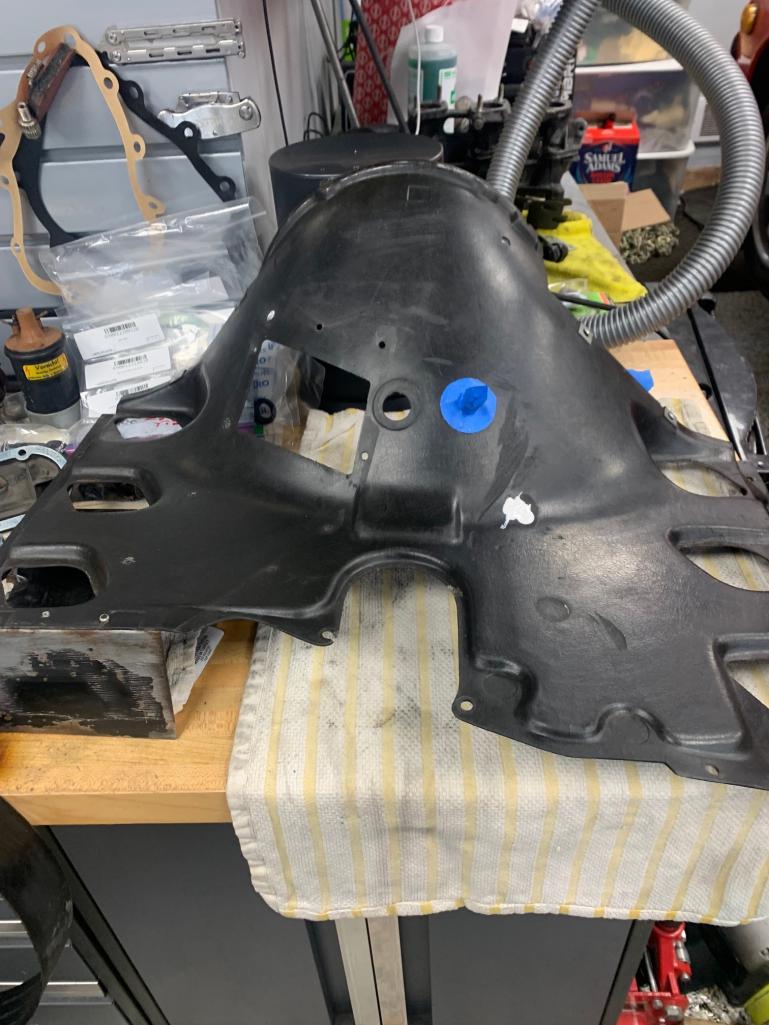 The Cam Box Cover was in tough shape - I painted and then removed the letter paint with a emery paper flat - very flat, block. I saw someone use a mill machine to do the same......talk about tool envy!  Paint Color is always a topic, I will be keeping all of the original colors, this one is supposed to be a match.....seems ok.......See the original below the freshly painted part. 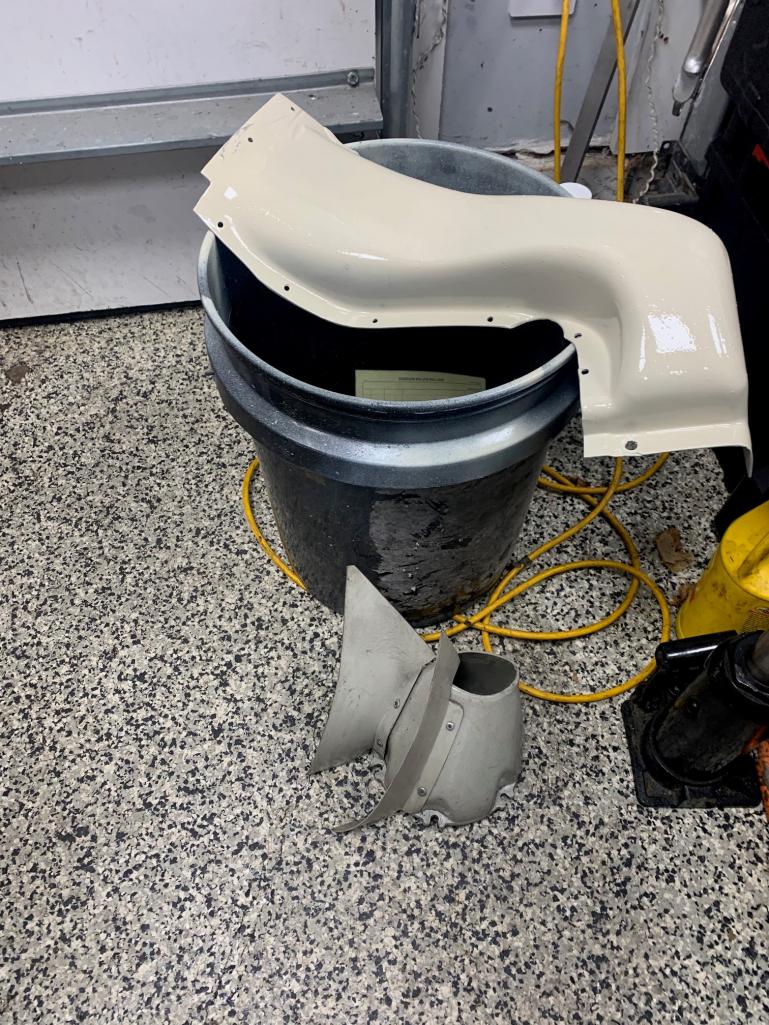 Attached thumbnail(s) 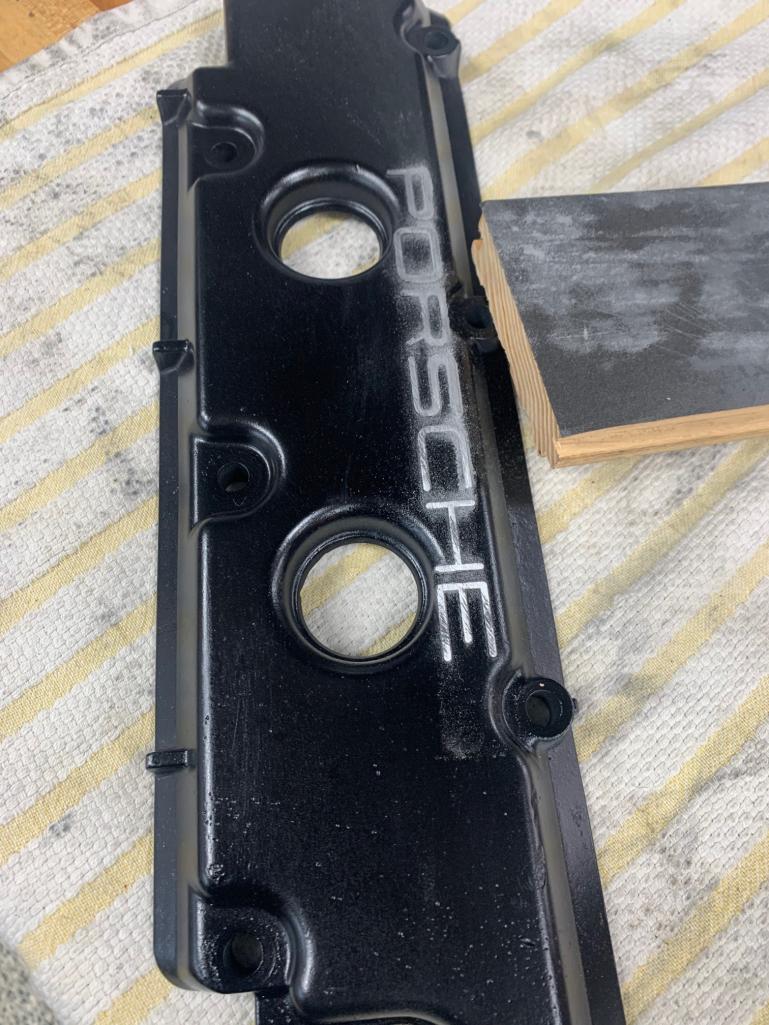
|
|
|
|
| ctc911ctc |
Apr 26 2025, 03:55 PM
Post
#70
|
|
Senior Member Group: Members Posts: 1,331 Joined: 9-June 18 From: boston Member No.: 22,206 Region Association: North East States |
Before and After
The Magnesium is pitted but cleaned up pretty good! 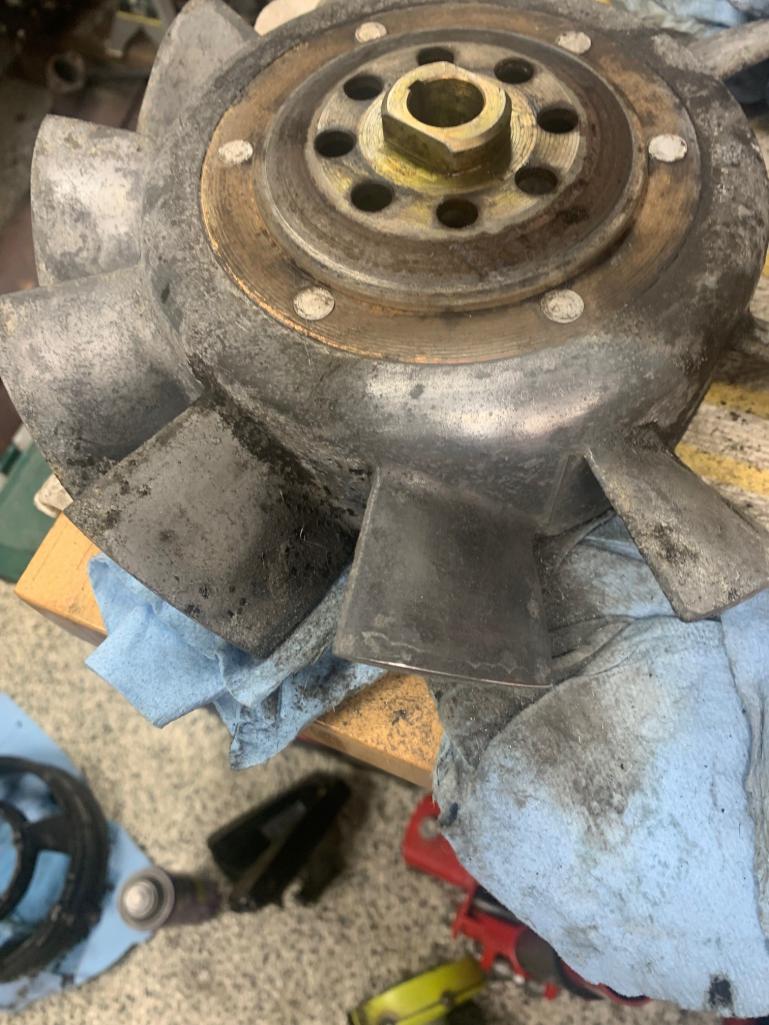 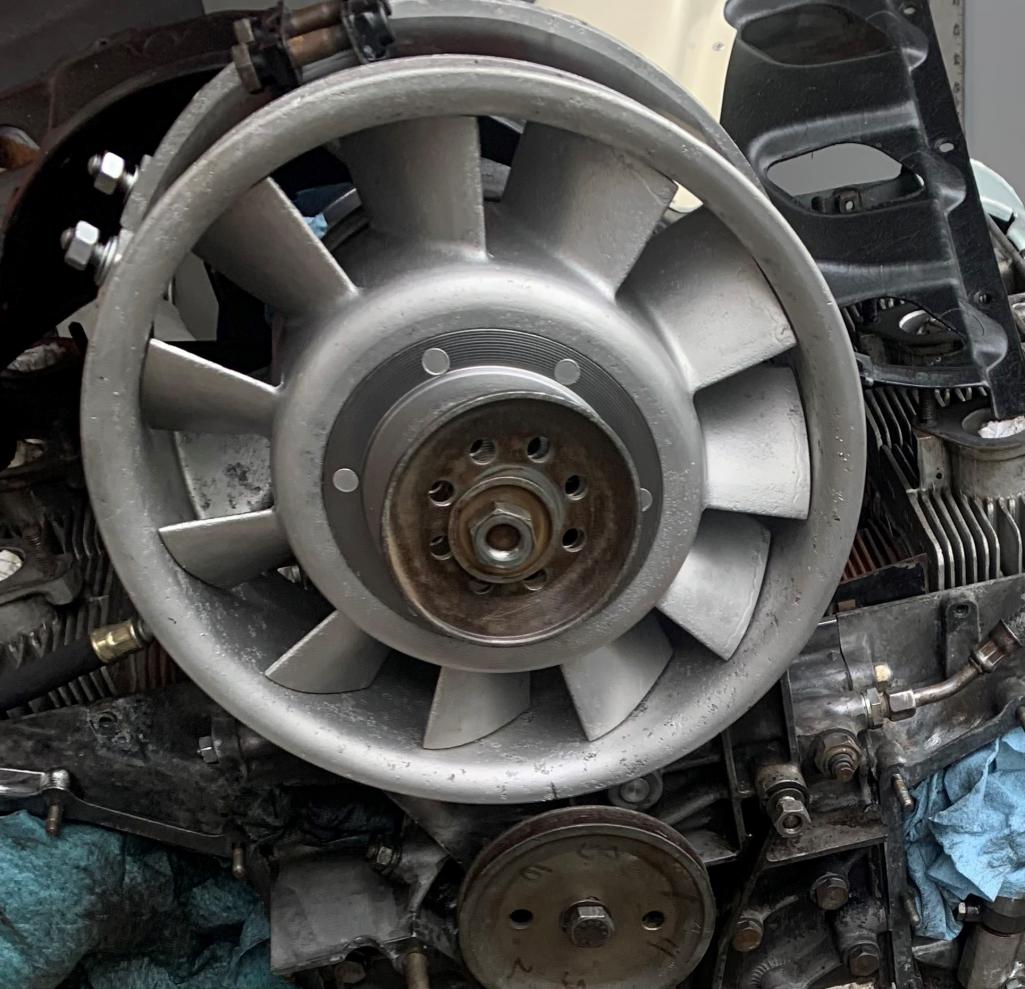 |
|
|
|
| ctc911ctc |
Apr 26 2025, 04:01 PM
Post
#71
|
|
Senior Member Group: Members Posts: 1,331 Joined: 9-June 18 From: boston Member No.: 22,206 Region Association: North East States |
Wiring and Shroud today here are a few pictures
Wiring done, new grommet, ready to bolt down 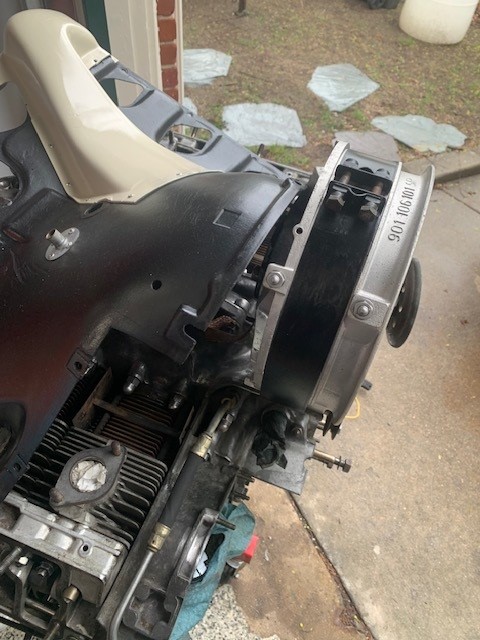 Front look - no fan......when will those gaskets arrive??  Cleaning this shroud took a week - it was caked with heavy grease, hard to remove without damaging the shroud. Colors are original, new rivets and bolts -  |
|
|
|
| ctc911ctc |
Apr 26 2025, 04:05 PM
Post
#72
|
|
Senior Member Group: Members Posts: 1,331 Joined: 9-June 18 From: boston Member No.: 22,206 Region Association: North East States |
I went to the hardware store and purchased some supplies, I could not find this gasket within our online vendors - and on a whim asked the owner about fiber gaskets.
He had an old box going back to the 60s, I got the last one. Perfect material and size match. 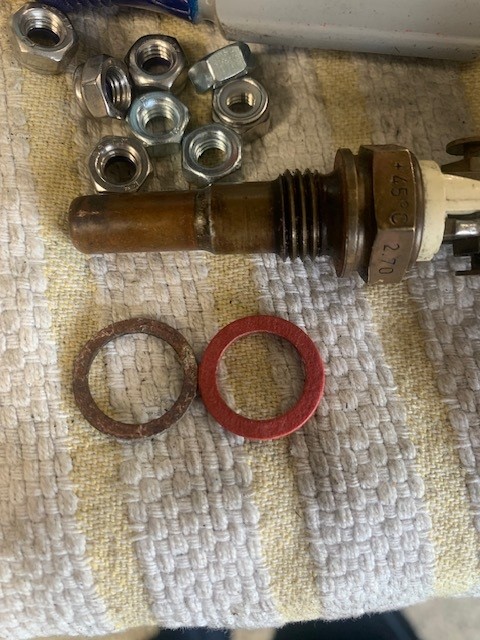 |
|
|
|
| porschetub |
Apr 26 2025, 05:57 PM
Post
#73
|
|
914 Guru Group: Members Posts: 5,124 Joined: 25-July 15 From: New Zealand Member No.: 18,995 Region Association: None |
QUOTE(ctc911ctc @ Apr 27 2025, 10:05 AM) I went to the hardware store and purchased some supplies, I could not find this gasket within our online vendors - and on a whim asked the owner about fiber gaskets. He had an old box going back to the 60s, I got the last one. Perfect material and size match. Nice job ,bit late to ask but did you replace the earth strap from the case to alternator ?,mine looked ok but after a clean it was too crusty to use ,had a new one on advice from Perry who built my new custom engine loom . Keep up the good work ,cheers |
|
|
|
| ctc911ctc |
Apr 26 2025, 06:41 PM
Post
#74
|
|
Senior Member Group: Members Posts: 1,331 Joined: 9-June 18 From: boston Member No.: 22,206 Region Association: North East States |
I am glad you asked - I used the existing ground strap and forgot (uh-oh) where it went so I bolted it to the shroud on the backside where the fan flow blades are attached, could not find a diagram as to how/where to attach the strap.....sigh (IMG:style_emoticons/default/confused24.gif) I took the strap off and polished it, looks new and the connections are solid. Still plenty of free electrons within the copper strap (IMG:style_emoticons/default/dry.gif) Where did you attach the strap? QUOTE(porschetub @ Apr 26 2025, 05:57 PM) QUOTE(ctc911ctc @ Apr 27 2025, 10:05 AM) I went to the hardware store and purchased some supplies, I could not find this gasket within our online vendors - and on a whim asked the owner about fiber gaskets. He had an old box going back to the 60s, I got the last one. Perfect material and size match. Nice job ,bit late to ask but did you replace the earth strap from the case to alternator ?,mine looked ok but after a clean it was too crusty to use ,had a new one on advice from Perry who built my new custom engine loom . Keep up the good work ,cheers |
|
|
|
| rgalla9146 |
Apr 27 2025, 06:55 AM
Post
#75
|
|
Advanced Member Group: Members Posts: 4,972 Joined: 23-November 05 From: Paramus NJ Member No.: 5,176 Region Association: None |
The ground strap attaches to the case just to the left of the blue plier handles in a photo above |
|
|
|
| porschetub |
Apr 27 2025, 01:39 PM
Post
#76
|
|
914 Guru Group: Members Posts: 5,124 Joined: 25-July 15 From: New Zealand Member No.: 18,995 Region Association: None |
QUOTE(ctc911ctc @ Apr 27 2025, 12:41 PM) I am glad you asked - I used the existing ground strap and forgot (uh-oh) where it went so I bolted it to the shroud on the backside where the fan flow blades are attached, could not find a diagram as to how/where to attach the strap.....sigh (IMG:style_emoticons/default/confused24.gif) I took the strap off and polished it, looks new and the connections are solid. Still plenty of free electrons within the copper strap (IMG:style_emoticons/default/dry.gif) Where did you attach the strap? QUOTE(porschetub @ Apr 26 2025, 05:57 PM) QUOTE(ctc911ctc @ Apr 27 2025, 10:05 AM) I went to the hardware store and purchased some supplies, I could not find this gasket within our online vendors - and on a whim asked the owner about fiber gaskets. He had an old box going back to the 60s, I got the last one. Perfect material and size match. Nice job ,bit late to ask but did you replace the earth strap from the case to alternator ?,mine looked ok but after a clean it was too crusty to use ,had a new one on advice from Perry who built my new custom engine loom . Keep up the good work ,cheers Bolts on to the nearest top case 8 mm thru stud ,you should see where its been,then on to the altenator 6mm stud ,I used nylock 6mm nuts as all my mine were somewhat loose where they had sunk into the fiberglass ,also used new heavier washers for under those nuts ,gave it more support . Make sure the air deflector is fitted as it came out as only works in that spot ,I marked mine with a top mark ,my alternator stopped charging shortly after fitting the motor was fitted which was a hassle but not too bad. Cheers. |
|
|
|
| ctc911ctc |
Apr 27 2025, 08:35 PM
Post
#77
|
|
Senior Member Group: Members Posts: 1,331 Joined: 9-June 18 From: boston Member No.: 22,206 Region Association: North East States |
QUOTE(porschetub @ Apr 27 2025, 01:39 PM) QUOTE(ctc911ctc @ Apr 27 2025, 12:41 PM) I am glad you asked - I used the existing ground strap and forgot (uh-oh) where it went so I bolted it to the shroud on the backside where the fan flow blades are attached, could not find a diagram as to how/where to attach the strap.....sigh (IMG:style_emoticons/default/confused24.gif) I took the strap off and polished it, looks new and the connections are solid. Still plenty of free electrons within the copper strap (IMG:style_emoticons/default/dry.gif) Where did you attach the strap? QUOTE(porschetub @ Apr 26 2025, 05:57 PM) QUOTE(ctc911ctc @ Apr 27 2025, 10:05 AM) I went to the hardware store and purchased some supplies, I could not find this gasket within our online vendors - and on a whim asked the owner about fiber gaskets. He had an old box going back to the 60s, I got the last one. Perfect material and size match. Nice job ,bit late to ask but did you replace the earth strap from the case to alternator ?,mine looked ok but after a clean it was too crusty to use ,had a new one on advice from Perry who built my new custom engine loom . Keep up the good work ,cheers Bolts on to the nearest top case 8 mm thru stud ,you should see where its been,then on to the altenator 6mm stud ,I used nylock 6mm nuts as all my mine were somewhat loose where they had sunk into the fiberglass ,also used new heavier washers for under those nuts ,gave it more support . Make sure the air deflector is fitted as it came out as only works in that spot ,I marked mine with a top mark ,my alternator stopped charging shortly after fitting the motor was fitted which was a hassle but not too bad. Cheers. Hopefully I have installed correctly, pretty sure the shroud will not fit if the deflector is incorrectly aligned}??? (IMG:style_emoticons/default/confused24.gif) |
|
|
|
| ctc911ctc |
May 3 2025, 02:50 PM
Post
#78
|
|
Senior Member Group: Members Posts: 1,331 Joined: 9-June 18 From: boston Member No.: 22,206 Region Association: North East States |
Distributor
I really like this setup, simple, no noticeable wear, however, old grease has made the shaft a bit stiff and the advance operation no doubt is effected by old grease that is now glue........interesting metaphor (IMG:style_emoticons/default/dry.gif) I took apart all of the screws which were muscle-F****D at some time in the past, also ordered a rebuild kit from PartsKlassic. The shaft was never removed from the assembly and I had to drill out the original drift, it was distorted most likely with a factory press on either side. My question is the re-distortion of the pin that is with the rebuild kit, has anyone else done this job? Is there a tool I could use in my press to properly distort the pin? Looking for any guidance, thank you, 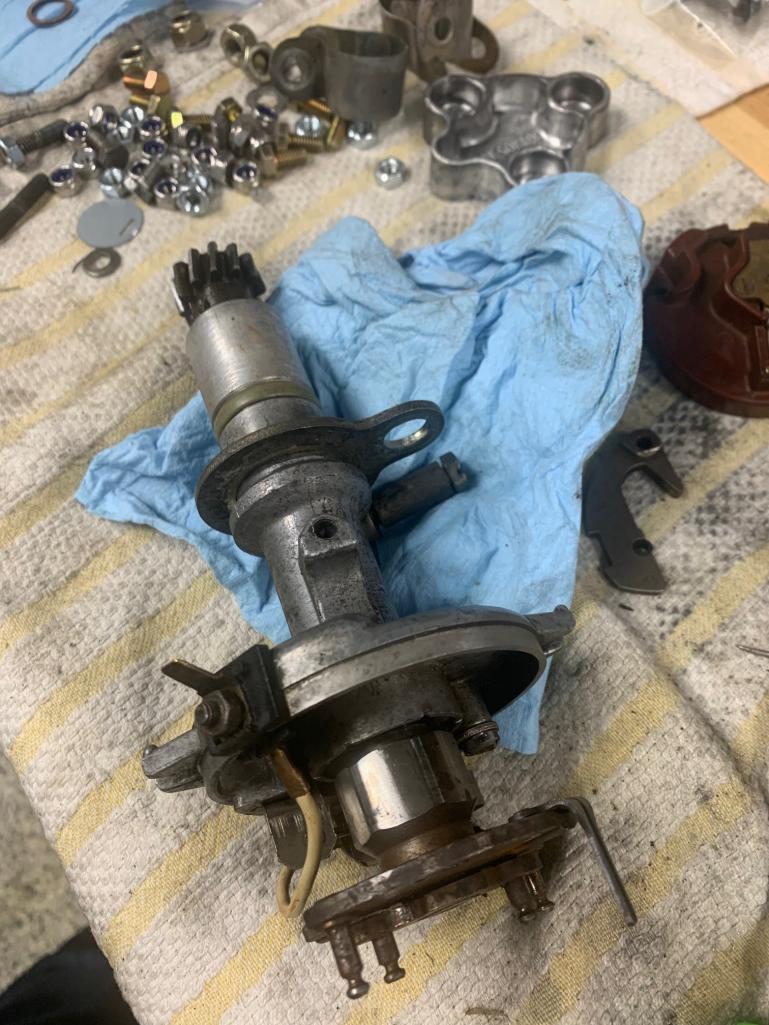  There was a minor deformation on the case at the entry to the Distro into the case. Just a small burr that made a nasty score on the shaft - I gently removed this marring with steel wool. 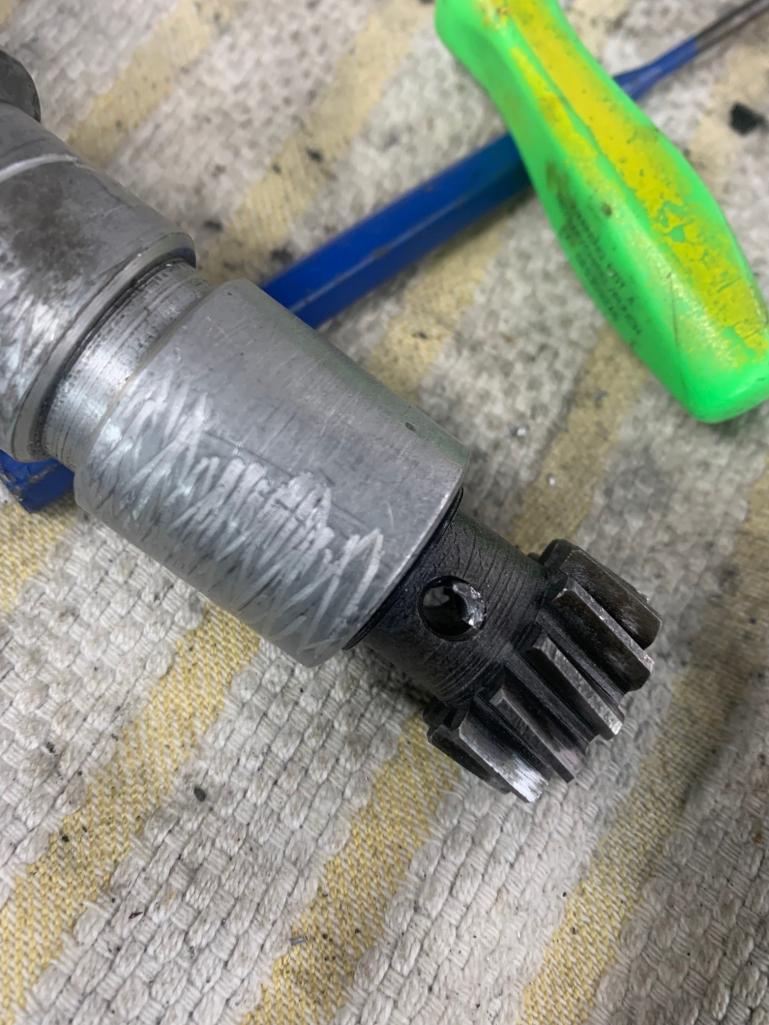 I could not, after removing the head of the drift on one side, get it to come out with a firm drift/punch tool - I did not want to hit it too hard, so I started the long and careful drilling process............. 3 HOURS LATER 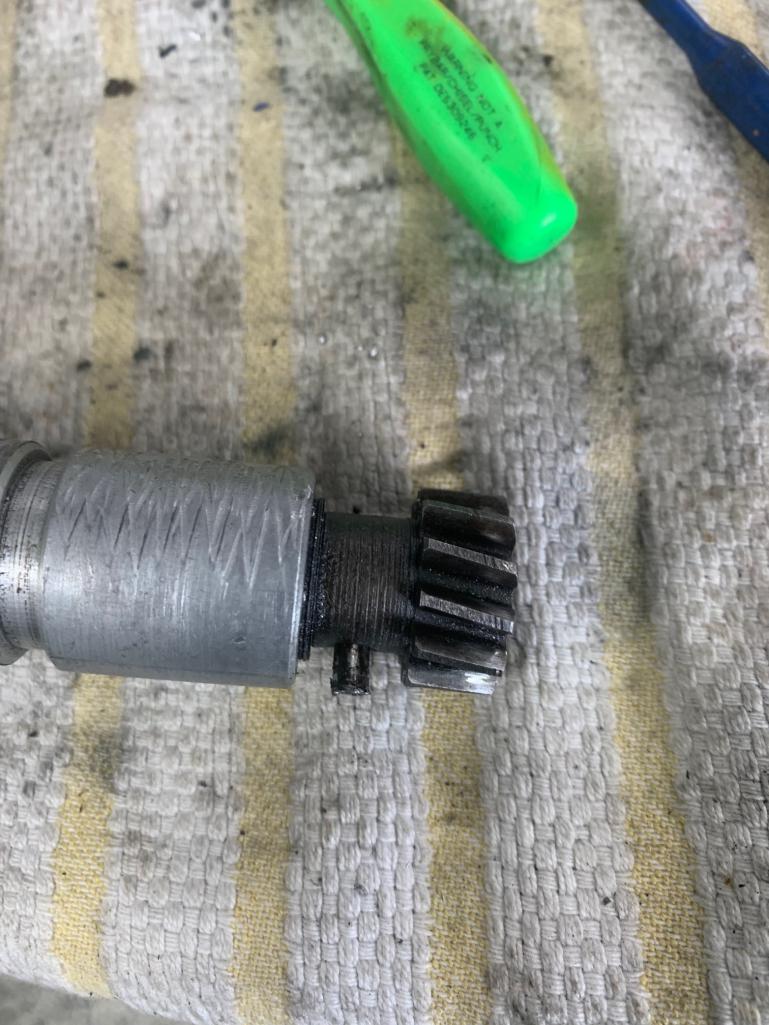 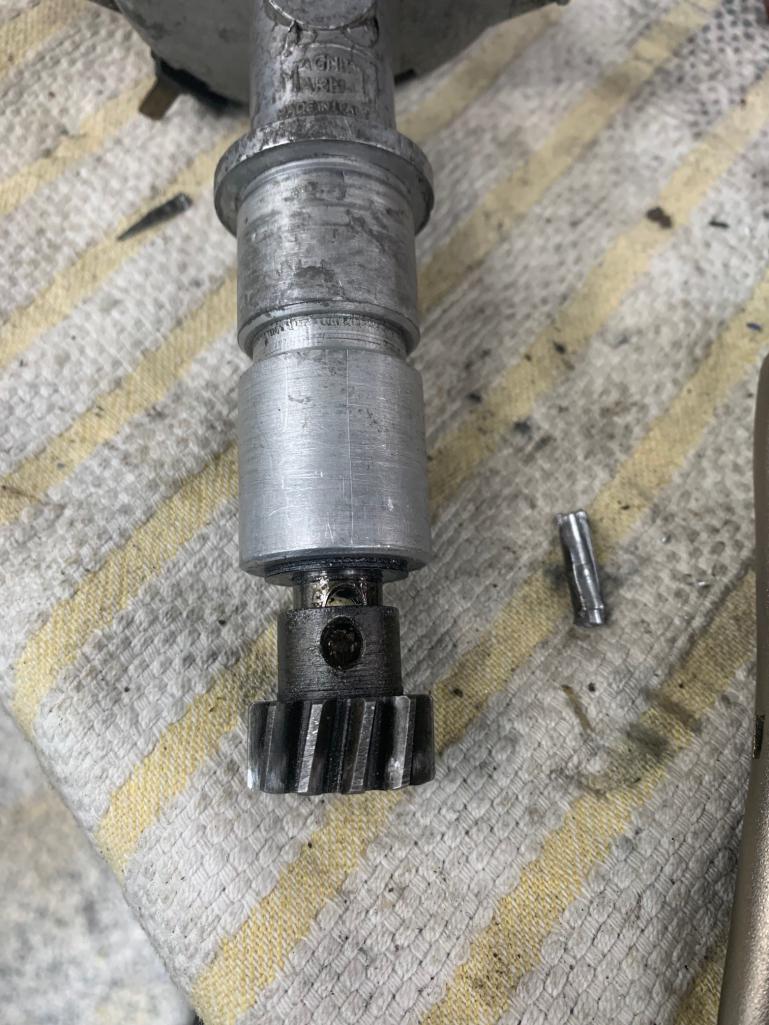 |
|
|
|
| mb911 |
May 3 2025, 05:09 PM
Post
#79
|
|
914 Guru Group: Members Posts: 7,787 Joined: 2-January 09 From: Burlington wi Member No.: 9,892 Region Association: Upper MidWest |
Where is there a rebuild kit available? I remember I did one years ago and had to reuse the pin and peened it over
|
|
|
|
| ctc911ctc |
May 3 2025, 08:06 PM
Post
#80
|
|
Senior Member Group: Members Posts: 1,331 Joined: 9-June 18 From: boston Member No.: 22,206 Region Association: North East States |
https://www.partsklassik.com/p-3794-distrib...marelli-bx.aspx QUOTE(mb911 @ May 3 2025, 06:09 PM) Where is there a rebuild kit available? I remember I did one years ago and had to reuse the pin and peened it over |
|
|
|
|
2 User(s) are reading this topic (2 Guests and 0 Anonymous Users)
0 Members:

|
Lo-Fi Version | Time is now: 18th June 2026 - 10:47 PM |
Invision Power Board
v9.1.4 © 2026 IPS, Inc.