|
|
|
Porsche, and the Porsche crest are registered trademarks of Dr. Ing. h.c. F. Porsche AG.
This site is not affiliated with Porsche in any way. Its only purpose is to provide an online forum for car enthusiasts. All other trademarks are property of their respective owners. |
|
|

  |

| emerygt350 |
 Apr 5 2025, 02:34 PM Apr 5 2025, 02:34 PM
Post
#21
|
|
Advanced Member  Group: Members Posts: 3,528 Joined: 20-July 21 From: Upstate, NY Member No.: 25,740 Region Association: North East States |
Definitely check the vacuum before you go breaking into the valves. If the vacuum is good, that really points to no real problem with the valves. No need to go crawling around if you don't have to. All you need to do is attach the mityvac to the hose that would normally go to the MPS or even the vacuum retard port on the TB if you want to leave the MPS attached. The engine vacuum will register on the mityvac gauge (don't pump it or anything).
When you do get around to adjusting the valves, I seriously suggest you do the crusty method, that allows you to set the gap without having to worry yourself about which cylinder is on a compression stroke. You just turn the wheel till a valve is completely compressed (very easy to see as you roll the wheel back and forth) and then adjust the opposite valve on the engine. There are only four lobes on the cam each lobe operates 2 valves on opposite banks, so when cylinder 1 exhaust is completely compressed, cylinder 3 exhaust is as loose as it can get. |
   |

 
|
| Ron914 |
Apr 5 2025, 03:43 PM
Post
#22
|
|
Member Group: Members Posts: 496 Joined: 19-April 22 From: Huntington Beach,Ca Member No.: 26,487 Region Association: Southern California |
QUOTE(emerygt350 @ Apr 5 2025, 03:34 PM)  Definitely check the vacuum before you go breaking into the valves. If the vacuum is good, that really points to no real problem with the valves. No need to go crawling around if you don't have to. All you need to do is attach the mityvac to the hose that would normally go to the MPS or even the vacuum retard port on the TB if you want to leave the MPS attached. The engine vacuum will register on the mityvac gauge (don't pump it or anything). When you do get around to adjusting the valves, I seriously suggest you do the crusty method, that allows you to set the gap without having to worry yourself about which cylinder is on a compression stroke. You just turn the wheel till a valve is completely compressed (very easy to see as you roll the wheel back and forth) and then adjust the opposite valve on the engine. There are only four lobes on the cam each lobe operates 2 valves on opposite banks, so when cylinder 1 exhaust is completely compressed, cylinder 3 exhaust is as loose as it can get. Very sound advice Emery , I will use the Crusty method , Im all about efficiency and things that don't waste my time I was trying to figure out about checking the vacuum first but I had to pump the mighty max to add 20inHG on my MPS I wasn't sure how I was going to connect to my plenum and read the draw, makes since the way you just explained . I love working on this car, learning things as I go .As the quote goes "You can give a man a fish to eat today but teach him how to fish and can eat for life " Thanks again for working with me and I've been collecting more cool tools |
 |
|
| Ron914 |
Apr 5 2025, 03:46 PM
Post
#23
|
|
Member Group: Members Posts: 496 Joined: 19-April 22 From: Huntington Beach,Ca Member No.: 26,487 Region Association: Southern California |
QUOTE(Ron914 @ Apr 5 2025, 04:43 PM) QUOTE(emerygt350 @ Apr 5 2025, 03:34 PM) Definitely check the vacuum before you go breaking into the valves. If the vacuum is good, that really points to no real problem with the valves. No need to go crawling around if you don't have to. All you need to do is attach the mityvac to the hose that would normally go to the MPS or even the vacuum retard port on the TB if you want to leave the MPS attached. The engine vacuum will register on the mityvac gauge (don't pump it or anything). When you do get around to adjusting the valves, I seriously suggest you do the crusty method, that allows you to set the gap without having to worry yourself about which cylinder is on a compression stroke. You just turn the wheel till a valve is completely compressed (very easy to see as you roll the wheel back and forth) and then adjust the opposite valve on the engine. There are only four lobes on the cam each lobe operates 2 valves on opposite banks, so when cylinder 1 exhaust is completely compressed, cylinder 3 exhaust is as loose as it can get. Very sound advice Emery , I will use the Crusty method , Im all about efficiency and things that don't waste my time I was trying to figure out about checking the vacuum first but I had to pump the mighty max to add 20inHG on my MPS I wasn't sure how I was going to connect to my plenum and read the draw, makes since the way you just explained . I love working on this car, learning things as I go .As the quote goes "You can give a man a fish to eat today but teach him how to fish and can eat for life " Thanks again for working with me and I've been collecting more cool tools I'll be asking for help when I get to adjust the valves down the road , How often ?miles should I be adjusting them . I probably have just a few hundred miles on my new motor now while testing driving around in my neighborhood. |
|
|
|
| Ron914 |
Apr 5 2025, 03:48 PM
Post
#24
|
|
Member Group: Members Posts: 496 Joined: 19-April 22 From: Huntington Beach,Ca Member No.: 26,487 Region Association: Southern California |
QUOTE(Ron914 @ Apr 5 2025, 04:46 PM) QUOTE(Ron914 @ Apr 5 2025, 04:43 PM) QUOTE(emerygt350 @ Apr 5 2025, 03:34 PM) Definitely check the vacuum before you go breaking into the valves. If the vacuum is good, that really points to no real problem with the valves. No need to go crawling around if you don't have to. All you need to do is attach the mityvac to the hose that would normally go to the MPS or even the vacuum retard port on the TB if you want to leave the MPS attached. The engine vacuum will register on the mityvac gauge (don't pump it or anything). When you do get around to adjusting the valves, I seriously suggest you do the crusty method, that allows you to set the gap without having to worry yourself about which cylinder is on a compression stroke. You just turn the wheel till a valve is completely compressed (very easy to see as you roll the wheel back and forth) and then adjust the opposite valve on the engine. There are only four lobes on the cam each lobe operates 2 valves on opposite banks, so when cylinder 1 exhaust is completely compressed, cylinder 3 exhaust is as loose as it can get. Very sound advice Emery , I will use the Crusty method , Im all about efficiency and things that don't waste my time I was trying to figure out about checking the vacuum first but I had to pump the mighty max to add 20inHG on my MPS I wasn't sure how I was going to connect to my plenum and read the draw, makes since the way you just explained . I love working on this car, learning things as I go .As the quote goes "You can give a man a fish to eat today but teach him how to fish and can eat for life " Thanks again for working with me and I've been collecting more cool tools I'll be asking for help when I get to adjust the valves down the road , How often ?miles should I be adjusting them . I probably have just a few hundred miles on my new motor now while testing driving around in my neighborhood. With your help I think I will be able to drive it to WCR this year in June . |
|
|
|
| fiacra |
Apr 5 2025, 04:14 PM
Post
#25
|
|
Person.Woman.Man.Camera.TV. = MCI Group: Members Posts: 724 Joined: 1-March 19 From: East Bay Region - California Member No.: 22,920 Region Association: Northern California |
QUOTE(Ron914 @ Apr 5 2025, 02:46 PM) QUOTE(Ron914 @ Apr 5 2025, 04:43 PM) QUOTE(emerygt350 @ Apr 5 2025, 03:34 PM) Definitely check the vacuum before you go breaking into the valves. If the vacuum is good, that really points to no real problem with the valves. No need to go crawling around if you don't have to. All you need to do is attach the mityvac to the hose that would normally go to the MPS or even the vacuum retard port on the TB if you want to leave the MPS attached. The engine vacuum will register on the mityvac gauge (don't pump it or anything). When you do get around to adjusting the valves, I seriously suggest you do the crusty method, that allows you to set the gap without having to worry yourself about which cylinder is on a compression stroke. You just turn the wheel till a valve is completely compressed (very easy to see as you roll the wheel back and forth) and then adjust the opposite valve on the engine. There are only four lobes on the cam each lobe operates 2 valves on opposite banks, so when cylinder 1 exhaust is completely compressed, cylinder 3 exhaust is as loose as it can get. Very sound advice Emery , I will use the Crusty method , Im all about efficiency and things that don't waste my time I was trying to figure out about checking the vacuum first but I had to pump the mighty max to add 20inHG on my MPS I wasn't sure how I was going to connect to my plenum and read the draw, makes since the way you just explained . I love working on this car, learning things as I go .As the quote goes "You can give a man a fish to eat today but teach him how to fish and can eat for life " Thanks again for working with me and I've been collecting more cool tools I'll be asking for help when I get to adjust the valves down the road , How often ?miles should I be adjusting them . I probably have just a few hundred miles on my new motor now while testing driving around in my neighborhood. Ron, I've been enjoying watching your journey with this car. As for time interval for adjusting valves, typically it would be every 3K miles. However, since I it probably would take me two years or more to put that many miles on any of my air cooled cars I do a valve adjustment yearly, or whenever my ear tells me it is time. I also use the Cap'n Krusty method of valve adjusting. Make sure you have a decent set of feeler gauges and a good understanding of the amount of drag you would like to feel. If I remember correctly there is a very nice description of this in John Muir's "How to Keep your Volkswagen Alive." I would suggest you check the valve clearance on a newly rebuilt engine at 300 miles and then again at 1K miles. Not sure what others would recommend, but that's what I have done. You might ask your engine builder what they recommend. That might be your best source, especially if you have a warranty on your engine. |
|
|
|
| emerygt350 |
Apr 5 2025, 05:13 PM
Post
#26
|
|
Advanced Member Group: Members Posts: 3,528 Joined: 20-July 21 From: Upstate, NY Member No.: 25,740 Region Association: North East States |
That interval is what I shoot for, and I drive my car very hard (autocross, watkins glen, daily driver). After my rebuild I have put on nearly 7k and have checked my valves at the intervals fiacra mentioned. So far no adjustments necessary on mine (new valves in the 2056 upgrade).
|
|
|
|
| Ron914 |
Apr 7 2025, 07:29 AM
Post
#27
|
|
Member Group: Members Posts: 496 Joined: 19-April 22 From: Huntington Beach,Ca Member No.: 26,487 Region Association: Southern California |
Emery ,
If the flaps are working and nothing has made a home in there, I really suspect the gauges are not working properly. A quick way on the 73 to check the flap action is to use the coil mounting holes and a hangar or just a long screw driver. You could also use the oil sender hole or the spark wire holder near there to get an endoscope in there to look at the cooler. You may be able to use the oil pressure sender hole in the tin to look with an endoscope at the cooler. Where exactly are your cht senders mounted? This is interesting information . I have a bore scope . So I will be getting back to you on this next week . I am leaving for Arizona and will not be able to get to my car until next week. |
|
|
|
| Ron914 |
Apr 10 2025, 06:25 PM
Post
#28
|
|
Member Group: Members Posts: 496 Joined: 19-April 22 From: Huntington Beach,Ca Member No.: 26,487 Region Association: Southern California |
Before I left for AZ I took photos of a couple of parts I have a question about . it of a replacement CHT and what I thought was the original CHT sender .
What is this part ? and is the replacement 012 sender worth installing . I noticed how much bigger the nut is on the old part.I am not sure what the builder of my motor installed an old one or a new one . I think an old one based on the look of the spade connector . I was told this is a must have spare part to carry in your tool kit , and I already know what happens if you unplug it from the ECU connection (the car won't start) so another question ,Which one should I carry with me? 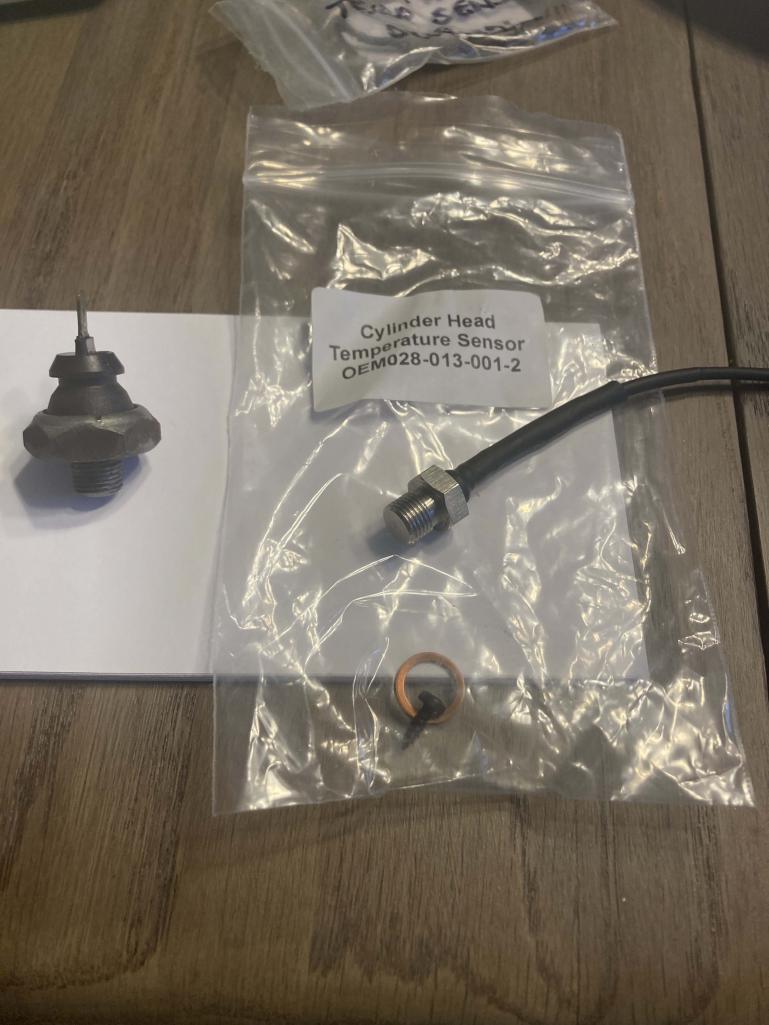 |
|
|
|
| Superhawk996 |
Apr 11 2025, 04:19 AM
Post
#29
|
|
914 Guru Group: Members Posts: 7,824 Joined: 25-August 18 From: Woods of N. Idaho Member No.: 22,428 Region Association: Galt's Gulch |
Part on the left is the oil pressure switch for the idiot light.
As a general principle, test parts and don’t replace parts needlessly. It is becoming the new normal that replacement parts are often inferior to the original parts. Measure what you have vs Brad Anders site or the chart below. The chart below has the data for the 012 CHT sensor. If the resistance at couple random points (cold & hot) is OK, keep your new one as the spare.  |
|
|
|
| emerygt350 |
Apr 11 2025, 07:07 AM
Post
#30
|
|
Advanced Member Group: Members Posts: 3,528 Joined: 20-July 21 From: Upstate, NY Member No.: 25,740 Region Association: North East States |
I would hate to be changing the cht sender at the side of the road. ouch.
I bet regardless of the curve it would limp you home so as a spare it's fine. Hopefully what you have installed is the right one. |
|
|
|
| Superhawk996 |
Apr 11 2025, 08:11 AM
Post
#31
|
|
914 Guru Group: Members Posts: 7,824 Joined: 25-August 18 From: Woods of N. Idaho Member No.: 22,428 Region Association: Galt's Gulch |
QUOTE(emerygt350 @ Apr 11 2025, 09:07 AM) Hopefully what you have installed is the right one. Curves are sufficiently different on the ambient end to tell what’s installed by measuring. |
|
|
|
| Ron914 |
Apr 22 2025, 08:42 PM
Post
#32
|
|
Member Group: Members Posts: 496 Joined: 19-April 22 From: Huntington Beach,Ca Member No.: 26,487 Region Association: Southern California |
Hello Emery,
Finally had time to look at my car today . To clear up a bit of confusion I do not have the Euro spec MPS in my car (I am using my original MPS (the adjustment screw is intact and the factory seal was never messed with. I only added the resistor because in the box of parts there was a homemade resistor (it was not re-usable ) so I purchased what I believe was a replacement part for it from AA . The MPS I am using on my 2056 motor is the original that came with the car . I read a post from GregAmy that tells you how to test your decel valve so I did that today first and found that there was nothing wrong with my original decel valve except a PO had changed the adjustment on the plenum side connection and once I loosened the locking nut and opened it up I could now blow through it when I applied 15-17inhg to it . I did reconnect it to the plenum (not sure if I should have done this first today). I started the car up with my MPS connected and the resistor mentioned removed from the CHT circuit. There is no resistor in-line between the CHT and the ECU currently. As before I had to retard my distributor to get the motor to start . I did not plug the MPS port on the plenum but left it connected to my MPS .I drove the car around the block a few times and it seemed to be getting hot . It actually touched the red mark on the temp gauge so I shut it off and parked it before I do damage to the motor. I will not be able to get back to the car until Thursday so I will update with more information then . While driving the car around I had the previous issue of the idle staying around 2000 when I lifted on the throttle and slowly coming back down (This is a problem so maybe II I should just disconnect the decel and plug the two ports on the plenum ,this will leave only the MPS connected to the plenum . Should I also remove the retard hose from my throttle body and plug it also , this will leave no control of the trigger points in my distributor ? |
|
|
|
| emerygt350 |
Apr 23 2025, 06:09 AM
Post
#33
|
|
Advanced Member Group: Members Posts: 3,528 Joined: 20-July 21 From: Upstate, NY Member No.: 25,740 Region Association: North East States |
Definitely don't use the retard till you are getting better results. On a 2056 you are going to be quite lean without the resistor and the stock mps. How long were you driving? If my cars oil went to red as quickly as you seem to have done I would immediately be looking at my timing. Something strange is going on. It should take a long time even on a hot day, beating the engine, to get the oil that hot. The heads will heat much faster, which scares me. If your oil was in the red and you are running lean, your heads must have been glowing. Did you verify your sender and oil temp gauge are matched?
No mice nests? Thermostat is working? Perhaps you are running very advanced and don't realize it? That would explain the starting. I also suspect sticking weights in the distributor. That would explain the slow fall from 2k The only thing the trigger points are connected to is the ECU. So the retard vacuum etc isn't going to do anything to them. It's bank fire as well so even the timing of the pulse isn't important. |
|
|
|
| emerygt350 |
Apr 23 2025, 06:15 AM
Post
#34
|
|
Advanced Member Group: Members Posts: 3,528 Joined: 20-July 21 From: Upstate, NY Member No.: 25,740 Region Association: North East States |
The more I think about the more I suspect your dizzy is sticky. If the advance plate is sticky and the weights are not moving smoothly it may take a while for the vacuum to pull the plate into an idle position. If it's stuck in an advanced position when you try to start that might explain the retard needed to start. If your plenum vacuum is low that would also weaken the strength of the can. A low plenum vacuum would also richen your mix, compensating for the 2056. But all of this equals a poorly running car.
|
|
|
|
| Superhawk996 |
Apr 23 2025, 07:38 AM
Post
#35
|
|
914 Guru Group: Members Posts: 7,824 Joined: 25-August 18 From: Woods of N. Idaho Member No.: 22,428 Region Association: Galt's Gulch |
(IMG:style_emoticons/default/agree.gif)
Gauge measures oil temp. Vehicle should not be heating oil that quickly. Oil lags head temps by a significant amount of time. I’d use a non-contact temp gun and double check / monitor the case sump temp to see if it’s truly getting that hot. Can also use the same to measure head temps underneath the car Likewise you shouldn’t have to be messing with timing retard to start the engine. |
|
|
|
| Ron914 |
Apr 23 2025, 07:58 AM
Post
#36
|
|
Member Group: Members Posts: 496 Joined: 19-April 22 From: Huntington Beach,Ca Member No.: 26,487 Region Association: Southern California |
I was probably idling and driving 30-40 minutes. I have not seen the oil temp go that high before. I checked the heads with my infrared thermometer and saw 297deg . We did check the plates but I think I will check again . Only thing I did different yesterday was work on the decel which I believe is working correctly now .
I will be able to work on the car tomorrow. I am going to disconnect the Decel and plug the hoses going to the plenum this will only leave the MPS connected . I will get a reading of the vacuum in the plenum with the Mityvac , will use the hose that goes to the decel . No rats nests , this is a new rebuild . My thermostat connected to the cooling flaps does not appear to be working but I have the flaps pushed all the way towards the rear of the car in the direction I assumed the thermo would pull them if working. I will pull my coil and check position , I also have a bore scope . After checking all this I will update this post . Thanks again for the help . WCR is coming soon so I really want to get this car running so I can take it . @emerygt350 , @Superhawk996 |
|
|
|
| Superhawk996 |
Apr 23 2025, 08:57 AM
Post
#37
|
|
914 Guru Group: Members Posts: 7,824 Joined: 25-August 18 From: Woods of N. Idaho Member No.: 22,428 Region Association: Galt's Gulch |
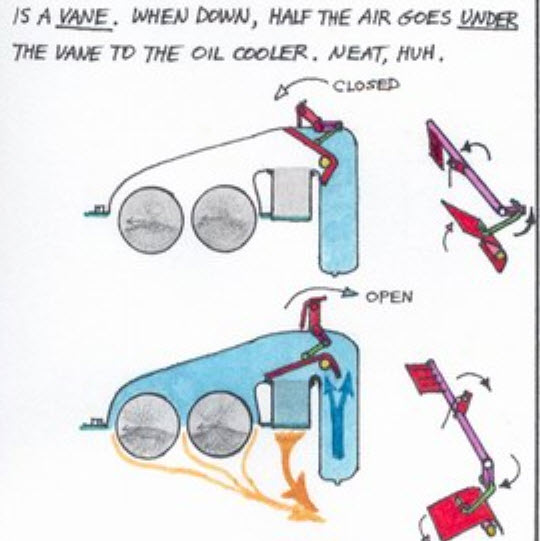 “ I assumed the thermo would pull them if working.” The thermostat expands when hot - releasing tension on the cable - allows flaps to open. This is a fail safe - if the cable breaks - the flaps default open. Double check against diagram above |
|
|
|
| ClayPerrine |
Apr 23 2025, 10:03 AM
Post
#38
|
|
Life's been good to me so far..... Group: Admin Posts: 16,542 Joined: 11-September 03 From: Hurst, TX. Member No.: 1,143 Region Association: NineFourteenerVille |
QUOTE(Superhawk996 @ Apr 23 2025, 09:57 AM) “ I assumed the thermo would pull them if working.” The thermostat expands when hot - releasing tension on the cable - allows flaps to open. This is a fail safe - if the cable breaks - the flaps default open. Double check against diagram above (IMG:style_emoticons/default/agree.gif) If the thermostat is malfunctioning, it will cause the oil temp to climb rapidly. Raise the car up, and with it not running, take a heat gun and warm up the thermostat. You should see it expand and the flaps move to the open position. It's real easy to get the arm or the spring installed incorrectly making the flaps not work right. If your thermostat is bad, and you hooked up the cable with the thermostat expanded, your flaps will be held closed (not good). If that is the case, disconnect the cable from the flaps and see if the flaps can be moved by hand. If they can then you need a new thermostat. |
|
|
|
| Ron914 |
Apr 24 2025, 12:04 PM
Post
#39
|
|
Member Group: Members Posts: 496 Joined: 19-April 22 From: Huntington Beach,Ca Member No.: 26,487 Region Association: Southern California |
QUOTE(ClayPerrine @ Apr 23 2025, 11:03 AM) QUOTE(Superhawk996 @ Apr 23 2025, 09:57 AM) “ I assumed the thermo would pull them if working.” The thermostat expands when hot - releasing tension on the cable - allows flaps to open. This is a fail safe - if the cable breaks - the flaps default open. Double check against diagram above (IMG:style_emoticons/default/agree.gif) If the thermostat is malfunctioning, it will cause the oil temp to climb rapidly. Raise the car up, and with it not running, take a heat gun and warm up the thermostat. You should see it expand and the flaps move to the open position. It's real easy to get the arm or the spring installed incorrectly making the flaps not work right. If your thermostat is bad, and you hooked up the cable with the thermostat expanded, your flaps will be held closed (not good). If that is the case, disconnect the cable from the flaps and see if the flaps can be moved by hand. If they can then you need a new thermostat. Hi Clay, I have the spring disconnected and have been pushing the flaps back towards the firewall (what I call up) , when I checked they were pointing towards the rear of the car (what I call down) so that is probably why I overheated . This is something else on my list I need to get fixed. Thanks |
|
|
|
| Ron914 |
Apr 24 2025, 01:38 PM
Post
#40
|
|
Member Group: Members Posts: 496 Joined: 19-April 22 From: Huntington Beach,Ca Member No.: 26,487 Region Association: Southern California |
@emerygt350 ,Superhawk996,
I pulled my car out this morning and started over . 1) First I disconnected the 3 hoses going to my plenum except the MPS . Well I actually do have the MPS disconnected here and connected to the Mityvac , I tried to hold 19inhg but it bleeds off quite fast to around 9-10 inhg so I reconnected to the MPS because I could not get the car to start. I also disconnected the retard hose going to the TB and I am using that hose to read the vacuum of the plenum . Idling apx 1100 I am showing 13-15inhg of vac on the plenum , motor is hunting 11-1300rpm. and plenum vac is fluctuating 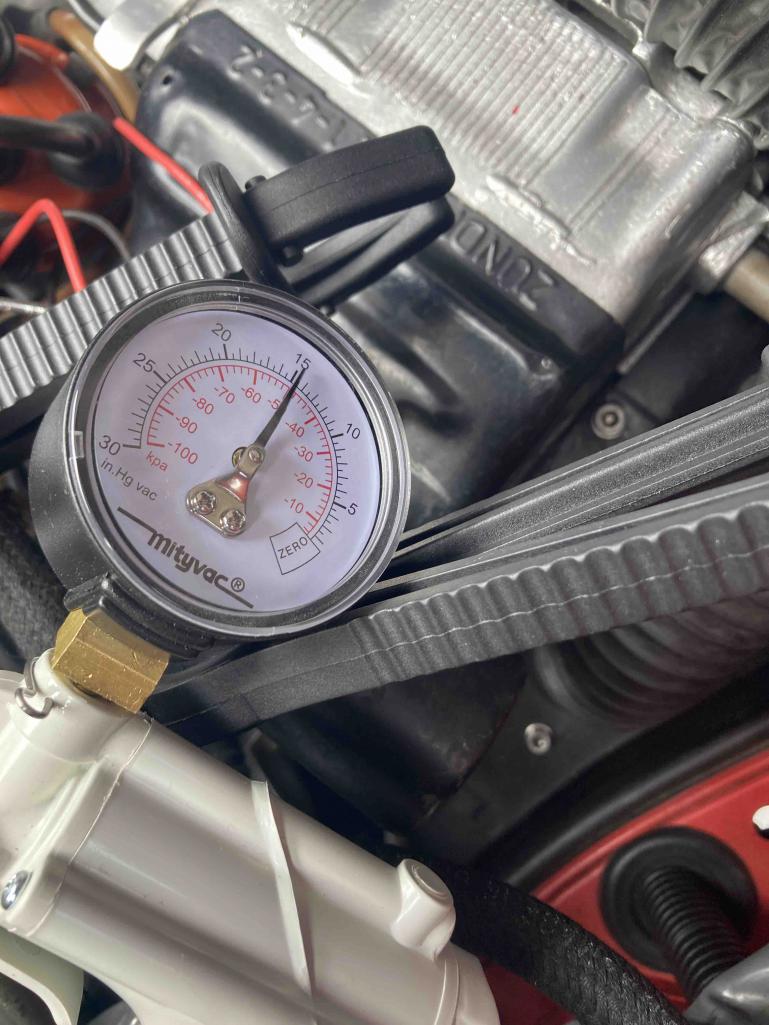 2) after I played with the dizzy to get car started I got it idling about 1000rpm (but it was hunting ) I set the ECU knob to 9:00 position , and let it warm up until the AAR closed. 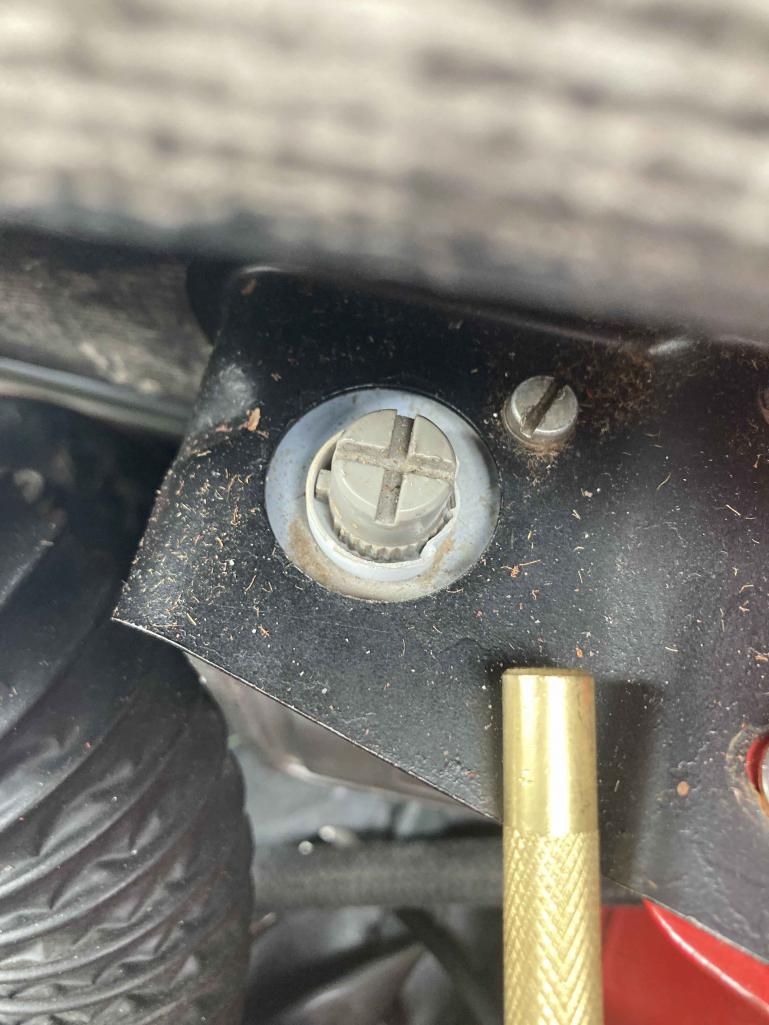 3) that resistor I bought from AA is no longer in the CHT circuit . 4) Checked the CHT and block with my infrared thermometer. 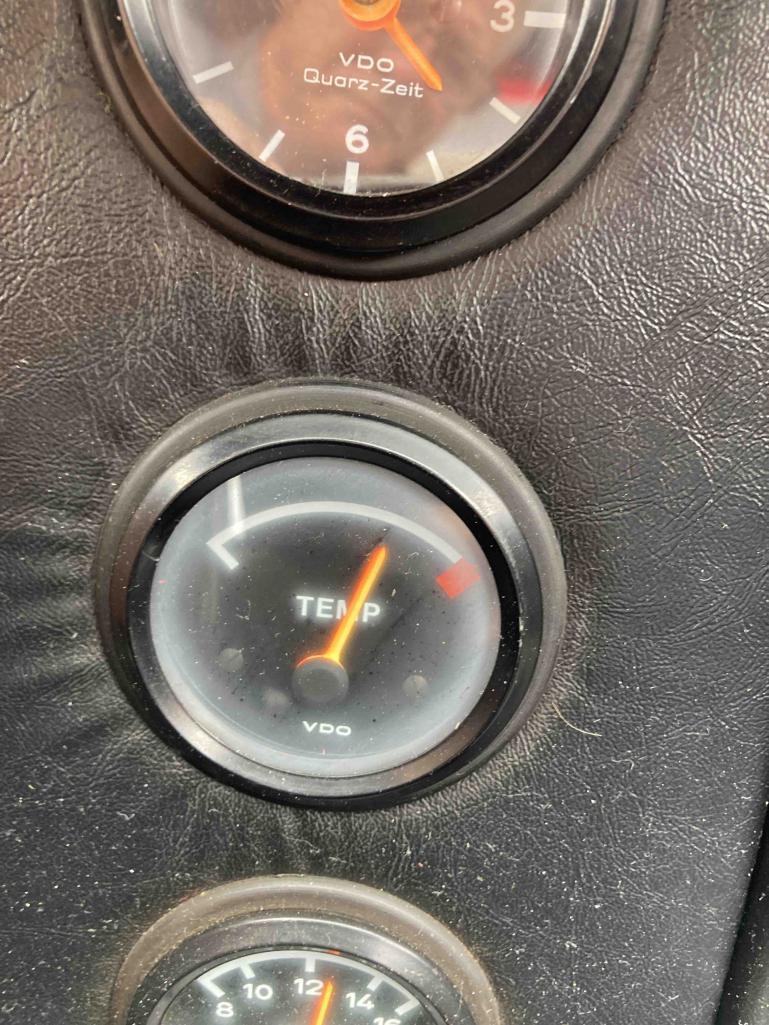 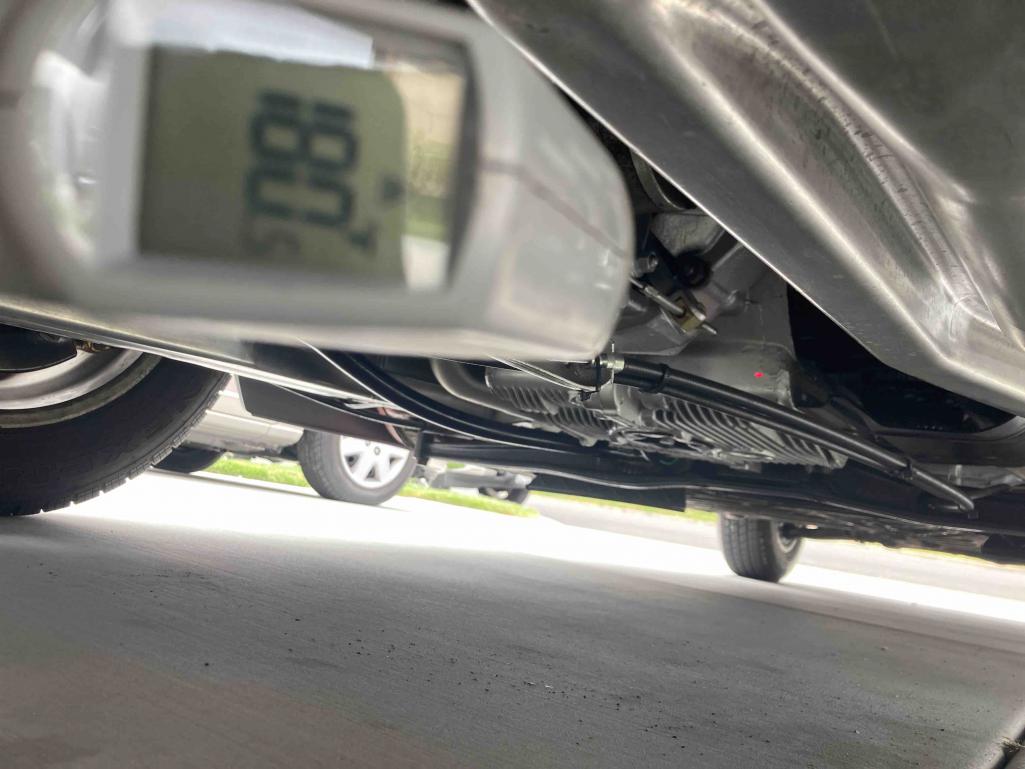 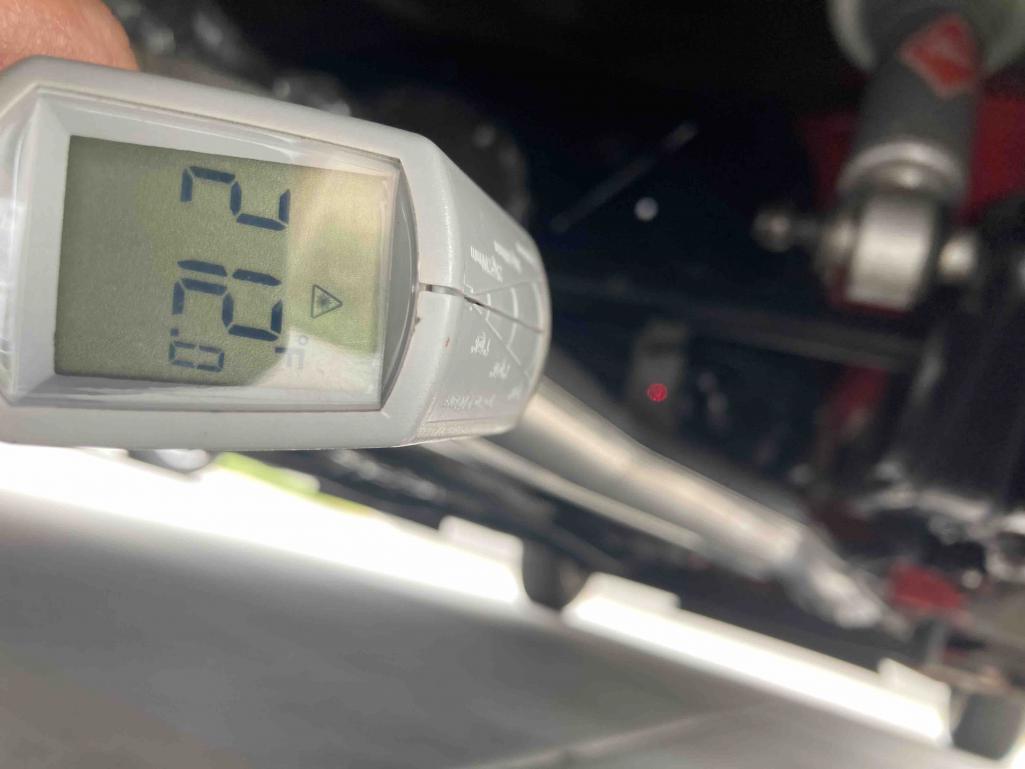 Lettingf the car cool down and will see if it will start again with out moving my dizzy. The motor is hunting a lot ,doesn't seem right . I feeling I should send my throttle body to Mark to be rebuilt and in the mean time I believe Bruce might have one I can borrow . @bdstone914 |
|
|
|
|
1 User(s) are reading this topic (1 Guests and 0 Anonymous Users)
0 Members:

|
Lo-Fi Version | Time is now: 29th April 2026 - 08:24 AM |
Invision Power Board
v9.1.4 © 2026 IPS, Inc.