|
|
|
Porsche, and the Porsche crest are registered trademarks of Dr. Ing. h.c. F. Porsche AG.
This site is not affiliated with Porsche in any way. Its only purpose is to provide an online forum for car enthusiasts. All other trademarks are property of their respective owners. |
|
|

  |

| TRP |
 Aug 14 2025, 11:16 AM Aug 14 2025, 11:16 AM
Post
#21
|
|
Member  Group: Members Posts: 78 Joined: 2-September 23 From: Morgan Hill, CA Member No.: 27,559 Region Association: None |
Thanks @Rob-O!
Last night I broke my own rules and got started on two different projects once. I dove in and started looking at the 'sprung' trunk lid hinge and also remove the BUBs for the bumper backdate. Fixing the hinge started out okay until I found that the hinge point was completely wasted. I had already ordered the JWest solution as a backup in the event that what was there wasn't salvageable. With the parts already in hand I started to clean the area and prep for the new hinge point. I kind of lost steam trying to determine where to mount the new hinge point. I read a couple of threads which suggested putting the hinge on the trunk, closing the trunk, and aligning everything correctly -- and then locate/mark your hinge point mounting location. Maybe I'm over thinking this but I don't want to drill a bunch of holes in there and completely botch the job. The BUBs and brackets are all removed, the car looks better already. I will take those and the fiberglass spoiler to a parts recycling place in Redwood City for 'store credit' on a multi-gauge or other items I may need. I drop the trunk off at the paint shop tomorrow, my painter will start the repair work on the decklid and start the paint match process. I will take him the whole car next week where he will touch up a few dings/scratches and marry the trunk back to the car. This weekend I will tackle the bumper backdate project so that the bumper areas will be ready for paint next week. I will update with photos along the way if anyone is interested. (IMG:style_emoticons/default/biggrin.gif) |
   |

 
|
| TRP |
Aug 16 2025, 06:44 PM
Post
#22
|
|
Member Group: Members Posts: 78 Joined: 2-September 23 From: Morgan Hill, CA Member No.: 27,559 Region Association: None |
This weekend was mostly shot because FedEx lost my packages from Auto Atlanta. Waiting on bumper toppers and foglight grills. :/
|
|
|
|
| TRP |
Aug 18 2025, 12:09 PM
Post
#23
|
|
Member Group: Members Posts: 78 Joined: 2-September 23 From: Morgan Hill, CA Member No.: 27,559 Region Association: None |
Good news! FedEx managed to locate the package and delivered a day or so late. Unfortunately Auto Atlanta sent me two right hand fog light grills and the bumper topper was slightly damaged from an errant stable in the AA box which kind of hung me up a bit.
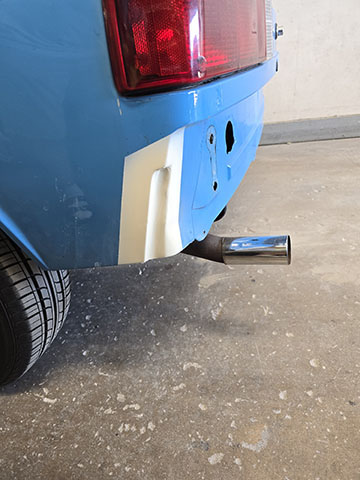
Anyway - a few updates that I'm sure you've all seen on other cars in the past. Trunk Panel: While waiting for the package I decided to remove the old/faded Porsche crest of the rear trunk panel. Thankfully it was just a sticker, so no holes to fill in. 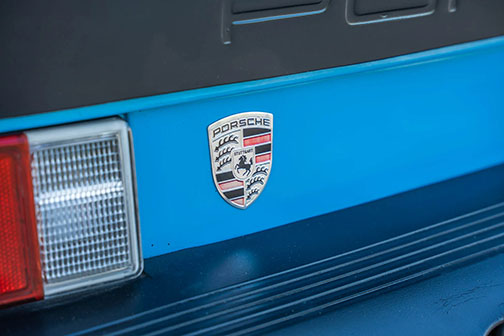 Removed with some fishing line and some elbow grease: 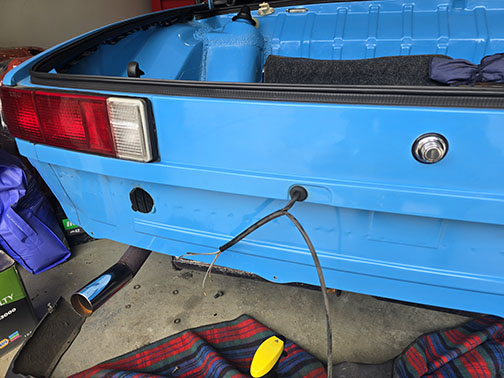 Rear Bumper: BUB removed and tabs ground off. Ooops... blew through the panel there. Need to lower the bumper a bit maybe. 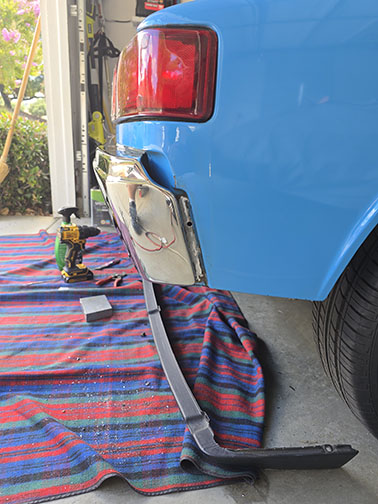 More eyeballing: 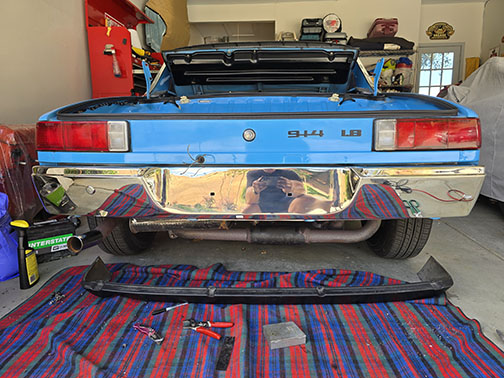 Few different angles: 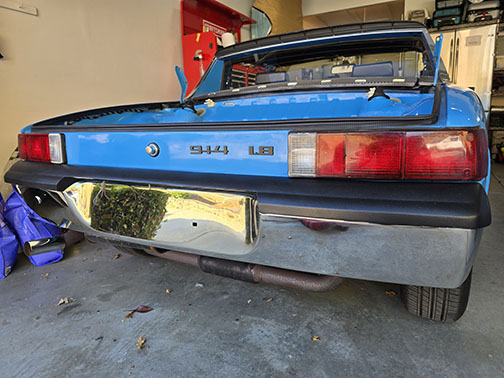 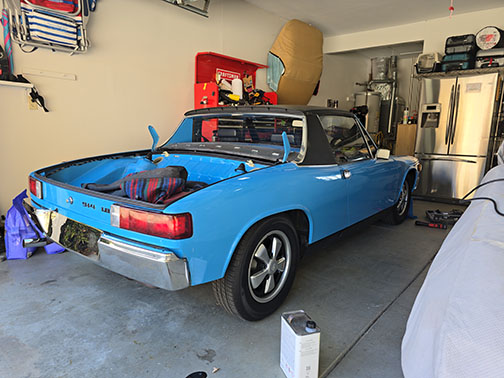 Front Bumper: Didn't take too many photos of the spot weld removal and the grinding down on the front lip. BUB Removed and new bumper offered up for some eyeballin 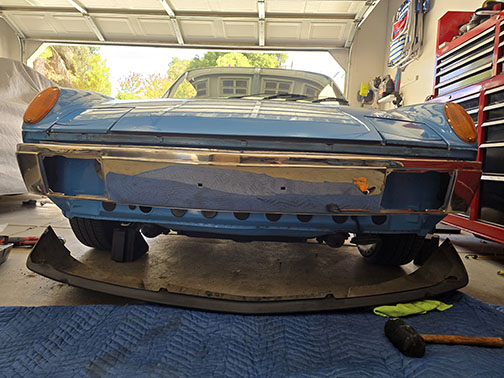 Horns installed after I filled the holes from the BUB bumper mounts:  Need to tweak it a bit more, also waiting for the rivnut tool to arrive so I can mount the driving lights. Maybe I'll get the correct driving light grills this week: 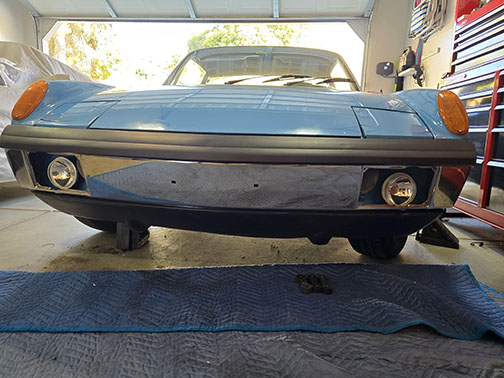 |
|
|
|
| TRP |
Aug 21 2025, 12:26 PM
Post
#24
|
|
Member Group: Members Posts: 78 Joined: 2-September 23 From: Morgan Hill, CA Member No.: 27,559 Region Association: None |
Hello!
I'm back with more photos and questions! I am trying to hook up the early model horns and driving lights behind the newly installed early bumpers. I would like to use the wires that are already there, what do/should these wires go to? 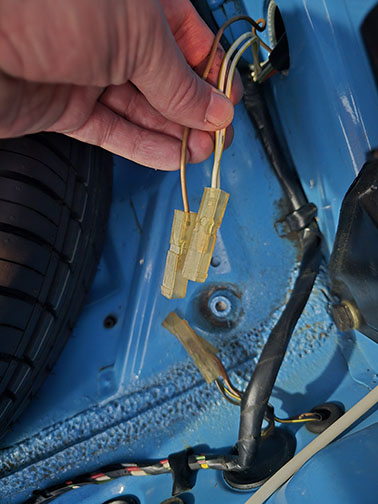 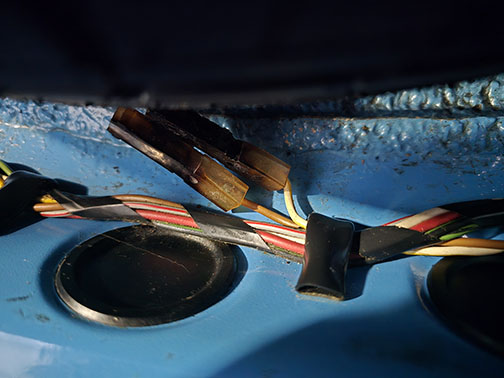 We have two sets of white/brown and another clump of wires with multiple colors and nothing connected to them. Thank you! |
|
|
|
| Chad911sc |
Aug 23 2025, 05:12 PM
Post
#25
|
|
Member Group: Members Posts: 196 Joined: 24-September 24 From: Florida Member No.: 28,374 Region Association: South East States |
The white/brown should be your driving/fog lights. Usually the drivers side wiring has the two white wires soldered together and that is what brings the power over to the passenger side. The white is positive, and brown is the negative. Mine is a 74, but I think they are the same. I’m sure someone else will chime in.
The other wires in the front for mine were black/yellow and brown. These are the horn wires. Attached thumbnail(s) 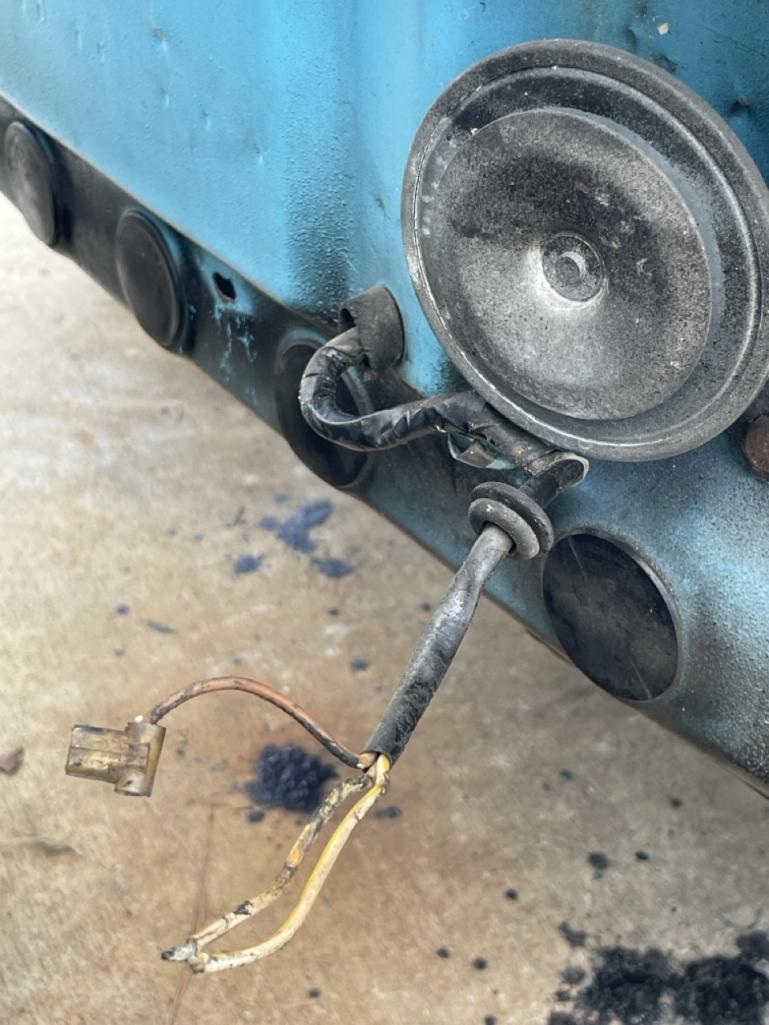 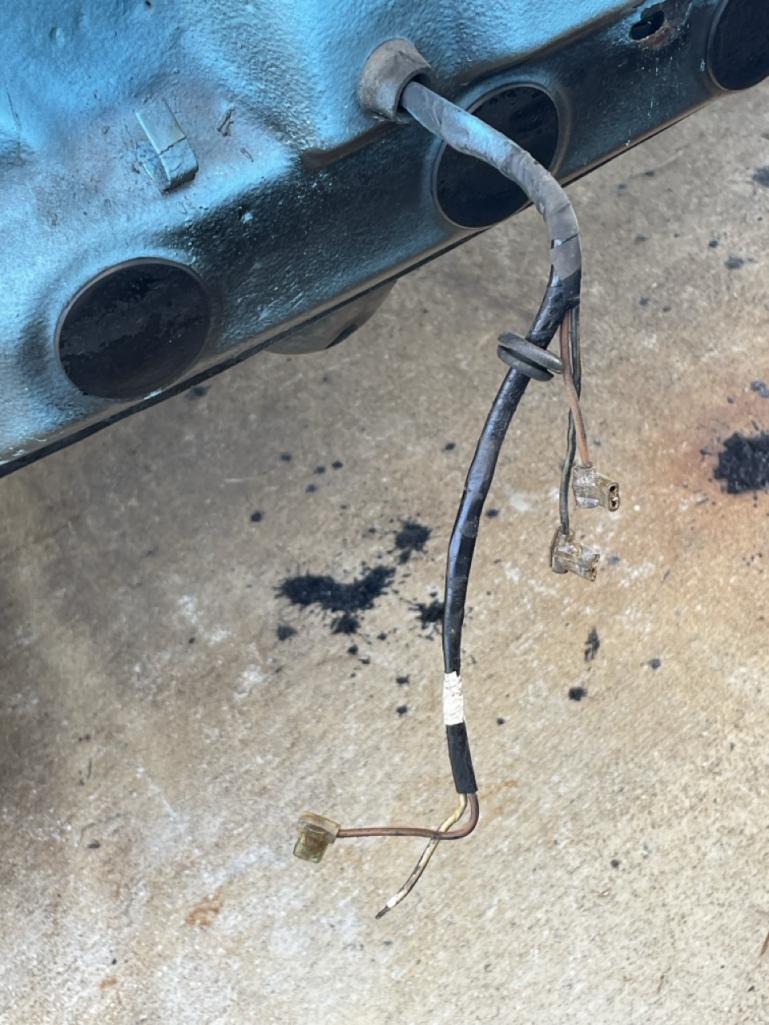
|
 |
|
| TRP |
Aug 25 2025, 02:20 PM
Post
#26
|
|
Member Group: Members Posts: 78 Joined: 2-September 23 From: Morgan Hill, CA Member No.: 27,559 Region Association: None |
Hello Chad! Thanks for the info, much appreciated. I dug around a bit and also found another thread which confirmed what you shared / helped me sort this out.
I made some great progress on the front bumper, fog lights, and horns install this weekend: 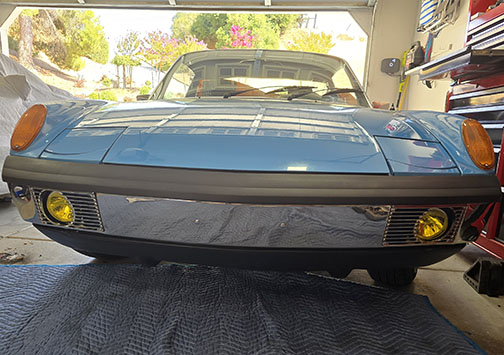 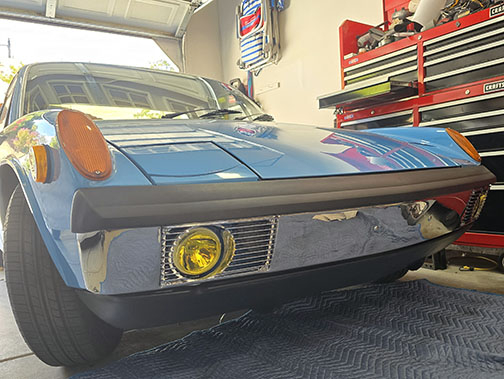 It's getting there but still needs some tweaking: 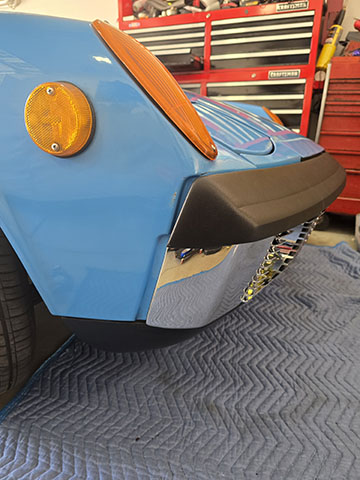 Testing the fog lights / driving lights with the switch all wired up properly: 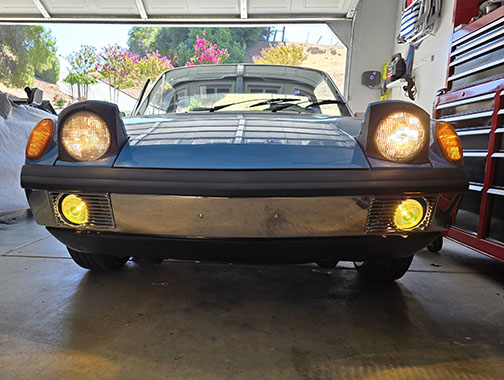 Took a break from noodling on the perfect alignment and shifted my attention to the rear bumper: 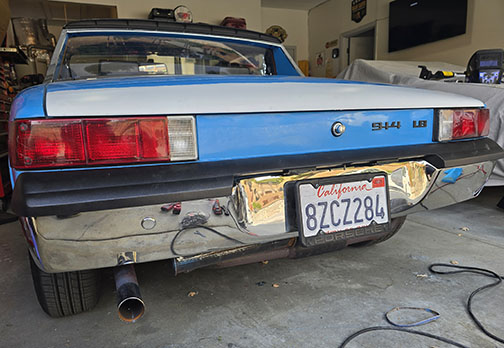 The rear is almost there, just a small tweak to the driver side to pull everything in tight. You can also see the rear trunk is in primer with all the body work done to fill the holes and scratches/rust from the PO's spoiler that I removed. |
|
|
|
| TRP |
Aug 25 2025, 03:37 PM
Post
#27
|
|
Member Group: Members Posts: 78 Joined: 2-September 23 From: Morgan Hill, CA Member No.: 27,559 Region Association: None |
After getting the driving lights/fog lights all wired up to the oem switch, I shifted gears to check on the horns. One thing I noticed right away is that the horn didn't work on this car when I purchased it a few weeks back. I remembered seeing that the car had a Momo wheel on it in a previous life. When I picked up the car I noticed that it was now it was wearing one that looked closer to 914 stock, I assumed that was related to why the horn didn't work.
Pushing the butterfly horn button didn't even click the relay under the dash, so I pulled down the fuse panel to check the relays. All the relays looked to be present. (IMG:style_emoticons/default/confused24.gif) I twisted the butterfly to see what was going on behind the horn button and found that the steering wheel nut was barely finger tight. (IMG:style_emoticons/default/mad.gif) I pulled the wheel off and started to investigate. Right away I noticed that something was not right: 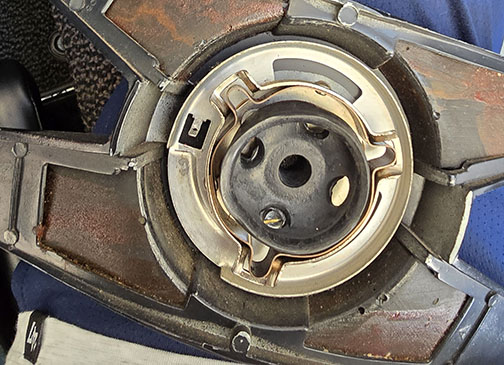 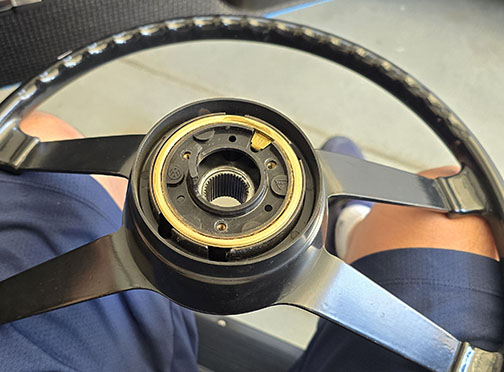 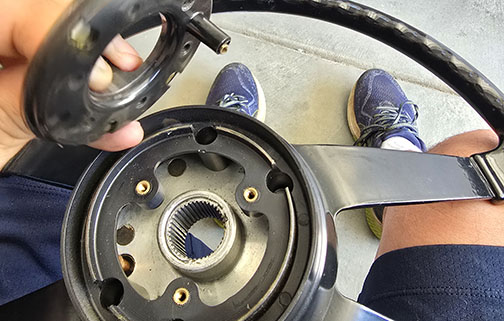 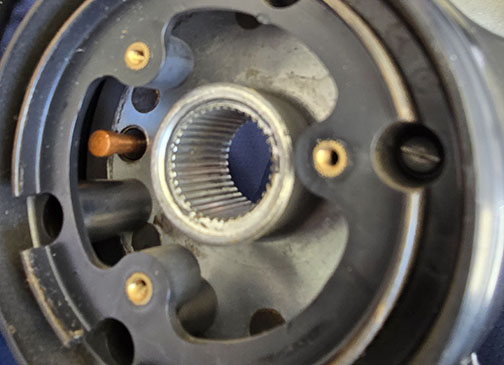 I'm not an expert on VW or Porsche horns, but I think there should be a brown wire (or green?) from the indicator cancelation ring that connects to the butterfly. I don't think the black/gold barrel with the two copper spring loaded nubs is supposed to be used with this horn arrangement. Maybe I'm wrong? Regardless, something doesn't look right. (IMG:style_emoticons/default/WTF.gif) I tested grounding the column to the copper bar on the signal assembly and immediately heard the horn relay click. I'm going to solder a new wire to the nub on the indicator cancelation ring and plug it into the butterfly and take it from there. I will debug the horn button and then plug the horns back in. |
|
|
|
| TRP |
Aug 28 2025, 10:25 PM
Post
#28
|
|
Member Group: Members Posts: 78 Joined: 2-September 23 From: Morgan Hill, CA Member No.: 27,559 Region Association: None |
I think tonight was 4 for 5 on quick projects on the 75.
I successfully tightened up the front to back spacing on the rear bumper. Still need to adjust the left to right spacing by a 1/4 to 1/8" to the driver side. I successfully finished up removing the old Alpine CD player and swapped in a Bluetooth enabled RetroSound radio. I'm not sure how I feel about it. May just look for the correct Blaupunkt. I successfully fixed the stuck brakelight switch by removing the foot board and adjusting the switch a bit. This was super easy after searching here. I successfully fixed the driver's seat tilt. Not sure how I fixed it. I just pulled the seat out and reinstalled it with the seat centered properly. I was not successful with fixing the horn. Somehow ended up snapping the little horn wire tab off the butterfly. Not sure how to fix it now. I guess I need to get back to prepping the rear trunk for paint. |
|
|
|
| TRP |
Sep 1 2025, 09:35 AM
Post
#29
|
|
Member Group: Members Posts: 78 Joined: 2-September 23 From: Morgan Hill, CA Member No.: 27,559 Region Association: None |
Yesterday I decided to address the spongy brake pedal. Ever since the first drive I felt the brakes were spongy and lacked the ability to properly slow the car, I've had aircooled bugs on drum brakes which inspired more confidence.
I jacked the rear of the car up and let it sit for a bit while I cleaned and prepared the Motiv setup. First caliper (passenger rear) had a few air bubbles. The rest of the car was pretty clean and bubble free. I tried the pedal again and it felt better. If I held the pedal, I noticed that it would slowly sink / lose pressure. (IMG:style_emoticons/default/dry.gif) The car appears to be in great shape mechanically. The suspension looks relatively new, calipers all look fresh/new. I'm sort of surprised the MC needs replacement. The previous two owners didn't log many miles, in 2019 the car had 80,200-ish miles. When I bought it in August of 2025 the car had 81,400-ish miles. Could that lack of use cause the MC seals to fail? Im not finding any leaks anywhere. I ordered a new one from one of the suppliers. I was really confused by the wild differences in price. ($85.00 - $375.00 ?). I did see a few for close to 800.00 and assumed those were for the PCA restoration crowd? Is there anything else to be aware of when it comes to 914 brakes? Thanks! Ted |
|
|
|
| 914rrr |
Sep 16 2025, 04:23 PM
Post
#30
|
|
Senior Member Group: Members Posts: 1,971 Joined: 1-July 03 From: Knoxville, TN Member No.: 874 Region Association: South East States |
QUOTE(TRP @ Sep 1 2025, 11:35 AM)  Yesterday I decided to address the spongy brake pedal. Ever since the first drive I felt the brakes were spongy and lacked the ability to properly slow the car, I've had aircooled bugs on drum brakes which inspired more confidence. I jacked the rear of the car up and let it sit for a bit while I cleaned and prepared the Motiv setup. First caliper (passenger rear) had a few air bubbles. The rest of the car was pretty clean and bubble free. I tried the pedal again and it felt better. If I held the pedal, I noticed that it would slowly sink / lose pressure. (IMG:style_emoticons/default/dry.gif) The car appears to be in great shape mechanically. The suspension looks relatively new, calipers all look fresh/new. I'm sort of surprised the MC needs replacement. The previous two owners didn't log many miles, in 2019 the car had 80,200-ish miles. When I bought it in August of 2025 the car had 81,400-ish miles. Could that lack of use cause the MC seals to fail? Im not finding any leaks anywhere. I ordered a new one from one of the suppliers. I was really confused by the wild differences in price. ($85.00 - $375.00 ?). I did see a few for close to 800.00 and assumed those were for the PCA restoration crowd? Is there anything else to be aware of when it comes to 914 brakes? Thanks! Ted Check the MC size vendors are offering for 914's. 17 mm is stock but NLA or extremely hard to find and $$$. 19 mm will work but requires greater pedal effort. Although many vendors offer 23 mm MC's they really aren't a good choice as it requires way too much pedal effort. |
|
|
|
| TRP |
Sep 16 2025, 10:00 PM
Post
#31
|
|
Member Group: Members Posts: 78 Joined: 2-September 23 From: Morgan Hill, CA Member No.: 27,559 Region Association: None |
Thank you @914rrr .
The car has been with the painter for a few days getting the holes in the trunk fixed from the goofy spoiler I removed. Once I get it back I plan on jumping back on the MC. I ordered one from PMB or Sierra Madre, I forget which one. They both offered the same unit, I ordered from whomever was cheaper. I also ordered all new soft lines, if Im bleeding the brakes anyway, might as well just do them now. I have a pile of parts from Tangerine Racing and a few other retailers. Maybe I will take next week off and dive into this project. Ted |
|
|
|
| Chad911sc |
Sep 17 2025, 05:01 AM
Post
#32
|
|
Member Group: Members Posts: 196 Joined: 24-September 24 From: Florida Member No.: 28,374 Region Association: South East States |
Every single thing I purchased from Tangerine racing has been top notch and worked exactly as advertised. Can’t go wrong with Chris’s products. The transmission linkage, bearing, and adjustment tool, transformed my shifting experience. I thought my transmission was broke when I bought it, grinding every shift and couldn’t even get it in 1st gear, and now it shifts like butter!
|
|
|
|
| TRP |
Sep 28 2025, 03:05 PM
Post
#33
|
|
Member Group: Members Posts: 78 Joined: 2-September 23 From: Morgan Hill, CA Member No.: 27,559 Region Association: None |
I took the week off to work on the 914, naturally the car didn't come back from paint as scheduled. Kind of a bummer, but what are you going to do?
Decided to clean up some old parts I had sitting, waiting to go into thw car. I have an OEM front anti-sway bar that had 50 years of grime and black paint on it, so I stripped all the ugly off of it. Started with the bar itself. Hit it with some Eastwood epoxy chassis black. All the brackets were pretty gross so I stripped them down as well. I looked into having them gold chromate plated. Decided that was going to be too much effort, so I hit them with some rustmort and a shot of cast blast (leftover from cleaning up the 66 C2 (IMG:style_emoticons/default/dry.gif) ). I will replace the hardware with new gold chromate hardware. Looking for an OEM rear bar, PM me if you have one for sale. I will post some photos later once I can suck them off my phone and shrink em down. Thanks for checking in! |
|
|
|
| TRP |
Sep 28 2025, 06:58 PM
Post
#34
|
|
Member Group: Members Posts: 78 Joined: 2-September 23 From: Morgan Hill, CA Member No.: 27,559 Region Association: None |
Body work in progress. Block sanding both rear fenders and the decklid:
 This corner had some rust bubbling under the paint. Found some questionable work here. Dug it out and welded everything up. We will end up painting the entire back half of the car due to some very questionable brush on 'touch up' paint from a previous owner. In the end it should all look pretty good. 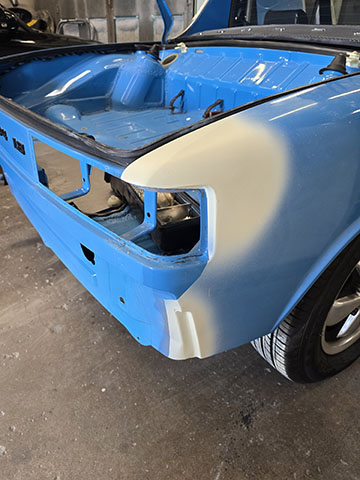 Sway Bar as purchased: 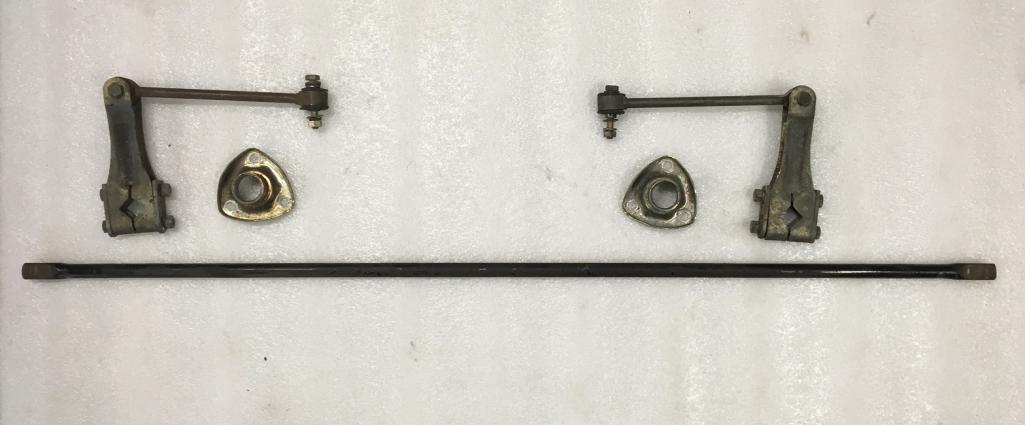 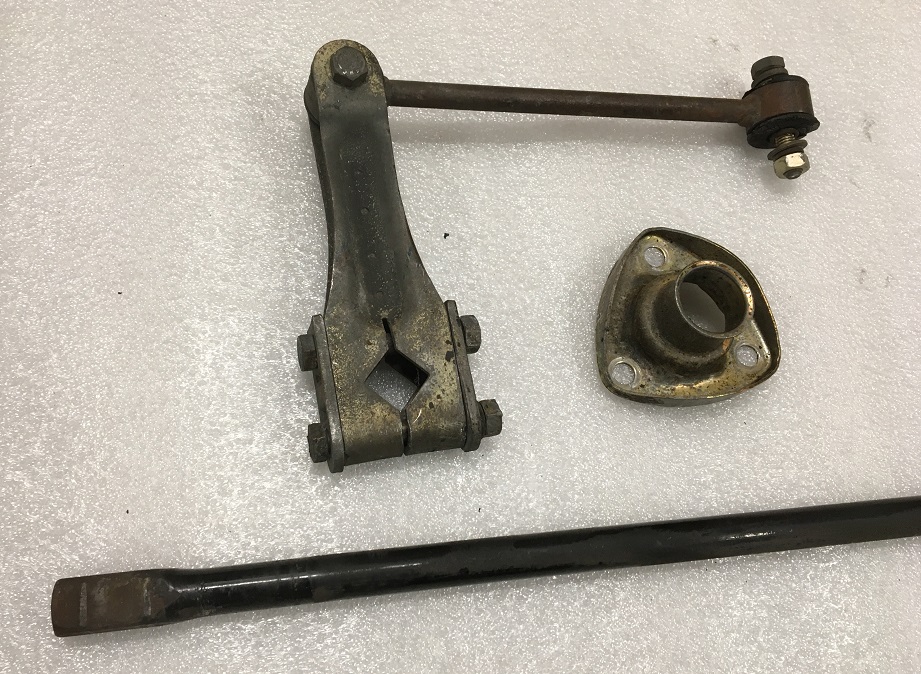 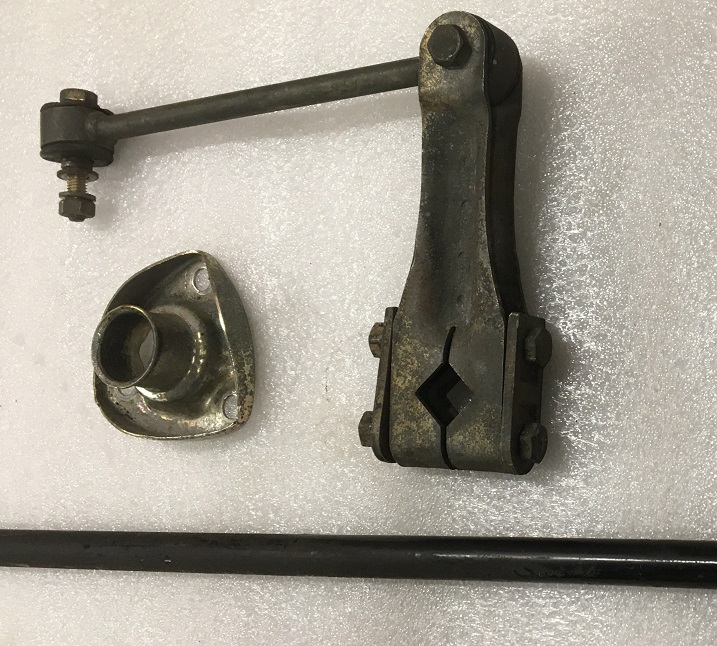 Cleaning up the sway bar bits. Sanded this down to remove some rust and then hit it with Eastwood Ceramic Epoxy. 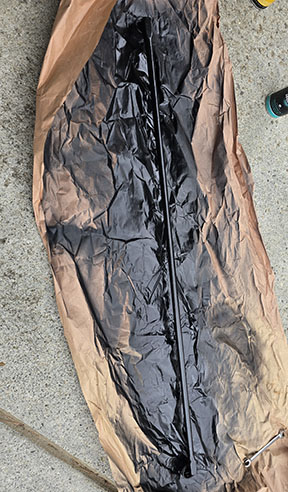 Cleaned up all the brackets and then hit them with some epoxy primer and cast blast: 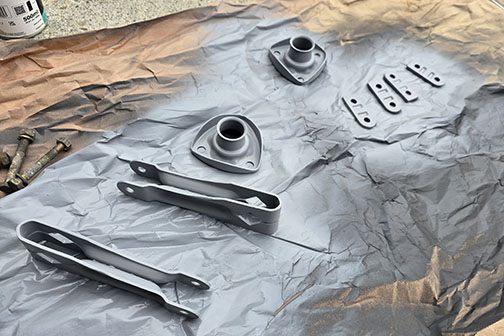 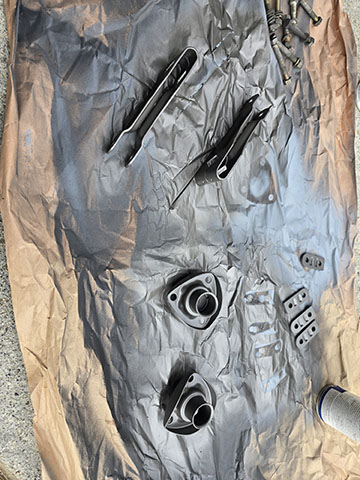 I will get all new gold chromate hardware for the install. Most likely not necessary but someone already spray bombed all the car's suspension component black. It will be a nice contrast under there. Thanks again, Ted |
|
|
|
| TRP |
Oct 2 2025, 10:23 AM
Post
#35
|
|
Member Group: Members Posts: 78 Joined: 2-September 23 From: Morgan Hill, CA Member No.: 27,559 Region Association: None |
Updates... we got updates.
My buddy finished painting the rear fenders and the trunk! I only have photos from while he was in the middle of laying down the color. Both rear corners of the fenders are all cleaned up! They had years of door dings and horribly applied 'touch up' paint. The passenger fender had a pretty good ding from where someone dropped something on it, all of that is gone. The passenger rear corner had an old repair that wasn't fixed properly, the rust has dug out and the repair was done right. The trunk is FINALLY free of the 8 holes from where I removed the spoiler. This will make it 'better' but not perfect. After I retire I can spend the time to blow it apart and paint the whole car. And on to the reason why you're all here, the photos! 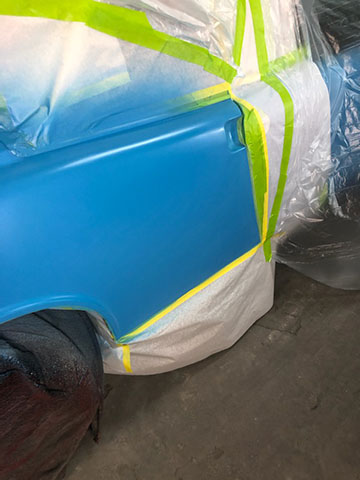 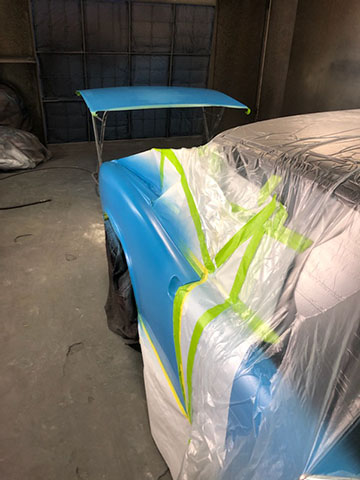 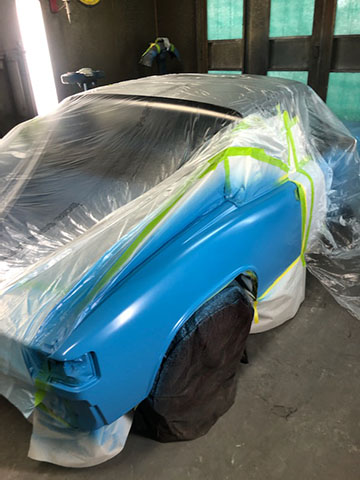 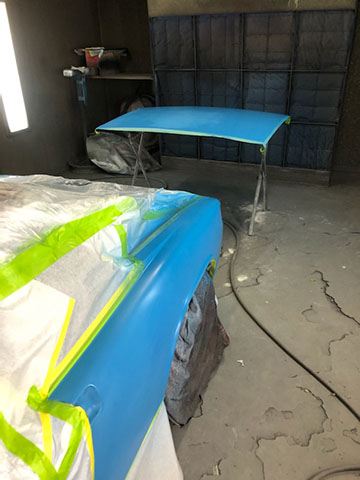 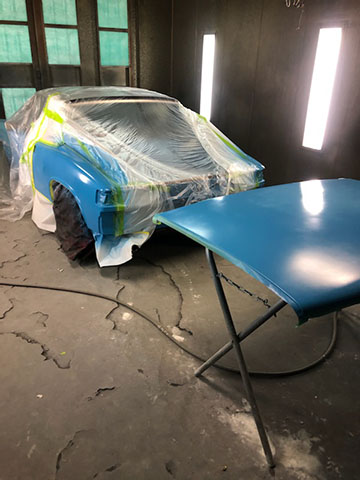 Thanks for checkin in! This weekend I will bite the bullet and dig into installing the PILE of parts I have ordered while the car has been in body shop jail. (IMG:style_emoticons/default/smile.gif) Ted |
|
|
|
| TRP |
Oct 2 2025, 05:18 PM
Post
#36
|
|
Member Group: Members Posts: 78 Joined: 2-September 23 From: Morgan Hill, CA Member No.: 27,559 Region Association: None |
We've got MORE updates! Looks like I'm getting the car back tomorrow!
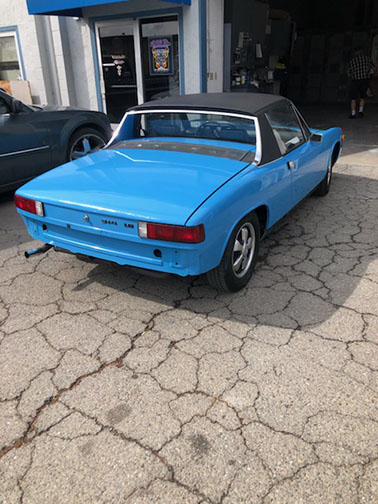 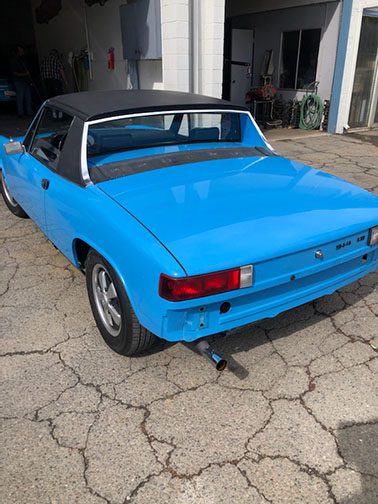  Now the fun begins... |
|
|
|
| TRP |
Oct 9 2025, 02:45 PM
Post
#37
|
|
Member Group: Members Posts: 78 Joined: 2-September 23 From: Morgan Hill, CA Member No.: 27,559 Region Association: None |
So... today was an interesting morning!
I got up early to check on why my brake lights were 'stuck on' (again). I had fixed this a few weeks back but the issue sprung up again. I took everything apart and found that the little lever was no longer contacting the washer on the brake pedal when the pedal was at rest. I found that there was pretty good side to side play in the lever/arm on the switch. I had an extra on hand so I swapped in the new one (after adjusting the switch). I put everything back together, got cleaned up, and was about to drive into work. When I went to start the car it took a few more cranks than usual for it to fire up (it usually fires after about a second or maybe two...) Car started up and all seemed good. When I backed out of the garage I noticed a football sized puddle from where the car was parked ... with two wet marks leading to the car. Looked under the car and saw fuel pouring out from under the car (up by the tank/passenger side). Turned off the car and after a few minutes the drips stopped. I pushed the car back into the garage and monitored the leak. All good, no more drips. Good news! I found where the 'fuel smell' was coming from! Now I have a reason to pull the tank to replace the plastic fuel lines that run through the body/replace with stainless steel lines. Attached image(s) 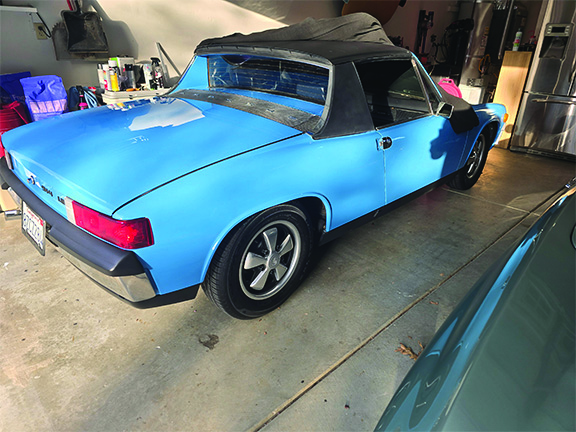
|
|
|
|
| wonkipop |
Oct 9 2025, 04:56 PM
Post
#38
|
|
914 Guru Group: Members Posts: 5,122 Joined: 6-May 20 From: north antarctica Member No.: 24,231 Region Association: NineFourteenerVille |
tunnel fuel lines.
fun job ------not. (IMG:style_emoticons/default/biggrin.gif) but every 914 needs it done by now. esp if you are running with a fuel pump up front like all the 75s did (and other years subsequently by owners). thats pressurized fuel you are running through your cabin with you. suspect porsche did plastic lines for purposes of collision forces. 4 axle stands required. or hoist if you so fortunate as to have one. think there are some threads around here on the tricks to manouvre the lines through. i did it before i found this website. and boy did it send me screwy - but i also bent up my own lines (had to - mine is rhd the left hand drives are different at top of tunnel.). but i got it done and have peace of mind these days. (IMG:style_emoticons/default/beerchug.gif) by the way thats the only thing i am not sure about with ss lines. less likely to bend if you had the misfortune to crash. i bent mine up out of brake fluid tubing. |
|
|
|
| TRP |
Oct 9 2025, 09:39 PM
Post
#39
|
|
Member Group: Members Posts: 78 Joined: 2-September 23 From: Morgan Hill, CA Member No.: 27,559 Region Association: None |
Yeah, Im totally not looking forward to that task. I'm not sure which project I'm dreading more, the stainless lines or upgrading the shifter bushing/tangerine linkage (mostly because of having to adjust the shifter).
I came home from work tonight and drained the fuel/pulled the tank. It's not too bad in there, just dirty. 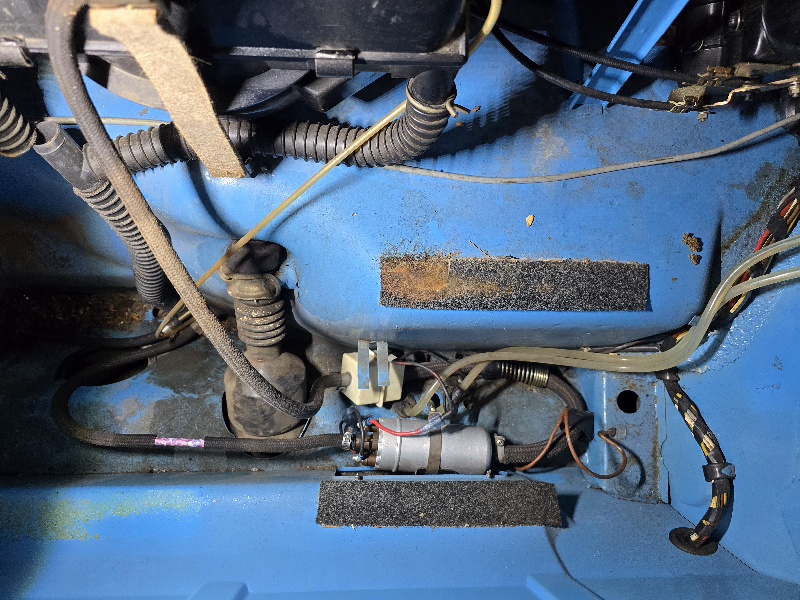 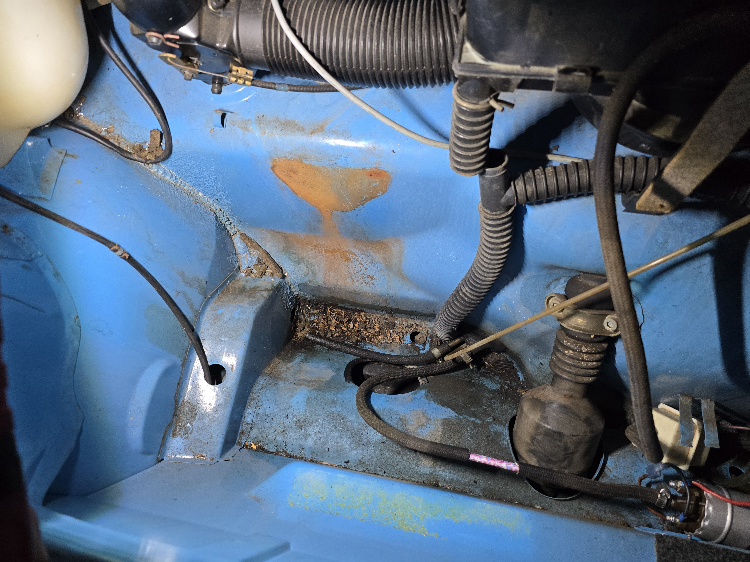 This weekend I will start to dive into some of these projects. Thanks for checking in on my progress! |
|
|
|
| TRP |
Oct 12 2025, 11:05 PM
Post
#40
|
|
Member Group: Members Posts: 78 Joined: 2-September 23 From: Morgan Hill, CA Member No.: 27,559 Region Association: None |
I spent about half the day working on several projects on the 914 today. I managed to bang out the Tangerine Racing Bushing, Fuel Lines, and Spherical Bushing kit. I also installed the new bolts for the rear sway bar. I was *really* shocked at how easy the fuel lines went in! I mean, I had to gut the interior to get to all the right access windows, but other than that, it was really straight forward.
Here are some photos of the progress:   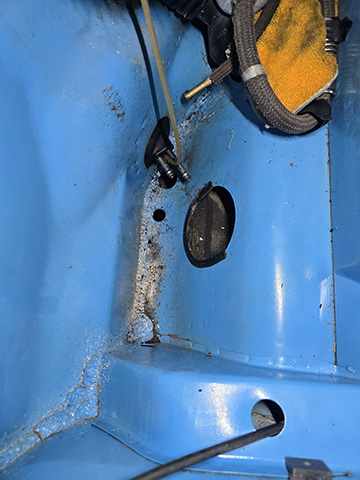 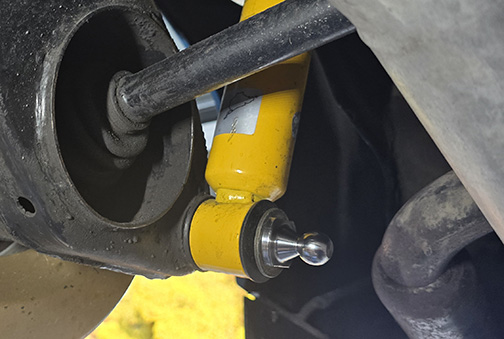 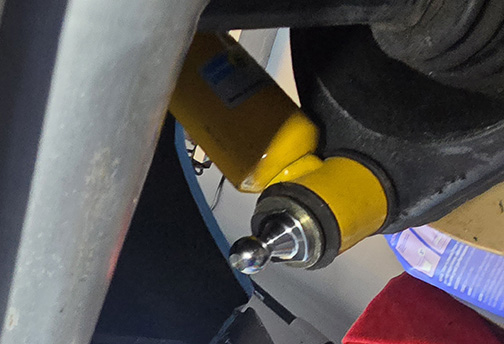 I had a question about these wires... what are there and where should they go? 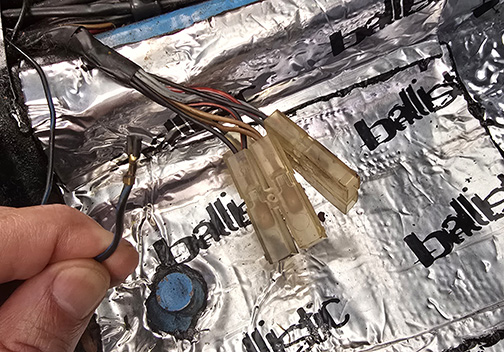 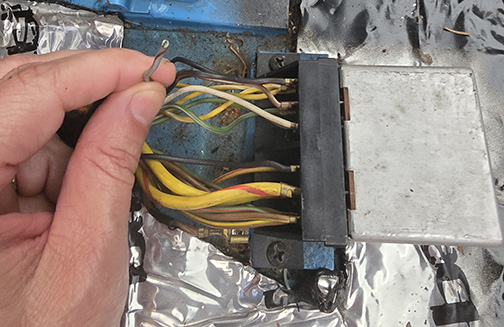 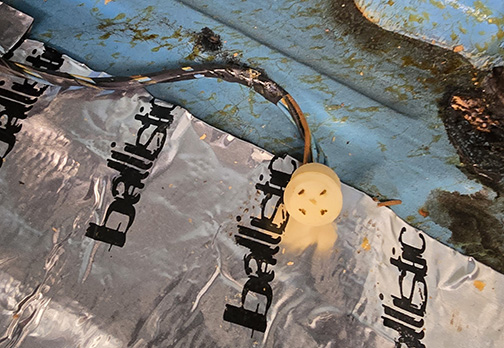 If anyone knows what these wires should go to, please let me know. Thanks for checking in on my progress. |
|
|
|
|
3 User(s) are reading this topic (3 Guests and 0 Anonymous Users)
0 Members:

|
Lo-Fi Version | Time is now: 13th October 2025 - 10:59 PM |
Invision Power Board
v9.1.4 © 2025 IPS, Inc.