|
|
|
Porsche, and the Porsche crest are registered trademarks of Dr. Ing. h.c. F. Porsche AG.
This site is not affiliated with Porsche in any way. Its only purpose is to provide an online forum for car enthusiasts. All other trademarks are property of their respective owners. |
|
|

  |

| Literati914 |
 Apr 24 2026, 05:47 PM Apr 24 2026, 05:47 PM
Post
#61
|
|
Advanced Member  Group: Members Posts: 2,341 Joined: 16-November 06 From: Dallas, TX Member No.: 7,222 Region Association: Southwest Region |
Other side (IMG:style_emoticons/default/biggrin.gif)
|
   |

 
|
| Literati914 |
Apr 24 2026, 05:47 PM
Post
#62
|
|
Advanced Member Group: Members Posts: 2,341 Joined: 16-November 06 From: Dallas, TX Member No.: 7,222 Region Association: Southwest Region |
Other side (IMG:style_emoticons/default/biggrin.gif)
Attached thumbnail(s) 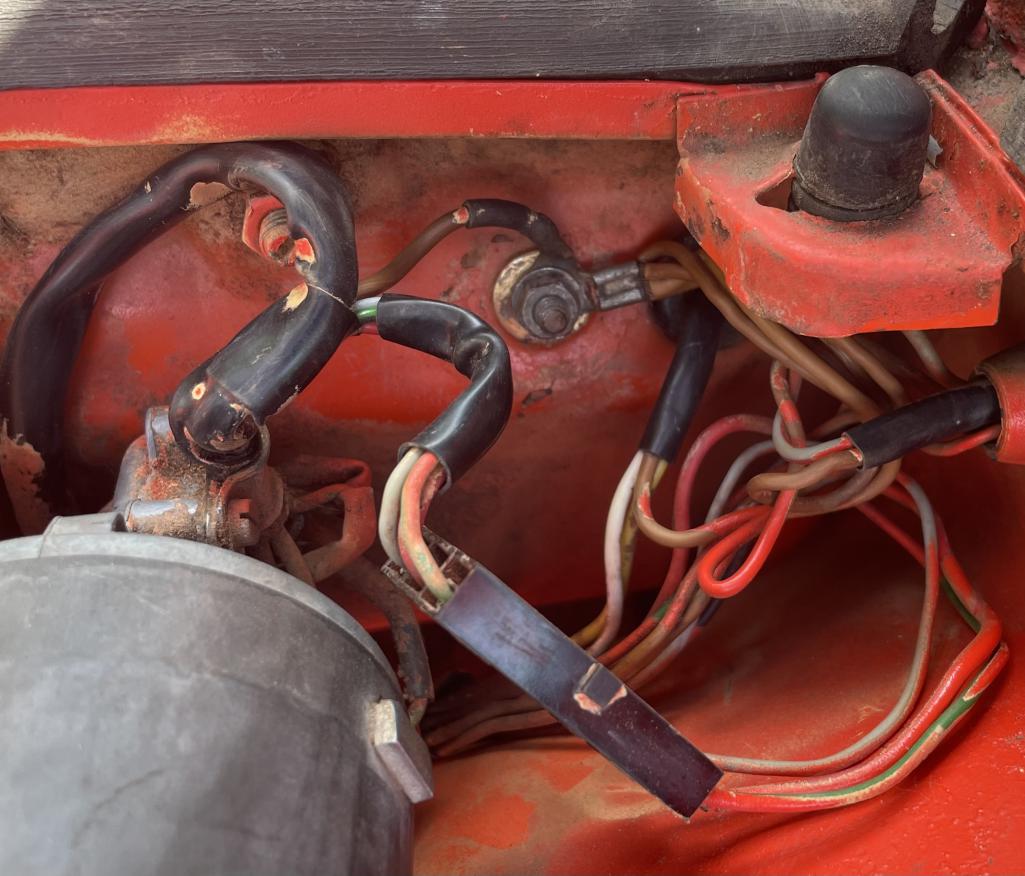
|
|
|
|
| Literati914 |
Apr 25 2026, 12:38 PM
Post
#63
|
|
Advanced Member Group: Members Posts: 2,341 Joined: 16-November 06 From: Dallas, TX Member No.: 7,222 Region Association: Southwest Region |
Moved to the back and cleaned up and installed the wiring harness at the engine compartment
Attached thumbnail(s) 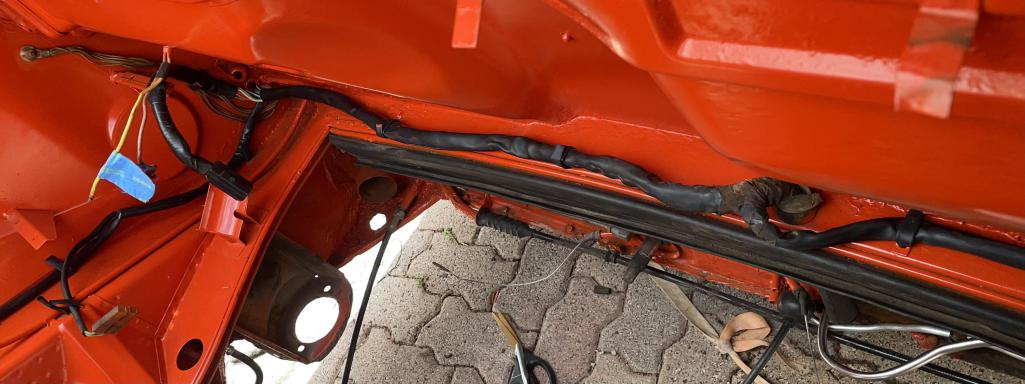
|
|
|
|
| Literati914 |
Apr 25 2026, 12:40 PM
Post
#64
|
|
Advanced Member Group: Members Posts: 2,341 Joined: 16-November 06 From: Dallas, TX Member No.: 7,222 Region Association: Southwest Region |
The right side
Attached thumbnail(s) 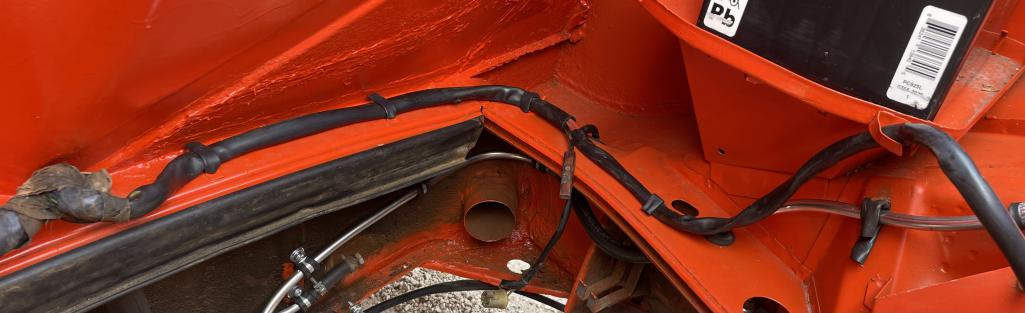
|
|
|
|
| Literati914 |
Apr 25 2026, 12:43 PM
Post
#65
|
|
Advanced Member Group: Members Posts: 2,341 Joined: 16-November 06 From: Dallas, TX Member No.: 7,222 Region Association: Southwest Region |
Wires going back to the trunk were in a sorry state, loose tape and oversprayed paint
Attached thumbnail(s) 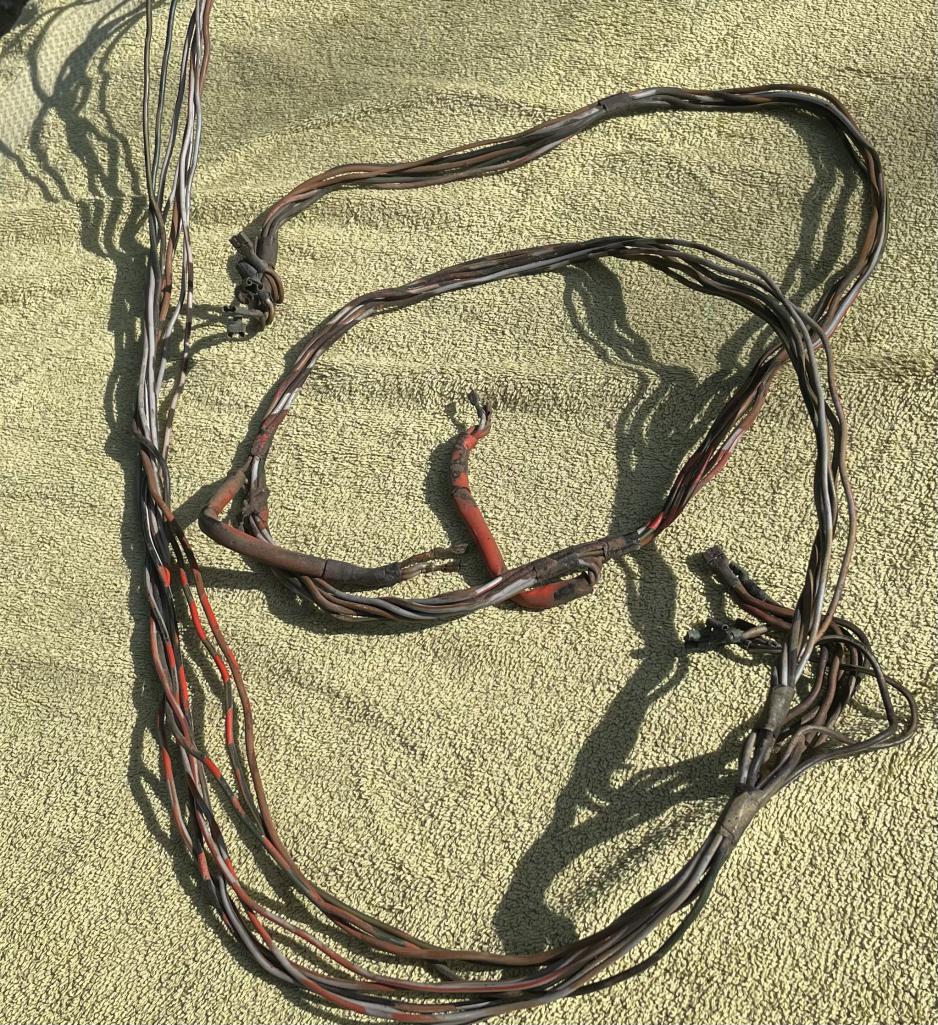
|
|
|
|
| Literati914 |
Apr 25 2026, 12:44 PM
Post
#66
|
|
Advanced Member Group: Members Posts: 2,341 Joined: 16-November 06 From: Dallas, TX Member No.: 7,222 Region Association: Southwest Region |
Cleaned up, re-taped.. and now reinstalled
Attached thumbnail(s) 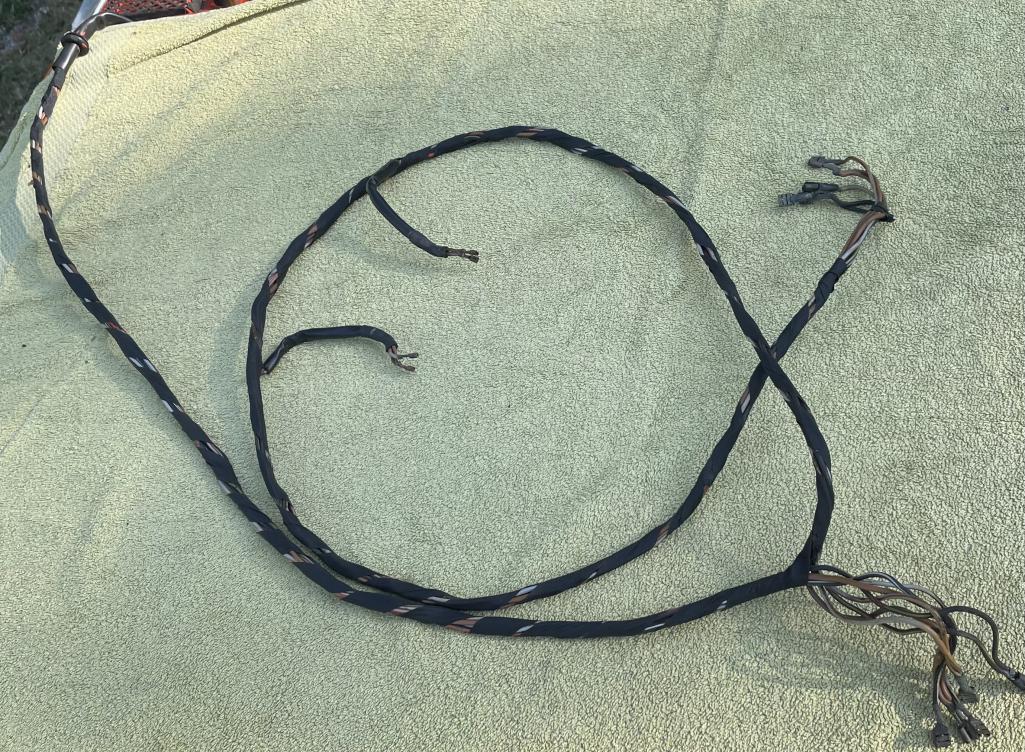
|
|
|
|
| Literati914 |
Apr 27 2026, 07:31 PM
Post
#67
|
|
Advanced Member Group: Members Posts: 2,341 Joined: 16-November 06 From: Dallas, TX Member No.: 7,222 Region Association: Southwest Region |
Which leads me to tail lights. The right side tail light lens on this car looked terrible, very washed out and oddly more transluscent on the outer curved section than normal. I snagged a better one for the car, a used Hella lens.
Attached thumbnail(s) 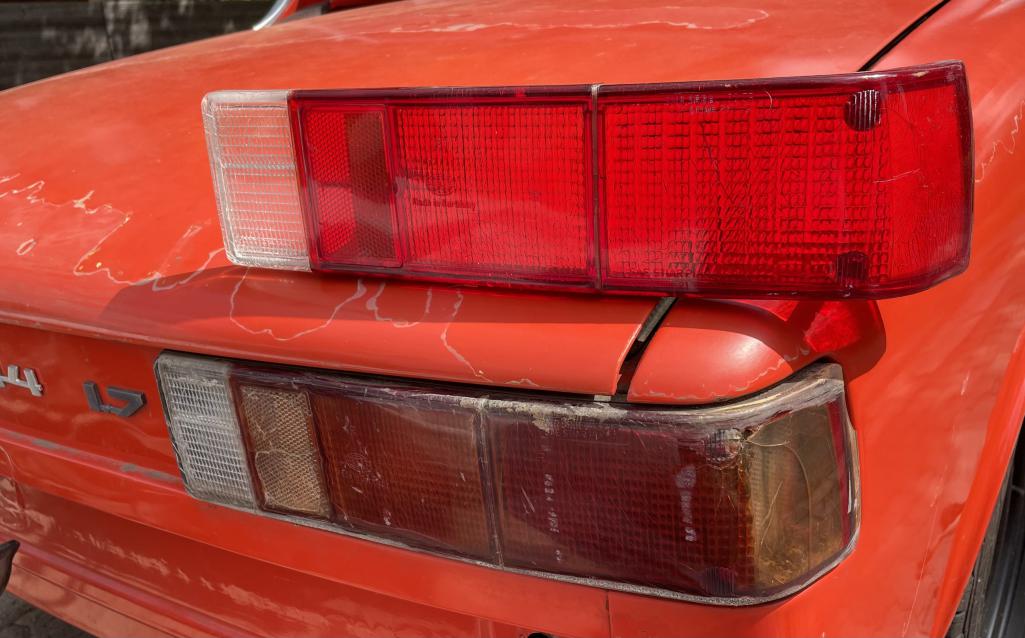
|
|
|
|
| Literati914 |
Apr 27 2026, 07:33 PM
Post
#68
|
|
Advanced Member Group: Members Posts: 2,341 Joined: 16-November 06 From: Dallas, TX Member No.: 7,222 Region Association: Southwest Region |
The thin seals around the lenses were both deteriorated so I replaced them before re-install
Attached thumbnail(s) 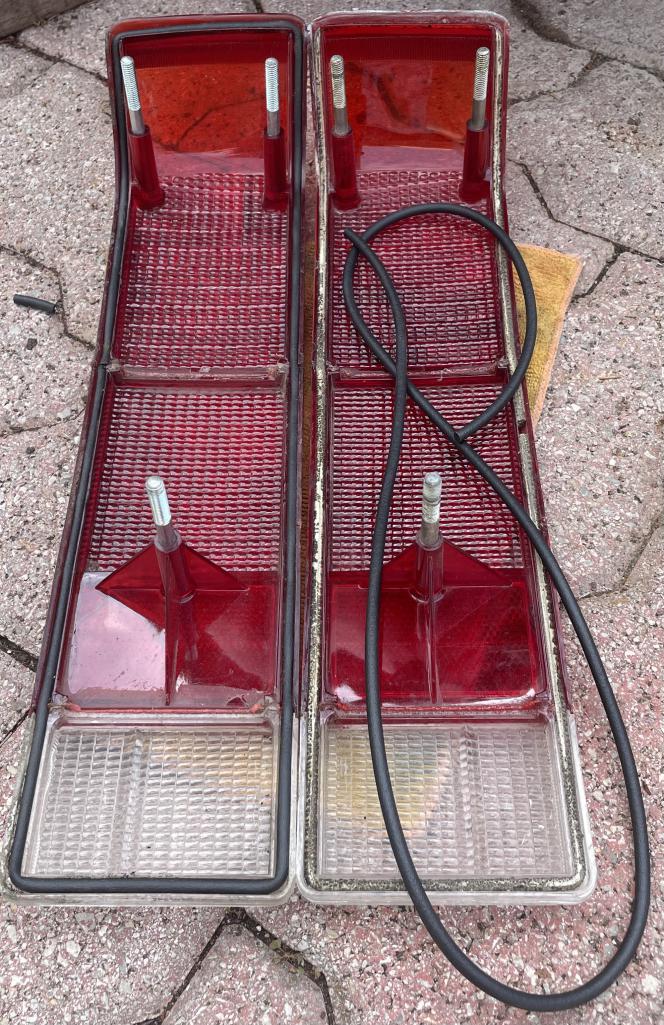
|
|
|
|
| Literati914 |
Apr 27 2026, 07:41 PM
Post
#69
|
|
Advanced Member Group: Members Posts: 2,341 Joined: 16-November 06 From: Dallas, TX Member No.: 7,222 Region Association: Southwest Region |
Jumped up to the front and cleaned up the suspension assembly a little - shot a little paint on them sad looking strut housing. But more importantly I got new rubber brake hoses installed on both sides:
Attached thumbnail(s) 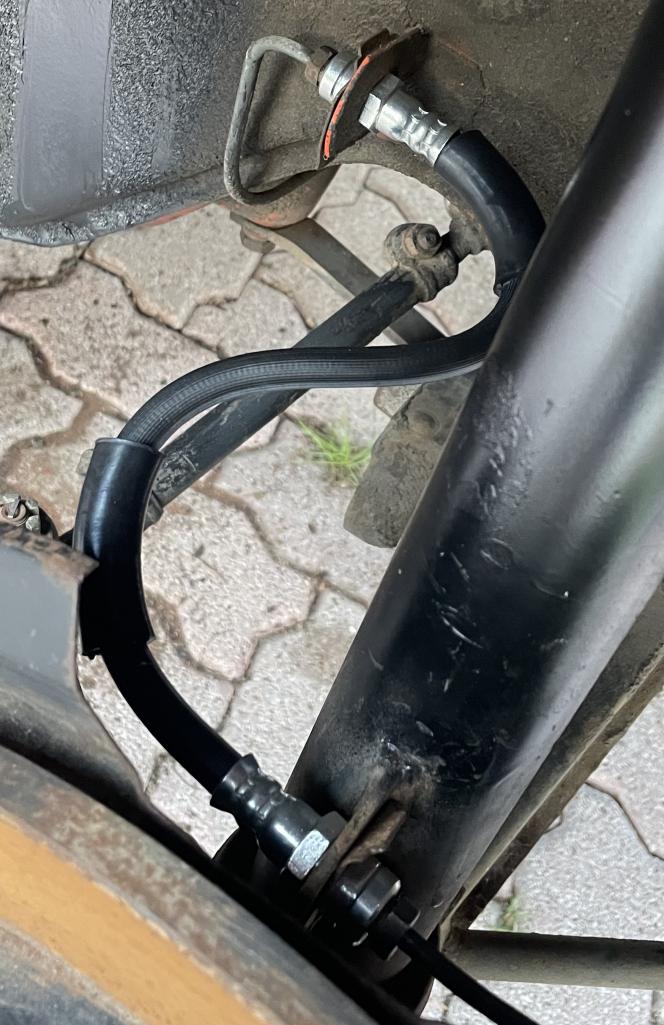 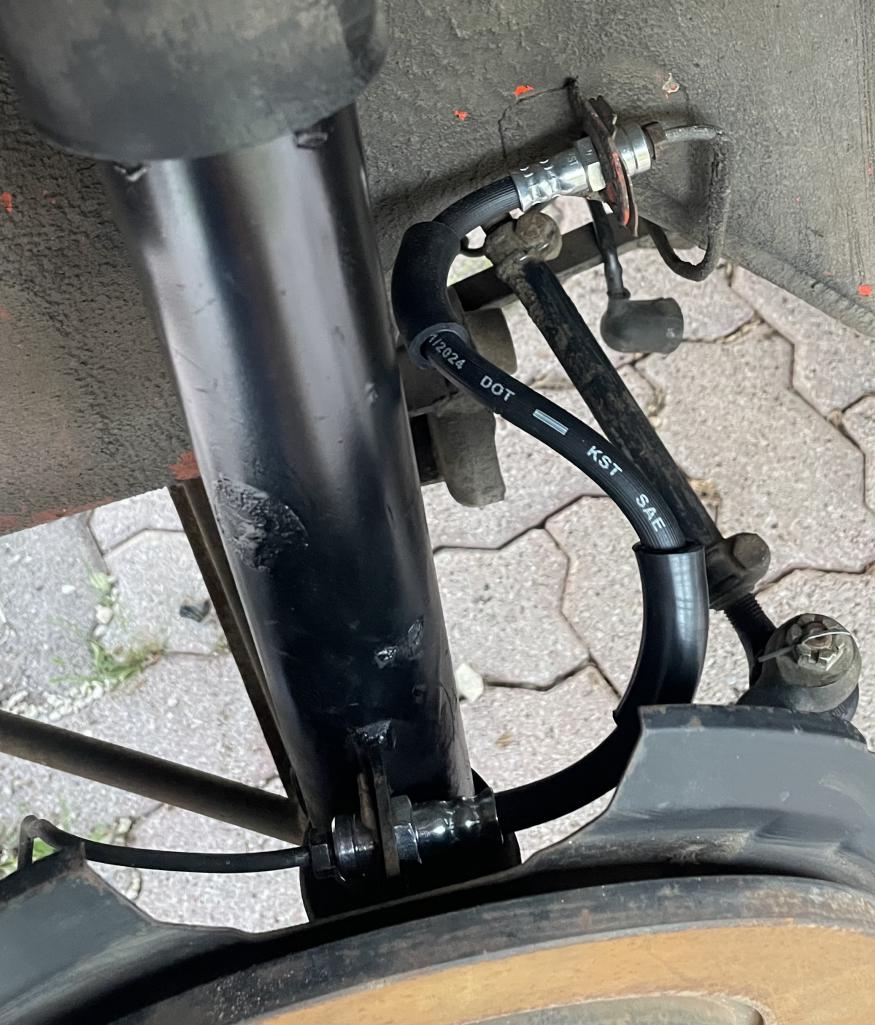
|
|
|
|
| Literati914 |
May 29 2026, 09:02 PM
Post
#70
|
|
Advanced Member Group: Members Posts: 2,341 Joined: 16-November 06 From: Dallas, TX Member No.: 7,222 Region Association: Southwest Region |
The targa top on this car was in bad shape. The finish, which I don’t know whether it was original or not was severely sun damaged and peeling all over. And on top of that someone had taken what looked like a flat screwdriver and tried scraping it in various places… leaving deep gouges. So I decided to try and refinish it, or at least improve it.
Attached thumbnail(s) 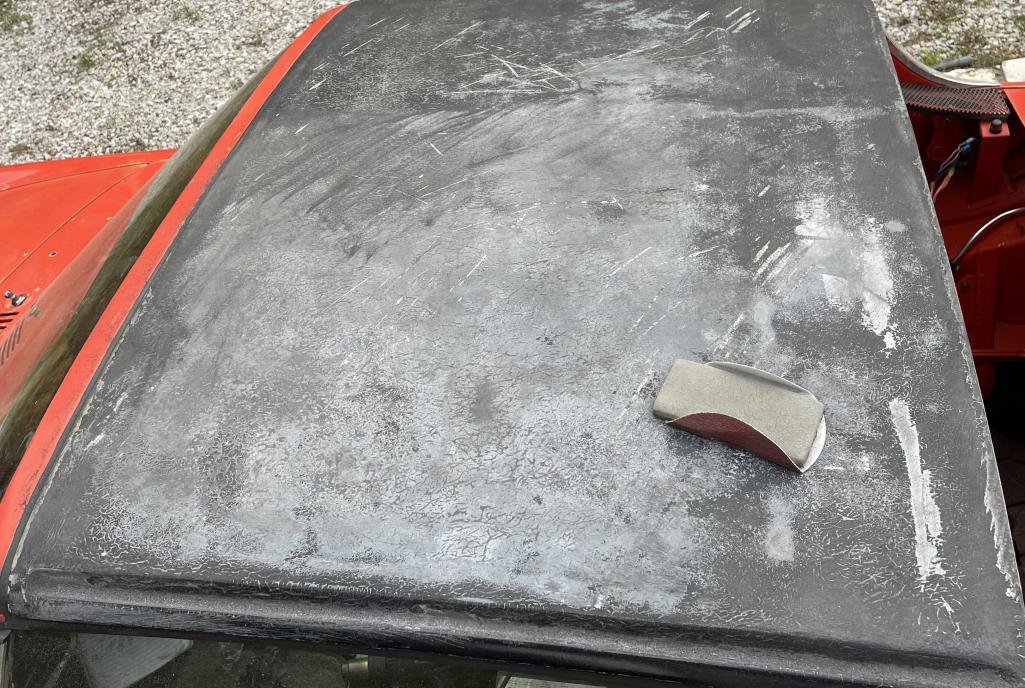
|
|
|
|
| Literati914 |
May 29 2026, 09:04 PM
Post
#71
|
|
Advanced Member Group: Members Posts: 2,341 Joined: 16-November 06 From: Dallas, TX Member No.: 7,222 Region Association: Southwest Region |
After sanding smooth and some filler, this pic is prior to a primer coat:
Attached thumbnail(s) 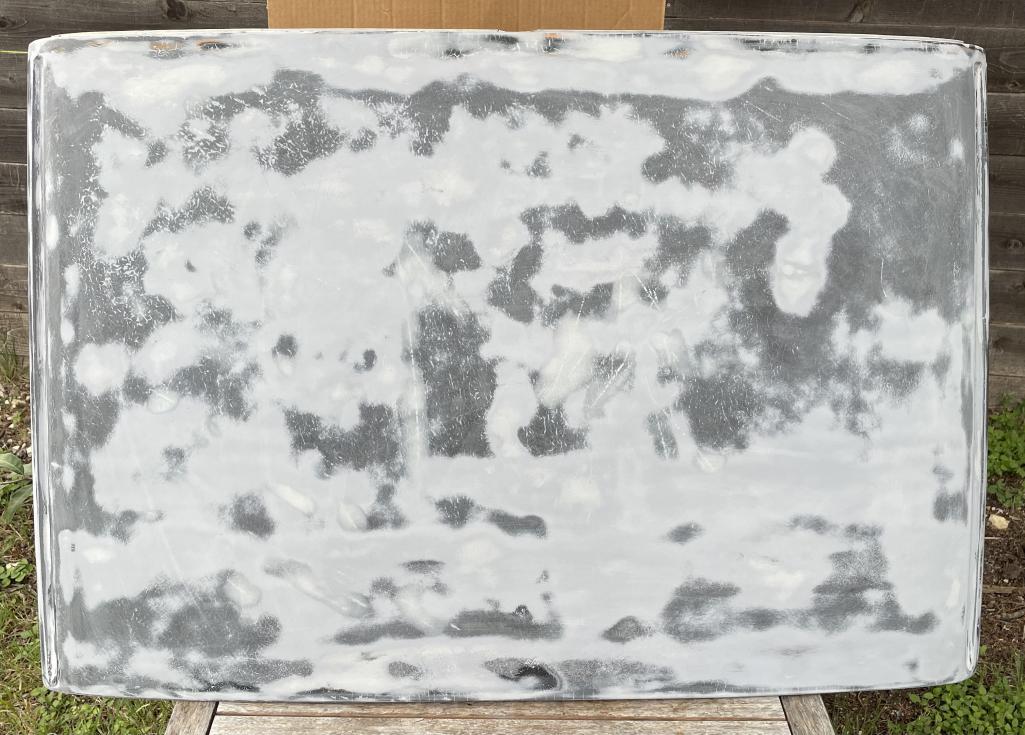
|
|
|
|
| Literati914 |
May 29 2026, 09:10 PM
Post
#72
|
|
Advanced Member Group: Members Posts: 2,341 Joined: 16-November 06 From: Dallas, TX Member No.: 7,222 Region Association: Southwest Region |
I picked up a 1 gal. Herculiner roll-on kit, unused and very cheap off marketplace with the intension to thin it if needed and spray it from a schutz gun. I basically decided to try rolling it on at the last minute because I didn’t feel like going thru the trial and error with air Psi and product volume.
Attached thumbnail(s) 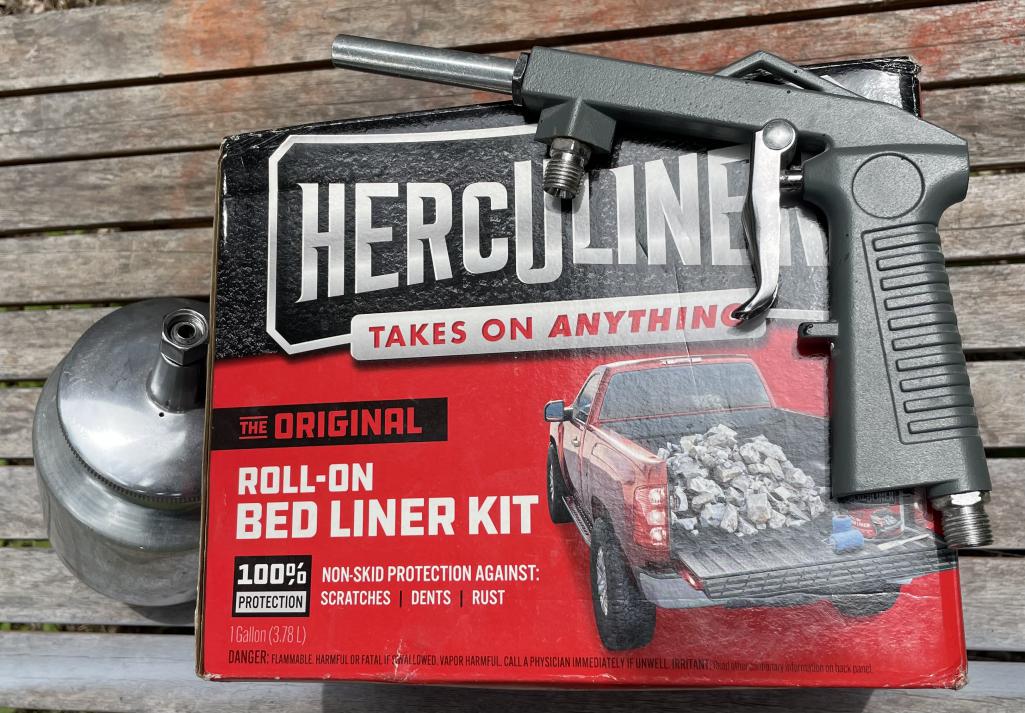
|
|
|
|
| Literati914 |
May 29 2026, 09:14 PM
Post
#73
|
|
Advanced Member Group: Members Posts: 2,341 Joined: 16-November 06 From: Dallas, TX Member No.: 7,222 Region Association: Southwest Region |
The kit came with textured rollers and I did use some acetone to thin it after mixing it really well. I applied 4 coats, not waiting for the previous to dry - just one after the other. It came out better than I expected, perhaps not strictly a factory texture but pretty close and pretty nice - a great improvement imho.. though next time I’d probably just do 3 coats.
Attached thumbnail(s) 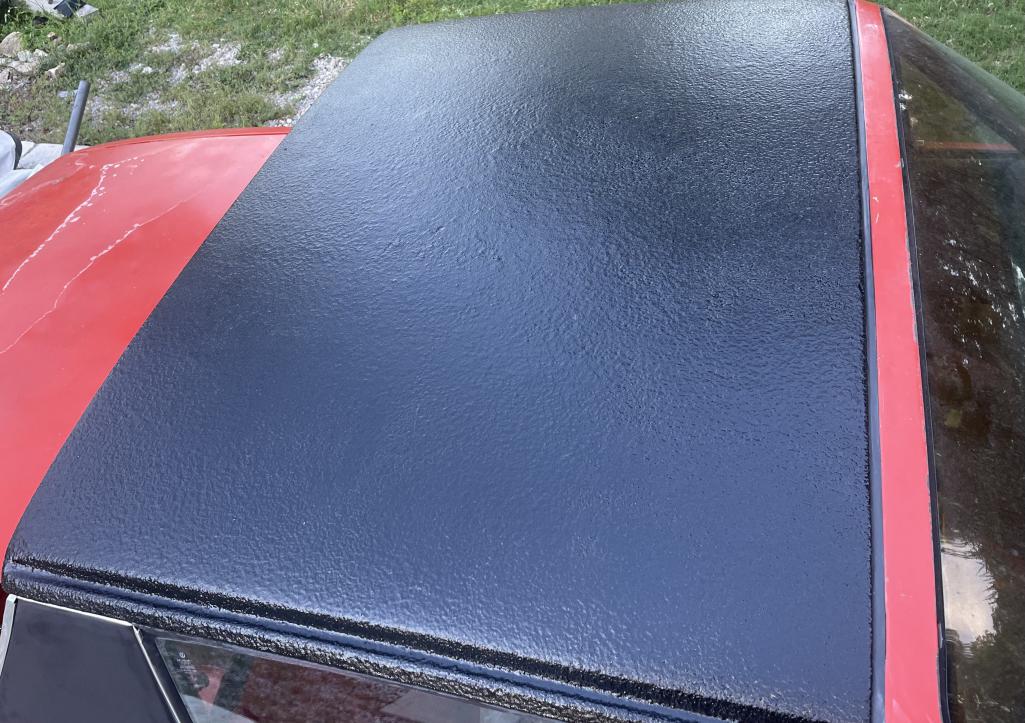
|
|
|
|
| Literati914 |
Jun 5 2026, 10:20 AM
Post
#74
|
|
Advanced Member Group: Members Posts: 2,341 Joined: 16-November 06 From: Dallas, TX Member No.: 7,222 Region Association: Southwest Region |
I had left over bed liner and decided to coat the underside of the floors
Attached thumbnail(s) 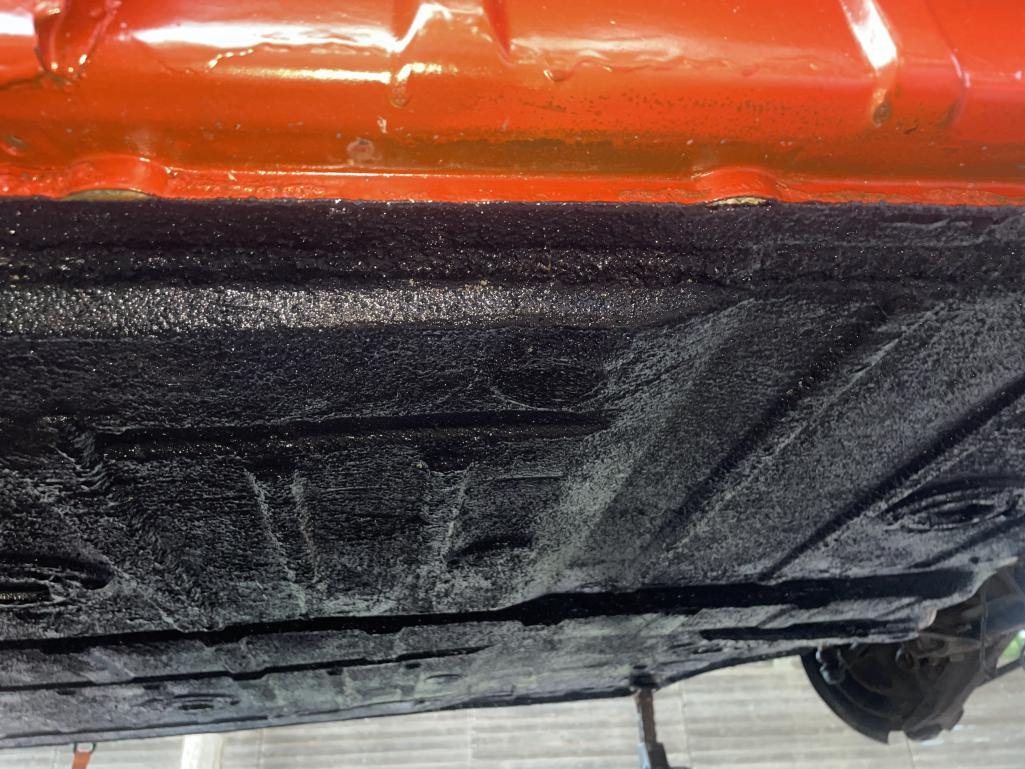
|
|
|
|
| Literati914 |
Jun 5 2026, 10:26 AM
Post
#75
|
|
Advanced Member Group: Members Posts: 2,341 Joined: 16-November 06 From: Dallas, TX Member No.: 7,222 Region Association: Southwest Region |
I roughed up the surface and applied it over the original undercoating … of course this really benefits the patched areas that I had welded in to the floors. So now there is ‘Chassis Saver’ on the inside and a double coating of bedliner underneith… the floors should be good for decades!
Attached thumbnail(s) 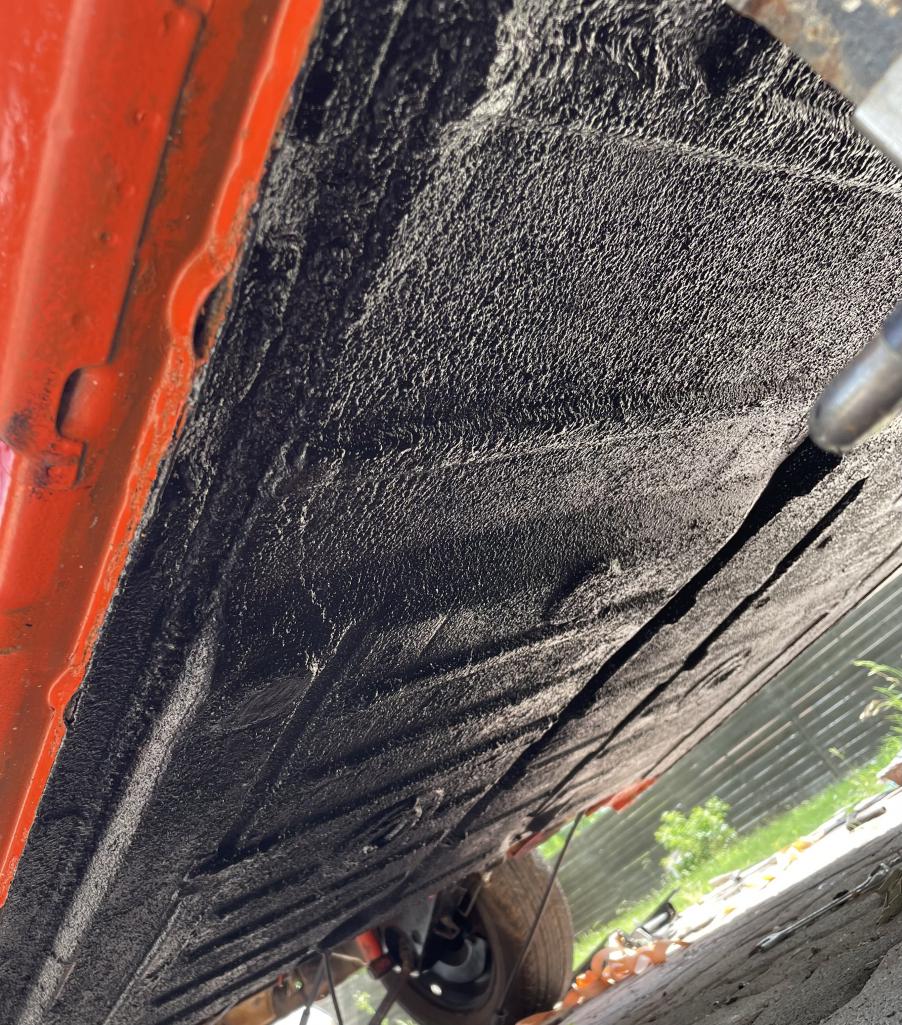
|
|
|
|
| Literati914 |
Jun 7 2026, 07:10 PM
Post
#76
|
|
Advanced Member Group: Members Posts: 2,341 Joined: 16-November 06 From: Dallas, TX Member No.: 7,222 Region Association: Southwest Region |
I added hydraulic hood support struts to the front of this car today.
Attached thumbnail(s) 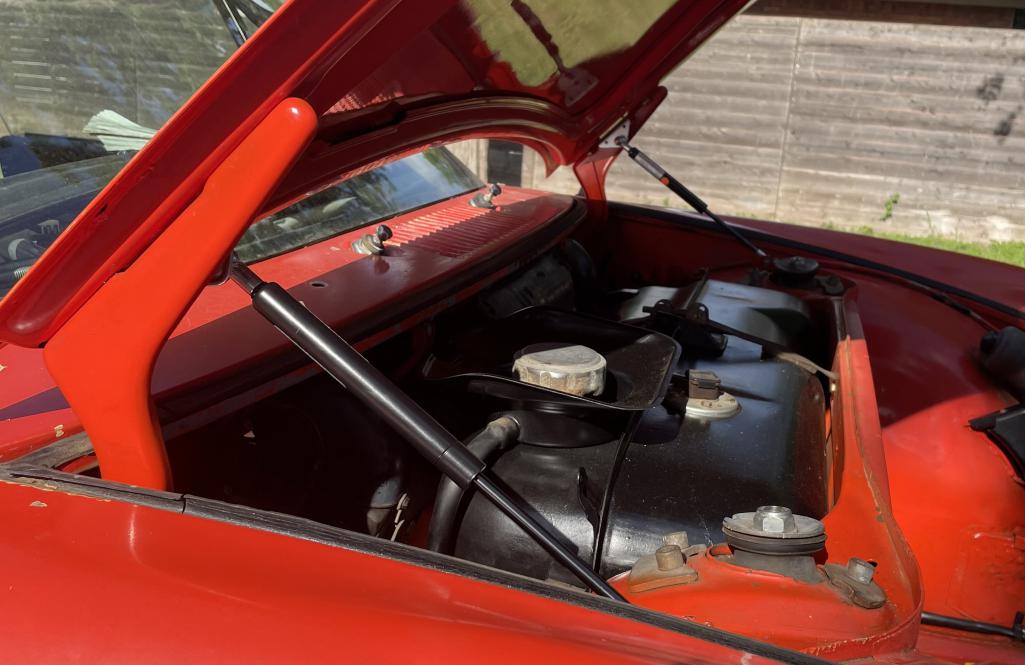
|
|
|
|
| Literati914 |
Jun 7 2026, 07:15 PM
Post
#77
|
|
Advanced Member Group: Members Posts: 2,341 Joined: 16-November 06 From: Dallas, TX Member No.: 7,222 Region Association: Southwest Region |
So much better imho, now that I’m not hearing the obnoxious squeaky springs every time I raise the hood. They are very smooth, and now match the rear trunk set also (posted earlier in this thread)
Attached thumbnail(s) 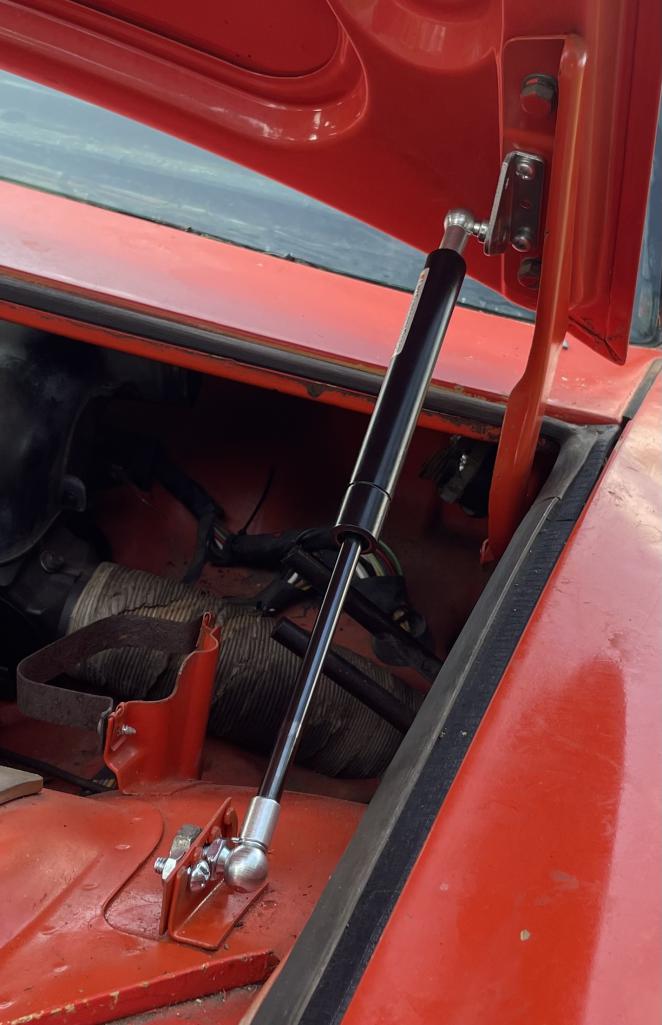
|
|
|
|
| HFC3 |
Jun 8 2026, 06:51 PM
Post
#78
|
|
Member Group: Members Posts: 78 Joined: 14-December 25 From: Virginia Member No.: 29,151 Region Association: MidAtlantic Region |
Great job!
|
|
|
|
| Literati914 |
Jun 10 2026, 02:29 PM
Post
#79
|
|
Advanced Member Group: Members Posts: 2,341 Joined: 16-November 06 From: Dallas, TX Member No.: 7,222 Region Association: Southwest Region |
Started reinstalling the interior. Seat belts are in as well as the B-pillar trim:
Attached thumbnail(s) 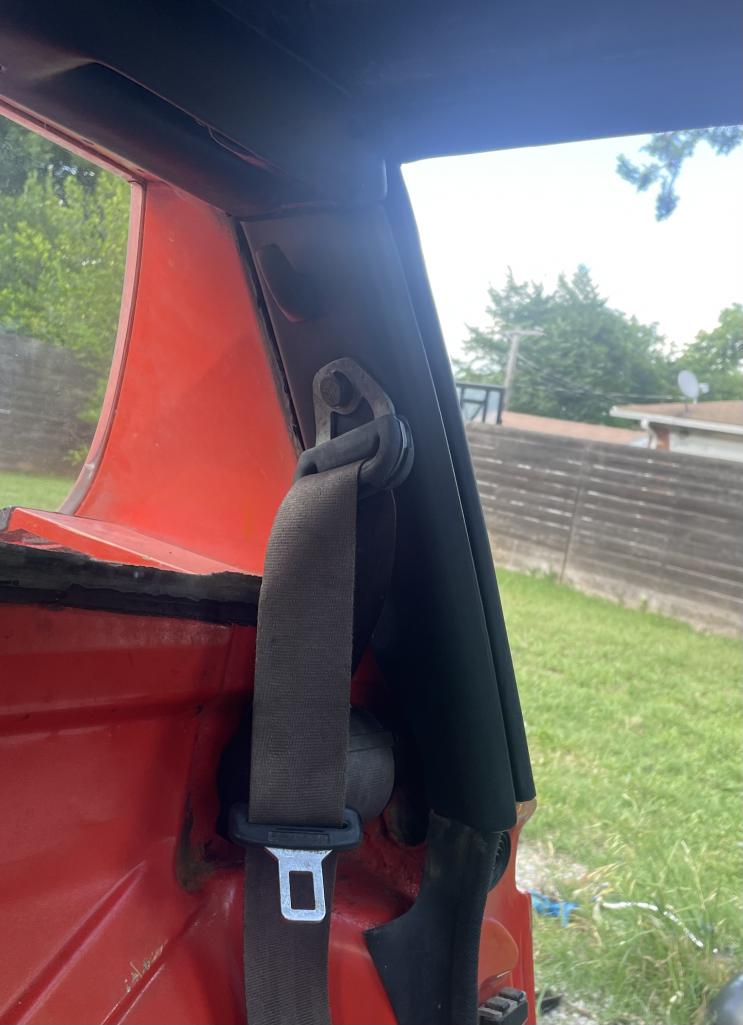
|
|
|
|
| Literati914 |
Jun 10 2026, 02:34 PM
Post
#80
|
|
Advanced Member Group: Members Posts: 2,341 Joined: 16-November 06 From: Dallas, TX Member No.: 7,222 Region Association: Southwest Region |
The Backpad needed some love just to make it usable. The upper tabs on the back had pulled free of the particle board (driver's side only) and needed reattachment. I made up some retaining brackets for the front and back - and used rivets to attach everything. It’s not ideal but the brackets are painted on the front side and will not be seen when the driver’s seat is installed:
ps - this picture is accentuating the angle of that one tab (IMG:style_emoticons/default/blink.gif) , but they both positively engage the metal loops at the top of the firewall. Attached thumbnail(s) 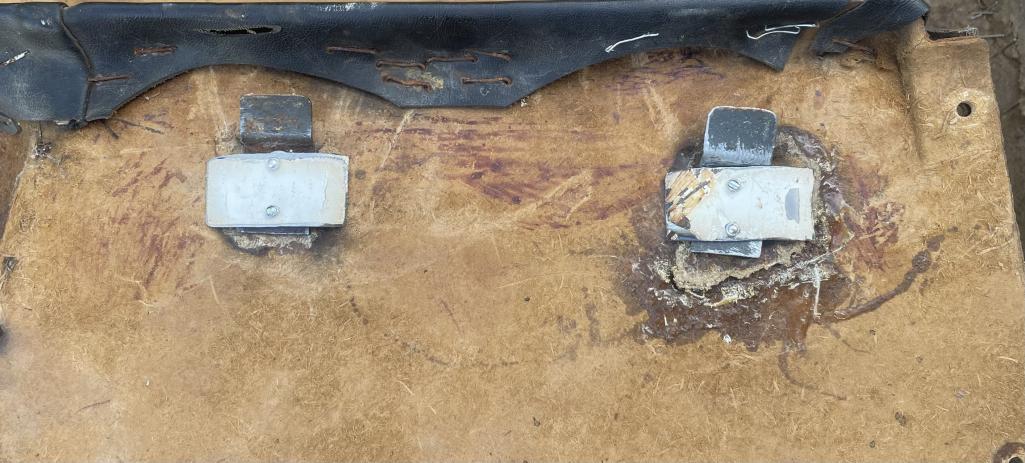
|
|
|
|
|
1 User(s) are reading this topic (1 Guests and 0 Anonymous Users)
0 Members:

|
Lo-Fi Version | Time is now: 15th June 2026 - 04:12 AM |
Invision Power Board
v9.1.4 © 2026 IPS, Inc.