

 Fred's 2374 -> 2258 Engine Build Thread Fred's 2374 -> 2258 Engine Build Thread |
|
|

|
Porsche, and the Porsche crest are registered trademarks of Dr. Ing. h.c. F. Porsche AG.
This site is not affiliated with Porsche in any way. Its only purpose is to provide an online forum for car enthusiasts. All other trademarks are property of their respective owners. |
|
|
  |
| friethmiller |
 Oct 11 2026, 02:05 PM Oct 11 2026, 02:05 PM
Post
#181
|
|
Senior Member  Group: Members Posts: 1,568 Joined: 10-February 19 From: Austin, TX Member No.: 22,863 Region Association: Southwest Region 
 |
Test Stand and Break-in (10/10 - 10/11/2026):
Started this weekend in the backyard with the goal of retrieving the test stand out from under the LE's engine. I removed the back 2x4 board at the top in order to be able to work the jack with the TR engine lifting plate. Don't try this at home kids! What could go wrong? Thanks again to the cardboard for providing me the ability to slide/pull the engine onto the yard cart. I then recovered the engine with a tarp. 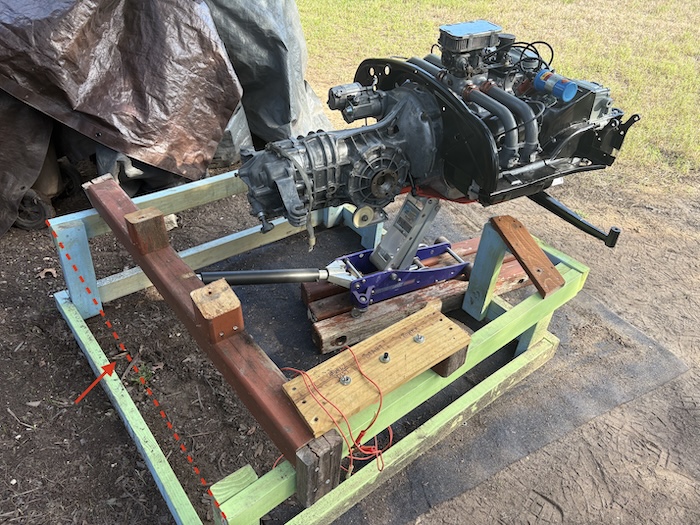 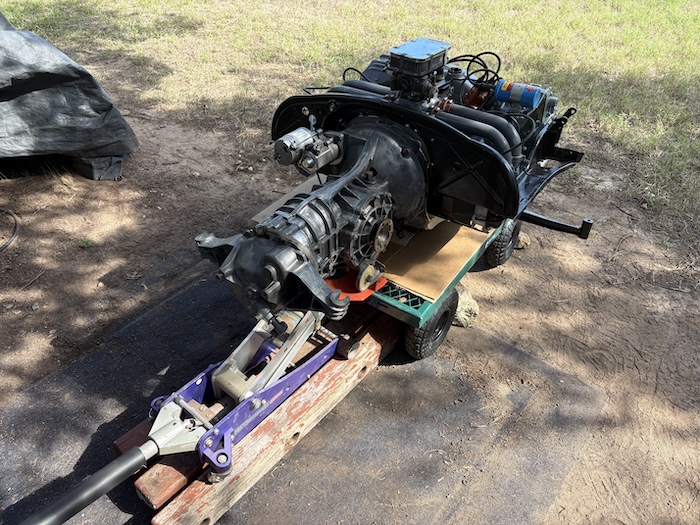 With the test stand in the garage, reassembled, and the transmission mounted, I used the lift cart to remove the engine from the stand and wheel it right into place. I designed the gap in the stand to fit the cart. I'm using the engine's crossbar for rigidity here. (IMG:style_emoticons/default/aktion035.gif) After about 10-15 minutes of farting around, the trans and engine were finally bolted together. Second photo shows how I used the jack cart with some wood blocks to get the engine level with the transmission. 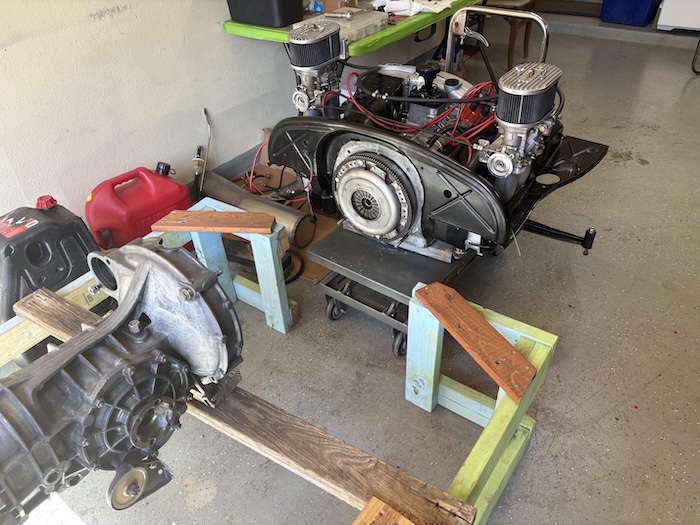 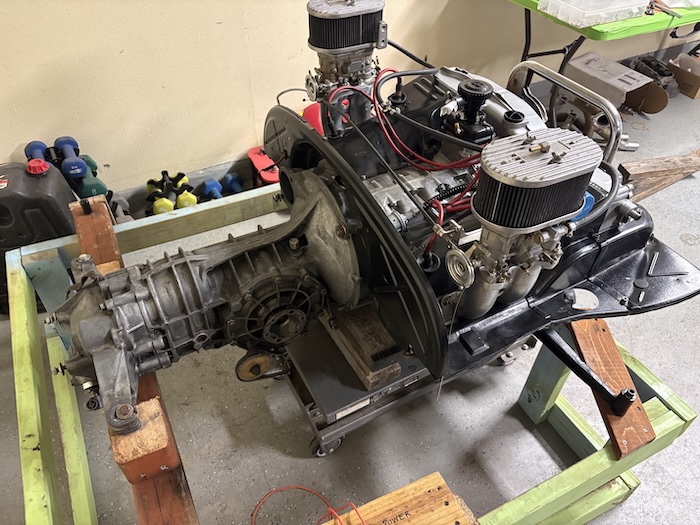 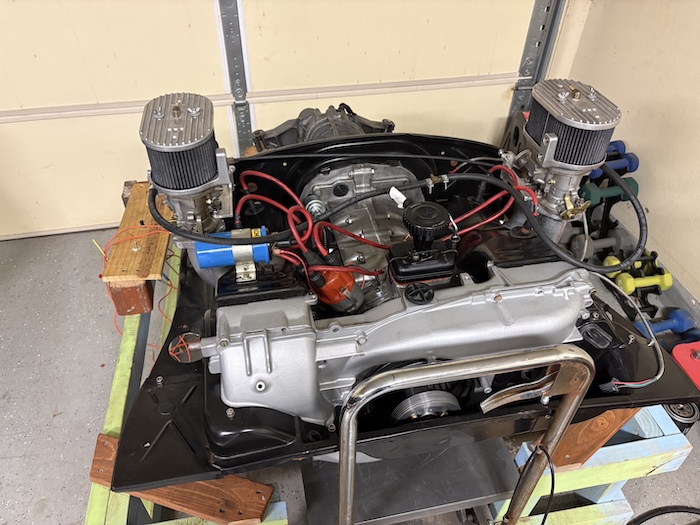 Next, was mounting the new high torque starter and fabricating a mount for the oil pressure sender. I used a leftover factory wire holder for this. I bent the small tab of sheet metal into a "U" shape so the sender could rest on it. I cut two slits in the metal tab to allow a worm clamp to secure everything. Note: since this sender hose is rubber (from Auto Atlanta), I'm also using this mount as the ground straight to the engine case. 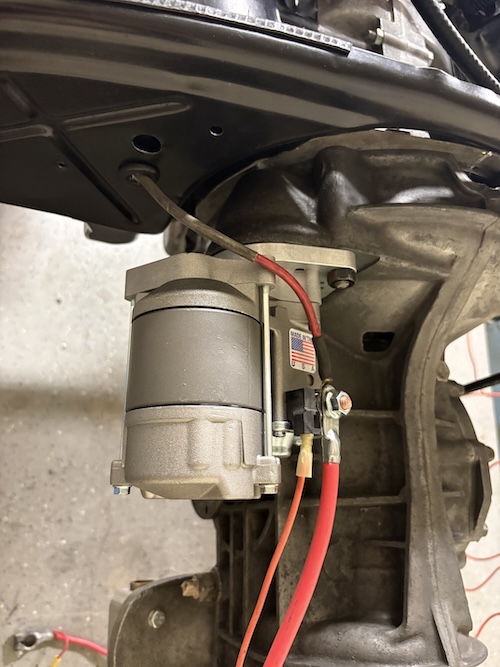 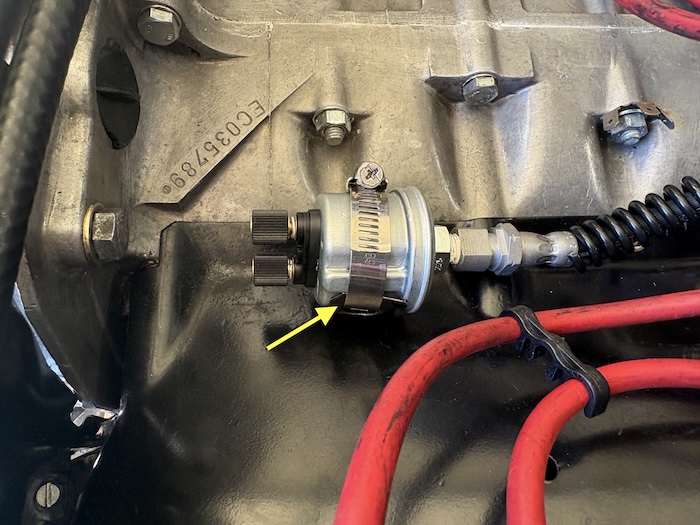 Next, was wiring in the oil pressure gauge (with the light) and the TR remote oil cooler (see arrows) minus the hoses. This is how I left things on Saturday evening. 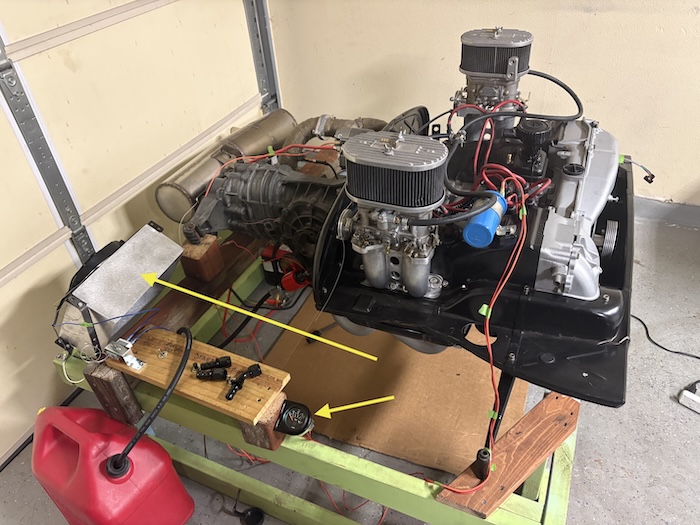 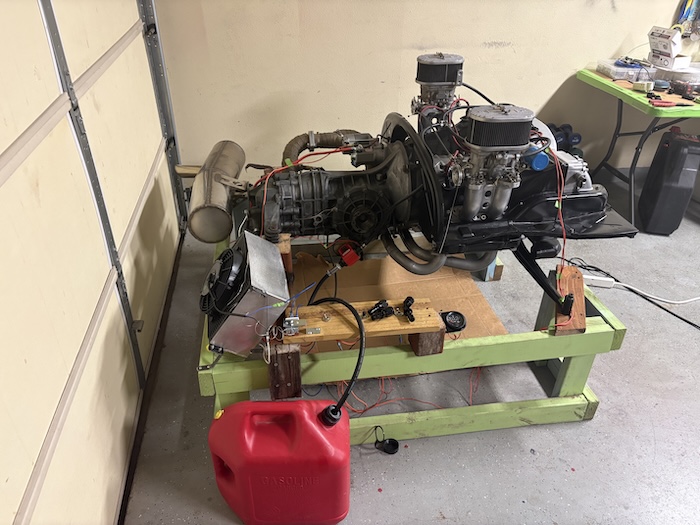 On Sunday morning, I decided to move the oil cooler closer to the engine and orient it in a way that better matches the "installed configuration". Plus, the hoses that came with the kit couldn't reach the cooler where I had it. I didn't want to have to redo the hose connections if I used longer hoses since my spare 5/8" heater hose wasn't rated for oil. (IMG:style_emoticons/default/dry.gif) 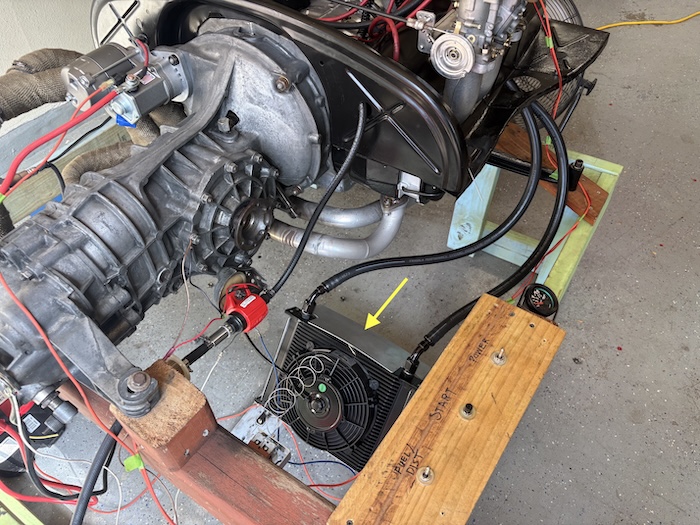 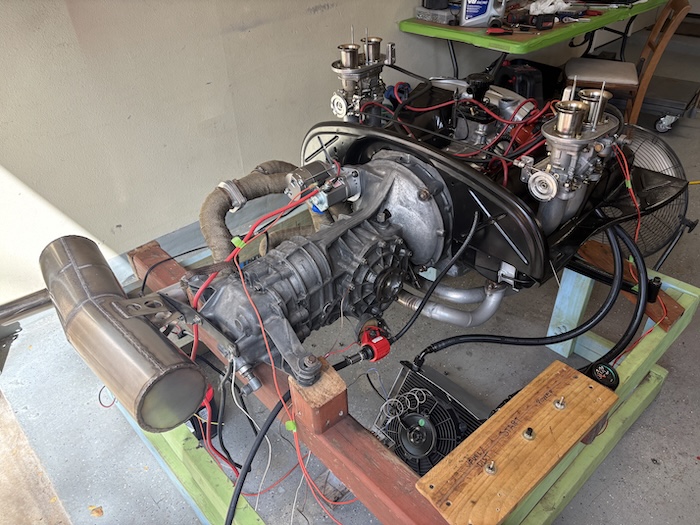 Next, I went back out to the LE's engine and traded out the intake gaskets that I had originally intended to use on the 2258 with it's 44 IDFs. Don't worry though, I did replace the intake gaskets with the thicker "stock" ones and bolted everything back together. 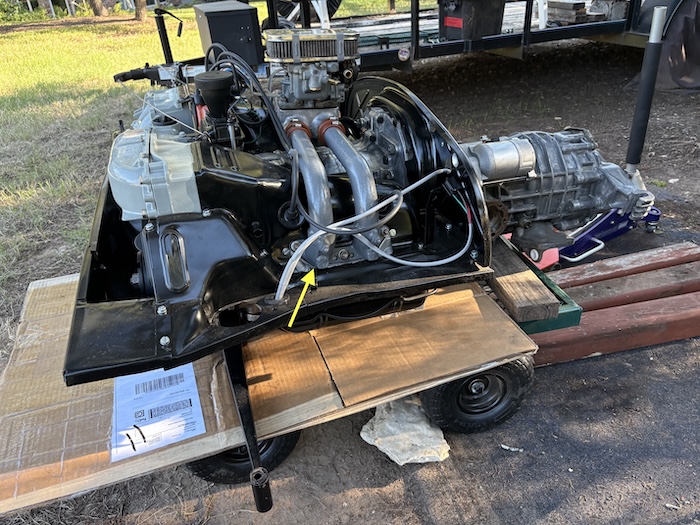 Finally, with the intake gaskets on the 2258 and the carbs all bolted down, the engine was ready to go! (IMG:style_emoticons/default/cheer.gif) Here's a 20 sec and a shorter 10 sec video that I took during the 20 min. break-in. Funny... about 5 mins in, about half the nuts on the exhaust down pipes rattled off. I guess I forgot to tight them down. (IMG:style_emoticons/default/idea.gif) So despite the exhaust leaks the engine ran well with no smoke. I did try to set timing but the "0" wasn't very well marked so I may have to redo that later. Super happy with the results and still need to hunt down a one or two small oil leaks. (IMG:style_emoticons/default/dry.gif) Wow! What an intense couple of days getting this thing put together and running (IMG:style_emoticons/default/shades.gif) Cheers!! (IMG:style_emoticons/default/beerchug.gif) 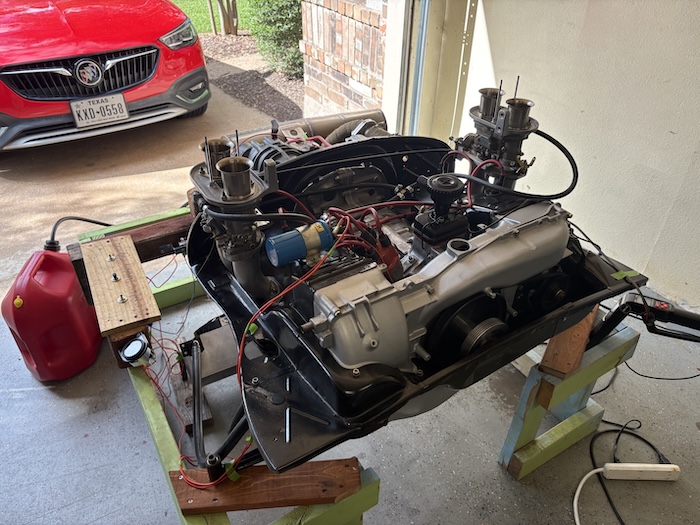 Long video: Click Here Short video: Click Here |
   |

 
|
| Jack Standz |
Oct 11 2026, 02:22 PM
Post
#182
|
|
Senior Member Group: Members Posts: 950 Joined: 15-November 19 From: Happy Place (& surrounding area) Member No.: 23,644 Region Association: None
|
Congratulations! (IMG:style_emoticons/default/biggrin.gif) (IMG:style_emoticons/default/biggrin.gif) (IMG:style_emoticons/default/cheer.gif) (IMG:style_emoticons/default/driving.gif)
What? You didn't break it in at 6AM with open exhaust?? |
|
|
|
| friethmiller |
Oct 11 2026, 07:46 PM
Post
#183
|
|
Senior Member Group: Members Posts: 1,568 Joined: 10-February 19 From: Austin, TX Member No.: 22,863 Region Association: Southwest Region
|
QUOTE(Jack Standz @ Oct 11 2026, 03:22 PM)  Congratulations! (IMG:style_emoticons/default/biggrin.gif) (IMG:style_emoticons/default/biggrin.gif) (IMG:style_emoticons/default/cheer.gif) (IMG:style_emoticons/default/driving.gif) What? You didn't break it in at 6AM with open exhaust?? Thanks! Ha! No. This was at noon today. After looking things over after everything cooled off, I might have a slight oil pump cover leak - but not sure yet. It does look like the oil sender hose to case connection isn't tight enough and is seeping out oil when it runs. Hard to get a wrench on it now but I'll figure out a tool to get down there. I also turned the engine over by hand this evening to get the fan right on the 0 degree mark. My goal is to get it set to 28° BTDC (using my adv on my timing light) but I'll need to apply some white paint so I can see the mark first. Once I've verified timing, I'll move on with carb setup and probably do a valve adjustment. Need to make a list! (IMG:style_emoticons/default/idea.gif) |
|
|
|
| frank_c |
Oct 11 2026, 11:06 PM
Post
#184
|
|
Member Group: Members Posts: 110 Joined: 29-December 24 From: Austin, TX Member No.: 28,542 Region Association: None |
QUOTE(friethmiller @ Oct 11 2026, 08:46 PM) It does look like the oil sender hose to case connection isn't tight enough and is seeping out oil when it runs. Hard to get a wrench on it now but I'll figure out a tool to get down there. Congrats Fred! I've been following this thread for tips on a build I'm planning for my 2.0. Regarding the leak from the oil sender hose - I have the same setup on my engine (928 brake line), and wanted to check if you installed the copper seal under the hose fitting at the case. With as thorough as you are with everything else, I doubt you missed this, but wanted to check just in case. I have both a 14mm crows foot and 14mm sensor deep socket for tightening that hose. I'm also in Austin and might be able to drop them off if you want to borrow them - PM me if interested. Also, are those barrel nuts that you used on the exhaust studs the same as the part used on the 911 exhaust? I'd like to swap mine out to something similar the next time I drop the exhaust. |
|
|
|
| 930cabman |
Oct 12 2026, 05:00 AM
Post
#185
|
|
Advanced Member Group: Members Posts: 4,860 Joined: 12-November 20 From: Buffalo Member No.: 24,877 Region Association: North East States
|
It lives, great milestone
(IMG:style_emoticons/default/cheer.gif) (IMG:style_emoticons/default/cheer.gif) |
|
|
|
| friethmiller |
Oct 12 2026, 07:19 AM
Post
#186
|
|
Senior Member Group: Members Posts: 1,568 Joined: 10-February 19 From: Austin, TX Member No.: 22,863 Region Association: Southwest Region
|
@frank_c
Thanks. Yes, I've got the correct copper crush washer under the hose. I'm always a little cautious when tightening stuff like this into the case. I'll pull the distributor out to get to it, if I have to. For the exhaust down pipes, I'm just using regular M8 nuts for now. I have the correct barrel nuts in a baggy somewhere - probably in the bottom of one of these containers. (IMG:style_emoticons/default/dry.gif) |
|
|
|
| friethmiller |
Oct 12 2026, 08:54 PM
Post
#187
|
|
Senior Member Group: Members Posts: 1,568 Joined: 10-February 19 From: Austin, TX Member No.: 22,863 Region Association: Southwest Region
|
Quick Update (10/12/2026):
Ok, ran the engine again today at lunch and set timing to 28 deg BTDC. I also checked the carbs briefly and noticed a big difference with the synchrometer between the sides. I'll disconnect the linkage tomorrow to see if that helps. The passenger side (slave) carb is pulling a bit more and the idle screw isn't even touching the throttle mechanism. I also need to hook up the AFR and a CHT gauges while I'm at it. AI says I can do some stuff with the AFR while the engine is on the test stand. More to come on this work soon. The good news today is that between this afternoon and this evening I was able to fix or rule out all 4 known oil leaks (see list below).
Here's a pic of the threaded bolt hole that I exposed by removing thermostat wheel. I had to look at a spare case to realize that, yes, I created my own oil leak. (IMG:style_emoticons/default/rolleyes.gif) Thinking this should do it! 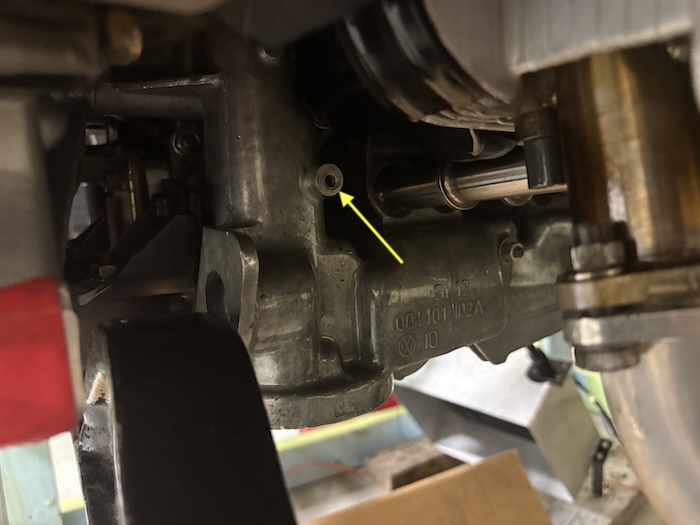 . . 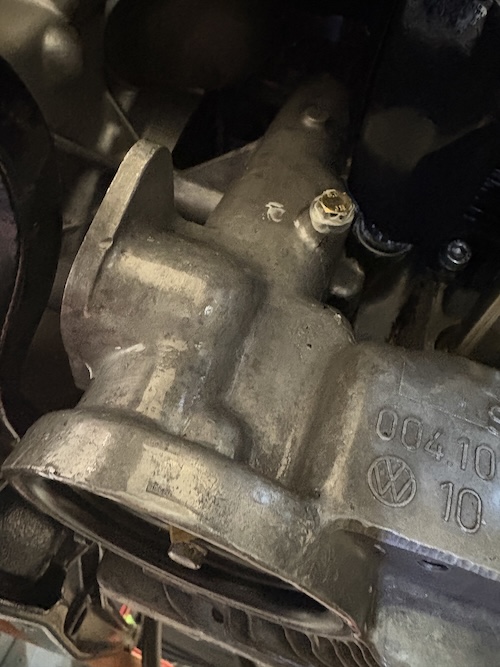 |
|
|
|
|
11 User(s) are reading this topic (11 Guests and 0 Anonymous Users)
0 Members:

|
Lo-Fi Version | Time is now: 13th October 2026 - 04:37 AM |
Invision Power Board
v9.1.4 © 2026 IPS, Inc.