

 Picked up a 73 2.0 project, Future 6 conversion Picked up a 73 2.0 project, Future 6 conversion |
|
|

|
Porsche, and the Porsche crest are registered trademarks of Dr. Ing. h.c. F. Porsche AG.
This site is not affiliated with Porsche in any way. Its only purpose is to provide an online forum for car enthusiasts. All other trademarks are property of their respective owners. |
|
|
  |
| mepstein |
 Aug 21 2026, 06:51 AM Aug 21 2026, 06:51 AM
Post
#21
|
|
914-6 GT in waiting  Group: Members Posts: 20,927 Joined: 19-September 09 From: Landenberg, PA/Wilmington, DE Member No.: 10,825 Region Association: MidAtlantic Region 
 |
QUOTE(914Sixer @ Aug 21 2026, 08:01 AM)  (IMG:style_emoticons/default/agree.gif) choosing the right chassis is most of the battle. |
   |

 
|
| Luke M |
Aug 24 2026, 01:37 PM
Post
#22
|
|
Senior Member Group: Members Posts: 1,609 Joined: 8-February 05 From: WNY Member No.: 3,574 Region Association: North East States
|
QUOTE(mepstein @ Aug 21 2026, 05:51 AM) QUOTE(914Sixer @ Aug 21 2026, 08:01 AM) (IMG:style_emoticons/default/agree.gif) choosing the right chassis is most of the battle. So true. Just look at the amount of time and work I've put into my 6. It still needs more time and parts. I'm waiting on a few metal parts to show up so I can move forward in the rear trunk repair of that car. So far on the 73 it's been kinda of an easy go at it. I need to make up some cross braces before I can mount it on my rotisserie. My son and I have spent the last several days tagging and boxing up parts from the 73. We finished up that portion today so the real work starts next. |
|
|
|
| Luke M |
Aug 27 2026, 03:02 PM
Post
#23
|
|
Senior Member Group: Members Posts: 1,609 Joined: 8-February 05 From: WNY Member No.: 3,574 Region Association: North East States
|
Got the door braces made up and installed. Started removing the tar paper from the floor pan. We got the drivers side rear section done and called it a day. Once the tar paper is off it goes on the rotisserie.
Attached thumbnail(s) 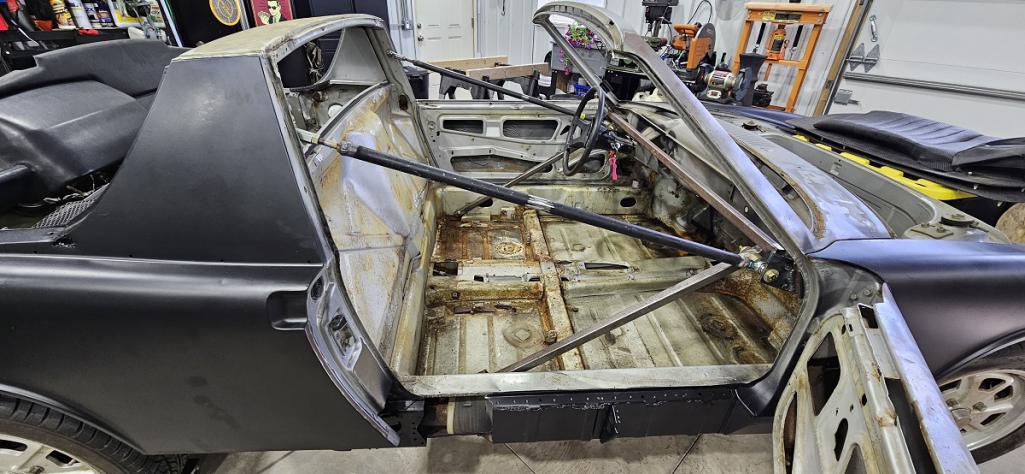 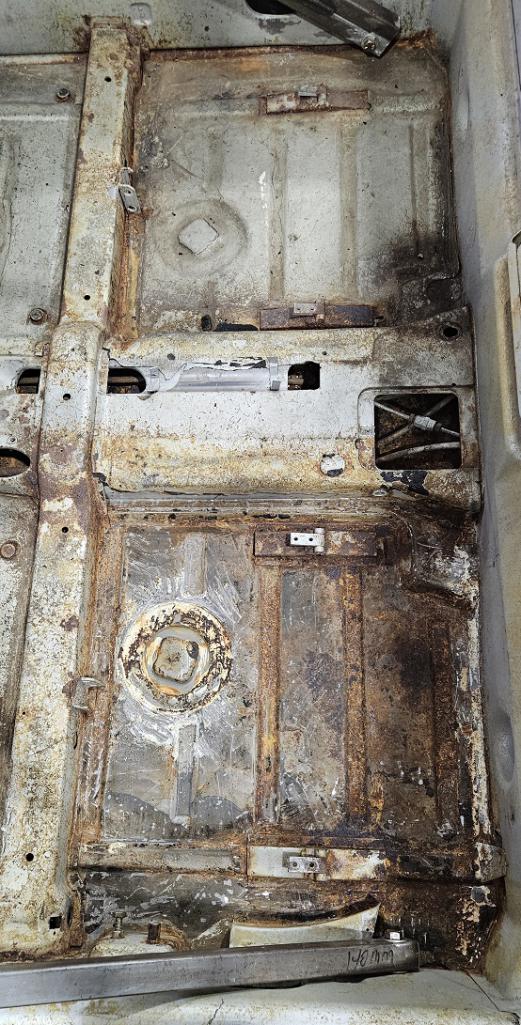
|
|
|
|
| Luke M |
Sep 2 2026, 05:07 PM
Post
#24
|
|
Senior Member Group: Members Posts: 1,609 Joined: 8-February 05 From: WNY Member No.: 3,574 Region Association: North East States
|
The 73 is on the rotisserie. We got the rear control arms and shocks off. Thursday we will take the front end off. Looks like Bilstein struts are installed. These will be going up for sale here soon.
Attached thumbnail(s) 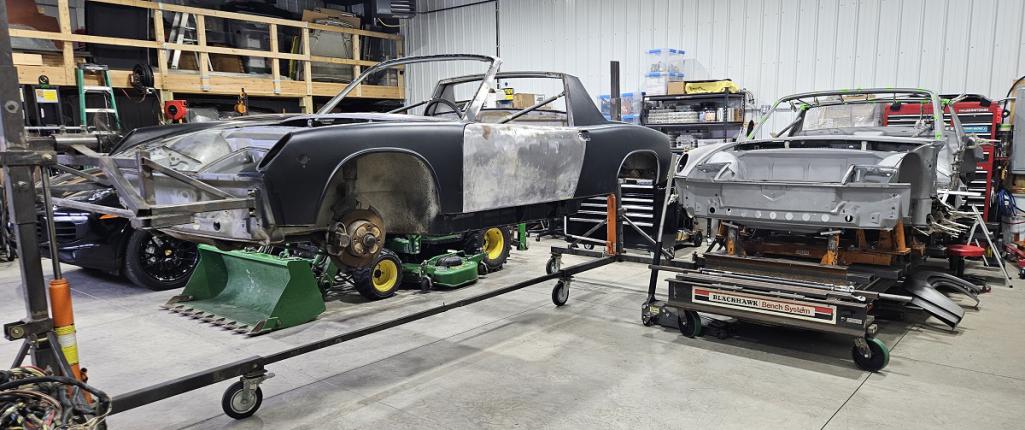 Attached image(s) 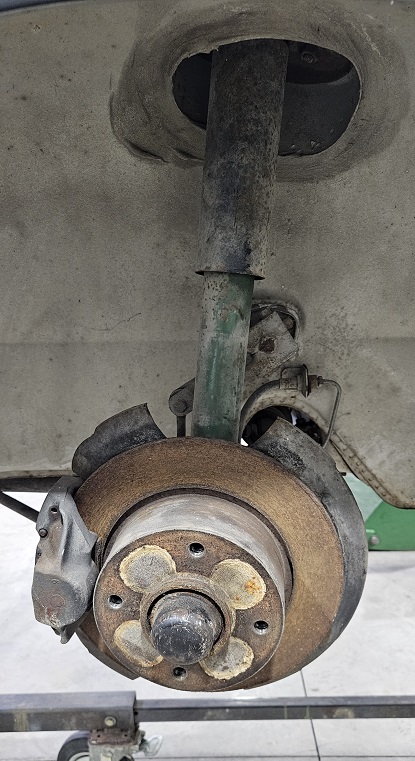 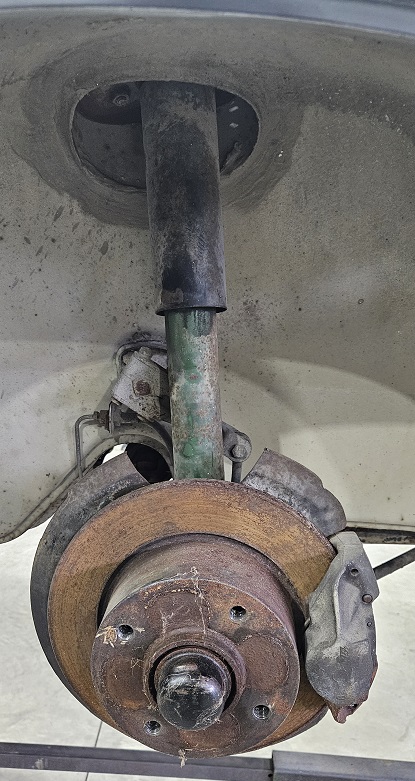
|
|
|
|
| MikeK |
Sep 3 2026, 09:12 AM
Post
#25
|
|
Member Group: Members Posts: 141 Joined: 15-June 23 From: 80906 Member No.: 27,418 Region Association: Rocky Mountains |
I like how you braced the door openings so that you can trial fit the doors.
Can you post some more details and pics of what you did? Thanks! |
 |
|
| Luke M |
Sep 3 2026, 03:12 PM
Post
#26
|
|
Senior Member Group: Members Posts: 1,609 Joined: 8-February 05 From: WNY Member No.: 3,574 Region Association: North East States
|
QUOTE(MikeK @ Sep 3 2026, 08:12 AM) I like how you braced the door openings so that you can trial fit the doors. Can you post some more details and pics of what you did? Thanks! This setup works really well and yes you can open and close the doors. I like this setup especially when doing door post installs. Makes it very easy to test door gaps too. The upper braces have left hand and right hand heim rod joints. The lowers are just square tube drilled to fit at the mounting points. I think that I'll add a few extra braces from the cross tube to the chassis. It may not need it but I don't think it'll hurt. I'll get you better pictures and info on Friday. Attached thumbnail(s) 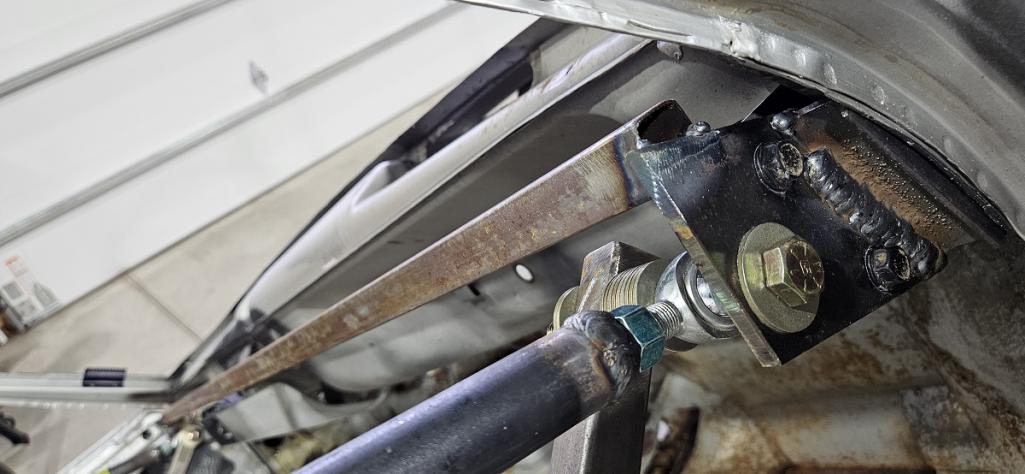 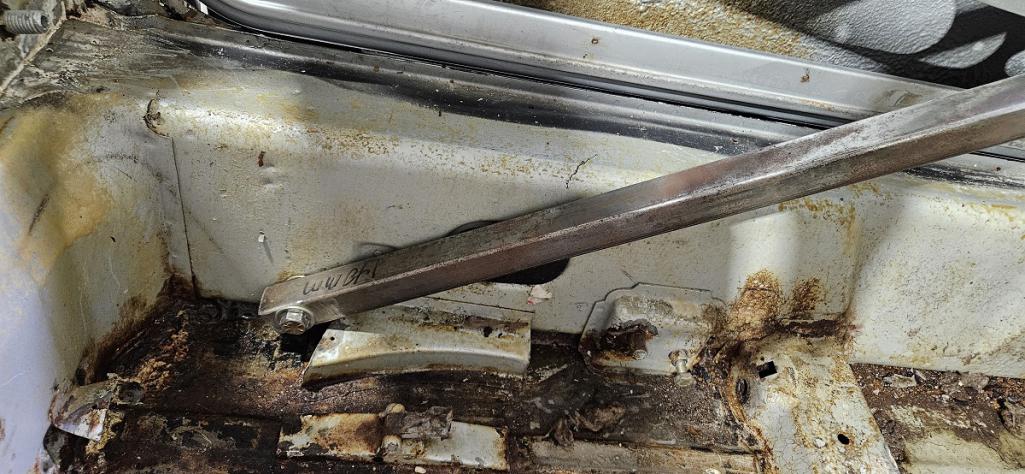 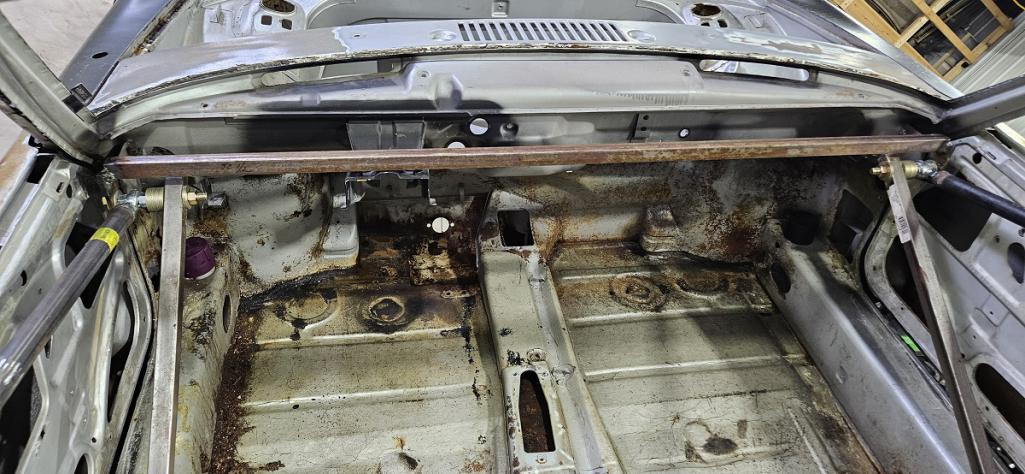 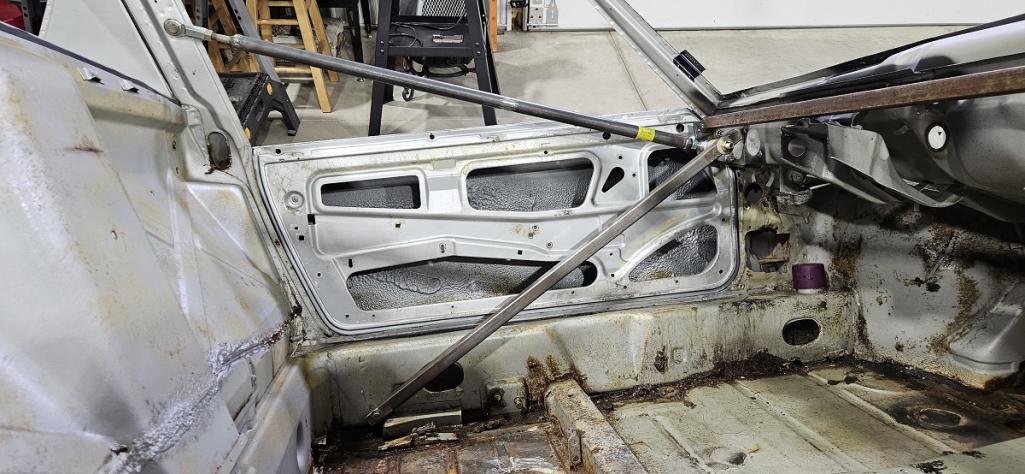 Attached image(s) 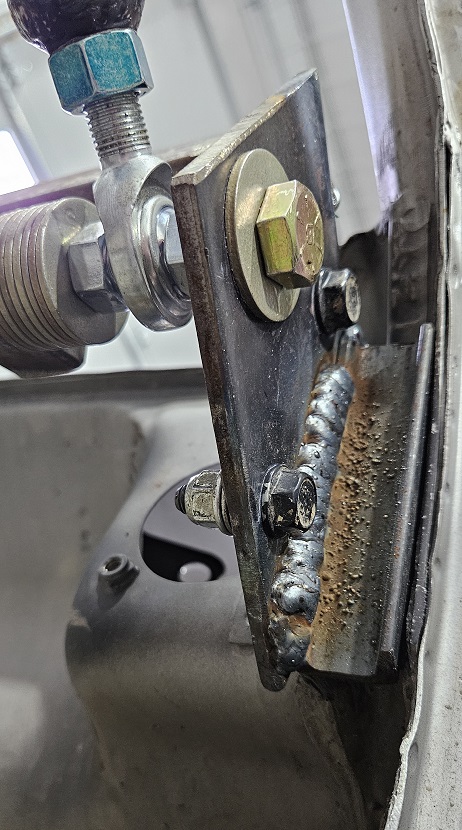 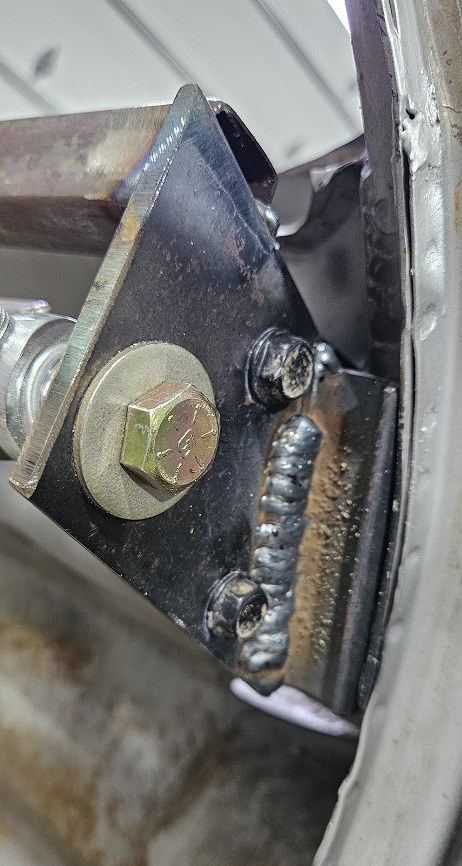 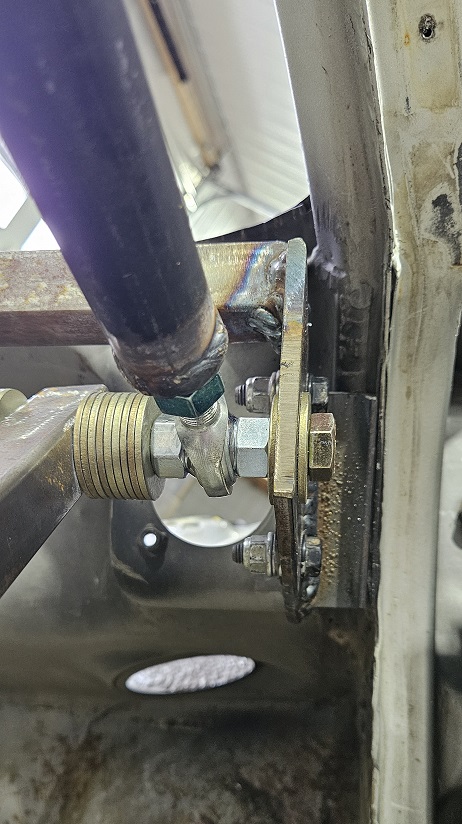 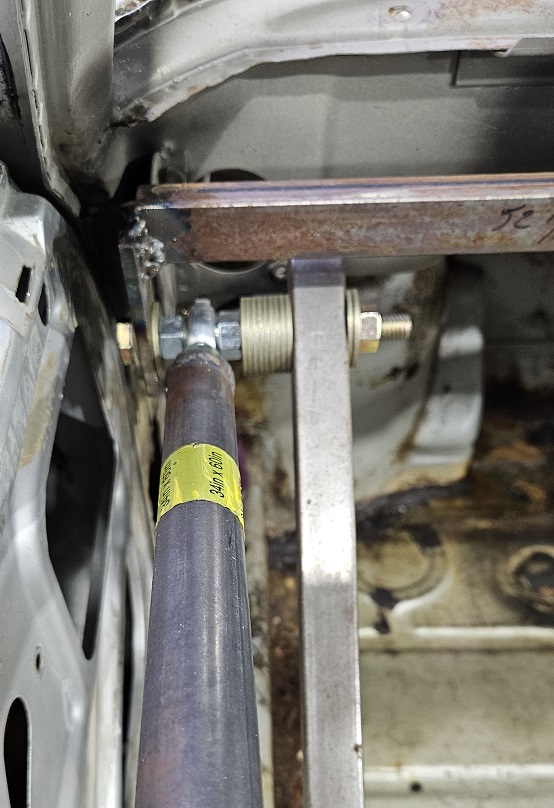
|
|
|
|
| Luke M |
Sep 4 2026, 08:00 AM
Post
#27
|
|
Senior Member Group: Members Posts: 1,609 Joined: 8-February 05 From: WNY Member No.: 3,574 Region Association: North East States
|
The front suspension is off. I'll be posting the struts and calipers for sale at some point.
The rotors are rough so they will be removed. Attached image(s) 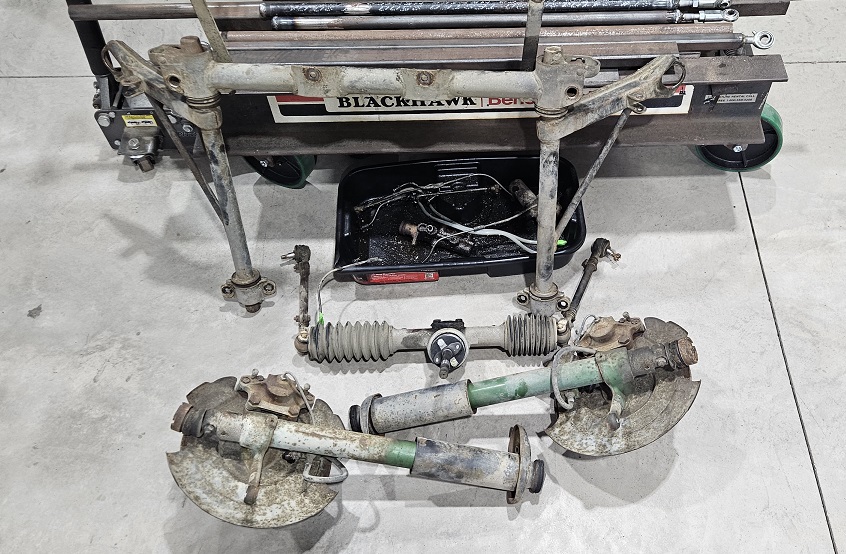
|
|
|
|
| Luke M |
Sep 4 2026, 07:48 PM
Post
#28
|
|
Senior Member Group: Members Posts: 1,609 Joined: 8-February 05 From: WNY Member No.: 3,574 Region Association: North East States
|
We got the 73 outside and pressure washed. A lot of media and insulation came out of the chassis. The p/o started to media blast the chassis so I knew there would be some around. The mice helped in hiding the insulation all around. She's nice and clean now. It's time to start cutting and welding.
Attached thumbnail(s) 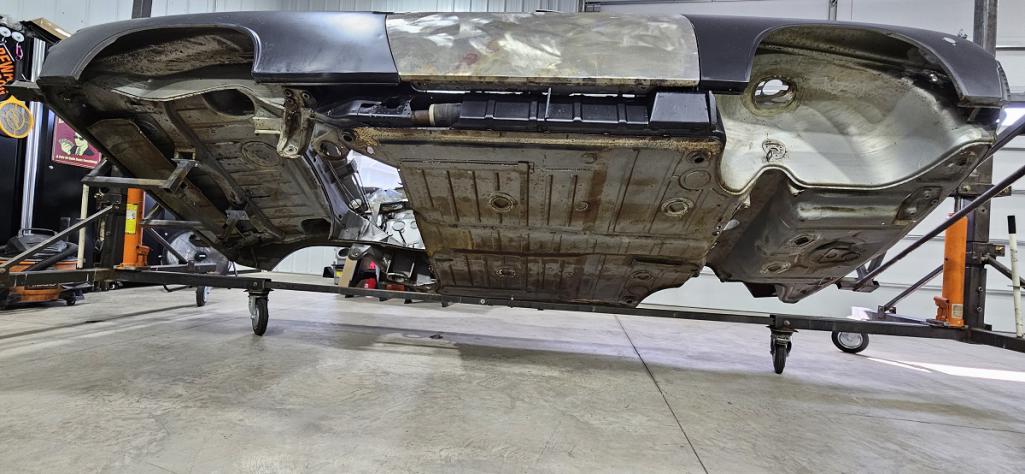 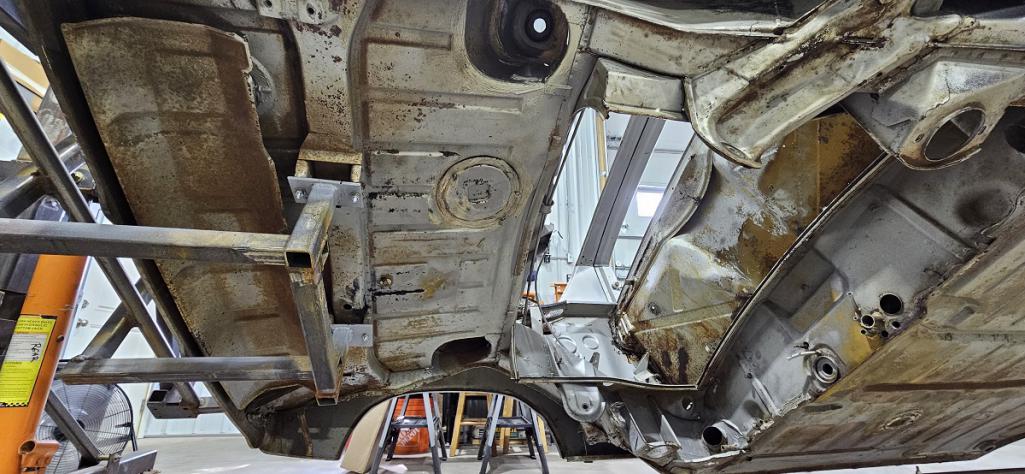 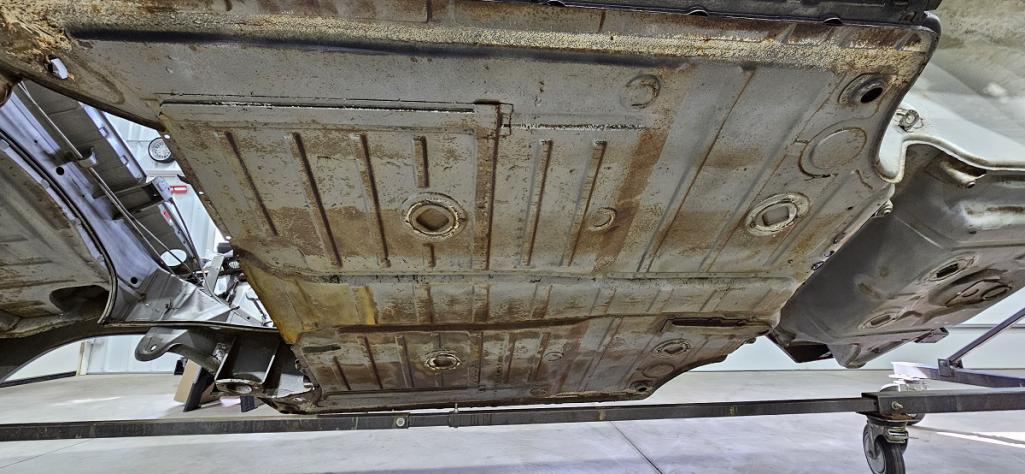 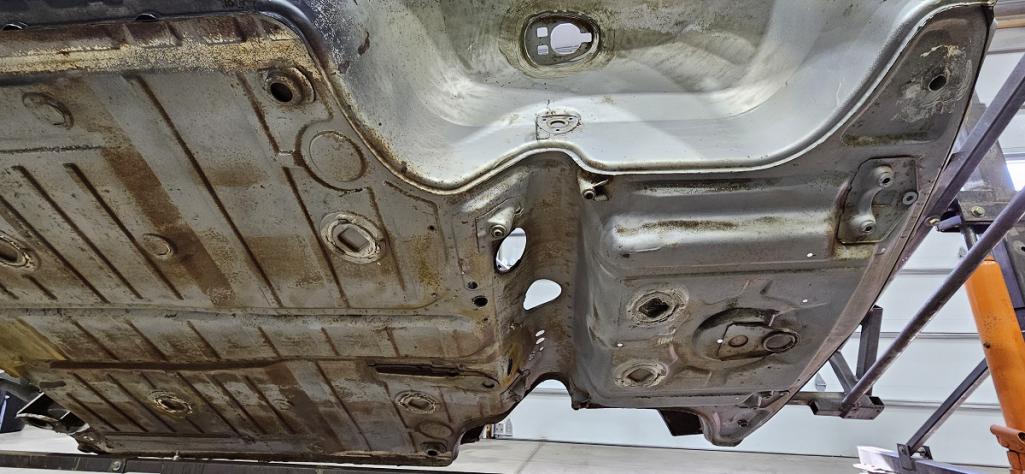
|
|
|
|
| sixnotfour |
Sep 4 2026, 08:21 PM
Post
#29
|
|
914 Wizard Group: Members Posts: 11,379 Joined: 12-September 04 Member No.: 2,744 Region Association: NineFourteenerVille 
|
Nice..plus Factory sway bars and Bilstien struts...
|
|
|
|
| mepstein |
Sep 5 2026, 04:44 AM
Post
#30
|
|
914-6 GT in waiting Group: Members Posts: 20,927 Joined: 19-September 09 From: Landenberg, PA/Wilmington, DE Member No.: 10,825 Region Association: MidAtlantic Region
|
QUOTE(sixnotfour @ Sep 4 2026, 10:21 PM) Nice..plus Factory sway bars and Bilstien struts... Bilstein - Sorry, can't help it. (IMG:style_emoticons/default/biggrin.gif) |
|
|
|
| sixnotfour |
Sep 5 2026, 09:30 AM
Post
#31
|
|
914 Wizard Group: Members Posts: 11,379 Joined: 12-September 04 Member No.: 2,744 Region Association: NineFourteenerVille
|
QUOTE(mepstein @ Sep 5 2026, 04:44 AM) QUOTE(sixnotfour @ Sep 4 2026, 10:21 PM) Nice..plus Factory sway bars and Bilstien struts... Bilstein - Sorry, can't help it. (IMG:style_emoticons/default/biggrin.gif) Green Struts.. (IMG:style_emoticons/default/beerchug.gif) |
|
|
|
| Luke M |
Sep 10 2026, 05:02 AM
Post
#32
|
|
Senior Member Group: Members Posts: 1,609 Joined: 8-February 05 From: WNY Member No.: 3,574 Region Association: North East States
|
I spent a little time yesterday looking over the right side long and rear q-panel so I could come up with a repair plan. Looking at this r/r q-panel I figured it would be best to remove and replace it. It has dents and rusted out sections in several spots. Someone also drilled a few holes through a dent and slapped some bondo on it. I figured no big deal I have a r/r q-panel that's in great shape on hand. It would also save me hours of cutting and welding in new metal to repair it. It also gives me a chance to take a better look at the inner fender by the hell hole and take care of any possible issues. I got the spot weld drill bit/tools out and off she came. I found a few minor issues but otherwise pretty solid. It's now time to deal with the right inner rocker and jack point repairs.
(IMG:style_emoticons/default/sawzall-smiley.gif) (IMG:style_emoticons/default/smash.gif) (IMG:style_emoticons/default/welder.gif) Attached thumbnail(s) 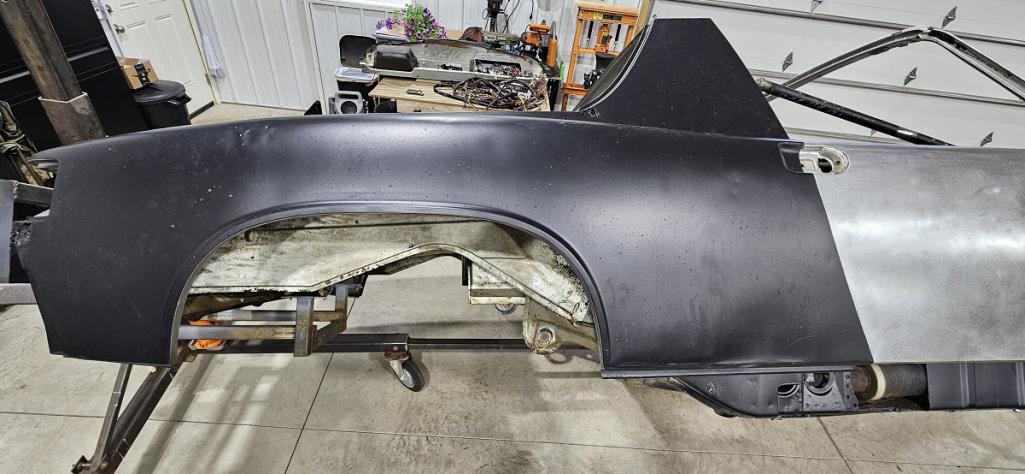 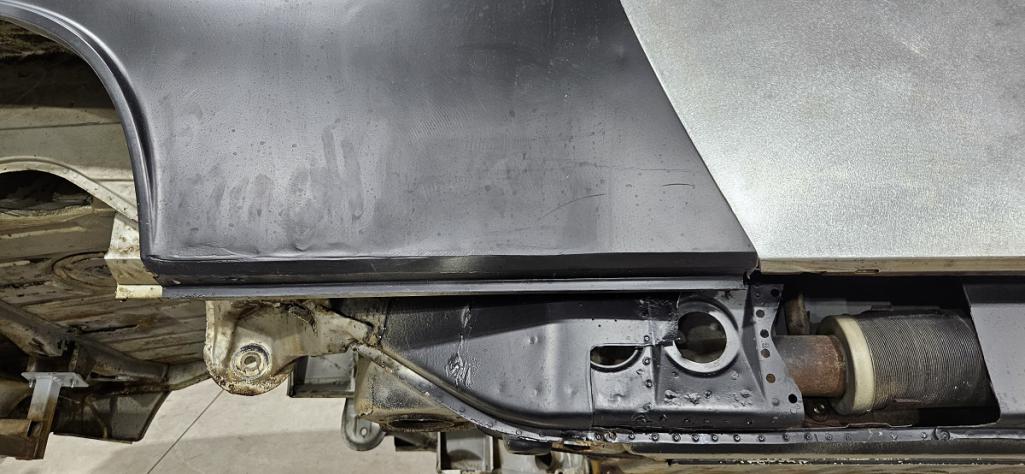 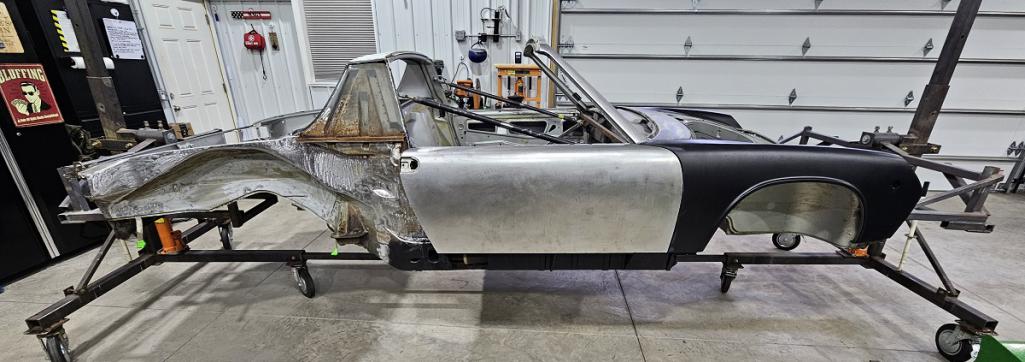 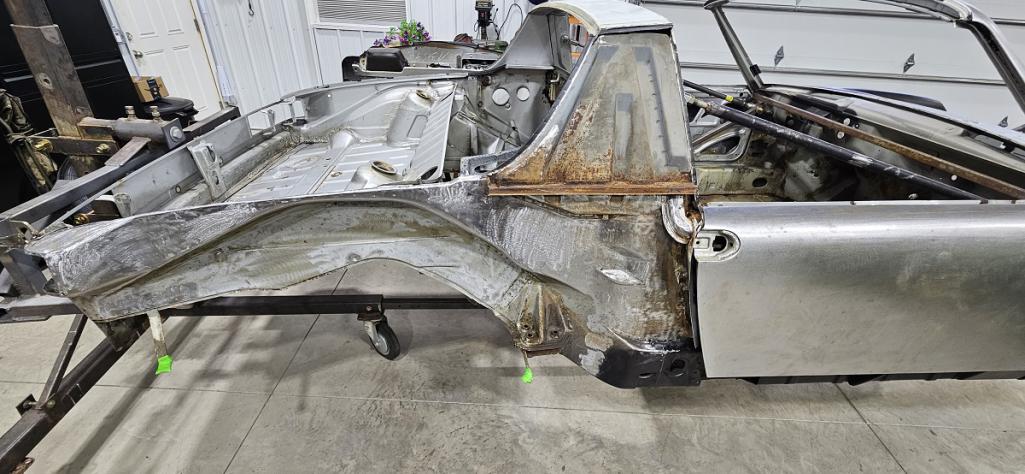 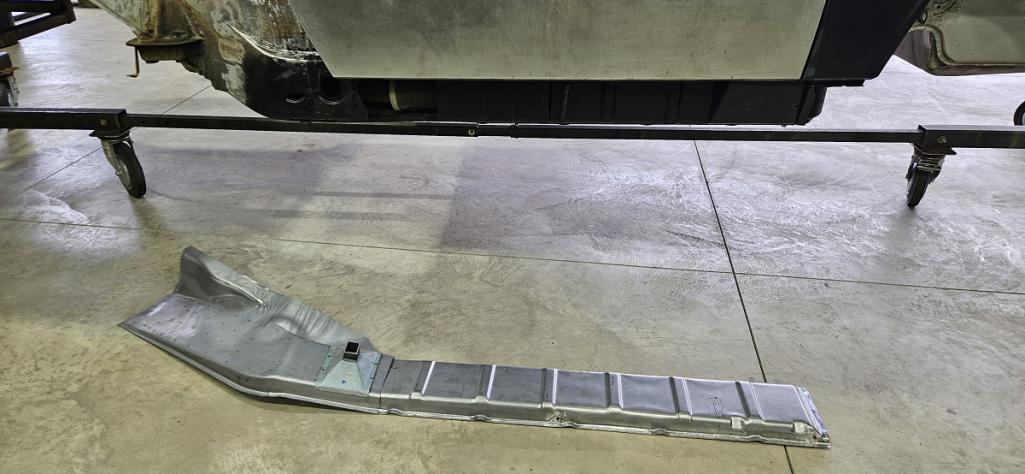 Attached image(s) 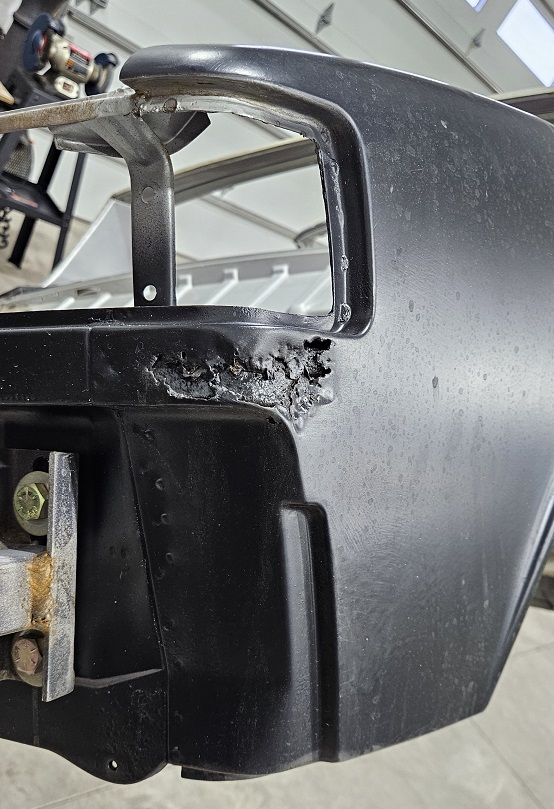 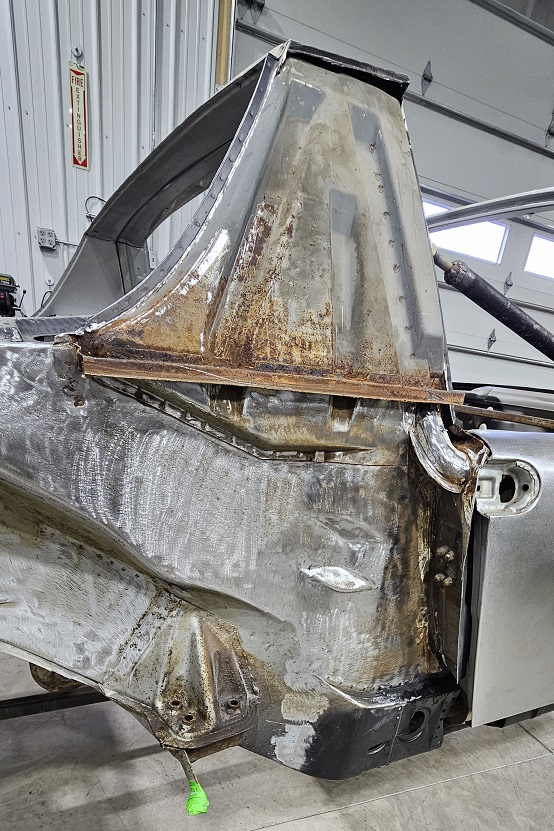
|
|
|
|
| Luke M |
Sep 11 2026, 10:21 AM
Post
#33
|
|
Senior Member Group: Members Posts: 1,609 Joined: 8-February 05 From: WNY Member No.: 3,574 Region Association: North East States
|
Prepping the right long for repair. (IMG:style_emoticons/default/sawzall-smiley.gif) (IMG:style_emoticons/default/smash.gif) (IMG:style_emoticons/default/welder.gif)
Attached thumbnail(s) 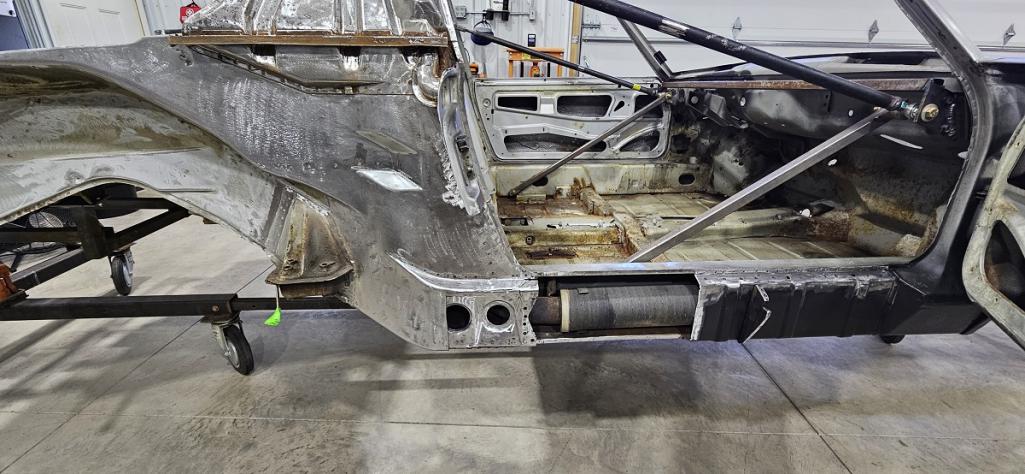 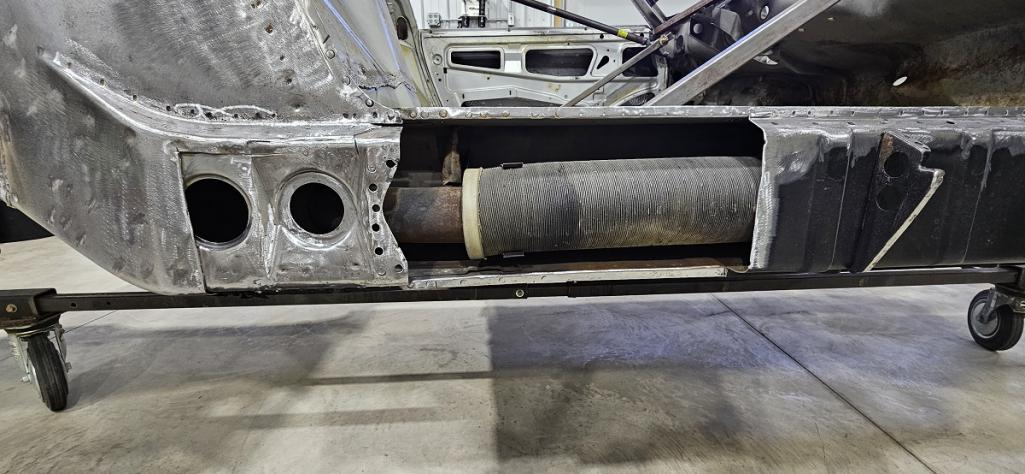
|
|
|
|
| MikeK |
Sep 12 2026, 11:11 AM
Post
#34
|
|
Member Group: Members Posts: 141 Joined: 15-June 23 From: 80906 Member No.: 27,418 Region Association: Rocky Mountains |
Thanks for detailed photos of the door struts. It seems like a much better solution putting them in a place where you can check door fitment/gaps. I'm not at the point where my car is blown apart and ready for the rack, but when I do, I'll be sure to use a similar technique. It appears that both of our cars need similar repairs.
Looking forward to seeing more good work! |
|
|
|
| Luke M |
Sep 12 2026, 01:29 PM
Post
#35
|
|
Senior Member Group: Members Posts: 1,609 Joined: 8-February 05 From: WNY Member No.: 3,574 Region Association: North East States
|
No Problem Mike. This setup seams to work well. I adjusted the door gaps and holds well. Took measurements again and still solid. Obviously you would keep checking the measurements as your work progresses. I have this same setup on my 6 chassis and no issues there too. (IMG:style_emoticons/default/beerchug.gif)
Attached thumbnail(s) 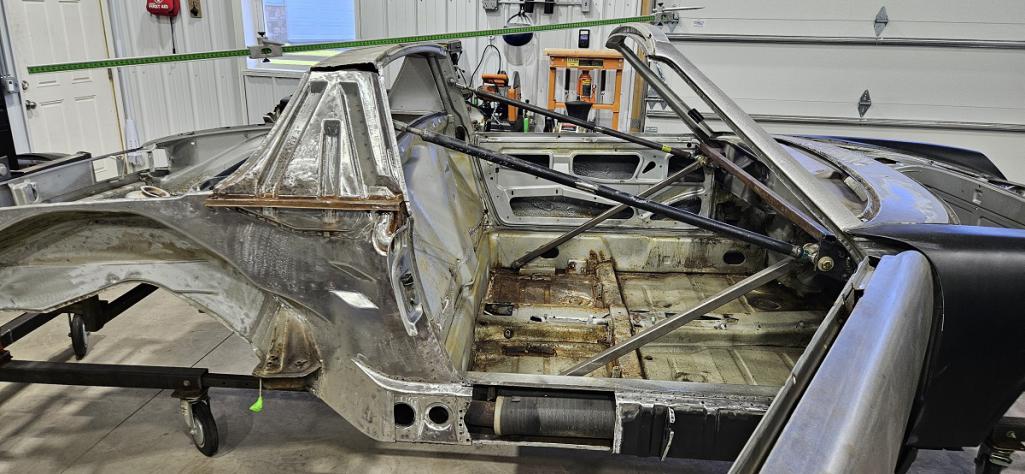 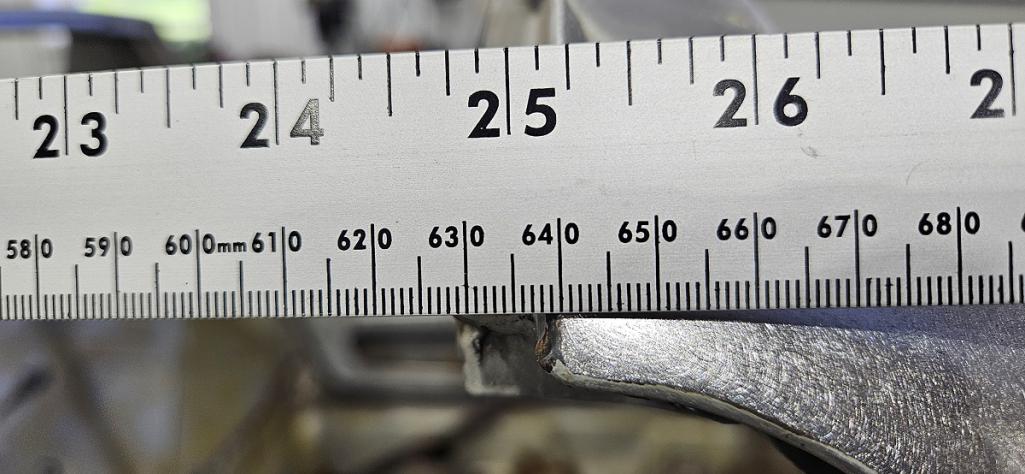
|
|
|
|
| Luke M |
Sep 14 2026, 04:02 PM
Post
#36
|
|
Senior Member Group: Members Posts: 1,609 Joined: 8-February 05 From: WNY Member No.: 3,574 Region Association: North East States
|
Got a few things done and off the to do list. All of the tar paper is removed from the floor pan. We found one small issue with the floor pan. There's a small rust hole by the throttle pedal mount. I need to remove the pedal support bracket then fix the rust hole.
I have a new bracket among other things on order. Moved to the firewall where I found a few spots that will need to be repaired. Gotta love the firewall engine pad that collects and holds water like a sponge. Started fixing the right targa inner support bracket flange. I made a custom piece to fit and only took about 2 hours.. (IMG:style_emoticons/default/blink.gif) Cut, grind, test fit... repeat..... Here's a piece of knowledge for you guys and gals.. If you ever have to replace this on a future project use an piece of an old door sill. Works like a charm and has most of the bends already there for you. The more you know... (IMG:style_emoticons/default/beerchug.gif) Attached thumbnail(s) 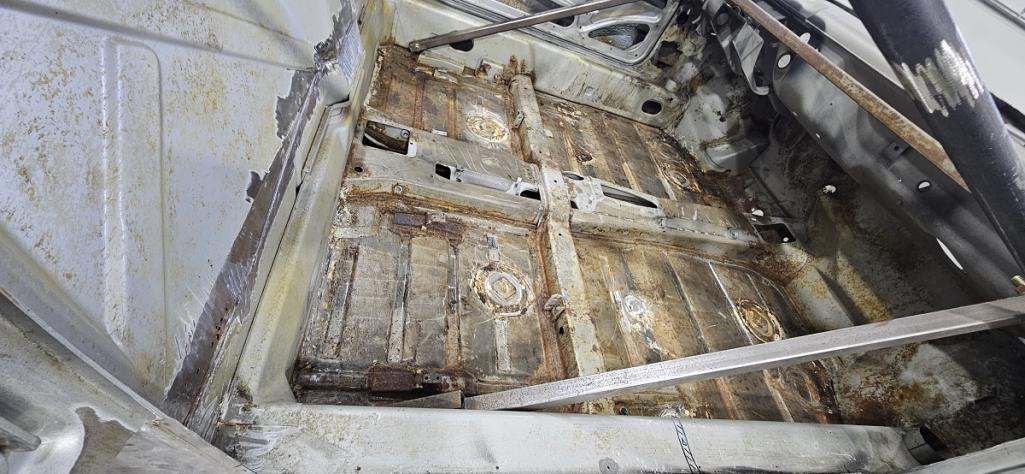 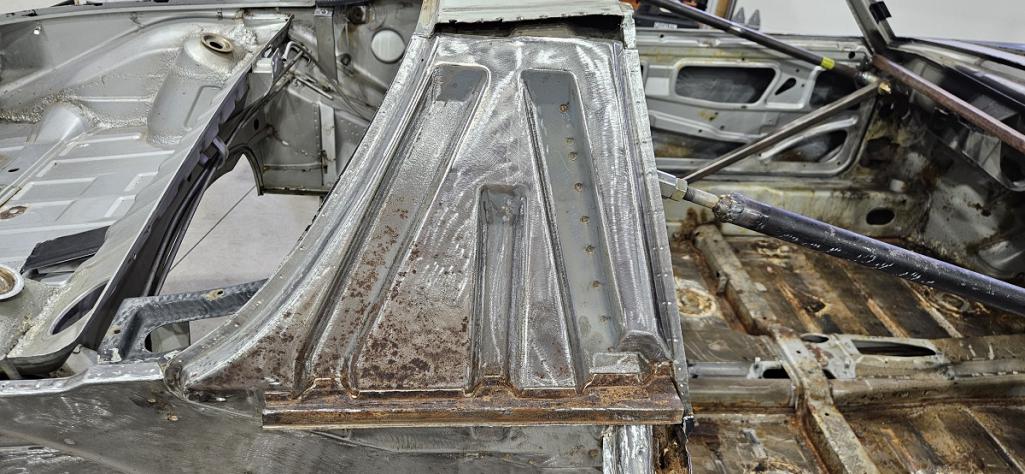 Attached image(s) 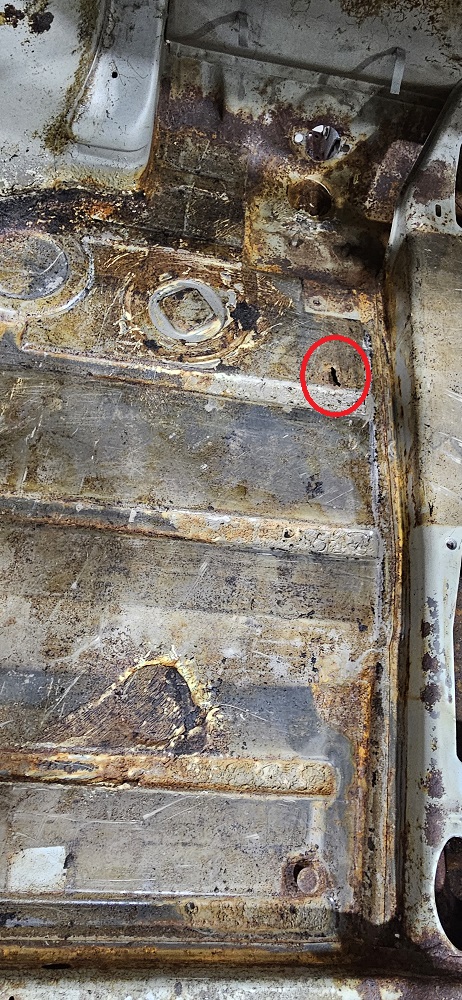 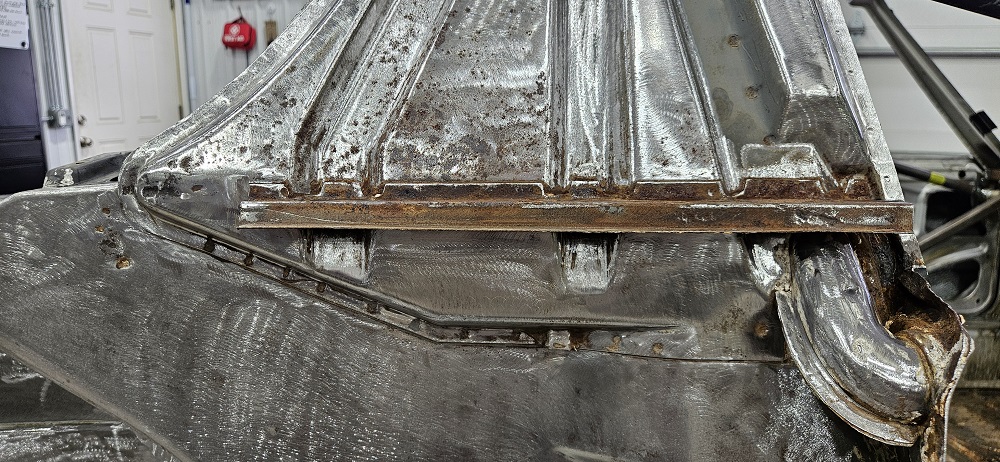 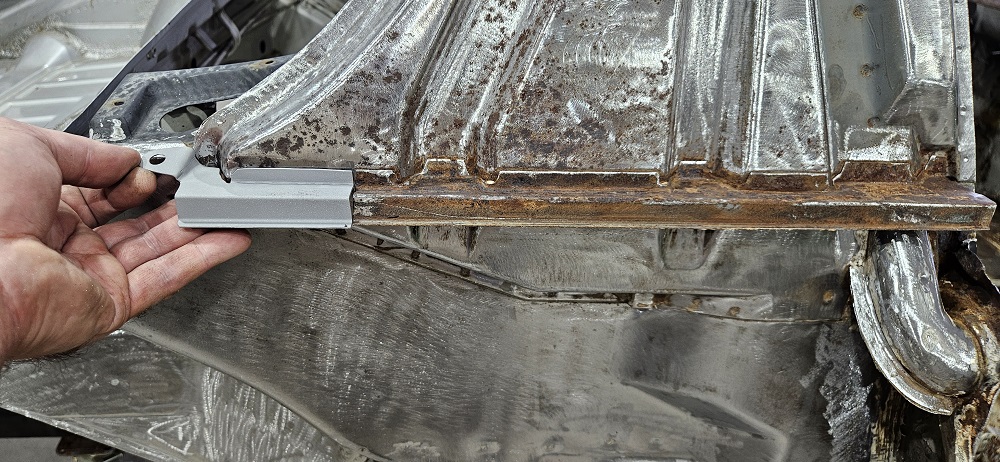 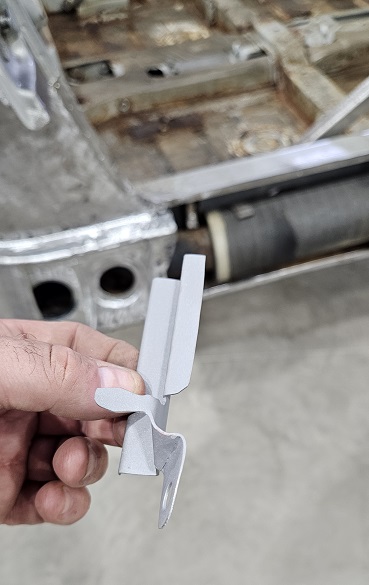 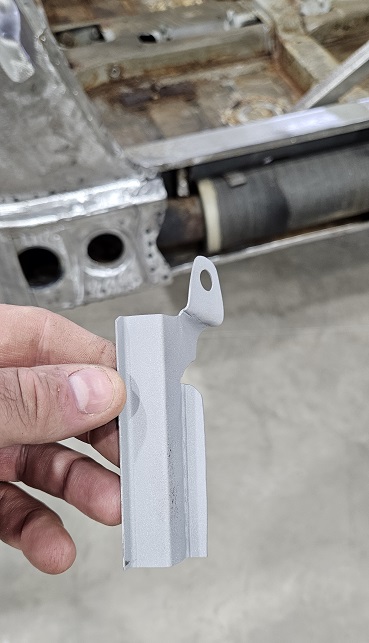
|
|
|
|
| bkrantz |
Sep 14 2026, 08:09 PM
Post
#37
|
|
914 Guru Group: Members Posts: 8,801 Joined: 3-August 19 From: SW Colorado Member No.: 23,343 Region Association: Rocky Mountains
|
BTW was that an original spare tire in the first photo set?
|
|
|
|
| Luke M |
Sep 15 2026, 04:35 AM
Post
#38
|
|
Senior Member Group: Members Posts: 1,609 Joined: 8-February 05 From: WNY Member No.: 3,574 Region Association: North East States
|
QUOTE(bkrantz @ Sep 14 2026, 07:09 PM) BTW was that an original spare tire in the first photo set? Yes, I do believe so. Michelin 165 SR 15 ZX Attached image(s) 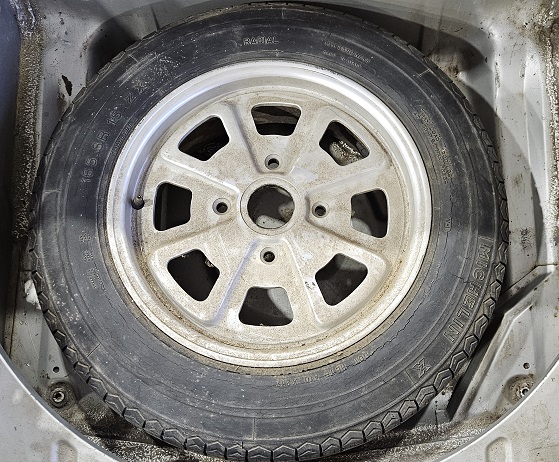
|
|
|
|
| Luke M |
Sep 15 2026, 03:19 PM
Post
#39
|
|
Senior Member Group: Members Posts: 1,609 Joined: 8-February 05 From: WNY Member No.: 3,574 Region Association: North East States
|
Got the right engine tray cut out and hellhole cleaned up. Looking pretty good down there but I can't say that for the firewall. It's going to need a few patches. Waiting for the new RD metal to show up so I can start welding. Lower engine side firewall is prepped for a 6 mount.
Attached thumbnail(s) 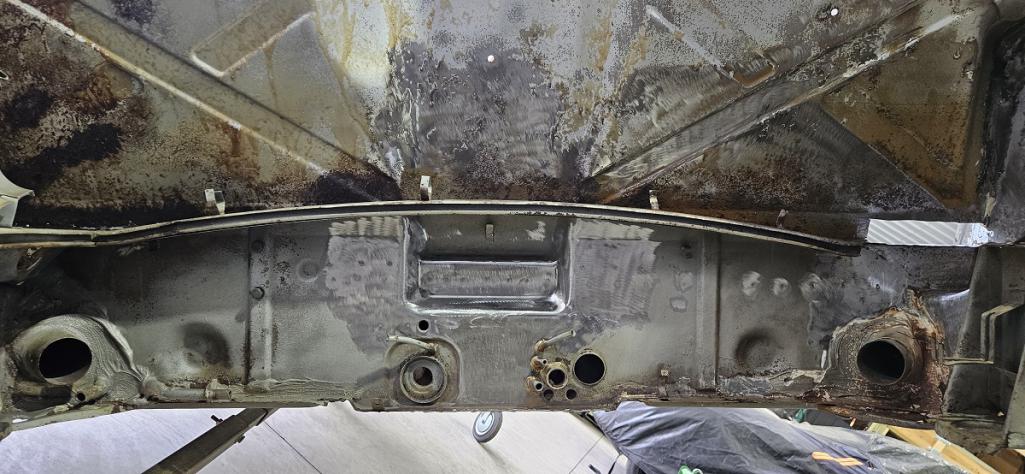 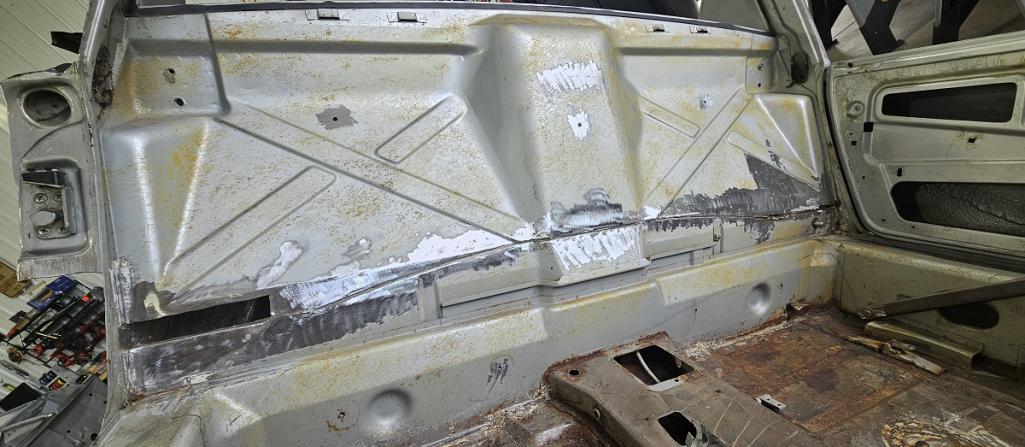 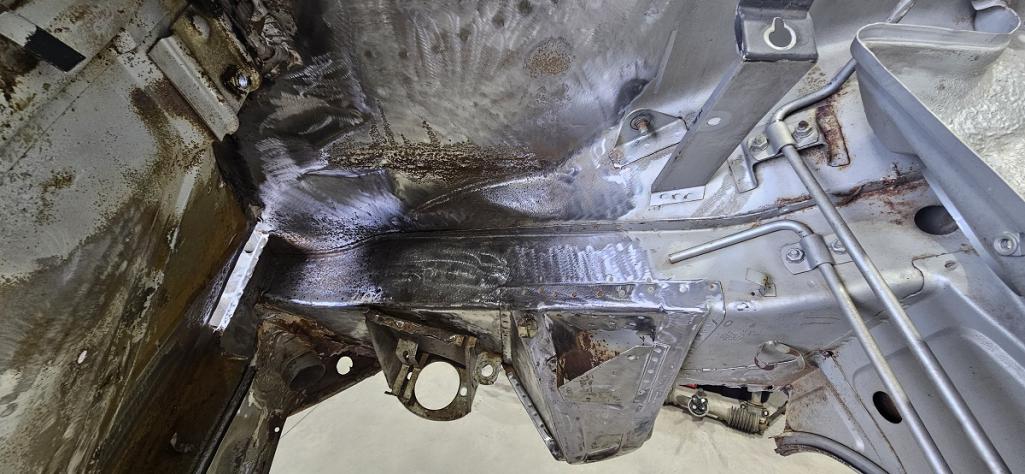 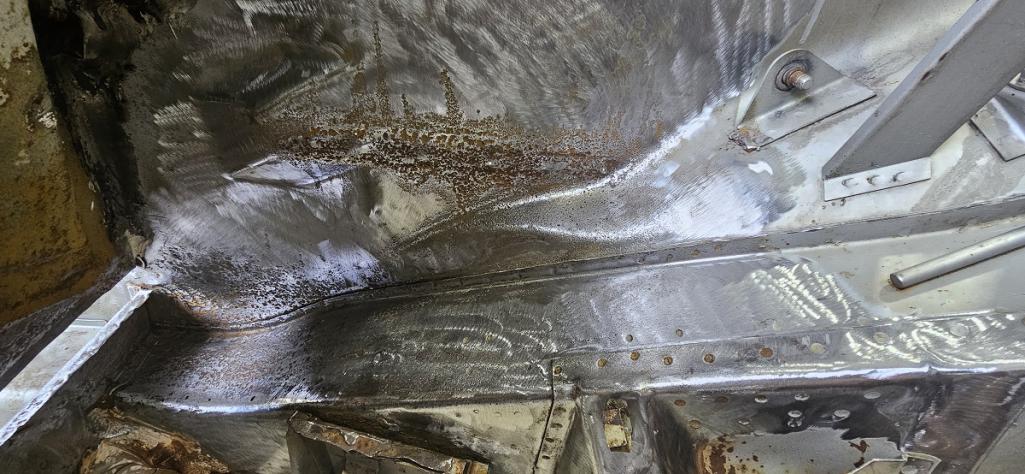
|
|
|
|
| Luke M |
Sep 18 2026, 03:23 PM
Post
#40
|
|
Senior Member Group: Members Posts: 1,609 Joined: 8-February 05 From: WNY Member No.: 3,574 Region Association: North East States
|
Removed the pass side 4 cyl mount then tested fitted the 6 firewall mount.
I'm waiting on some new sheet metal to arrive so just prepping things for now. Attached thumbnail(s) 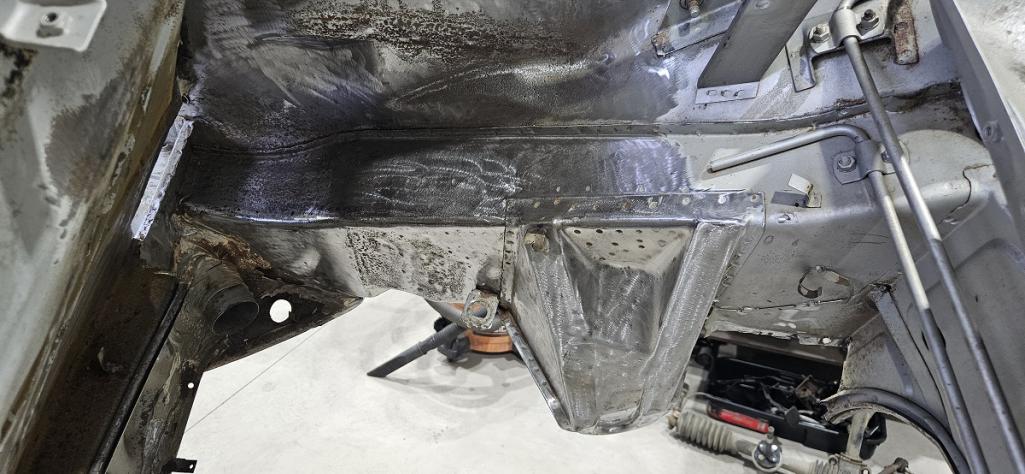 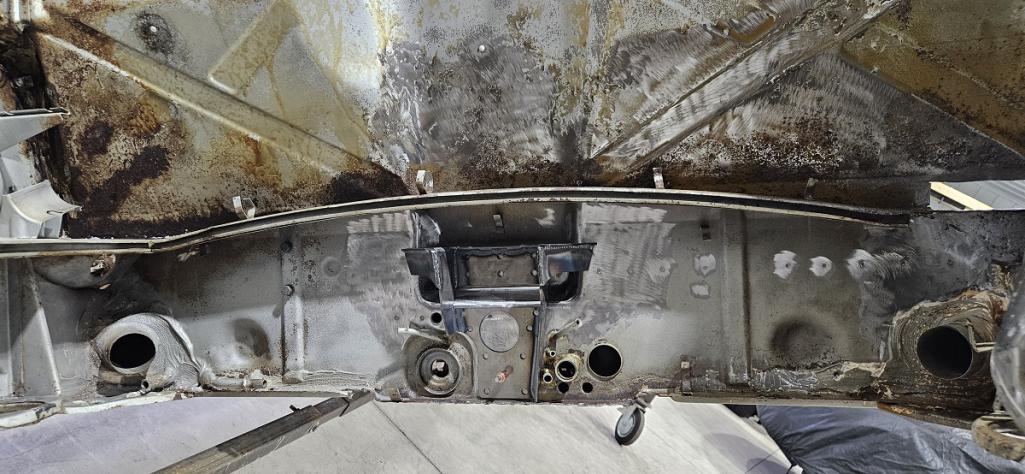 Attached image(s) 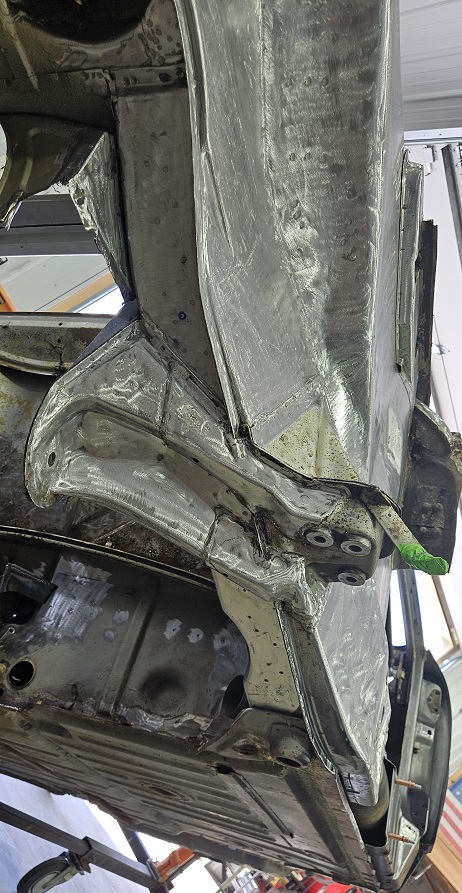
|
|
|
|
|
11 User(s) are reading this topic (11 Guests and 0 Anonymous Users)
0 Members:

|
Lo-Fi Version | Time is now: 10th October 2026 - 11:55 AM |
Invision Power Board
v9.1.4 © 2026 IPS, Inc.