|
|
|
Porsche, and the Porsche crest are registered trademarks of Dr. Ing. h.c. F. Porsche AG.
This site is not affiliated with Porsche in any way. Its only purpose is to provide an online forum for car enthusiasts. All other trademarks are property of their respective owners. |
|
|

  |

| marks914 |
 Jan 2 2006, 01:47 PM Jan 2 2006, 01:47 PM
Post
#1
|
|
Senior Member  Group: Members Posts: 845 Joined: 9-October 04 From: the motor city Member No.: 2,912 Region Association: None |
Thought I would start this thread over,
I am installing Brad Mayeur's Longitudinal clamshell kit. It should make the car MUCH stiffer. Specs: 3/32 thick, plug and seam welded to the existing longs, and ties into the suspension console Mark Attached image(s) 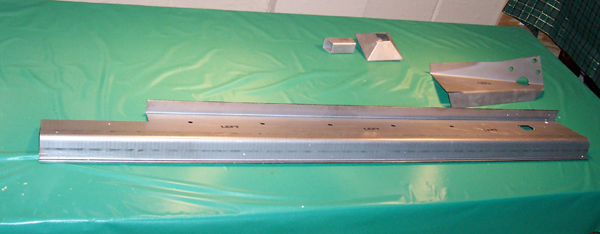
|
   |

 
|
| marks914 |
Jan 2 2006, 01:48 PM
Post
#2
|
|
Senior Member Group: Members Posts: 845 Joined: 9-October 04 From: the motor city Member No.: 2,912 Region Association: None |
Here you can see the section, very strong..
Attached image(s) 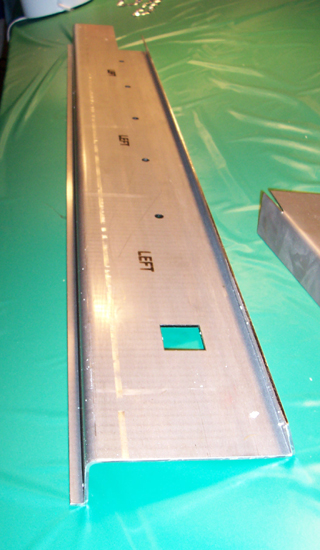
|
|
|
|
| marks914 |
Jan 2 2006, 01:49 PM
Post
#3
|
|
Senior Member Group: Members Posts: 845 Joined: 9-October 04 From: the motor city Member No.: 2,912 Region Association: None |
Here is how the two pieces fit together..
I marked where I am going to drill and plug weld to the chassis, I think you are supposed to weld along the top, but I just can't reach in there. Attached image(s) 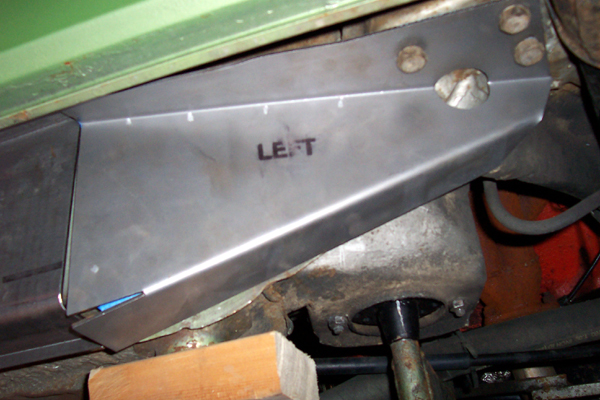
|
|
|
|
| marks914 |
Jan 2 2006, 01:51 PM
Post
#4
|
|
Senior Member Group: Members Posts: 845 Joined: 9-October 04 From: the motor city Member No.: 2,912 Region Association: None |
You can trim around the box section if it is strong...
Attached image(s) 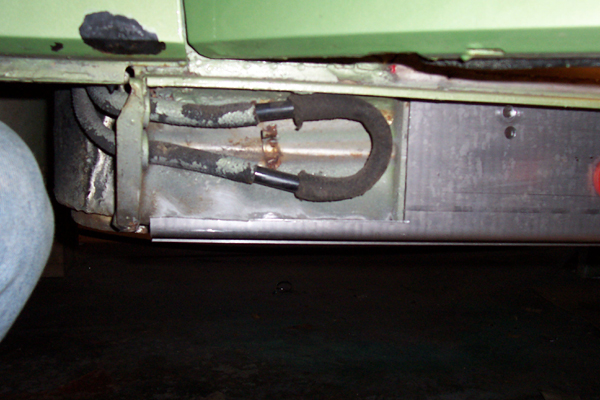
|
|
|
|
| marks914 |
Jan 2 2006, 01:53 PM
Post
#5
|
|
Senior Member Group: Members Posts: 845 Joined: 9-October 04 From: the motor city Member No.: 2,912 Region Association: None |
On the driver side I had to cut out the boxed section, install the clamshell and restore the box with 16ga sheetmetal.
Attached image(s) 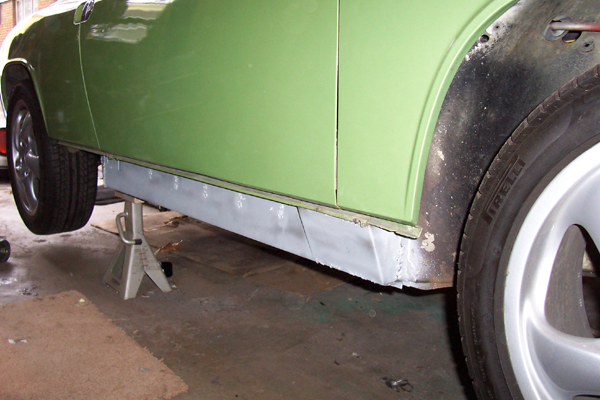
|
|
|
|
| marks914 |
Jan 2 2006, 01:56 PM
Post
#6
|
|
Senior Member Group: Members Posts: 845 Joined: 9-October 04 From: the motor city Member No.: 2,912 Region Association: None |
Here is how the downstanding flange mates with the kit, fits well, here it should be stitch welded.
Attached image(s) 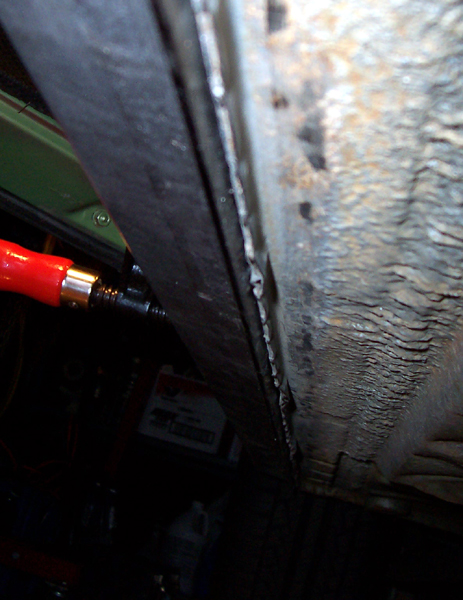
|
|
|
|
| marks914 |
Jan 2 2006, 02:01 PM
Post
#7
|
|
Senior Member Group: Members Posts: 845 Joined: 9-October 04 From: the motor city Member No.: 2,912 Region Association: None |
This is why I started this project, pass side was a bit rusty. I patched the holes before I installed the kit on the pass side.
Attached image(s) 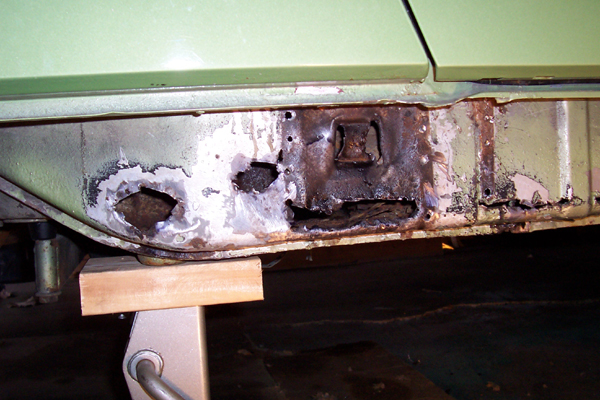
|
|
|
|
| dkos |
Jan 4 2006, 01:38 PM
Post
#8
|
||
|
say, "RUST"! Group: Members Posts: 295 Joined: 1-December 04 From: Philadelphia, PA Member No.: 3,204 Region Association: None |
New to welding. What does stitch weld mean? I will be installing Brad's Reinforcement Piece as soon as I finish my inner log repairs. Do you have any other pics of how you welded this area? |
||
|
|
|
||
| groot |
Jan 4 2006, 01:40 PM
Post
#9
|
|
Dis member Group: Members Posts: 896 Joined: 17-December 03 From: Michigan Member No.: 1,444 |
Cool.... just curious, where are you in the Motor City?
I'm in Dearborn. |
|
|
|
| marks914 |
Jan 4 2006, 02:21 PM
Post
#10
|
|
Senior Member Group: Members Posts: 845 Joined: 9-October 04 From: the motor city Member No.: 2,912 Region Association: None |
dkos: Stitch welding is when you weld for a length, leave some without and weld some more, like a stitch: ==== ==== ==== groot: I'm in Ferndale. Were you at the MWC? My car is the cybergreen V8. Mark |
|
|
|
| URY914 |
Jan 4 2006, 02:38 PM
Post
#11
|
|
I built the lightest 914 in the history of mankind. Group: Members Posts: 120,598 Joined: 3-February 03 From: Jacksonville, FL Member No.: 222 Region Association: None |
I would be careful that your car is sitting level on the jack stands and not twisted. Take careful measurements before you weld it up. You could be welding a permenant "pre-load" into the car.
|
|
|
|
| dkos |
Jan 4 2006, 03:19 PM
Post
#12
|
||
|
say, "RUST"! Group: Members Posts: 295 Joined: 1-December 04 From: Philadelphia, PA Member No.: 3,204 Region Association: None |
OK...I get it...like a stitch with tread. I can see where you would stitch weld two pieces that butt up to each other or overlap, but I don't get where you stitch weld the bottom length of Brad's Clamshell to the inner rocker? Attached image(s) 
|
||
|
|
|
||
| Britain Smith |
Jan 4 2006, 03:41 PM
Post
#13
|
|
Nano Member Group: Members Posts: 2,354 Joined: 27-February 03 From: Hillsboro, OR Member No.: 364 |
IIRC, the actual strength of the longs are on the inside of the car. Why would one chose this kit instead of the one that installs under the carpet on the inside like Trekkor did.
-Britain |
|
|
|
| horizontally-opposed |
Jan 4 2006, 03:44 PM
Post
#14
|
|
Advanced Member Group: Members Posts: 3,432 Joined: 12-May 04 From: San Francisco Member No.: 2,058 Region Association: None |
I like this idea a lot...
BUT what about the rusting away from the inside thing? With those over some of the weakest points in the 914's design, it seems a little scary to me. Ditto on the preloading thing. |
|
|
|
| marks914 |
Jan 4 2006, 06:46 PM
Post
#15
|
||
|
Senior Member Group: Members Posts: 845 Joined: 9-October 04 From: the motor city Member No.: 2,912 Region Association: None |
This kit ties the longs to the rear of the car, whereas the inner kit just strengthens the part between the door opening. The weakest point as far as I can tell is around the jack post. This is where the rear section joins the long. (and where cars sag) horizontally opposed: As to rusting from inside... The back side is painted, unlike the orignal. The car lasted 33 years, and this kit should last at least another 33. I don't think I will care when I'm in my 70s. The whole point of the kit is to strengthen the weakest point of the car. Yes, you do have to make sure the car is straight when you install the kit. Here is a link on the Bird board with more info: http://www.pelicanparts.com/techarticles/9...gitude_repl.htm I will post a full article in the future with complete pics. Mark |
||
|
|
|
||
| marks914 |
Jan 4 2006, 06:51 PM
Post
#16
|
|
Senior Member Group: Members Posts: 845 Joined: 9-October 04 From: the motor city Member No.: 2,912 Region Association: None |
Here's where to weld:
Attached image(s) 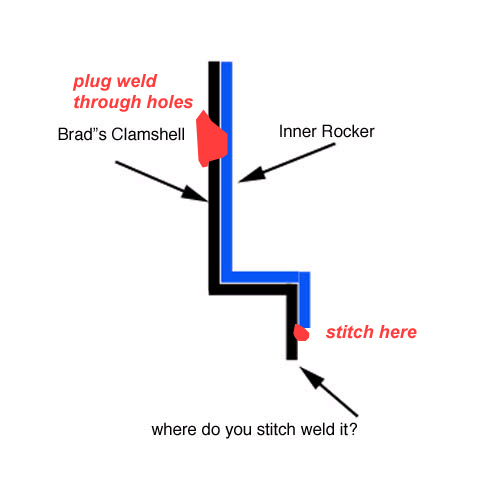
|
|
|
|
| IronHillRestorations |
Jan 4 2006, 06:54 PM
Post
#17
|
|
I. I. R. C. Group: Members Posts: 6,719 Joined: 18-March 03 From: West TN Member No.: 439 Region Association: None |
The thing about this kit is it supports the outer suspension mount better than any other kit out there. Engman's kit is good, but it doesn't do anything for the suspension mount. If you've got serious corrosion and you aren't going for concours perfection, this is a great way to go. It's also really good for high horsepower cars.
Here's a pic of one of the installation "deviations" I do when installing this kit. It helps alot, and Brad likes the idea too. The "windows" are to weld the longitudinal stiffeners to the vertical ribs. The holes are covered by the sill plates. The other thing I do is to grind off the weep holes instead of crushing them flat. I'll post a pic of that too. Attached image(s) 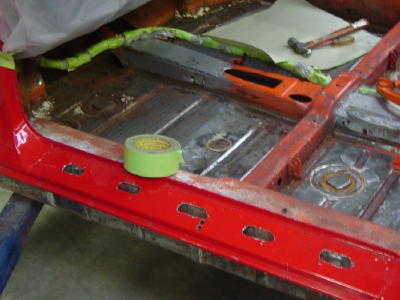
|
 |
|
| IronHillRestorations |
Jan 4 2006, 06:59 PM
Post
#18
|
|
I. I. R. C. Group: Members Posts: 6,719 Joined: 18-March 03 From: West TN Member No.: 439 Region Association: None |
Here's the other thing I do. The thing that isn't shown in this pic, is I punch the flange inward to make sort of a mirror of the original weep holes. First time around I just drilled holes in the same location, but I like the other way better.
As far as covering over any rust. IMHO the best thing to do is clean and treat all the rust you can before you install any repair pieces, and then do my corrosion treatment after all the welding is done. The only problem you could run into here is if the car is getting retro-fitted, as opposed to a complete restoration and then having the car painted. Attached image(s) 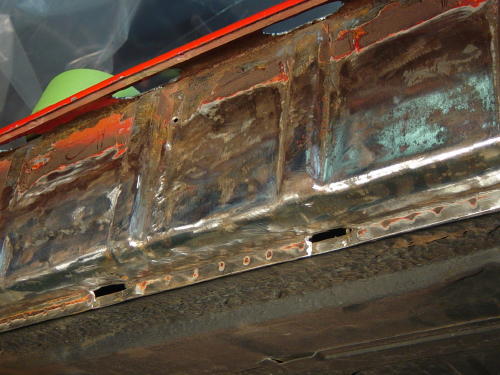
|
|
|
|
| marks914 |
Jan 4 2006, 07:08 PM
Post
#19
|
|
Senior Member Group: Members Posts: 845 Joined: 9-October 04 From: the motor city Member No.: 2,912 Region Association: None |
9146986:
Are you welding the top of the kit at the ribs as well? I drilled an additional hole on each rib and did another plug weld. I agree, this is the best kit out there for connecting the whole car. I didn't want to stiffen with a cage and Brad told me about his kit when he did my tall gears last year. I am running a SBC and I am sure this will help. Mark |
|
|
|
| IronHillRestorations |
Jan 4 2006, 07:13 PM
Post
#20
|
||
|
I. I. R. C. Group: Members Posts: 6,719 Joined: 18-March 03 From: West TN Member No.: 439 Region Association: None |
Yes, and I only did the single large plug weld holes on each rib. Everyone who has a car with these on comments about how much less the top squeeks! (IMG:http://www.914world.com/bbs2/html/emoticons/biggrin.gif) |
||
|
|
|
||
|
1 User(s) are reading this topic (1 Guests and 0 Anonymous Users)
0 Members:

|
Lo-Fi Version | Time is now: 16th May 2024 - 11:06 AM |
Invision Power Board
v9.1.4 © 2024 IPS, Inc.