|
|
|
Porsche, and the Porsche crest are registered trademarks of Dr. Ing. h.c. F. Porsche AG.
This site is not affiliated with Porsche in any way. Its only purpose is to provide an online forum for car enthusiasts. All other trademarks are property of their respective owners. |
|
|

  |

| Spoke |
 Jan 23 2006, 08:41 AM Jan 23 2006, 08:41 AM
Post
#1
|
|
Jerry  Group: Members Posts: 6,978 Joined: 29-October 04 From: Allentown, PA Member No.: 3,031 Region Association: None |
I've decided to keep my wrecked red car until my new 74 2L 914 from Part Pricer is road ready.
I just needed to pound out a few dents to get Big Red back on the road. Here's a couple of before pics. Attached thumbnail(s) 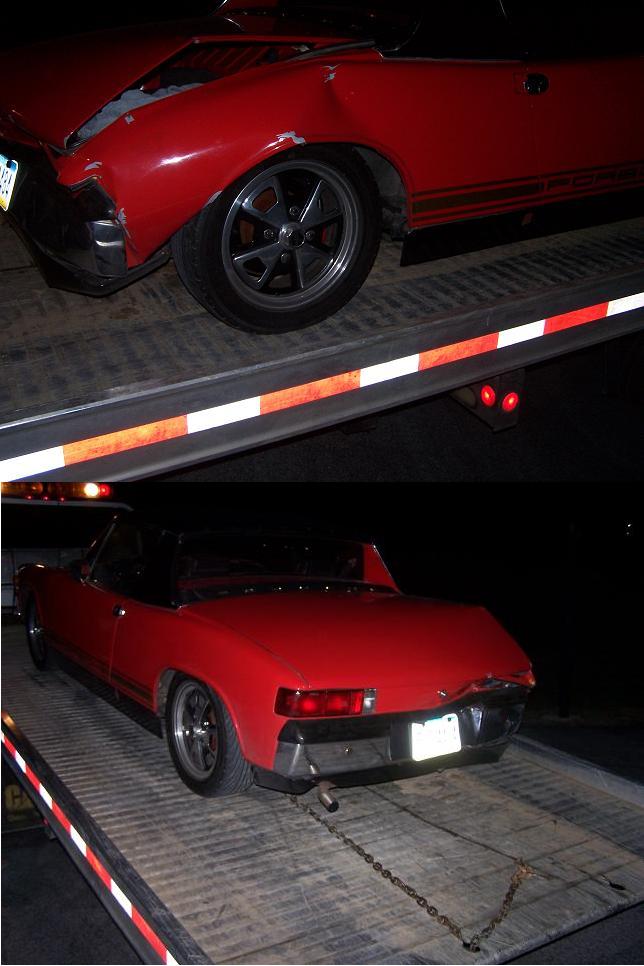
|
   |

 
|
| Spoke |
Jan 23 2006, 08:45 AM
Post
#2
|
|
Jerry Group: Members Posts: 6,978 Joined: 29-October 04 From: Allentown, PA Member No.: 3,031 Region Association: None |
Here's some pics now. I don't have any special repair tools, just one heavy sledge hammer, a 20 oz hammer, some small body hammers and dollies, and an Audi scissor jack.
Attached image(s) 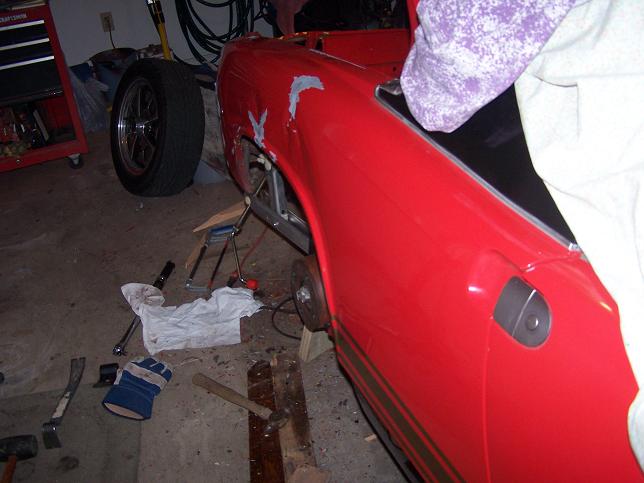
|
|
|
|
| Spoke |
Jan 23 2006, 08:47 AM
Post
#3
|
|
Jerry Group: Members Posts: 6,978 Joined: 29-October 04 From: Allentown, PA Member No.: 3,031 Region Association: None |
Here's one way that I've used the Audi jack. In this position, the jack was able to pull the fender out quite nicely. I think the fender is still about 1/2 inch lower than the driver side, but it's getting close.
Attached image(s) 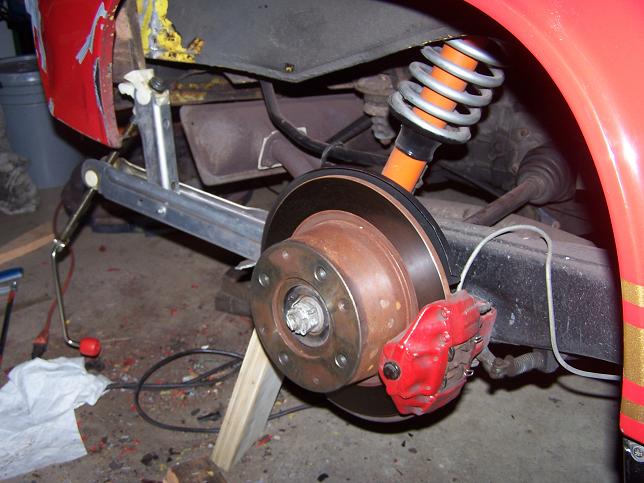
|
|
|
|
| Spoke |
Jan 23 2006, 08:50 AM
Post
#4
|
|
Jerry Group: Members Posts: 6,978 Joined: 29-October 04 From: Allentown, PA Member No.: 3,031 Region Association: None |
From the back, the trunk is starting to look like it did before. First I'm getting the metal to the right position, then I'll work it to get it into shape.
The wood in the back of the trunk was used to support the Audi jack when pushing the back end of the car back into shape. The engine seems to run ok, and the loud exhaust noise has been traced to a loose header bolt so it should be ok. I've driven the car around the block a few times without issue. Attached image(s) 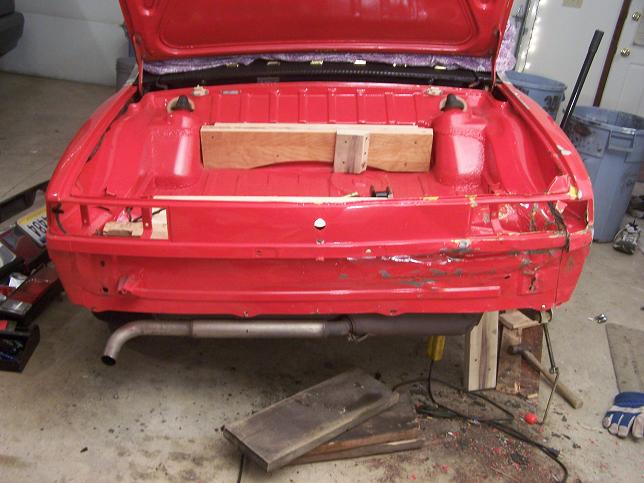
|
|
|
|
| Spoke |
Jan 23 2006, 08:55 AM
Post
#5
|
|
Jerry Group: Members Posts: 6,978 Joined: 29-October 04 From: Allentown, PA Member No.: 3,031 Region Association: None |
I'll also pound out the rear bumper, haven't gotten there yet. The valence has minimal damage, just a few dents and one screw hole pulled out.
I will need a passenger side taillight assembly. I have extra lenses. Also need the rear trunk lock actuator. Attached thumbnail(s) 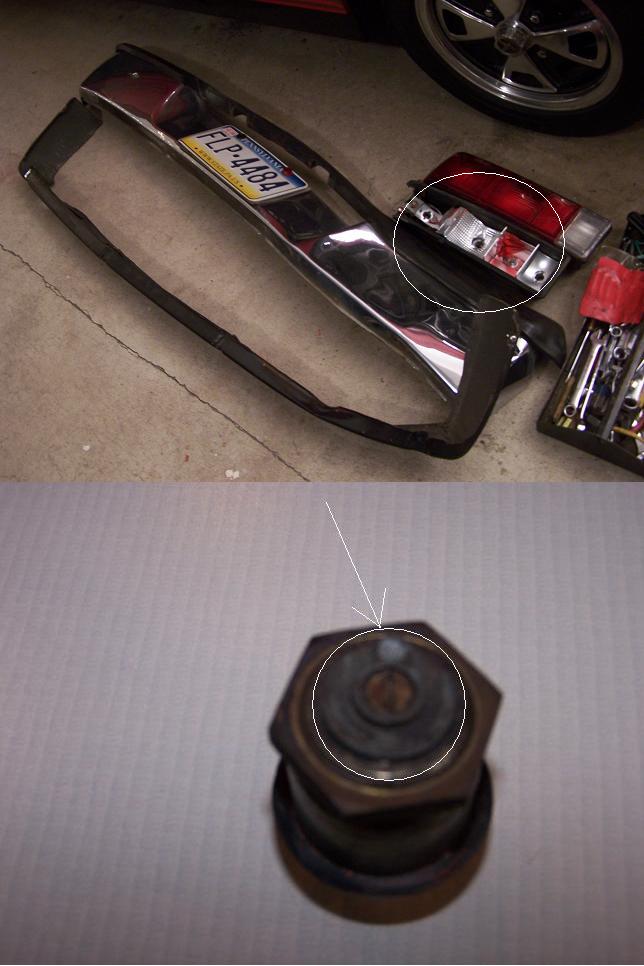
|
|
|
|
| Part Pricer |
Jan 23 2006, 12:39 PM
Post
#6
|
|
Believe everything I post Group: Benefactors Posts: 1,825 Joined: 28-December 02 From: Danbury, CT Member No.: 35 |
Nice work. A little bondo and some touch up paint and you're good to go. (IMG:http://www.914world.com/bbs2/html/emoticons/smash.gif) (IMG:http://www.914world.com/bbs2/html/emoticons/smash.gif) (IMG:http://www.914world.com/bbs2/html/emoticons/smash.gif) I thought that I may have had a trunk lock actuator in the parts stash. But, I went down and looked, no such luck. I went down to the garage in my bare feet. Damn, it's cold. |
|
|
|
| Kargeek |
Jan 23 2006, 01:24 PM
Post
#7
|
|
Senior Member Group: Members Posts: 555 Joined: 14-March 03 From: Orange, CA Member No.: 430 |
Nice work! I have done a lot of body work over my 30 years of fooling around with cars and at one time I was taught metal finishing and body repair by a top notch body man. The key thing to keep in mind when pulling out collision damage is to reverse the process of the impact. Look at how the vehicle was impacted, what damage was done first and the secondary damage. We would put unibody cars like 914’s on a frame machine and set up a pull say, for a right side rear quarter and apply initial pull pressure but not completely back to shape. Sometimes rear damage would transfer to the front of the car with a ripple to fender etc. and during the pull we would work out the front damage first as that was that last area of damage that happened to the car during its accident.
Same thing goes for managing a fender dent. Apply reverse pressure to the center of the damage and work out the dent from the outside areas that are least damaged. It's amazing with patience and the right body tools how you can manage metal back into shape. Good luck! |
|
|
|
| bondo |
Jan 23 2006, 01:25 PM
Post
#8
|
|
Practicing my perpendicular parking Group: Members Posts: 4,277 Joined: 19-April 03 From: Los Osos, CA Member No.: 587 Region Association: Central California |
Dang, I'm impressed. I've got a porta-power and I don't know if I would have tried tackling that.
|
|
|
|
| John Kelly |
Jan 24 2006, 07:34 AM
Post
#9
|
|
Senior Member Group: Members Posts: 692 Joined: 1-May 03 From: Moclips WA. Member No.: 640 |
Nice job!
John www.ghiaspecialties.com |
|
|
|
| Spoke |
Apr 4 2006, 09:05 PM
Post
#10
|
|
Jerry Group: Members Posts: 6,978 Joined: 29-October 04 From: Allentown, PA Member No.: 3,031 Region Association: None |
Still working on the damage. Don't make much progress working 1-2 hours every 2-3 days. Here's the latest pics. I'm welding split seams and a couple of cuts and holes that I made.
Just welded the seam between the rear fender and rear panel just below the tail light opening. Also welded the tail light hangers. Attached image(s) 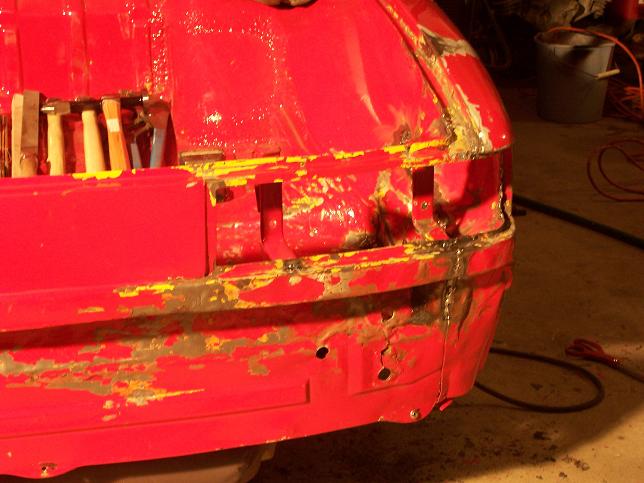
|
|
|
|
| Spoke |
Apr 4 2006, 09:10 PM
Post
#11
|
|
Jerry Group: Members Posts: 6,978 Joined: 29-October 04 From: Allentown, PA Member No.: 3,031 Region Association: None |
Welded the floor pan to the wheel well. The long weld on the wheel well repaired a cut that I made to make unfolding the wheel well easier.
Attached image(s) 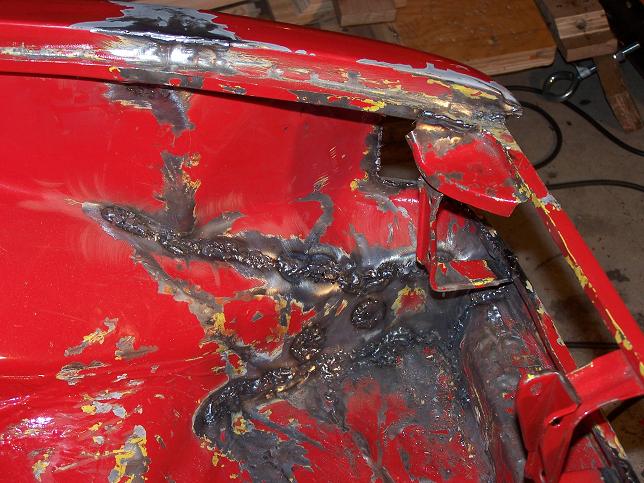
|
|
|
|
| drewvw |
Apr 4 2006, 09:11 PM
Post
#12
|
|
new england car guy Group: Members Posts: 1,631 Joined: 24-February 06 From: Boston, MA Member No.: 5,630 Region Association: North East States |
bringing her back slow and steady, I like it.... (IMG:http://www.914world.com/bbs2/html/emoticons/smash.gif) Nice hammer collection in the trunk there (IMG:http://www.914world.com/bbs2/html/emoticons/biggrin.gif) |
|
|
|
| Spoke |
Apr 4 2006, 09:12 PM
Post
#13
|
|
Jerry Group: Members Posts: 6,978 Joined: 29-October 04 From: Allentown, PA Member No.: 3,031 Region Association: None |
The fender is starting to get back to its original shape. Some of the metal has been stretched by the accident. How do I get it to go back to its original shape?
Attached image(s) 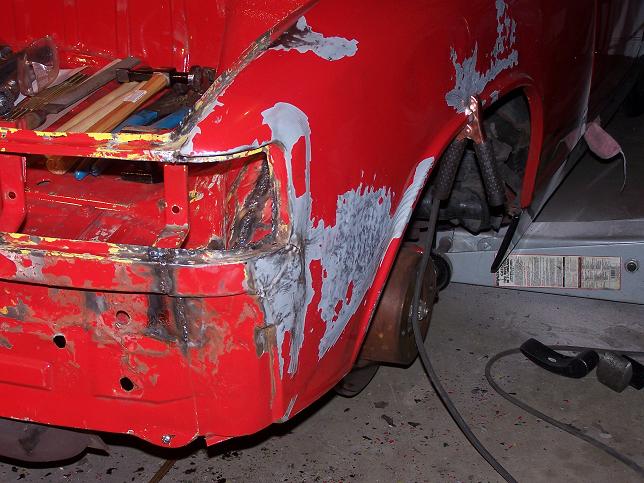
|
|
|
|
| Spoke |
Apr 4 2006, 09:13 PM
Post
#14
|
|
Jerry Group: Members Posts: 6,978 Joined: 29-October 04 From: Allentown, PA Member No.: 3,031 Region Association: None |
Nother side view.
Attached image(s) 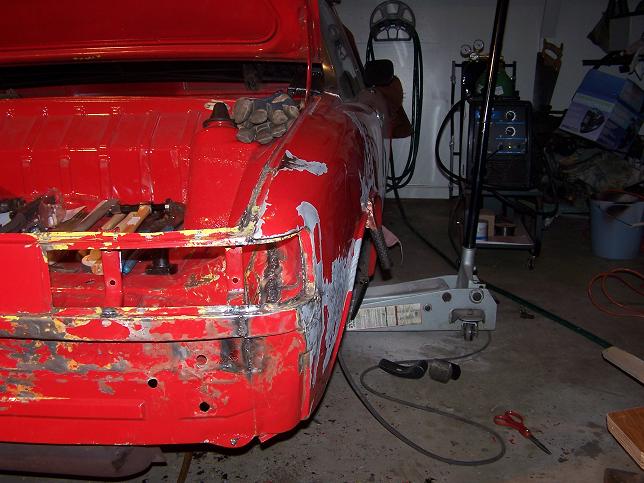
|
|
|
|
| Spoke |
Apr 4 2006, 09:15 PM
Post
#15
|
|
Jerry Group: Members Posts: 6,978 Joined: 29-October 04 From: Allentown, PA Member No.: 3,031 Region Association: None |
Tail light fits pretty well. I've used cardstock to make templates to get the proper shape of the corner.
Attached image(s) 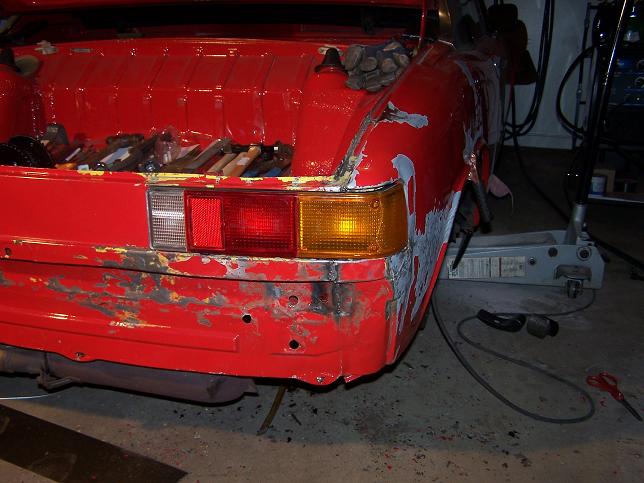
|
|
|
|
| Spoke |
Apr 4 2006, 09:20 PM
Post
#16
|
|
Jerry Group: Members Posts: 6,978 Joined: 29-October 04 From: Allentown, PA Member No.: 3,031 Region Association: None |
The trunk is the next project. The hinge on this side needs adjusted. The edge of the trunk with the paint knocked off is where the actual impact happened.
Attached image(s) 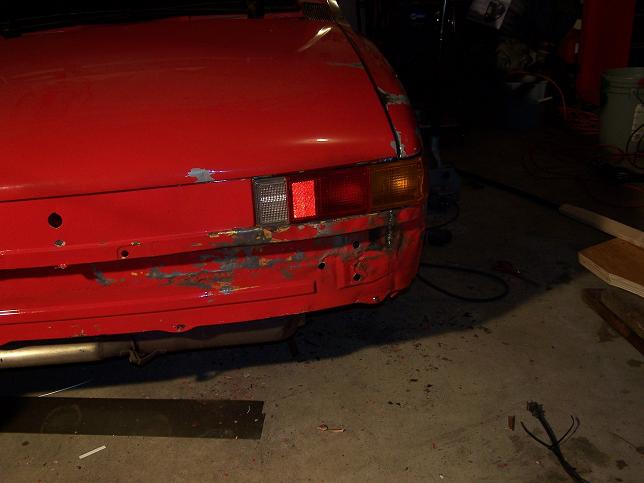
|
|
|
|
| Spoke |
Apr 4 2006, 09:36 PM
Post
#17
|
|
Jerry Group: Members Posts: 6,978 Joined: 29-October 04 From: Allentown, PA Member No.: 3,031 Region Association: None |
I noticed this little crack by the passenger door before the wreck. It got bigger after the wreck so I decided to grind it down to find about 1/4 inch of bondo.
Attached image(s) 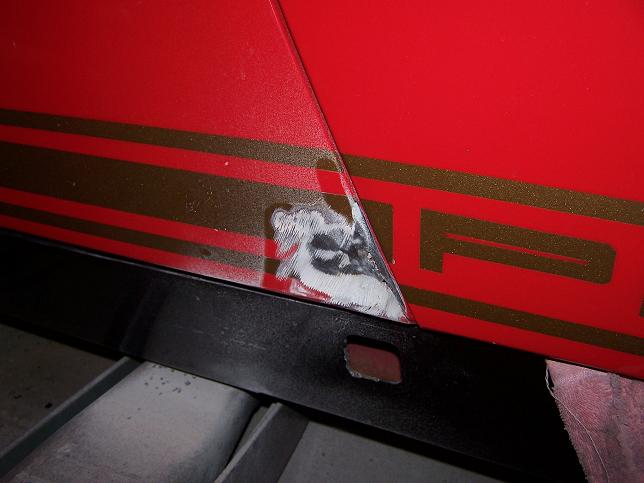
|
|
|
|
| Spoke |
Apr 4 2006, 09:39 PM
Post
#18
|
|
Jerry Group: Members Posts: 6,978 Joined: 29-October 04 From: Allentown, PA Member No.: 3,031 Region Association: None |
Picked up a chrome bumper in Jersey. $10 from Ebay. Someone mounted a trailor hitch to the car so there's some extra holes on each side. The bumper's very solid.
Attached image(s) 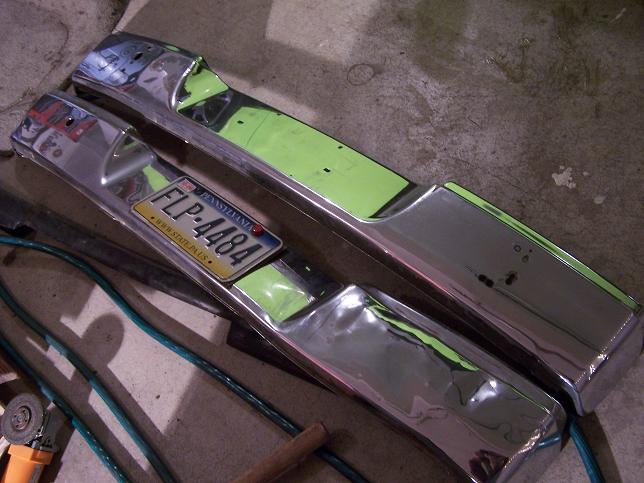
|
|
|
|
| John |
Apr 4 2006, 09:50 PM
Post
#19
|
||
|
member? what's a member? Group: Members Posts: 3,393 Joined: 30-January 04 From: Evansville, IN (SIRPCA) Member No.: 1,615 Region Association: None |
You have done an amazing job getting the car back in shape.
I wish I could answer your question about shrinking metal, but I have the same question. I have heard of shrinking hammers, but don't know how they work or how to use them. I have also heard of shrinking disks, but again don't really know what they are or how to use them. I know that there is a guy here that does absolutely AWESOME metal work and even he said you were doing a nice job. (John Kelly) I would love to learn to do some of the metal shaping that he can do. |
||
|
|
|
||
| Dave_Darling |
Apr 4 2006, 09:51 PM
Post
#20
|
|
914 Idiot Group: Members Posts: 14,982 Joined: 9-January 03 From: Silicon Valley / Kailua-Kona Member No.: 121 Region Association: Northern California |
Heat will shrink the metal. Ask JP about how his car flexed a little when he welded in his roll cage. John Kelly (sp?) sells a "shrinking disk", which seems to be a large copper or copper-coated disk that you chuck into your drill and then spin against whatever metal you want shrunk. The friction heats the metal and shrinks it. (Going from memory, but I think that was what it was.)
The "rear trunk latch cam" should be available from most of the usual parts places. Hmmm... OK, it doesn't seem to be available from us, for whatever reason. I believe that Weltmeister makes a nylon version; we ought to be able to get it I would think. If not, I'm sure the "other" PP place in L.A. can--and GPR probably can as well. Or PartPricer? --DD |
|
|
|
|
2 User(s) are reading this topic (2 Guests and 0 Anonymous Users)
0 Members:

|
Lo-Fi Version | Time is now: 8th May 2024 - 11:56 AM |
Invision Power Board
v9.1.4 © 2024 IPS, Inc.