|
|
|
Porsche, and the Porsche crest are registered trademarks of Dr. Ing. h.c. F. Porsche AG.
This site is not affiliated with Porsche in any way. Its only purpose is to provide an online forum for car enthusiasts. All other trademarks are property of their respective owners. |
|
|


| Spoke |
 Jan 23 2006, 08:41 AM Jan 23 2006, 08:41 AM
Post
#1
|
|
Jerry  Group: Members Posts: 6,979 Joined: 29-October 04 From: Allentown, PA Member No.: 3,031 Region Association: None |
I've decided to keep my wrecked red car until my new 74 2L 914 from Part Pricer is road ready.
I just needed to pound out a few dents to get Big Red back on the road. Here's a couple of before pics. Attached thumbnail(s) 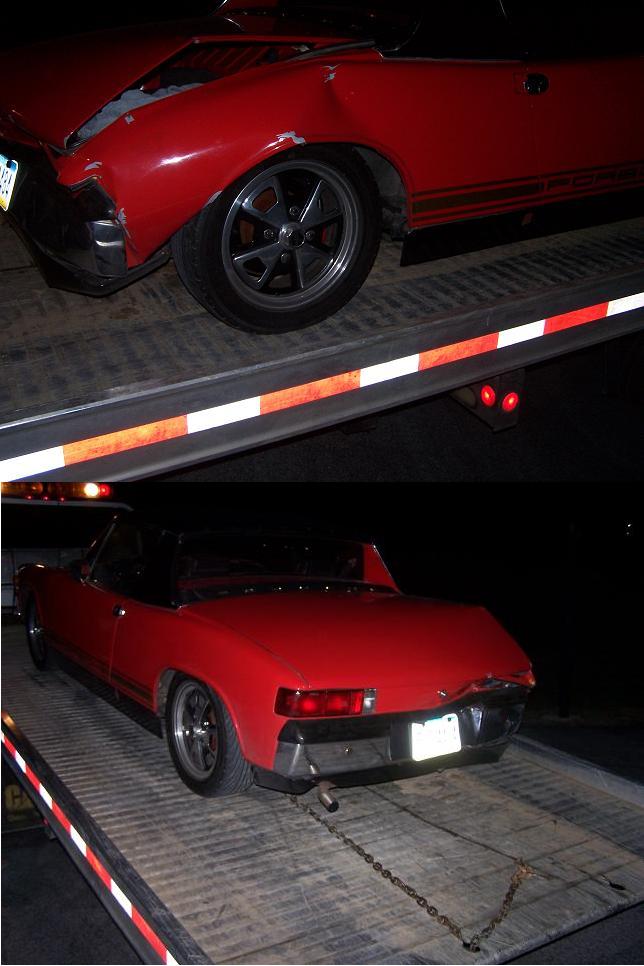
|
   |

 
|
  |
Replies(20 - 39)
| newto914s |
Apr 4 2006, 09:55 PM
Post
#21
|
||
|
Senior Member Group: Members Posts: 561 Joined: 16-February 04 From: Thornton, CO Member No.: 1,663 |
Shrinking dollies and hammers. They are what you use to unstretch the metal. Eastwood search |
||
|
|
|
||
| computers4kids |
Apr 4 2006, 10:25 PM
Post
#22
|
|
Love these little cars! Group: Members Posts: 2,443 Joined: 11-June 05 From: Port Townsend, WA Member No.: 4,253 Region Association: None |
I don't know how much experience you have doing this type of work, but from what I can tell you are doing an amazing job of bringing your 914 back into shape. I think the best thing, is you are using no special body tools for the most part...unless of course, you count the "Audi" jack. LOL
Way to Go! |
|
|
|
| mcbain77 |
Apr 5 2006, 07:03 AM
Post
#23
|
|
Member Group: Members Posts: 155 Joined: 27-January 06 From: Houston, TX Member No.: 5,485 |
When you get into the small details you might want to pick up a book on metal bumping for some of the basic procedures. I am doing this same thing (in a different place) and it really helps out with understanding the priciples. Just like with anything else there are two ways to do something. You can beat it into a rough shape and then fix all the little ridges, v-channels, and strecthes that result (rough 'em out / smooth 'em out) or you can use the Fairmount method and take a more scientific approach. The Fairmount method deals with relieving the stresses on the metal that result from a collision and using the sheetmetal's natural tendencies to reform it's shape. It will result in A LOT LESS WORK to get a professional result. You will also greatly reduce the amount of body filler you will need to use in your repair.
I recommend this book: The Key to Metal Bumping By: Frank T. Sargent BTW - I am not an expert in bodywork (yet (IMG:http://www.914world.com/bbs2/html/emoticons/rolleyes.gif) ) but it looks like you are doing a great job. Keep it up! |
|
|
|
| Jaiden |
Apr 5 2006, 07:32 AM
Post
#24
|
|
Member Group: Members Posts: 346 Joined: 13-January 05 From: Stroudsburg PA Member No.: 3,443 |
Spoke,
It looks like your really moving now. I guess the small bit of spring weather in the NE got you motivated. So how's the green car coming? and when will you have a teener on the road so we can do a PA meet? My car should be back on it's wheels this weekend. I had a small brake hose issue!!!!! Hopefully I can pull off the alignment and get the car driving by sunday. |
|
|
|
| John Kelly |
Apr 5 2006, 07:48 AM
Post
#25
|
||||
|
Senior Member Group: Members Posts: 692 Joined: 1-May 03 From: Moclips WA. Member No.: 640 |
Those shrinking hammers and dollies are...for want of a better word: crap. They sell a lot of them, but all they do is mark up the metal with the harshest, least effective shrinking method ever. You would get better results just welding in the area you want to shrink....my very humble opinion. A torch can shrink stretched ares, but you have to practice a lot to get the technique down. One thing...heat only a little bit. The metal should not turn red like so many people recommend....or even blue. It is not necessary and distorts and hardens the metal. Heat just until the metal steams when you quench it with water. This is a gentle, effective way to shrink. A shrinking disc is the easiest and best method of shrinking, but may not be a good investment for one time use. Here is one of my shrinking disc albums with a little more information: http://allshops.org/cgi-bin/community/comm...d=9980121727059 If you are broke, you can make one from a stainless saucepan lid. Won't work as well, but the price can't be beat. Here is an article with some shrinking disc instruction in it: http://metalshapers.org/101/jkelly/index.html John www.ghiaspecialties.com |
||||
|
|
|
||||
| McMark |
Apr 5 2006, 08:28 AM
Post
#26
|
|
914 Freak! Group: Retired Admin Posts: 20,179 Joined: 13-March 03 From: Grand Rapids, MI Member No.: 419 Region Association: None |
I agree with everything John said. I've found the same conclusions. His shrinking disk on a polisher is a great tool. It takes a while to work stuff out, but that's actually better because you can avoid over shrinking.
|
|
|
|
| Spoke |
Apr 13 2006, 07:09 PM
Post
#27
|
|
Jerry Group: Members Posts: 6,979 Joined: 29-October 04 From: Allentown, PA Member No.: 3,031 Region Association: None |
Finishing up the last of the welding. Got all of the metal where it needs to be. I heated the metal on the fender according to instructions I read on the web (thanks John Kelly) and from guidance from friends at Klasse 356.
When I removed the muffler heat shield, I cut the floor and now time to fix the holes. Since this is the second time I cut the floor for the muffler shield (first time was when I fixed the trunk floor rust), I decided to bolt the shield to the floor instead of welding it. 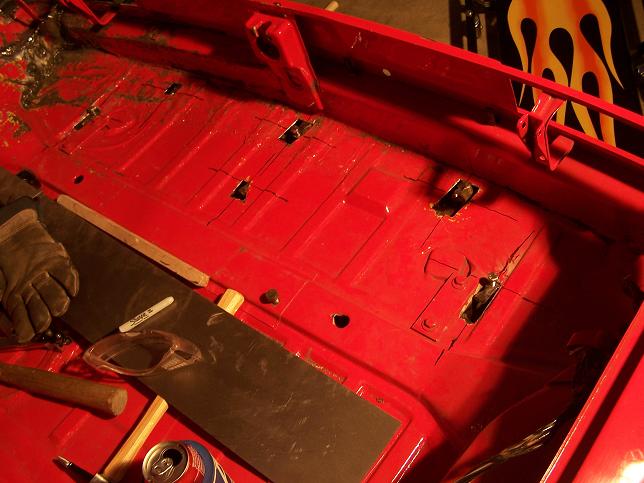 |
|
|
|
| Spoke |
Apr 13 2006, 07:15 PM
Post
#28
|
|
Jerry Group: Members Posts: 6,979 Joined: 29-October 04 From: Allentown, PA Member No.: 3,031 Region Association: None |
Here's a close up of one of the bolts. I welded a nut onto each of the mounting tabs, then made alignment marks for after the welding.
My pics are coming out like thumbnails. Is this new to the site? Can I turn this off? Attached image(s) 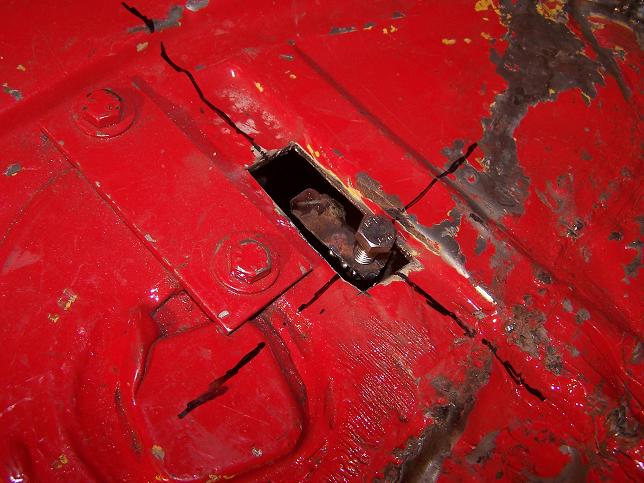
|
|
|
|
| Spoke |
Apr 13 2006, 07:17 PM
Post
#29
|
|
Jerry Group: Members Posts: 6,979 Joined: 29-October 04 From: Allentown, PA Member No.: 3,031 Region Association: None |
Here's the heat shield with bolts attached.
Attached image(s) 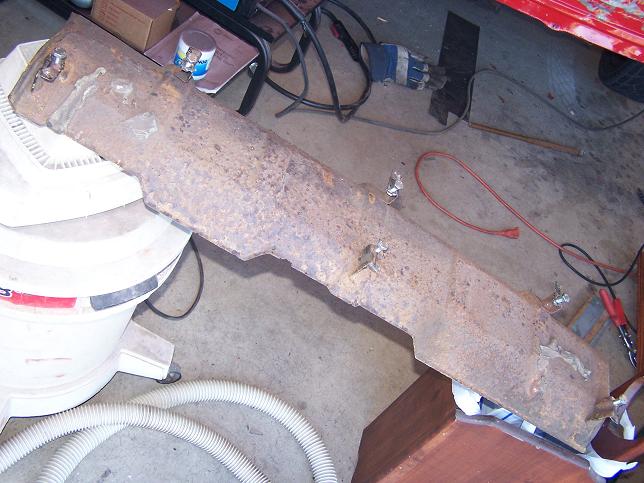
|
|
|
|
| Spoke |
Apr 13 2006, 07:20 PM
Post
#30
|
|
Jerry Group: Members Posts: 6,979 Joined: 29-October 04 From: Allentown, PA Member No.: 3,031 Region Association: None |
Had to repair some rust under the bumper dog bone. Another signature Spoke weld. Still not good at welding but getting better
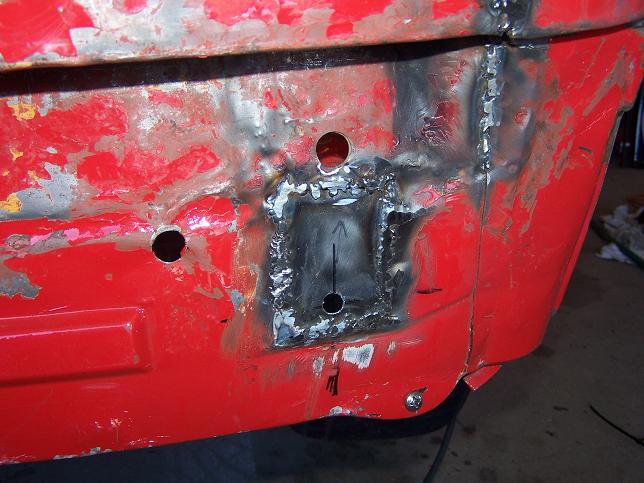 More signature Spoke welds and holes are gone. Attached image(s) 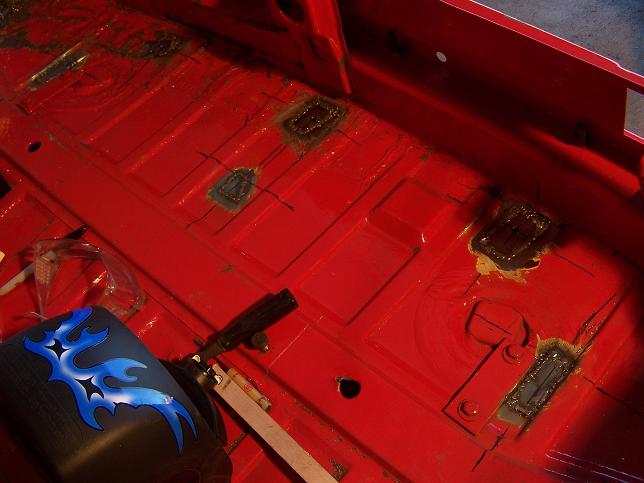
|
|
|
|
| Spoke |
Apr 13 2006, 07:23 PM
Post
#31
|
|
Jerry Group: Members Posts: 6,979 Joined: 29-October 04 From: Allentown, PA Member No.: 3,031 Region Association: None |
Started stripping the damaged areas in the trunk
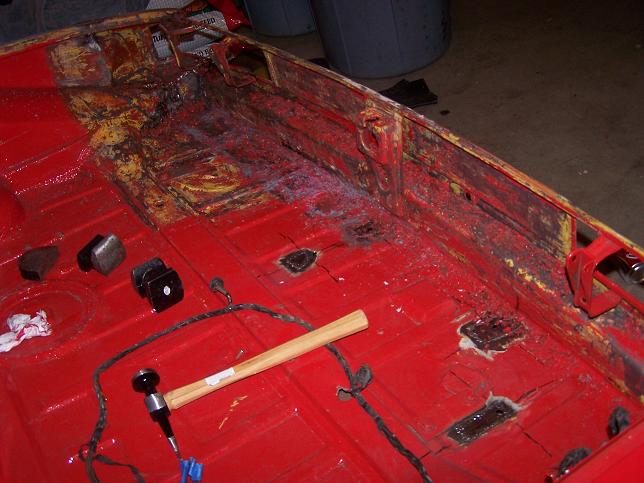 Back panel came out very nice. Will still need bondo to smooth it out. 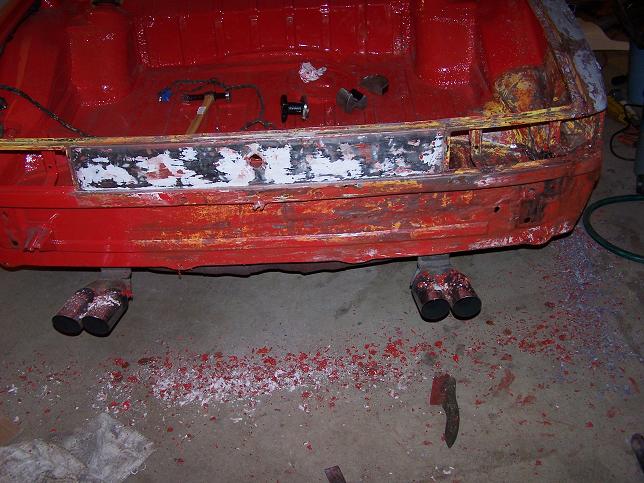 |
|
|
|
| Katmanken |
Apr 13 2006, 07:24 PM
Post
#32
|
|
You haven't seen me if anybody asks... Group: Members Posts: 4,738 Joined: 14-June 03 From: USA Member No.: 819 Region Association: Upper MidWest |
I third it...
John Kellys shrinking disks are a freeking awesome tool. It is one of a handfull of tools that I really rate high on the best tools ever- along with my Miller MIG, my HVLC paint system and a few others. Ith has really changed my bodywork style. Before I was vey careful to not stretch the metal pushing it back out and to make sure that it NEVER protrudes above the undented surface. With John's disk, pound it out past the surface, don't worry about stretch, and shrink to match...... I bet you could take a car fender and turn it into a flat sheet with a hammer and his disk. Ken |
|
|
|
| Spoke |
Apr 13 2006, 07:27 PM
Post
#33
|
|
Jerry Group: Members Posts: 6,979 Joined: 29-October 04 From: Allentown, PA Member No.: 3,031 Region Association: None |
The fender is now as close to the original shape as possible. I used cardstock to make templates for the shape of several areas of the fender. I decided to strip just the damaged area as I may end up cutting the fender area covering the longitudinal to do some long repairs.
Attached image(s) 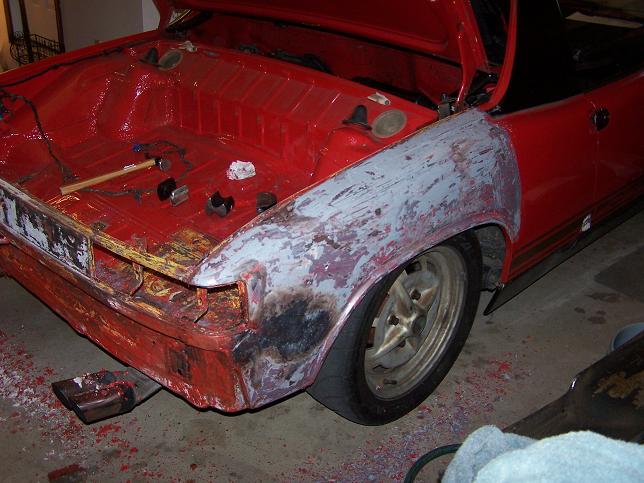
|
|
|
|
| r_towle |
Apr 13 2006, 09:59 PM
Post
#34
|
|
Custom Member Group: Members Posts: 24,574 Joined: 9-January 03 From: Taxachusetts Member No.: 124 Region Association: North East States |
Are you gonna drive that the hershey???
Rich |
|
|
|
| Spoke |
Apr 14 2006, 06:00 AM
Post
#35
|
|
Jerry Group: Members Posts: 6,979 Joined: 29-October 04 From: Allentown, PA Member No.: 3,031 Region Association: None |
QUOTE(r_towle @ Apr 13 2006, 11:59 PM)  Are you gonna drive that the hershey??? Rich If the weather cooperates, I'll bring the green 74. Progress on the red car is so slow that I won't have it fixed by then. Spoke |
|
|
|
| Spoke |
Apr 14 2006, 06:05 AM
Post
#36
|
|
Jerry Group: Members Posts: 6,979 Joined: 29-October 04 From: Allentown, PA Member No.: 3,031 Region Association: None |
QUOTE(Jaiden @ Apr 5 2006, 09:32 AM) Spoke, It looks like your really moving now. I guess the small bit of spring weather in the NE got you motivated. So how's the green car coming? and when will you have a teener on the road so we can do a PA meet? My car should be back on it's wheels this weekend. I had a small brake hose issue!!!!! Hopefully I can pull off the alignment and get the car driving by sunday. James, I put a new clutch in the green "Skittle" car as my daughter's boyfriend calls it and I'm on the road. Been driving it every day to work. Haven't done much to it since it runs real good and is a very solid car. What a difference between a 2.0 with properly functioning FI and a 1.7 with one of those stupid center progressive carbs. Spoke |
|
|
|
| Spoke |
Apr 14 2006, 06:08 AM
Post
#37
|
|
Jerry Group: Members Posts: 6,979 Joined: 29-October 04 From: Allentown, PA Member No.: 3,031 Region Association: None |
QUOTE(John Kelly @ Apr 5 2006, 09:48 AM) A shrinking disc is the easiest and best method of shrinking John, I want to get one of your shrinking disks. Which one should I purchase for working around the rear fender? PM sent. Spoke |
|
|
|
| Part Pricer |
Apr 14 2006, 06:10 AM
Post
#38
|
|
Believe everything I post Group: Benefactors Posts: 1,825 Joined: 28-December 02 From: Danbury, CT Member No.: 35 |
QUOTE(Spoke @ Apr 14 2006, 08:05 AM) I put a new clutch in the green "Skittle" car as my daughter's boyfriend calls it and I'm on the road. Been driving it every day to work. Haven't done much to it since it runs real good and is a very solid car. What a difference between a 2.0 with properly functioning FI and a 1.7 with one of those stupid center progressive carbs. Glad to hear that the car is working out for you. Although, you made me really miss having a 914. (IMG:style_emoticons/default/sad.gif) Oh well, I get one again eventually when I can find storage. Did you get the extra keys? BTW, you should be able to post your pics now without thumbnails being created as long as they are less than 800x640 pixels. |
|
|
|
| Spoke |
Apr 14 2006, 09:15 AM
Post
#39
|
|
Jerry Group: Members Posts: 6,979 Joined: 29-October 04 From: Allentown, PA Member No.: 3,031 Region Association: None |
QUOTE(Part Pricer @ Apr 14 2006, 08:10 AM) Did you get the extra keys? Yes, thank you. The keys arrived a couple of days ago. I've already distributed them at home and work (IMG:style_emoticons/default/burnout.gif) Spoke |
|
|
|
| Spoke |
Apr 15 2006, 07:22 PM
Post
#40
|
|
Jerry Group: Members Posts: 6,979 Joined: 29-October 04 From: Allentown, PA Member No.: 3,031 Region Association: None |
Test fitted the $10 ebay bumper I picked up in Jersey. Seems to fit well but the damaged passenger side of the bumper sticks out about 1/8 inch more than the driver side. Both bolts on the rubber top pad were ripped off in the impact. I was thinking to just contact cement the pad on on this side. Is there any way to re-bolt the missing bolts?
BTW, the 2 vertical reflections in the middle of the bumper are my legs. Not that I'm a male model or anything but my legs look better than the reflections. Spoke Attached image(s) 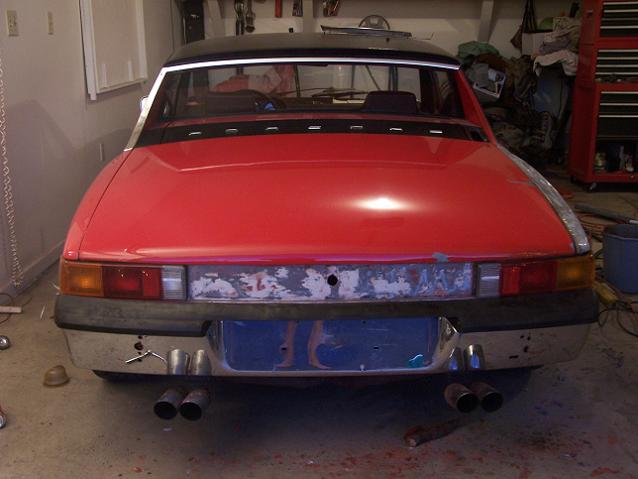
|
|
|
|
|
1 User(s) are reading this topic (1 Guests and 0 Anonymous Users)
0 Members:

|
Lo-Fi Version | Time is now: 19th May 2024 - 07:59 PM |
Invision Power Board
v9.1.4 © 2024 IPS, Inc.