|
|
|
Porsche, and the Porsche crest are registered trademarks of Dr. Ing. h.c. F. Porsche AG.
This site is not affiliated with Porsche in any way. Its only purpose is to provide an online forum for car enthusiasts. All other trademarks are property of their respective owners. |
|
|


| rjames |
 Feb 18 2006, 05:56 PM Feb 18 2006, 05:56 PM
Post
#21
|
|
I'm made of metal  Group: Members Posts: 4,447 Joined: 24-July 05 From: Shoreline, WA Member No.: 4,467 Region Association: Pacific Northwest |
Rust treating, killing, etc, and just want to get some input before I get to crazy with the MIG.
Here are some questions: I have some floor pan issues. Are the holes too big just to try and fill? The following photo is from the driverside, under the seat after the tar has been removed, and I've grinded down to bare metal. Should I advertise for someone who's cutting up a car to cut this pieces out for me, or should I just go buy some sheet metal and make a patch knowing it won't really match, but can at least be made to 'line up'? Attached image(s) 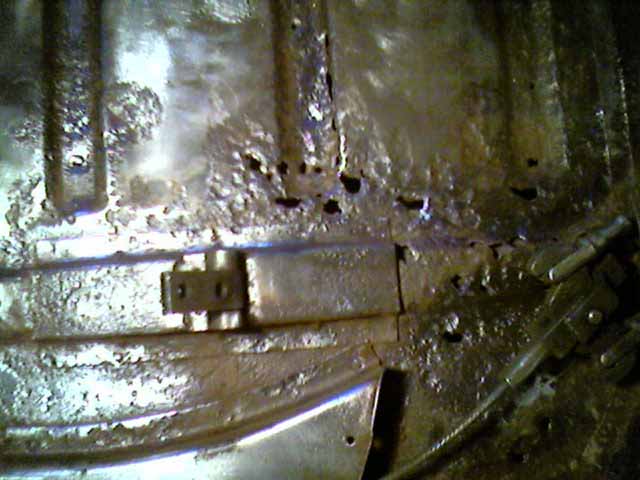
|
   |

 
|
Posts in this topic
 rjames Rust repair Questions Feb 18 2006, 05:56 PM
 Hammy You can buy new replacement floor pans.
Also any ... Feb 18 2006, 06:01 PM scotty b do yourself a favor and get a new pan section. Tha... Feb 18 2006, 06:02 PM rjames Next set of questions:
Do I just cut the jack pla... Feb 18 2006, 06:05 PM scotty b Cut it out, treat inside and replace with a new pi... Feb 18 2006, 06:11 PM scotty b you need to do something with the upper left porti... Feb 18 2006, 06:16 PM rjames
Hammy You can buy new replacement floor pans.
Also any ... Feb 18 2006, 06:01 PM scotty b do yourself a favor and get a new pan section. Tha... Feb 18 2006, 06:02 PM rjames Next set of questions:
Do I just cut the jack pla... Feb 18 2006, 06:05 PM scotty b Cut it out, treat inside and replace with a new pi... Feb 18 2006, 06:11 PM scotty b you need to do something with the upper left porti... Feb 18 2006, 06:16 PM rjames 


