|
|
|
Porsche, and the Porsche crest are registered trademarks of Dr. Ing. h.c. F. Porsche AG.
This site is not affiliated with Porsche in any way. Its only purpose is to provide an online forum for car enthusiasts. All other trademarks are property of their respective owners. |
|
|

  |

| michel richard |
 Mar 12 2006, 04:17 PM Mar 12 2006, 04:17 PM
Post
#1
|
|
Senior Member  Group: Members Posts: 1,291 Joined: 22-July 03 From: Longueuil, Québec Member No.: 936 |
On my /6 project, I have decided not to add the tub reinforcements on the inside rear wheel well, for a variety of reasons. I did decide that I wanted the dog-ear reinforcement, also for a variety of reasons.
I am building the whole thing from scratch and I will post a detailed picture sequence in the hope that some will find it interesting. I first bought some cold-rolled flat stock, 1/4 inch by 1.5 inch. I will say that I did not try to calculate if this resulted in a tang of the right strength, but it's what I used. There's 8 tangs required, 6 the same and 2 a little longer. To make the tangs, I began by drilling a 3/8 inch hole: Attached image(s) 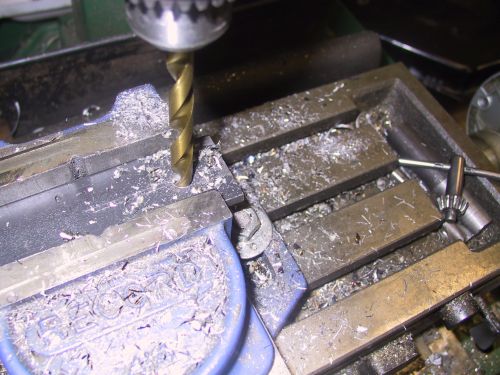
|
   |

 
|
| michel richard |
Mar 12 2006, 04:18 PM
Post
#2
|
|
Senior Member Group: Members Posts: 1,291 Joined: 22-July 03 From: Longueuil, Québec Member No.: 936 |
Then I cut the outboard corners off:
Attached image(s) 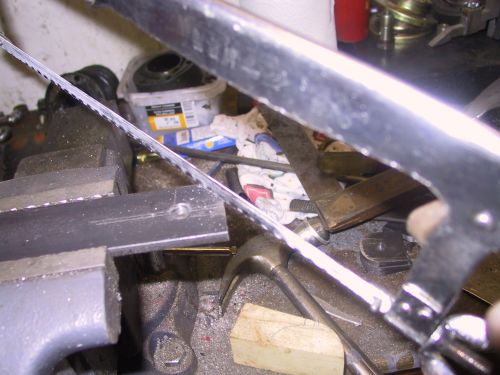
|
|
|
|
| michel richard |
Mar 12 2006, 04:20 PM
Post
#3
|
|
Senior Member Group: Members Posts: 1,291 Joined: 22-July 03 From: Longueuil, Québec Member No.: 936 |
Back to the mill, I rounded the ends. I had a small pice of steel in which I inserted a 3/8 bolt, used to hold the tang material down. When the bolt is tightened, the plate can be rotated against the end mill and the end rounded.
Attached image(s) 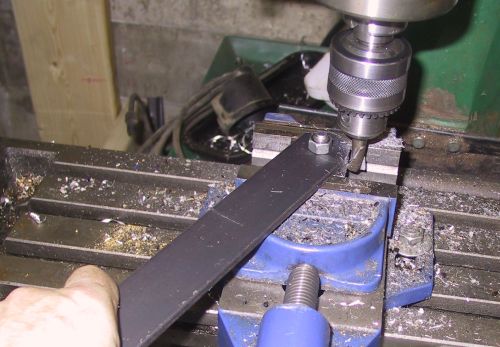
|
|
|
|
| michel richard |
Mar 12 2006, 04:21 PM
Post
#4
|
|
Senior Member Group: Members Posts: 1,291 Joined: 22-July 03 From: Longueuil, Québec Member No.: 936 |
The picture is frozen, in the previous shot, but the mill was spinning !
Then I cut the tang to approximate length, and started over. Attached image(s) 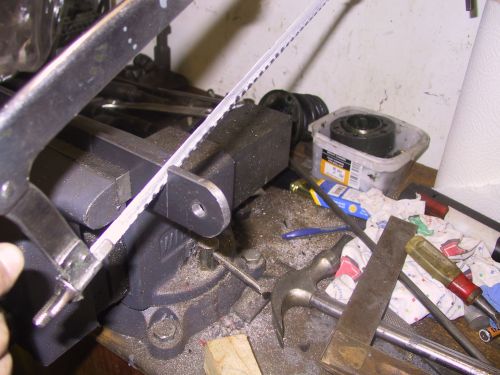
|
|
|
|
| michel richard |
Mar 12 2006, 04:23 PM
Post
#5
|
|
Senior Member Group: Members Posts: 1,291 Joined: 22-July 03 From: Longueuil, Québec Member No.: 936 |
To make sure all the tangs were the same length, I put a 3/8 pice of round stock in the holes, stacked the tangs, and cut them down to final length on the lathe. Once again, the lathe is spinning in this shot:
Attached image(s) 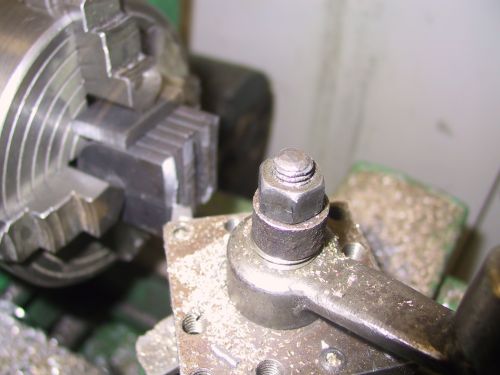
|
|
|
|
| michel richard |
Mar 12 2006, 04:25 PM
Post
#6
|
|
Senior Member Group: Members Posts: 1,291 Joined: 22-July 03 From: Longueuil, Québec Member No.: 936 |
The next step is to cut some more steel plate (or sheet, I'm not sure what the exact terminology is) from 1/8 inch stock. I made this 5 inches by 3.5 inches, simply based on measurements on the tub, and comparisons to Armando Serrano's site. This is what it'll look like:
Attached image(s) 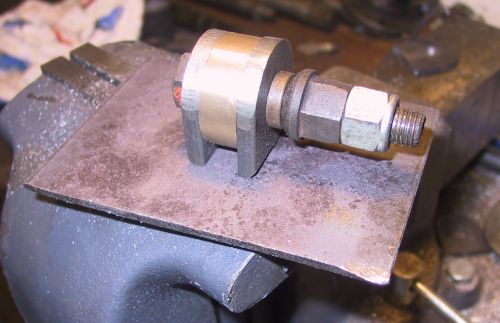
|
|
|
|
| michel richard |
Mar 12 2006, 04:27 PM
Post
#7
|
|
Senior Member Group: Members Posts: 1,291 Joined: 22-July 03 From: Longueuil, Québec Member No.: 936 |
Okay, so the bolt I had was too long.
In the previous picture, you can see that I chamfered the tangs so that I would get better penetration when welded, which I did with my trusty Mig: Attached image(s) 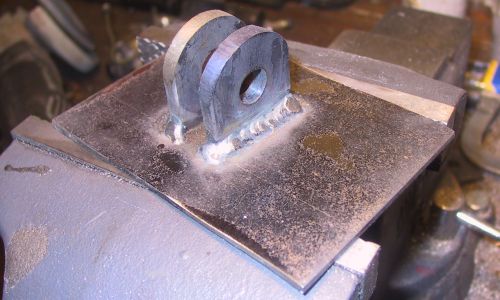
|
|
|
|
| michel richard |
Mar 12 2006, 04:28 PM
Post
#8
|
|
Senior Member Group: Members Posts: 1,291 Joined: 22-July 03 From: Longueuil, Québec Member No.: 936 |
And this is what it's going to look like with the rod-end (I'll post details on that part later)
Attached image(s) 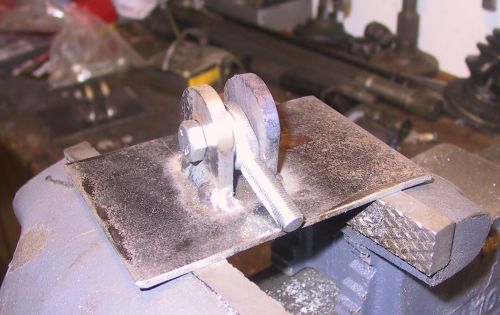
|
|
|
|
| michel richard |
Mar 12 2006, 04:32 PM
Post
#9
|
|
Senior Member Group: Members Posts: 1,291 Joined: 22-July 03 From: Longueuil, Québec Member No.: 936 |
This part gets welded to the main bulkhead, as shown below.
What remains is to (1) put together the tangs that will be welded to the dog-ear itself, (2) and to make the rod that will go between the bulkhead and the dog-ear and (3) do the welding to the tub. Picture below from Armando Serrano's site: Attached image(s) 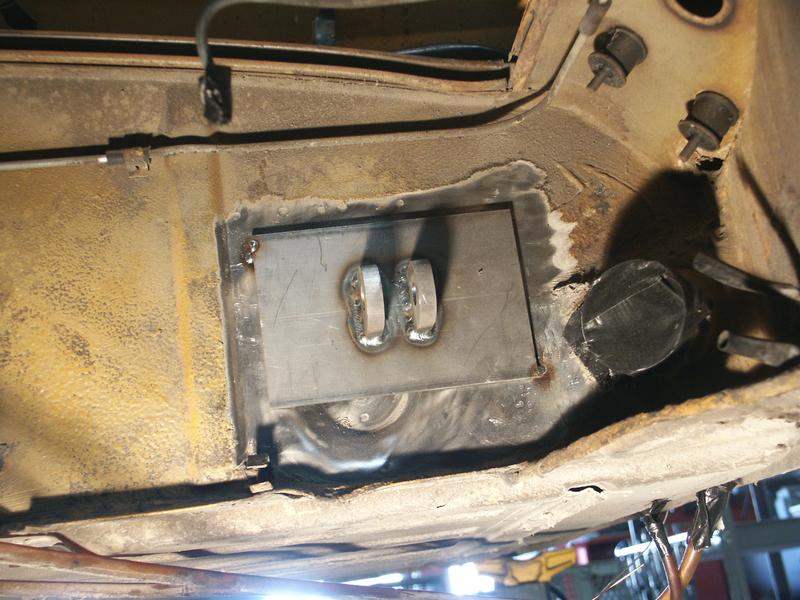
|
|
|
|
| okieflyr |
Mar 13 2006, 11:35 AM
Post
#10
|
|
9fauxteen Group: Members Posts: 816 Joined: 9-January 05 From: Phila PA Member No.: 3,426 Region Association: North East States |
Watching with great interest ! (IMG:http://www.914world.com/bbs2/html/emoticons/welder.gif) KB
|
|
|
|
| Andyrew |
Mar 13 2006, 11:43 AM
Post
#11
|
|
Spooling.... Please wait Group: Members Posts: 13,376 Joined: 20-January 03 From: Riverbank, Ca Member No.: 172 Region Association: Northern California |
Seems like welding a tube in there would be much easyer..
But complexity is gud!! Unless your going to be racing in a class that says no weld in reinforcements.. bolt in only. |
|
|
|
| alpha434 |
Mar 13 2006, 12:32 PM
Post
#12
|
||
|
My member number is no coincidence. Group: Members Posts: 3,154 Joined: 16-December 05 From: Denver, CO Member No.: 5,280 Region Association: Rocky Mountains |
Has to be removable so that the engine will come out. |
||
|
|
|
||
| Andyrew |
Mar 13 2006, 12:37 PM
Post
#13
|
|
Spooling.... Please wait Group: Members Posts: 13,376 Joined: 20-January 03 From: Riverbank, Ca Member No.: 172 Region Association: Northern California |
Interesting..
guess I dont think about that unremovable engine tin now adays.... |
|
|
|
| Brad Roberts |
Mar 13 2006, 12:38 PM
Post
#14
|
||
|
914 Freak! Group: Members Posts: 19,148 Joined: 23-December 02 Member No.: 8 Region Association: None |
I have welded in 20+.. all the engines come out without issue. I do agree that removable is more better (easier to adjust valves) The issue is rust inside the ear. They are plenty strong up until a 12inch wide slick is used on a good ear (and a good driver) B |
||
|
|
|
||
| Andyrew |
Mar 13 2006, 12:41 PM
Post
#15
|
|
Spooling.... Please wait Group: Members Posts: 13,376 Joined: 20-January 03 From: Riverbank, Ca Member No.: 172 Region Association: Northern California |
Brad, real quick...
My left ear hole is ovaled out.. and I assume the right one is slightly ovaled as well. Both bolts come loose after driving them. I have a lincoln mig now, and was going to replace the metal with 1/8in or something simular, then reinforce it a little on both sides. (with a welded in bar from the front firewall to the ear) Does that sound right? thanks.. |
|
|
|
| michel richard |
Mar 13 2006, 01:36 PM
Post
#16
|
||
|
Senior Member Group: Members Posts: 1,291 Joined: 22-July 03 From: Longueuil, Québec Member No.: 936 |
Agreed. Not going into any racing class. I just think that welding in a permanent tube is something that could come back to haunt me sometime down the road. And the thing with the rod ends is that it's kinda fun to do. |
||
|
|
|
||
| michel richard |
Mar 13 2006, 01:49 PM
Post
#17
|
|
Senior Member Group: Members Posts: 1,291 Joined: 22-July 03 From: Longueuil, Québec Member No.: 936 |
I got the Aurora CM-6 rod end, locally, it has a 3/8 inch hole, and a 3/8 inch fine thread shaft, but I think that's on the small side and I will probably get some CM-8 fittings. These are basic run-of-the-mill items. Here's the link to the manufacturer's site. I paid C$40 for the four ends that I got.
http://www.aurorabearing.com/ You can download their catalog free, it contains a lot of info. |
|
|
|
| brant |
Mar 13 2006, 01:56 PM
Post
#18
|
|
914 Wizard Group: Members Posts: 11,641 Joined: 30-December 02 From: Colorado Member No.: 47 Region Association: Rocky Mountains |
Nice..
but you can buy those mounts and ends pre-made too. here are the ones we used: Attached thumbnail(s) 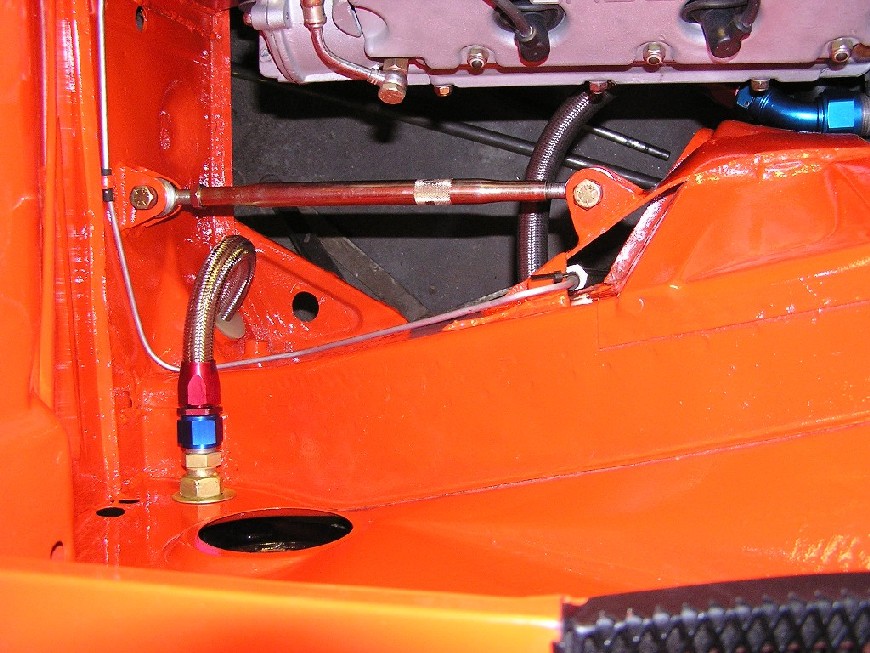
|
|
|
|
| brant |
Mar 13 2006, 01:57 PM
Post
#19
|
|
914 Wizard Group: Members Posts: 11,641 Joined: 30-December 02 From: Colorado Member No.: 47 Region Association: Rocky Mountains |
both sides are connected so they can be lighter weight and retain their strength. Close up:
Attached thumbnail(s) 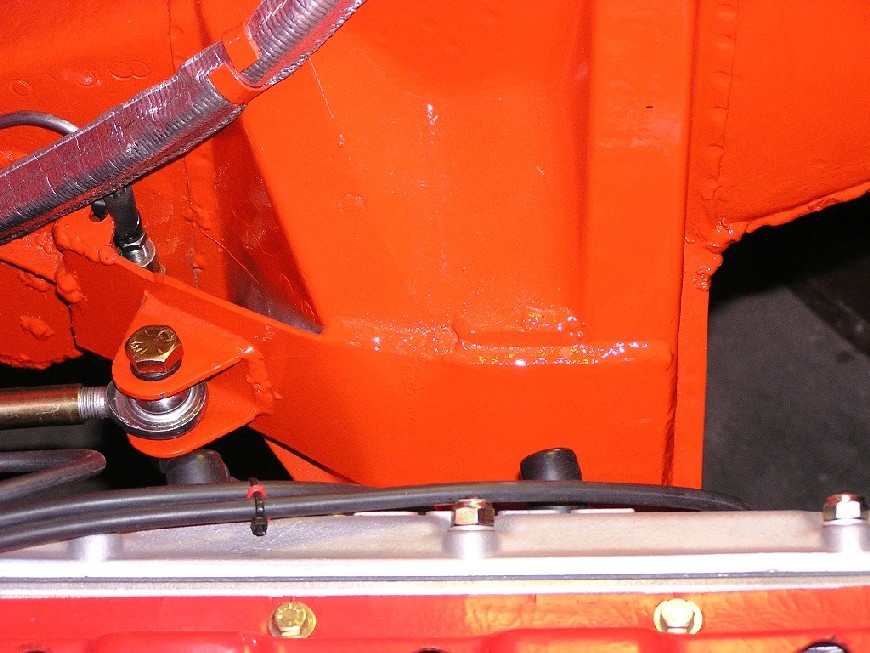
|
|
|
|
| michel richard |
Mar 13 2006, 02:08 PM
Post
#20
|
|
Senior Member Group: Members Posts: 1,291 Joined: 22-July 03 From: Longueuil, Québec Member No.: 936 |
Brant, what size rod-ends do you use ?
In my case, part of the fun is making the things myself. |
|
|
|
|
1 User(s) are reading this topic (1 Guests and 0 Anonymous Users)
0 Members:

|
Lo-Fi Version | Time is now: 16th June 2024 - 05:41 AM |
Invision Power Board
v9.1.4 © 2024 IPS, Inc.