|
|
|
Porsche, and the Porsche crest are registered trademarks of Dr. Ing. h.c. F. Porsche AG.
This site is not affiliated with Porsche in any way. Its only purpose is to provide an online forum for car enthusiasts. All other trademarks are property of their respective owners. |
|
|

  |

| brant |
 Mar 13 2006, 02:19 PM Mar 13 2006, 02:19 PM
Post
#21
|
||
|
914 Wizard  Group: Members Posts: 12,011 Joined: 30-December 02 From: Colorado Member No.: 47 Region Association: Rocky Mountains |
I'm not absolutely certain. should have it on a receipt buried somewhere... I know the threaded portion of the rod is about 3/8 - 1/2, if that helps add any point of reference to the picture. On my -4 car my similar brace rods are angled like yours. but on our -6 we made them straight forward and back to clear the larger motor. brant |
||
   |

 
|
||
| michel richard |
Mar 13 2006, 07:40 PM
Post
#22
|
|
Senior Member Group: Members Posts: 1,291 Joined: 22-July 03 From: Longueuil, Québec Member No.: 936 |
Meanwhile, back in the shop . . .
At the other end of the stay, the tang assembly is a little more complicated, because it meets the surface of the dog-ear at an angle. Here's the assembly, before welding. I attempted to get better penetration with a good chamfer on the part: Attached image(s) 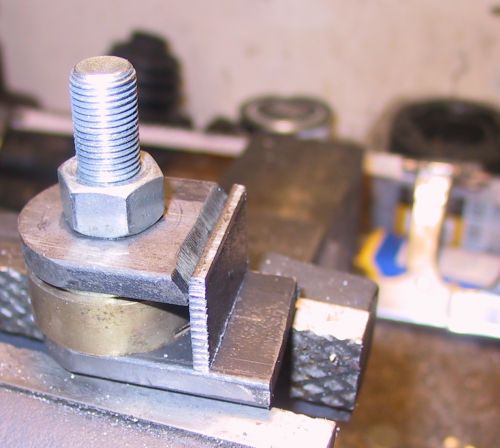
|
 |
|
| michel richard |
Mar 13 2006, 07:43 PM
Post
#23
|
|
Senior Member Group: Members Posts: 1,291 Joined: 22-July 03 From: Longueuil, Québec Member No.: 936 |
And after welding. I know weld penetration does'nt look fantastic, but it's actually better than it appears in the picture.
The next step will be welding these assemblies to the tub. Stay tuned. Attached image(s) 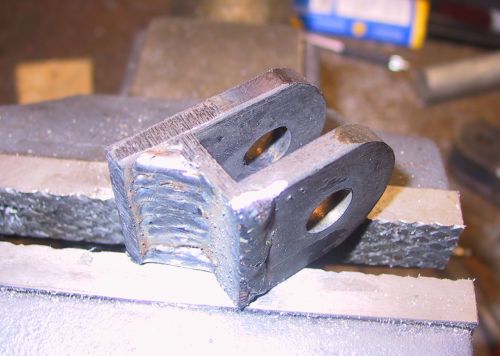
|
|
|
|
| michel richard |
Mar 13 2006, 08:05 PM
Post
#24
|
|
Senior Member Group: Members Posts: 1,291 Joined: 22-July 03 From: Longueuil, Québec Member No.: 936 |
Here's what it's going to look like (hopefully) when done. From Armando Serrano's site:
Attached image(s) 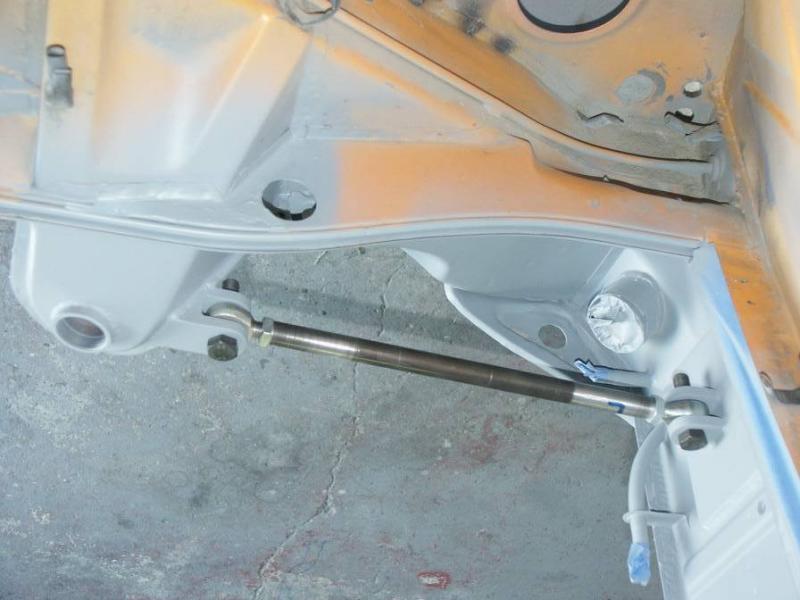
|
|
|
|
| andys |
Mar 13 2006, 08:54 PM
Post
#25
|
||
|
Advanced Member Group: Members Posts: 2,165 Joined: 21-May 03 From: Valencia, CA Member No.: 721 Region Association: None |
I think you'd be surprised at the amount of static axial load a 3/8" quality rod end can take; 4,000lbs+. The link (tube) between them needs to be appropriate for the loading you expect. A larger diameter tube with swaged or welded ends would be best. Andys |
||
|
|
|
||
| drew365 |
Mar 13 2006, 09:03 PM
Post
#26
|
|
These are the good old days! Group: Members Posts: 2,004 Joined: 29-December 02 From: Sunny So. Cal. Member No.: 37 |
Your work looks very good. After splitting my dog ear once we reinforced it to the rear against the tranny mount beam. TRE did the work.
Attached image(s) 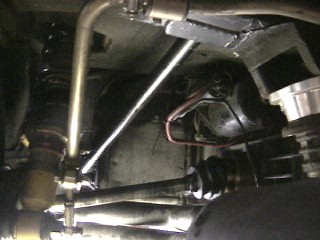
|
|
|
|
| andys |
Mar 13 2006, 09:04 PM
Post
#27
|
|
Advanced Member Group: Members Posts: 2,165 Joined: 21-May 03 From: Valencia, CA Member No.: 721 Region Association: None |
Nice work!
BTW, what kind of bearing or (?) are you using for the trailing arm pivot shaft on the dog ear? On a general note, it has always seemed to me that this type of re-eforcement link has a down side. Any chassis flex that changes the distance between the two mounting points will transfer the load and perhaps over stress the weakest point , which I speculate is the dog ear. I know some of the race guys do this, but I have seen at least one instance where the dog ear cracked on a caged car from this. Some data would end my speculation (IMG:http://www.914world.com/bbs2/html/emoticons/smile.gif) Andys |
|
|
|
| brant |
Mar 13 2006, 10:42 PM
Post
#28
|
||
|
914 Wizard Group: Members Posts: 12,011 Joined: 30-December 02 From: Colorado Member No.: 47 Region Association: Rocky Mountains |
I think the Dog ear cracks from not doing this... I ripped out 2 of them in 2 years. The first time I attributed it to old metal. the second time I didn't have that excuse. the dog ears crack and rip out due to side loads generated from tires these cars were never meant to have... the reinforcement makes a significant difference in reducing the flex that causes cracking and ripping. Pre-suspension brace we used to have the inner and outer swingarm bolts come loose every single day of track event. after putting in the 2nd brand new console and the bracing along with it, we didn't have those swing arm bolts come loose even once in 8+ years. brant |
||
|
|
|
||
| michel richard |
Mar 14 2006, 08:07 AM
Post
#29
|
||
|
Senior Member Group: Members Posts: 1,291 Joined: 22-July 03 From: Longueuil, Québec Member No.: 936 |
The spec on the radial load (which is the load along the shaft, I think - it's radial relative to the eye) is 5,000 pounds for the CM-6, and 8,338 pounds on the CM-8. With the size of the components I am using, it would be the weak link, but could still be strong enough, I agree. Actually, in compression, with the dog-ear trying to move forward, the weak link would probably be the stay itself buckling. I agree that a large diameter on the tube would help. Just my thoughts. |
||
|
|
|
||
| michel richard |
Mar 15 2006, 07:48 PM
Post
#30
|
|
Senior Member Group: Members Posts: 1,291 Joined: 22-July 03 From: Longueuil, Québec Member No.: 936 |
Okay, a couple of changes in the project, since the last update.
1. I have decided that would switch to 1/2 inch rod ends. That will mean a slight modification to the tang assembly that bolts to the bulkhead, but that's no big deal and 2. For a variety of reasons, I'm making a second set reinforcements (but they're not available). The tangs are pretty much done, so I moved to the stay itself. I was able to visit a metals supply house and get the following: 1) 4 feet of 1 inch od round steel tube. They had a variety with the outside ground to a fine finish, and I took that. 2) 1 foot of 1 inch steel hex bar plus some cold rolled steel for the second set of stays. I started in the machine shop with the hex bar. I figure I can make two end fittings at a time. I chucked a 3 inch piece, and squared the end: Attached image(s) 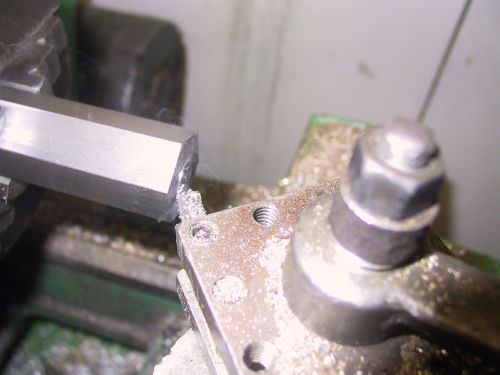
|
|
|
|
| michel richard |
Mar 15 2006, 07:50 PM
Post
#31
|
|
Senior Member Group: Members Posts: 1,291 Joined: 22-July 03 From: Longueuil, Québec Member No.: 936 |
I then drilled a bearing in the end of the bar to support it with a center. After that, I turned down a half inch length to fit the inside of the round tube:
Attached image(s) 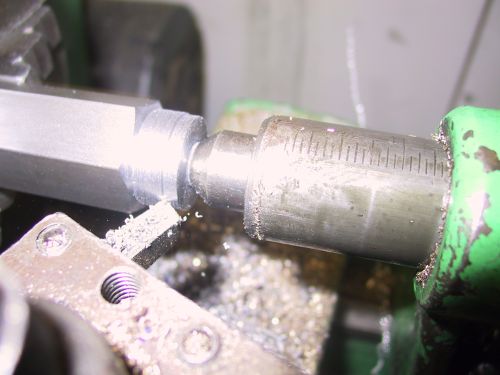
|
|
|
|
| michel richard |
Mar 15 2006, 07:51 PM
Post
#32
|
|
Senior Member Group: Members Posts: 1,291 Joined: 22-July 03 From: Longueuil, Québec Member No.: 936 |
Drilled 29 / 64 and cut off one inch: after that, I taped the fitting 1/2-20.
Attached image(s) 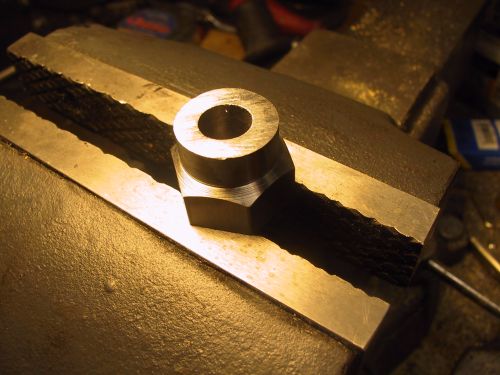
|
|
|
|
| michel richard |
Mar 15 2006, 07:51 PM
Post
#33
|
|
Senior Member Group: Members Posts: 1,291 Joined: 22-July 03 From: Longueuil, Québec Member No.: 936 |
this is how it fits: (you can see the three other stays in the background, waiting for their turn)
Attached image(s) 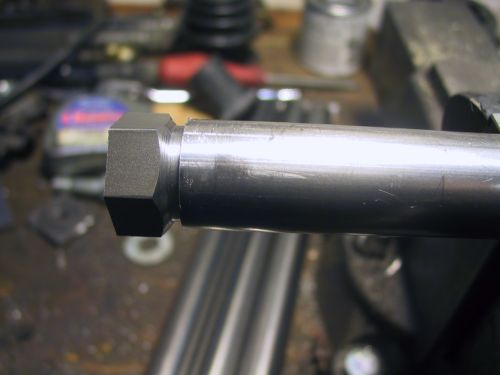
|
|
|
|
| michel richard |
Mar 15 2006, 07:53 PM
Post
#34
|
|
Senior Member Group: Members Posts: 1,291 Joined: 22-July 03 From: Longueuil, Québec Member No.: 936 |
One end completed. I now have one stay ready to be welded in the car.
Attached image(s) 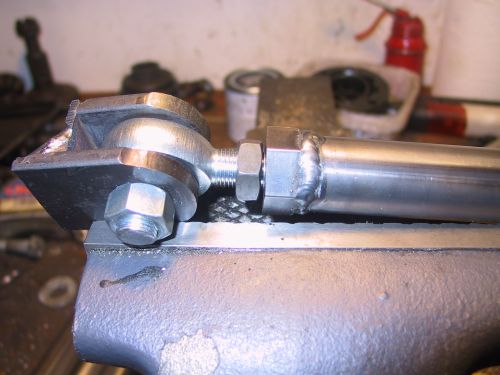
|
|
|
|
| michel richard |
Mar 15 2006, 07:56 PM
Post
#35
|
|
Senior Member Group: Members Posts: 1,291 Joined: 22-July 03 From: Longueuil, Québec Member No.: 936 |
I figure my overall length , from the bulkhead to the end of the dog-ear needs to be approximately 18.5 inches. With my setup, this translated into a 12 inch tube.
I now need to finish the other stays, and then weld the things onto the tub. |
|
|
|
| brant |
Mar 15 2006, 08:20 PM
Post
#36
|
|
914 Wizard Group: Members Posts: 12,011 Joined: 30-December 02 From: Colorado Member No.: 47 Region Association: Rocky Mountains |
looking good...
I believe that our bar stock is actually aluminum, and you can save a few pounds that way if you want. nice work though brant |
|
|
|
| Brett W |
Mar 15 2006, 09:46 PM
Post
#37
|
|
Advanced Member Group: Members Posts: 2,859 Joined: 17-September 03 From: huntsville, al Member No.: 1,169 Region Association: None |
Looks good. You went a little overkill on the parts. You could have easily used 1/8 plate for all of the mounting ears. The 3/8 rod ends are more than sufficent.
|
|
|
|
| michel richard |
Mar 17 2006, 11:54 AM
Post
#38
|
|
Senior Member Group: Members Posts: 1,291 Joined: 22-July 03 From: Longueuil, Québec Member No.: 936 |
Took another vacation day, and spent this morning at the body shop. Owner is still super-nice and lets me work on the car in his shop.
I started by taking some paint off the bulkhead: Attached image(s) 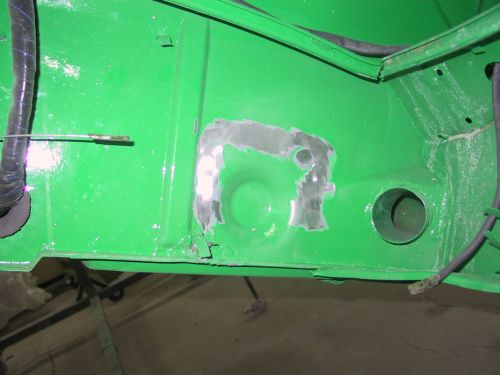
|
|
|
|
| michel richard |
Mar 17 2006, 11:55 AM
Post
#39
|
|
Senior Member Group: Members Posts: 1,291 Joined: 22-July 03 From: Longueuil, Québec Member No.: 936 |
Then I started welding, taking care that things were close enough to being lined up:
Attached image(s) 
|
|
|
|
| michel richard |
Mar 17 2006, 11:57 AM
Post
#40
|
|
Senior Member Group: Members Posts: 1,291 Joined: 22-July 03 From: Longueuil, Québec Member No.: 936 |
Welding the dog-ear end was a bit more involved, but Sylvain, my bodyman, obviously has a good Mig and a good helmet (and less obviously let me use them) so that I was able to weld everything in.
Here's the finished product (actually, I later groud the welds a little): Attached image(s) 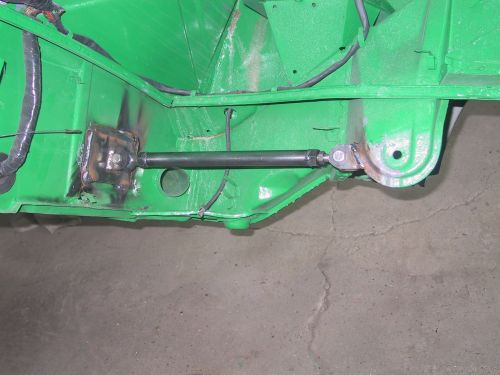
|
|
|
|
|
1 User(s) are reading this topic (1 Guests and 0 Anonymous Users)
0 Members:

|
Lo-Fi Version | Time is now: 12th July 2025 - 09:37 PM |
Invision Power Board
v9.1.4 © 2025 IPS, Inc.