|
|
|
Porsche, and the Porsche crest are registered trademarks of Dr. Ing. h.c. F. Porsche AG.
This site is not affiliated with Porsche in any way. Its only purpose is to provide an online forum for car enthusiasts. All other trademarks are property of their respective owners. |
|
|

  |

| McMark |
 Mar 15 2006, 02:00 PM Mar 15 2006, 02:00 PM
Post
#21
|
|
914 Freak!  Group: Retired Admin Posts: 20,180 Joined: 13-March 03 From: Grand Rapids, MI Member No.: 419 Region Association: None |
QUOTE(Dr. Roger @ Mar 15 2006, 10:23 AM) i'm looking at a hand "deep flanger" from eastwood. this seems to give the deeper flange to give more screwing/gluing area of adhesion. (IMG:style_emoticons/default/clap56.gif) This will be nice for making a nice smooth transition between metal and glass. But don't be afraid to trim your FG as well. Just because it came like that doesn't mean it has be installed like that. I regularly cut big chunks off of brand new sheet metal pieces. Only use what works in your situation. QUOTE geez, i wish there was an easier way to do this (meaning not by hand). (IMG:style_emoticons/default/biggrin.gif) The only other tool you have is in your wallet. (IMG:style_emoticons/default/wink.gif) Otherwise, get used to manual labor. |
   |

 
|
| slivel |
Mar 15 2006, 02:17 PM
Post
#22
|
|
Old car....... older driver Group: Members Posts: 532 Joined: 10-July 04 From: San Diego Member No.: 2,332 Region Association: Southern California |
I have a Sheridan body on my 914.
Attached image(s) 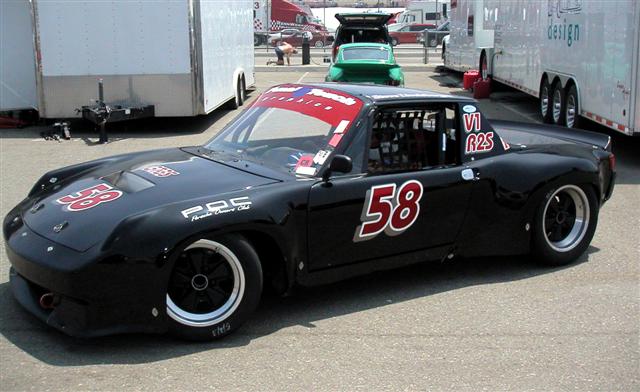
|
 |
|
| slivel |
Mar 15 2006, 02:20 PM
Post
#23
|
|
Old car....... older driver Group: Members Posts: 532 Joined: 10-July 04 From: San Diego Member No.: 2,332 Region Association: Southern California |
My fenders have the 1 inch flange on them and blend into the door bulkhead.
Attached thumbnail(s) 
|
|
|
|
| slivel |
Mar 15 2006, 02:29 PM
Post
#24
|
|
Old car....... older driver Group: Members Posts: 532 Joined: 10-July 04 From: San Diego Member No.: 2,332 Region Association: Southern California |
Right side. Also used a small dzus fastener on the door bulkhead.
Attached image(s) 
|
|
|
|
| wbergtho |
Mar 15 2006, 05:08 PM
Post
#25
|
|
Senior Member Group: Members Posts: 1,314 Joined: 28-April 03 From: Roberts, WI Member No.: 623 |
Hello Dr. Roger,
I did not step down my metal (although I think this idea is great). Creating a step down flange using an Eastwood tool will not get you a deep enough step because that tool is designed to step the thickness of sheetmetal. As you know, fibreglass is alot thicker requiring a step down equal to the thickness of the fibreglass...to do it correctly. You can modify the tool to make a deeper flange. Depends on how far you want to go here? My body guy rolled his eyes at me and said it would take a long time and add over $1000 to my bill if that's what I wanted. He talked me into cutting off the door handle indents on the fibreglass and then fitting the Sheridan rear quarters directly over the original metal fenders...leaving about 3" of exposed original bodywork. This allows you some extra room to fill and blend. Of course the fibreglass tapers a bit after sanding..just make sure you have a 1-1 1/2" of bonded fibreglass all around the perimeter. You do the same thing with the front flaires. You cut off about 2+ inches of the Sheridan fenders along the perimeter of the front door gap. This will allow enough spacing to effectively taper & fill in order to create a continuous smooth flowing look right into the original metal. The 2 inches in front of your door gap and the 2-3" inches of space surrounding your indented door handle area will be original sheet metal. I have a few pics I can send you...but they are not digital and have to be scanned. Problem is my scanner software went down. I'll shoot these pics off as soon as it is back up. My body work hasn't cracked or failed me in any way and it's been bonded to my car for almost three years. (IMG:http://www.914world.com/bbs2/html/emoticons/biggrin.gif) (IMG:http://www.914world.com/bbs2/html/emoticons/aktion035.gif) (IMG:http://www.914world.com/bbs2/html/emoticons/driving.gif) Regards, Bill Attached image(s) 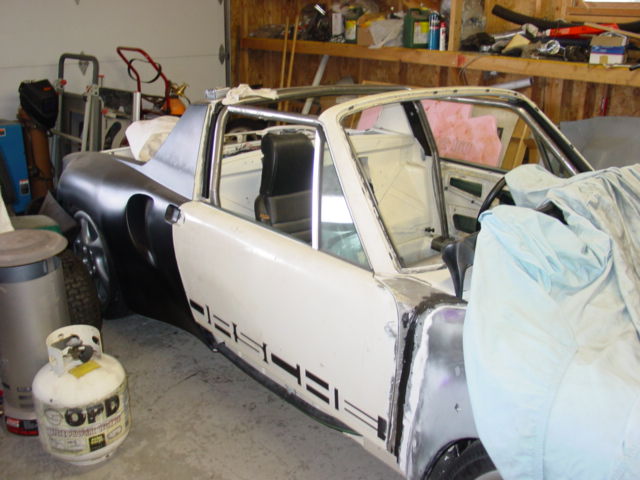
|
|
|
|
| Dr. Roger |
Mar 15 2006, 05:18 PM
Post
#26
|
|
A bat out of hell. Group: Members Posts: 3,944 Joined: 31-January 05 From: Hercules, California Member No.: 3,533 Region Association: Northern California |
wow bill,
that's exactly what i needed to know. which adhesive did you use??? are your fenders being held on 100% by adhesive or is there a combo of screws and adhesive? i ask only because i was thinking of counter sinking the fenders and screwing as a backup measure. dang you guys kick some serious @ss!!!! THANKS! (IMG:http://www.914world.com/bbs2/html/emoticons/biggrin.gif) (IMG:http://www.914world.com/bbs2/html/emoticons/laugh.gif) (IMG:http://www.914world.com/bbs2/html/emoticons/beerchug.gif) (IMG:http://www.914world.com/bbs2/html/emoticons/smilie_pokal.gif) |
|
|
|
| byndbad914 |
Mar 15 2006, 05:39 PM
Post
#27
|
|
shoehorn and some butter - it fits Group: Members Posts: 1,547 Joined: 23-January 06 From: Broomfield, CO Member No.: 5,463 Region Association: None |
My fenders... I trimmed the edges to perfectly match the slope of the original door jamb and laid the fiberglass right over the original fender. I have about a 3" section of the old fender that I attached the Dzus wires to. I did have to cut out the back edge of the pocket in the factory fender to get it to fit right.
You don't have to completely remove the fender to put the glass work on as I didn't want to have to go back and weld in a bunch of mount tabs when I could just drill the fender and rivet the wires to it. btw Steve - love your car - saw it at Willow a couple years ago (I immediately recognize any fellow Sheridan kit owner) and great work... Attached image(s) 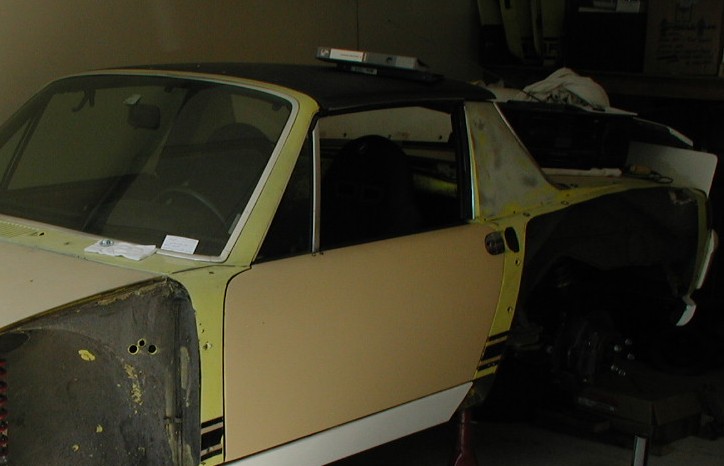
|
|
|
|
| byndbad914 |
Mar 15 2006, 05:41 PM
Post
#28
|
|
shoehorn and some butter - it fits Group: Members Posts: 1,547 Joined: 23-January 06 From: Broomfield, CO Member No.: 5,463 Region Association: None |
I trimmed the lips off unlike Steve, but that is just personal preference. My door gaps worked out better doing it that way...
going back to your first post, your "lips" are already gone as well. I would suggest lining the fender up (since it has been cut already) by eyeballing the fender opening to the tire and getting that centered. Then, see if you can trim that front edge to fit, or maybe you want to cut back a ways and blend in with bodywork... maybe I read through too quickly and missed it - but do you intend to permanently fix these or Dzus them? Attached image(s) 
|
|
|
|
| wbergtho |
Mar 15 2006, 05:54 PM
Post
#29
|
|
Senior Member Group: Members Posts: 1,314 Joined: 28-April 03 From: Roberts, WI Member No.: 623 |
Message for the "Good Dr.",
Roger, I used the screws only to help snug the fibreglass to the metal while the adhesive set. The next day I discarded them into the trash. The entire Sheridan body work is bonded w/out any screws. I'm afraid you may get pops (like drywall scew heads popping). The adhesive is a special 2 part adhesive (expensive) made by 3M. Go to any good autobody supply shop. There is a special gun they rent/sell you for its application. There may be other space aged adhesives out there that will work...but as always...I did alot of research before using just any old glue. It has micro particles in the adhesive to keep the adhesive from entirely squeezing out of the way when you apply pressure (screws). It is very strong stuff. You could glue a hook onto your car and dangle it from a crane 24 hrs later. Bill Attached image(s) 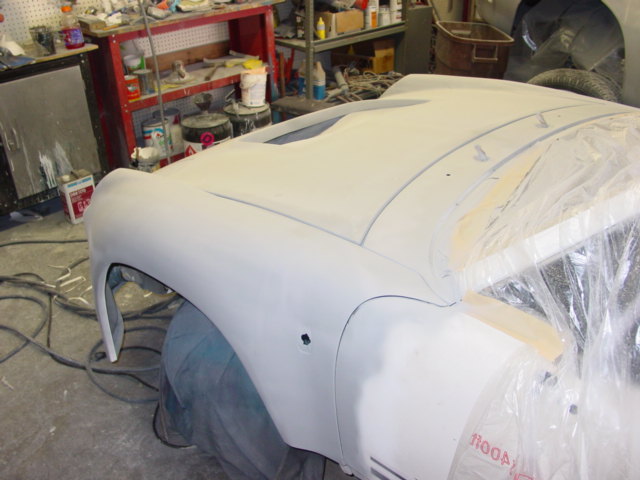
|
|
|
|
| SirAndy |
Mar 15 2006, 06:05 PM
Post
#30
|
|
Resident German Group: Admin Posts: 42,234 Joined: 21-January 03 From: Oakland, Kalifornia Member No.: 179 Region Association: Northern California |
QUOTE(Dr. Roger @ Mar 15 2006, 03:18 PM) i ask only because i was thinking of counter sinking the fenders and screwing as a backup measure. don't! it *will* crack if you do both, adhesive and screws/rivets ... the FG to metal adhesive these days is stronger than welding! ask scott at yeamans autobody for the exact stuff they use ... (IMG:style_emoticons/default/cool_shades.gif) Andy |
|
|
|
| Dr. Roger |
Mar 15 2006, 07:40 PM
Post
#31
|
|
A bat out of hell. Group: Members Posts: 3,944 Joined: 31-January 05 From: Hercules, California Member No.: 3,533 Region Association: Northern California |
does anyone see any reason why i shouldn't glue the FG fender to the underside of the remaining 2" of perimeter steel? (by leaving a few inches of steel fender around the circumference)
this could potentially eliminate feathering down the FG to match the steel fenders. |
|
|
|
| wbergtho |
Mar 15 2006, 09:25 PM
Post
#32
|
|
Senior Member Group: Members Posts: 1,314 Joined: 28-April 03 From: Roberts, WI Member No.: 623 |
Dr. Roger,
I understand that you are trying to avoid grinding your FG to a taper...but if you have at least 1" of adhesive contact under 1/8" thick or thicker fibreglass you'll be just fine. You definitely want to avoid grinding down 90% of the contact area. Something tells me the FG fenders won't fit as well on the inside lip of the existing sheetmetal as opposed to the outside. These flairs were designed and molded to fit right over the existing body work. |
|
|
|
|
1 User(s) are reading this topic (1 Guests and 0 Anonymous Users)
0 Members:

|
Lo-Fi Version | Time is now: 3rd July 2025 - 10:55 AM |
Invision Power Board
v9.1.4 © 2025 IPS, Inc.