|
|

|
Porsche, and the Porsche crest are registered trademarks of Dr. Ing. h.c. F. Porsche AG.
This site is not affiliated with Porsche in any way. Its only purpose is to provide an online forum for car enthusiasts. All other trademarks are property of their respective owners. |
|
|
  |
| Andyrew |
 Apr 21 2006, 05:43 PM Apr 21 2006, 05:43 PM
Post
#1
|
|
Spooling.... Please wait           Group: Members Posts: 13,380 Joined: 20-January 03 From: Riverbank, Ca Member No.: 172 Region Association: Northern California 
|
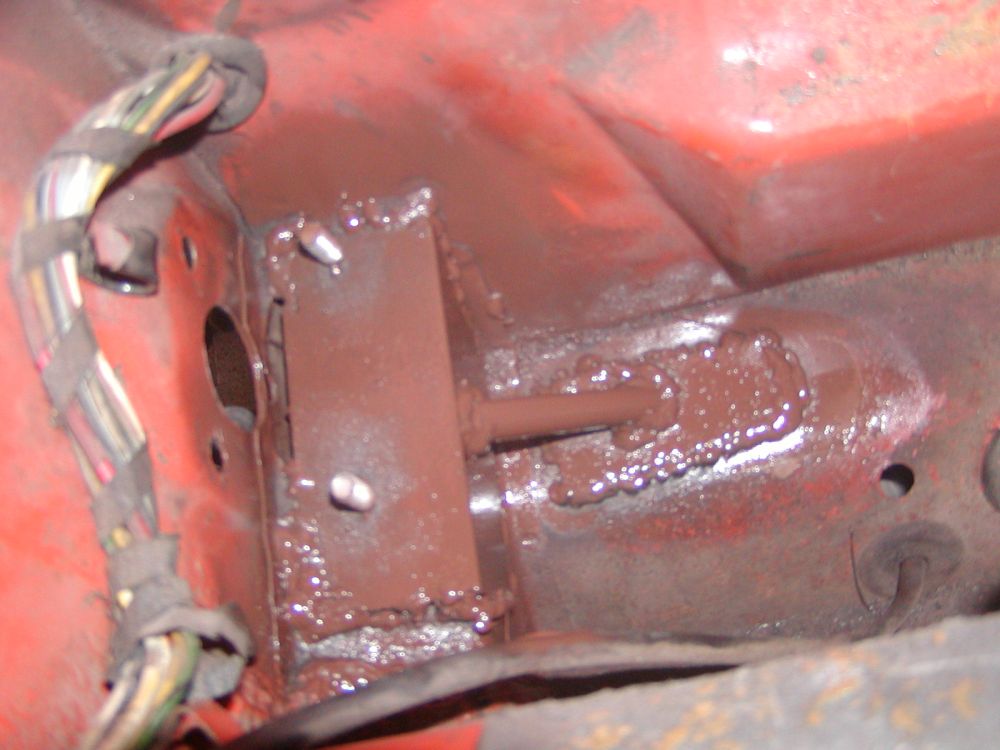
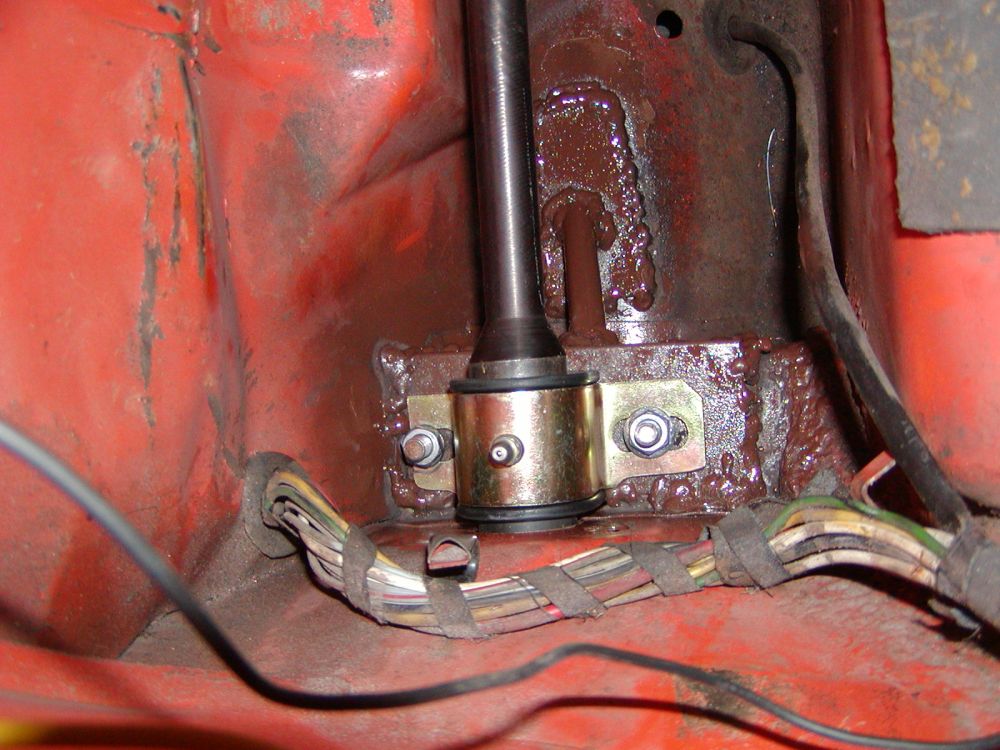
Well, heres what i've been doing past couple of days, between work...
Dad told me to make it strong enough to lift the car... so hopefully I did.. My welds were not what I would have liked them to be.. there was something wrong with my welder, it was giving me inconsistant wire speed. I'll take it in and have it looked at. and the angles were hard... I can make good welds.. Honest (IMG:style_emoticons/default/biggrin.gif) (IMG:style_emoticons/default/welder.gif) bla bla bla... heres the pics 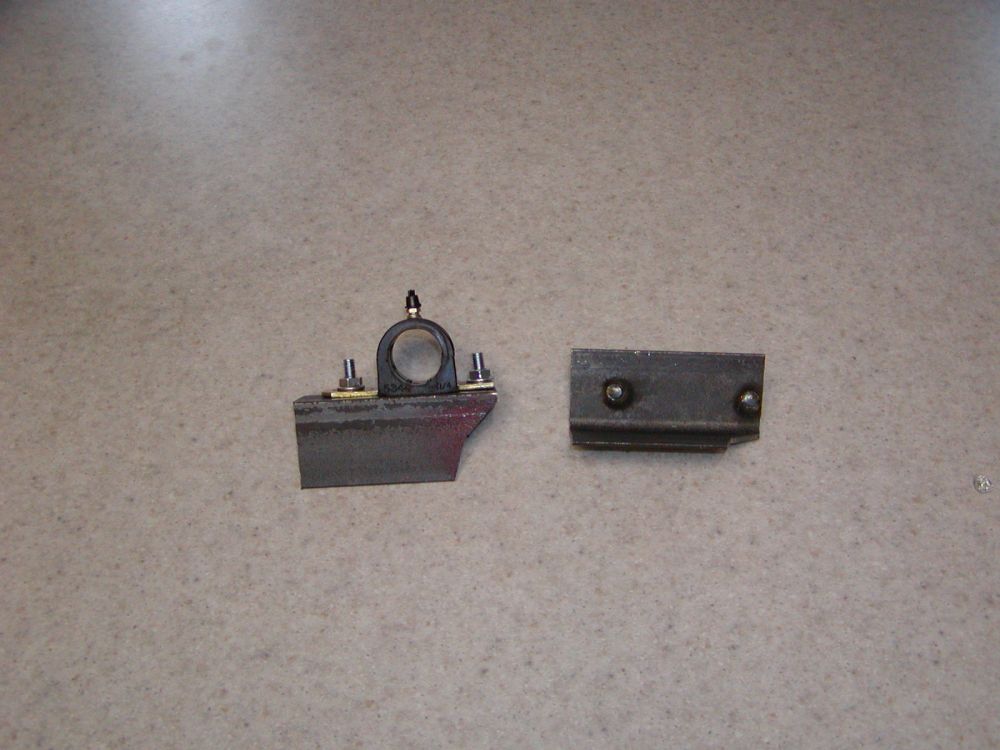 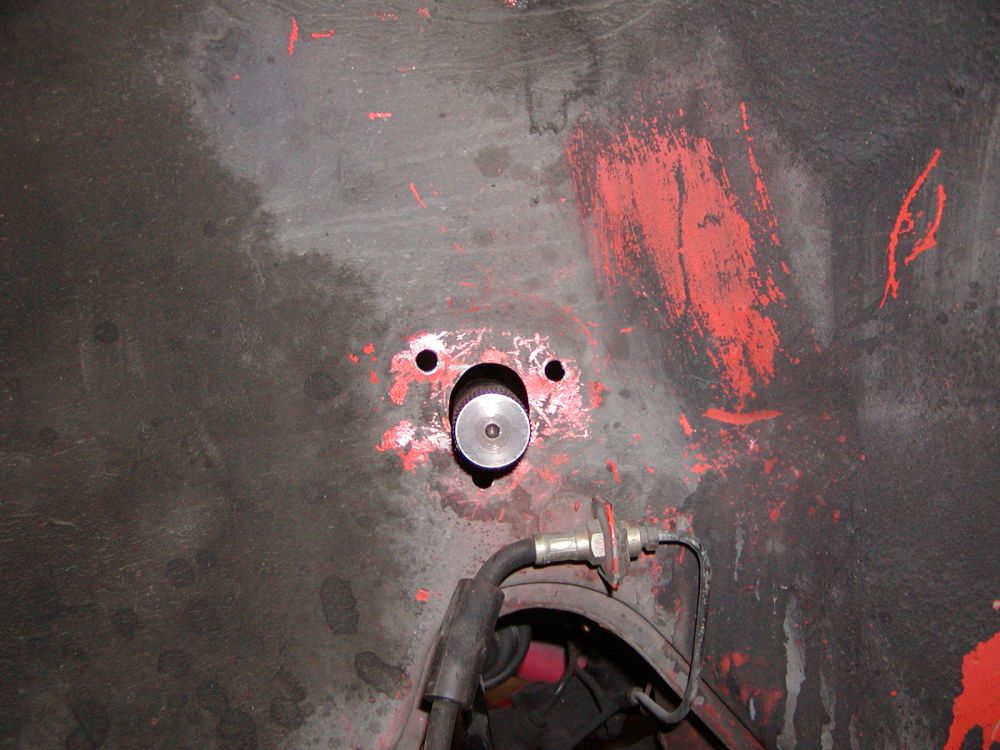 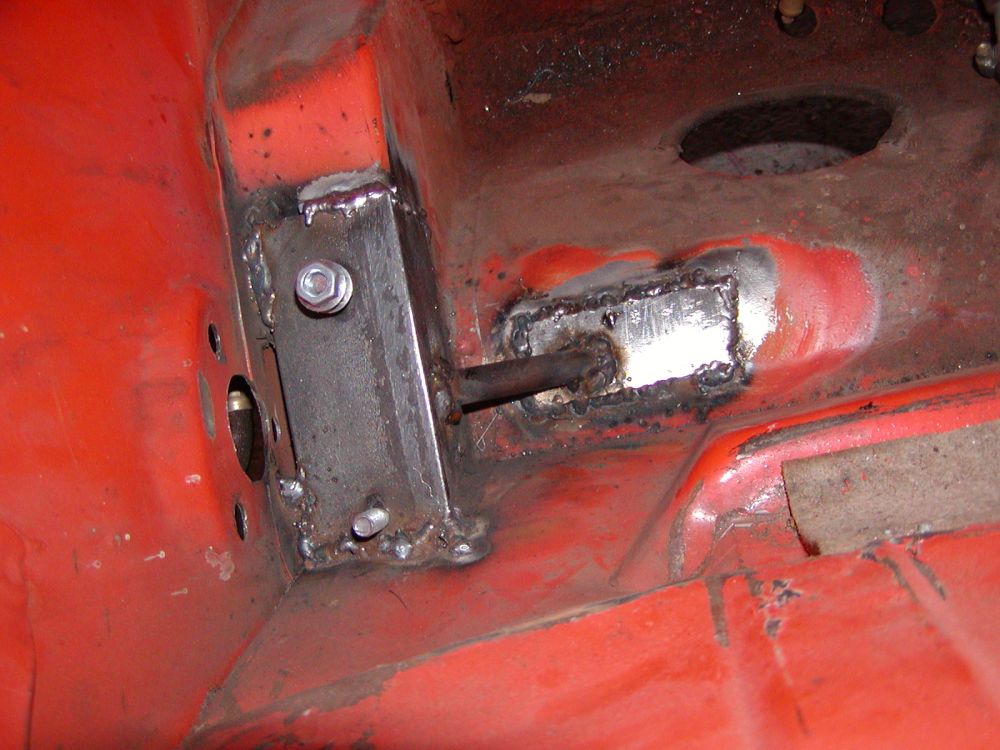 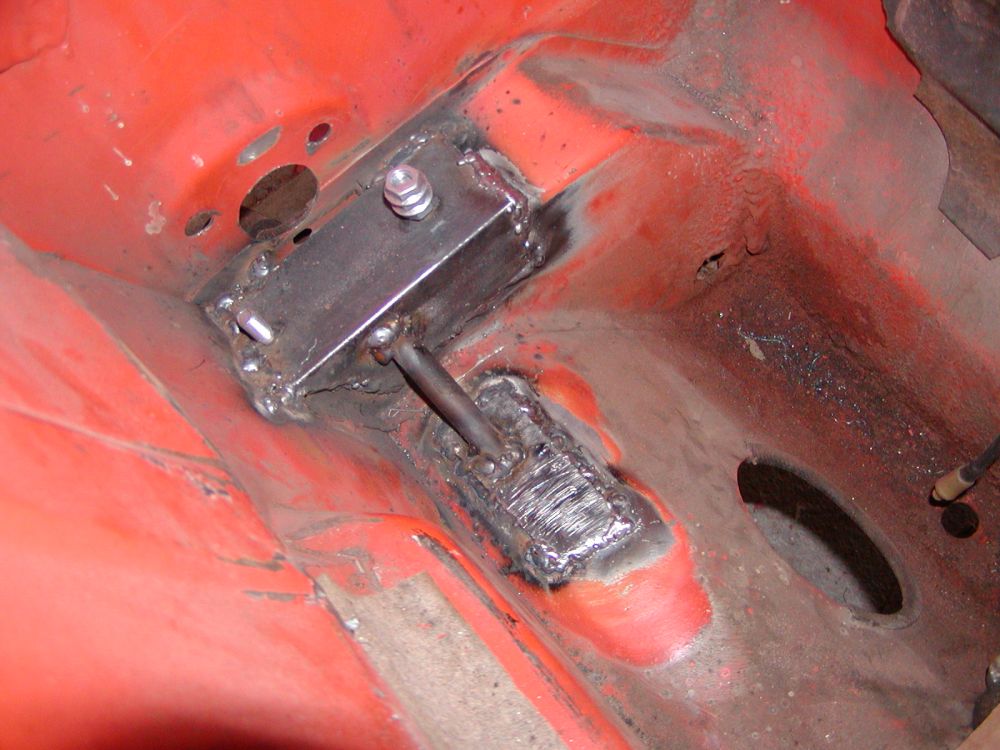 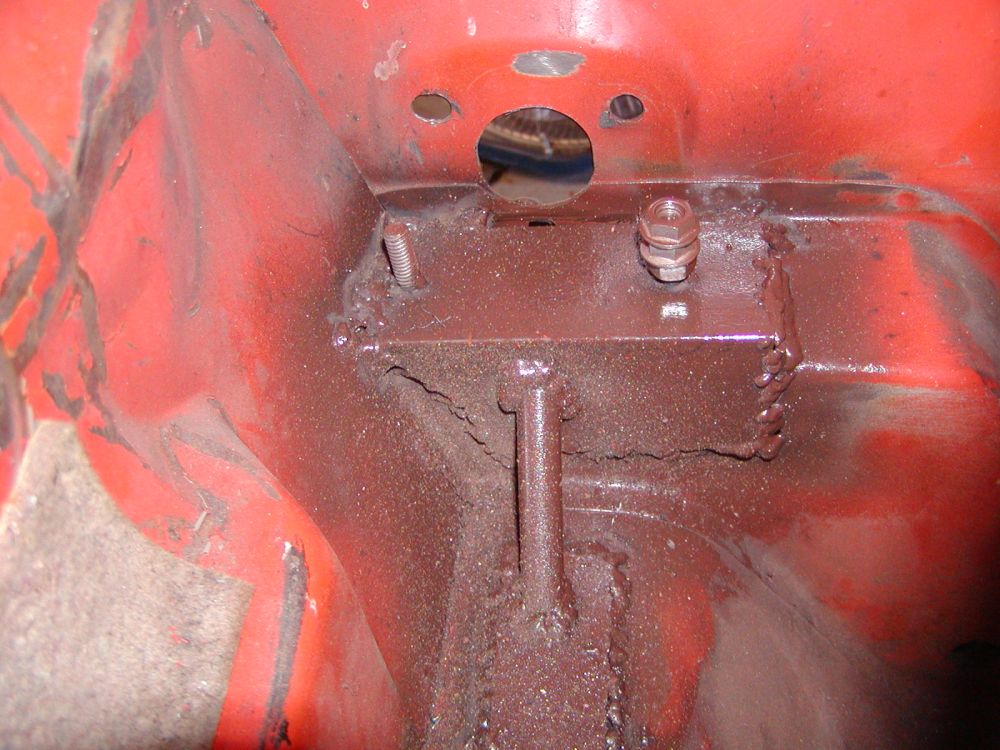 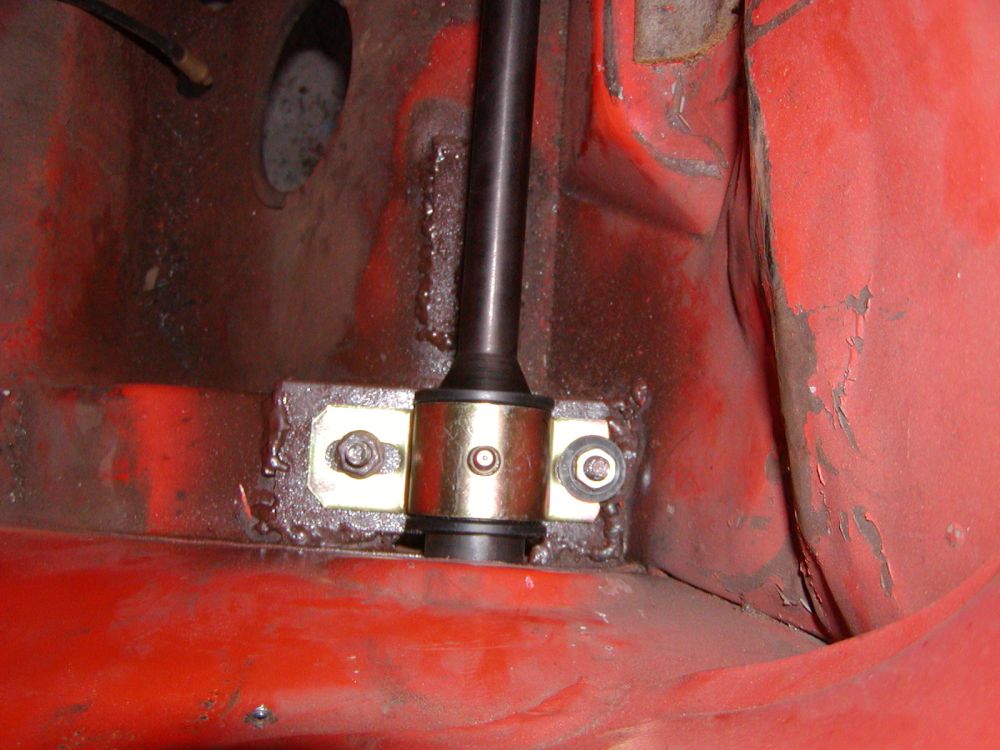 |
| Andyrew |
 Apr 21 2006, 05:46 PM Apr 21 2006, 05:46 PM
Post
#2
|
|
Spooling.... Please wait           Group: Members Posts: 13,380 Joined: 20-January 03 From: Riverbank, Ca Member No.: 172 Region Association: Northern California 
|
|
| Brando |
 Apr 21 2006, 07:33 PM Apr 21 2006, 07:33 PM
Post
#3
|
|
BUY MY SPARE KIDNEY!!!     Group: Members Posts: 3,935 Joined: 29-August 04 From: Santa Ana, CA Member No.: 2,648 Region Association: Southern California |
1.5" swaybar?
That is cool! Any gas-tank clearance issues? Or are you going with a fuel cell up front? |
| Trekkor |
 Apr 21 2006, 10:07 PM Apr 21 2006, 10:07 PM
Post
#4
|
|
I do things...      Group: Members Posts: 7,809 Joined: 2-December 03 From: Napa, Ca Member No.: 1,413 Region Association: Northern California |
I like where this is heading. (IMG:style_emoticons/default/clap56.gif)
On the welder, check the tensioner wheel in the cabinet where the wire feeds. If it's too tight, it'll sput n' sput. KT |
| Aaron Cox |
 Apr 21 2006, 10:11 PM Apr 21 2006, 10:11 PM
Post
#5
|
|
Professional Lawn Dart                Group: Retired Admin Posts: 24,542 Joined: 1-February 03 From: Corona, CA Member No.: 219 Region Association: Southern California |
yummy! "Goober welds" (IMG:style_emoticons/default/chowtime.gif)
neat mounting idea!! your car oversteers with all that meet back there???? sounds like you are possibly working on the wrong end - got a 'big'ol nascar rear bar?" |
| Andyrew |
 Apr 22 2006, 04:39 AM Apr 22 2006, 04:39 AM
Post
#6
|
|
Spooling.... Please wait           Group: Members Posts: 13,380 Joined: 20-January 03 From: Riverbank, Ca Member No.: 172 Region Association: Northern California 
|
The hardest part so far was getting it correct in geometry.. all I basically did for that was bolt the bar with the bushing to my mount, placed it in, got it where I liked it, and tacked it in... Simple actually...
But the next hardest part is the droplinks... The current sway bar arms are FAT... 10lbs a piece!!! and they are LONG... uber uber long.. So i figure, I could cut them off about 1/2 inch off the last neccesary part for the arm.. and weld on some square tubing. 1/8in, 1x1 or maybe bigger cut a long hole on the bottom, and about 5 or more holes on the sides to place the droplinks. Droplinks can be made using some good hardware so they pivot a little.. Then maybe put a bushing on the bottom where it attaches to the A arm... Main reason for me to have this sway bar is for adjustablity.. On the track, dial the bar down... on the autox and street, dial it up! (street corners dont see over 40mph....) Currently no sway bar on the rear... It would be too much rear... I believe this will put me very near neutral.. I might have to go with a bigger bar.. but those are readily avalible and just drop right in (goody goody cheepo nascar parts..) Andrew |
| marks914 |
 Apr 22 2006, 06:09 AM Apr 22 2006, 06:09 AM
Post
#7
|
|
Senior Member    Group: Members Posts: 845 Joined: 9-October 04 From: the motor city Member No.: 2,912 Region Association: None |
Nice,
I am currently considering the same thing, I like how you mounted the bushings, that is the part I couldn't figure out. Can't wait to see the next step. Mark |
| Thorshammer |
 Apr 22 2006, 12:12 PM Apr 22 2006, 12:12 PM
Post
#8
|
|
Senior Member    Group: Members Posts: 749 Joined: 11-November 03 Member No.: 1,335 |
This is a difficult job, and your solution is rather clever. spread the load out, nice, heres why you have had some probems welding this, I am not a welder, but when I started with my 110 VAC mig welder, my beads looked like yours. First, You have removed the paint from the car, but the metal you are using has a corrosion coating on it that must be ground off at least 1 inch back, so the heat does not allow it to migrate into the weld, this will account for the splatter. That is why the lower piece looks a little better. Second, it is always hard to weld different thicknesses of material and get a good weld, The secret as I have found it is to concentrate the heat on the thicker material and then move the torch (wire feed) over just a bit to fuse the thinner material. This may not be the proper method (I did say I am not a welder), but it has worked for me. I also run a very stiff front sway bar, 1 1/8 hollow, .110 wall thickness. It runs in needle bearings, it was very important to get the bearings in the same plane. or the bar will bind. Good luck on welding, You know, most welders will spend a few minutes with you and teach you some basics, and for me it was the difference between welding and slag. Good luck, Erik Madsen |
| Andyrew |
 Apr 22 2006, 02:25 PM Apr 22 2006, 02:25 PM
Post
#9
|
|
Spooling.... Please wait           Group: Members Posts: 13,380 Joined: 20-January 03 From: Riverbank, Ca Member No.: 172 Region Association: Northern California 
|
Eric... I know how to weld... but its configuring the welder that im not the best with.
I can lay and join beads very nicely.. I've seam welded the whole targa bar very nicely and did all of the engman long kit, and many numerous other things... The welder was craping out on me and giving me inconsistant feed, something was holding it up. Like I said, im going to have it looked at. I ground down the paint as best as I could with the tools that I had. I decreased the load on the spool, and increased the load on the wire feed, toyed with the wire speed and wire heat... and even reversed the polarity on the welder! (oddly reversing the polarity gave me a more consistant weld... but didnt give me the buzz) Andrew |
| neo914-6 |
 Apr 22 2006, 03:53 PM Apr 22 2006, 03:53 PM
Post
#10
|
|
neo life      Group: Members Posts: 5,086 Joined: 16-January 03 From: Willow Glen (San Jose) Member No.: 159 |
Are those grease fittings that will be buried under the tank? Suppose this won't be done too often...
Nice adaptation, when will the NASCAR motor go in? (IMG:style_emoticons/default/biggrin.gif) When will you be running? Chris, Harry, and Bud are running... |
| Mike T |
 Apr 22 2006, 04:20 PM Apr 22 2006, 04:20 PM
Post
#11
|
|
can't 'member   Group: Members Posts: 378 Joined: 16-January 03 From: Brackney, PA Member No.: 161 |
Great solution. Love the mini brace.
What length bar did you use? Dia? Mike T |
| Andyrew |
 Apr 22 2006, 05:04 PM Apr 22 2006, 05:04 PM
Post
#12
|
|
Spooling.... Please wait           Group: Members Posts: 13,380 Joined: 20-January 03 From: Riverbank, Ca Member No.: 172 Region Association: Northern California 
|
Are those grease fittings that will be buried under the tank? Suppose this won't be done too often... Nice adaptation, when will the NASCAR motor go in? (IMG:style_emoticons/default/biggrin.gif) When will you be running? Chris, Harry, and Bud are running... buried... lol Well it was either greasable or non greasable.. (or roller... but that would have been $$ and alot more fabrication...) I figured, why not go greesable...I can make a hole in the firewall to put a grease gun through.. but im not worried about it. Takes 10 minutes to move a gas tank around to have room to greese it (the gas tank is actually still installed. just moved off..) Nascar motor? next year... Sorry.. Bar Dia is 1 1/4 on the big side and 3/4 on the small side. solid tube. I figure the metal is much stronger, its not 3/4 all the way through, and its shorter (37.5in, firewall is 32in or so) so it should be stiffer than a 19mm sway bar, probably more like 21 or bigger.. So far it cost 75 for the bar and arms 15 for the metal 15 for the bushings 20 for the wire and gas to weld it.. (rounded way up... lol) and probably about 50 in more metal and rod ends. (coleman) Better than a $500 sway bar... Andrew Oh ya.. I'll be up and running... never.. Mike P's trani seems like its locked between gears, so I think it HAS to be rebuilt.. so if I want this thing running quickly I'll have to make this a 2 step process.. If I just wanted it running... it would be about another month.. to throw everything in, and finish the sway bar. (and to get money for the tires... lol) If I wanted it painted, interior done, my bracing done, front hood done, radiator shrouding done, 944 turbo front bumper done, and 915 lsd trani in... probably 3-6 months. ie end of summer. FYI felix, Im planning on an American Graffiti party at my house... |
  |
1 User(s) are reading this topic (1 Guests and 0 Anonymous Users)
0 Members:

|
Lo-Fi Version | Time is now: 30th June 2025 - 08:01 PM |
Invision Power Board
v9.1.4 © 2025 IPS, Inc.


