|
|
|
Porsche, and the Porsche crest are registered trademarks of Dr. Ing. h.c. F. Porsche AG.
This site is not affiliated with Porsche in any way. Its only purpose is to provide an online forum for car enthusiasts. All other trademarks are property of their respective owners. |
|
|

  |

| charliew |
 Mar 24 2009, 09:52 PM Mar 24 2009, 09:52 PM
Post
#221
|
|
Advanced Member  Group: Members Posts: 2,363 Joined: 31-July 07 From: Crawford, TX. Member No.: 7,958 |
When I was modding my son's ic lines for his sti I got my bends from
http://www.stainlessworks.net They are not cheap but the stuff is good. Another solution is to buy knock off stuff on ebay and cut it up for the bends. I bought a sti downpipe that goes from the turbo to the muffler, about 5 feet long 3.0 od polished for not much I really don't remember but it will make most of the rear exhaust for the suby. The polished ss muffler with 3.0 od inlet and outlet was a different story. |
   |

 
|
| GS Guy |
Mar 25 2009, 02:25 PM
Post
#222
|
|
Member Group: Members Posts: 243 Joined: 8-July 04 From: Columbia, MD Member No.: 2,325 Region Association: North East States |
Best "coolant materials" article I know of.
http://www.rjes.com/html/material_choice.html According to this, a mix of steel (iron) and aluminum is OK, more noble materials like brass, copper and stainless steel to be avoided except in very small amounts. Another source for SS elbows, seems to be a good compromise for quality (304 available) and price (much less than Burns). Custom bends too! http://www.mandrelbendingsolutions.com/servlet/StoreFront Jeff |
|
|
|
| Amenson |
Mar 25 2009, 08:16 PM
Post
#223
|
|
That's opposite lock!! Group: Members Posts: 645 Joined: 27-May 05 From: Dublin, OH Member No.: 4,154 Region Association: None |
QUOTE(GS Guy @ Mar 25 2009, 12:25 PM)  Best "coolant materials" article I know of. http://www.rjes.com/html/material_choice.html According to this, a mix of steel (iron) and aluminum is OK, more noble materials like brass, copper and stainless steel to be avoided except in very small amounts. Another source for SS elbows, seems to be a good compromise for quality (304 available) and price (much less than Burns). Custom bends too! http://www.mandrelbendingsolutions.com/servlet/StoreFront Jeff Now those are some compelling articles. I am going to have to strongly consider going to aluminum. (IMG:style_emoticons/default/sad.gif) Scott |
|
|
|
| Amenson |
Jun 8 2009, 09:10 PM
Post
#224
|
|
That's opposite lock!! Group: Members Posts: 645 Joined: 27-May 05 From: Dublin, OH Member No.: 4,154 Region Association: None |
I figured that it was time for another post and looking back at my pictures, one is long overdue.
One of the things distracting me from the forum is my new RC heli. This is my 4th bird and by far the best. It is an Align Trex 250. Not really relivant to my PorSti build thread but I did build it (IMG:style_emoticons/default/smash.gif) . Started like this... 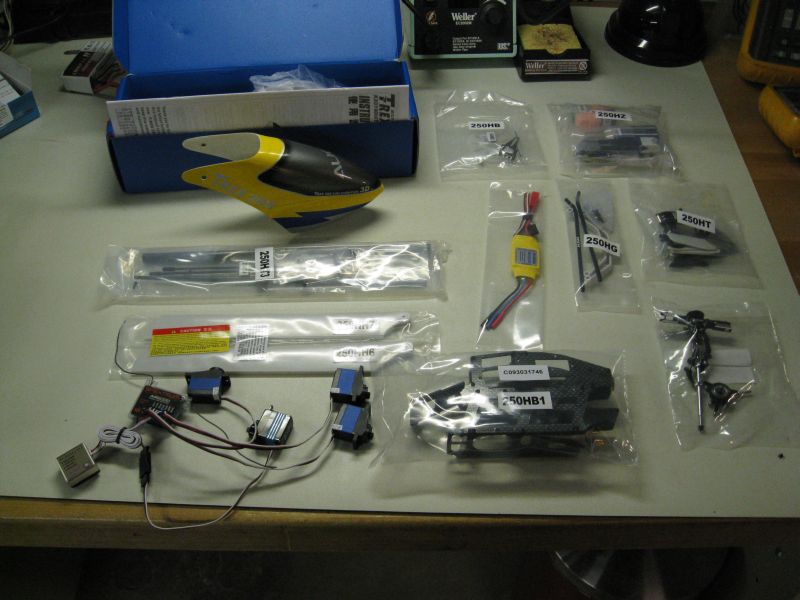 ...and ended up like this. 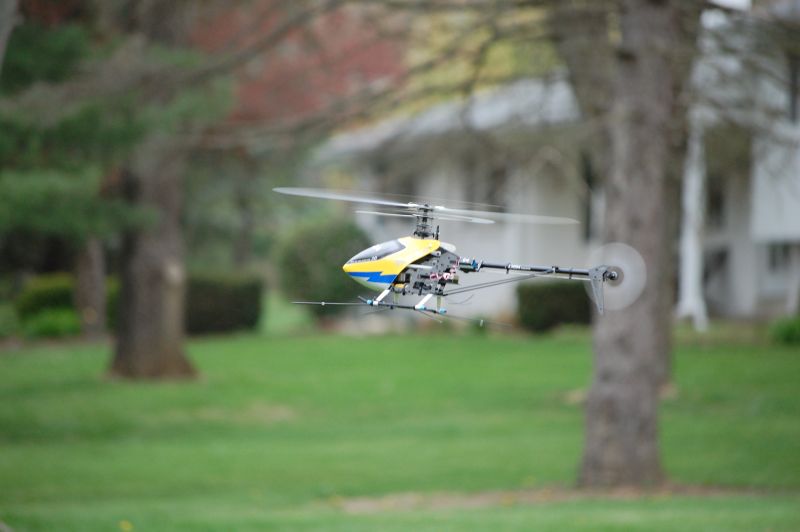 Now on to the real stuff. I finally have my new axles assembled. Mmmm, pretty 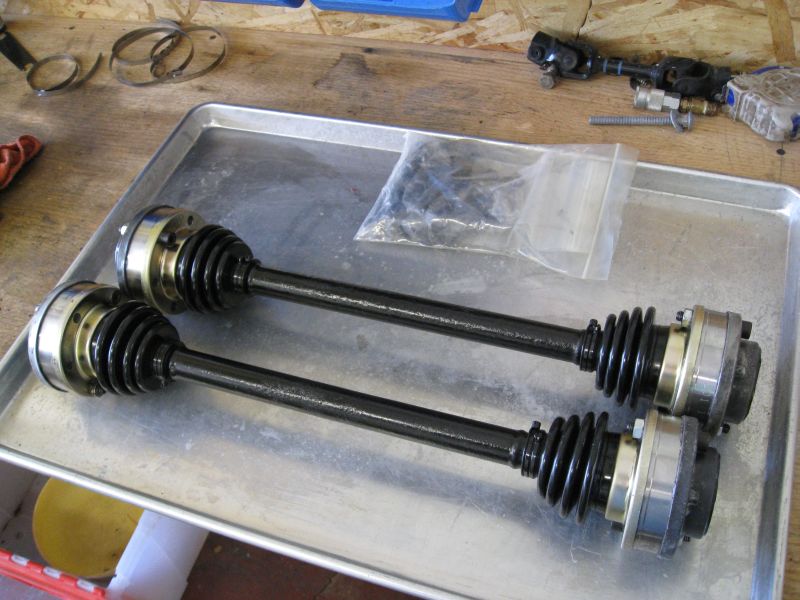 Probably not a new technique but it was novel to me. I used the old CV boots and a little plastic to make covers so that the packed CV's would not get nasty grease all over the place. 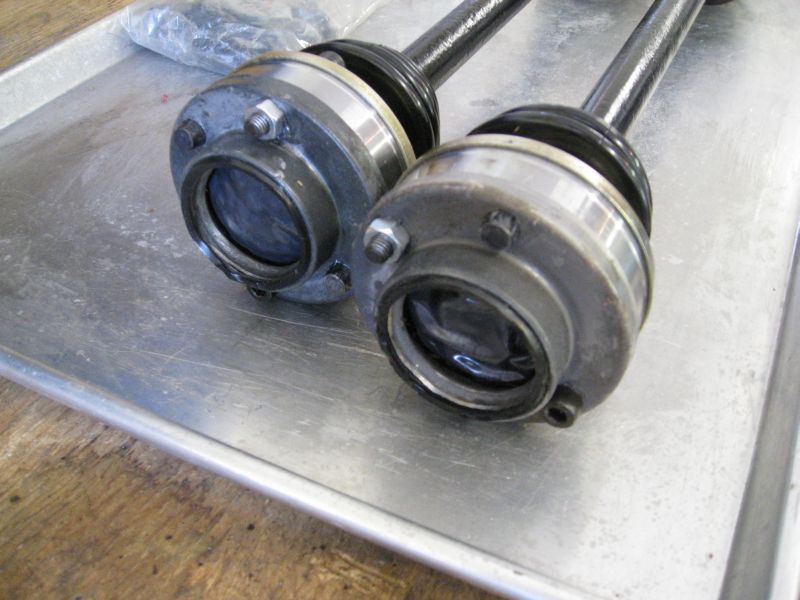 With the help of my Father I now have a battery box for the new tiny battery. I drew up the pattern, he had one of the guys at his work bend it from SS and I tig'ed it together. 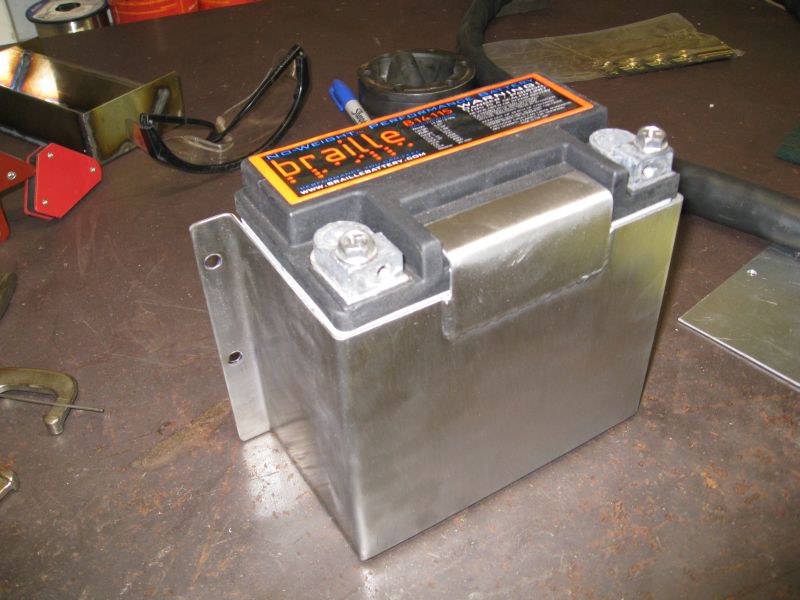 ... |
|
|
|
| Amenson |
Jun 8 2009, 09:24 PM
Post
#225
|
|
That's opposite lock!! Group: Members Posts: 645 Joined: 27-May 05 From: Dublin, OH Member No.: 4,154 Region Association: None |
...
Bottom View (just to show the nice welds (IMG:style_emoticons/default/welder.gif) ) 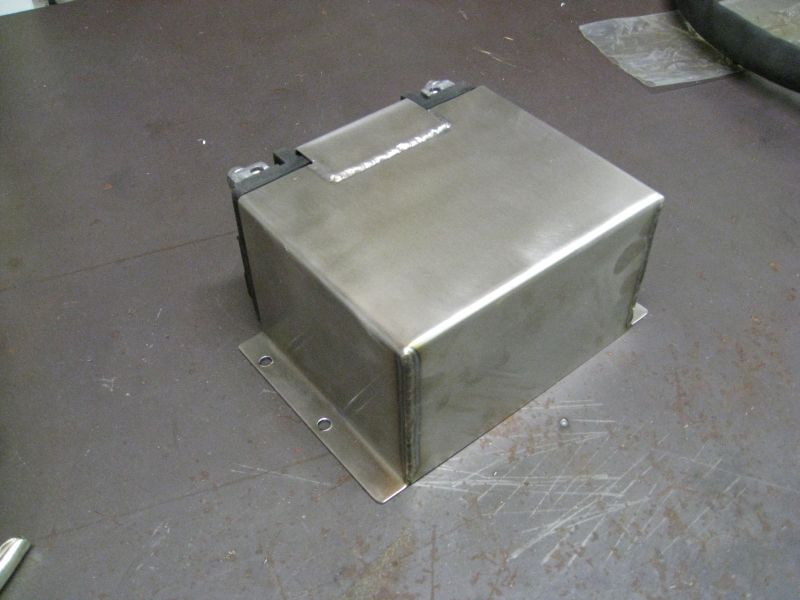 My Mother took a cool picture of me welding while they visited. Not making a car part though...I needed a banzai tray so I fabbed one up. 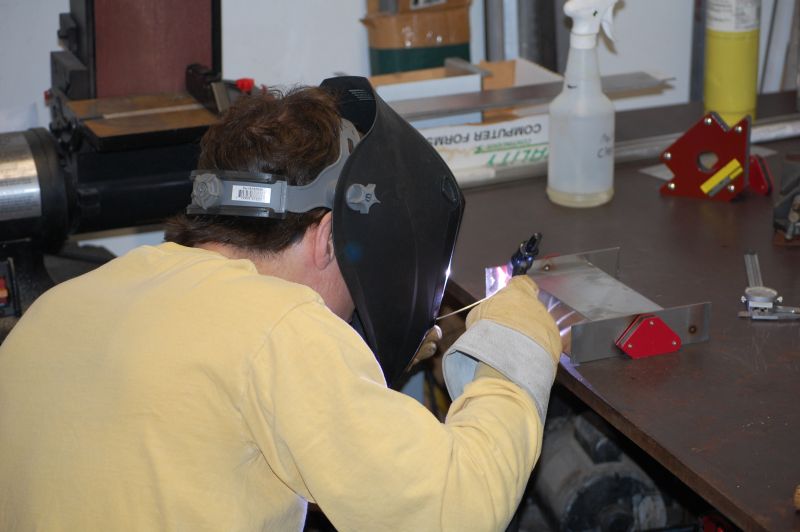 In the car. 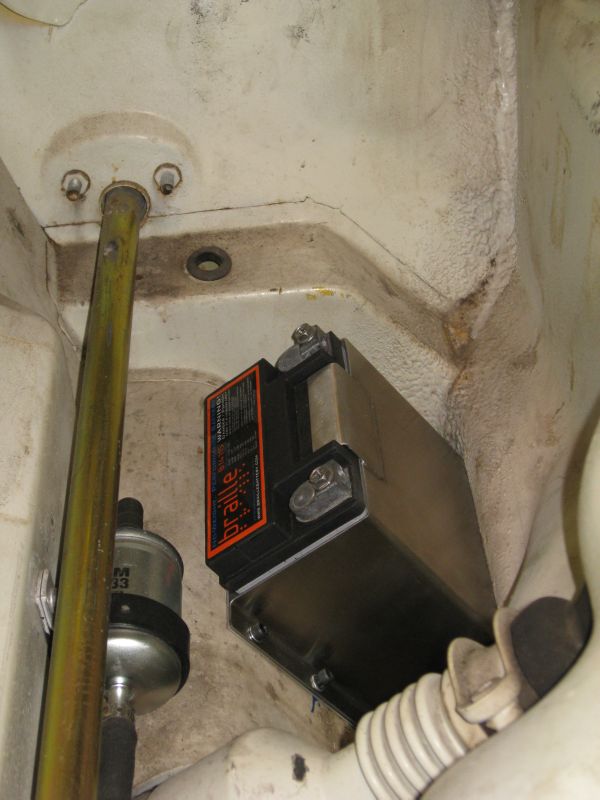 The next task was to install the new pedals but I need a new MIG before I could get started. After months of searching I found the right machine at the right price. The guy I purchased it from said that he had waxed it a few times, I did not belive him until I pulled the covers off and found wax residue stuck in the seams. 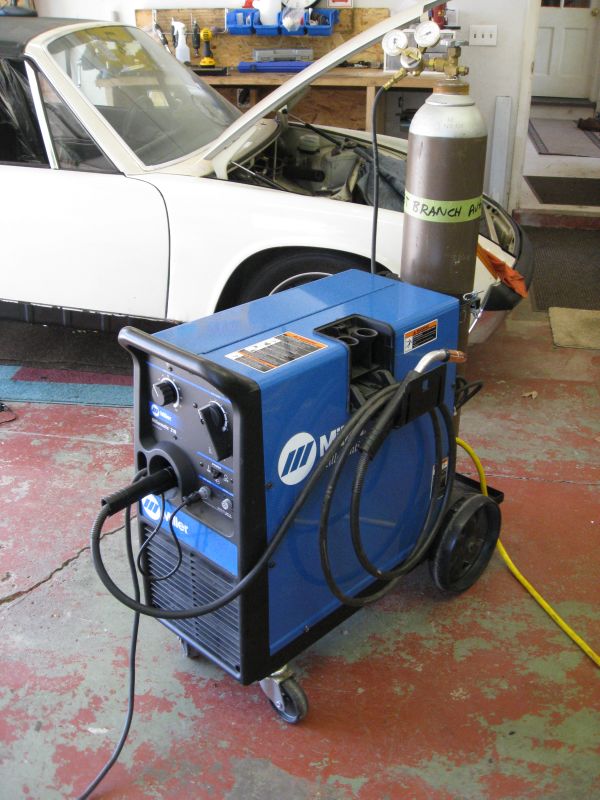 Pedals Set in place with the new base plate before cutting/welding. 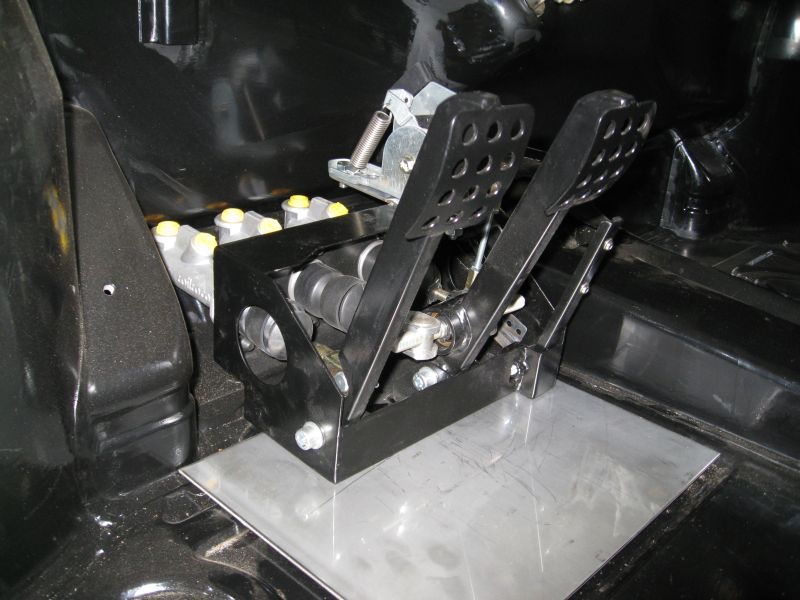 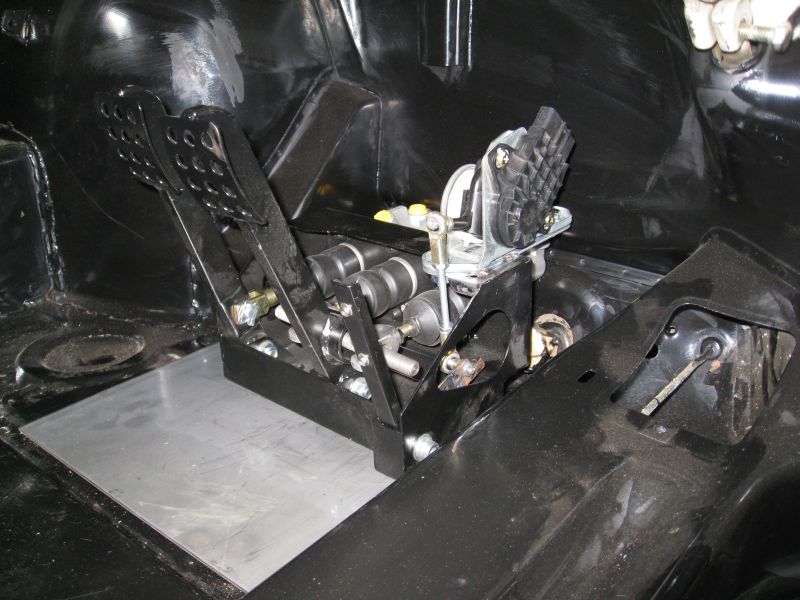 ... |
|
|
|
| Amenson |
Jun 8 2009, 09:32 PM
Post
#226
|
|
That's opposite lock!! Group: Members Posts: 645 Joined: 27-May 05 From: Dublin, OH Member No.: 4,154 Region Association: None |
...
I welded an edge to support the back corner in the dip where the stock pedals mount. 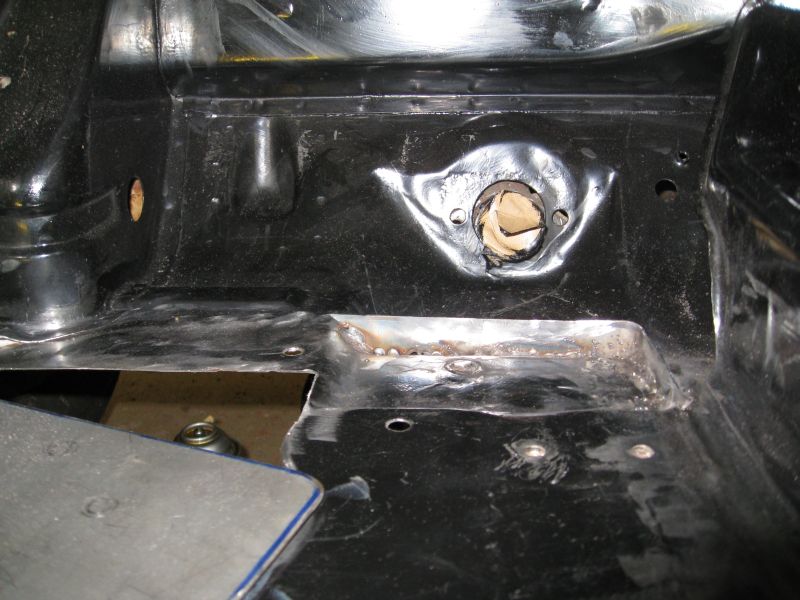 Tacked in place from the top: 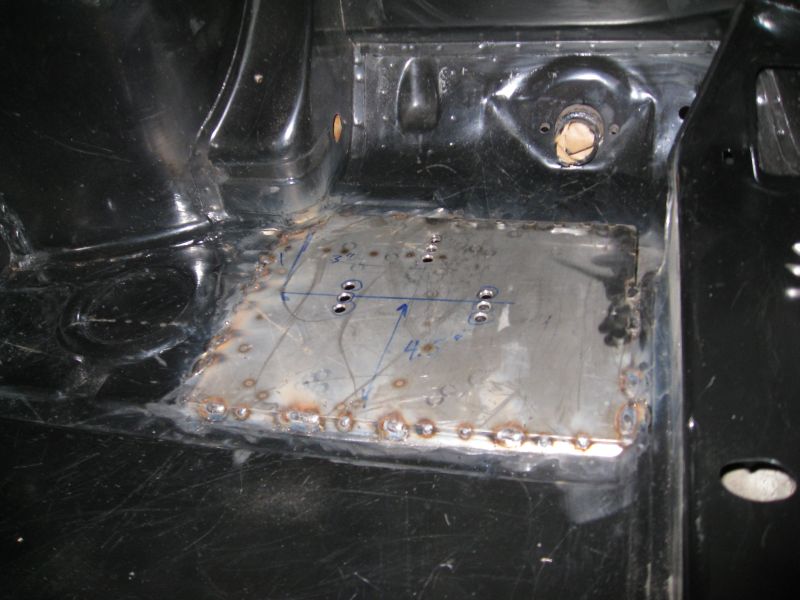 Tacked in place from the bottom:  Back corner support after welding: 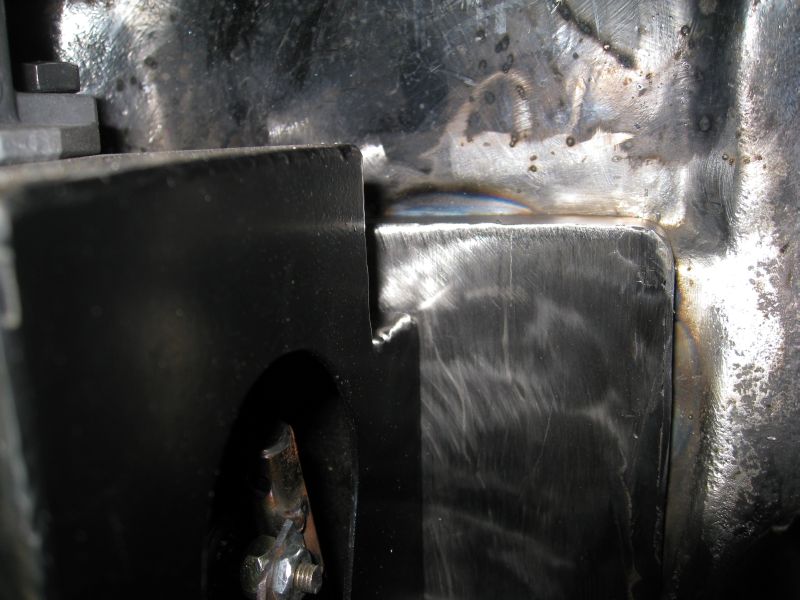 After getting the mount in place it was time to fab up the switch/sensor mounts. Finished throttle sensor mount: 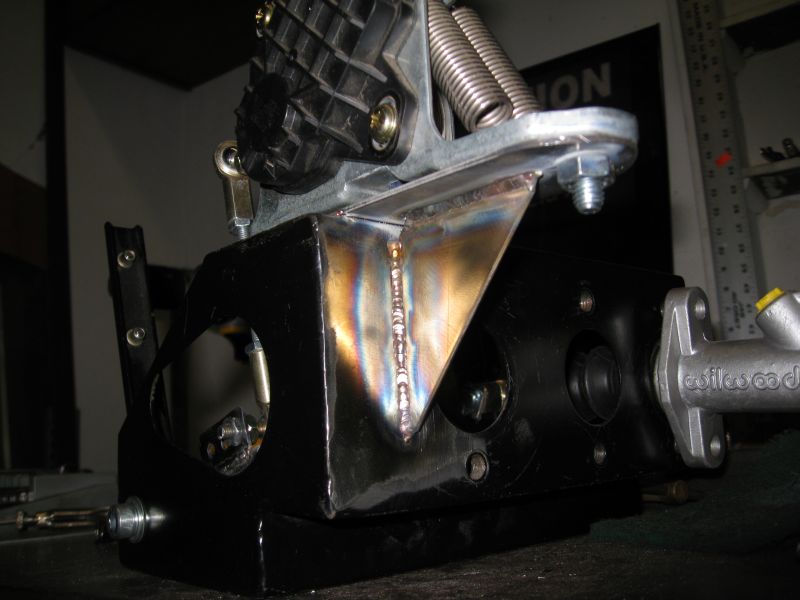 Linkage: 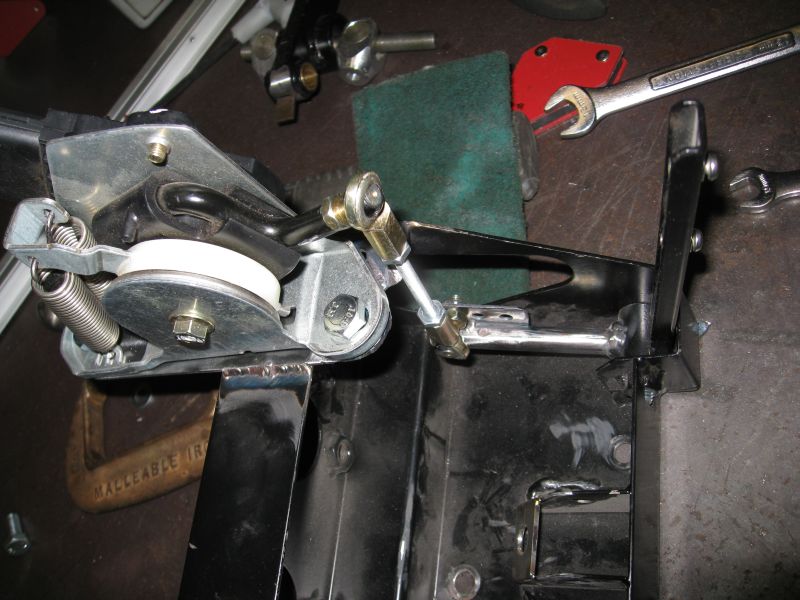 ... |
|
|
|
| Amenson |
Jun 8 2009, 09:46 PM
Post
#227
|
|
That's opposite lock!! Group: Members Posts: 645 Joined: 27-May 05 From: Dublin, OH Member No.: 4,154 Region Association: None |
...
Clutch switch/pedal stop (Can you spot the TIG weld that I buggered up so badly that I had to grind it. Just when I think that I am getting good I really mess something up): 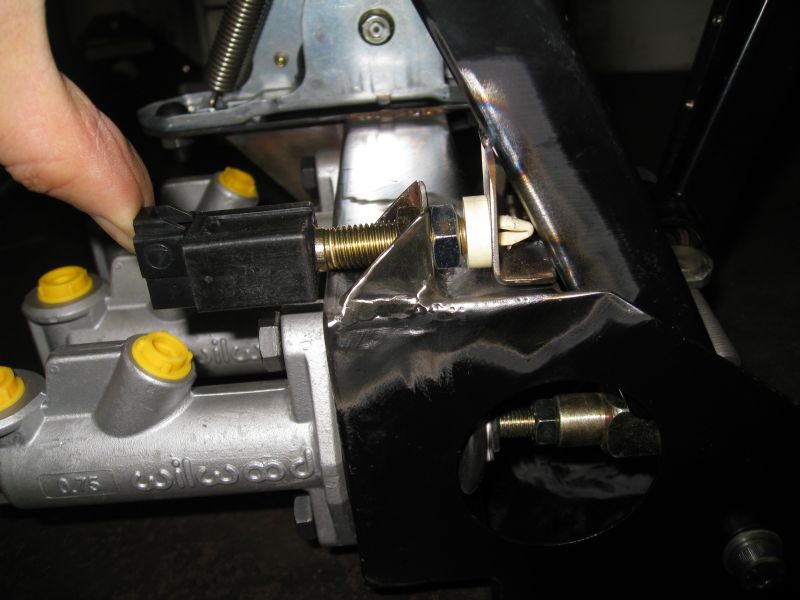 You can see the BLS between the two brake master cylinder rods. 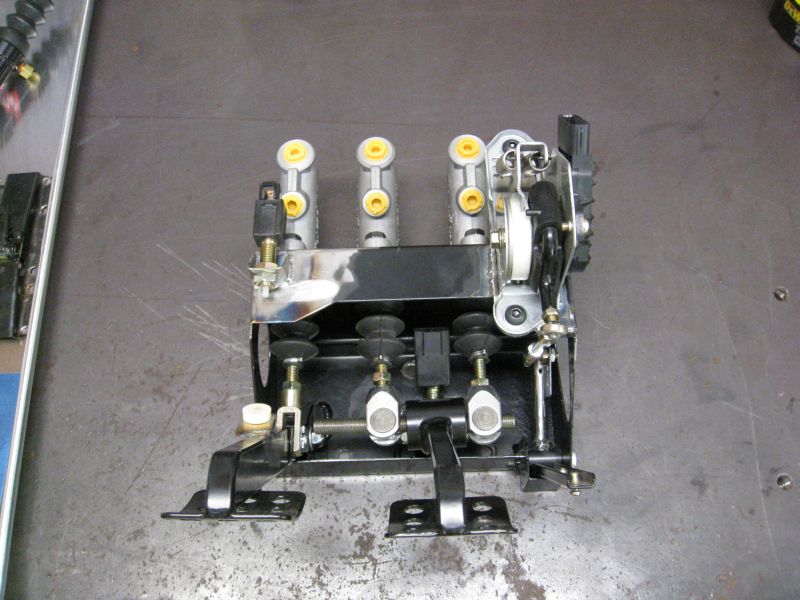 Side shot: 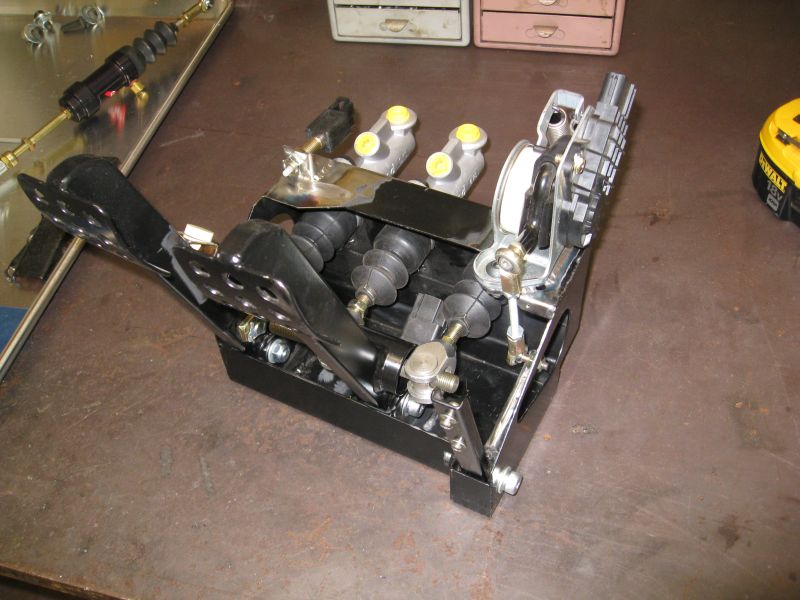 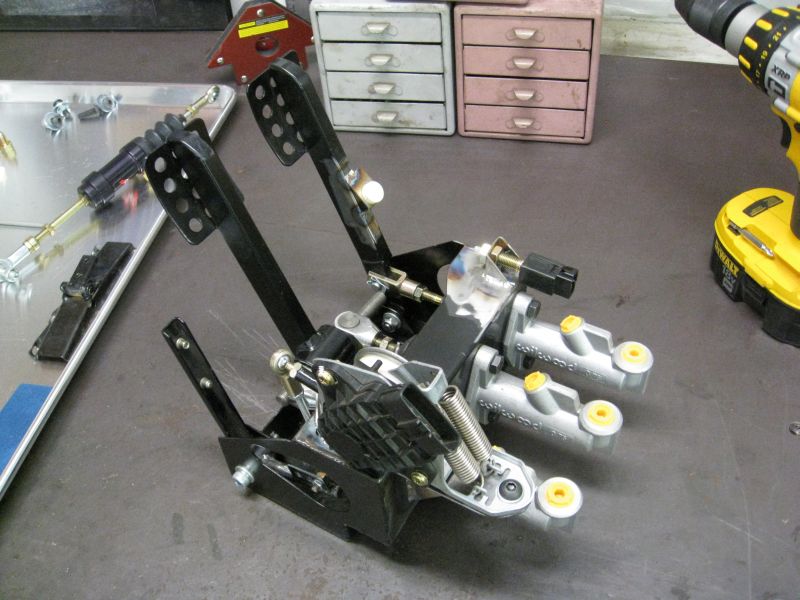 Modified the throttle pedal to use the pivoting Suby pedal. Still need to add two set screws to the assembly to hold the shaft in the tube. 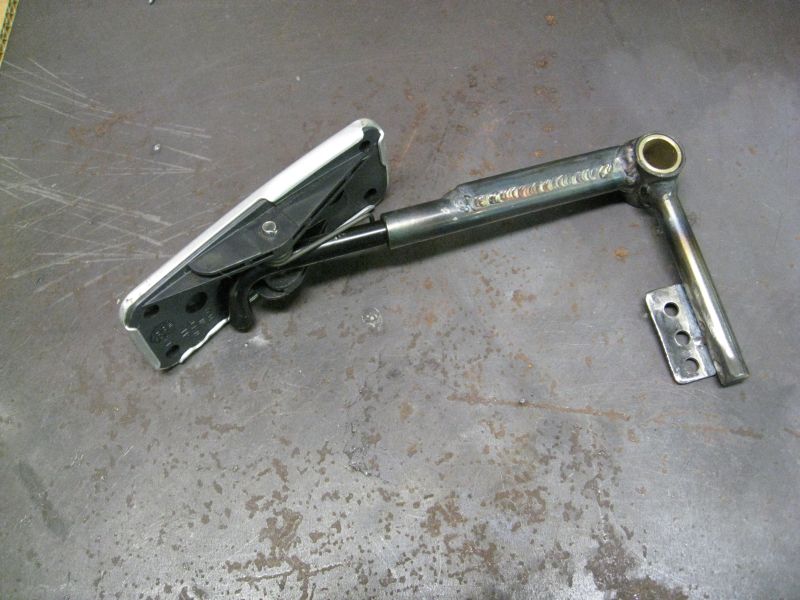 Will take some pictures of the box installed once it is finished. I am going to have to shift the clutch pedal away from the brake as things are a bit tight with normal shoes. ... |
|
|
|
| Amenson |
Jun 8 2009, 09:52 PM
Post
#228
|
|
That's opposite lock!! Group: Members Posts: 645 Joined: 27-May 05 From: Dublin, OH Member No.: 4,154 Region Association: None |
...
I also started making room for the new seats/sliders to fit. Still a lot of work to be done here. 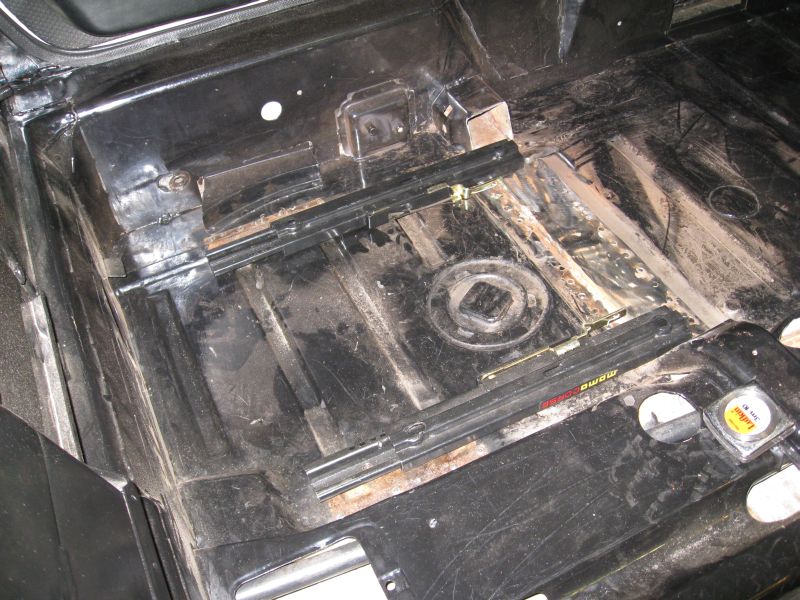 Next up was the radiator fan mount. This took a lot of time to get right but I am very happy how it turned out. Top mount prior to welding: 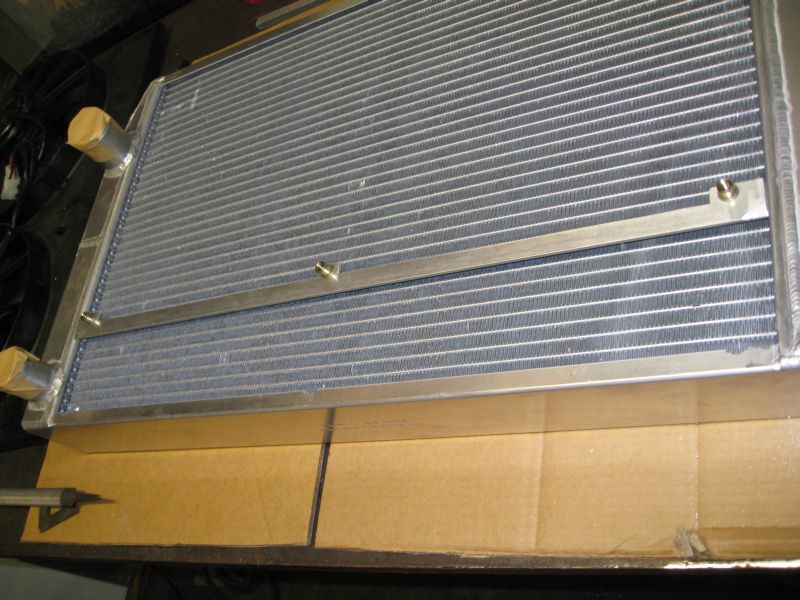 Both mounts welded in place: 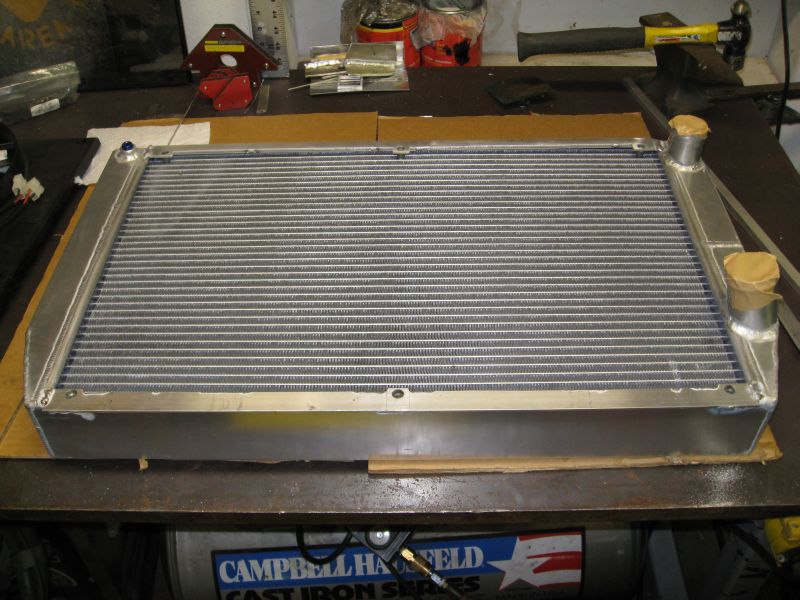 Bolted up: 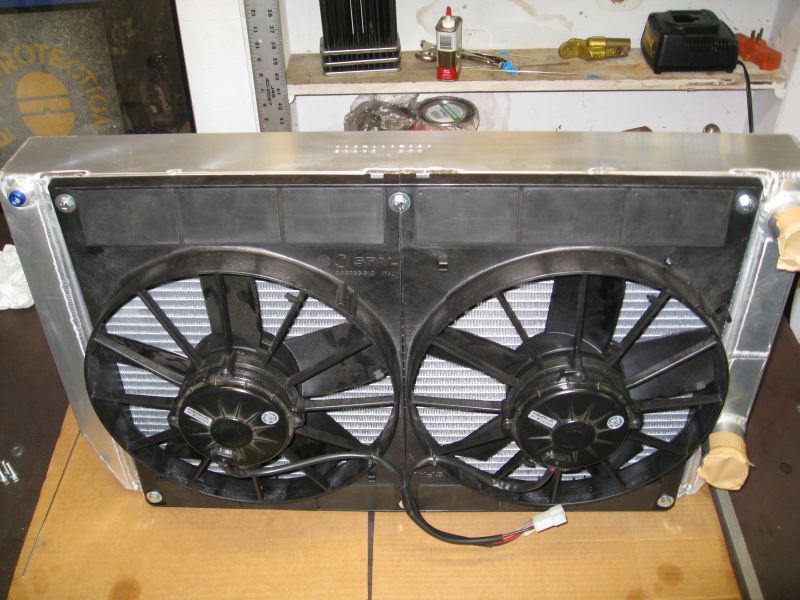 Next will be to fab up the hold downs. Am going to try to get that stared in the evenings this week. That's all for now. Scott |
|
|
|
| Zaney |
Jun 9 2009, 01:13 PM
Post
#229
|
|
Deuchland en der Haus Group: Members Posts: 461 Joined: 1-March 04 From: Engine 11 Redmond, WA Member No.: 1,738 Region Association: Pacific Northwest |
|
|
|
|
| Amenson |
Jul 12 2009, 09:52 PM
Post
#230
|
|
That's opposite lock!! Group: Members Posts: 645 Joined: 27-May 05 From: Dublin, OH Member No.: 4,154 Region Association: None |
Still making progress, took a week off from work and the garage to tour the Finger Lakes region of New York. Apparently the lakes and hills in the region make it suitable for grape cultivation so there are a ton of wineries in the area. Probably tasted a bit over 200 wines. Not all of them were good but we found 6 cases worth that we liked (IMG:style_emoticons/default/beer.gif)
Made the hold downs for the radiator: Starting point: 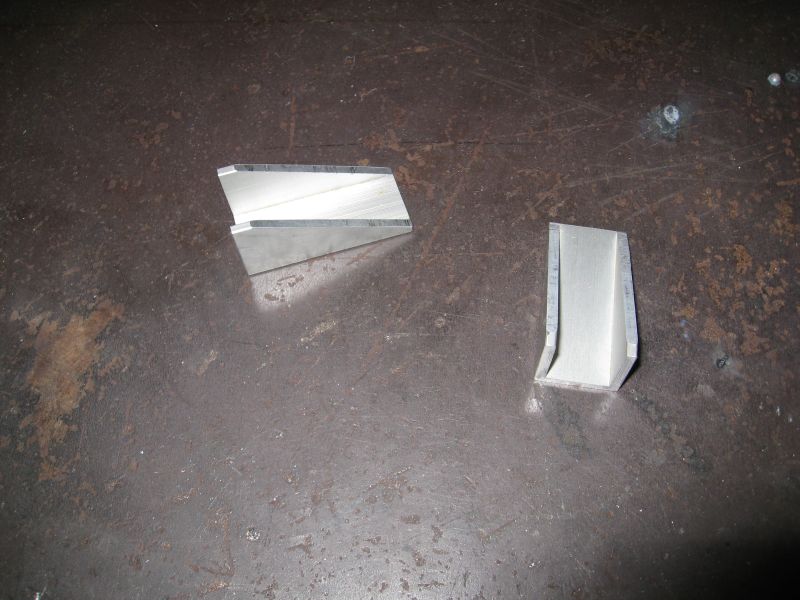 Ready to go on the rad:  Installed, still need to weld the sides: 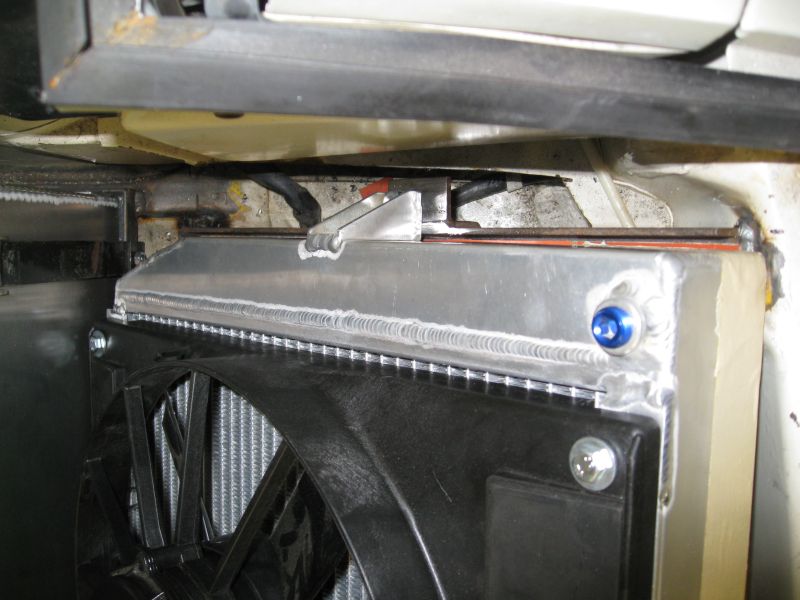 Spent a load of time getting the chassis ready for the seat.  Bolted in, and the center storage still fits. I am going to need to recline the seat ~10deg to get the driving position right.  ... |
|
|
|
| Amenson |
Jul 12 2009, 10:10 PM
Post
#231
|
|
That's opposite lock!! Group: Members Posts: 645 Joined: 27-May 05 From: Dublin, OH Member No.: 4,154 Region Association: None |
...
Painted the pedal box parts.  Ready for assembly. 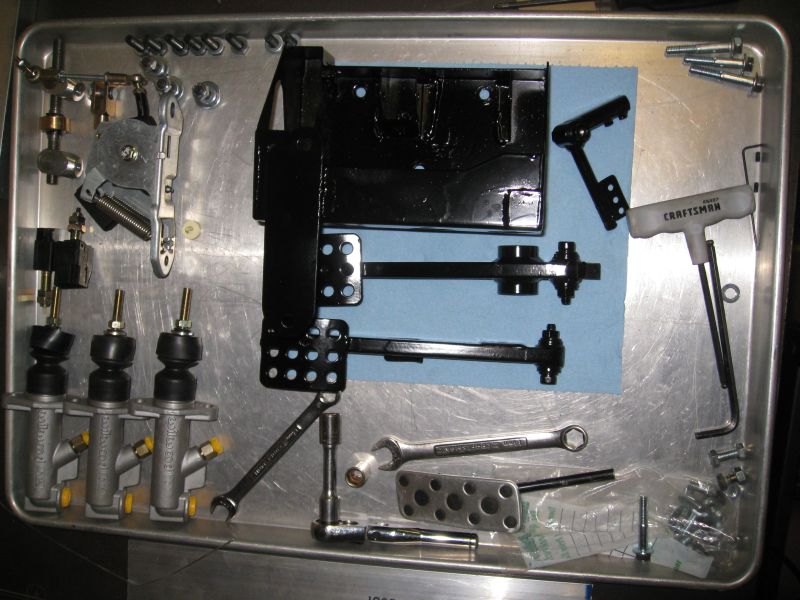 Had a bit of beer left after cleaning up for the night so I started assembly. 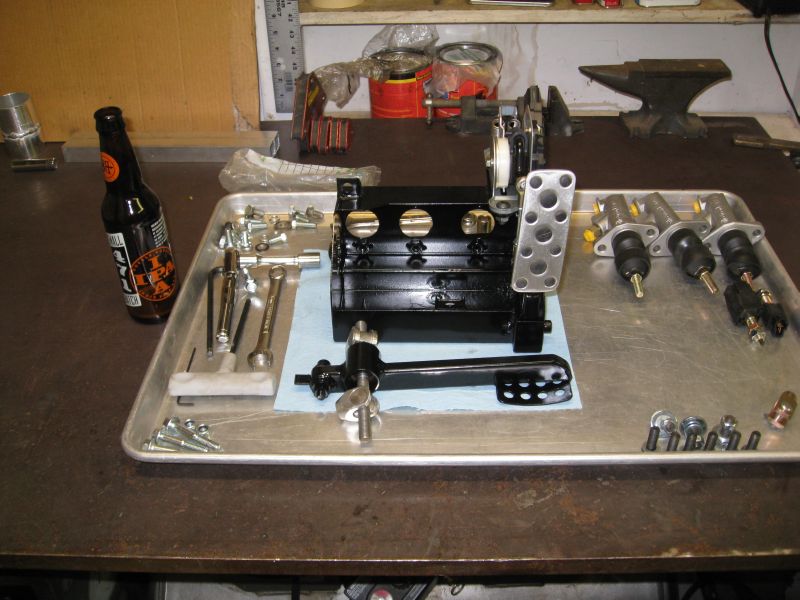 My wife gave me a trip to the local winery to make a couple batches of custom wine for my birthday. We bottled it the other week. I made the label for the red to commemorate what should be the year of the first drive of the PorSTi. 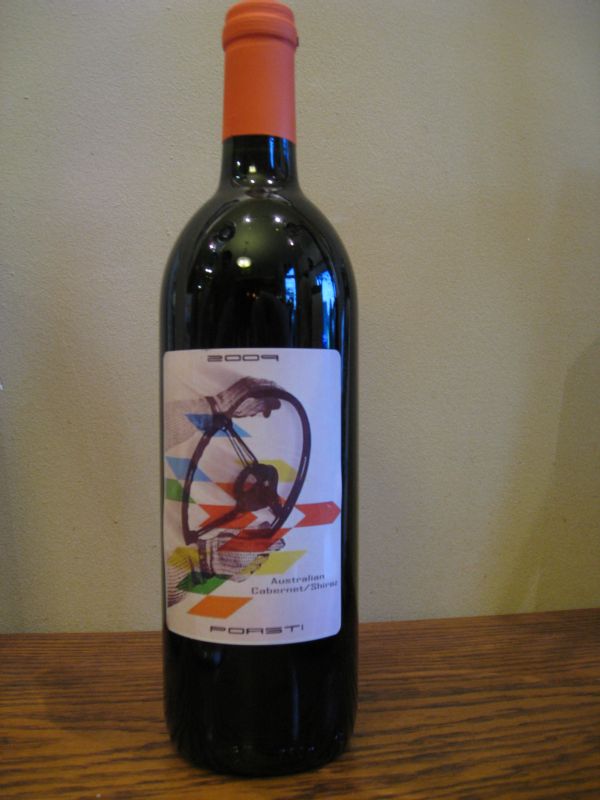 Not too far left to go... Scott |
|
|
|
| Amenson |
Jul 19 2009, 09:12 PM
Post
#232
|
|
That's opposite lock!! Group: Members Posts: 645 Joined: 27-May 05 From: Dublin, OH Member No.: 4,154 Region Association: None |
Lots of progress this week.
I finished assembling the pedal box (IMG:style_emoticons/default/cheer.gif) only to find that the balance bar interferes with the throttle pedal. (IMG:style_emoticons/default/dry.gif) I really do not have the time to fix stupid mistakes like this. 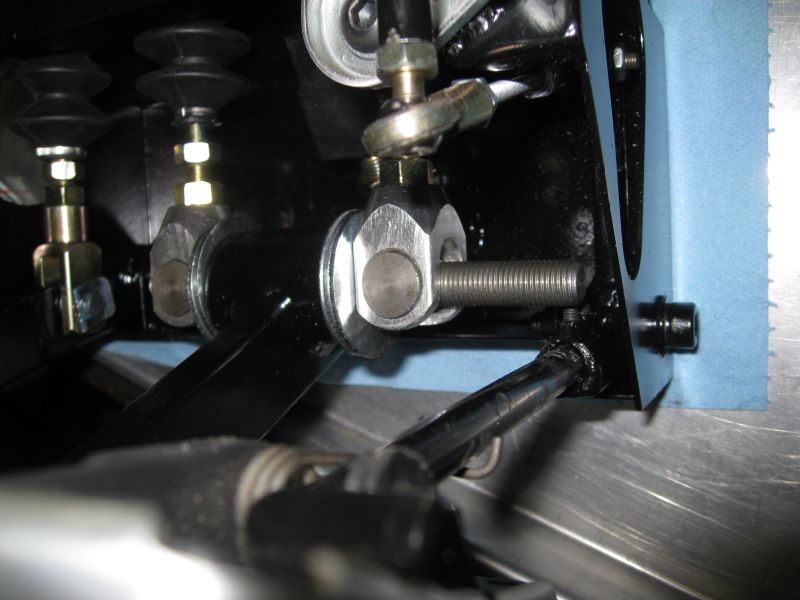 The aluminum tubes arrived to replace the SS parts of the cooling system. Ordered them from Global Technology. Good quality stuff at a great price. Fast shipping as well. 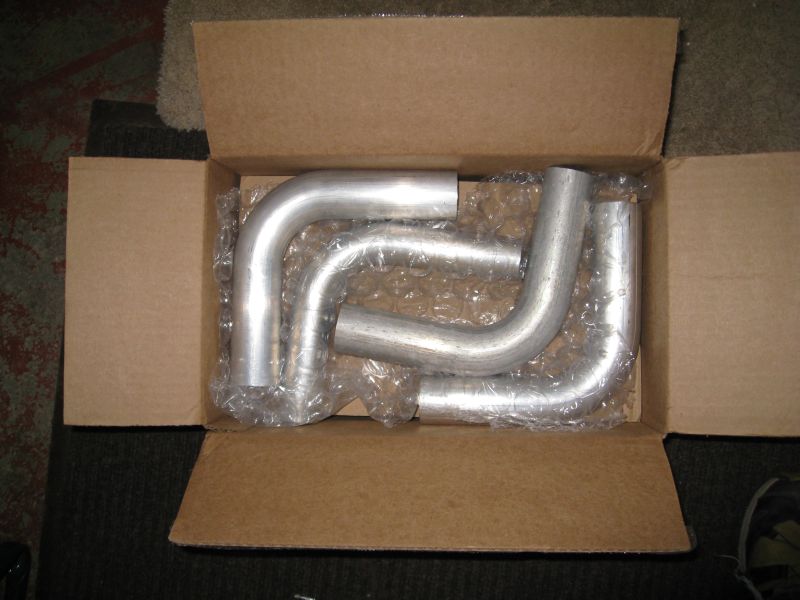 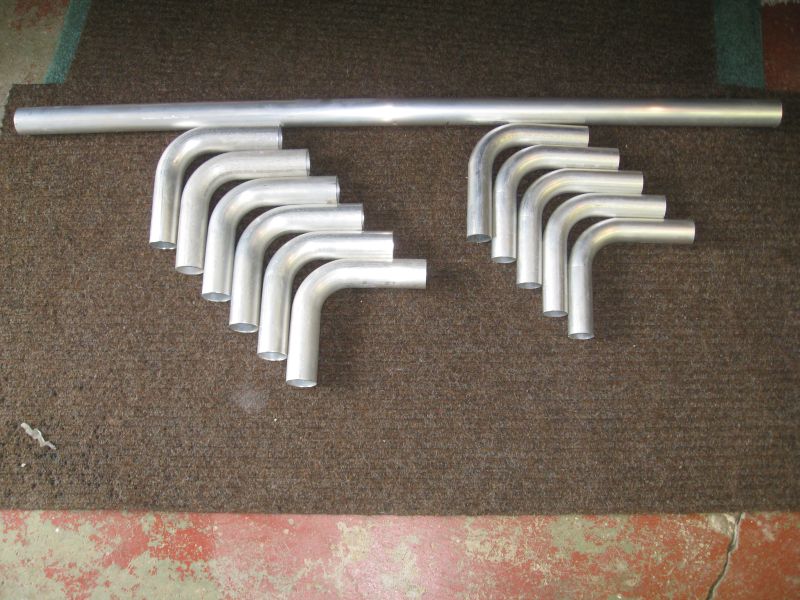 Made the clutch slave cylinder mount per GS Guy's directions. Still need to clearance the shifter fork so that the heim joint fits properly. Looks like it should work really well. 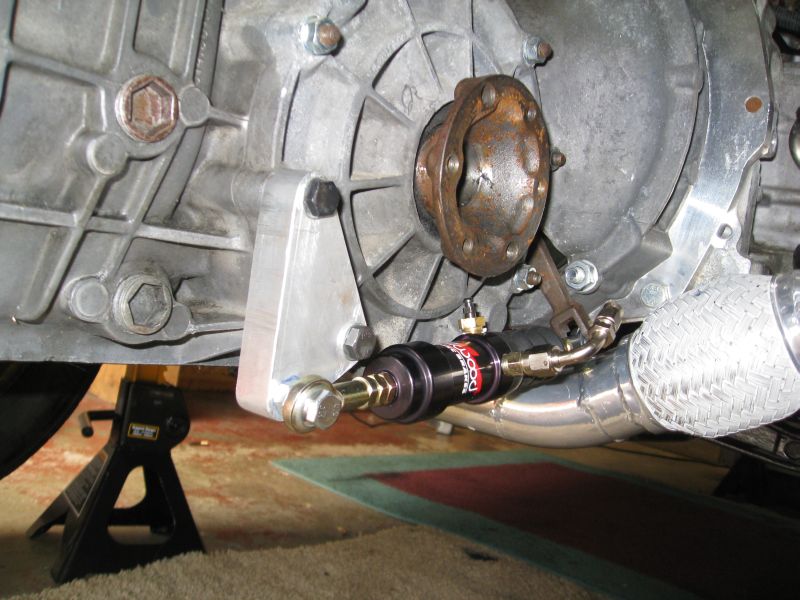 ... |
|
|
|
| Amenson |
Jul 19 2009, 09:49 PM
Post
#233
|
|
That's opposite lock!! Group: Members Posts: 645 Joined: 27-May 05 From: Dublin, OH Member No.: 4,154 Region Association: None |
Mid way through fabbing the cooling line that crosses over. While I was fitting everything up I decided to redo the radiator exit stub. The one that came on the rad was at a very strange angle and would have interfered with the ducting. The new one looks much better too.
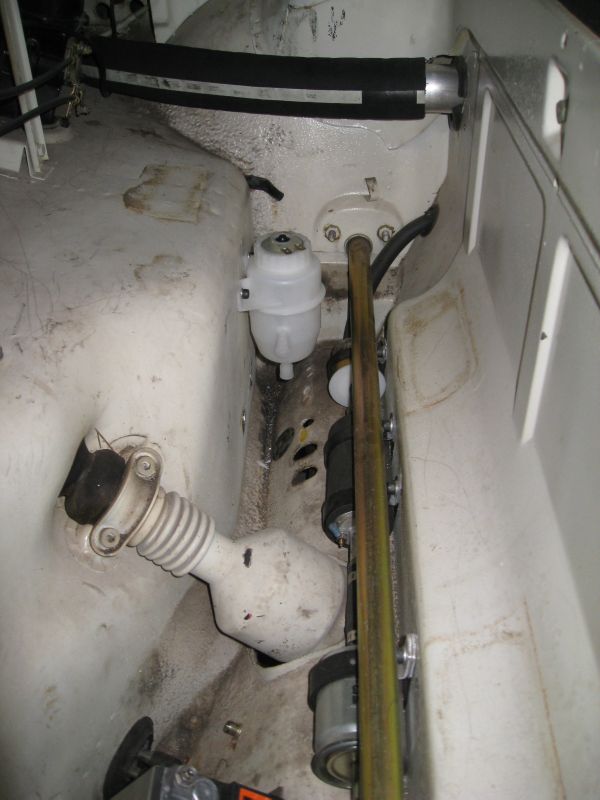
 Everything fit together, ready for for the two halfs to be tacked together. I found that a piece of angle and a couple of hose clamps really helps with fitting and keeps everything straight and aligned while tacking. 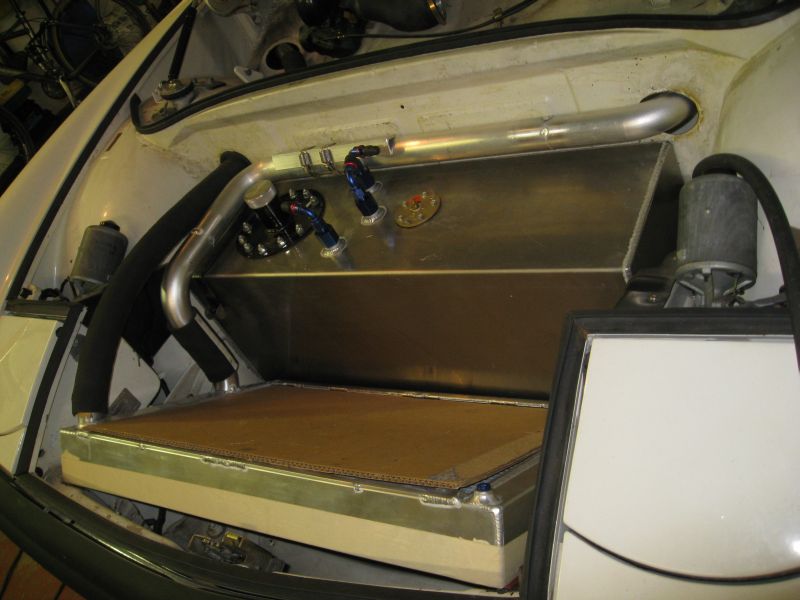 All welded (IMG:style_emoticons/default/welder.gif) 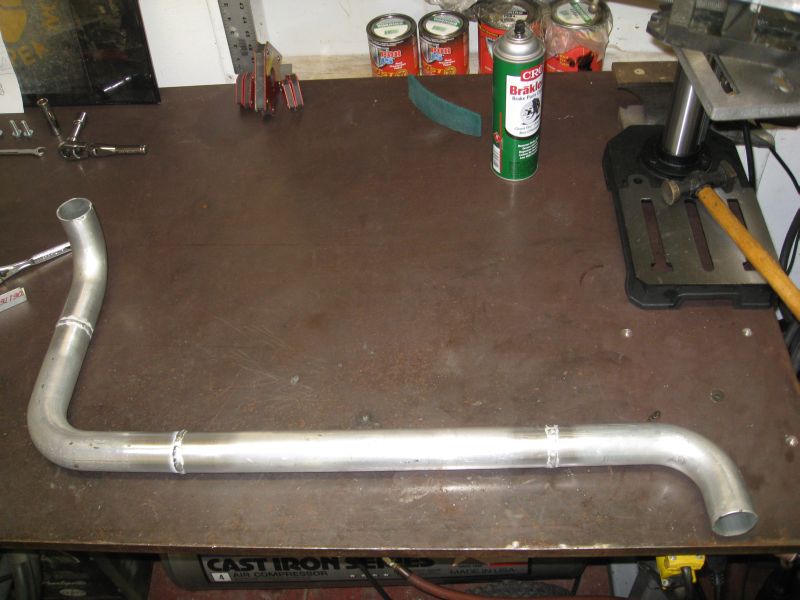 Worked on plumbing the new pedal box.. "T" in the front. 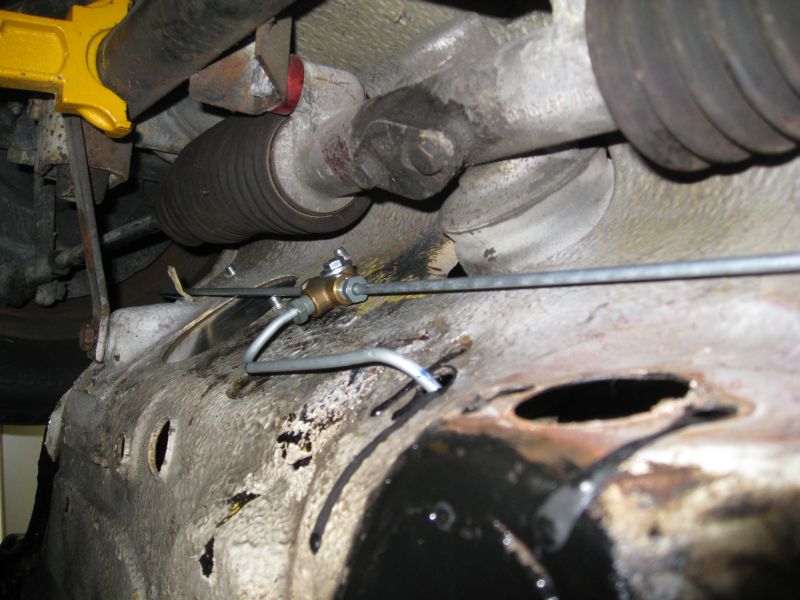 No more adjustable prop valve in the back. Also notice the line coming out of the clutch tube. I ran the hydraulic line where the cable used to to live. Still need to trim and flare it. 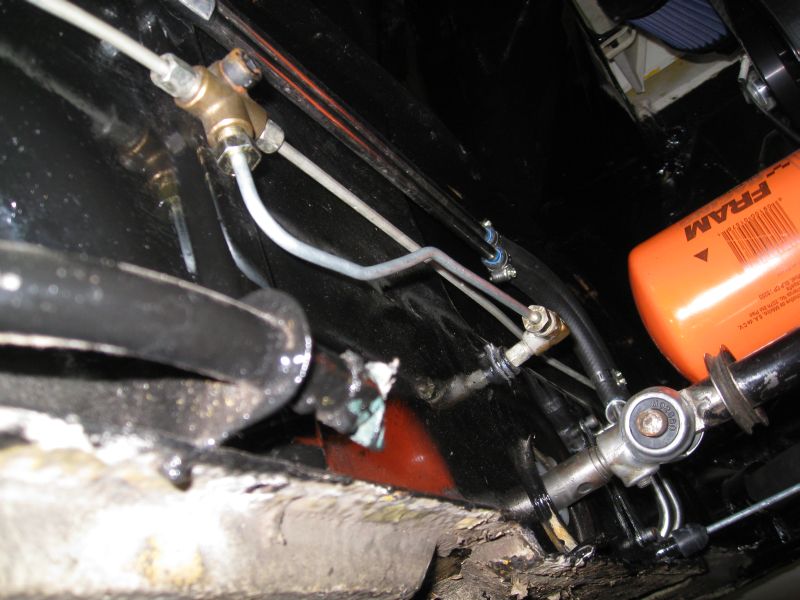 Clutch and front master cylinders pretty much done. Still need to tweak them a bit. I messed up a few tubes so I ran out before I could finish the rear. There are no original brake lines left on the car. You can also see the lines to the brake fluid reservoir. Need to pick up some rubber grommets. 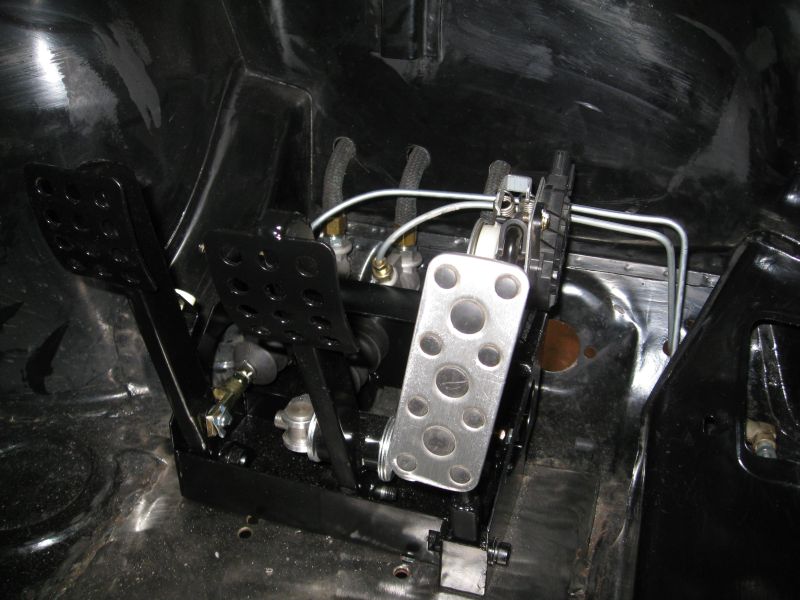 ... |
|
|
|
| Amenson |
Jul 19 2009, 09:57 PM
Post
#234
|
|
That's opposite lock!! Group: Members Posts: 645 Joined: 27-May 05 From: Dublin, OH Member No.: 4,154 Region Association: None |
After searching to the end of the internet I finally found a singe reservoir that woudl feed all three master cylinder and would fit where I wanted. Turns out that I had one in the garage for my other project car, a BMW 2002. (IMG:style_emoticons/default/headbang.gif) It is getting full down there.
 I am in full thrash mode to get the car done for the Woodward Dream Cruise in Detroit on August 15th. Starting last week I am taking every Friday off until Woodward. I did not quite get everything I needed finished this weekend, if I can't make up for it next week I may have to burn more vacation (IMG:style_emoticons/default/shades.gif) |
|
|
|
| FourBlades |
Jul 20 2009, 09:39 AM
Post
#235
|
|
From Wreck to Rockin Group: Members Posts: 2,054 Joined: 3-December 07 From: Brevard, FL Member No.: 8,414 Region Association: South East States |
Wow, that is some beautiful work. Love the pedals. Did you make the fuel cell? John |
|
|
|
| Amenson |
Jul 20 2009, 11:24 AM
Post
#236
|
|
That's opposite lock!! Group: Members Posts: 645 Joined: 27-May 05 From: Dublin, OH Member No.: 4,154 Region Association: None |
QUOTE(FourBlades @ Jul 20 2009, 07:39 AM) Wow, that is some beautiful work. Love the pedals. Did you make the fuel cell? John The fuel cell came from Summit. I do not have the confidence to build something to contain gallons of flammable liquid quite yet. (IMG:style_emoticons/default/blowup.gif) Scott |
|
|
|
| Amenson |
Jul 22 2009, 09:43 PM
Post
#237
|
|
That's opposite lock!! Group: Members Posts: 645 Joined: 27-May 05 From: Dublin, OH Member No.: 4,154 Region Association: None |
Made some parts the last couple of nights.
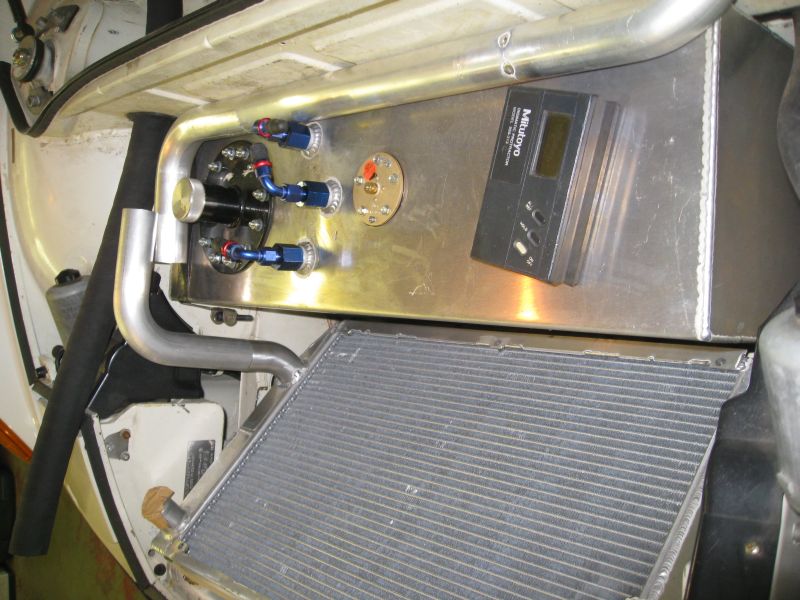
I started fitting the passenger seat and found that the right side needs to be directly above the reinforcing rib for the original seat mount in order for my wife to be comfortable with the seating position. Nice and strong location but I had to shorten the mount. Cut out the middle.  Welded back together. 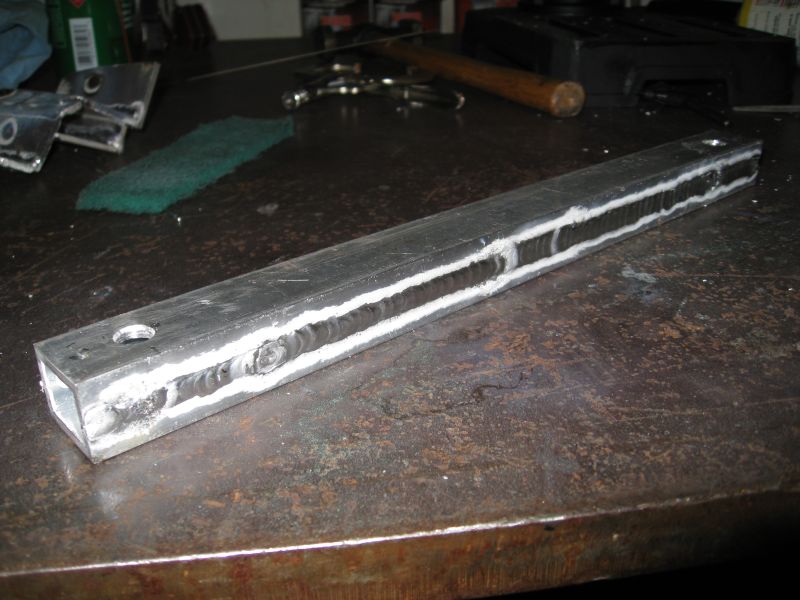 Made the final tube of the cooling system. 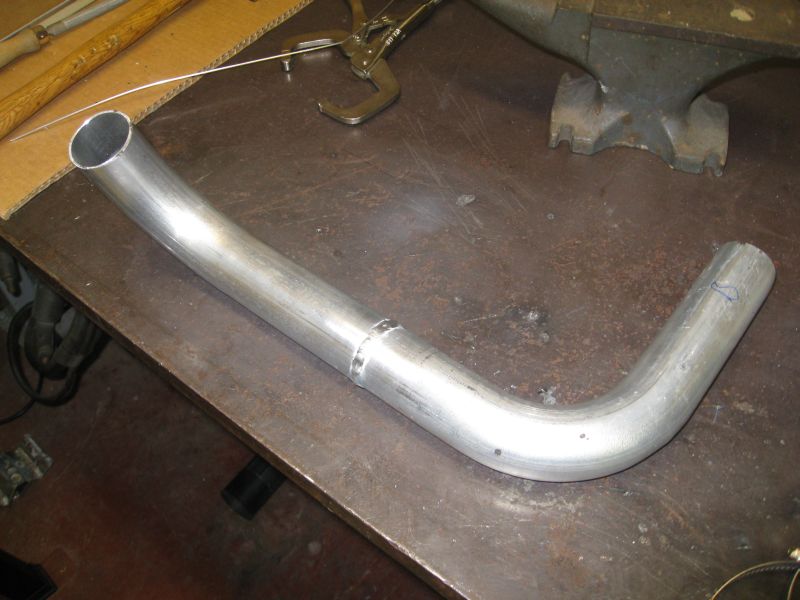 Installed, from above 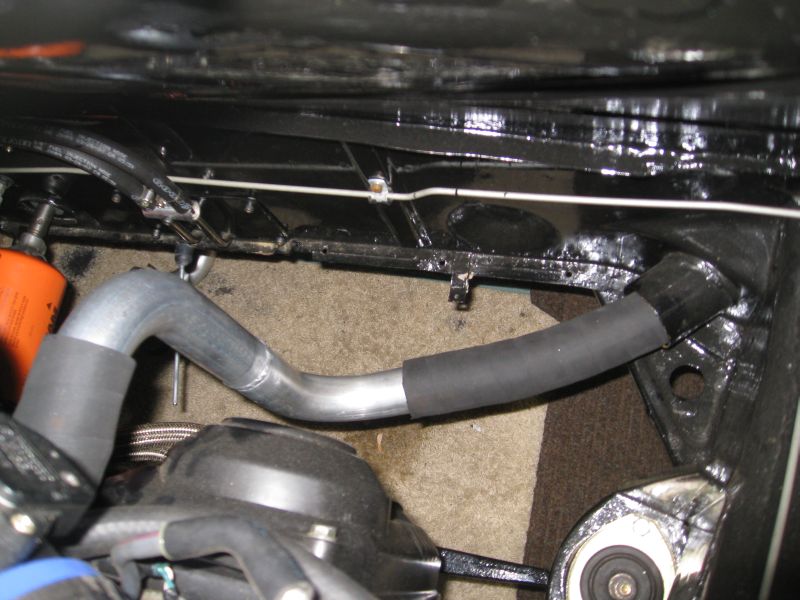 From passenger side 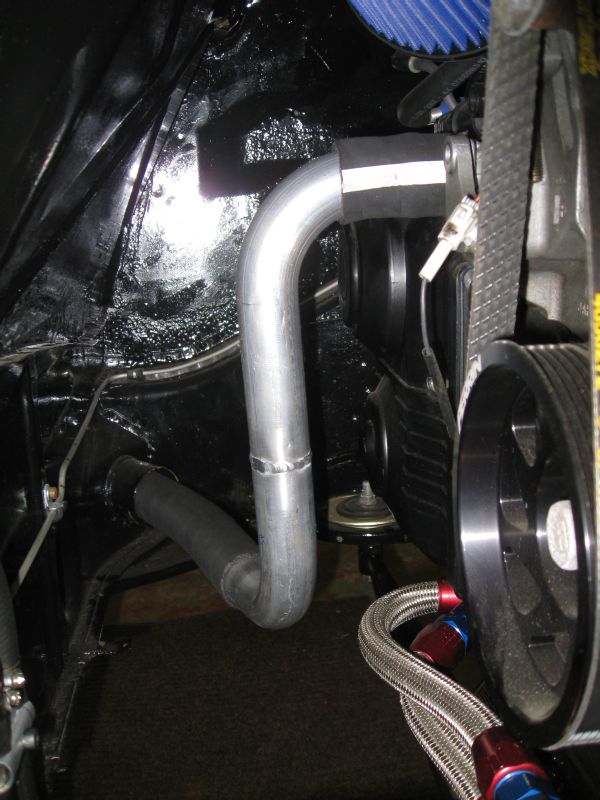 I could fill it with water if I wanted to now. I should be excited but the looming deadline is is really weighing on me. That and all of the hoops to jump through trying to close on a house at the end of the month. The worst part of it is that by buying the house I am probably going to lose the band saw that is in the basement. The owner of the saw seems to be unwilling to sell it for a reasonable price. Scott |
|
|
|
| Amenson |
Jul 25 2009, 09:26 PM
Post
#238
|
|
That's opposite lock!! Group: Members Posts: 645 Joined: 27-May 05 From: Dublin, OH Member No.: 4,154 Region Association: None |
Still plugging away...
I managed to install the passenger seat. While this may not seem like such a huge feat, because the threaded inserts in the Momo seat were no where near where they belonged (based on the other seat), it was a huge pain in the ass. I wish I would have realized this when I first purchased the seats, I would have returned it. Now they do not make this style any more so I am stuck. Oh well, I made it work. With the passenger seat in place I was able to mark the harness shoulder mounts. Took the seats out and installed the mounts. 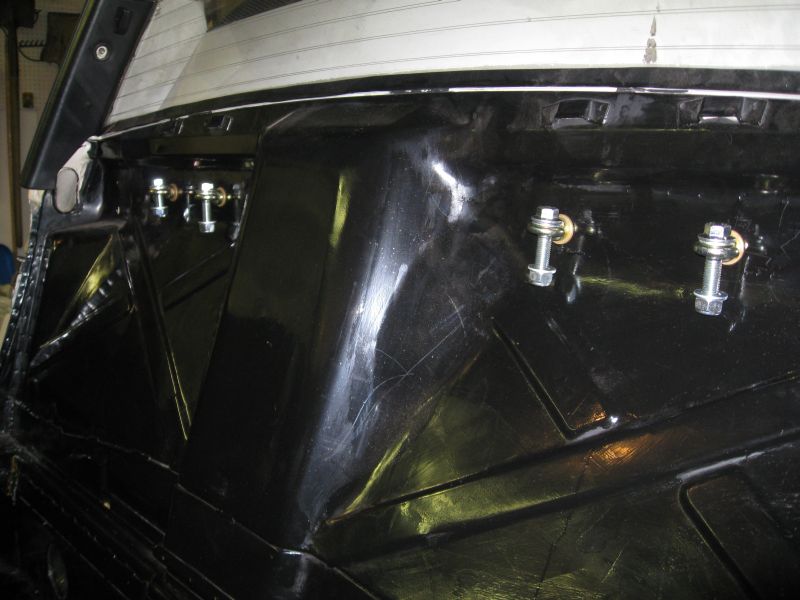 After remaking a few lines, the pedal box plumbing is finished... 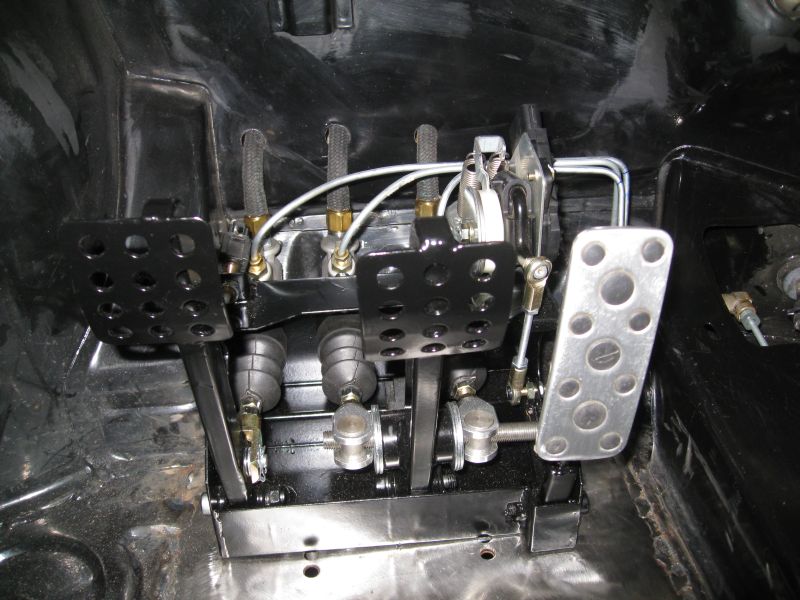 ...so I took everything back out and repainted the floor for the third, and hopefully last time. No more bare metal, can hardy tell I did anything down there. 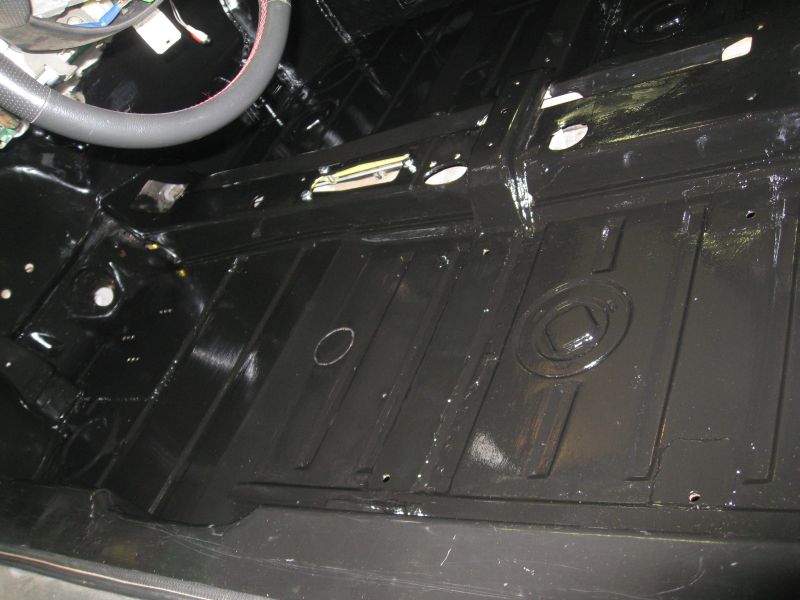 Tomorrow the engine/trans come out so that I can button everything up. There are a number of fittings and hoses that need crush washers and clamps installed/tightened. Scott |
|
|
|
| my928s4 |
Jul 26 2009, 08:05 AM
Post
#239
|
|
Member Group: Members Posts: 349 Joined: 18-August 07 From: Spokane, WA Member No.: 8,018 Region Association: Pacific Northwest |
Looking great, still love looking at those welds. Good luck with the deadline !
|
|
|
|
| Amenson |
Jul 27 2009, 09:37 PM
Post
#240
|
|
That's opposite lock!! Group: Members Posts: 645 Joined: 27-May 05 From: Dublin, OH Member No.: 4,154 Region Association: None |
Lots more progress. (IMG:style_emoticons/default/piratenanner.gif)
Pedals are back in, hopefully for good. 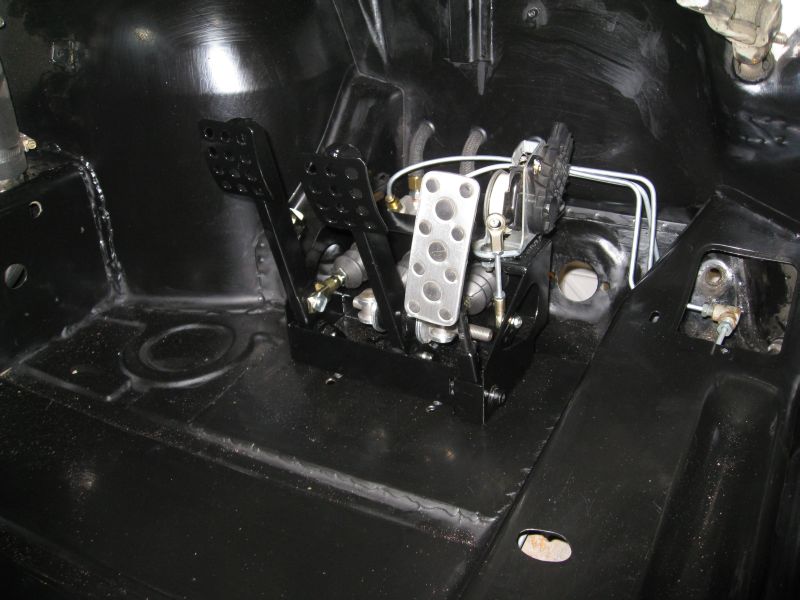 Painted the front trunk. I did not intend to paint the entire bottom but dripped paint when covering the bare metal. I figured that it would happen so I prepped it proactively. Also installed the isolating rubber. The stuff below the fuel cell is black. The high temp stuff for the radiator is red. 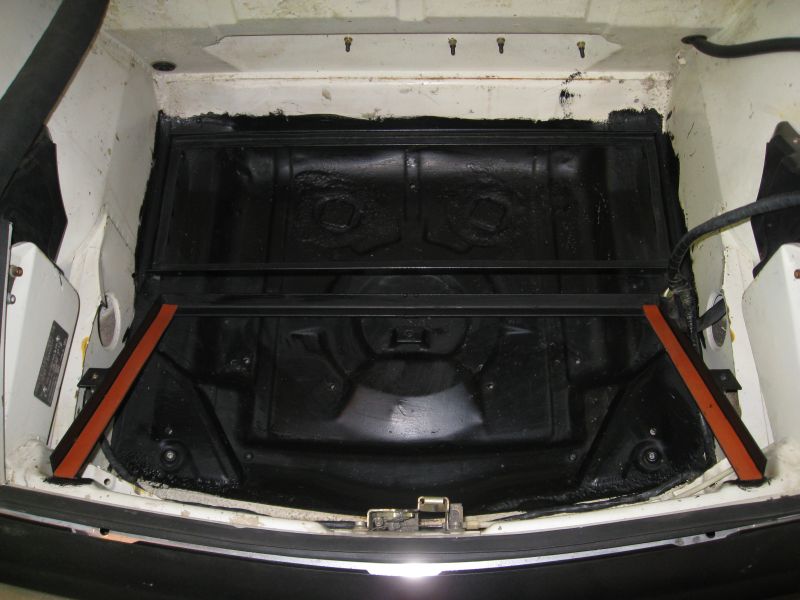 Back in, I decided to take a few minutes to paint the hold down straps as well. 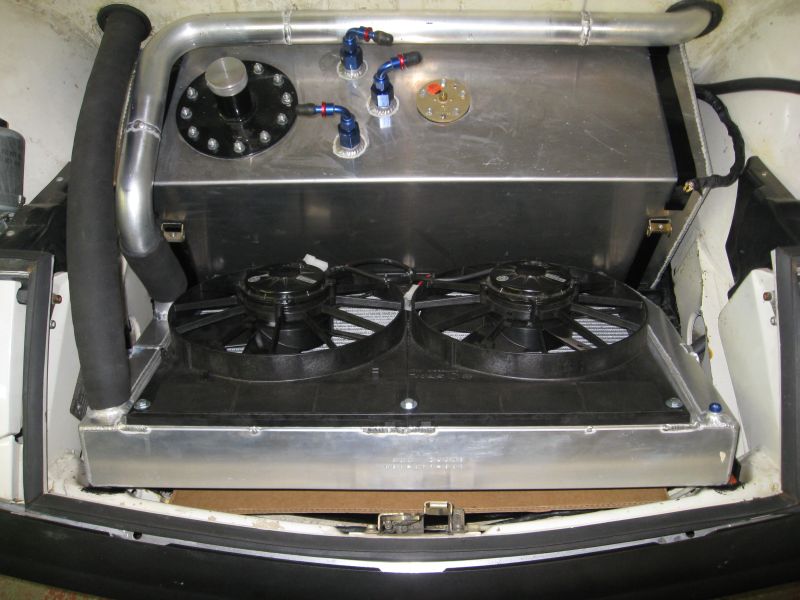 Out comes the drive-train. I tried leaving the trans mounts in place and just remove the nuts from the mounting ears...unfortunately the intercooler is in the way and I still ended up removing the mounts. I just realized that I could invert the mounting bolts so that the nuts are on top and could leave the mounts in. Any reason that this would be a bad idea? 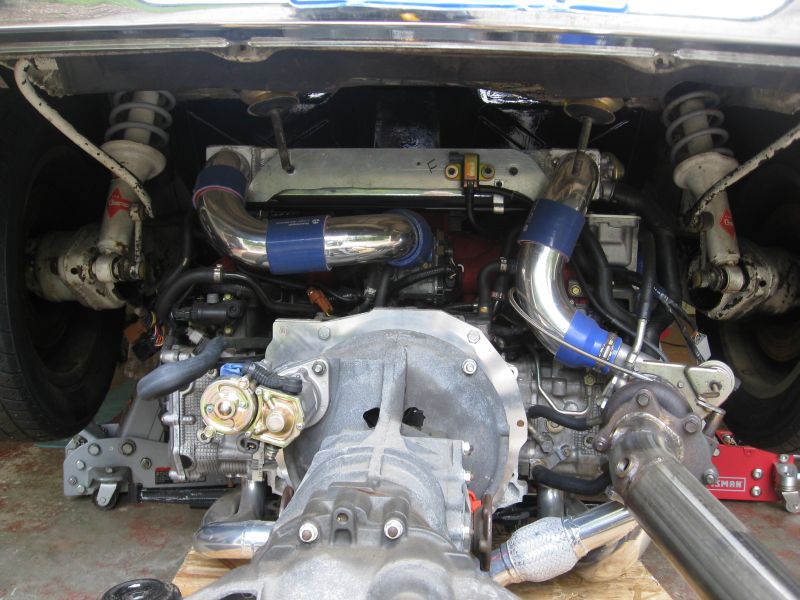 I also realised today that I did not make the exhaust so that I could remove the trans w/o dropping the header. Damn (IMG:style_emoticons/default/hissyfit.gif) Put that on the list for REV2. 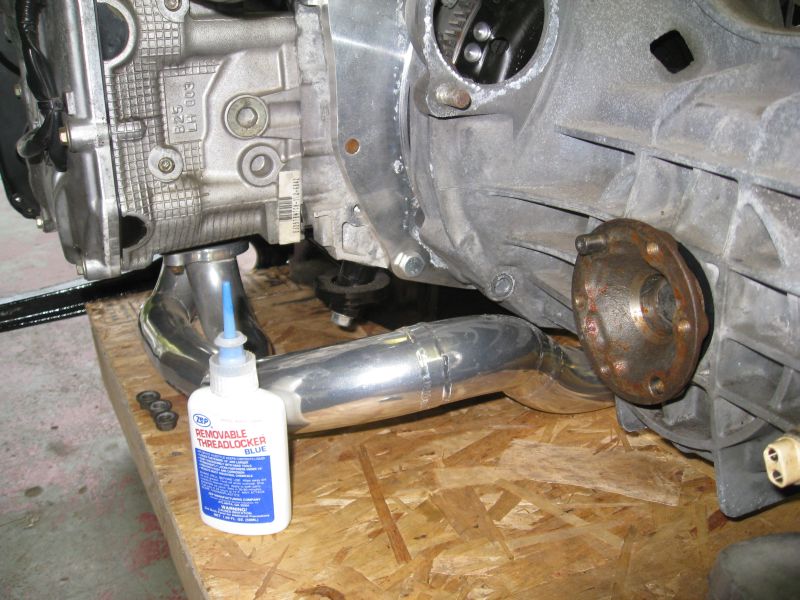 I pulled the trans so that I could clearance the clutch fork for the slave cylinder heim joint. Unfortunately I did not get a very good picture of it.  ... |
|
|
|
|
2 User(s) are reading this topic (2 Guests and 0 Anonymous Users)
0 Members:

|
Lo-Fi Version | Time is now: 2nd May 2024 - 11:10 PM |
Invision Power Board
v9.1.4 © 2024 IPS, Inc.