|
|
|
Porsche, and the Porsche crest are registered trademarks of Dr. Ing. h.c. F. Porsche AG.
This site is not affiliated with Porsche in any way. Its only purpose is to provide an online forum for car enthusiasts. All other trademarks are property of their respective owners. |
|
|

  |

| Amenson |
 Sep 18 2016, 02:24 PM Sep 18 2016, 02:24 PM
Post
#561
|
|
That's opposite lock!!  Group: Members Posts: 645 Joined: 27-May 05 From: Dublin, OH Member No.: 4,154 Region Association: None |
Hello from Poland. (IMG:style_emoticons/default/bye1.gif) Spent last week in Germany with a grand farwell at the opening day of Oktoberfest. Whoever invented liter beer mugs is a complete asshole. But I only had 4 beers (IMG:style_emoticons/default/drunk.gif)
 Anyways, back to the project. With my trip on Sunday I had to get it running so I put in 12 hours on Saturday. First finished routing the tubes. 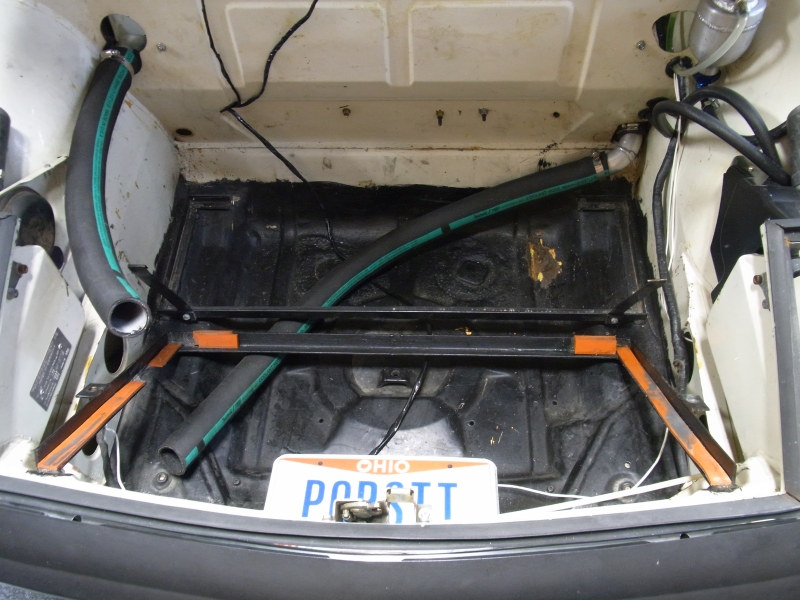 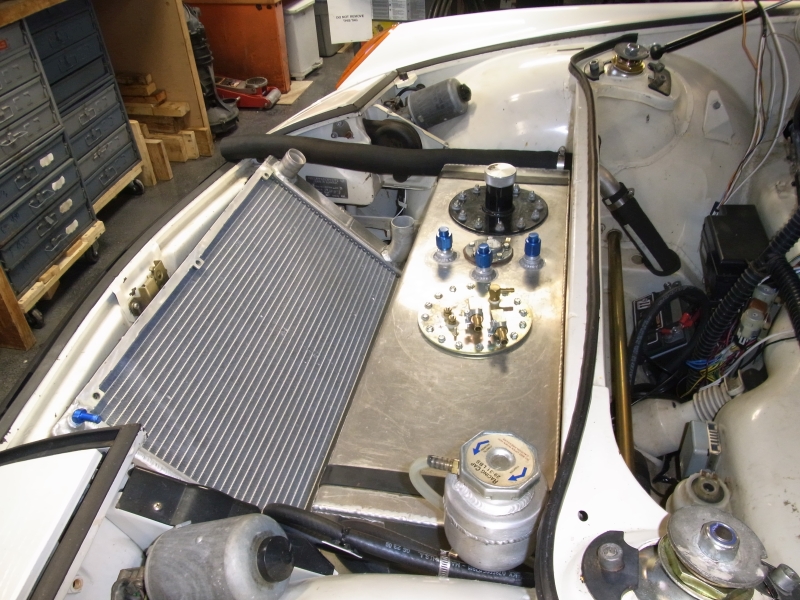 Then modified the radiator. Didn't take any pictures due to full thrash mode. Installed the fuel tank/lines and tided up some wiring stuff. Car started right up. It was 11pm so I could not really rev it to build heat but got it warm just idling so that it could suck off of the expansion tanks overnight. Found a leak at the driver side long elbow where I had not tighten a hose clamp fully. First thing Sunday morning I brought it up to temperature with throttle. Everything pressurized nicely and as soon as the radiator started warming up the passenger side kink popped out! There was a bit of steam coming from the radiator but I figured that it was from spillage while filling. The entire radiator was coming up to temp and the engine temp was right where it should be. Waiting for the driver kink to pop up as the tube heated up when I noticed a lot more steam coming from the radiator. A quick inspection and it was easy to see that my hole repair had not only failed but made it worse. At this point my departure for the airport is only a couple hours away and I return 36 hours before I need to leave for Okteenerfest. I quickly decide that one of my buddies will have to pick up the radiator and drop it off someplace that can fix and test it properly. I finish packing while the car cools and out comes the radiator. Buddy picks it up as I am leaving for the airport. I got word Thursday that it is repaired, tested and back in the garage waiting for me to return. So this is how she sits. 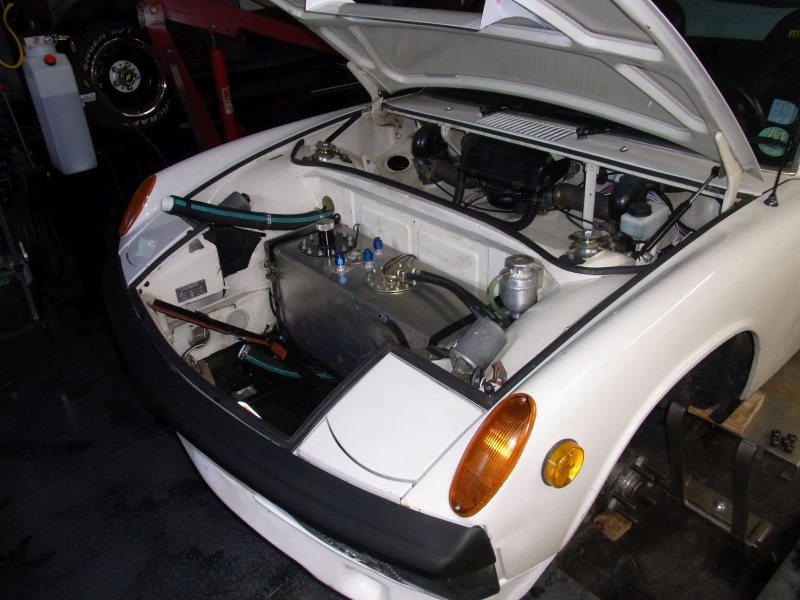 Unproven cooling setup, no radiator and front suspension that is only loosely installed...Okteenerfest, no problem! Cheers, Scott |
   |

 
|
| Amenson |
Sep 18 2016, 02:30 PM
Post
#562
|
|
That's opposite lock!! Group: Members Posts: 645 Joined: 27-May 05 From: Dublin, OH Member No.: 4,154 Region Association: None |
QUOTE(ruby914 @ Sep 17 2016, 02:33 AM)  Hey Scott, I see you, Chris and Kent all working on coolant line plumbing. Yours is the STI, not a 6, so I check yours first. I am again thinking about rerouting my 1.25 ID ~ 1.62OD lines from under the car to behind the kick panel and out side of the longs. The hose would turn in sharply into the cabin, the same as yours. That turn, even before where yours kinked, is the problem area. I had a 1/2 baked plan last year. Something like welding in a 1.75 guide tube and feed the hose thru... I try to revisit and work out the bugs again. A smaller hose would help. Kent may have found the small hose limit. What size coolant lines are you using? PS. ELYSIAN Space Dust powered this post. I am using 1.5" ID hose, the stuff is huge. Doug has 1" silicone that I will be installing into Grey Matter. It feels substantially more flexible, really looking forward to working with it. Cheers, Scott |
|
|
|
| 914forme |
Sep 19 2016, 10:51 AM
Post
#563
|
|
Times a wastin', get wrenchin'! Group: Members Posts: 3,899 Joined: 24-July 04 From: Dayton, Ohio Member No.: 2,388 Region Association: None |
QUOTE(Amenson @ Sep 18 2016, 04:30 PM) QUOTE(ruby914 @ Sep 17 2016, 02:33 AM) Hey Scott, I see you, Chris and Kent all working on coolant line plumbing. Yours is the STI, not a 6, so I check yours first. I am again thinking about rerouting my 1.25 ID ~ 1.62OD lines from under the car to behind the kick panel and out side of the longs. The hose would turn in sharply into the cabin, the same as yours. That turn, even before where yours kinked, is the problem area. I had a 1/2 baked plan last year. Something like welding in a 1.75 guide tube and feed the hose thru... I try to revisit and work out the bugs again. A smaller hose would help. Kent may have found the small hose limit. What size coolant lines are you using? PS. ELYSIAN Space Dust powered this post. I am using 1.5" ID hose, the stuff is huge. Doug has 1" silicone that I will be installing into Grey Matter. It feels substantially more flexible, really looking forward to working with it. Cheers, Scott Silicone the best choice for coolant? From what I read on the Gates Site they say it can be used for coolant but tends to have a 10-15% higher water permeation over their rubber counter parts. Since most cars have a total of 3-4 feet of hose. That might not be to bad. Since a conversion will have 15-20 feet of hose!!! You can do the math. They also tend to cut easier, and clamping can be an issue. As worm clamps will cut into the silicone. Under extreme pressure they will pop right off your beaded tubing even with T clamps (IMG:style_emoticons/default/headbang.gif) learned that lesson the hard way. All materials have the positives and negatives. Flexibility is plus of silicone. Also don't get fuel on or in it. Fuel (IMG:style_emoticons/default/chowtime.gif) on silicone. |
|
|
|
| Amenson |
Sep 21 2016, 07:26 AM
Post
#564
|
|
That's opposite lock!! Group: Members Posts: 645 Joined: 27-May 05 From: Dublin, OH Member No.: 4,154 Region Association: None |
Back in the good old (actually quite young comparably) USA. Within 8 hours of landing (including a 45 minute meeting) the radiator is in and the whole system brought fully up to temp.
 No leaks, temp is rock solid and best of all....the kinks going into the longs are gone. 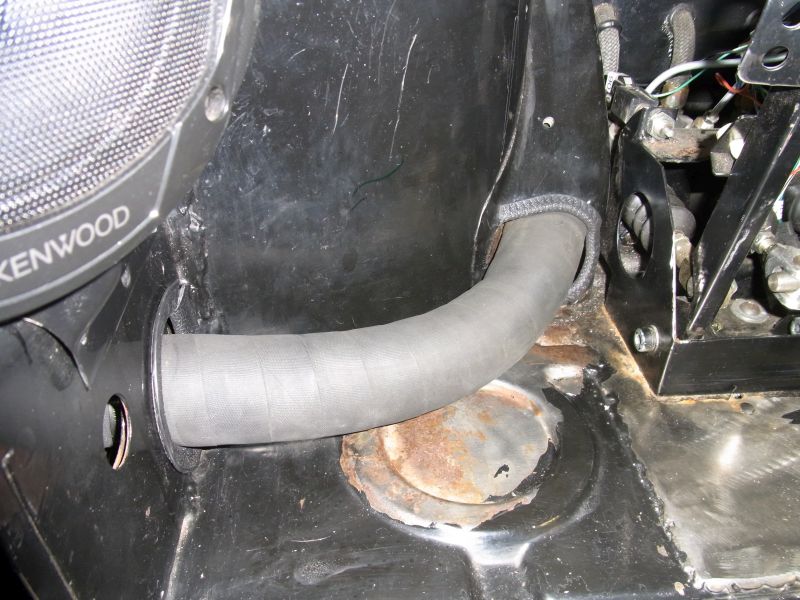 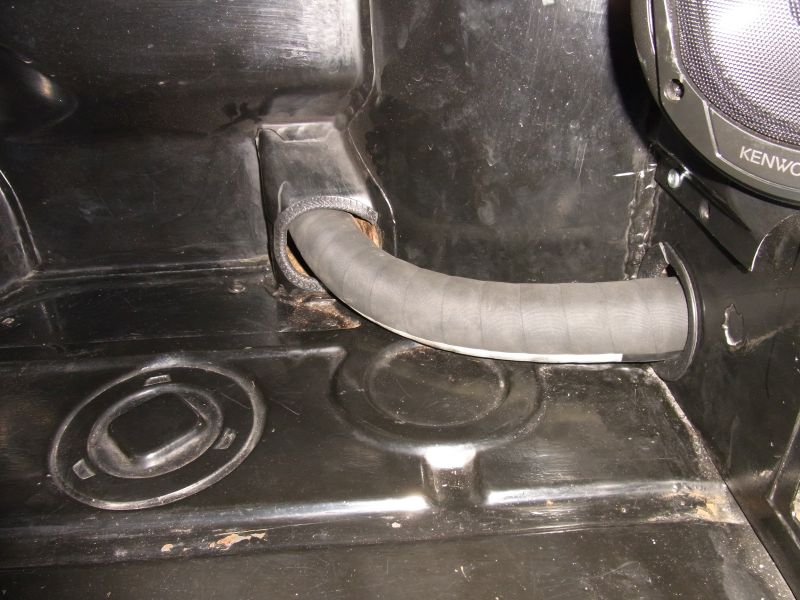 The driver side still has a slight pucker and I think that I can make some adjustments to make that go away. Now onto the front suspension, after a few more business calls. (IMG:style_emoticons/default/headbang.gif) Cheers, Scott |
|
|
|
| Mike Bellis |
Sep 21 2016, 08:43 PM
Post
#565
|
|
Resident Electrician Group: Members Posts: 8,348 Joined: 22-June 09 From: Midlothian TX Member No.: 10,496 Region Association: None |
Only real problem I see is you are going to have 200°F fuel. Not good. Gasoline starts turning to vapor at -45°F, at 200°F it turns to vapor much faster. More fumes, less MPG and most of all... Lower performance. Don't worry, you are well below the auto-ignition temp of 536°F...
If it were me, and I have been considering the same tank, I would have it cut and modified to fit in the original location. |
|
|
|
| Amenson |
Oct 11 2016, 09:20 PM
Post
#566
|
|
That's opposite lock!! Group: Members Posts: 645 Joined: 27-May 05 From: Dublin, OH Member No.: 4,154 Region Association: None |
Just realized that I never posted an update.
After a solid thrash I got the front suspension together and the air worked out of the new cooling system. A quick alignment and test drive and I was off to Okteenerfest. Temps were rock solid and the suspension is amazing. Really mad that I took so long to ditch the KYB's. The elephant polybronze bushings and strut top monoball really enhance the directness of the steering and feedback from the chassis. Both of which really helped keep on the road while chasing "Huey" through the twisties. I did have one issue after getting it back together. The idle was periodically bizarre with very rare stalling on clutch in deceleration. The off throttle response was also sluggish and, much to the amusement of my passenger for the mountain drive, it felt a bit down on power. I checked for obvious vacuum leaks but did not find anything. Once home a bit of research showed that a dirty MAF could cause similar issues. I pulled it and it was pretty filthy, as was the filter. Amazing how much tire smoke clogs things up (IMG:style_emoticons/default/dry.gif) I also found a vacuum leak while getting to the MAF. With these things taken care of it was better but still not right. Still had the bizarre throttle response, periodic stalling and sluggish off throttle behavior. Out of desperation I checked the compression to make sure I had not hurt the engine along the way. Perfect numbers. Then I started looking into the ECU maps to see what signals go into the idle control and logging data to see if anything was wonky. I started fixating on the off throttle behavior because it activates the idle maps. Started getting to a point where the little problems made me want to stop driving the car. By chance I decided to yank on the harness bundle going to the ECU. The engine went crazy. I almost parked it on the way to work. Took quick look but did not see anything. Of course I was not logging at the time. After work it was back to the small issues. I went through all of the ECU connectors looking for loose pins and checked the wires for nicks. Nothing. There were a few factory splices for the shield grounds on the MAF and electronic throttle. One of them had some loose tape with a slightly exposed ground. Not sure if it was the real problem but everything is back to normal. Except the off throttle sluggishness. While looking through the maps I found one that sets a throttle offset based on Target Airflow. This applies when in gear when the car is moving. Target airflow is set in a map based on RPM. Put them together and you get a non zero throttle opening when decelerating by engine braking. At most points this ends up being 9%. No wonder it feels the way it does. A quick update to the Target throttle vs Idle airflow target map and the car is transformed....almost feels like there is a throttle cable! Now I get to enjoy driving it on these beautiful fall days and focus on Doug's Grey Matter Project.  If you are looking for Suby Mods, follow his thread for the next few months. Cheers, Scott |
|
|
|
| Amenson |
Jan 12 2017, 10:19 PM
Post
#567
|
|
That's opposite lock!! Group: Members Posts: 645 Joined: 27-May 05 From: Dublin, OH Member No.: 4,154 Region Association: None |
From the first throttle application after the suby swap it was clear that the car needed wider tires and flares to fit them. For a while I was all about "doing it right" and installing steel flares. Then after investigating some rust areas and other areas of concern, like a probable full driver side rear fender replacement, I decided that QRS full fiberglass fenders would be the way to go so that I could ditch the crappy steel. Now a project is coming together that will make me the proud new owner of a set of steel flares so it is time to see how bad it is....
(IMG:style_emoticons/default/barf.gif) (IMG:style_emoticons/default/barf.gif) (IMG:style_emoticons/default/barf.gif) (IMG:style_emoticons/default/barf.gif) (IMG:style_emoticons/default/barf.gif)  The vent area is pretty roached and it does look like a new fender was installed but it is not insanely terrible. 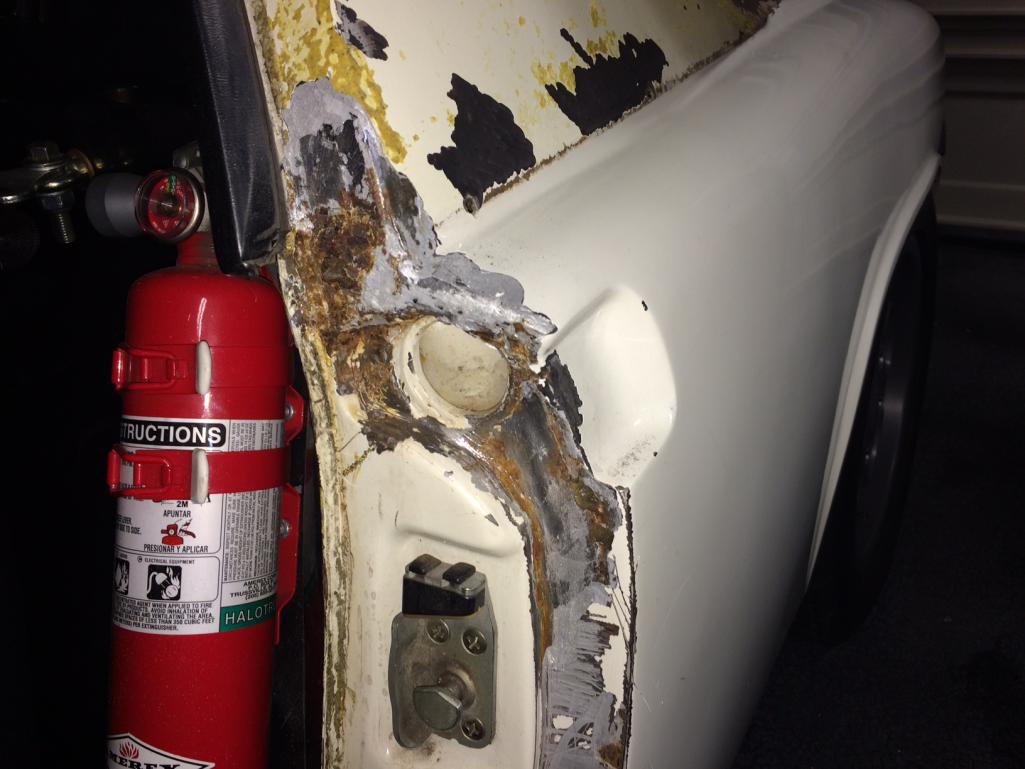 OK, it is ugly but fixable. I hated to take time away from Doug's car but I had to see if I needed a part that Stephen just offered to me....yup, I will definitely be taking you up on the sail panel chunk. I will probably also need some other sections of the fender to clean up the fender replacement but I should have access to a decent fender also. Back to Grey Matter! Cheers, Scott |
|
|
|
| 914forme |
Jan 14 2017, 09:43 PM
Post
#568
|
|
Times a wastin', get wrenchin'! Group: Members Posts: 3,899 Joined: 24-July 04 From: Dayton, Ohio Member No.: 2,388 Region Association: None |
QUOTE(Amenson @ Jan 12 2017, 11:19 PM) The vent area is pretty roached and it does look like a new fender was installed but it is not insanely terrible. OK, it is ugly but fixable. I hated to take time away from Doug's car but I had to see if I needed a part that Stephen just offered to me....yup, I will definitely be taking you up on the sail panel chunk. I will probably also need some other sections of the fender to clean up the fender replacement but I should have access to a decent fender also. Back to Grey Matter! Cheers, Scott Well I plan on cutting it out tomorrow, and bring it over after my meeting this week. 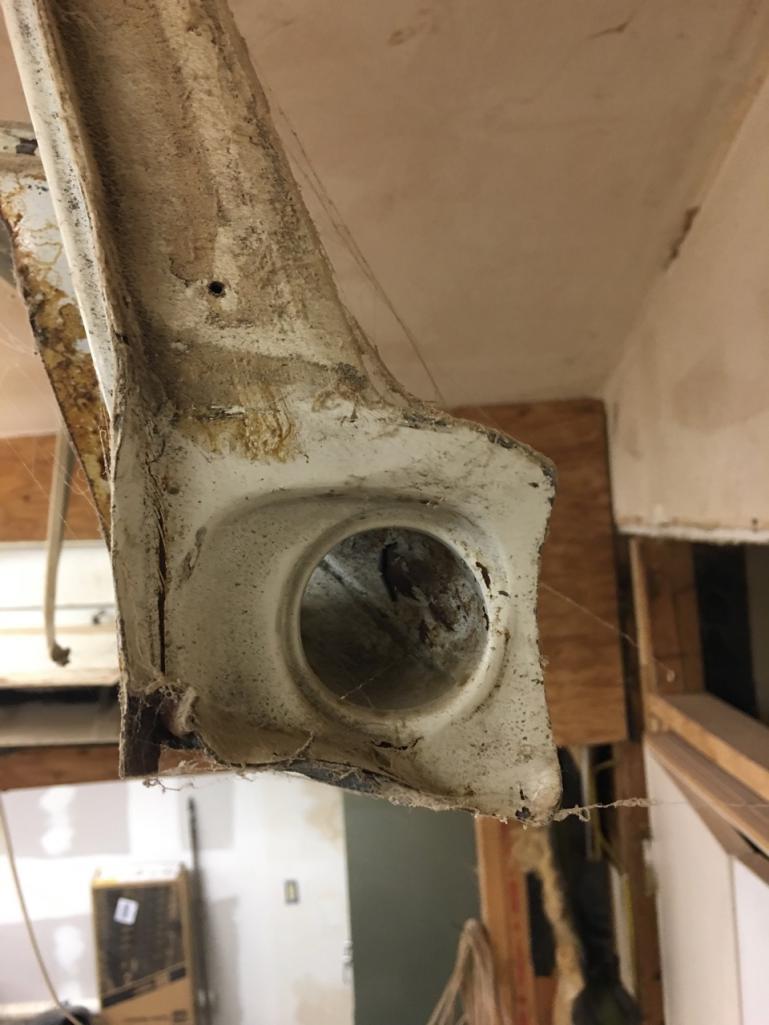 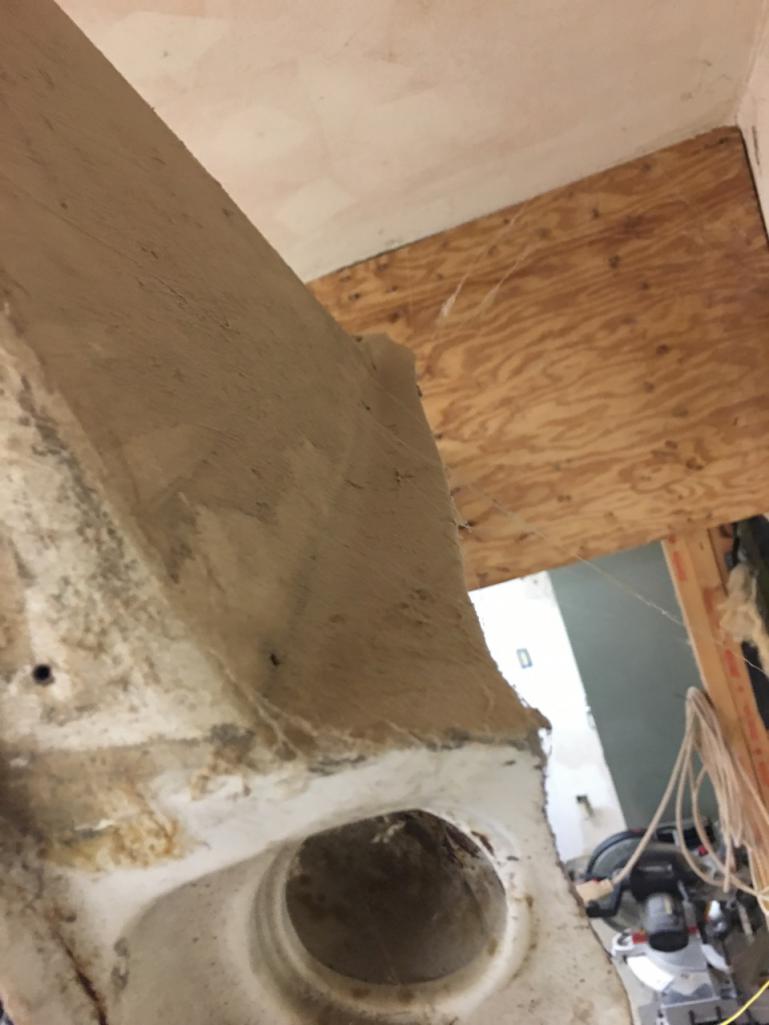 |
|
|
|
| Amenson |
Jan 22 2017, 08:39 PM
Post
#569
|
|
That's opposite lock!! Group: Members Posts: 645 Joined: 27-May 05 From: Dublin, OH Member No.: 4,154 Region Association: None |
It was a spring like day so I took the opportunity to get the PorSTI out of the garage for some exploratory grinding.
Not super happy with what I found. 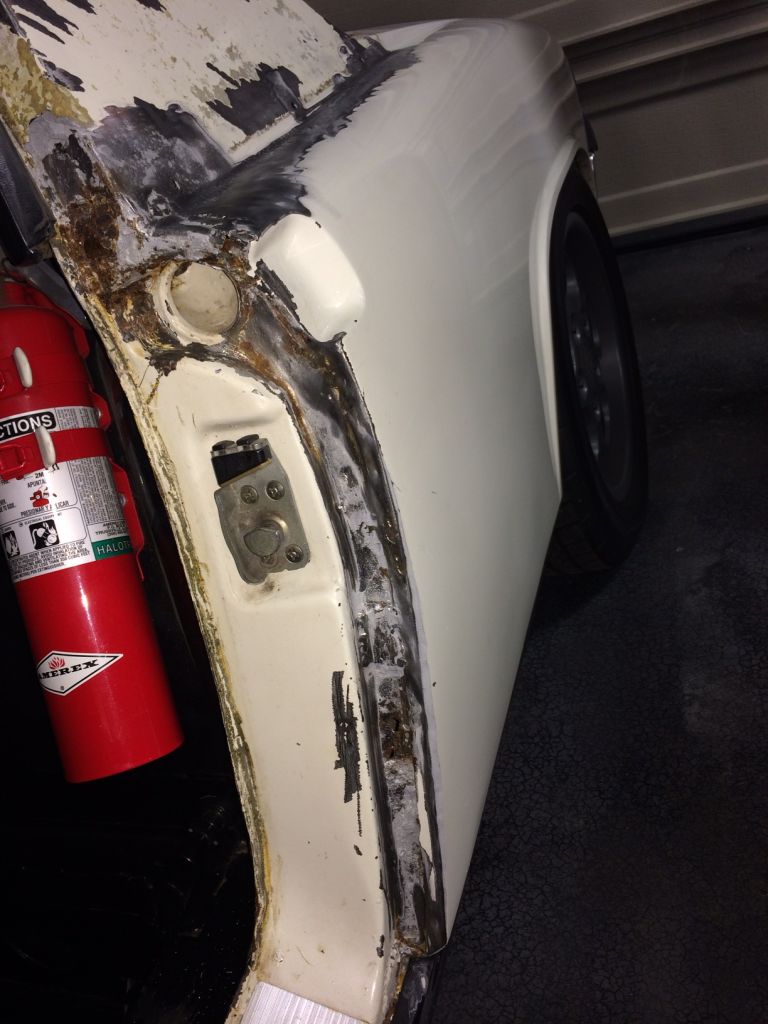 There was a huge chunk of filler in there. 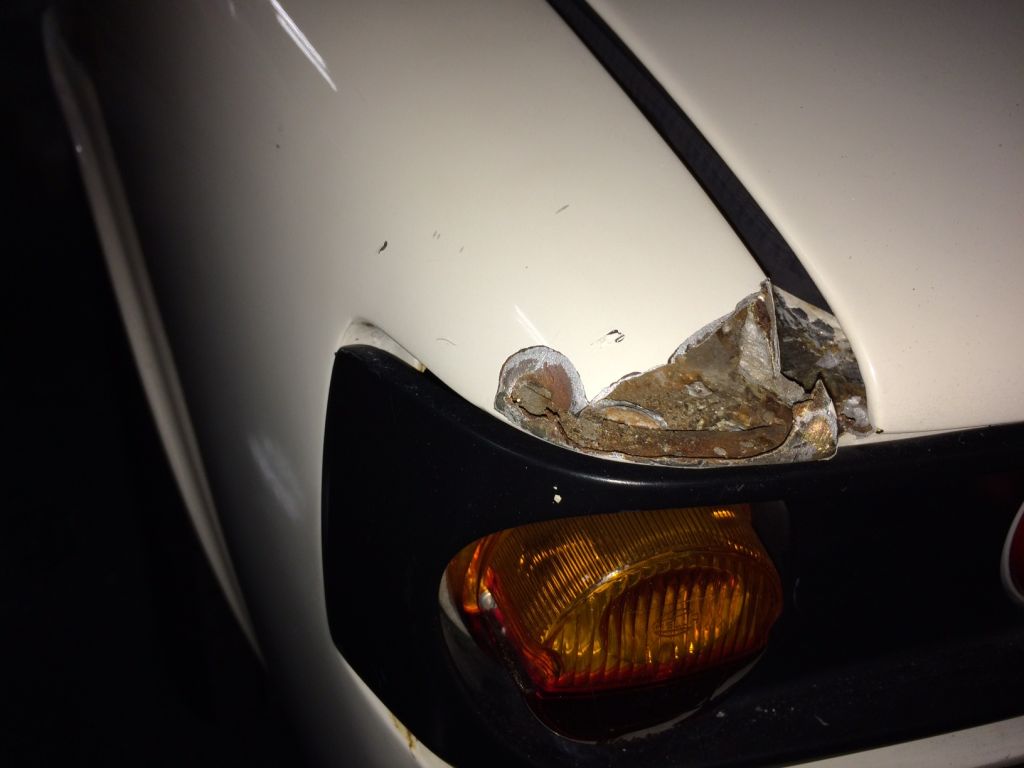 I ground back looking for a seam but it looks like the full fender was replaced. Based on the thickness of the filler over rust, the fender was rusty when installed and installed over rust. I just can't make any sense out of what I am finding. Cheers, Scott |
|
|
|
| 914forme |
Jan 22 2017, 08:55 PM
Post
#570
|
|
Times a wastin', get wrenchin'! Group: Members Posts: 3,899 Joined: 24-July 04 From: Dayton, Ohio Member No.: 2,388 Region Association: None |
(IMG:style_emoticons/default/barf.gif)
To bad it is not the pass side, I could hook you up. (IMG:style_emoticons/default/headbang.gif) I hate seeing that, (IMG:style_emoticons/default/headbang.gif) |
|
|
|
| charliew |
Jan 23 2017, 10:11 AM
Post
#571
|
|
Advanced Member Group: Members Posts: 2,363 Joined: 31-July 07 From: Crawford, TX. Member No.: 7,958 |
on a lot of redos you will find rust under the filler. most older repairs were done on bare metal without a two part sealer first so the porus filler lets moisture set in on the bare metal and it eventually raises the filler up. also some people wet sanded the primer that was porous and that let the moisture into the mix and it started the rusting process before the top coat was put on in some cases. filler and primer is porous. some redos take years and a car in a humid climate will soak up moisture in the repaired areas. It is a shame but thats the way with our old unibody cars, the cavities are tough to forsee their problems. Thats why I hate to weld on any area that the back side can't be treated to stop the rust that will come from being heated from welding. All the old foam they put in the corners cause more problems than it fixed. I guess washing up under the fenders might have added to the problem also.
You know that is a lot of work but I am sure you can handle it. I thought I bought a rust free car but I have found rust at the bottom of the threshold were the brazing is and in the vent area where the foam was like yours but not very bad. you really never know unless it is stripped. I wonder how much longer we will have good parts from parts cars. |
|
|
|
| Amenson |
Apr 23 2017, 09:04 PM
Post
#572
|
|
That's opposite lock!! Group: Members Posts: 645 Joined: 27-May 05 From: Dublin, OH Member No.: 4,154 Region Association: None |
Time for the sabbatical from working on the porsti to end. Last year I had the radiator repaired and well...it wasn't. I pulled the radiator this spring and brought it back to be fixed again and well...it still isn't. I decided to throw in the towel and contact Ron Davis for a replacement. Unfortunately they do not make my style of radiator as one of their standard models any more. They make the size but it is not the same, looks more OEM than custom/race. Ron gave me a price to make a full custom radiator with my modifications for only a couple hundred bucks more than the standard model. My radiator was out of the car and in the mail the next day.
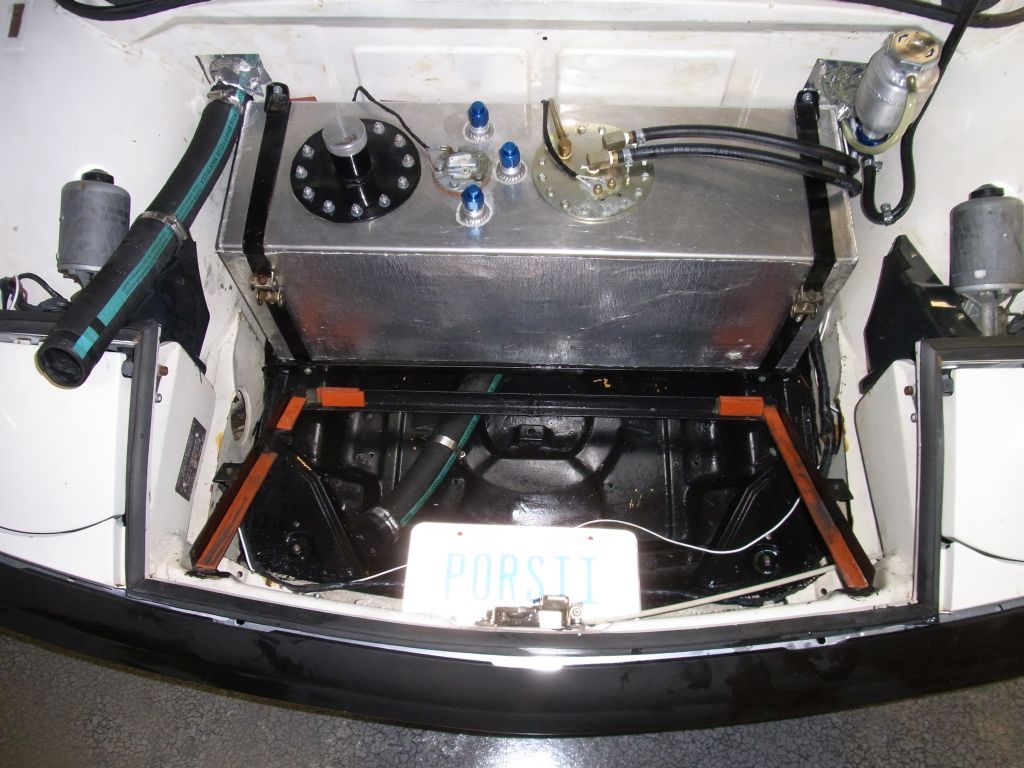 It has always bothered me that I didn't fully remove the front spare tire shelf when I initially installed the radiator. While I was working out how to install a screen to protect the new radiator I took the time to remove the remaining ugly bits. Much better. 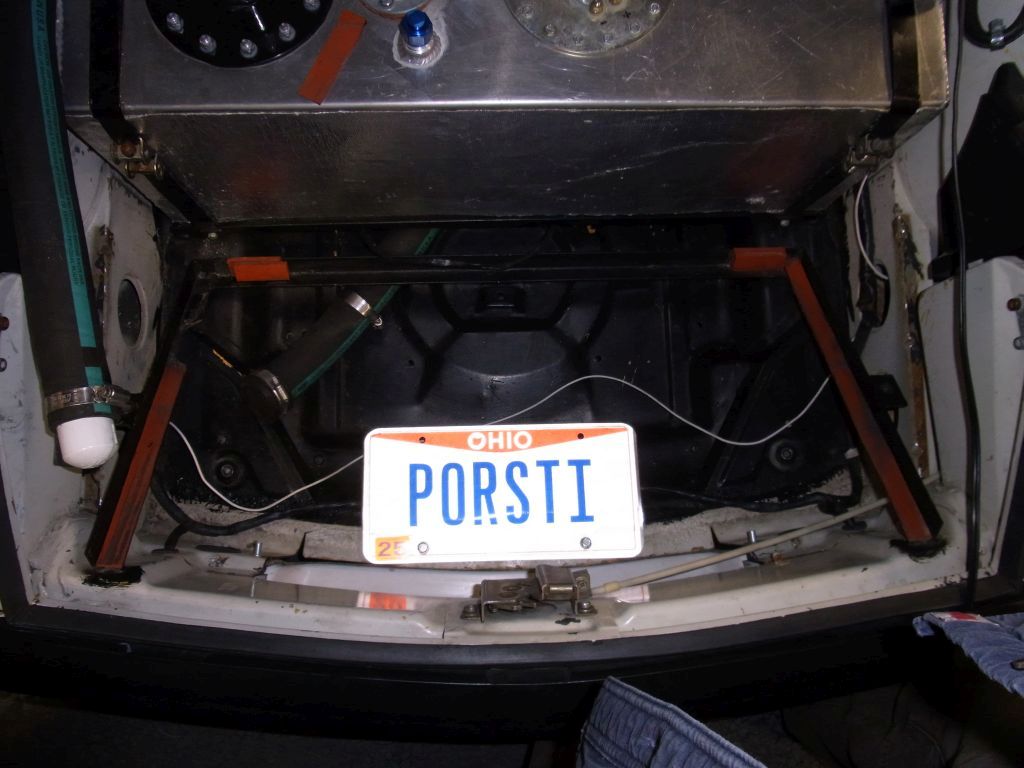 On to progress. Mark enticed me to work on his EG project with wheels and flares, including a driver side rear fender to replace the disaster that is there now. Stephen picked them up from Hershey this weekend and delivered them yesterday. You might say that things are getting serious! 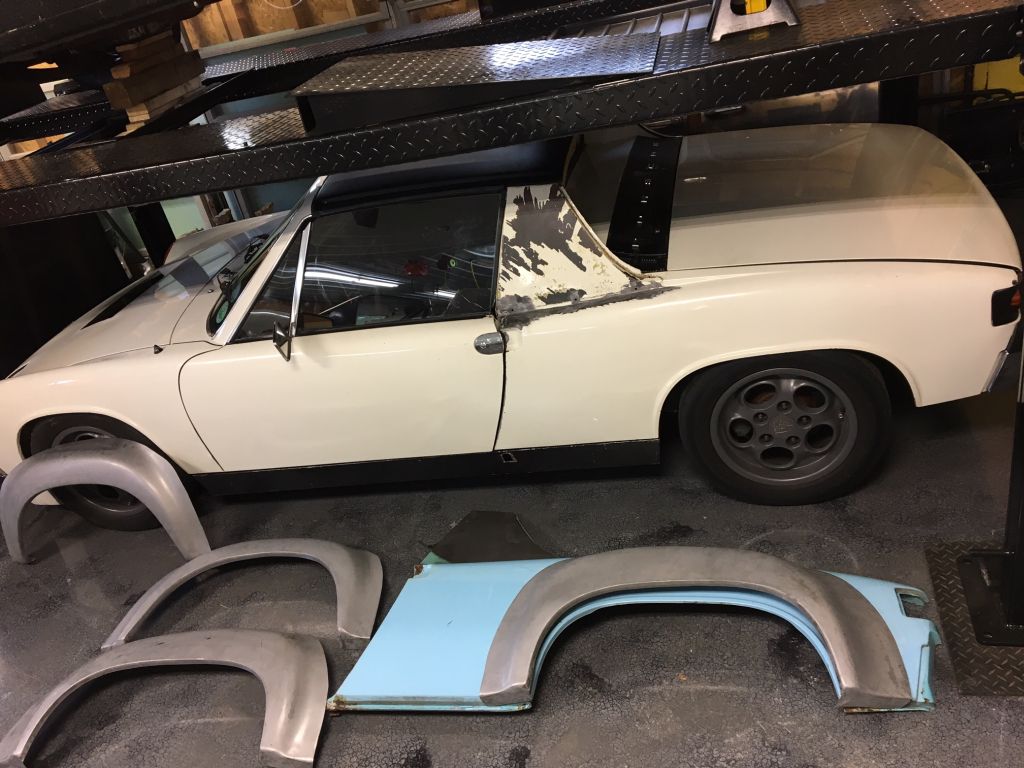 Flares need to be on the car by June 10th so I got started immediately by removing the guts from the sail panel. So many spot welds. 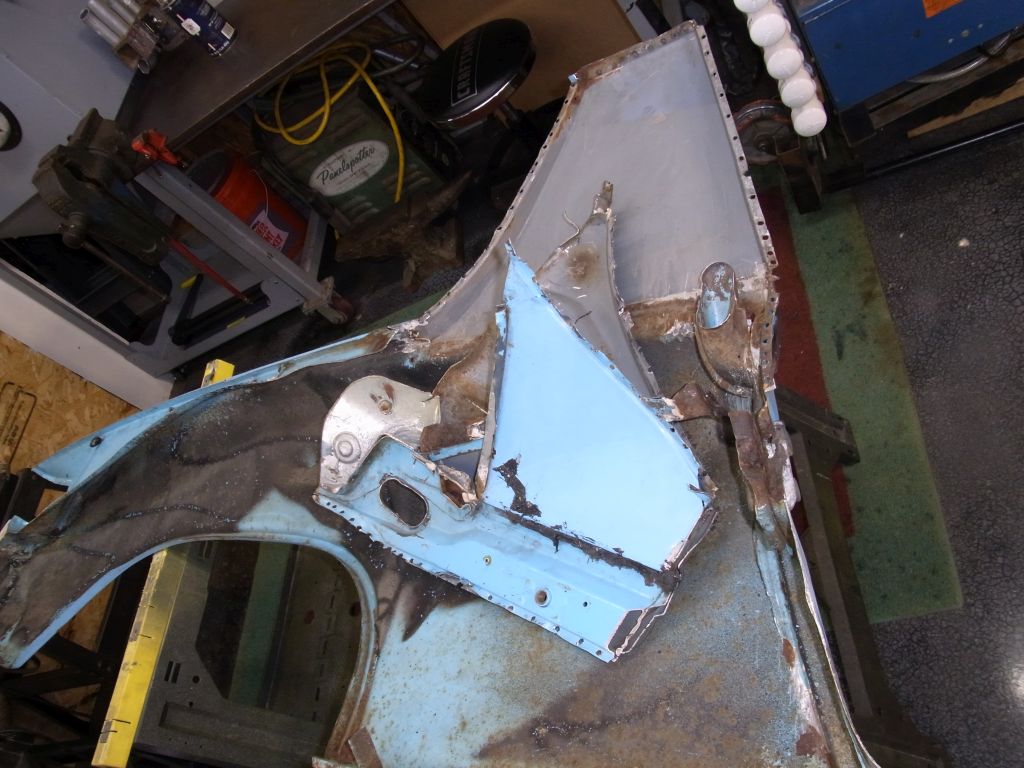 All this work for this! 9x17 and 7.5x17 Cup 1's. So convenient to have a flared car in the garage to test fitment. Thanks Tom! 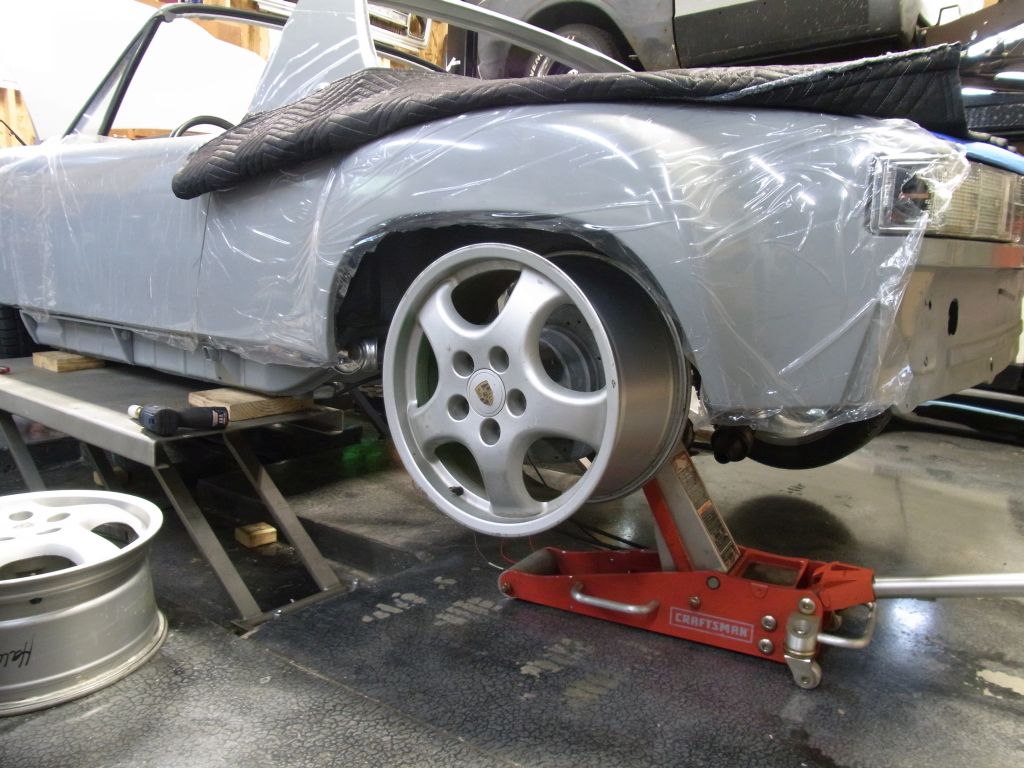 Wheels are off to the power coater tomorrow. Will be the same color as the current phonedials. Tires will be mounted next week. So much work, so little time. Cheers, Scott |
|
|
|
| theer |
Apr 24 2017, 07:44 AM
Post
#573
|
|
Senior Member Group: Members Posts: 692 Joined: 31-July 15 From: Dover, MA Member No.: 19,014 Region Association: North East States |
Looks good, Scott.
Glad to be of assistance. Tom |
|
|
|
| charliew |
Apr 26 2017, 01:18 PM
Post
#574
|
|
Advanced Member Group: Members Posts: 2,363 Joined: 31-July 07 From: Crawford, TX. Member No.: 7,958 |
Scott I thought I made this comment but I don't see it so here goes. I met a member in Arlington, tx. at a small swap meet/gettogether a few years ago and he had a nice example with flares. I asked him what he thought about it after it was done. He also had some nice metal rocker panels on the car. He showed me where I thought the front flares could have been positioned a little more rearward to clear wide front tires when you turn all the way. It is just a suggestion that you might mount your tires and wheels on your example and see about that. I have remembered that. My boxter wheels are 1/2 narrower than yours. It might be hard to check as the ride height and how low on corners the car dips might also play in the clearance.
|
|
|
|
| BIGKAT_83 |
Apr 26 2017, 05:47 PM
Post
#575
|
|
Senior Member Group: Members Posts: 1,800 Joined: 25-January 03 From: Way down south Bogart,GA Member No.: 194 Region Association: South East States |
|
|
|
|
| Amenson |
Apr 27 2017, 08:13 AM
Post
#576
|
|
That's opposite lock!! Group: Members Posts: 645 Joined: 27-May 05 From: Dublin, OH Member No.: 4,154 Region Association: None |
QUOTE(charliew @ Apr 26 2017, 03:18 PM) Scott I thought I made this comment but I don't see it so here goes. I met a member in Arlington, tx. at a small swap meet/gettogether a few years ago and he had a nice example with flares. I asked him what he thought about it after it was done. He also had some nice metal rocker panels on the car. He showed me where I thought the front flares could have been positioned a little more rearward to clear wide front tires when you turn all the way. It is just a suggestion that you might mount your tires and wheels on your example and see about that. I have remembered that. My boxter wheels are 1/2 narrower than yours. It might be hard to check as the ride height and how low on corners the car dips might also play in the clearance. Thanks for the hint. I have been scouring the forum for flare install discussions and thought that the common recommendation was to shift the fronts forward a bit for clearance. Either way I will install my wheels and check before final placement. Cheers, Scott |
|
|
|
| Amenson |
Apr 28 2017, 06:03 PM
Post
#577
|
|
That's opposite lock!! Group: Members Posts: 645 Joined: 27-May 05 From: Dublin, OH Member No.: 4,154 Region Association: None |
(IMG:style_emoticons/default/headbang.gif)
(IMG:style_emoticons/default/headbang.gif) (IMG:style_emoticons/default/headbang.gif) (IMG:style_emoticons/default/headbang.gif) (IMG:style_emoticons/default/headbang.gif) (IMG:style_emoticons/default/headbang.gif) (IMG:style_emoticons/default/headbang.gif) (IMG:style_emoticons/default/headbang.gif) (IMG:style_emoticons/default/headbang.gif) (IMG:style_emoticons/default/headbang.gif) Feel much better now. I just finished what I had planned to be prepping the fenders for the steel flare install. What I actually just finished was grinding through sickening amounts of body filler. I expected front right fender to need some repair, not quite this much but OK not the end of the world. Took some time to grind out over 1/4" of filler. 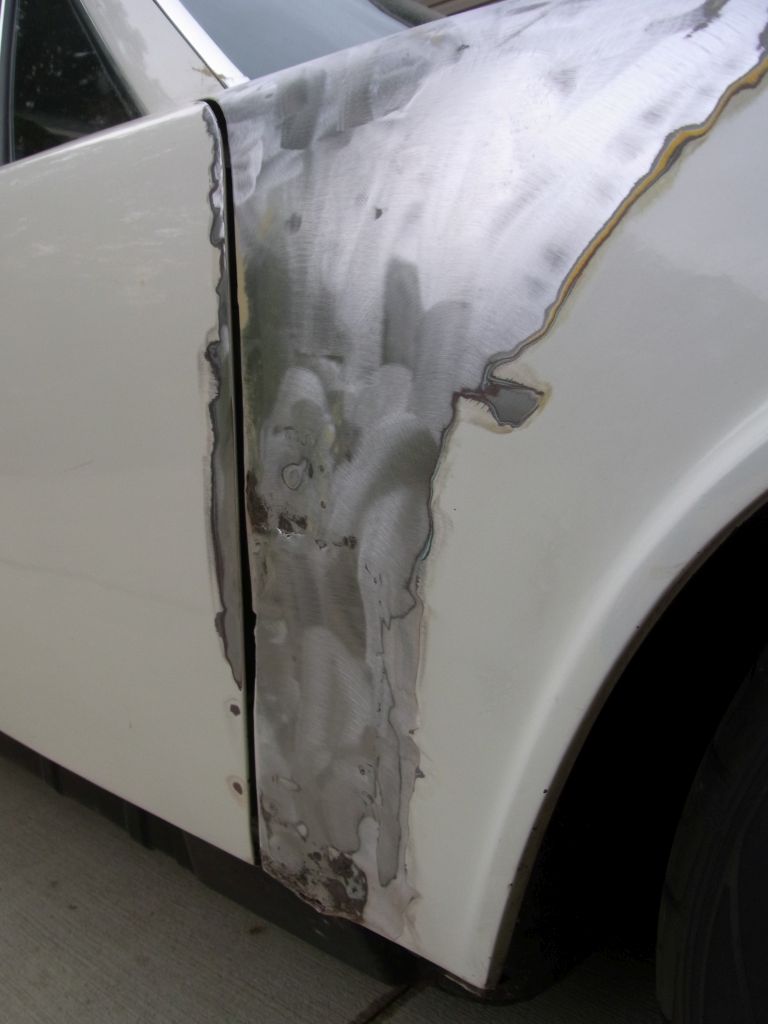 Rear right fender showed no signs of any issue. It has as much filler as the front right. 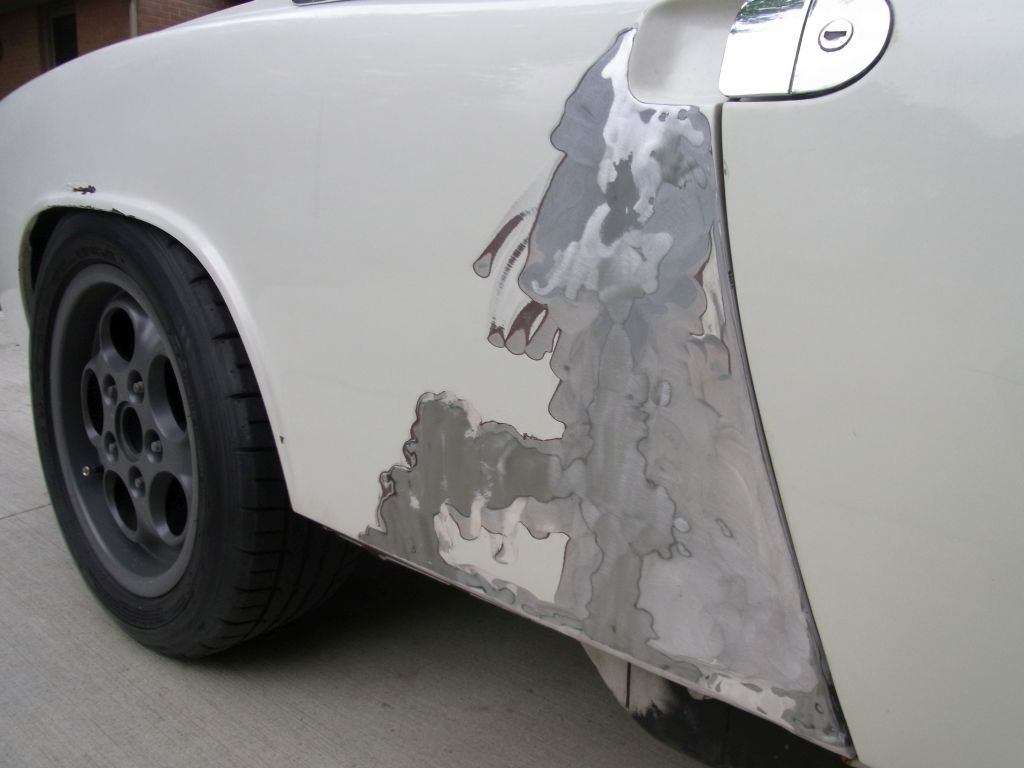 Front left fender had a small bubble but should be otherwise OK. WTF! A good 0.25" of filler. 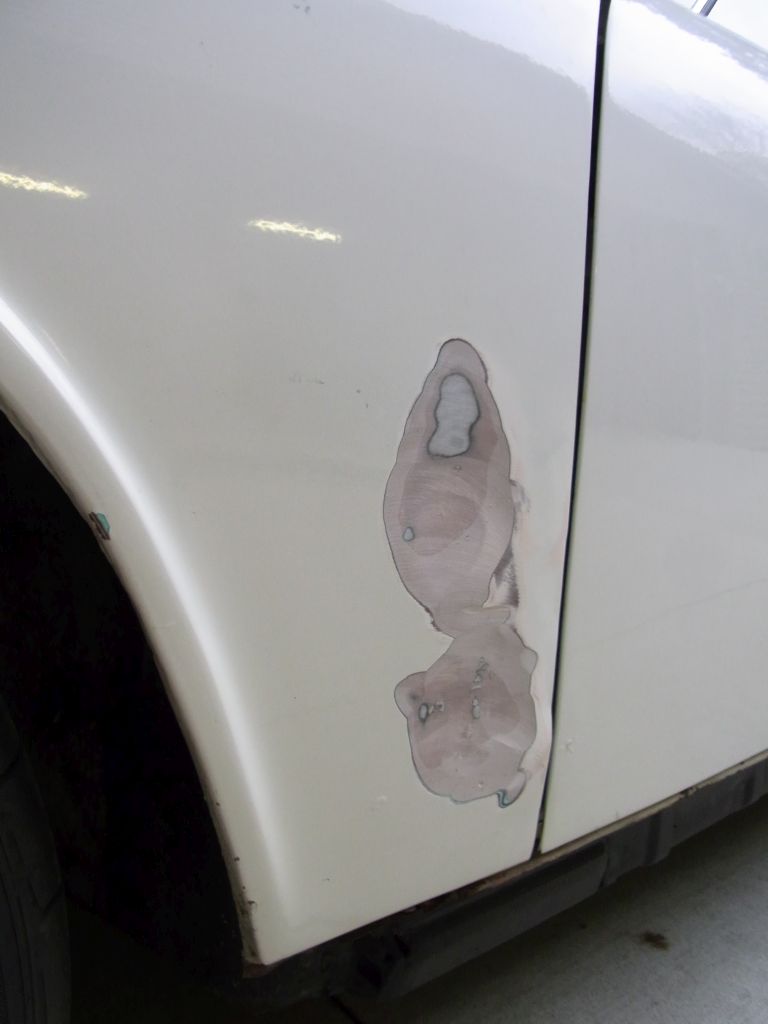 Time to call QRS and order a set of fiberglass flared fenders. Anyone need a set of steel flares? Time to go to my buddies house to drink bourbon and smoke cigars. Cheers, Scott |
|
|
|
| 914forme |
Apr 28 2017, 09:21 PM
Post
#578
|
|
Times a wastin', get wrenchin'! Group: Members Posts: 3,899 Joined: 24-July 04 From: Dayton, Ohio Member No.: 2,388 Region Association: None |
Oh that sucks, but yes, you have a solution.
Steel GT flares, should be an easy sell. So time for me to get out my dual plunger mixing gun, and pickup some 3m or SEM epoxy and it will be a very nice and easy fix. BTW, screws are what you use now, clecos will get gummed up by epoxy. |
|
|
|
| charliew |
Apr 28 2017, 09:40 PM
Post
#579
|
|
Advanced Member Group: Members Posts: 2,363 Joined: 31-July 07 From: Crawford, TX. Member No.: 7,958 |
I guess maybe it will be lighter also? I forgot but maybe there is a formula for every 10 lbs. less equals more hp?
|
|
|
|
| 914forme |
Apr 29 2017, 05:38 AM
Post
#580
|
|
Times a wastin', get wrenchin'! Group: Members Posts: 3,899 Joined: 24-July 04 From: Dayton, Ohio Member No.: 2,388 Region Association: None |
It might be lighter, not sure if Scott needs more HP to weight ratio (IMG:style_emoticons/default/dry.gif) it is all ready hard enough to keep up with him. (IMG:style_emoticons/default/driving.gif)
Heck I'm building a forced induction EG33 to run E85 just to give me a fair shake at it. If Cobb gets the E85 mod done for his engine year, then well (IMG:style_emoticons/default/shades.gif) In reality the forced induction EG33 on E85 is more because I've got a bad disease (IMG:style_emoticons/default/happy11.gif) BTW, don't get down on this, just get the parts ordered, and move on. So many good projects in your shop, pick one, work, hit a stand still, go to the next. Or hell start something a new, or practice fusion welding with the TIG on old beer cans. And if you need help staring at the car I'm good at that too (IMG:style_emoticons/default/drunk.gif) I know this nice Bier garden in Cincinnati that still serves the good stuff in them Liter Mugs you love so much. (IMG:style_emoticons/default/beer3.gif) And when your with me, we leave the Warstiener alone and move up the bier scale to much more optimized biers to drink from a liter or a boot. I'm off to do a brake job on a Chevy 2500HD, then maintenance on an Rabbit, and an EOS. Then have to fix a mower deck hopefully from where my wife decided it was a stump grinder by accident. Not really her fault, she could not see it. Might need to put stump shields on that mower. Then installing LED lighting in an outbuild, and after that, repairing another mower deck because I can see, and then trying to get one of the desiel tractors on the farm re primed (IMG:style_emoticons/default/headbang.gif) Running a diesel engine dry of fuel is bad very bad, harder than hell to get them re-primed. Mechanical pump, no boaster pump, it is all gravity. And gravity is a bitch. Oh in the middle of all this I get to have a meeting with one of our financial advisors to take car of some paperwork. (IMG:style_emoticons/default/headbang.gif) |
|
|
|
|
2 User(s) are reading this topic (2 Guests and 0 Anonymous Users)
0 Members:

|
Lo-Fi Version | Time is now: 7th June 2026 - 12:11 PM |
Invision Power Board
v9.1.4 © 2026 IPS, Inc.