|
|
|
Porsche, and the Porsche crest are registered trademarks of Dr. Ing. h.c. F. Porsche AG.
This site is not affiliated with Porsche in any way. Its only purpose is to provide an online forum for car enthusiasts. All other trademarks are property of their respective owners. |
|
|

  |

| charliew |
 Apr 29 2017, 10:51 AM Apr 29 2017, 10:51 AM
Post
#581
|
|
Advanced Member  Group: Members Posts: 2,363 Joined: 31-July 07 From: Crawford, TX. Member No.: 7,958 |
Blow a little air in the tank with a airtank or the compressor if the hose will reach to prime the pump. Just use a rag to try and plug the filler a little pressure is all it takes. You should not cut trees so close to the ground, leave the stumps tall so later you can push them over after the roots rot. we also gotta do estate planning which I hate for some reason. We try to keep at least three mowers going. This time of year it is hard to have any extra time for fun projects. At least I have propane on my miller 250 bobcat. the diesel mower is the most reliable mower we have.
|
   |

 
|
| 914forme |
Apr 29 2017, 12:45 PM
Post
#582
|
|
Times a wastin', get wrenchin'! Group: Members Posts: 3,899 Joined: 24-July 04 From: Dayton, Ohio Member No.: 2,388 Region Association: None |
QUOTE(charliew @ Apr 29 2017, 12:51 PM)  Blow a little air in the tank with a airtank or the compressor if the hose will reach to prime the pump. Just use a rag to try and plug the filler a little pressure is all it takes. You should not cut trees so close to the ground, leave the stumps tall so later you can push them over after the roots rot. we also gotta do estate planning which I hate for some reason. We try to keep at least three mowers going. This time of year it is hard to have any extra time for fun projects. At least I have propane on my miller 250 bobcat. the diesel mower is the most reliable mower we have. Thanks for the tip(s) I will give that a try |
|
|
|
| Amenson |
Apr 29 2017, 09:04 PM
Post
#583
|
|
That's opposite lock!! Group: Members Posts: 645 Joined: 27-May 05 From: Dublin, OH Member No.: 4,154 Region Association: None |
Moving forward....
Closed all of the browser tabs with steel flair install info and looked up all of my links to fiberglass flared fender installs. QRS was not answering the phone today so I will have to wait until Monday to place the order. Unfortunately I still have to fix the passenger sail panel/b-pillar so that I have something decent to attach the fender to. I started prepping the chunk from Stephen today and outlined the section of the fender from Mark that I still need. I gave up for the evening when I got to the goo around the b-pillar vent. I really wanted to cut off the fenders but will wait until I get the replacements so that I don't hack off something that I need. As for the weight, best case would be to offset the gain from the new wheel/tire setup. Not that it really matters, the power fluctuates more based on intake air tems that I would even notice from +- 50 pounds of weight change. As Stephen said, I need E85 and a new snail to make a difference at this point. Cheers, Scott |
|
|
|
| Amenson |
Apr 30 2017, 08:12 PM
Post
#584
|
|
That's opposite lock!! Group: Members Posts: 645 Joined: 27-May 05 From: Dublin, OH Member No.: 4,154 Region Association: None |
Continued prepping the car for the fender extraction. Removed the remaining B-pillar trim, sail panel vinyl, and lights in the front fenders. While I was playing in the front fender worked out new routing for the front harness. Currently it sits on the floor below the cooling inlet, very sloppy. I also mounted the external air temp sensor and ran the wires to the junction connector. I think that I need to pull the headlights to install the fenders, If I do I'll pull and rewrap the entire harness section to tidy it up and incorporate the additional wires I installed for the headlights and temp sensor.
With the fenders ready to cut off I needed a fun distraction to keep myself from hacking them off before I have the replacements to know what I can actually remove. I decided that it would be quick and satisfying to properly mount the ECU. I had not done it previously because it requires rerouting the shifter cables. First step was easy, pull the cables, tidy up the wires, trim the ecu ears and two nutserts. So much better. 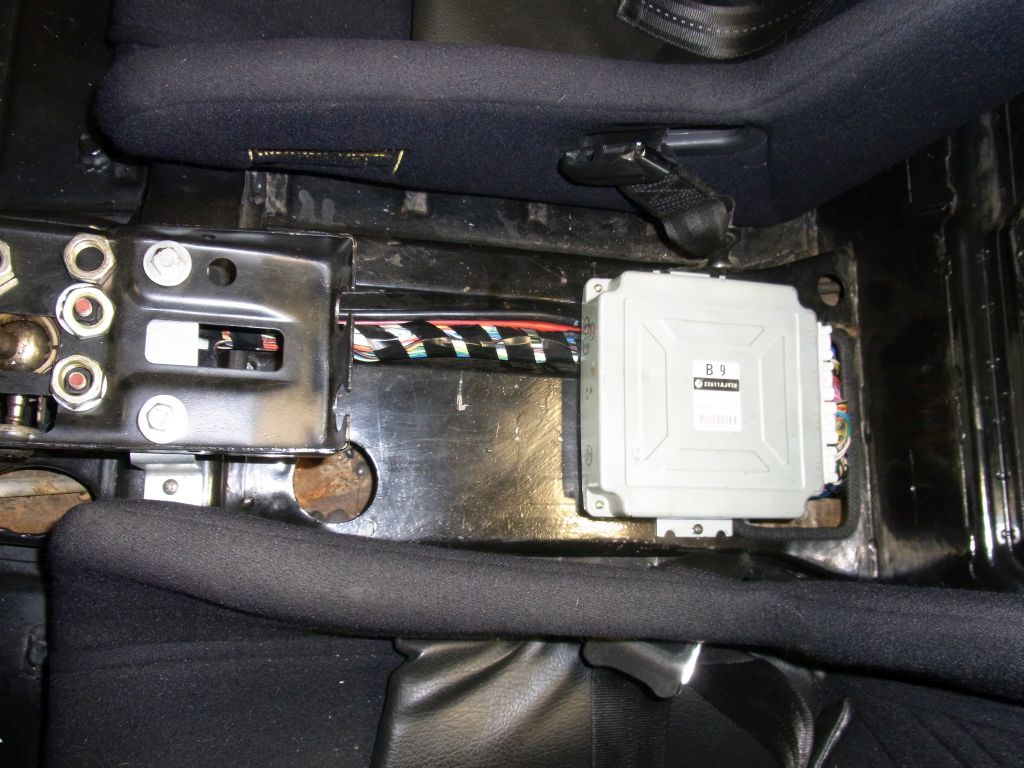 To run the cables I need to make sure that they would fit under the future center console/shifter stand.  I designed the part so that there was exactly enough room to fit the cable above the ecu and under the console. After much measuring I drilled a pilot hole to make sure that the crazy zigzag brake line that runs through the hollow section of the fire wall does not interfere with the cables. It does, perfectly. Now I get to remake the small chunk of brake line. Not a huge deal, it will take longer to clean up brake fluid than it will to make the brake line. Then I get to bleed the brakes. While I am doing that I might as well install the new 3-chamber Tilton reservoir that Stephen dropped off the other day. So much for a fun easy project. Cheers, Scott |
|
|
|
| Amenson |
May 6 2017, 06:50 AM
Post
#585
|
|
That's opposite lock!! Group: Members Posts: 645 Joined: 27-May 05 From: Dublin, OH Member No.: 4,154 Region Association: None |
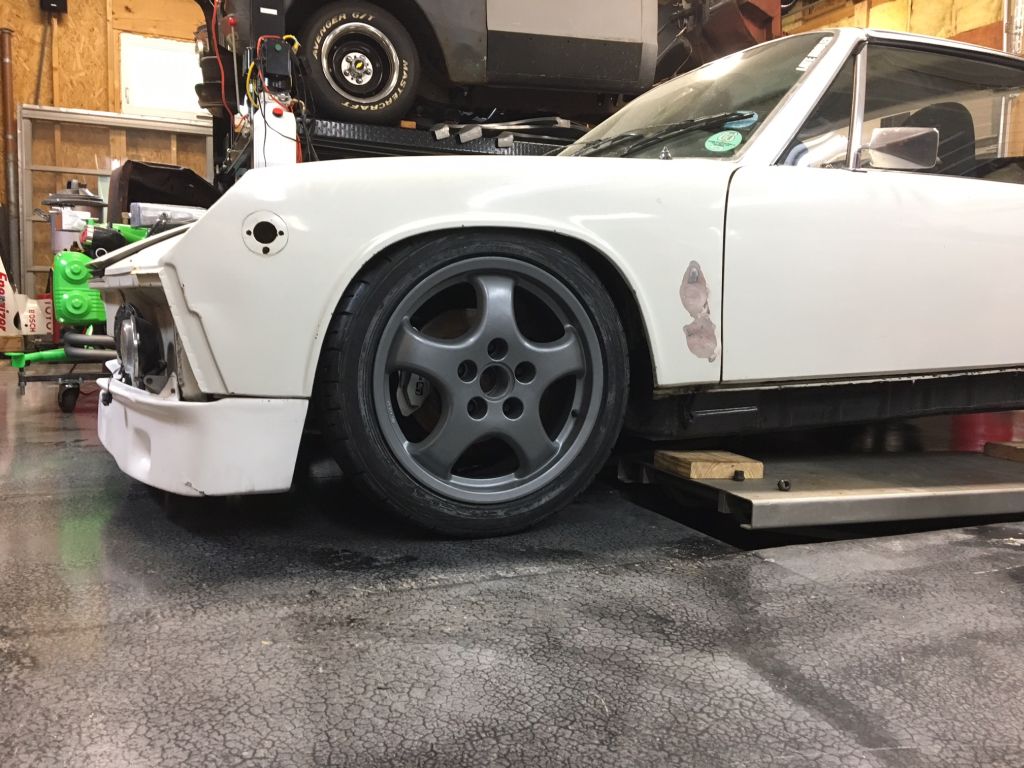
Wheels, wheels, wheels!
New vs. Old, the phone dials are awesome but the Cups are amazing. Phone dials will be available if anybody is looking for a set. 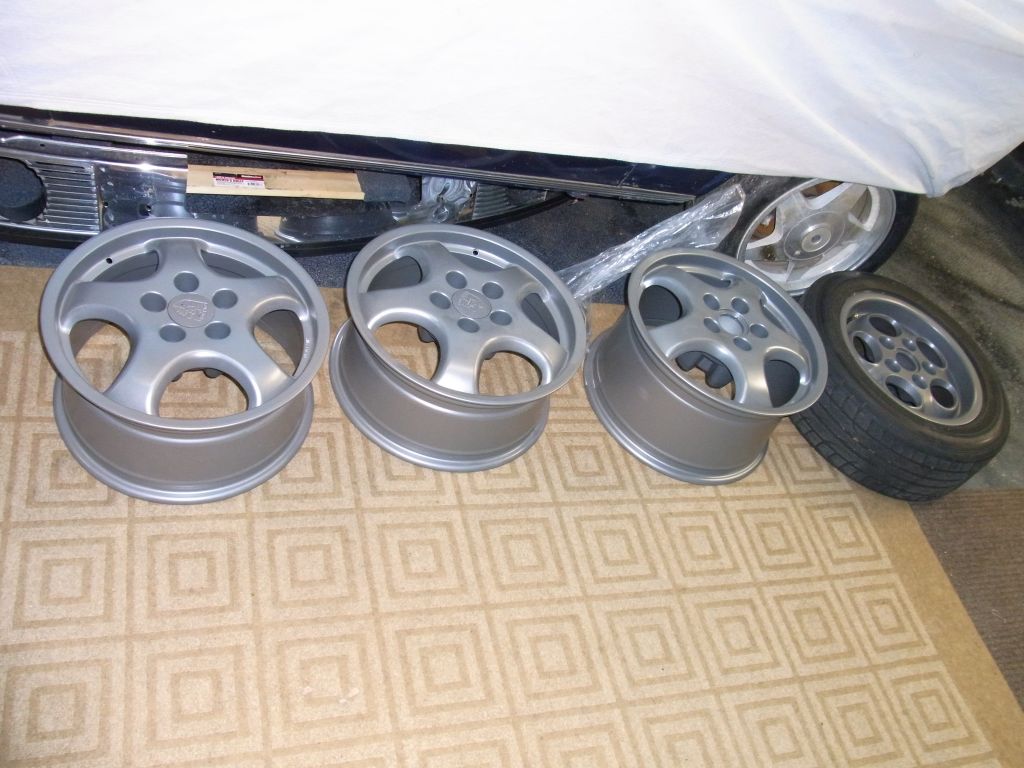 So nice. Bolts up w/o spacers but will need some to avoid rubbing on the inside with tires at ride height. 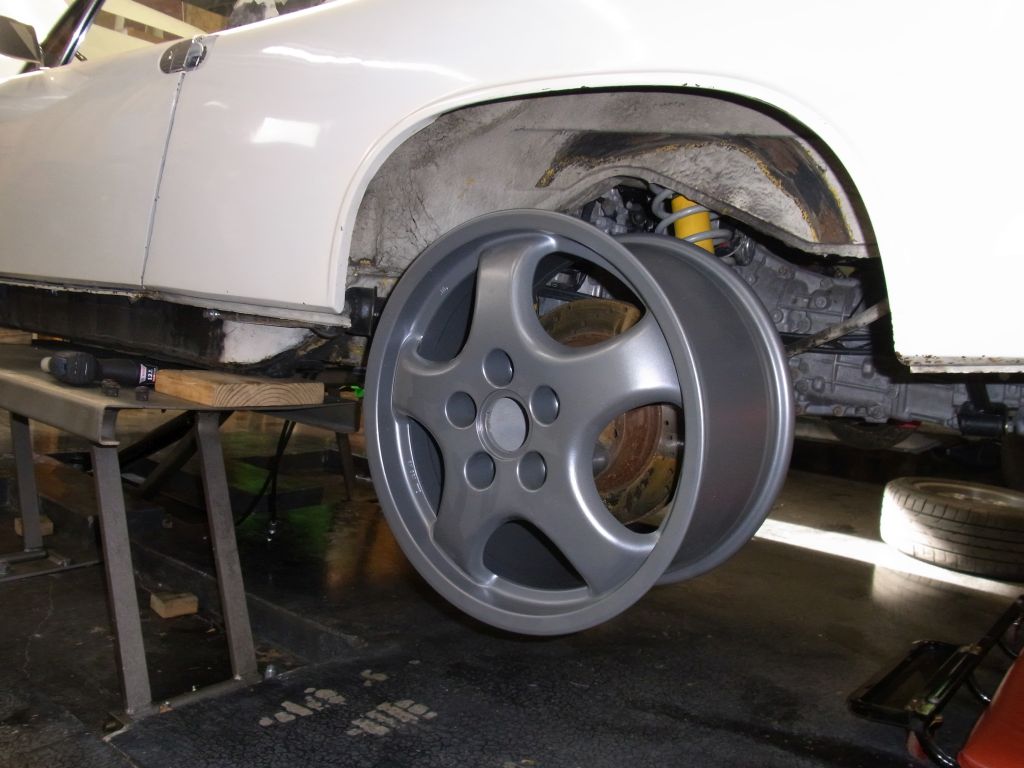 Who needs flares...this guy! 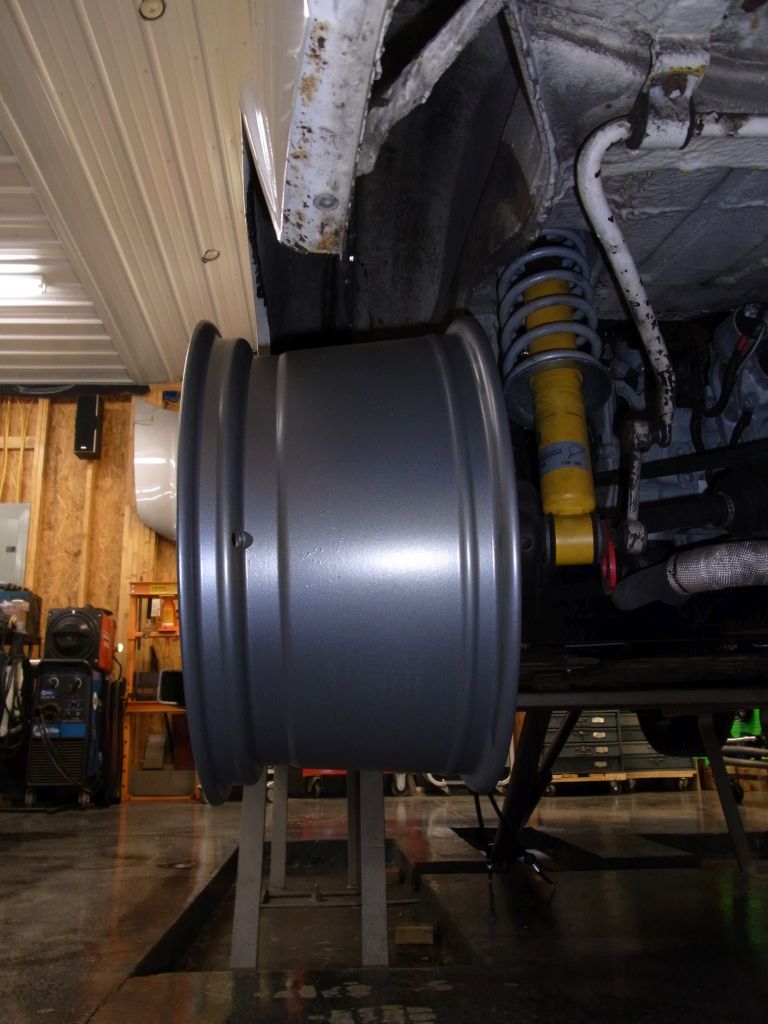 And a little hint of future plans arrived in the mail yesterday. 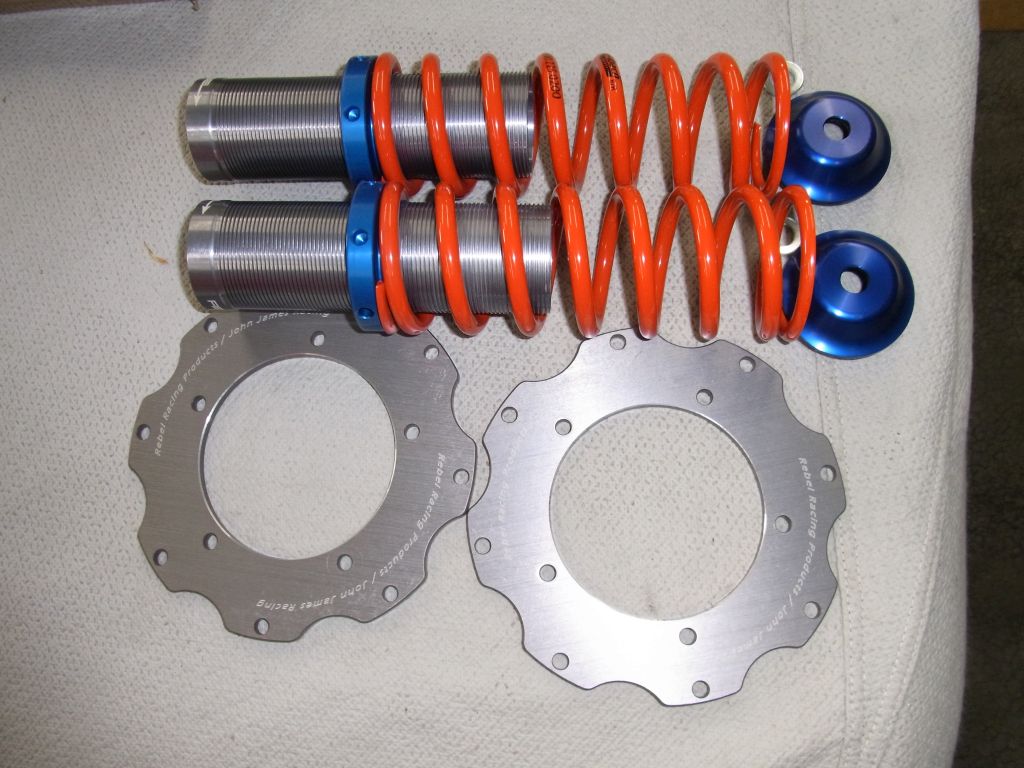 I did get the new brake line made this week and got two of the holes for shifter cables positioned and drilled. I stopped after binding a bit while drilling on the engine side of the firewall and smashed myself in the chin with the drill. No damage but shit did it hurt. Cheers, Scott |
|
|
|
| 914forme |
May 6 2017, 05:29 PM
Post
#586
|
|
Times a wastin', get wrenchin'! Group: Members Posts: 3,899 Joined: 24-July 04 From: Dayton, Ohio Member No.: 2,388 Region Association: None |
QUOTE(Amenson @ May 6 2017, 08:50 AM) I recognize those parts (IMG:style_emoticons/default/shades.gif) I like the wheels |
|
|
|
| Amenson |
May 7 2017, 08:51 PM
Post
#587
|
|
That's opposite lock!! Group: Members Posts: 645 Joined: 27-May 05 From: Dublin, OH Member No.: 4,154 Region Association: None |
Sometimes small things make me so happy.
 Time to focus on the Flares. They will arrive on Thursday, just in time for me to leave for a long weekend fly fishing in North Carolina. A new toy...tool, showed up yesterday. Stephen liked his so much I had to have one too. 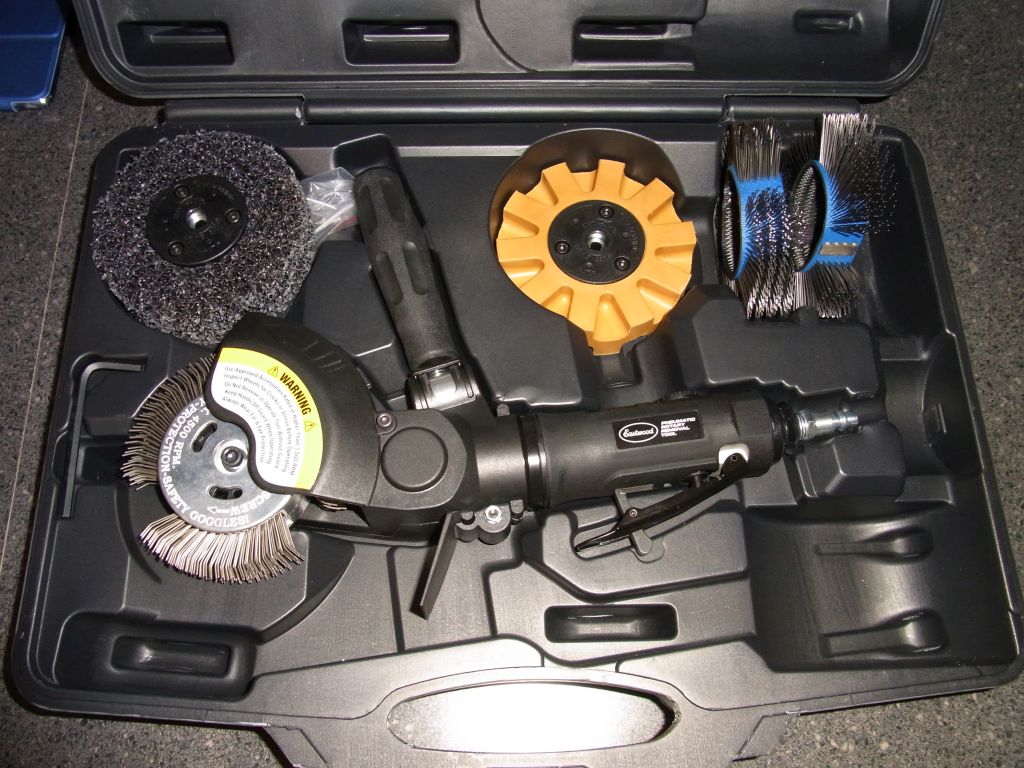 Hopefully it saves me some time getting the inner fenders to bare metal while I have access before the new fenders go on. Cheers, Scott |
|
|
|
| Amenson |
May 11 2017, 06:26 AM
Post
#588
|
|
That's opposite lock!! Group: Members Posts: 645 Joined: 27-May 05 From: Dublin, OH Member No.: 4,154 Region Association: None |
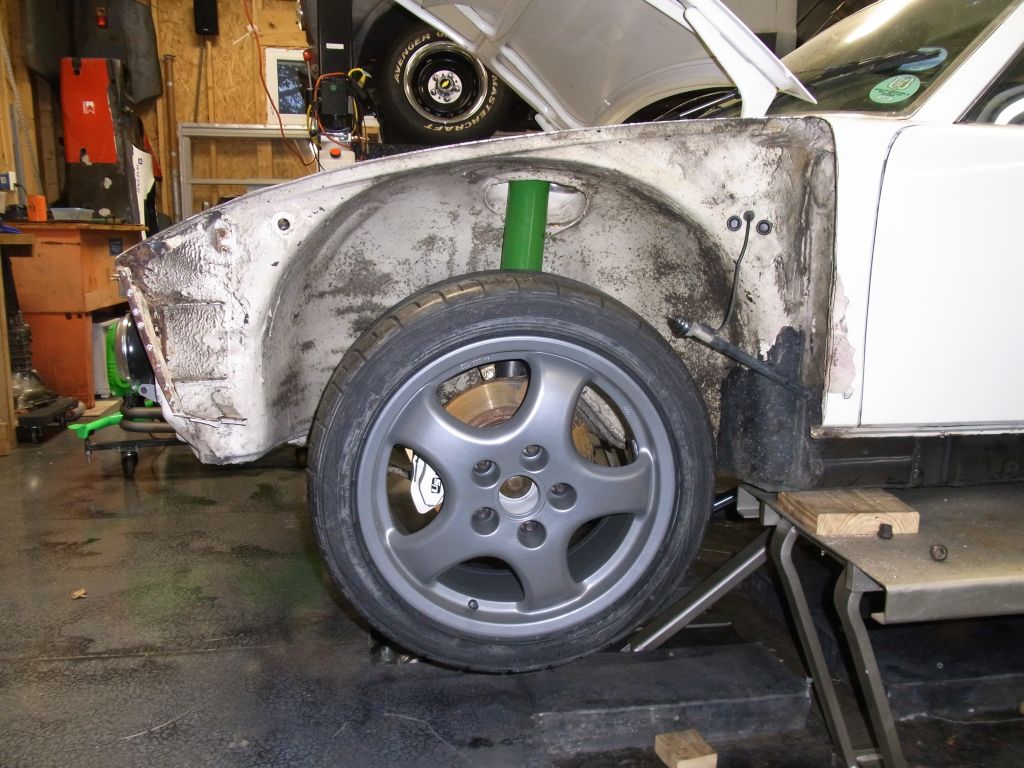
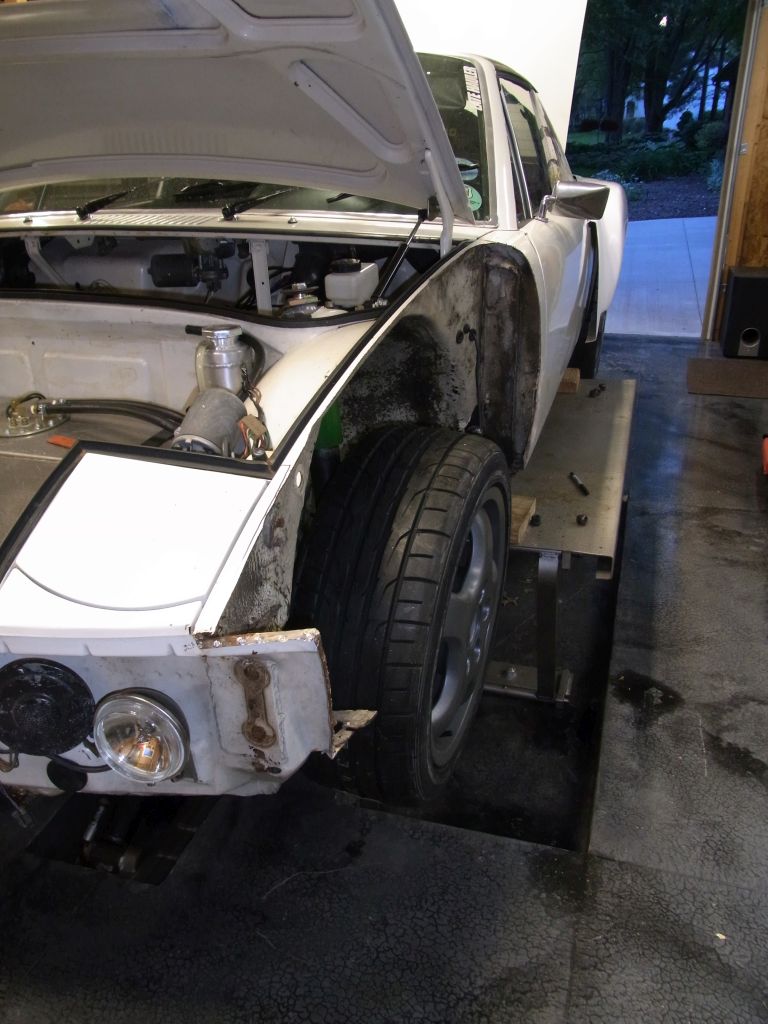
Tires were mounted yesterday and I could not wait to bolt them on to get a feel for how they would look. To be quite frank, with them on and the car on the lift the 17's really look out of place. Even the rears on the ground and not under the fenders it does not look particularly good....but at ride height with a bit of tuckage. Wowza'
 I will probably go 1/2" or so lower once I get the rear at the proper height. Had a bit of a snag finding out while balancing that one of the rears was bent but it is being taken care of quite expeditiously. Another thing that I have been working on is making a new airbox so that I can block the fresh air intake (aka: radiator heated air intake). Eventually I might want to run heat so I found a heater core that will fit in the space I plan to use. Of course, step one of any purchased part, bandsaw. 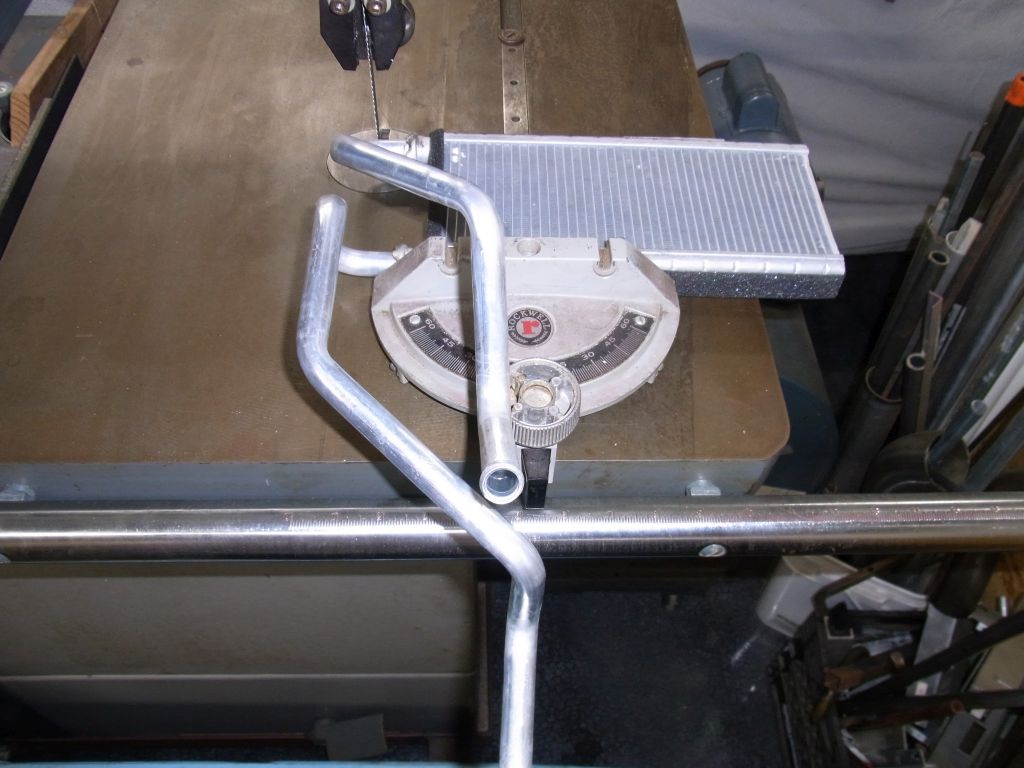 I will use the fan from the Summit airbox. 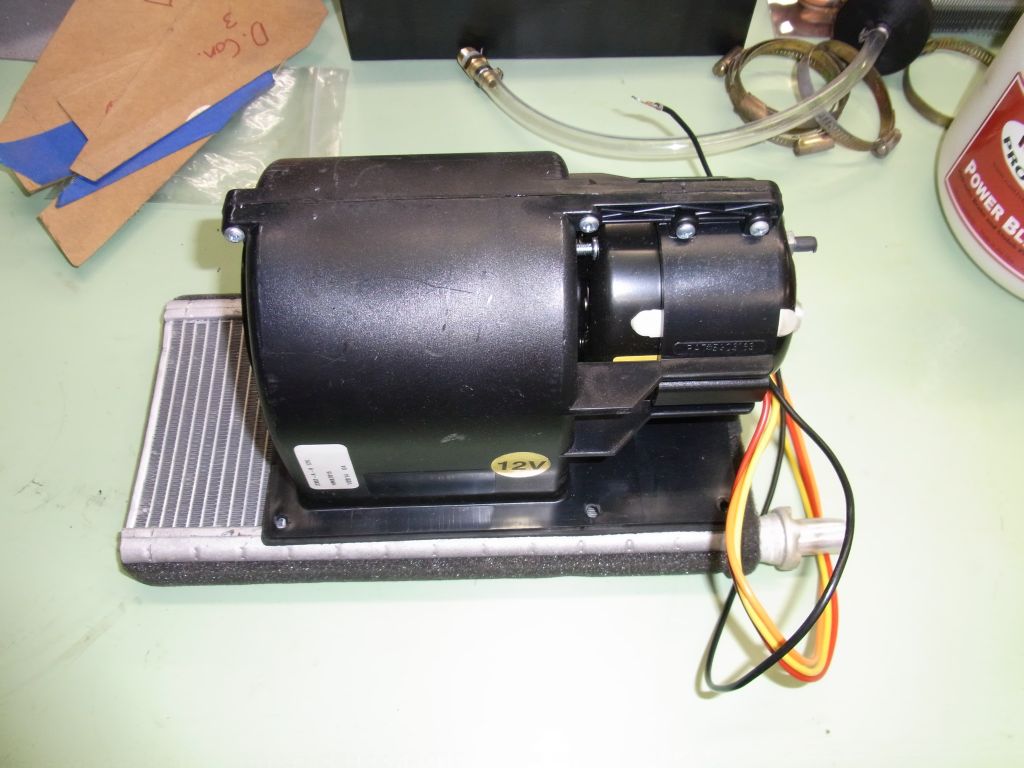 I am making it so that it will fit behind a stock tank. Why, mostly because I have a pipe dream of making a fiberglass insert where the stock tank used to be for additional storage. Also, if somebody wants to copy the design for their car with a stock tank. Delivery status of the QRS fenders...Out for Delivery!!!! Cheers, Scott |
|
|
|
| 914forme |
May 11 2017, 02:43 PM
Post
#589
|
|
Times a wastin', get wrenchin'! Group: Members Posts: 3,899 Joined: 24-July 04 From: Dayton, Ohio Member No.: 2,388 Region Association: None |
QUOTE(Amenson @ May 11 2017, 08:26 AM) Delivery status of the QRS fenders...Out for Delivery!!!! (IMG:style_emoticons/default/piratenanner.gif) |
|
|
|
| Amenson |
May 19 2017, 07:41 PM
Post
#590
|
|
That's opposite lock!! Group: Members Posts: 645 Joined: 27-May 05 From: Dublin, OH Member No.: 4,154 Region Association: None |
Deep breath... (IMG:style_emoticons/default/sawzall-smiley.gif) (IMG:style_emoticons/default/sawzall-smiley.gif) (IMG:style_emoticons/default/sawzall-smiley.gif) (IMG:style_emoticons/default/sawzall-smiley.gif)
  Ok, let's try a rear... (IMG:style_emoticons/default/sawzall-smiley.gif) (IMG:style_emoticons/default/sawzall-smiley.gif) (IMG:style_emoticons/default/sawzall-smiley.gif) (IMG:style_emoticons/default/sawzall-smiley.gif) 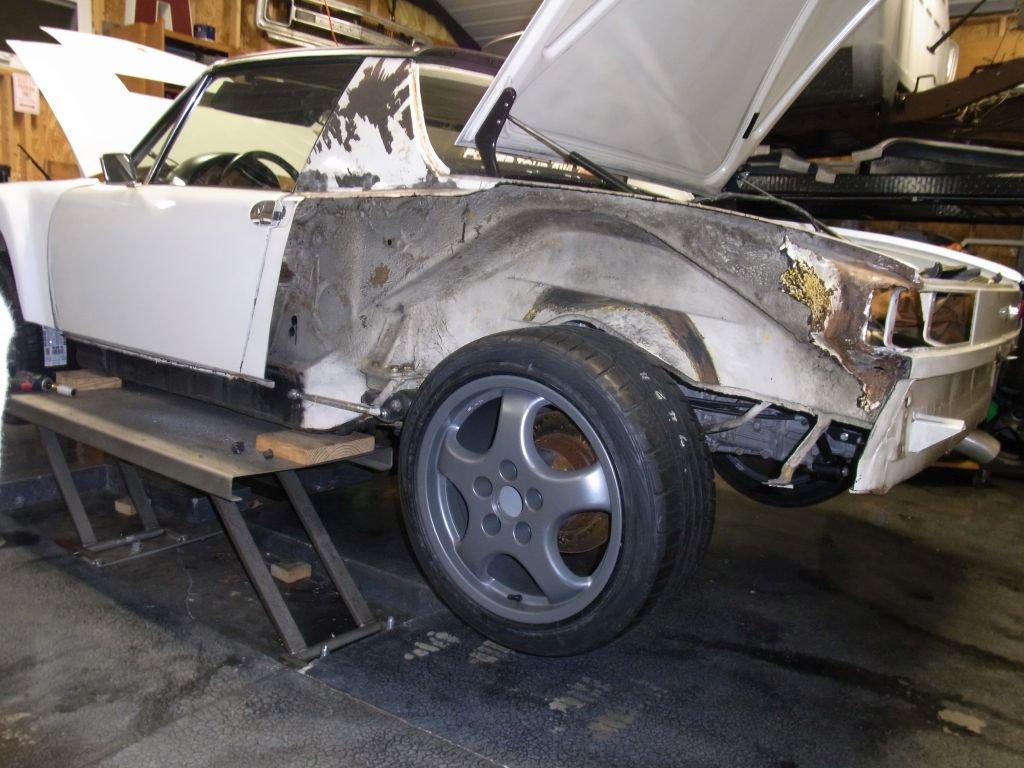 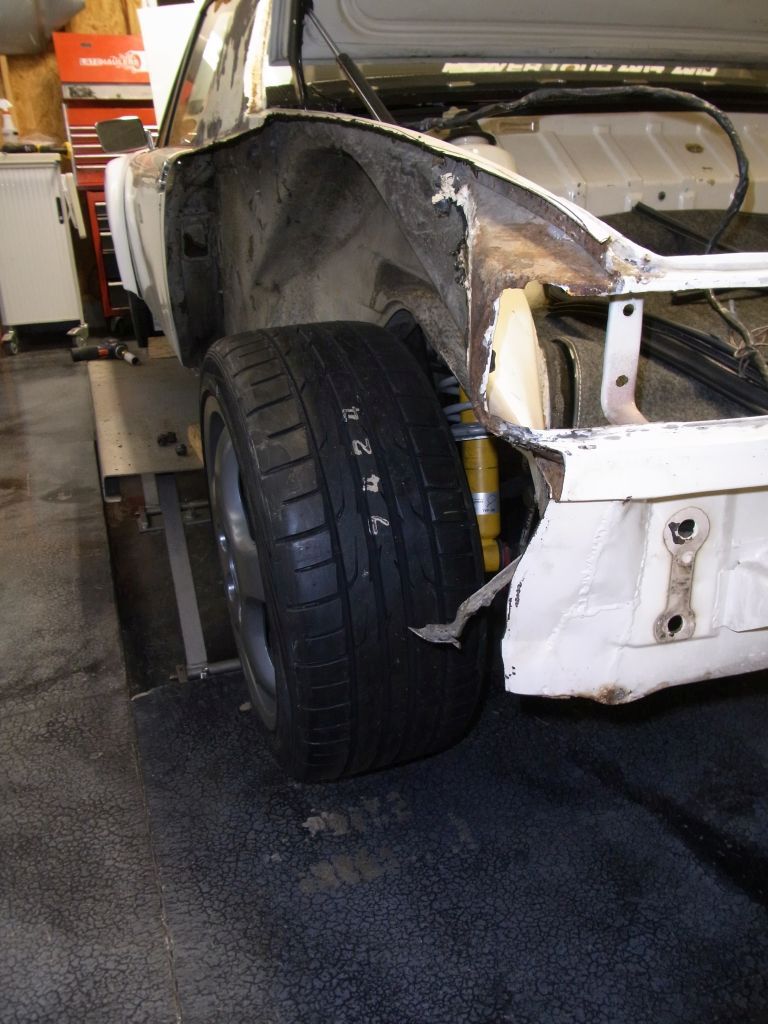 Not super happy with what I found, more areas of bondo'd over rust and other stupidness that I will need to fix. No worries, 22 days until departure and I will be in Mexico Monday-Friday next week on business. Cheers, Scott |
|
|
|
| effutuo101 |
May 20 2017, 08:31 AM
Post
#591
|
|
Advanced Member Group: Members Posts: 2,738 Joined: 10-April 05 From: Lemon Grove Member No.: 3,914 Region Association: Southern California |
Looking good! Progress is progress. Even if you do find that four letter word under everything.
Looking forward to the next update! |
|
|
|
| 914forme |
May 21 2017, 06:36 PM
Post
#592
|
|
Times a wastin', get wrenchin'! Group: Members Posts: 3,899 Joined: 24-July 04 From: Dayton, Ohio Member No.: 2,388 Region Association: None |
Add some rubber mud flaps and some welting on the exposed metal bits and go man go. The Jeep guys do this stuff all the time.
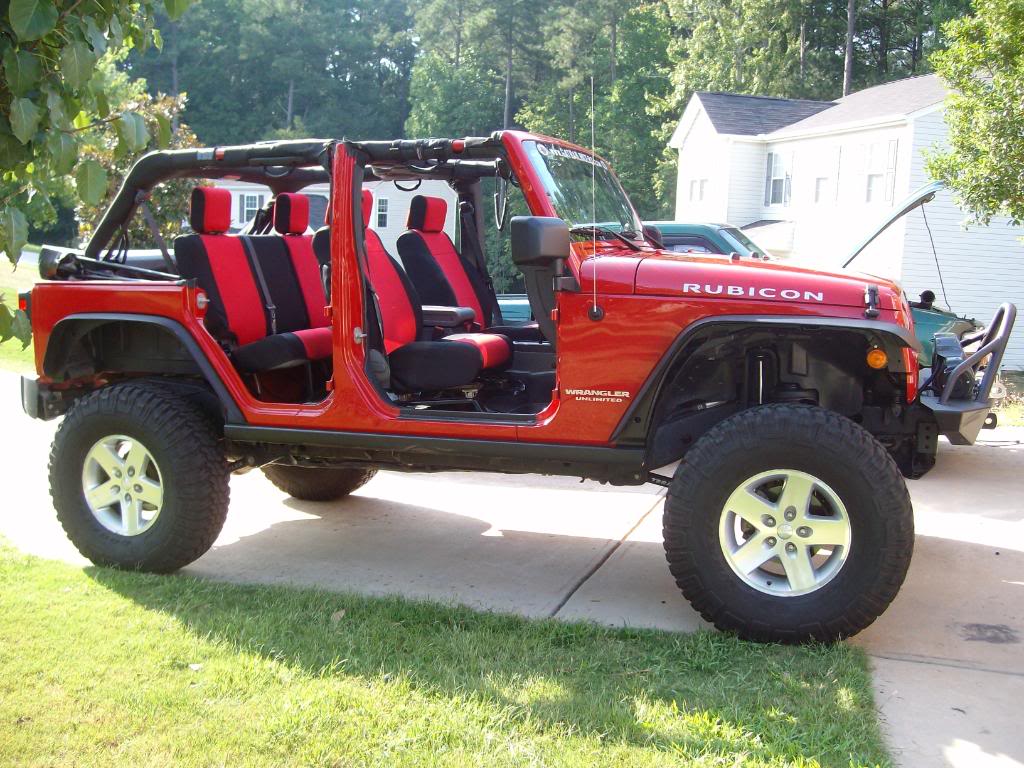 That will let you run the tour. (IMG:style_emoticons/default/av-943.gif) Let me know how I can help or if you need my help. Or just drink your beer (IMG:style_emoticons/default/happy11.gif) |
|
|
|
| Amenson |
Jun 18 2017, 08:28 PM
Post
#593
|
|
That's opposite lock!! Group: Members Posts: 645 Joined: 27-May 05 From: Dublin, OH Member No.: 4,154 Region Association: None |
Long time no post. Unfortunately it is not for the lack of work on the car as I have put in insane hours over the past weeks. I just have not been motivated to post as the effort is being wasted on rust repair. I have complained before the the previous work was shoddy at best but now I am convinced that it is criminal. Really terrible "repairs" are covered by filler with weld seams recreated in filler. Even after hacking off the fenders there is still a ton of metal work to do.
The result is that I could not get the car together in time to attend Hot Rod Power Tour. I had this week of vacation scheduled so I took the time to work int the garage. Made great progress but still some areas to fix before bonding on the fenders. I would much rather be building awesome parts for Grey Matter. Maybe in a could of weeks. 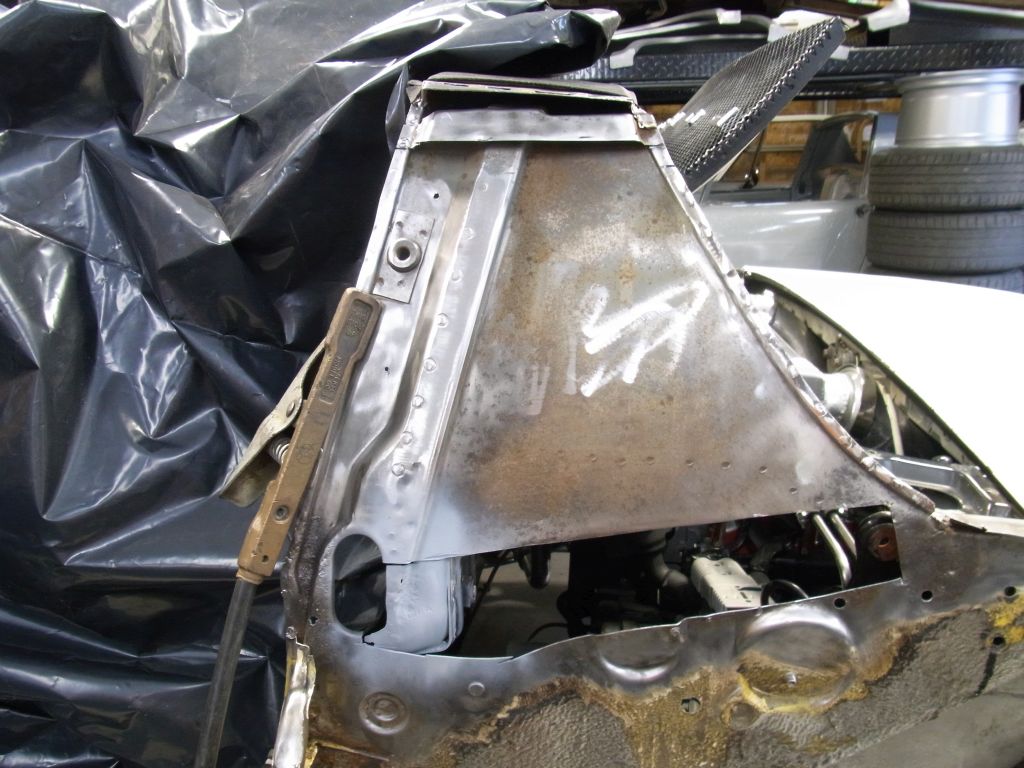 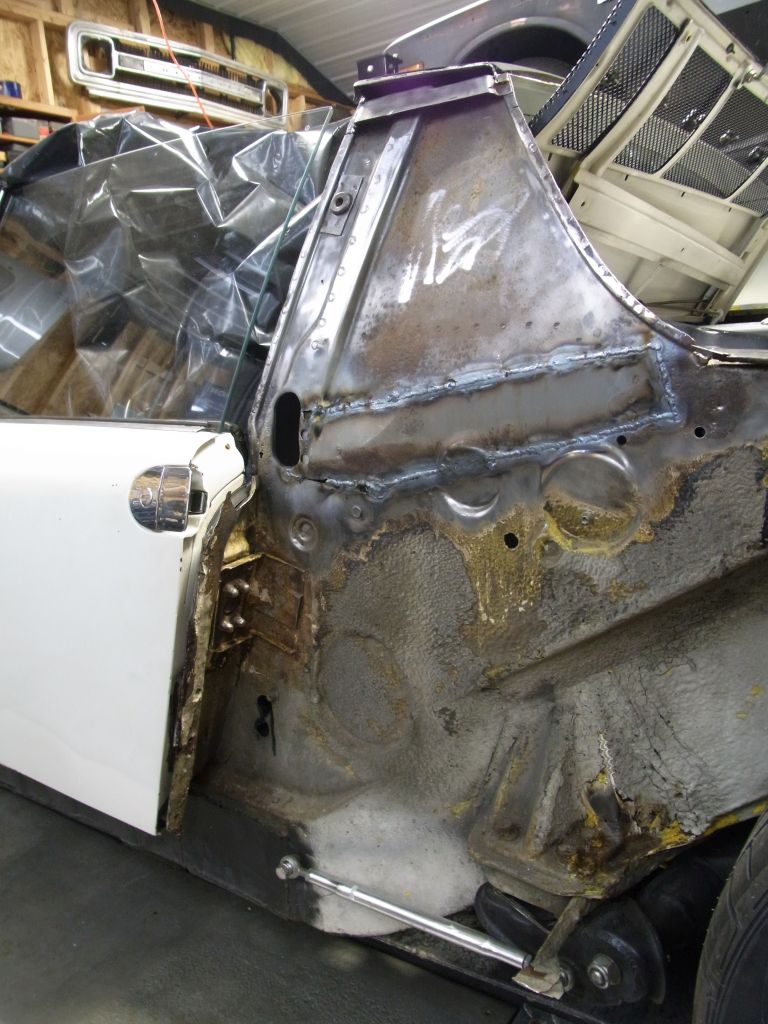 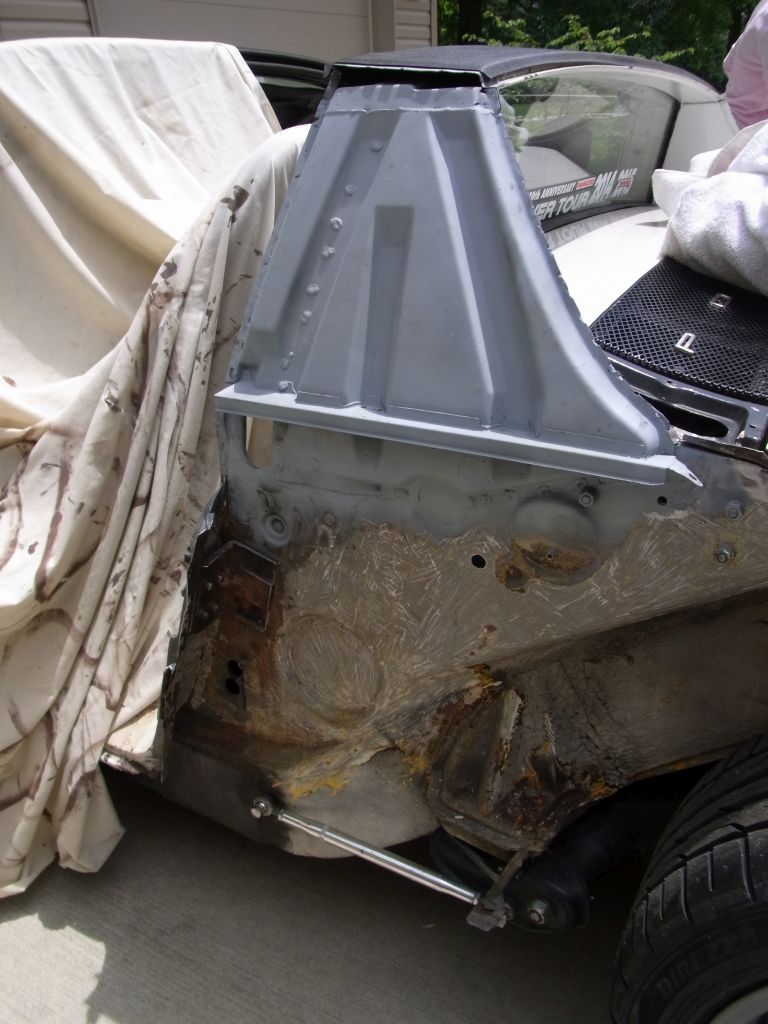 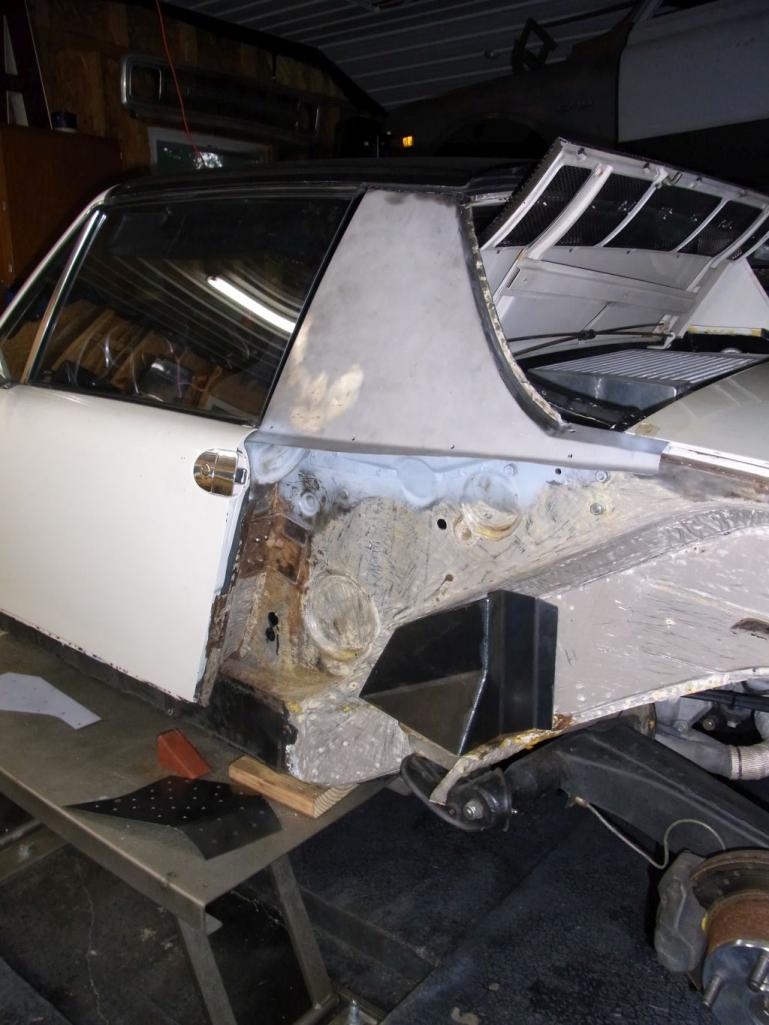 The spring kept coming out of the hat at full droop so I ordered and installed helper springs but at ride height the helper was not long enough so I had to open up the hole in the hat and zip tie it to the sprint to keep it in place. 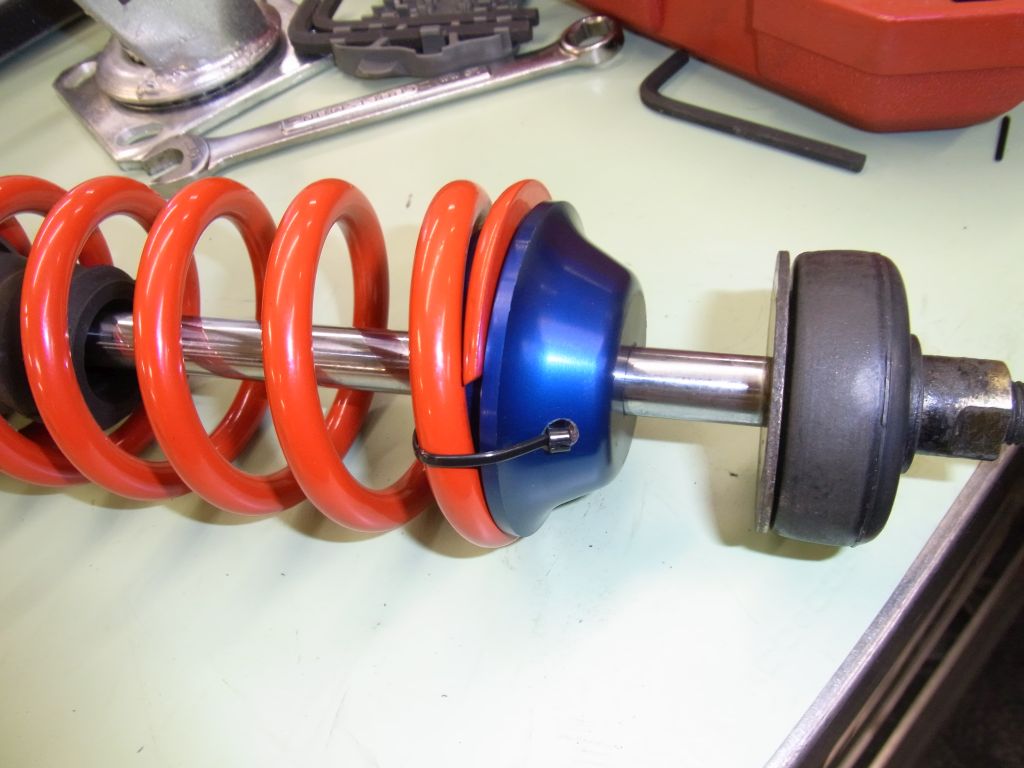 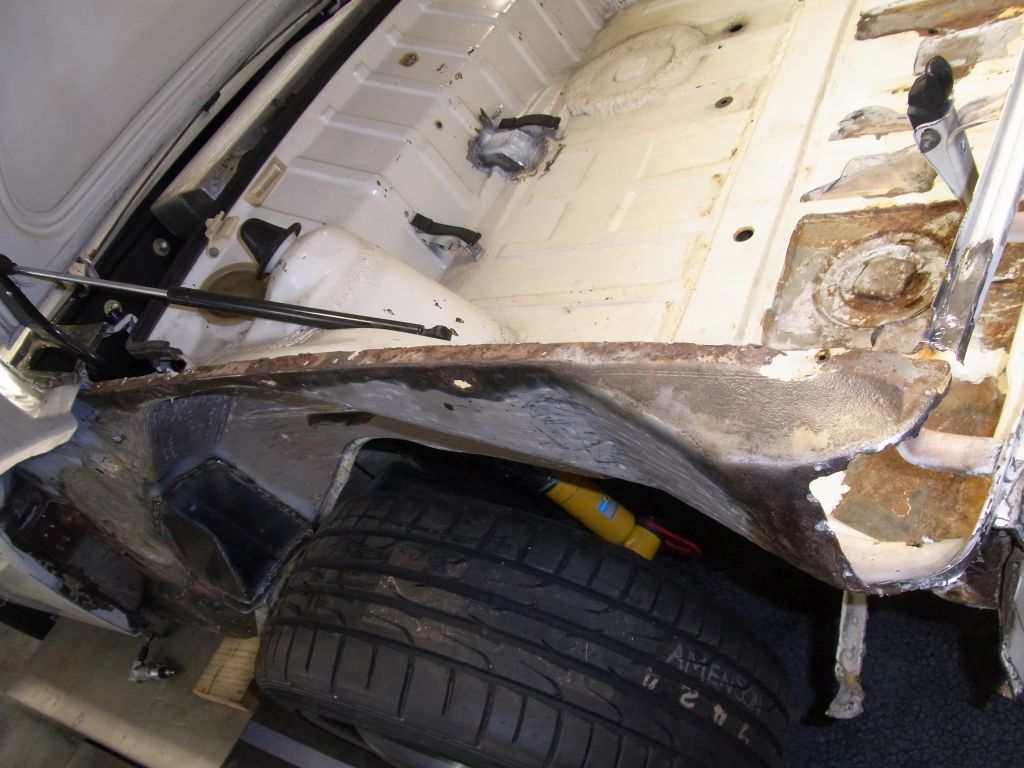 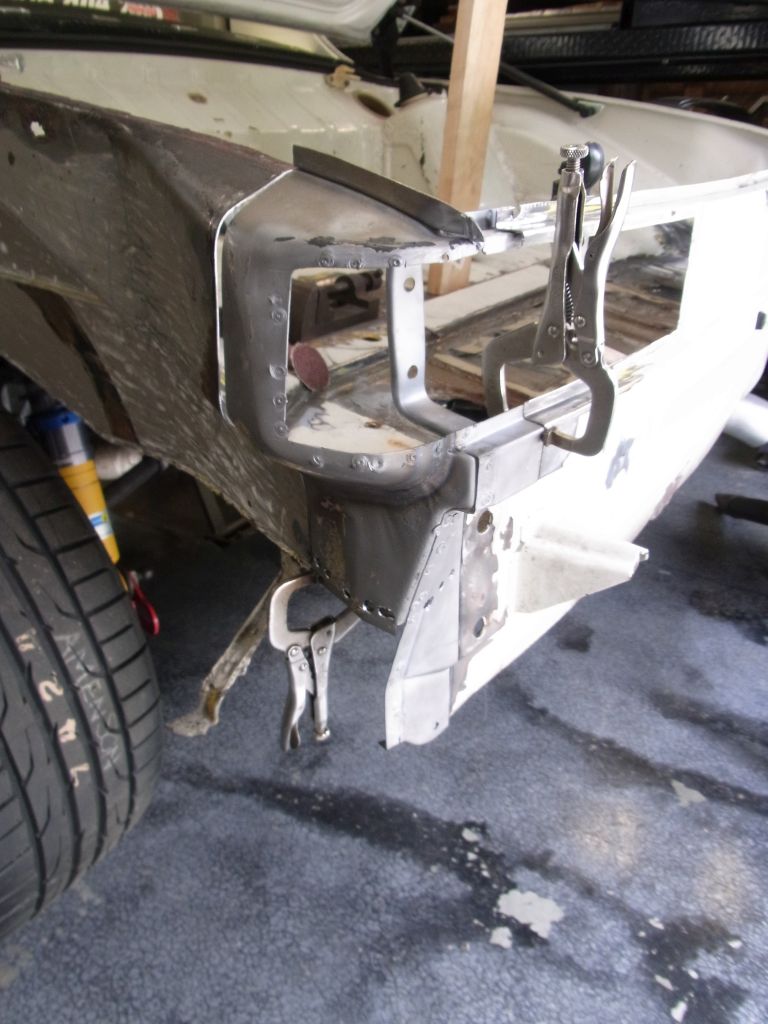 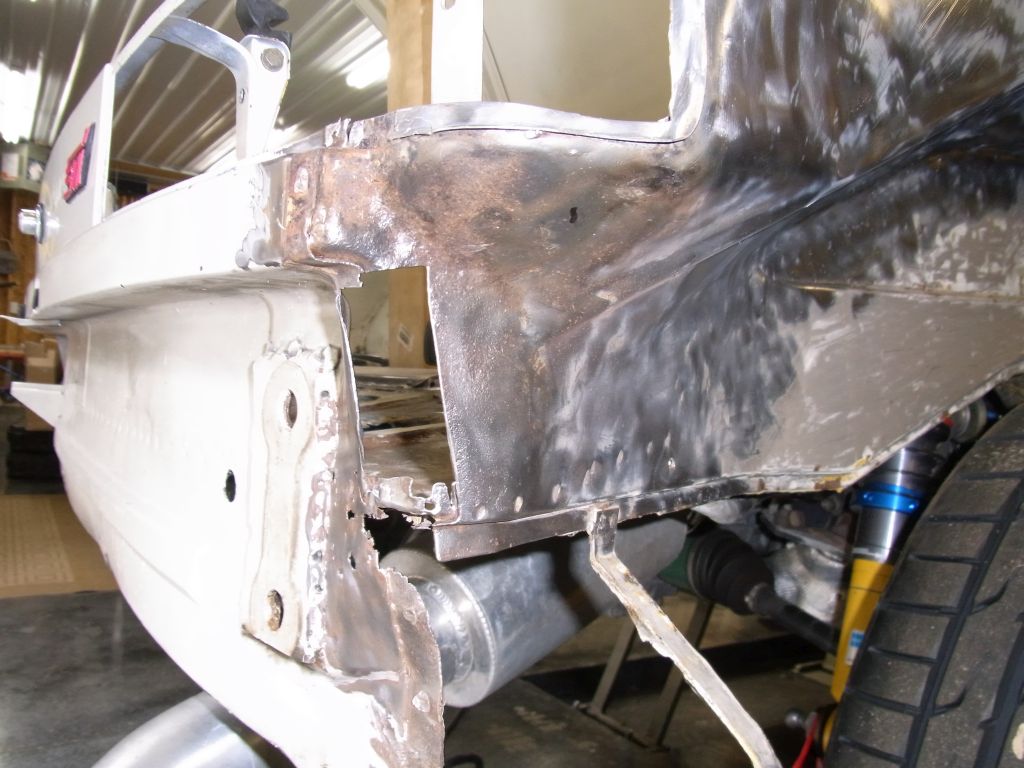 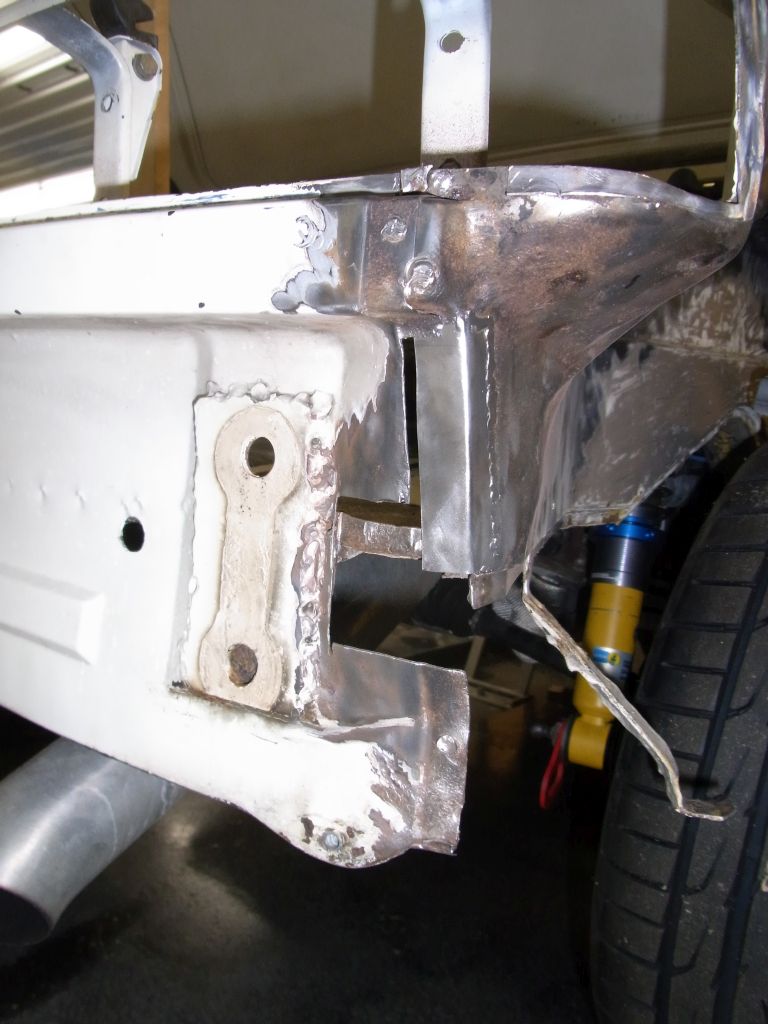 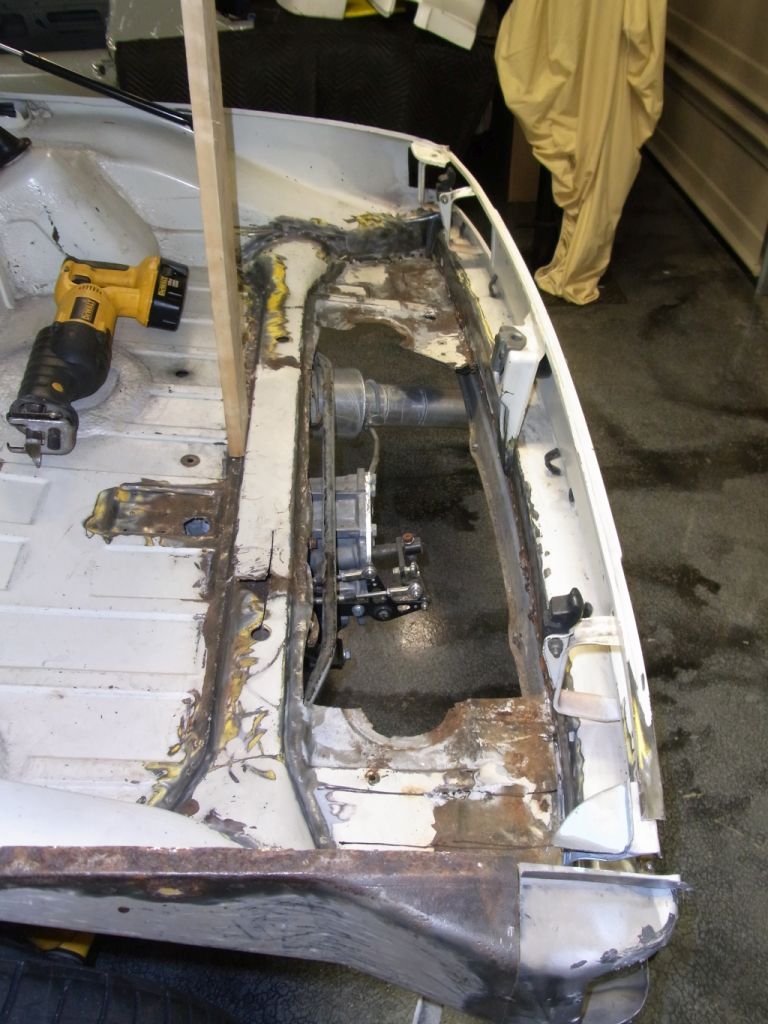 While I had access I decided to order and install CFR rear console reinforcing kit. 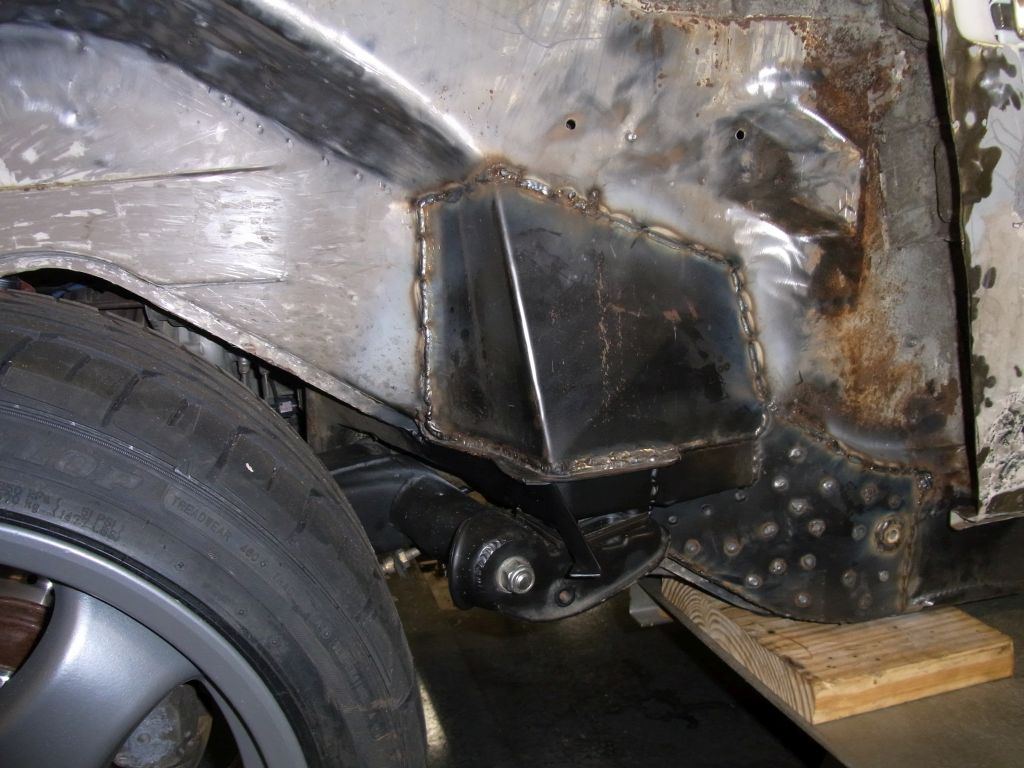 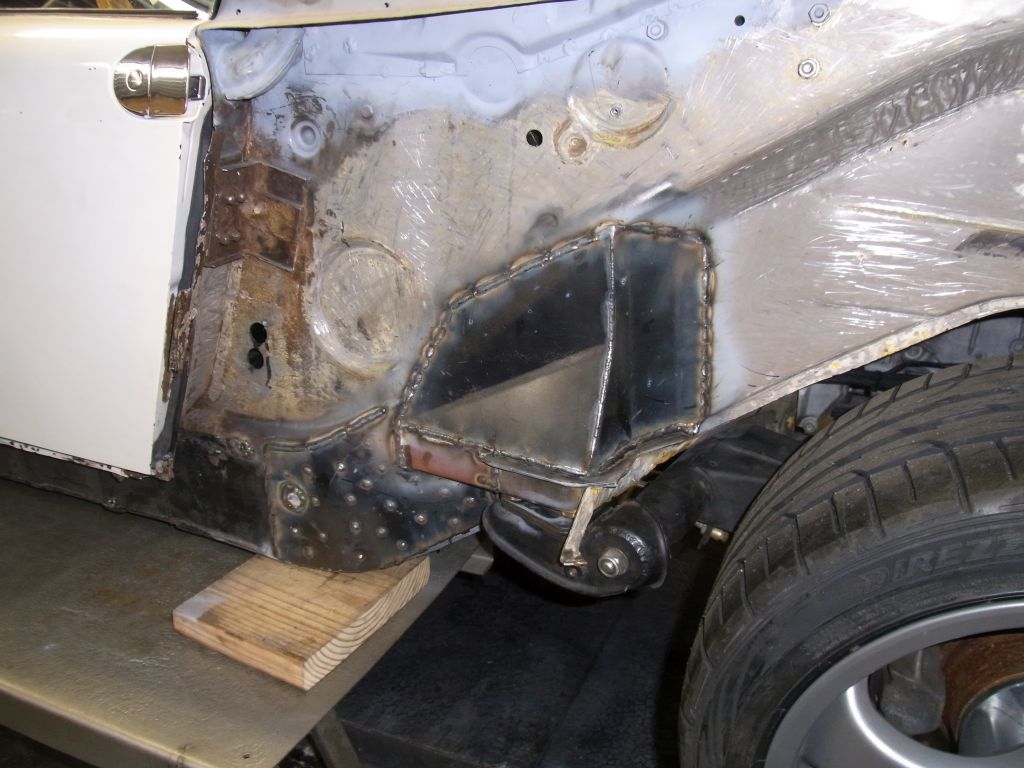 |
|
|
|
| charliew |
Jun 19 2017, 09:14 AM
Post
#594
|
|
Advanced Member Group: Members Posts: 2,363 Joined: 31-July 07 From: Crawford, TX. Member No.: 7,958 |
Scott you should get a trophy for your continuing diligence in repairing a unibody that's 40 years old. harbor freight has stainless steel zip ties that might work better on the hole in the hat, the spring moving up and down will probably do the plastic tie in pretty quick, course full droop will only happen when it is jacked up or on your short lift, ooor you compete in jumps at power tour. This would maybe be a time to use the area in front of the wheels for something like a oil cooler or accusump while it is easy to work on, you've got a year till the next power tour now it seems. What I like about the accusump is it gives the motor a shot of lube as soon as you turn on the key to lube it all up after sitting for a week or longer like a month or so turbo and all plus the extra lube capacity. My sons car has 8 qt cap pan I made and every time I checked the oil it, it was a qt low after only a couple thousand miles on the oil change. I guess it is the heat breaking the oil down and getting past the rings. the motor is pretty low mileage but his oil temps do get up in the 240f range occassionaly on long high rpm jaunts with old guys in caddys and vettes.
|
|
|
|
| 914forme |
Jun 19 2017, 07:55 PM
Post
#595
|
|
Times a wastin', get wrenchin'! Group: Members Posts: 3,899 Joined: 24-July 04 From: Dayton, Ohio Member No.: 2,388 Region Association: None |
I ran two plastic zip ties for years on my spring hats, never an issue.
Progress looks very good. Console reenforcement looks great. |
|
|
|
| Amenson |
Jun 24 2017, 08:15 AM
Post
#596
|
|
That's opposite lock!! Group: Members Posts: 645 Joined: 27-May 05 From: Dublin, OH Member No.: 4,154 Region Association: None |
I ran into this video yesterday and had two thoughts:
-Poor guy...I feel your pain. -Wait...he had a team of trained professionals fixing his stuff. I need a team of trained professionals to do my bodywork! (IMG:style_emoticons/default/headbang.gif) https://www.youtube.com/watch?v=SJHJlOdZtOA When I get around to my BMW 2002 build the first step will be full body media blasting. Off to Germany for a week of meetings...no progress in the garage. Cheers (IMG:style_emoticons/default/beer.gif) Scott |
|
|
|
| Amenson |
Jul 24 2017, 09:10 PM
Post
#597
|
|
That's opposite lock!! Group: Members Posts: 645 Joined: 27-May 05 From: Dublin, OH Member No.: 4,154 Region Association: None |
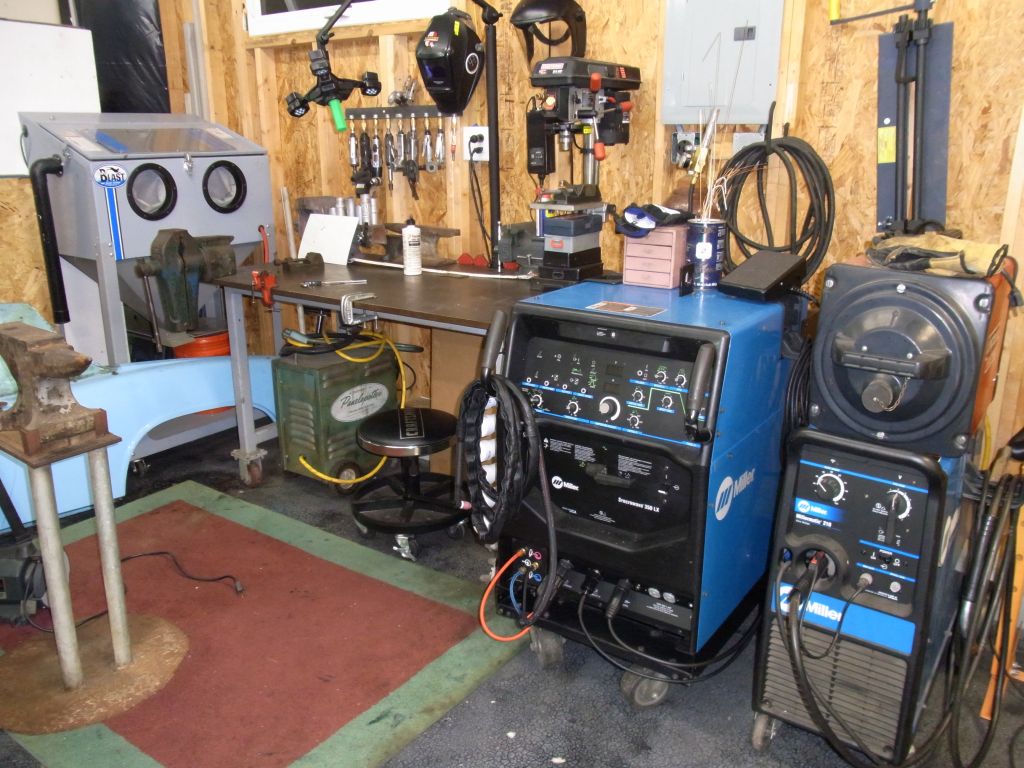
Month since a post...time flies when you are having fun! Germany was great, my wife enjoyed exploring the foothills of the Alps while I was in meetings all day. Before I left I put in a bid on a new welder and ended up winning it. Picked it up a few days after returning. Now the proud owner of a Miller Syncrowave 350lx. It is a 2005 but only has 28 hours of weld time on it. I opened it up to give it a good cleaning and noticed a coating of rust dust on everything, including wires and other things that don't rust. Strange but it wiped up easily. The cooling system was full of rust so I spent several hours flushing it with water. Yes hours, the flow was pretty low. While flushing I noticed that the pressure sensor was leaking. After a while the leaking stopped, mostly, so I took the opportunity to see if it would weld. Almost immediately made some really nice aluminum welds. Usually it takes me a while to get dialed back in on aluminum, this is exactly why I wanted a more modern welder. I did notice the the torch got a bit warm, strange for a water cooled torch. Went on to weld a few patch pieces for the Portsi and then the welder shut down. Error -19, no coolant flow. A quick look showed that the pump was not running and was very hot. Let it set for a while and it started back up. Welded for a bit and it shut down again. Pulled the pump and took it apart. Absolutely spotless inside. Put it back in and the same thing happened. When I had it apart I did not remove the pressure relief valve because I was concerned about getting the pressure set again. Nothing to lose because it is definitely not working so I pull the valve and find that the adjustment screw is as loose as it can be without falling out. The pump is, for the most part, just recirculating fluid through the relief valve creating heat. Crank it down and it now runs cool. It also dramatically increased the leaking through the pressure sensor and showed how rust residue got on everything. Amazing that I did not get electrocuted. Pulled the sensor, plugged the port and jumpered the wires and back in business. Took an amazing number of hours to get here but man is it nice. (IMG:style_emoticons/default/headbang.gif)
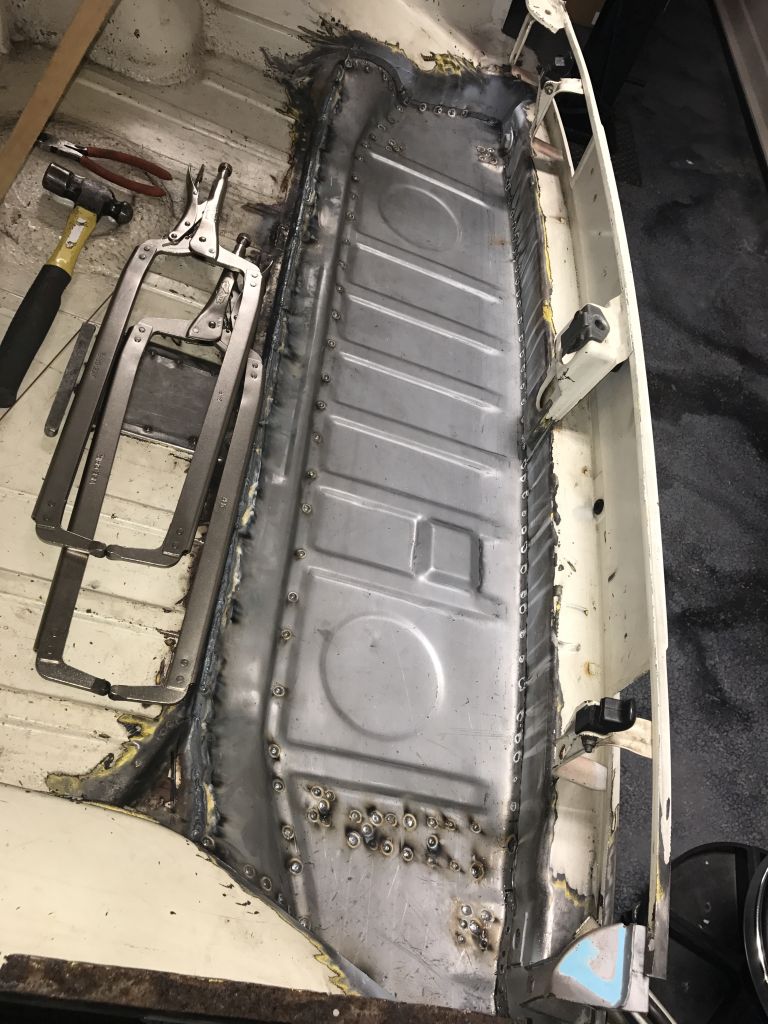
 Progress on the rustoration work. Hacked out the trunk. 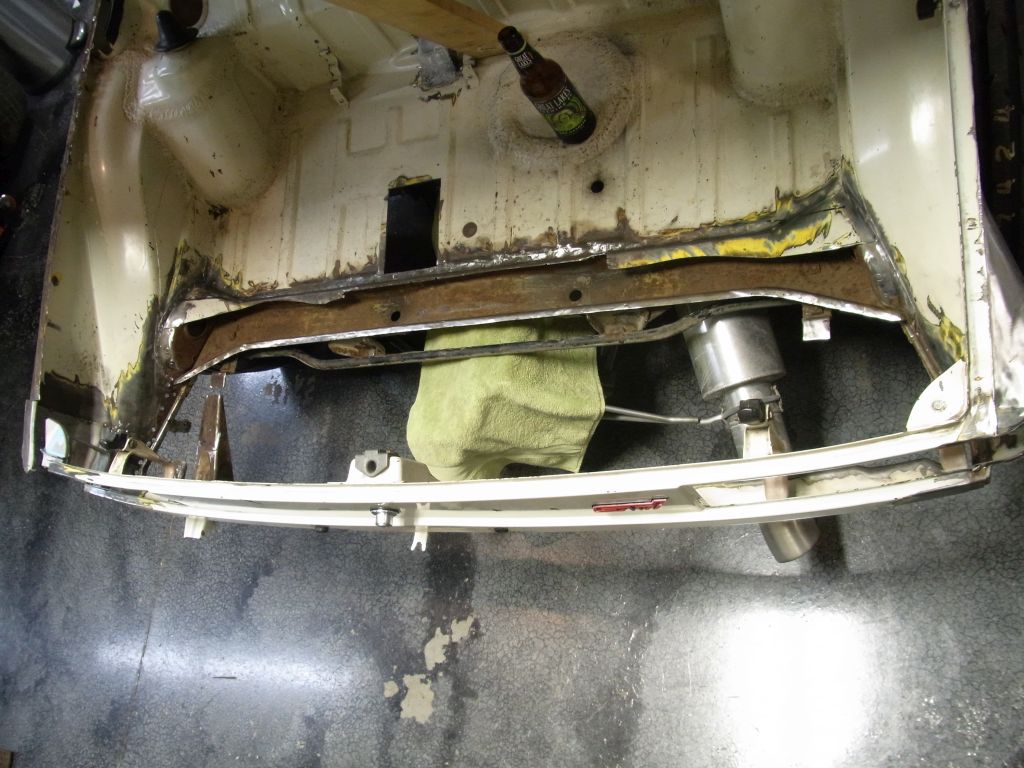 Time to remove whatever this 1/8" thick patch is covering. 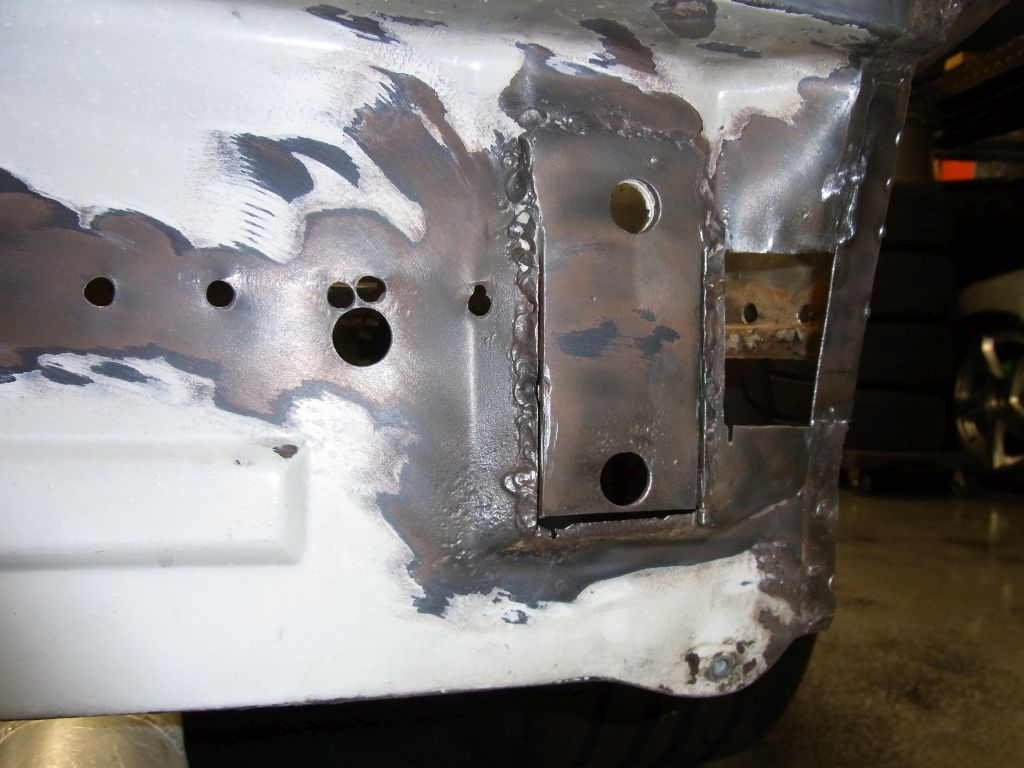 Yuk... 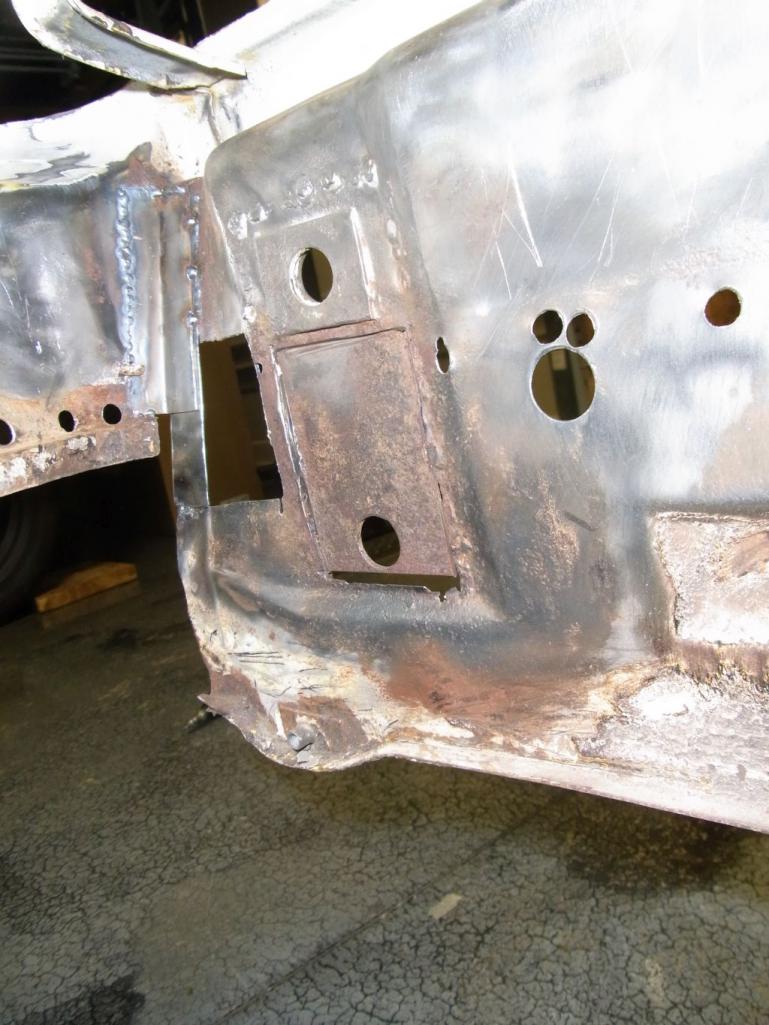 Much better. 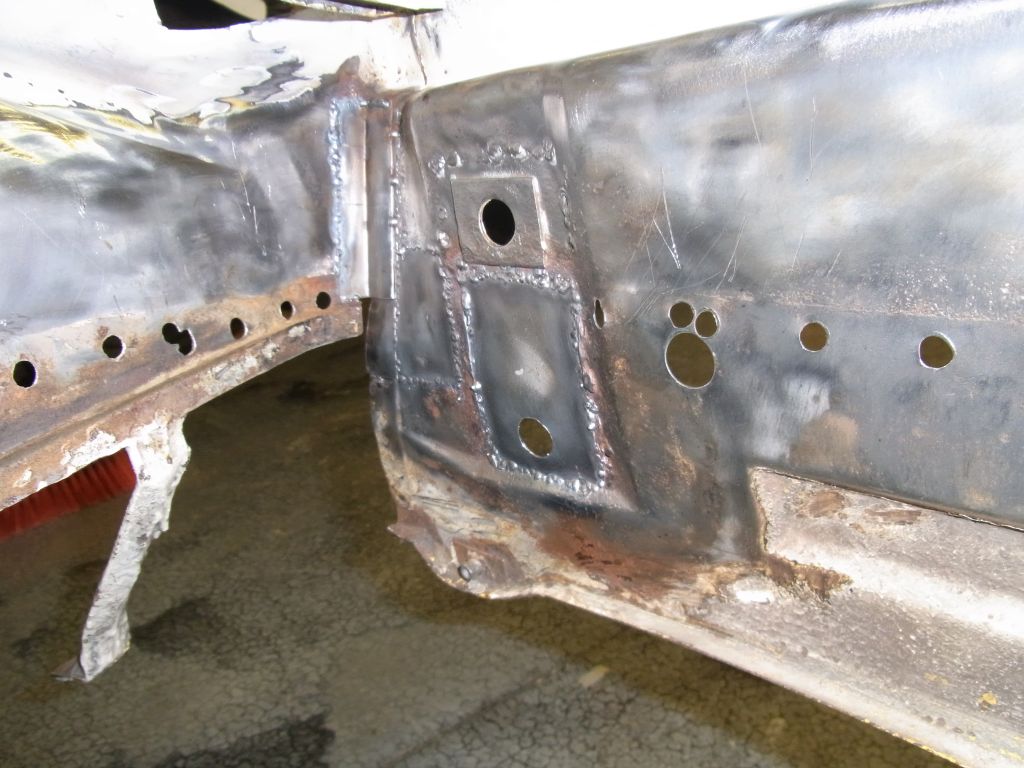 Trunk fitting commence. 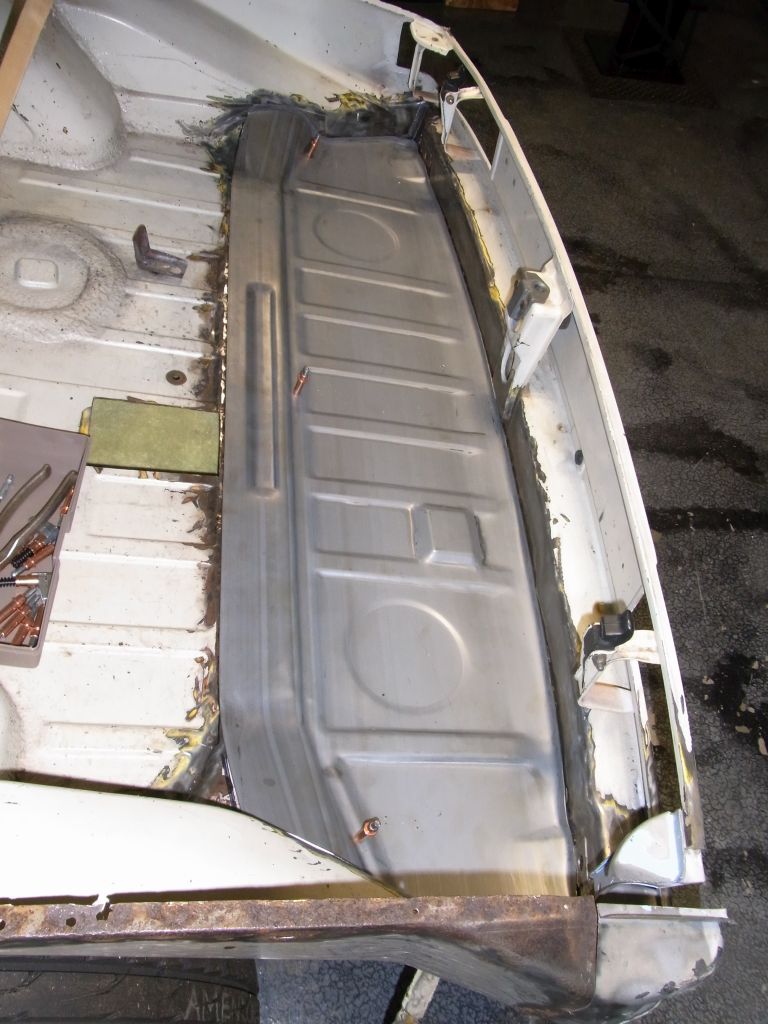 It is rewarding to take care of these problems but I would much rather be making cool parts so I am going to get back to finishing the IC plumbing on Grey Matter. Stay tuned for some aluminum dime stacking. Cheers, Scott |
|
|
|
| charliew |
Jul 26 2017, 12:17 PM
Post
#598
|
|
Advanced Member Group: Members Posts: 2,363 Joined: 31-July 07 From: Crawford, TX. Member No.: 7,958 |
nice welder. my friend has a extra 350 that he tried to sell me but I don't have a 100 amp breaker or circuit to supply it and I'm never going to be good enough to need it at this stage in my life, you will get lots of good use out of yours I'm sure. He had his on a 100 amp circuit and after about ten years the plug smoked so he redid it with 150 amp breaker and new plug and wires. luckily his was also on a short run like yours. he welds a lot of thick aluminum though as a business.
|
|
|
|
| Amenson |
Aug 17 2017, 08:48 PM
Post
#599
|
|
That's opposite lock!! Group: Members Posts: 645 Joined: 27-May 05 From: Dublin, OH Member No.: 4,154 Region Association: None |
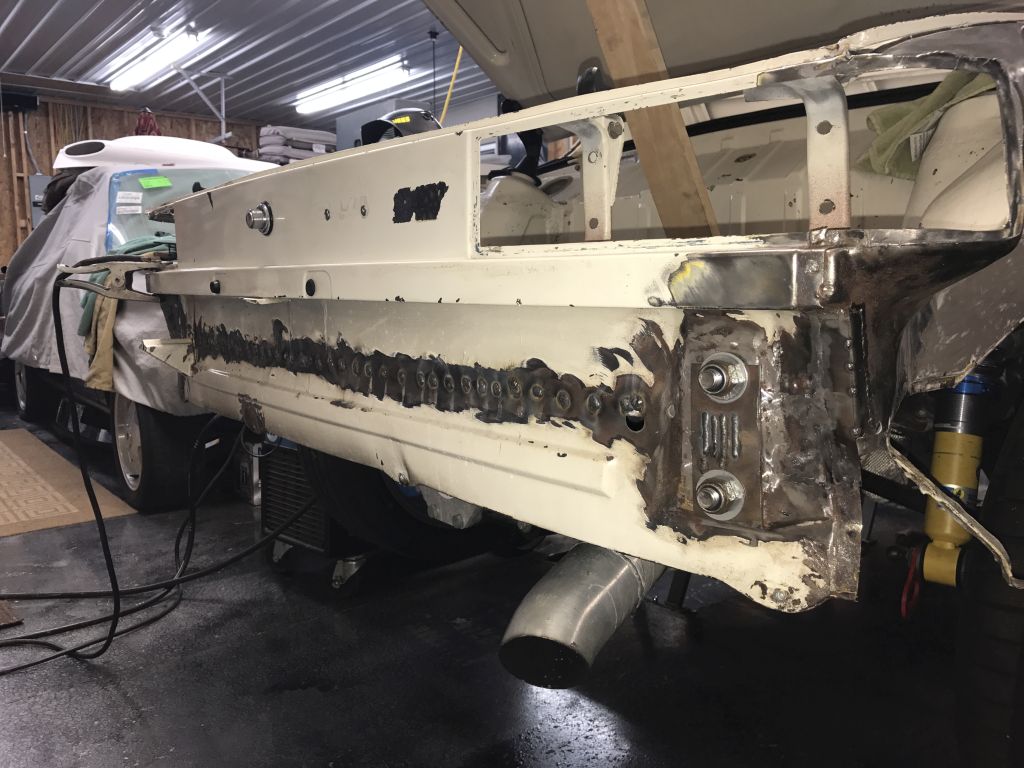
After much fitting, over 4ft of tig welded butt joint and 20 gazilion spot welds, the trunk area is almost fixed. Still some welding and then much grinding to remove the evidence of the squirt gun.
  In preparation of the work on the front I removed the front wiring harness to rewrap it and install the external temp sensor. 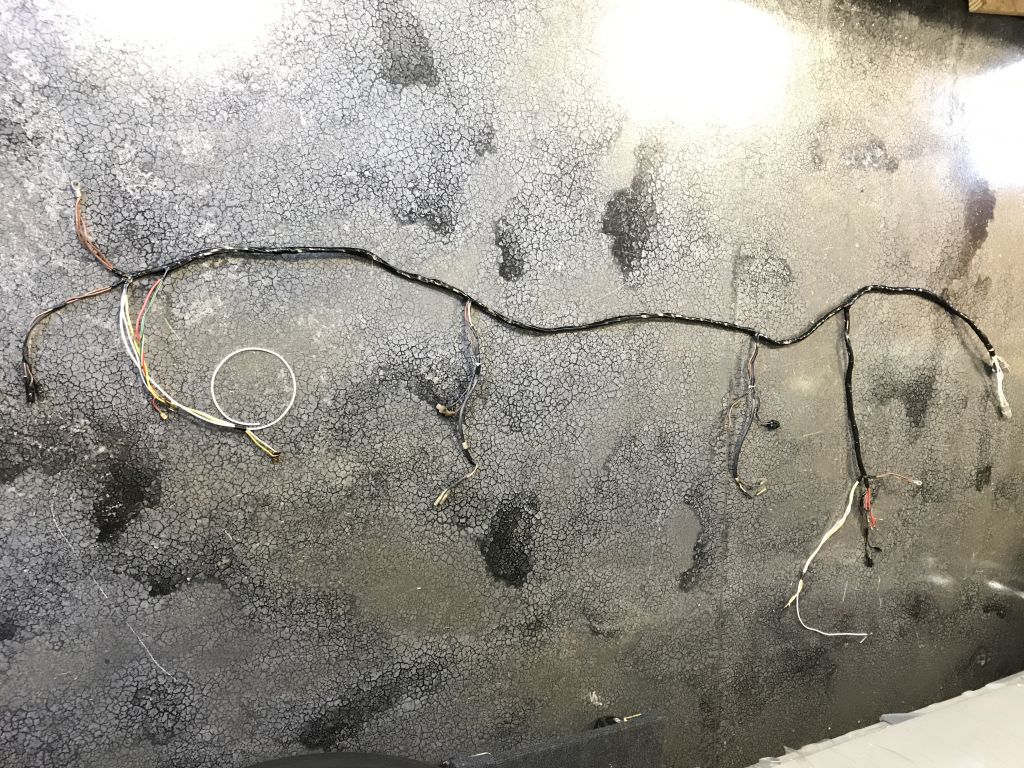 Anyone parting out a car willing to pull this section of the wiring harness. I need it for Grey Matter. PM me if you have one. Cheers, Scott |
|
|
|
| 914forme |
Aug 19 2017, 07:25 AM
Post
#600
|
|
Times a wastin', get wrenchin'! Group: Members Posts: 3,899 Joined: 24-July 04 From: Dayton, Ohio Member No.: 2,388 Region Association: None |
PM sent
|
|
|
|
|
2 User(s) are reading this topic (2 Guests and 0 Anonymous Users)
0 Members:

|
Lo-Fi Version | Time is now: 7th June 2026 - 01:21 PM |
Invision Power Board
v9.1.4 © 2026 IPS, Inc.