|
|
|
Porsche, and the Porsche crest are registered trademarks of Dr. Ing. h.c. F. Porsche AG.
This site is not affiliated with Porsche in any way. Its only purpose is to provide an online forum for car enthusiasts. All other trademarks are property of their respective owners. |
|
|

  |

| ptravnic |
 Nov 29 2006, 08:44 AM Nov 29 2006, 08:44 AM
Post
#21
|
|
Senior Member  Group: Members Posts: 1,231 Joined: 27-May 03 From: Chicago, IL Member No.: 747 Region Association: None |
Very Nice. I'm going to have about 8 months off before grad school starts in September. I'm looking forward to some projects & painting the teener myself sounds like a good way to go!
Thanks for the posts! -pt |
   |

 
|
| 1bad914 |
Nov 29 2006, 10:50 AM
Post
#22
|
|
Senior Member Group: Members Posts: 618 Joined: 6-May 04 From: Battle Creek, MI Member No.: 2,028 |
Very nice job!
I wrote a small manual on home paint jobs, if anyone is interested send me a PM with your email and I will send it to you. It is in PDF format. That looks like a conventional gun, have you tried an HVLP? I actually like a conventional gun, but have been trying to switch, much less waste. I have had problems getting my HVLP to lay down flat, wants to OP, I have done about every adjustment out there, I was told to try reducing it more. Any way, nice job on the paint, I like your idea of building braces on the wall for the hoods, I always hang them from the ceiling and then fight them moving while spraying. I 'll give that a try next time. |
|
|
|
| thomasotten |
Nov 29 2006, 11:18 AM
Post
#23
|
|
Senior Member Group: Members Posts: 1,583 Joined: 16-November 03 From: San Antonio, Texas Member No.: 1,349 |
My gun is sort of a hybrid, but it sprays much like a HVLP.
|
|
|
|
| thomasotten |
Nov 29 2006, 11:27 AM
Post
#24
|
|
Senior Member Group: Members Posts: 1,583 Joined: 16-November 03 From: San Antonio, Texas Member No.: 1,349 |
Ok, so one thing I wanted to have on this car is those PORSCHE negative side stripes. But, I wanted mine to be painted on. I also wanted to precisley dictate the color, which meant that stick-ons were not an option. So, here I'll show how you can easily paint on these stripes using the stickers as a template....
Step 1: With the base color you want the letters to be, spray enough color for coverage in the area where the sticker goes along the length of the car. I chose this cool VW/Audi dark blue, that I think you see on the Golf GTI's. Spray that and llow that to dry at least 30 minutes or so just to be safe. Attached image(s) 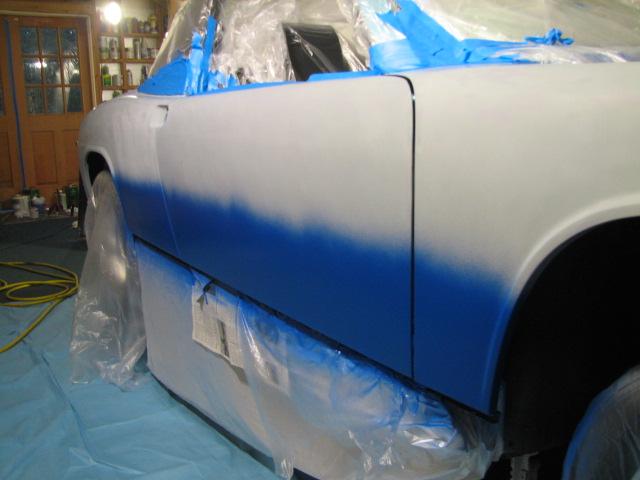
|
|
|
|
| thomasotten |
Nov 29 2006, 11:30 AM
Post
#25
|
|
Senior Member Group: Members Posts: 1,583 Joined: 16-November 03 From: San Antonio, Texas Member No.: 1,349 |
...
Attached image(s) 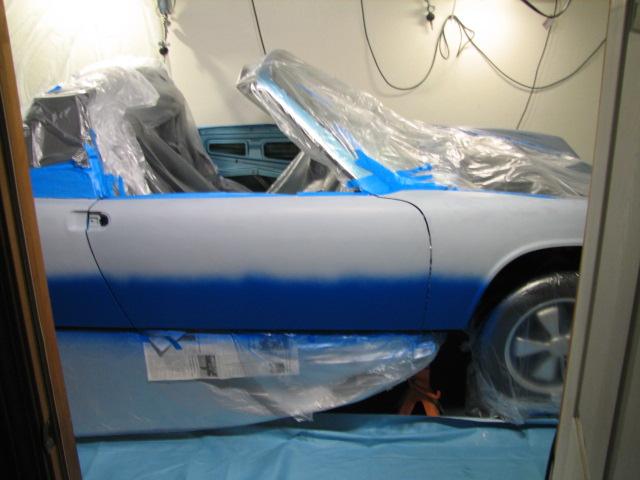
|
|
|
|
| thomasotten |
Nov 29 2006, 11:37 AM
Post
#26
|
|
Senior Member Group: Members Posts: 1,583 Joined: 16-November 03 From: San Antonio, Texas Member No.: 1,349 |
Next, you apply the stickers...
There are currently two sticker kits available for the 914: One from AutoAtlanta that has 3M backing, and one from Ebay. You will want to use the Ebay one. I practiced this technique before I went live, and I found that the Ebay kit was much more accurate in the lettering, and the sticker came up a lot easier when it came time to remove than did the AutoAtlanta kit. The sticker is pretty easy to put on, the only tricky part is that you need to create a reference line along the car, that is fairly straight, and then lay out the sticker slowly along that reference line. I used 1" masking tape, applied in small sections, along the bottom of the car, and use a long straight edge to line it up straight. When you apply the sticker, you don't need to get rid of all the air bubble, you just need to make sure that the edges of the letters are stuck on real well, that way you don't get any bleeding. Attached image(s) 
|
|
|
|
| thomasotten |
Nov 29 2006, 11:40 AM
Post
#27
|
|
Senior Member Group: Members Posts: 1,583 Joined: 16-November 03 From: San Antonio, Texas Member No.: 1,349 |
Once the decal is applied, you are ready to paint your main color.
One thing to remember when appying these decals, when the body is raised, is that there is body flex to be considered. If you have a lot, then apply the decal with the car on the ground, so the letters go straight across. My flex wasn't so bad. Attached image(s) 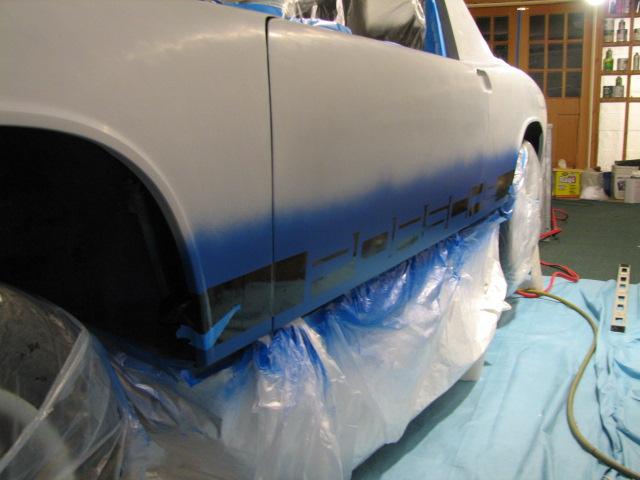
|
|
|
|
| thomasotten |
Nov 29 2006, 11:47 AM
Post
#28
|
|
Senior Member Group: Members Posts: 1,583 Joined: 16-November 03 From: San Antonio, Texas Member No.: 1,349 |
Ok, so next part, you spray your main base coat color. With metallics, I think the trickiest part is to develop your technique so that you don't get tiger-stripes. Tiger stripes occur when you are laying down metallic, and the metal flakes kind of stay in streaks together. I think everyone has to develop their own technique for that, and adjust their gun accordingly.
My general rule is to spray till you have coverage, then add another coat to be sure, then take care of any streaking. That's how I do it, and would love to hear what other folks do. |
|
|
|
| thomasotten |
Nov 29 2006, 11:51 AM
Post
#29
|
|
Senior Member Group: Members Posts: 1,583 Joined: 16-November 03 From: San Antonio, Texas Member No.: 1,349 |
Ok, so after you have finished spraying your base, and alowed it to dry, then it is time to remove the decals. I took my doors off the car earlier to make painting easier for me, by the way.
Here, you want to have some decent fingernails so you can get the decals up by prying under one of the corners of each letter. Nice and slow, and they come up just fine... Attached image(s) 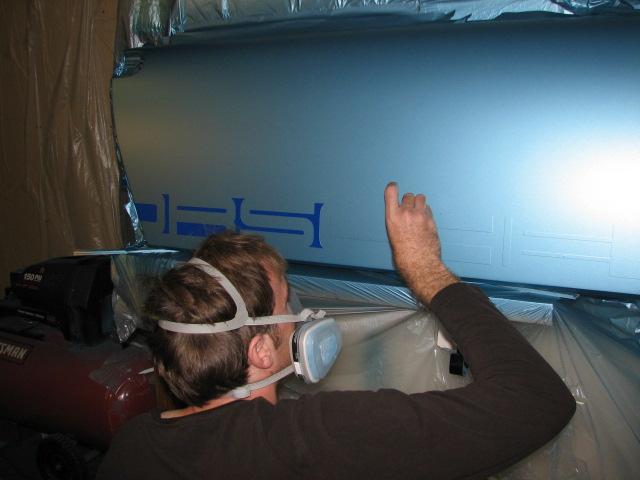 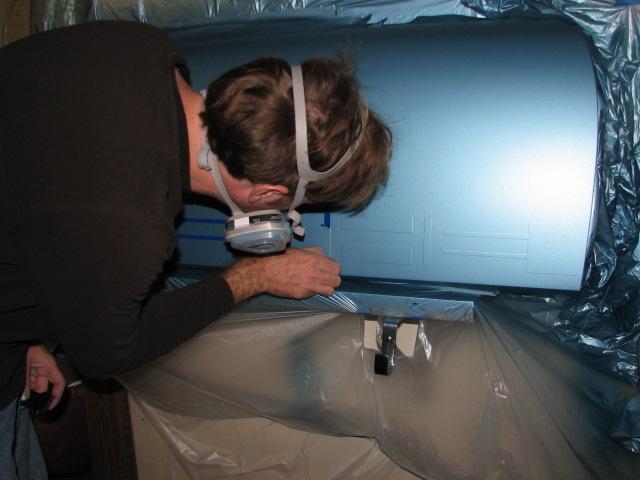
|
|
|
|
| tyler |
Nov 29 2006, 11:51 AM
Post
#30
|
|
Member Group: Members Posts: 335 Joined: 24-September 03 From: southern california Member No.: 1,192 |
Looks like you're doing a nice job. I'm doing mine now and exactly like you are. I just hope all the paaint matches when it's done. I used a conventional gun on the door jambs and inside of the sail and it flowed perfectly whith a good final finish. I'm using HVLP for all the rest and I don't think there's any way to avoid OP. I'm putting on 4 coats and color sanding it out. The best thing about the HVLP is the fact that it takes so much less paint. I paid $400 for the color paint $ catalyst so it's a big deal. Not only did I use epoxy sealer on the bare metal but I also put it over the primer after final sanding to keep my burnt orange dark. You're absolutly right about doing it yourself - a shop would never get all the rust out or take the extra effort to make sure nothing happened to the paint job later on. Only problem I have is sanding out the bugs.
QUOTE(1bad914 @ Nov 29 2006, 08:50 AM)  Very nice job! I wrote a small manual on home paint jobs, if anyone is interested send me a PM with your email and I will send it to you. It is in PDF format. That looks like a conventional gun, have you tried an HVLP? I actually like a conventional gun, but have been trying to switch, much less waste. I have had problems getting my HVLP to lay down flat, wants to OP, I have done about every adjustment out there, I was told to try reducing it more. Any way, nice job on the paint, I like your idea of building braces on the wall for the hoods, I always hang them from the ceiling and then fight them moving while spraying. I 'll give that a try next time. |
|
|
|
| 7TPorsh |
Nov 29 2006, 12:02 PM
Post
#31
|
|
7T Porsh Group: Members Posts: 2,691 Joined: 27-March 06 From: Glendale Ca Member No.: 5,782 Region Association: Southern California |
Looks great!
How did you spray? In your garage? How did you rig the ventilation up? I am in this same situation. |
|
|
|
| thomasotten |
Nov 29 2006, 01:07 PM
Post
#32
|
|
Senior Member Group: Members Posts: 1,583 Joined: 16-November 03 From: San Antonio, Texas Member No.: 1,349 |
QUOTE(7T Porsha @ Nov 29 2006, 10:02 AM) Looks great! How did you spray? In your garage? How did you rig the ventilation up? I am in this same situation. Only a single fan was used to exhaust, kept real low, so not to stir up dust. |
|
|
|
| Eric_Shea |
Nov 29 2006, 04:27 PM
Post
#33
|
|
PMB Performance Group: Admin Posts: 19,304 Joined: 3-September 03 From: Salt Lake City, UT Member No.: 1,110 Region Association: Rocky Mountains |
|
|
|
|
| thomasotten |
Nov 29 2006, 05:13 PM
Post
#34
|
|
Senior Member Group: Members Posts: 1,583 Joined: 16-November 03 From: San Antonio, Texas Member No.: 1,349 |
Ok, next I applied 3 coats of Dupont clear. Of course, thats when all the flying bugs come out....
Attached image(s) 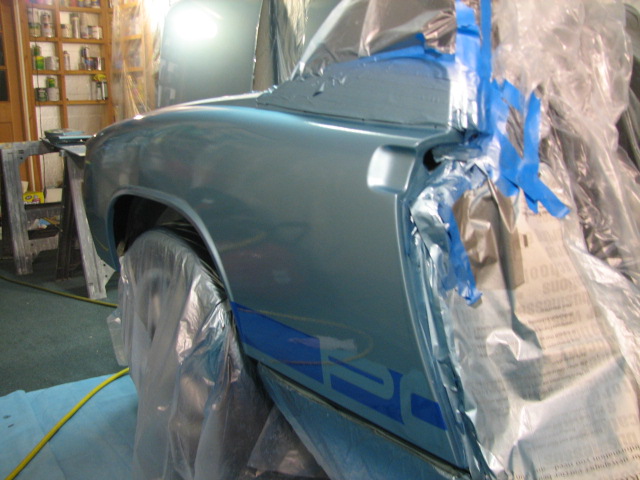 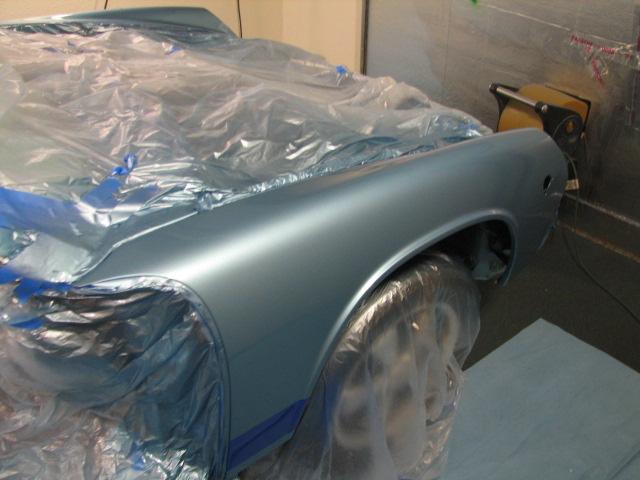 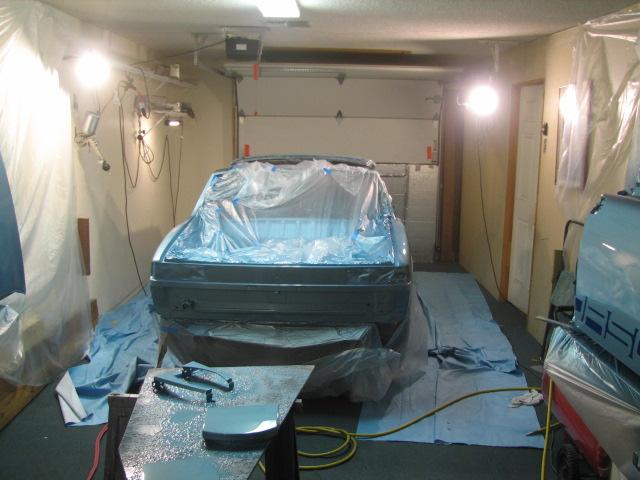 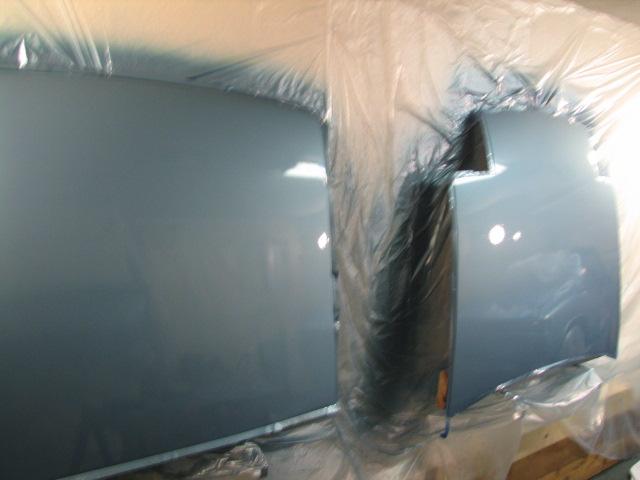 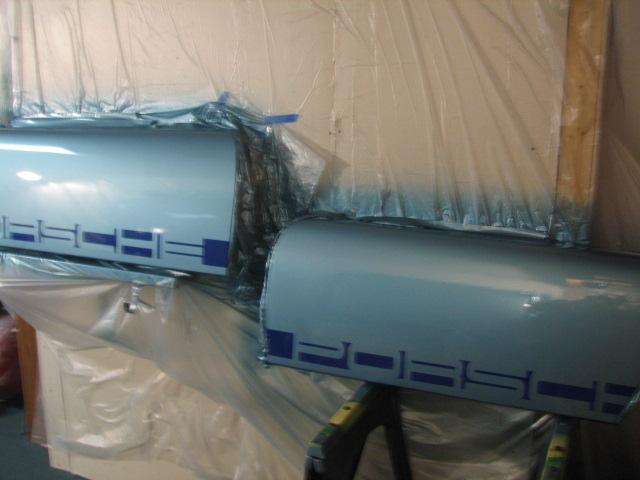
|
|
|
|
| thomasotten |
Nov 29 2006, 05:16 PM
Post
#35
|
|
Senior Member Group: Members Posts: 1,583 Joined: 16-November 03 From: San Antonio, Texas Member No.: 1,349 |
I finished painting about 2:30 AM. I was very tired, but it took at least another hour for me to wind down before I could fall asleep. Dreaming of my baby blue.... (IMG:style_emoticons/default/wub.gif)
Attached image(s) 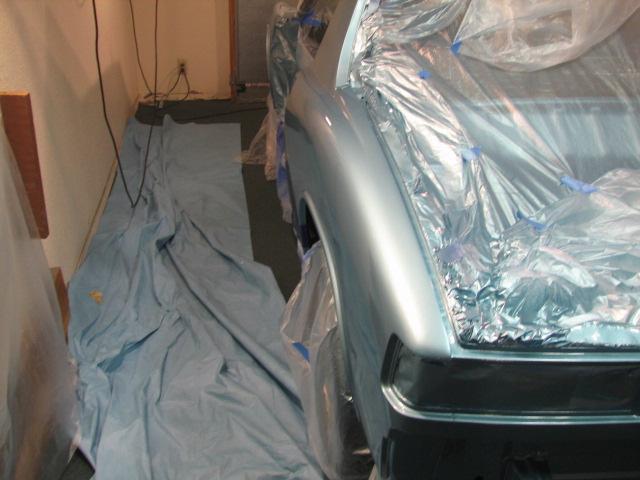 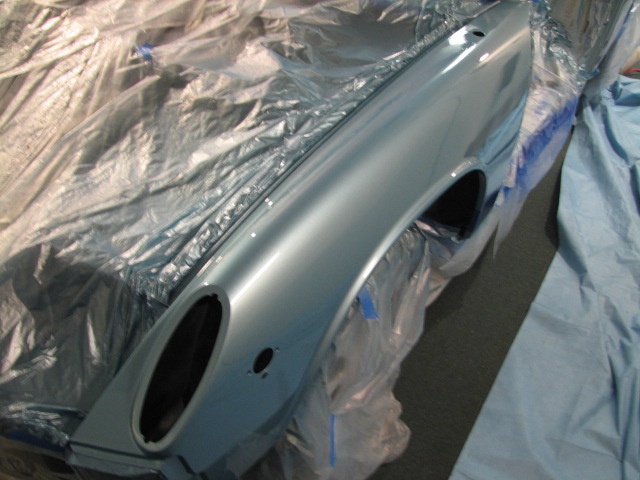
|
|
|
|
| thomasotten |
Nov 29 2006, 05:22 PM
Post
#36
|
|
Senior Member Group: Members Posts: 1,583 Joined: 16-November 03 From: San Antonio, Texas Member No.: 1,349 |
The next day, I was anxious to see the car in the sunlight....
..."I knew the moment had arrived, and I headed straight into the shining sun"... (Pink Floyd song) Attached image(s)  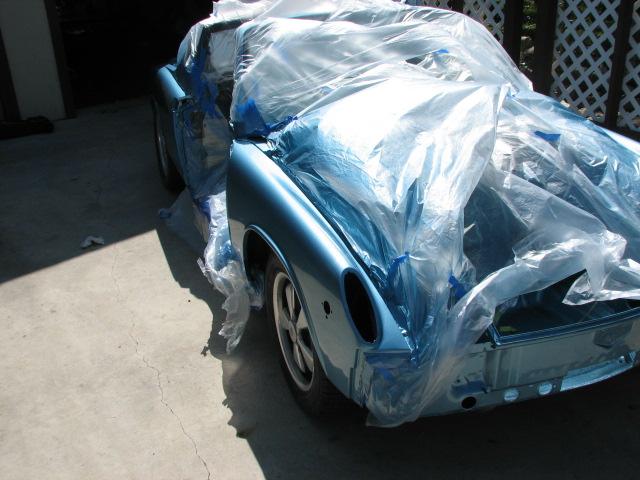 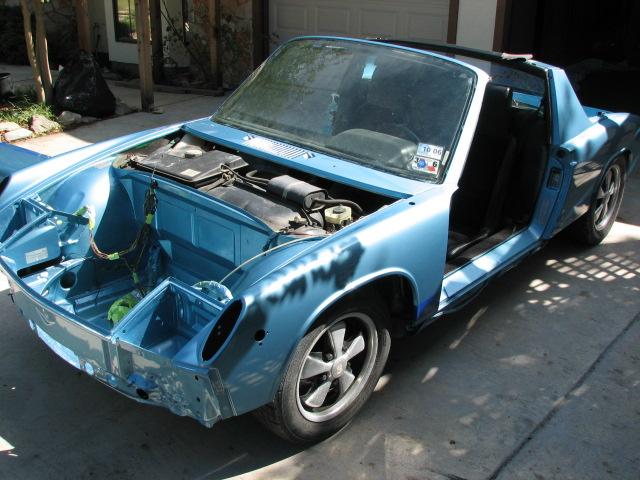 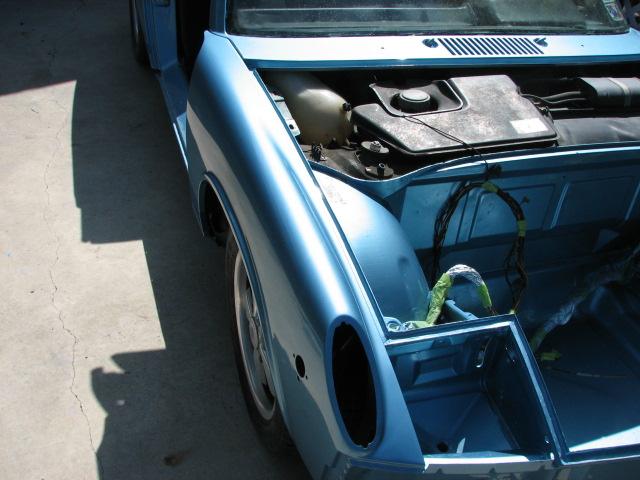 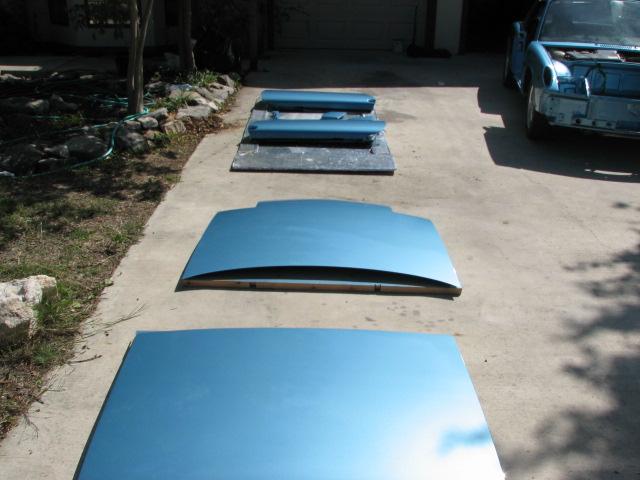
|
|
|
|
| thomasotten |
Nov 29 2006, 05:26 PM
Post
#37
|
|
Senior Member Group: Members Posts: 1,583 Joined: 16-November 03 From: San Antonio, Texas Member No.: 1,349 |
...
Attached image(s) 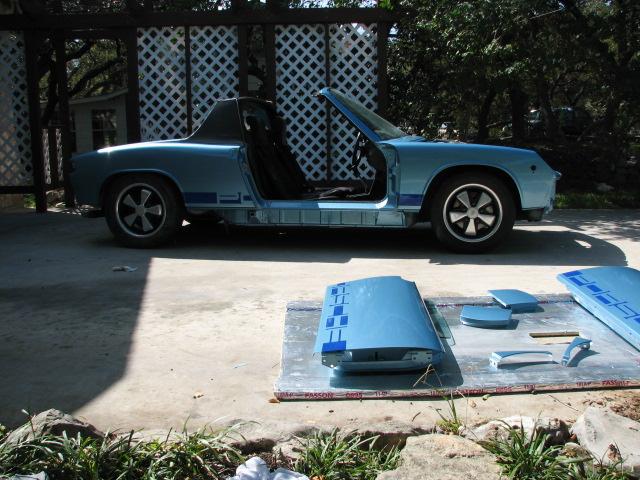 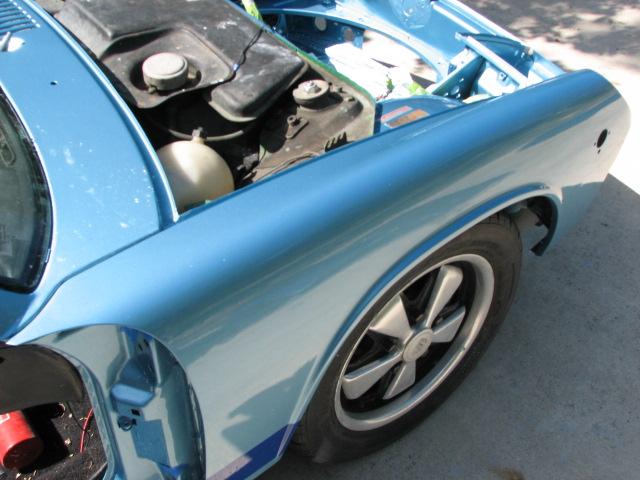 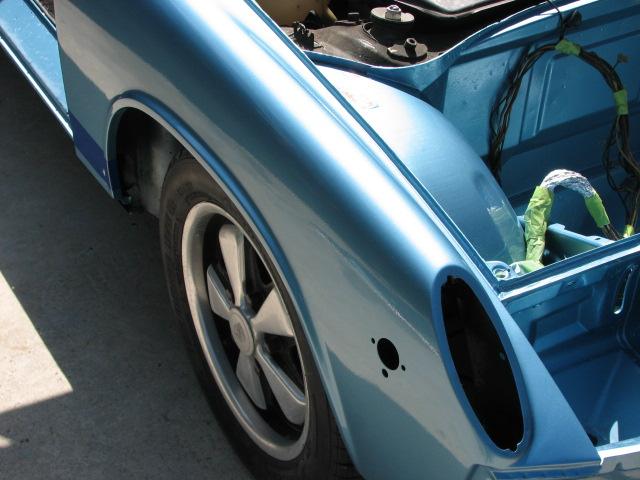 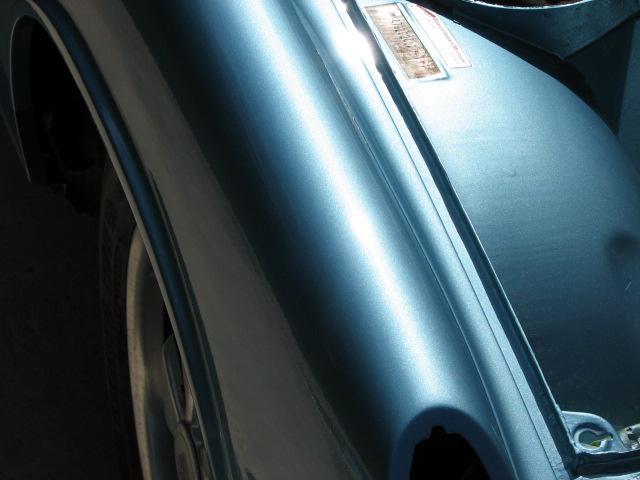
|
|
|
|
| Jenny |
Nov 29 2006, 05:33 PM
Post
#38
|
|
Advanced Member Group: Members Posts: 4,060 Joined: 6-January 03 Member No.: 96 Region Association: None |
Drool.. It looks so good, I just wanna take a bite out of it! Kudos!
Jen |
|
|
|
| TonyAKAVW |
Nov 29 2006, 05:37 PM
Post
#39
|
|
That's my ride. Group: Members Posts: 2,151 Joined: 17-January 03 From: Redondo Beach, CA Member No.: 166 Region Association: None |
Very very cool.
What sort of air compressor did you use for that? -Tony |
|
|
|
| markb |
Nov 29 2006, 05:42 PM
Post
#40
|
|
914less :( Group: Members Posts: 5,450 Joined: 22-January 03 From: Nipomo, CA Member No.: 180 Region Association: Central California |
|
|
|
|
|
1 User(s) are reading this topic (1 Guests and 0 Anonymous Users)
0 Members:

|
Lo-Fi Version | Time is now: 24th July 2026 - 07:31 PM |
Invision Power Board
v9.1.4 © 2026 IPS, Inc.