|
|
|
Porsche, and the Porsche crest are registered trademarks of Dr. Ing. h.c. F. Porsche AG.
This site is not affiliated with Porsche in any way. Its only purpose is to provide an online forum for car enthusiasts. All other trademarks are property of their respective owners. |
|
|

  |

| Trevorg7 |
 Aug 31 2007, 03:36 PM Aug 31 2007, 03:36 PM
Post
#1
|
|
Senior Member  Group: Members Posts: 1,242 Joined: 7-December 04 From: Highland Village, TX Member No.: 3,241 Region Association: Southwest Region |
I was chasing a fuel leak and planned to replace the old OEM fuel lines with Tangerine's stainless fuel lines. The leak turned out to be the fuel tank.
The PO apparently cut his own inspection port and capped the return line; I am guessing when they converted to carbs. Crummy job and they even left a screw driver in there (see handle in photo). Other photos show the fuel soaked road crud and new lines installed. T Attached image(s) 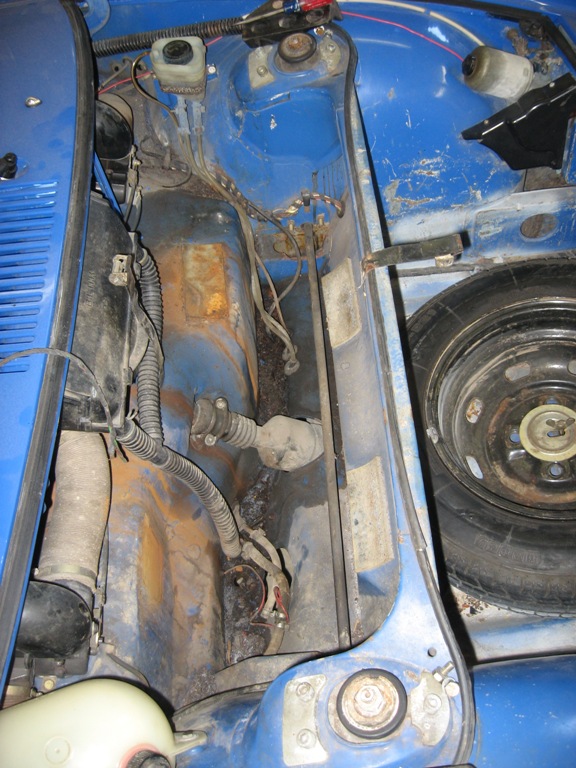 
|
   |

 
|
| Trevorg7 |
Aug 31 2007, 03:37 PM
Post
#2
|
|
Senior Member Group: Members Posts: 1,242 Joined: 7-December 04 From: Highland Village, TX Member No.: 3,241 Region Association: Southwest Region |
more
Attached image(s) 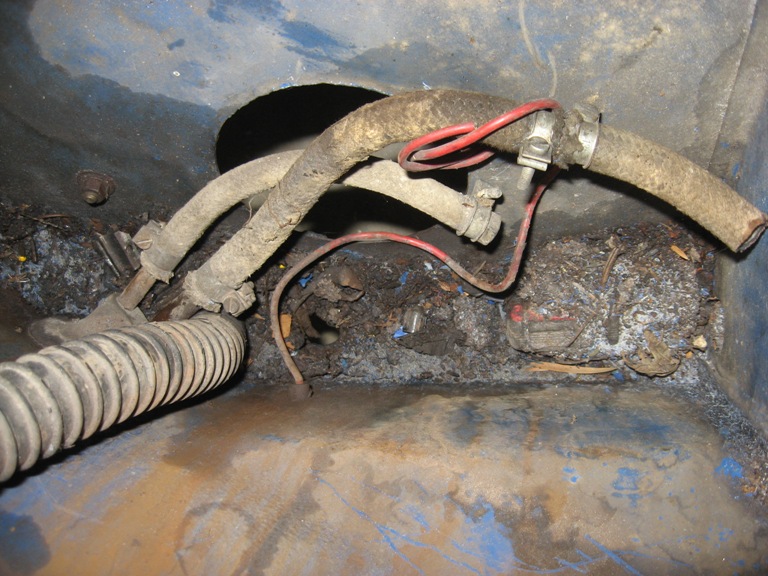 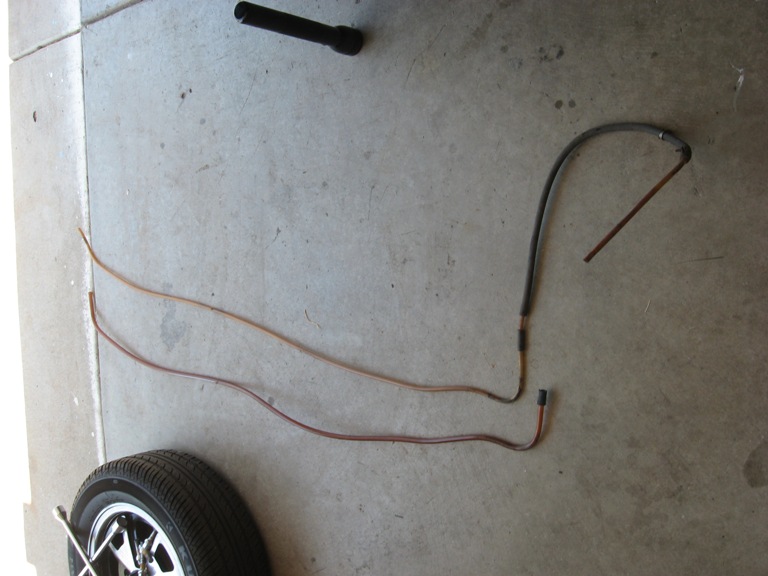
|
|
|
|
| Trevorg7 |
Aug 31 2007, 03:38 PM
Post
#3
|
|
Senior Member Group: Members Posts: 1,242 Joined: 7-December 04 From: Highland Village, TX Member No.: 3,241 Region Association: Southwest Region |
last ones
Attached image(s) 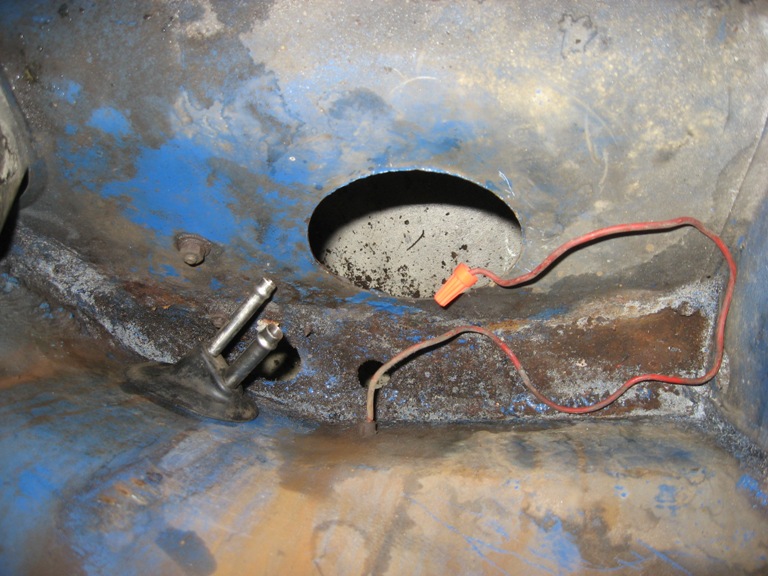 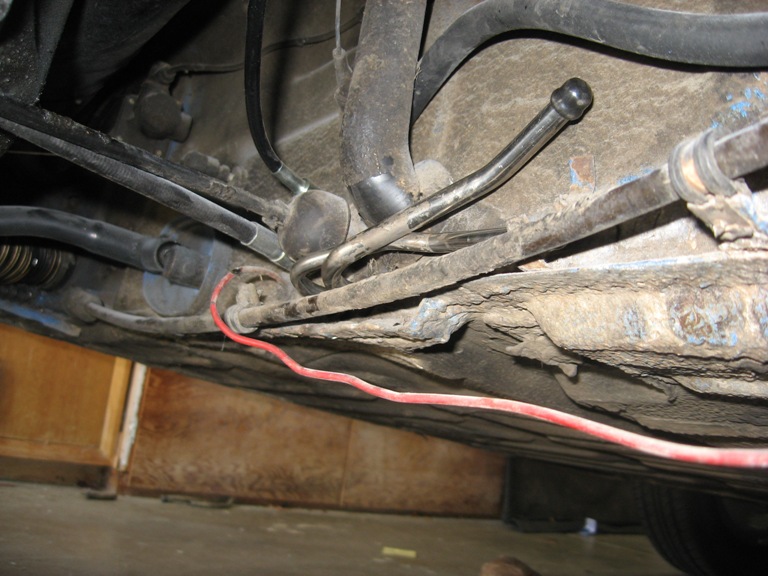
|
|
|
|
| Lavanaut |
Aug 31 2007, 04:31 PM
Post
#4
|
|
Hungry Mind : Thirsty Gullet Group: Members Posts: 916 Joined: 20-June 06 From: Bend, OR Member No.: 6,265 Region Association: Pacific Northwest |
Hey Trevor, how hard was it to pull the old lines and run the new ones? I've currently got my fuel tank out and the old lines cut. I was thinking I should install stainless lines, but was feeling a bit intimidated. A little feedback would be much appreciated.
Thanks! |
|
|
|
| Trevorg7 |
Aug 31 2007, 04:59 PM
Post
#5
|
|
Senior Member Group: Members Posts: 1,242 Joined: 7-December 04 From: Highland Village, TX Member No.: 3,241 Region Association: Southwest Region |
QUOTE(Lavanaut @ Aug 31 2007, 03:31 PM)  Hey Trevor, how hard was it to pull the old lines and run the new ones? I've currently got my fuel tank out and the old lines cut. I was thinking I should install stainless lines, but was feeling a bit intimidated. A little feedback would be much appreciated. Thanks! Lavanaut - I was intimidated too but it is not so bad. I did it by my self in about an hour. That said the car was already up on jack stands as I have a few other things going on. Pulling the old ones out was easy, the supply line was the hardest one to get in. With the car on jack stands I (by suggestion) took the right rear wheel off and snaked the new ones in. I used both inspection ports on the center trunk (in the cab) but especially the front one to get the new line out the hole in the front trunk. I kept the caps on the lines (you can see them still on in the rear) while fishing them through the center trunk and I think that was a good call to prevent crap from getting in them. You can hear the lines scrap the bottom/walls as you fish them through. I would do it, especially since you have the tank out. Get on the horn with Chris at Tangerine - he ships quickly. Thanks T |
|
|
|
| swl |
Aug 31 2007, 07:37 PM
Post
#6
|
|
Senior Member Group: Members Posts: 1,409 Joined: 7-August 05 From: Kingston,On,Canada Member No.: 4,550 Region Association: Canada |
When I pulled mine out (early 73) I had to remove the shift lever to get my hand in to undo the tab that was holding the line in place. Seem to remember there were 3 tabs and I just couldn't get to the middle one without going through the shifter port.
|
|
|
|
| ChrisFoley |
Sep 1 2007, 02:56 PM
Post
#7
|
|
I am Tangerine Racing Group: Members Posts: 7,925 Joined: 29-January 03 From: Bolton, CT Member No.: 209 Region Association: None |
QUOTE I was thinking I should install stainless lines, but was feeling a bit intimidated. I think replacing all the 30+ yr. old plastic lines is an important maintenance item. Even though the section inside the tunnel is still pliable it is way beyond its safe service life. On a diy difficulty scale of 1 to 10 I would rate this project as a 2.5. Not many tools involved but a bit tricky, and you may get dirty playing in the dark recesses of your car. 2 people makes the job go much faster. QUOTE(swl @ Aug 31 2007, 09:37 PM) When I pulled mine out (early 73) I had to remove the shift lever to get my hand in to undo the tab that was holding the line in place. Seem to remember there were 3 tabs and I just couldn't get to the middle one without going through the shifter port. I'm only familiar with a pair of tabs near the rear of the tunnel. They are accessed through the last opening the main wiring harness goes through. It takes some fishing to clear all the hazards inside the tunnel so having full access is essential, ie. remove carpet, packeage tray, etc. The hardest part is the last step: pushing the front ends through the big rubber angled grommet at the end of the tunnel. I like to have a helper at the rear pushing forward while I (from the access hole at the front of the tunnel) aim them into the grommet and add sideways force. Using silicone or teflon spray lube helps immensely. |
|
|
|
| Trevorg7 |
Sep 1 2007, 07:50 PM
Post
#8
|
|
Senior Member Group: Members Posts: 1,242 Joined: 7-December 04 From: Highland Village, TX Member No.: 3,241 Region Association: Southwest Region |
QUOTE The hardest part is the last step: pushing the front ends through the big rubber angled grommet at the end of the tunnel. Chris - I actually removed the rubber angled gromment first. then put in back on with silicon spray after the lines were through the hole. For someone going about this solo these seemed the easiest. Great product by the way! T |
|
|
|
| Rick L |
Sep 2 2007, 07:28 AM
Post
#9
|
|
Member Group: Members Posts: 405 Joined: 12-November 05 From: Columbia-ish, MD Member No.: 5,116 Region Association: North East States |
(IMG:style_emoticons/default/agree.gif)
I got my new set in 3 days. Today I'm draining and removing the tank and first thing tomorrow, I'm installing the new lines. Crash is coming over to play! Ought to be good times. Great product, Chris! (IMG:style_emoticons/default/smilie_pokal.gif) |
|
|
|
| type47fan |
Sep 2 2007, 05:45 PM
Post
#10
|
|
It Looks Better In Person. . . Group: Members Posts: 860 Joined: 17-September 03 From: Carlsbad, CA Member No.: 1,170 Region Association: Southern California |
Chris,
Tried to send you a PM, but it looks like your box if full. Thanks, QUOTE(Racer Chris @ Sep 1 2007, 12:56 PM) QUOTE I was thinking I should install stainless lines, but was feeling a bit intimidated. I think replacing all the 30+ yr. old plastic lines is an important maintenance item. Even though the section inside the tunnel is still pliable it is way beyond its safe service life. On a diy difficulty scale of 1 to 10 I would rate this project as a 2.5. Not many tools involved but a bit tricky, and you may get dirty playing in the dark recesses of your car. 2 people makes the job go much faster. QUOTE(swl @ Aug 31 2007, 09:37 PM) When I pulled mine out (early 73) I had to remove the shift lever to get my hand in to undo the tab that was holding the line in place. Seem to remember there were 3 tabs and I just couldn't get to the middle one without going through the shifter port. I'm only familiar with a pair of tabs near the rear of the tunnel. They are accessed through the last opening the main wiring harness goes through. It takes some fishing to clear all the hazards inside the tunnel so having full access is essential, ie. remove carpet, packeage tray, etc. The hardest part is the last step: pushing the front ends through the big rubber angled grommet at the end of the tunnel. I like to have a helper at the rear pushing forward while I (from the access hole at the front of the tunnel) aim them into the grommet and add sideways force. Using silicone or teflon spray lube helps immensely. Attached image(s) 
|
|
|
|
|
1 User(s) are reading this topic (1 Guests and 0 Anonymous Users)
0 Members:

|
Lo-Fi Version | Time is now: 16th May 2024 - 05:56 AM |
Invision Power Board
v9.1.4 © 2024 IPS, Inc.