Home  |  Forums  |  914 Info  |  Blogs
 
914World.com - The fastest growing online 914 community!
 
Porsche, and the Porsche crest are registered trademarks of Dr. Ing. h.c. F. Porsche AG. This site is not affiliated with Porsche in any way.
Its only purpose is to provide an online forum for car enthusiasts. All other trademarks are property of their respective owners.
 

Welcome Guest ( Log In | Register )

 
Reply to this topicStart new topic
> bigkmark turbo tach install, how to w/pics
ottox914
post Sep 13 2007, 07:12 PM
Post #1


The glory that once was.
***

Group: Members
Posts: 1,302
Joined: 15-December 03
From: Mahtomedi, MN
Member No.: 1,438
Region Association: Upper MidWest


Finally said to %&%* with work and decided to catch up on some things important to me. LIke catching up on some posts to the club. Here are some pics of my install of a "Bigmark's" turbo tach. I'll throw some words in here, then let the pics do the talking. This project is easier with the steering wheel removed. That was no problem on my car, but may require a little more work on yours. The tach removes easily by slowly working it out with your finger tips- its just held in by the rubber trim ring around the tach. You then pull out the lights and disconnect the wires. The plastic lights up top for the turn sigs come out easily enough. The metal socketed lights on the side of the tach could have a little corrosion on them and stick a little. Don't pull the wire out of the light, pull the light/socket out of the tach.

pic 1 is the oem tach and the turbo tach

pic2 is a close up of the oem. note that mine has a single wire for the high beam light, that has been cut off

pic3 is a close up of the back of the oem tach- the connectors are labled as to what the wires on them do, so watch this when you take things appart, so you can re-connect to the leads off your new turbo tach

pic 4 is a close up of the turbo tach

pic 5 shows the 2 fine leads off the turbo tach, red and black, for the high beam light. I needed to ground the black somewhere, I grounded it to the tach case w/the other wires being grounded there.


Attached image(s)
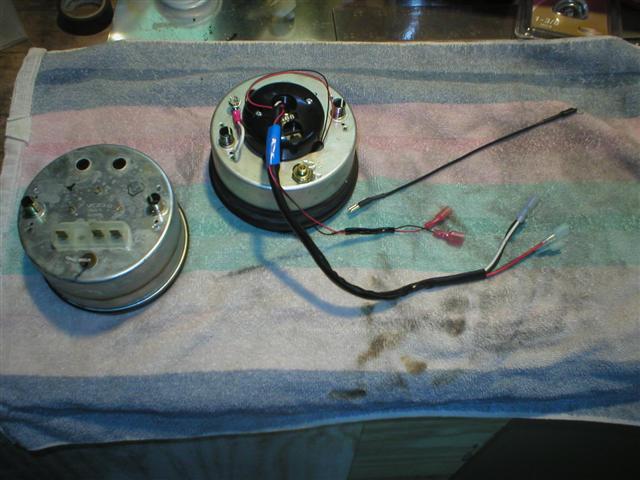
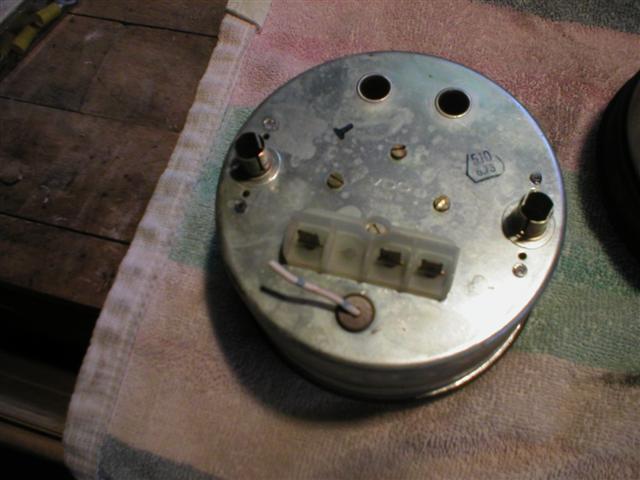
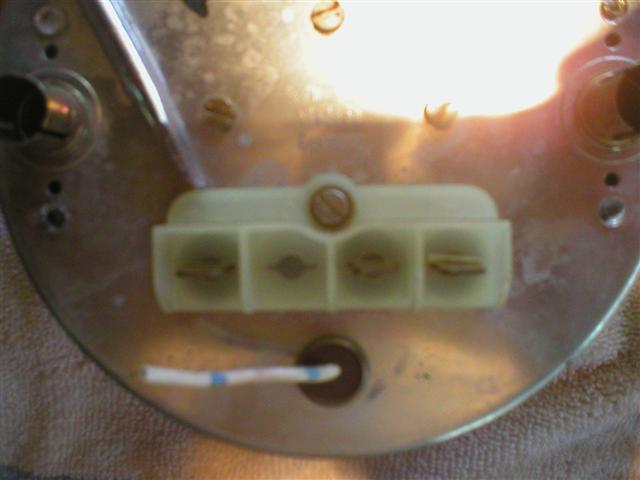
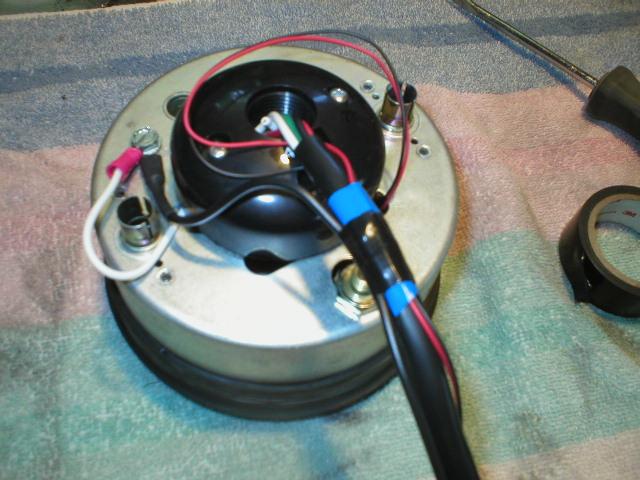
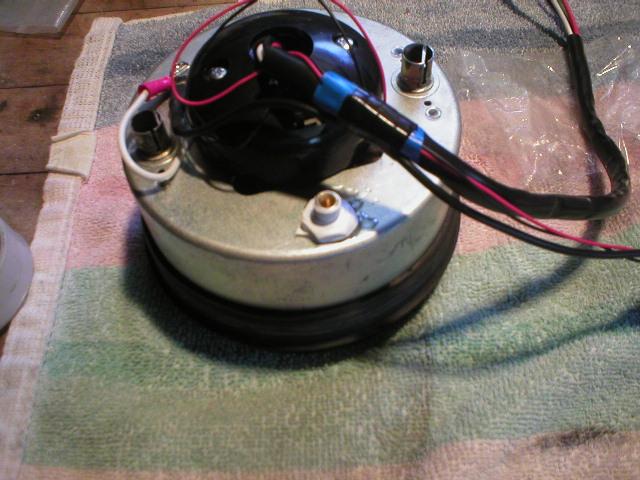
Attached Image Attached Image Attached Image Attached Image Attached Image
User is offlineProfile CardPM
Go to the top of the page
+Quote Post
ottox914
post Sep 13 2007, 07:19 PM
Post #2


The glory that once was.
***

Group: Members
Posts: 1,302
Joined: 15-December 03
From: Mahtomedi, MN
Member No.: 1,438
Region Association: Upper MidWest


Now into the car. With the wires pulled off, and your old tach removed, there is a gole in the dash you need to fill. I needed to add a connector to the white w/blue stripe wire I cut (high beam light) to get the tach out. Added the connector, and ready to re-install.

Pics are a little out of order, but I'm a little to lazy to fix it-

pic 1- all wired up, vaccume/boost line connected, ready to install

pic 2- when adding the SDS and wideband, I used a couple rubber fernco plumbing caps to cap off the heat tube in the rocker area, inserted some plastic hose, and used that as a conduit for wireing. I just pushed thru this plastic hose the small diameter boost line that came in the kit, and had my vaccume line from the back to the front. Added a "T" in the back, and was good to go.

pic 3- tach in dash- looks good.

pic 4- close up of tach, it works!

pic 5- replacment tach, this one with 15 psi boost gauge.

pic 6- out of order, but I added a stub line off the gauge and used a section of rubber to run from the gauge behind the dash to the line added in pic 2, to give myself plenty of length to work with.


So whats up with the 15 psi gauge? The initial gauge sent would only rev to 4300. Mark was ready to immediatly send a replacement unit, at his cost. I suggested we wait and see if the needle was just a little sticky. I went to Road America, and let one of the GRM guys drive it. A couple missed shifts and the needle had loosened up. But now it was bouncing all over at idle, compaired to the actual rpm shown on the SDS handheld. So more emails to Mark, and he shot me off another turbo tach. I asked him if 15psi was an option, as that would be more suited to the car, he said "sure!" Didn't once even imply that I was looking to get the tach re-build because of that. I never thought to ask about 15psi when ordering.

In summary, a great product, and a greater person to deal with. Emails answered with lightning speed, great support, and the coolest gauge money can buy. I wish I had known of his services before putting my oil pressure/temp gauges in the ashtray area, I'd have gotten one of his gauges for that as well.


Attached image(s)
Attached Image Attached Image Attached Image Attached Image Attached Image Attached Image
User is offlineProfile CardPM
Go to the top of the page
+Quote Post

Reply to this topicStart new topic
1 User(s) are reading this topic (1 Guests and 0 Anonymous Users)
0 Members:


- Lo-Fi Version Time is now: 15th May 2024 - 02:57 PM