|
|
|
Porsche, and the Porsche crest are registered trademarks of Dr. Ing. h.c. F. Porsche AG.
This site is not affiliated with Porsche in any way. Its only purpose is to provide an online forum for car enthusiasts. All other trademarks are property of their respective owners. |
|
|

  |

| BMXerror |
 Sep 20 2007, 07:38 PM Sep 20 2007, 07:38 PM
Post
#21
|
|
Senior Member  Group: Members Posts: 1,705 Joined: 8-April 06 From: Hesperia Ca Member No.: 5,842 |
The SCCA GCR calls out 20 degrees, which is approximately what I've got.
Mark D. |
   |

 
|
| Aaron Cox |
Sep 20 2007, 08:45 PM
Post
#22
|
|
Professional Lawn Dart Group: Retired Admin Posts: 24,542 Joined: 1-February 03 From: Corona, CA Member No.: 219 Region Association: Southern California |
QUOTE(BMXerror @ Sep 20 2007, 06:38 PM)  The SCCA GCR calls out 20 degrees, which is approximately what I've got. Mark D. Great (IMG:style_emoticons/default/aktion035.gif) |
|
|
|
| BMXerror |
Sep 21 2007, 12:45 PM
Post
#23
|
|
Senior Member Group: Members Posts: 1,705 Joined: 8-April 06 From: Hesperia Ca Member No.: 5,842 |
Nevermind
|
|
|
|
| PeeGreen 914 |
Sep 21 2007, 05:44 PM
Post
#24
|
|
Just when you think you're done...wait, there is more..lol Group: Members Posts: 10,219 Joined: 21-September 06 From: Seattle, WA... actually Everett Member No.: 6,884 Region Association: Pacific Northwest |
Anymore pics of your work?
|
|
|
|
| BMXerror |
Dec 5 2007, 01:10 PM
Post
#25
|
|
Senior Member Group: Members Posts: 1,705 Joined: 8-April 06 From: Hesperia Ca Member No.: 5,842 |
Okay, I haven't posted on this thread in quite a while due to being so busy with work and school. Now is really no different, but I just wanted to catch up. All I finished painting the firewall and got the harnesses installed. I had to jump through a lot of hoops to get the hardware that I needed and some other things took some time, but I finished this portion of work forever ago and wanted to share. Let's see.... Where was I?... Ahh, the floor. Here's a couple pictures of the floor panels tacked in. My brother suggested just tacking them in to make them easier to take out later, when I do the job right with full reproduction floor panels. They're still plenty strong this way.
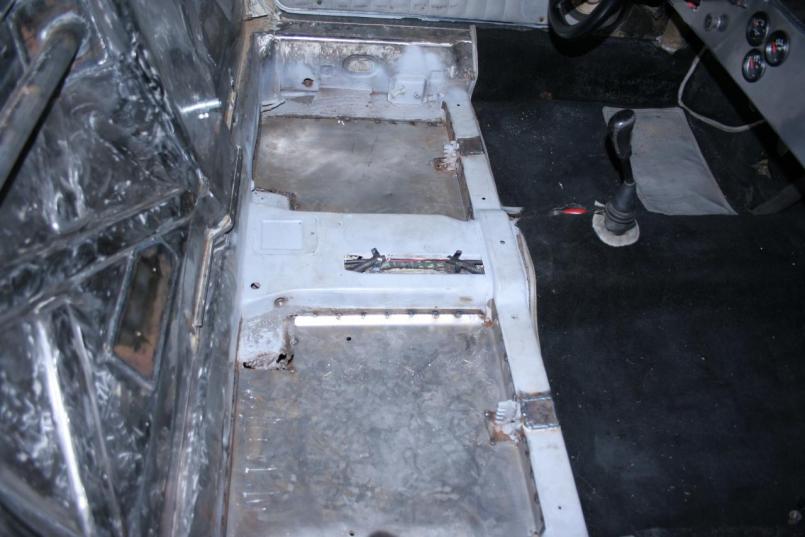  Painted pictures later. Mark D. |
|
|
|
| BMXerror |
Dec 5 2007, 01:17 PM
Post
#26
|
|
Senior Member Group: Members Posts: 1,705 Joined: 8-April 06 From: Hesperia Ca Member No.: 5,842 |
Now to actually mounting the harnesses. I made some plates for the anti-sub belt and had them welded to the frame bracing under the front edge of the seats. I was afraid it might be too far forward, but the geometry actually came out pretty good.
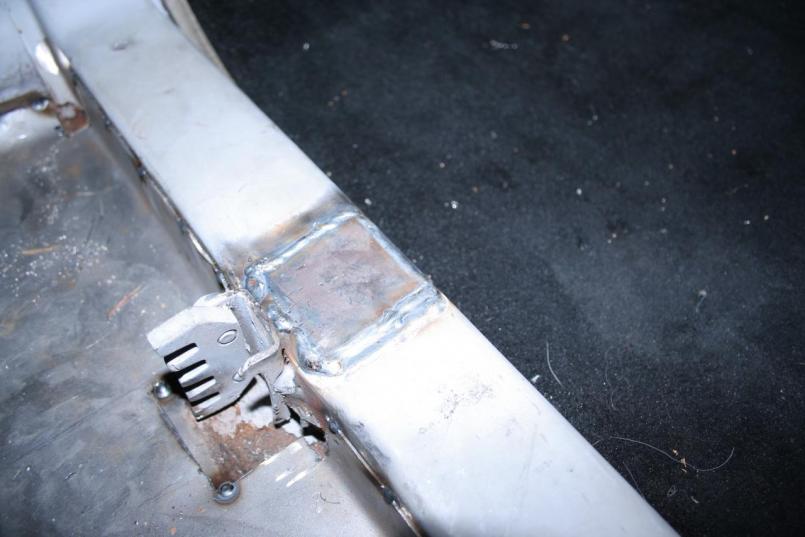 The reinforcement plates and metal under them were partially drilled with about a 1-1/4" drill to make a sort of chamfer. This was done in order to get weld engagement on both plates of metal.  Mark D. |
|
|
|
| BMXerror |
Dec 5 2007, 01:22 PM
Post
#27
|
|
Senior Member Group: Members Posts: 1,705 Joined: 8-April 06 From: Hesperia Ca Member No.: 5,842 |
The lap belts were done much the same as the anti-sub belts, but first I had to holesaw out the original bosses. At first, I wanted to just drill and tap the bosses to the size that I needed, but there wouldn't be enough metal left for thread engagement due to the existing threads. So instead, I took them out and welded in some Grade 12.9 nuts.
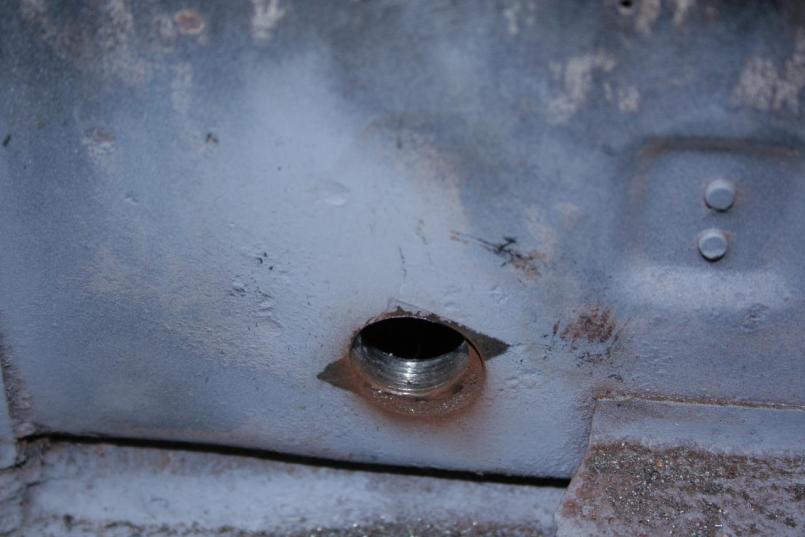 The holes were chamfered in the same way the anti-sub belts were. 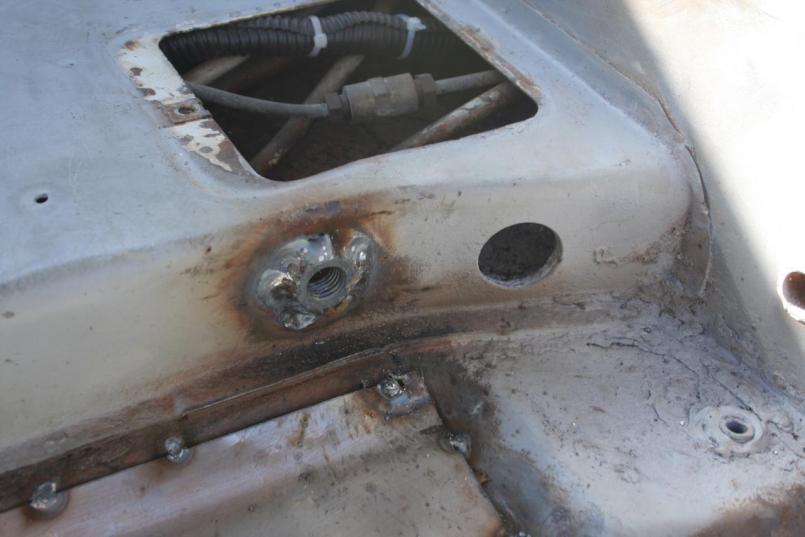 Mark D. |
|
|
|
| BMXerror |
Dec 5 2007, 01:28 PM
Post
#28
|
|
Senior Member Group: Members Posts: 1,705 Joined: 8-April 06 From: Hesperia Ca Member No.: 5,842 |
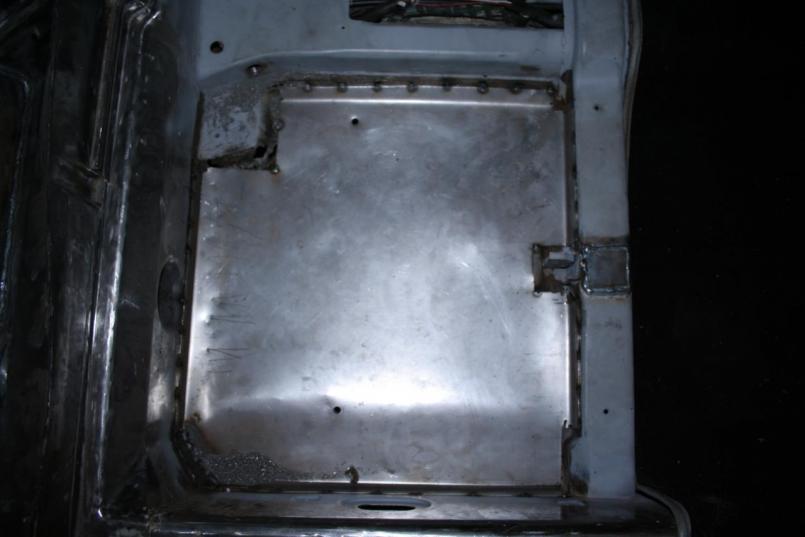
After that, I was ready to paint. These next few pictures were just taken today, and I didn't feel like removing the harnesses, but you get the idea. Rustolium Satin Black.
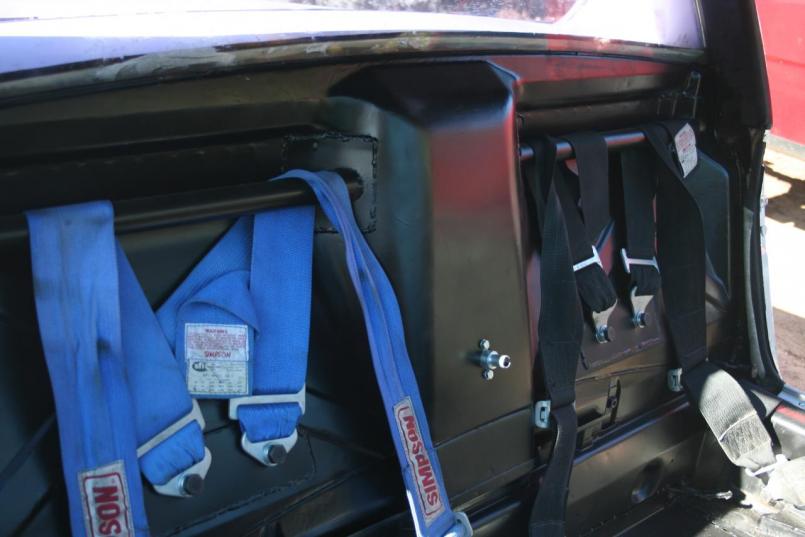 Notice the battery shut-off in the middle. 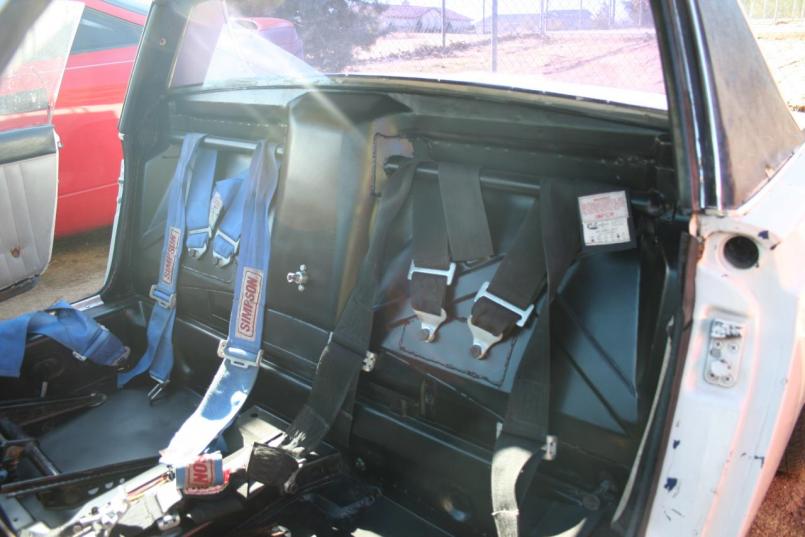 I know you just love how the stock seats are just bolted through the floor in the back. It's ghetto, I know, but the hinges were completely gone (probably rusted out), With no real metal left to weld in new ones. This'll work until I get some real race seats which will just be bolted in too. Mark D. |
|
|
|
| BMXerror |
Dec 5 2007, 01:30 PM
Post
#29
|
|
Senior Member Group: Members Posts: 1,705 Joined: 8-April 06 From: Hesperia Ca Member No.: 5,842 |
Close ups.
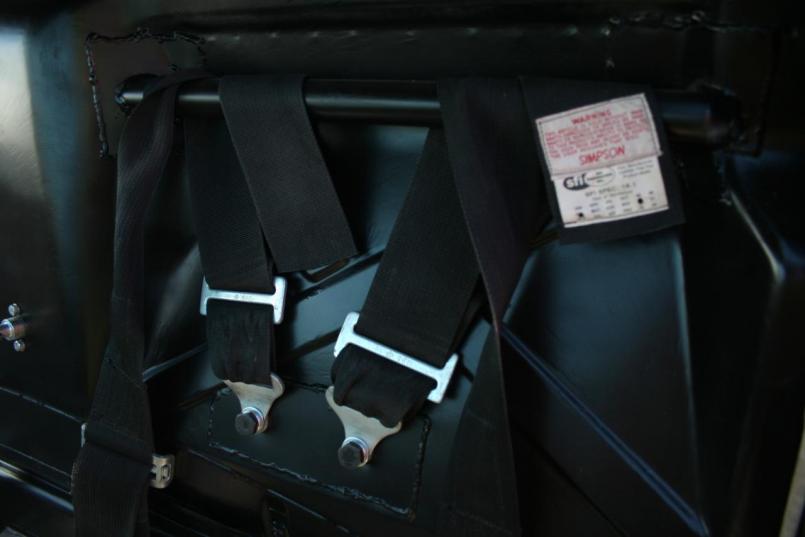 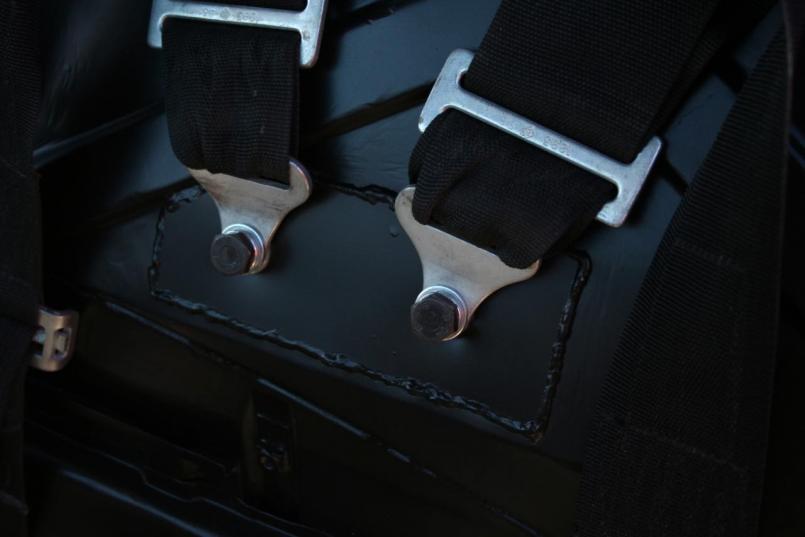 Mark D. |
|
|
|
| BMXerror |
Dec 5 2007, 01:39 PM
Post
#30
|
|
Senior Member Group: Members Posts: 1,705 Joined: 8-April 06 From: Hesperia Ca Member No.: 5,842 |
Grade 10.9 M12 X 1.5 bolts threaded into Grade 12.9 nuts, torqued to 85 ft/lbs with lock washers. Those aren't going anywhere. I don't particularly like the weight of all this hardware, but harnesses are one area you don't want to skimp on.
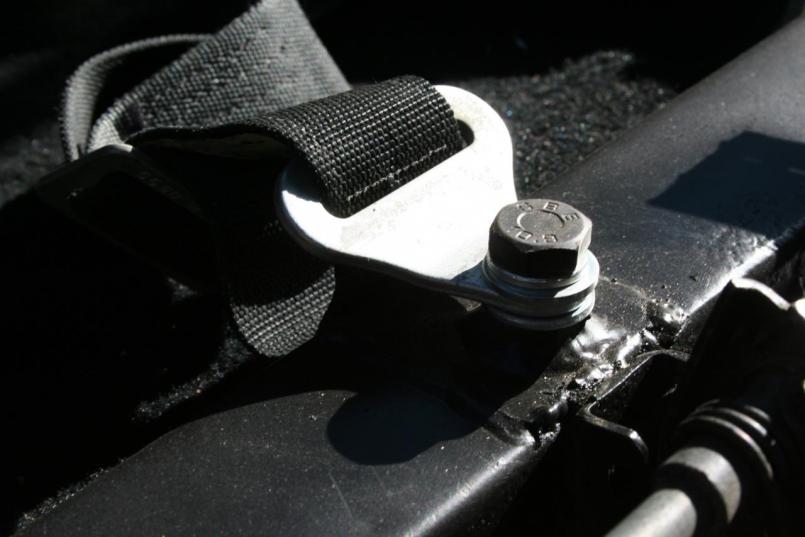 Ten minutes with a wire wheel and some new sheet metal screws does wonders on these little trim pieces.  One little problem that I don't have a picture of: I got the bolts just a little long, and on the right side of the driver's lap belt, the bolt went through and interfered with the shift linkage. This prevented me from getting into 4th and 5th..... oops. (IMG:style_emoticons/default/slap.gif) Simple fix though. I cut the bolt down about 10 mm and it's fine, and it's still threaded completely through the nut. Mark D. |
|
|
|
| PeeGreen 914 |
Dec 5 2007, 01:43 PM
Post
#31
|
|
Just when you think you're done...wait, there is more..lol Group: Members Posts: 10,219 Joined: 21-September 06 From: Seattle, WA... actually Everett Member No.: 6,884 Region Association: Pacific Northwest |
Your work is looking good. Keep it up, and keep posting your progress. |
|
|
|
| BMXerror |
Dec 5 2007, 01:46 PM
Post
#32
|
|
Senior Member Group: Members Posts: 1,705 Joined: 8-April 06 From: Hesperia Ca Member No.: 5,842 |
With the seats in:
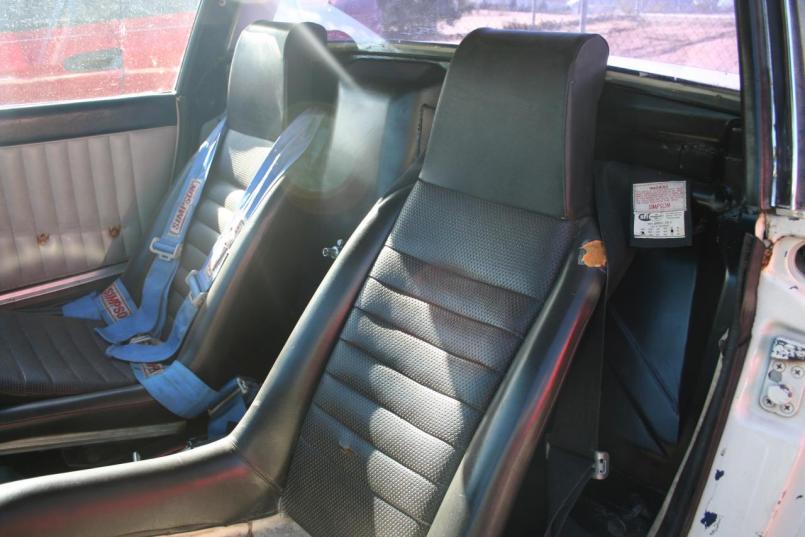 I actually run without a seat cushion for more 'support' in the corners. My skinny ass allows me to get away with this. However, I would like to make some pads with a hole for the sub belt sometime. 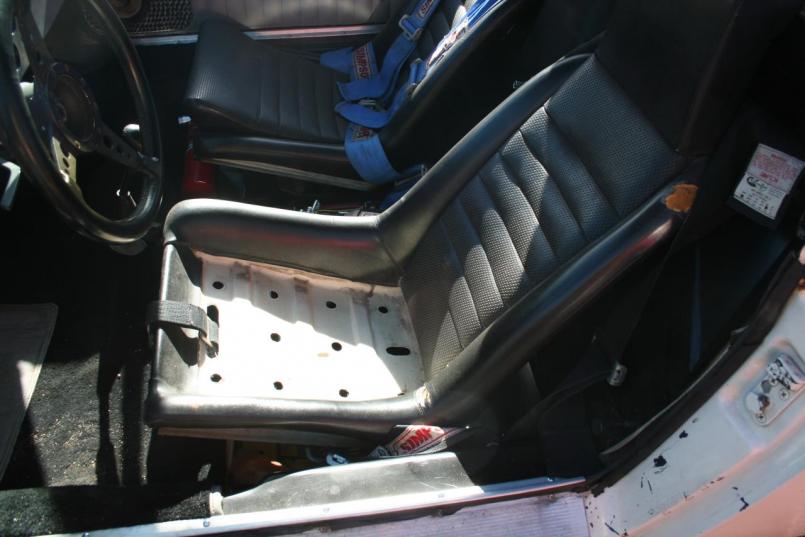 Mark D. |
|
|
|
| BMXerror |
Dec 5 2007, 02:06 PM
Post
#33
|
|
Senior Member Group: Members Posts: 1,705 Joined: 8-April 06 From: Hesperia Ca Member No.: 5,842 |
I've also been working on getting some gauges installed. The car originally had nothing but a tach, speedometer and fuel gauge.... well, and an oil pressure light. I bought a CHT, oil pressure, and oil temperature gauge from E-gauges.com, and have been gradually getting them wired up. It's not like I'm risking anything by taking my time as the car isn't even running right now. Anyways, the first thing I had to do was run some loom material under the front section of the tunnel. I actually did this a while ago when the PO's shitty wiring (under the trim piece on the longs) decided to short itself on a screw and melt the carpet.
I ran a fisher through the path that I wanted the loom material to go, while pulling a string along behind it (from back to front). I then poked a couple holes through the material, tied the string through those holes, and greased up the piece I was pulling through. It actually came through pretty easily. I then sent the fisher down the loom material and pulled a string through. The string is double the length of the loom piece with a washer on both ends, and it just stays in there so it's easy to pull wires when I need to. Simple pic. Note that this is before I got the interior repainted. 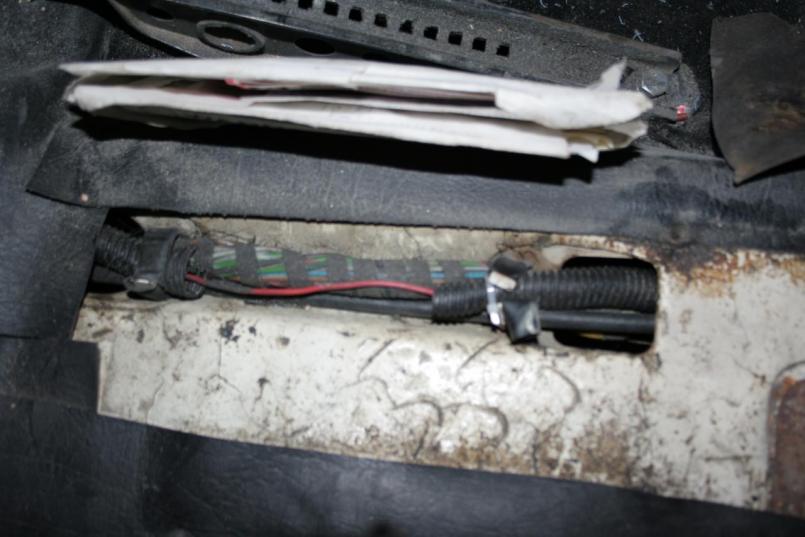 As you can see, I split the loom material where it comes up for air between the seats for accessibility. The back section was done with a hole saw and some rubber grommets from NAPA. I strung it up the same way to help me fish wire. Through the firewall:... 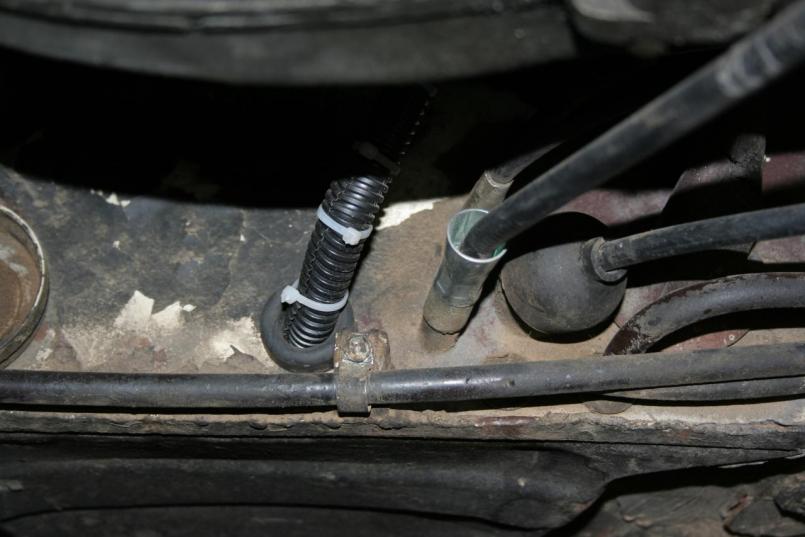 Mark D. |
|
|
|
| BMXerror |
Dec 5 2007, 02:09 PM
Post
#34
|
|
Senior Member Group: Members Posts: 1,705 Joined: 8-April 06 From: Hesperia Ca Member No.: 5,842 |
... and up to the top side of the engine bay.
 Mark D. |
|
|
|
| BMXerror |
Dec 5 2007, 02:13 PM
Post
#35
|
|
Senior Member Group: Members Posts: 1,705 Joined: 8-April 06 From: Hesperia Ca Member No.: 5,842 |
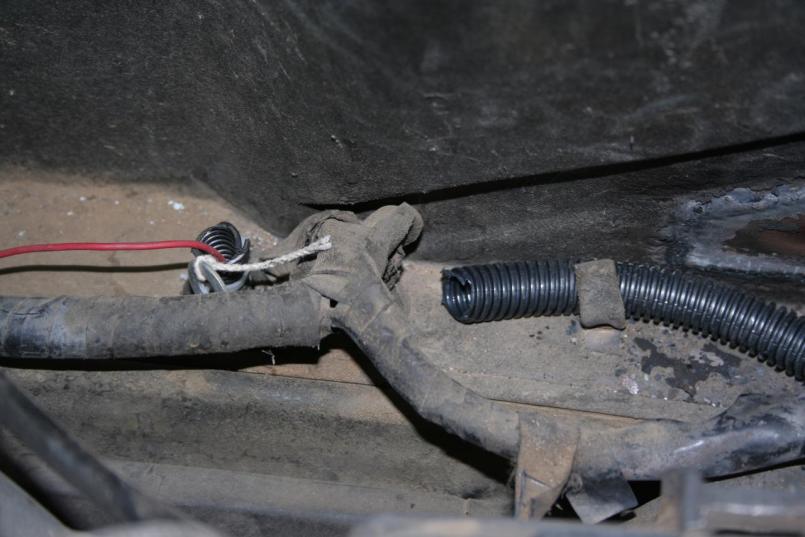
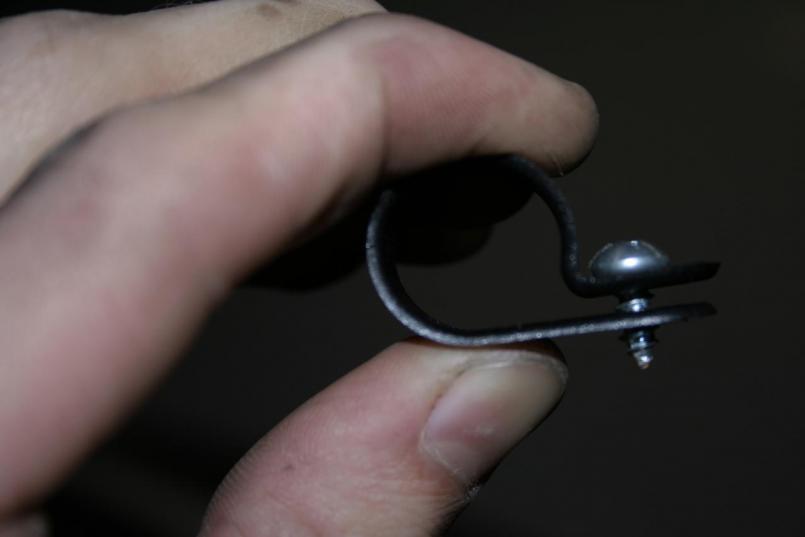
The last little section back to the CHT sensor (on cylinder #3) and the oil pressure sensor was attached using nylon Adelish Clamps.
  I'm ashamed of my dirty engine compartment. Mark D. |
|
|
|
| BMXerror |
Dec 5 2007, 02:23 PM
Post
#36
|
|
Senior Member Group: Members Posts: 1,705 Joined: 8-April 06 From: Hesperia Ca Member No.: 5,842 |
Now for the scary part; cutting giant holes in my hand-fabbed dash. In actuality it went very smoothly. Nobody that I found makes a 2-1/16" holesaw, but a 2" and some massaging with a rotary file worked just fine.
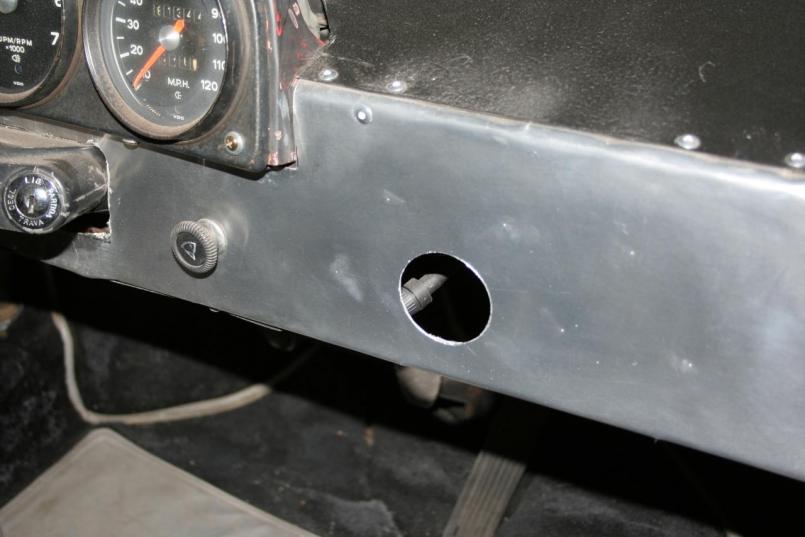  How do you like my Dewalt floor mat? Mark D. |
|
|
|
| BMXerror |
Dec 5 2007, 02:41 PM
Post
#37
|
|
Senior Member Group: Members Posts: 1,705 Joined: 8-April 06 From: Hesperia Ca Member No.: 5,842 |
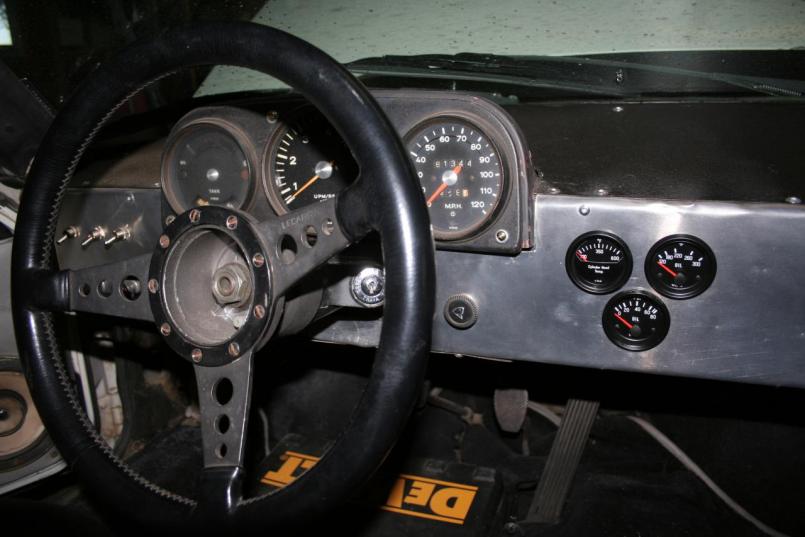
I don't yet have the Oil Temp sensor in, but the others work just fine. The power is daisy-chained from the 8th terminal on the fuse box, and the lights from the 7th terminal. I don't know if this is technically correct, but the PO seems to have the changed the wiring all around. The ground is run to the bolt on the lower brace of the dash. Everything seems to work like it should without catching on fire or repeatedly blowing fuses, so I'm happy enough with it.
Loom up from the tunnel. There will be more wires there later. 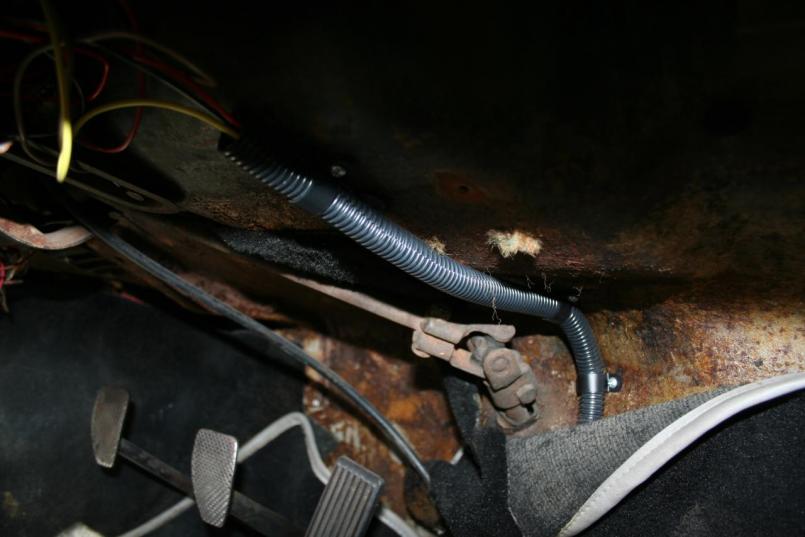 Tight fit back there. 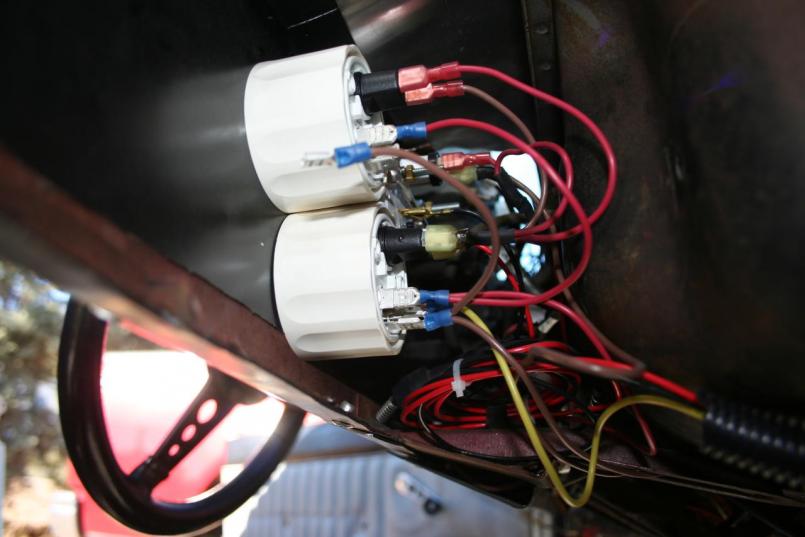 Mark D. |
|
|
|
| BMXerror |
Dec 5 2007, 02:48 PM
Post
#38
|
|
Senior Member Group: Members Posts: 1,705 Joined: 8-April 06 From: Hesperia Ca Member No.: 5,842 |
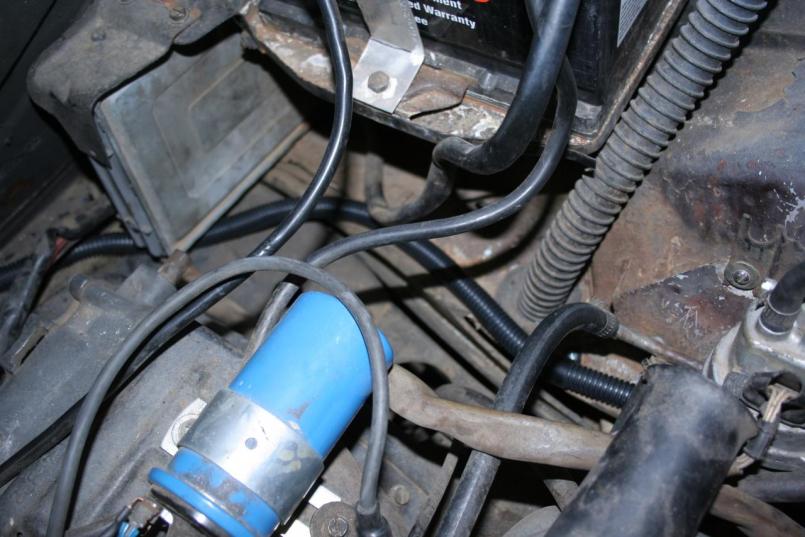
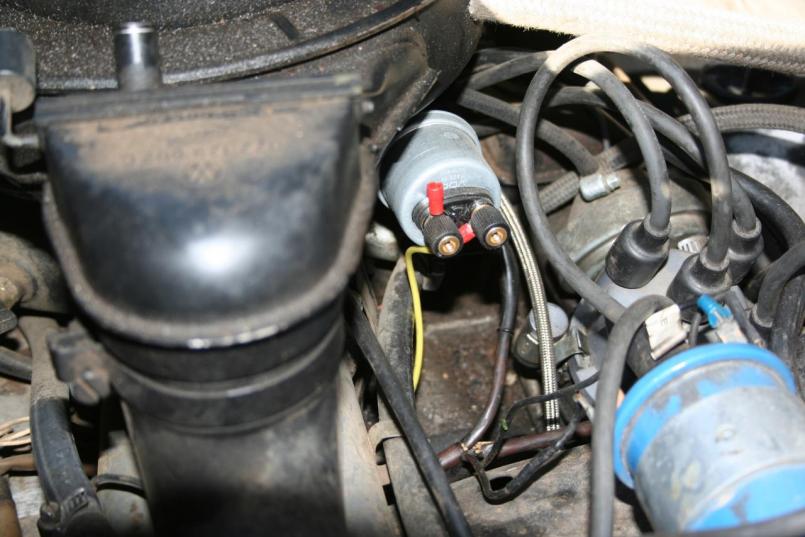
Oil pressure sensor mounted VIA adel clamp on the air filter bracket.
 Random picture of the afore mentioned battery shutoff. 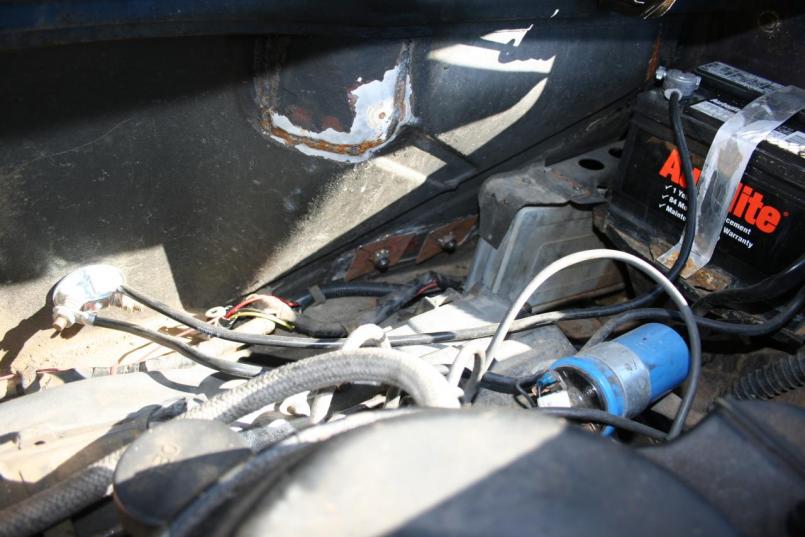 And that's probably all for quite a long time. I'm VERY broke right now, but hopefully that will change soon as I'm looking for a better job. I need to fix some things on the brakes and get into the motor to see why one cylinder is so weak all of the sudden (I think I broke a ring). Hopefully I can do a cheap re-hone/re-ring job and get her back on the road. I'd love to just build a 2056 or, better yet, a 2365 for it and be done with it, but that's not really financially feasible right now. Anyways, after she's on the road again, I'll work on fabbing a front swaybar for the old girl. Thanks for watching. Mark D. |
|
|
|
| BMXerror |
Dec 6 2007, 09:32 PM
Post
#39
|
|
Senior Member Group: Members Posts: 1,705 Joined: 8-April 06 From: Hesperia Ca Member No.: 5,842 |
QUOTE(Blood red 914-6gt @ Dec 5 2007, 11:43 AM) Your work is looking good. Keep it up, and keep posting your progress. Thanks, man. I really appreciate that coming from someone with such a gorgeous 914. (IMG:style_emoticons/default/drooley.gif) Mine's not much to look at right now, but, in time.... As soon as I make more progress, I'll put it up, even if only for your enjoyment. Mark D. |
|
|
|
| McMark |
Dec 6 2007, 09:38 PM
Post
#40
|
|
914 Freak! Group: Retired Admin Posts: 20,180 Joined: 13-March 03 From: Grand Rapids, MI Member No.: 419 Region Association: None |
Looks great. I love these threads. (IMG:style_emoticons/default/biggrin.gif) Doin' it your way.
PM me your address. I have a part that's been sitting for 2 years that will work great for you. (IMG:style_emoticons/default/cool.gif) |
|
|
|
|
1 User(s) are reading this topic (1 Guests and 0 Anonymous Users)
0 Members:

|
Lo-Fi Version | Time is now: 8th July 2025 - 11:03 AM |
Invision Power Board
v9.1.4 © 2025 IPS, Inc.