|
|
|
Porsche, and the Porsche crest are registered trademarks of Dr. Ing. h.c. F. Porsche AG.
This site is not affiliated with Porsche in any way. Its only purpose is to provide an online forum for car enthusiasts. All other trademarks are property of their respective owners. |
|
|

  |

| my928s4 |
 Jan 14 2008, 08:40 AM Jan 14 2008, 08:40 AM
Post
#21
|
|
Member  Group: Members Posts: 349 Joined: 18-August 07 From: Spokane, WA Member No.: 8,018 Region Association: Pacific Northwest |
QUOTE(finstermojo @ Jan 13 2008, 06:12 PM)  When i did my resto and did the same thing you are doing i had mixed results with the POR15 and stopped using it sometimes it would peel right off like a sheet of paper and with more research i found it happed to others too. Interesting thanks, the more I read about a particular rust protection product the more I became disillusioned with it, there was always something negative and I decided no matter what I chose it was a compromise. Your experience is a bummer and I sure hope mine does not turn out that way .... time will tell. As I said if I had the apparatus I would epoxy prime, maybe by the time I get to the underside we will have to see. |
   |

 
|
| my928s4 |
Jan 27 2008, 11:44 AM
Post
#22
|
|
Member Group: Members Posts: 349 Joined: 18-August 07 From: Spokane, WA Member No.: 8,018 Region Association: Pacific Northwest |
Still waiting for the rear pan (should be here next week) so worked on removing the rest of the paint from the rear bulkhead and then prepping and painting. I left where the Engman kit will go unpainted and I need to get some weld thru primer on those surfaces.
Need to get some gas for the welder too. 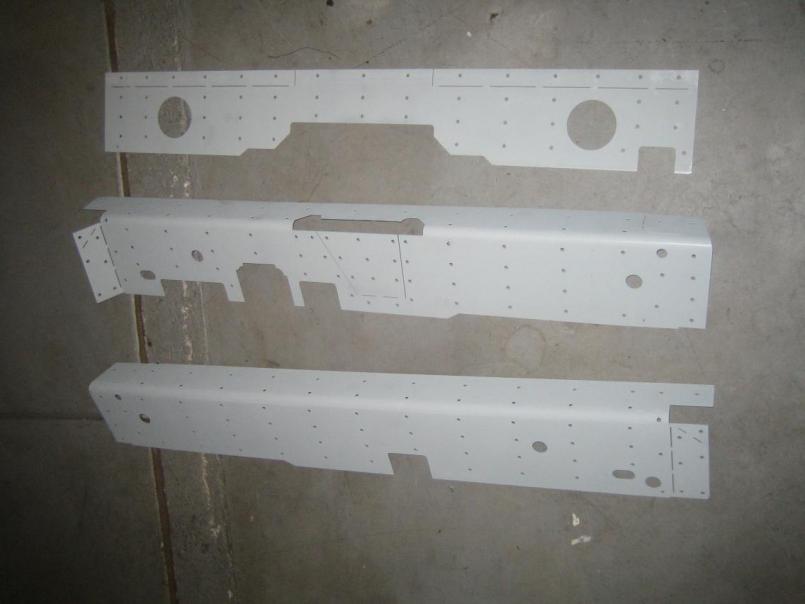 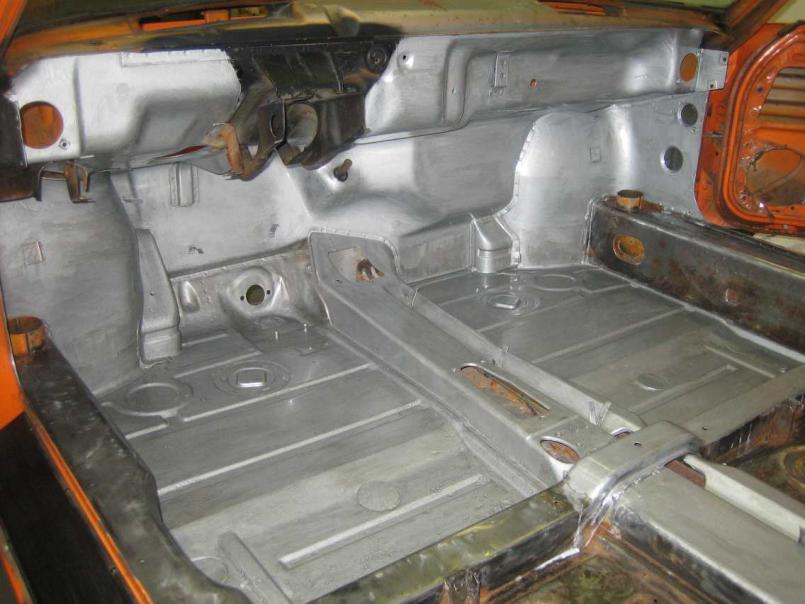 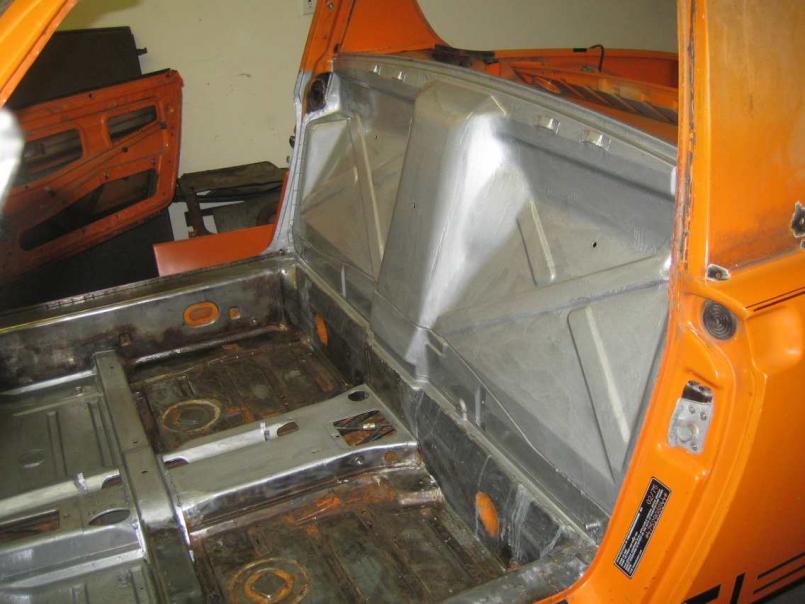 |
|
|
|
| Root_Werks |
Jan 27 2008, 06:54 PM
Post
#23
|
|
Village Idiot Group: Members Posts: 9,033 Joined: 25-May 04 From: About 15NM from Canada Member No.: 2,105 Region Association: Pacific Northwest |
I have seen many-o-914's and your's is not that bad at all. Little rust fixing and it'll be good to go. Can't wait to see this one come together!
|
|
|
|
| my928s4 |
Jan 27 2008, 07:24 PM
Post
#24
|
|
Member Group: Members Posts: 349 Joined: 18-August 07 From: Spokane, WA Member No.: 8,018 Region Association: Pacific Northwest |
QUOTE(Root_Werks @ Jan 27 2008, 04:54 PM) I have seen many-o-914's and your's is not that bad at all. Little rust fixing and it'll be good to go. Can't wait to see this one come together! Yep Dan I agree, progress is a little slow as this is an area I have little experience on a car I am unfamiliar with but then that is all part of the challenge. When I eventually get past the bodywork things should go a little quicker. Chris |
|
|
|
| my928s4 |
Jan 27 2008, 07:31 PM
Post
#25
|
|
Member Group: Members Posts: 349 Joined: 18-August 07 From: Spokane, WA Member No.: 8,018 Region Association: Pacific Northwest |
Cleaned up the battery area in the engine bay when I wasn't shovelling snow today. So far I don't see anything to worry about, took some time to remove the amateur trunk pivot that thing had a lot of weld on it.
After the interior this will be the next area that gets attended too. 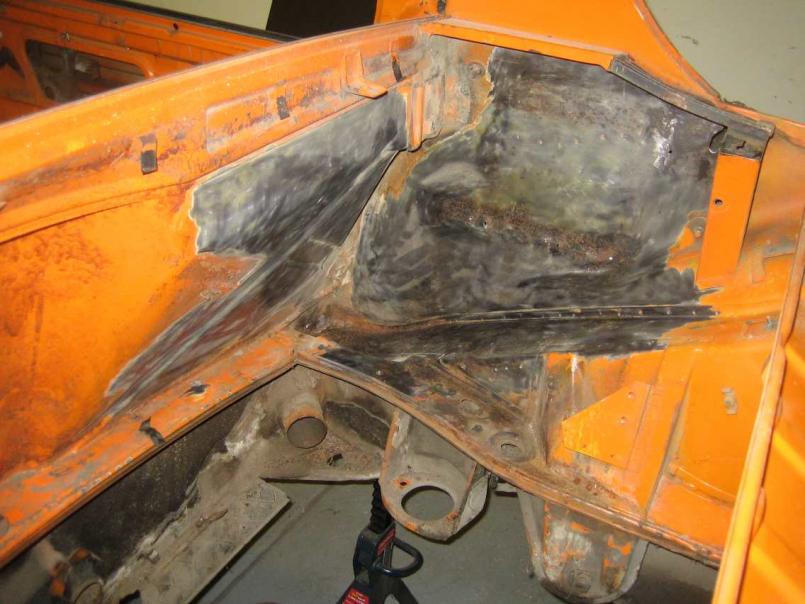 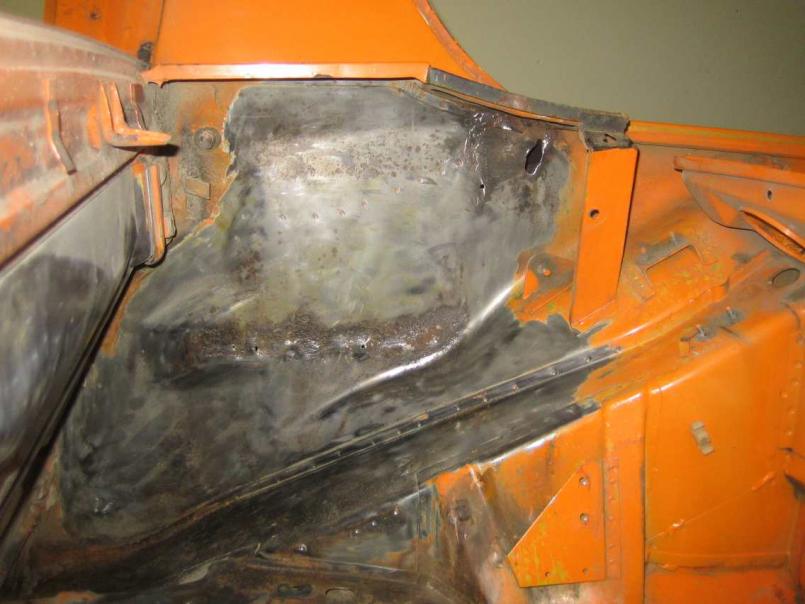 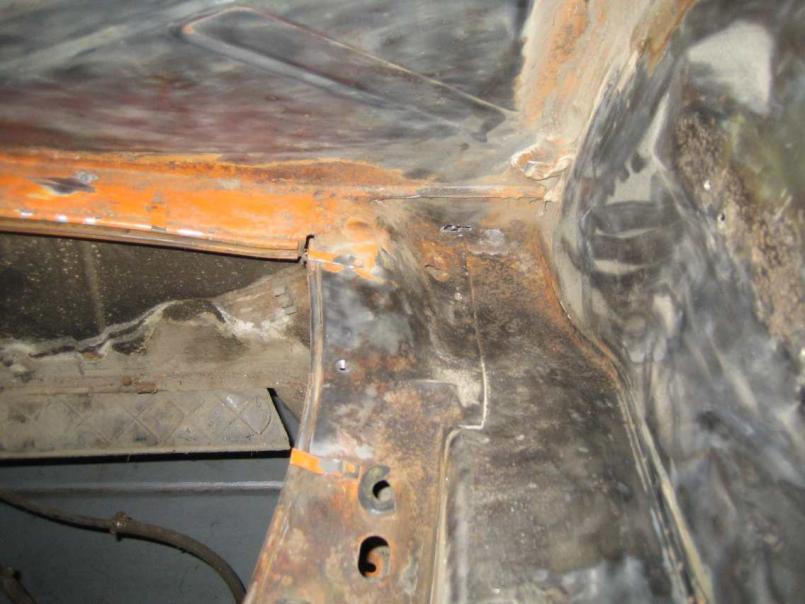 |
|
|
|
| bandjoey |
Jan 27 2008, 08:25 PM
Post
#26
|
|
bandjoey Group: Members Posts: 4,935 Joined: 26-September 07 From: Bedford Tx Member No.: 8,156 Region Association: Southwest Region |
In the Jan 13 post you've just finished cleaning the pans before the por15 treatment. What did you use to cut out and clean up the soundproofing glued to the floor? Great job..Can't wait to see the car in paint.
|
|
|
|
| my928s4 |
Jan 27 2008, 10:17 PM
Post
#27
|
|
Member Group: Members Posts: 349 Joined: 18-August 07 From: Spokane, WA Member No.: 8,018 Region Association: Pacific Northwest |
QUOTE(bandjoey @ Jan 27 2008, 06:25 PM) In the Jan 13 post you've just finished cleaning the pans before the por15 treatment. What did you use to cut out and clean up the soundproofing glued to the floor? Great job..Can't wait to see the car in paint. Heat gun and 1" wood chisel seems to be the consensus on that one and it works pretty good, heat up the surrounding area and then right where you want to work with the chisel. That worked for me, takes a couple of hours and comes off especially easy where there is rust underneath. Paint seems like such a long way of some times !!! |
|
|
|
| my928s4 |
Feb 3 2008, 09:08 PM
Post
#28
|
|
Member Group: Members Posts: 349 Joined: 18-August 07 From: Spokane, WA Member No.: 8,018 Region Association: Pacific Northwest |
OK so still waiting for the floor panel so I decided that since I bought some gas for my new welder I should put it to good use. Naturally I practiced on scraps for a few hours but could felt that it would be good to try on an area of the car that is well hidden.
So I chose to plug the rear bumper shock holes. Here is a pic of my welding machine, a Miller was a little rich for my blood and after reading everyone elses experience this seem like s good compromise. |
|
|
|
| my928s4 |
Feb 3 2008, 09:09 PM
Post
#29
|
|
Member Group: Members Posts: 349 Joined: 18-August 07 From: Spokane, WA Member No.: 8,018 Region Association: Pacific Northwest |
OK so still waiting for the floor panel so I decided that since I bought some gas for my new welder I should put it to good use. Naturally I practiced on scraps for a few hours but could felt that it would be good to try on an area of the car that is well hidden.
So I chose to plug the rear bumper shock holes. Here is a pic of my welding machine, a Miller was a little rich for my blood and after reading everyone elses experience this seem like s good compromise. 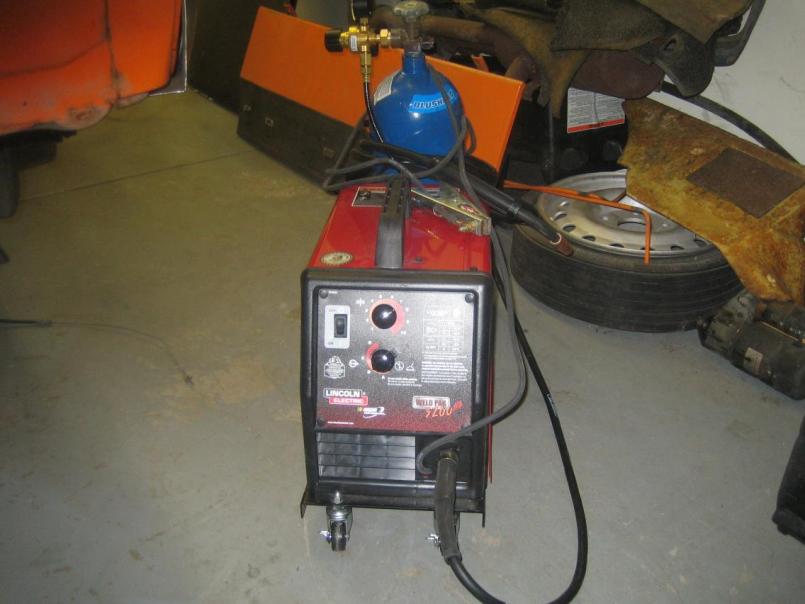 I prepped the area and cut out a patch. 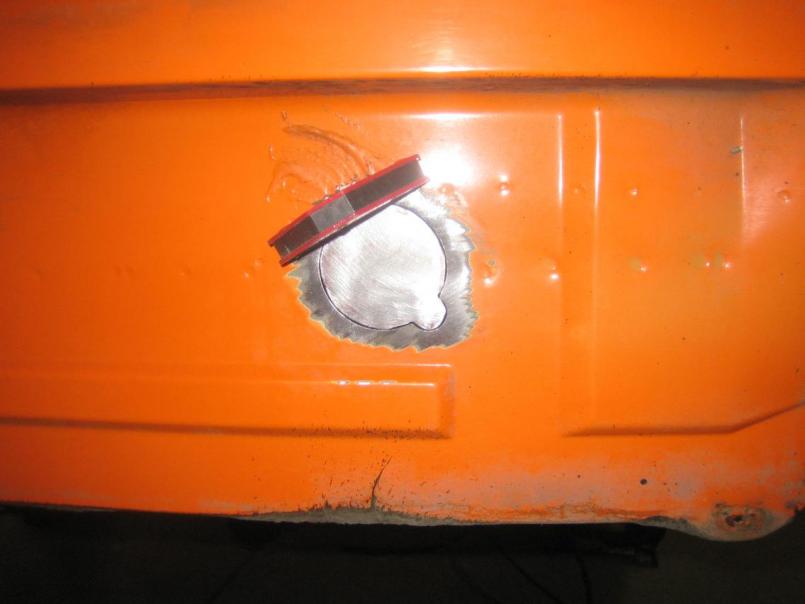 Then tack welded into place. 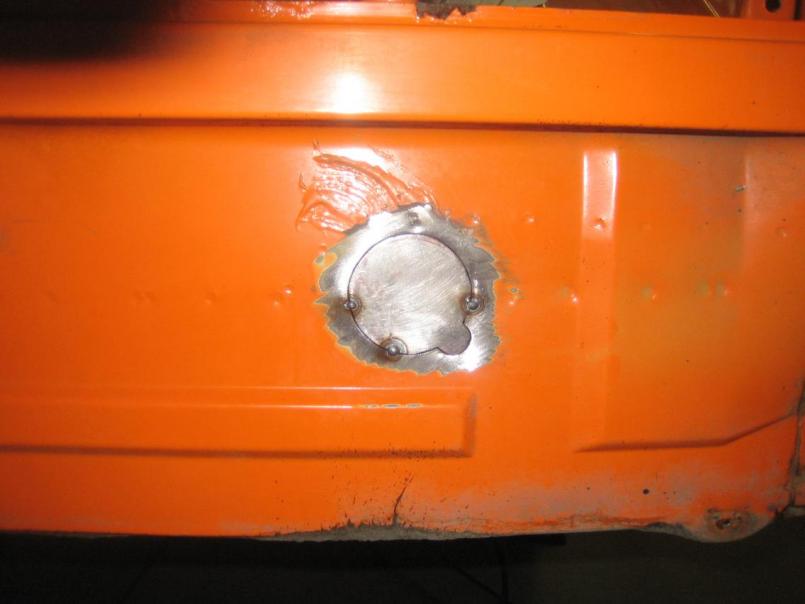 I was worried about running a bead and heating up the panel too much so I laid multiple tacks. Problem with this is after two or so rounds of tacks I end up with a few tiny pin holes. Is this the right way to do this or should I lay small beads moving around and allowing the panel to cool ?? 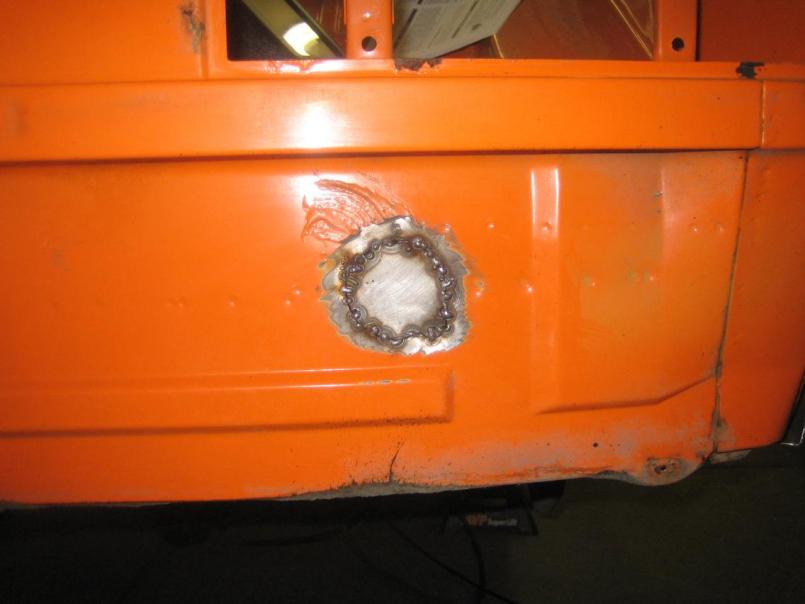 |
|
|
|
| my928s4 |
Feb 3 2008, 09:13 PM
Post
#30
|
|
Member Group: Members Posts: 349 Joined: 18-August 07 From: Spokane, WA Member No.: 8,018 Region Association: Pacific Northwest |
Here are the two holes after grinding.
Attached thumbnail(s) 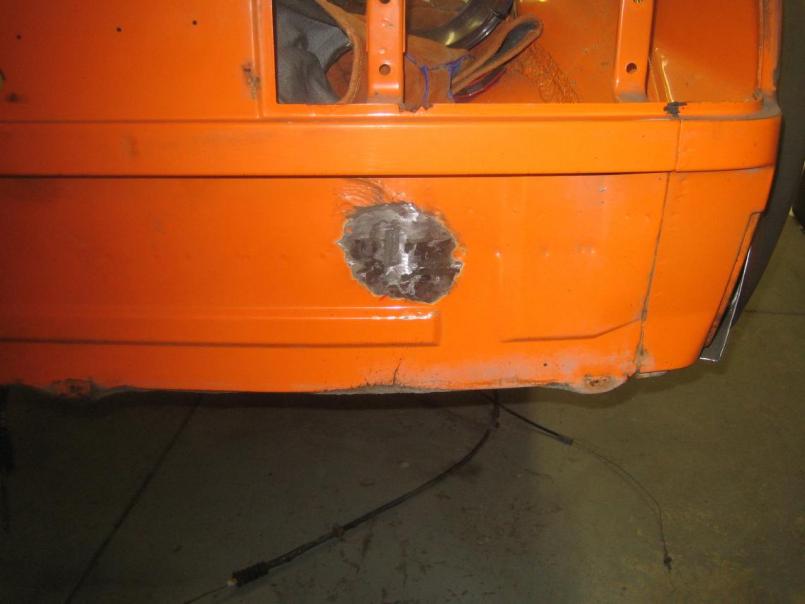 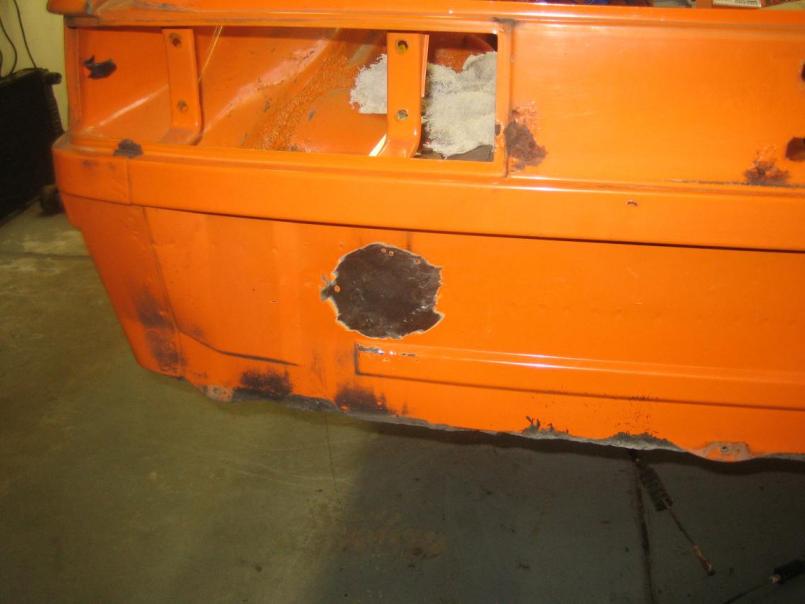
|
|
|
|
| Van |
Feb 3 2008, 09:25 PM
Post
#31
|
|
Member Group: Members Posts: 199 Joined: 15-January 08 From: Hyde Park, NY Member No.: 8,571 |
Your heat range on the welder (amps) might be set too high if you are consistantly burning through the metal. (You may also be able to turn up your wire speed a little bit - the same amps with more wire will give you a little less penetration.)
After tacking, I suggest you make 1/2" or 3/4" long beads alternating on opposit sides until your weld is complete. Great looking project. Keep us up to date! p.s. are you thinking of doing any seam welding? Especially around the rear suspension box sections? How about a GT stiffening kit? |
|
|
|
| my928s4 |
Feb 9 2008, 04:50 PM
Post
#32
|
|
Member Group: Members Posts: 349 Joined: 18-August 07 From: Spokane, WA Member No.: 8,018 Region Association: Pacific Northwest |
So bumper shock holes are now done, last one went sooo much better than the 1st one (IMG:style_emoticons/default/smile.gif)
  Also patched some thin metal on the inside, could not get the grinder to the weld at the bottom. 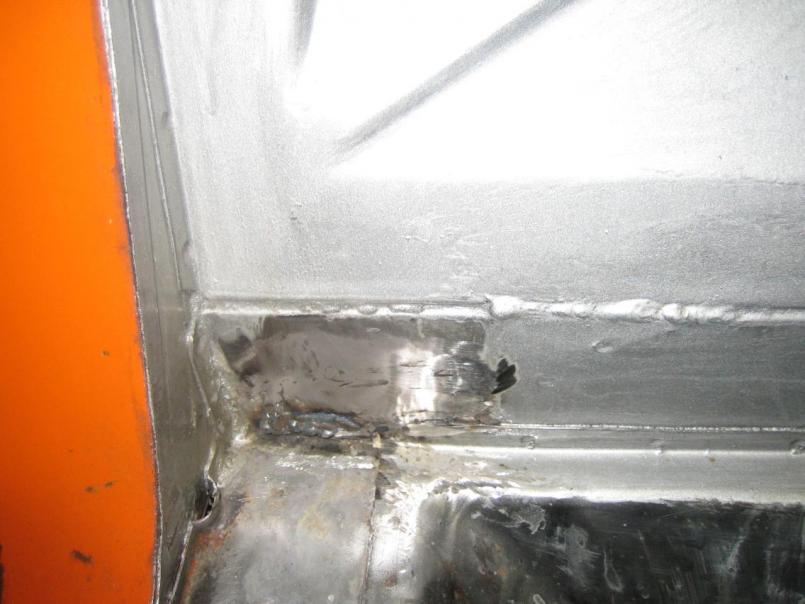 |
|
|
|
| my928s4 |
Feb 9 2008, 04:53 PM
Post
#33
|
|
Member Group: Members Posts: 349 Joined: 18-August 07 From: Spokane, WA Member No.: 8,018 Region Association: Pacific Northwest |
OK now onto the BIG job of the day, the floor pan removal. Wonder how much you would have to pay to have someone do this? A lot me thinks.
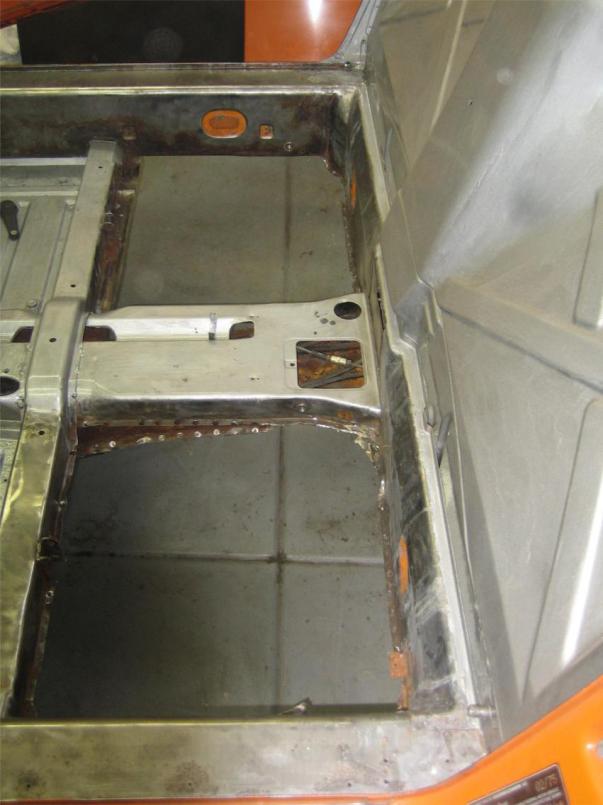 I ran out of steam so I cut out the big pieces and left the center section for another day, someone has seam welded the rear center and at that point I decided to call it quits till tomorrow. 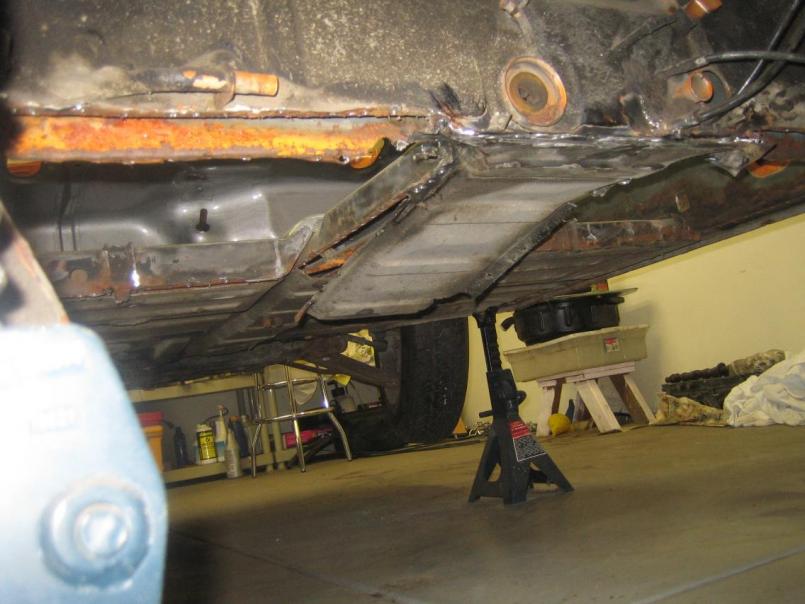 New floor pan arrived Friday but there is plenty of clean up before that goes in. |
|
|
|
| my928s4 |
Feb 10 2008, 04:44 PM
Post
#34
|
|
Member Group: Members Posts: 349 Joined: 18-August 07 From: Spokane, WA Member No.: 8,018 Region Association: Pacific Northwest |
Got the wire wheel attachment on the grinder and decided to check out the state of the surfaces this morning, longs look great and most of the rust is superficial so that is good.
Decided I might as well clean up the underside and most of the undercoating and paint came of pretty easy, thinking another 3-4 messy hours and it will be done. Here are the longs. 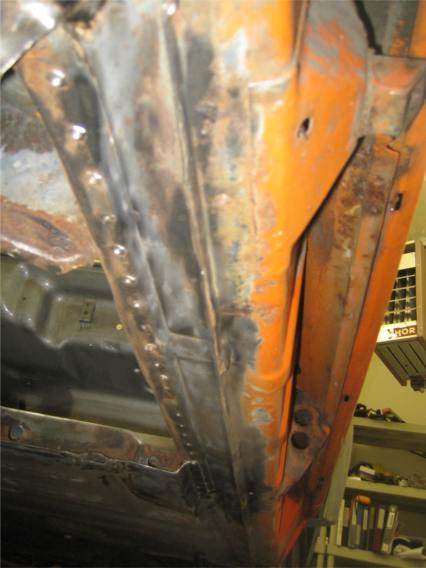 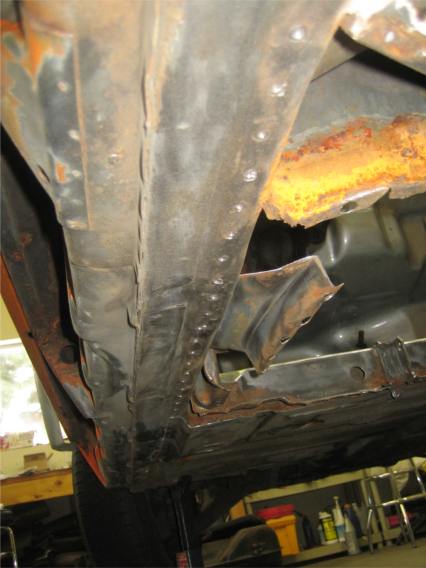 One thing about replacing the rear floor pan is the jack posts cover the rear corners, I could have removed them and re-used but new ones would be better. 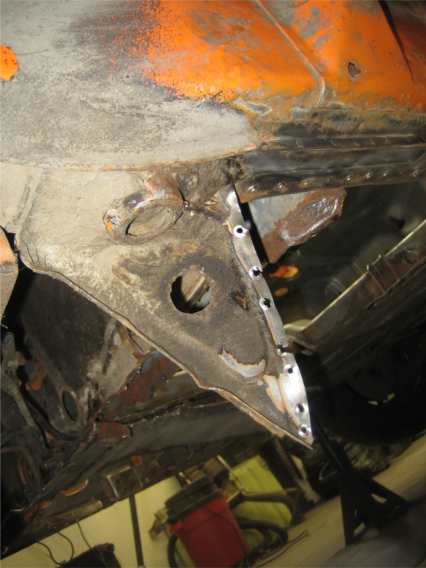 Here is a shot looking into the rear bulkhead. 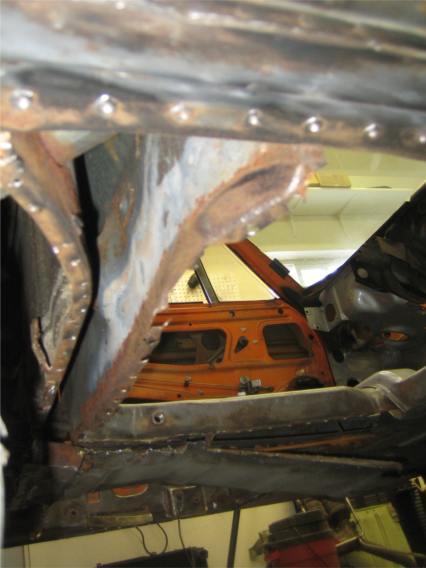 |
|
|
|
| my928s4 |
Feb 17 2008, 09:22 PM
Post
#35
|
|
Member Group: Members Posts: 349 Joined: 18-August 07 From: Spokane, WA Member No.: 8,018 Region Association: Pacific Northwest |
Another weekend lying mainly under the car, I thought I would be welding in the pan but POR15ing the areas which will hopefully never see the light of day again took some time.
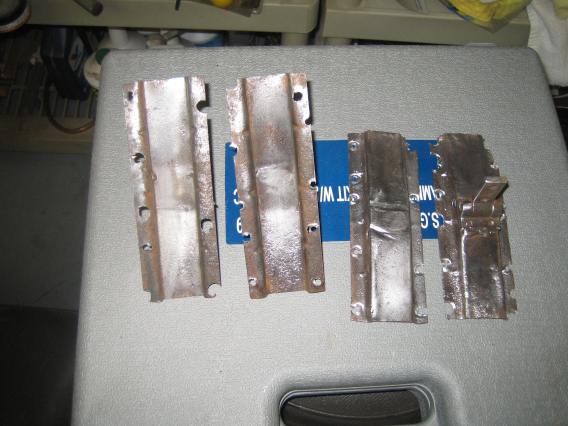
The new pan actually covered a lot more area than I thought so I extended the drivers side cut a bit more which of course necessitated another 30 or spot welds to drill. Here is a pic of how a new pan will look at some point ..., this is the fit where I marked out the cut lines. 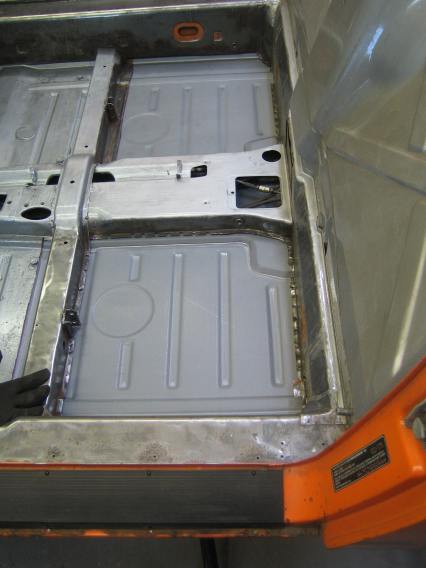 I found this the best method to support the panfor a snug fit and check for high and low points. 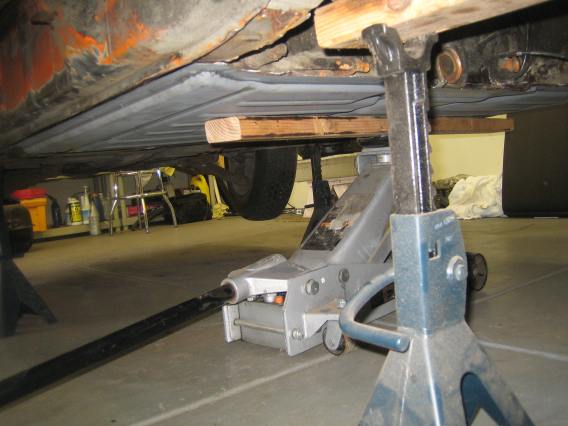 I did get sidetracked with undoing a PO clutch tube reinforcement which while effective did take away 1" of ground clearance. It was basically a threaded u tube with 4 nuts on each side. Here is a pic of the pieces I removed, I had to angle grind the loop off. 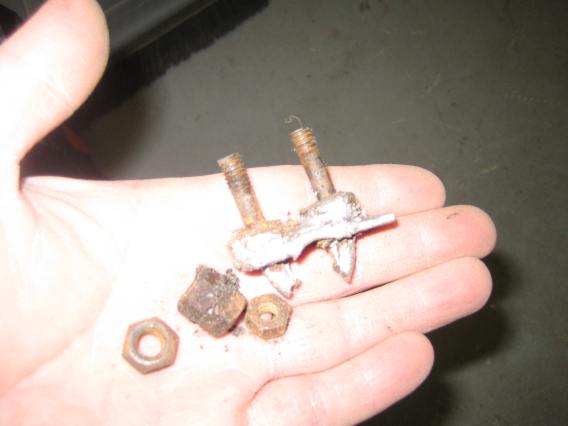 I fabricated a piece of metal around the tube much like the original (which is still on the tube futher forward), I used the holes left by the PO mod to weld the bracket to the floor. No judging on the top welds though please. 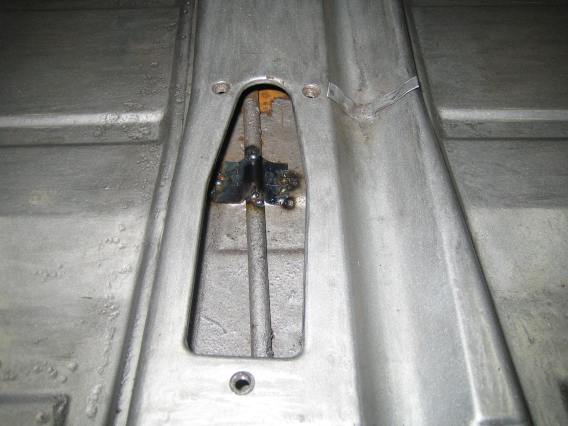 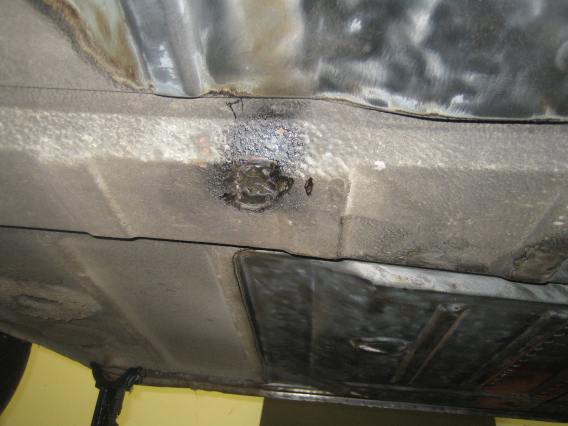 The tube had been welded at the rear so while the floor was out I welded a small plate to the inside of the bulkhead too. 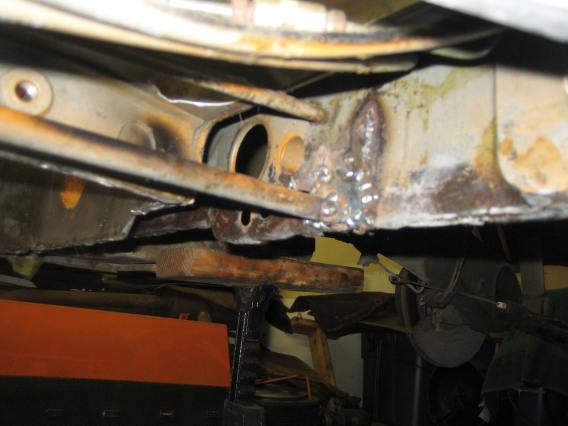 |
|
|
|
| my928s4 |
Feb 17 2008, 09:25 PM
Post
#36
|
|
Member Group: Members Posts: 349 Joined: 18-August 07 From: Spokane, WA Member No.: 8,018 Region Association: Pacific Northwest |
I ordered some seat mount hinges from restoration design which are on back order but I did manage to remove the old seat brackets and clean up the assemblies. Apart from one hinge which was broken these look salvagable so I need to give Bill a call. I need to order the two rear jack points anyway.
 As an aside I made my first visit to the local paint store, I was after some weld thru primer and brushable seam sealer, the people in their could not have been more helpful so they will be seeing me again for my future needs. |
|
|
|
| jim912928 |
Feb 17 2008, 10:24 PM
Post
#37
|
|
Senior Member Group: Members Posts: 1,487 Joined: 8-January 04 From: Granger, IN Member No.: 1,536 Region Association: Upper MidWest |
Excellent progress!
|
|
|
|
| my928s4 |
Feb 24 2008, 06:39 PM
Post
#38
|
|
Member Group: Members Posts: 349 Joined: 18-August 07 From: Spokane, WA Member No.: 8,018 Region Association: Pacific Northwest |
OK, spent some serious time on the car yesterday and a lot less today as a disagreement between the angle grinder and a finger (tight corner and gloves not thick enough) meant 4 hours at urgent care and two stitches.
Anyway the floor pans are in, the seat rail re-enforcement still need to go in as well as the seat mounting points but I thought I would put the Engman kit in before that. Welding under the car is interesting, took me a while to get the right settings and technique on the welder. This week I ran out of gas AND wire although a more competant user would no doubt have consumed vastly less of both. I was hoping to get all the welding done today and then start prepping for some paint, ha, best laid plans. Here is a pic of the inside, and underside of the new pan. 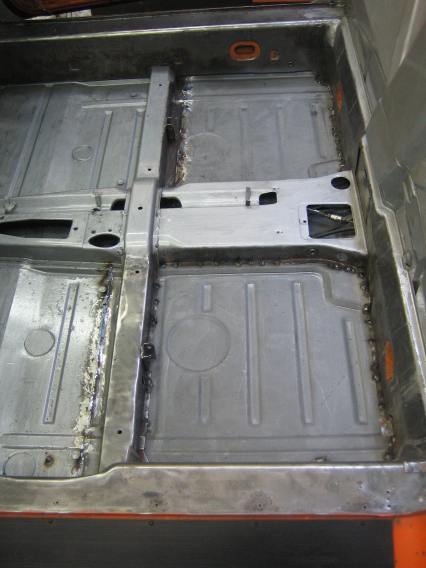 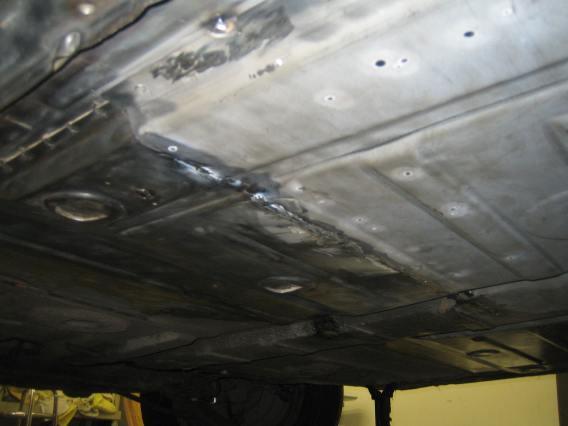 I then sprayed where the Engman kit goes with weld thru primer (anyone spot the access hatch a previous owner thought might be a good idea?). 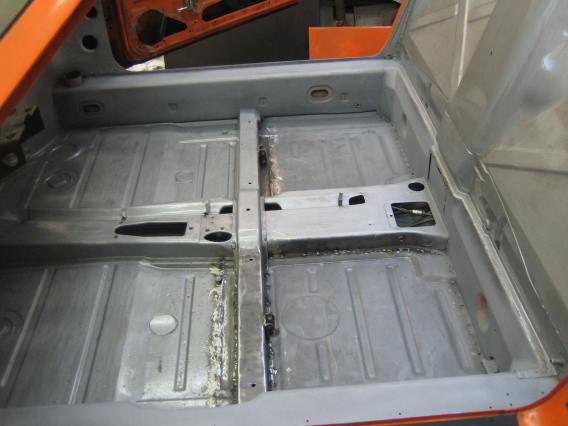 I spent quite a while getting the fit of the drivers side right, the inner long is far from square and I did the best I could to get it to metal to match the contours before I started welding. I thought the passenger side was better but I should have spent more time with it. 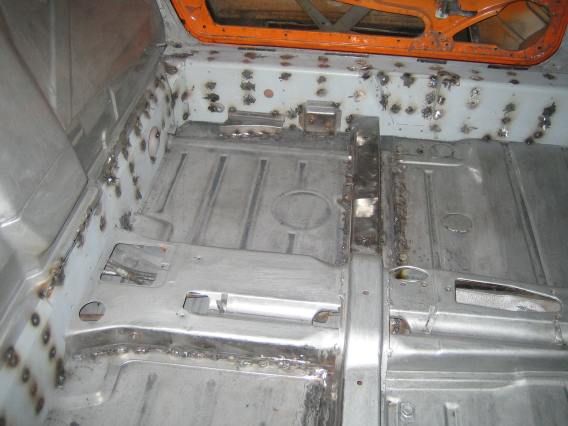 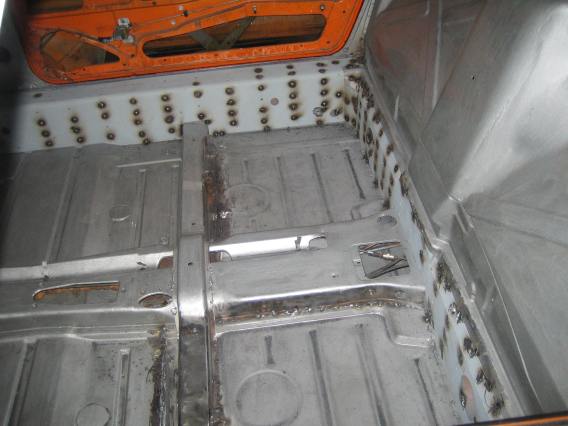 I was taking a break from welding to do some grinding, anyway it is coming on and hopefully I will get some eve time in this week. |
|
|
|
| my928s4 |
May 24 2008, 10:11 PM
Post
#39
|
|
Member Group: Members Posts: 349 Joined: 18-August 07 From: Spokane, WA Member No.: 8,018 Region Association: Pacific Northwest |
Well it has been a while, had a never ending honeydo list and some work to do on the 928 but finally got back to it.
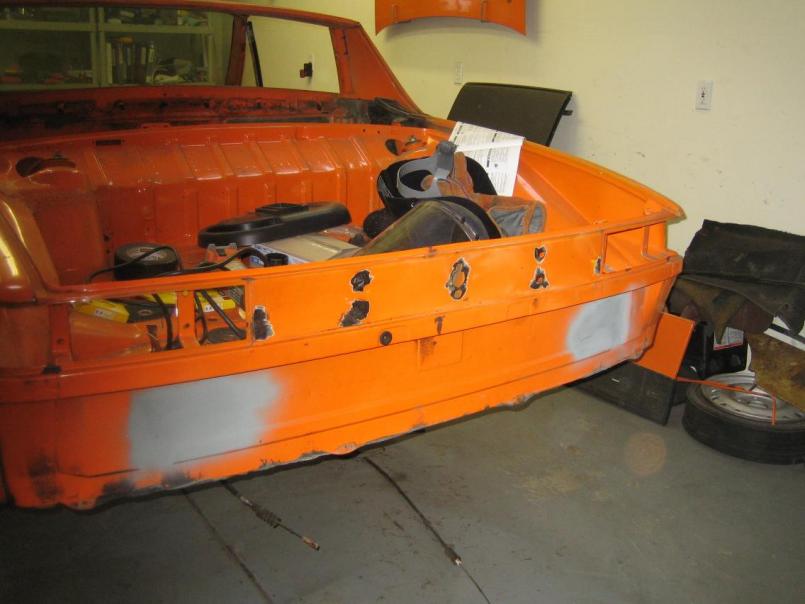
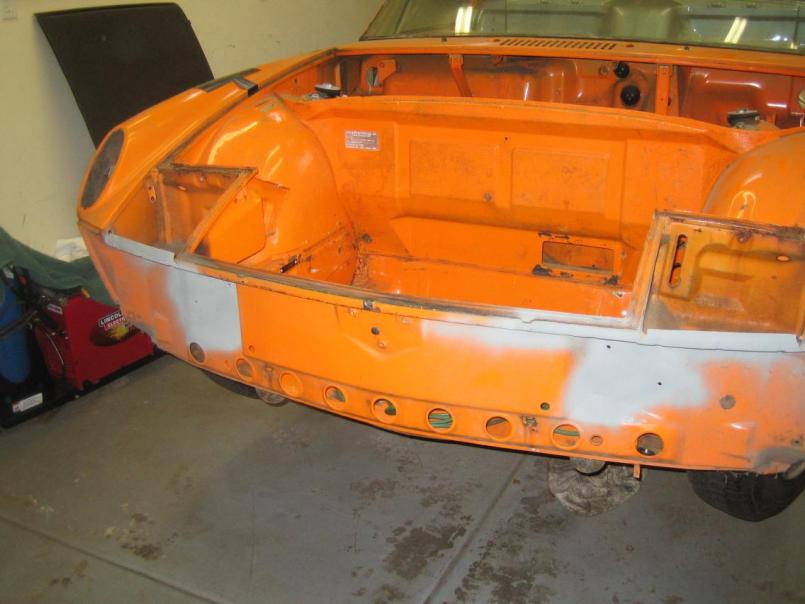
Interior is pretty much completed for now, need some primer and paint and one seat hinge but no rush on those. I also stripped all parts from the doors except the latch and removed the windshield. 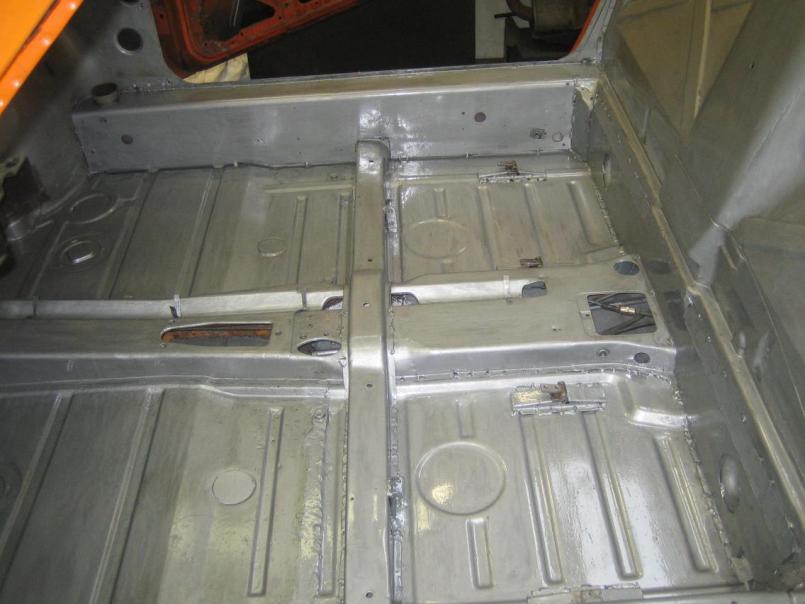 This weekend I started filling some holes on the body, first up the rear trunk lock and reflector holes. 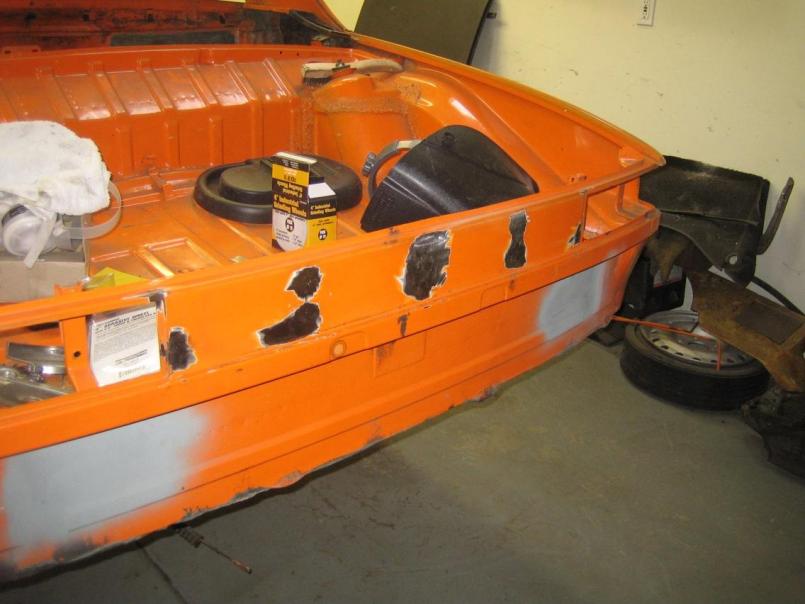 Next side marker lights, my welds are getting better, still a long way to go but I spend less time grinding now. 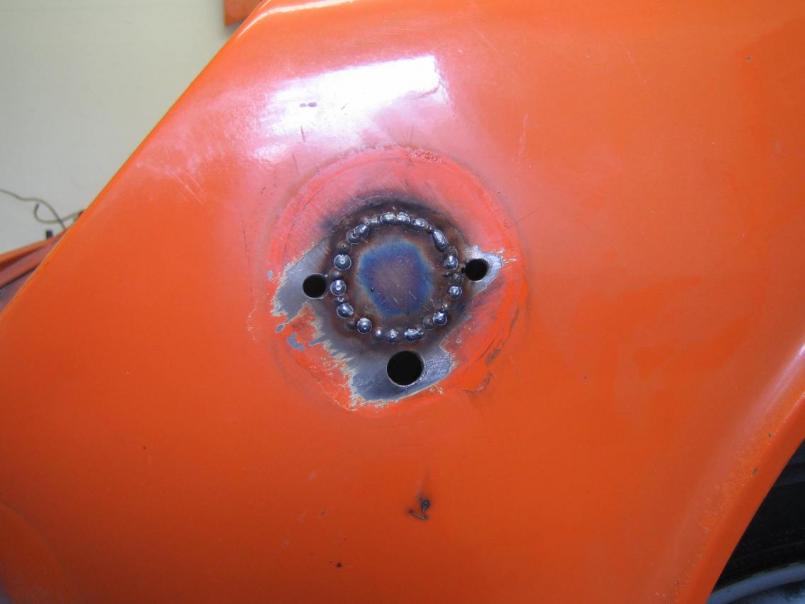 |
|
|
|
| my928s4 |
May 24 2008, 10:13 PM
Post
#40
|
|
Member Group: Members Posts: 349 Joined: 18-August 07 From: Spokane, WA Member No.: 8,018 Region Association: Pacific Northwest |
After grinding and 120 grit sander
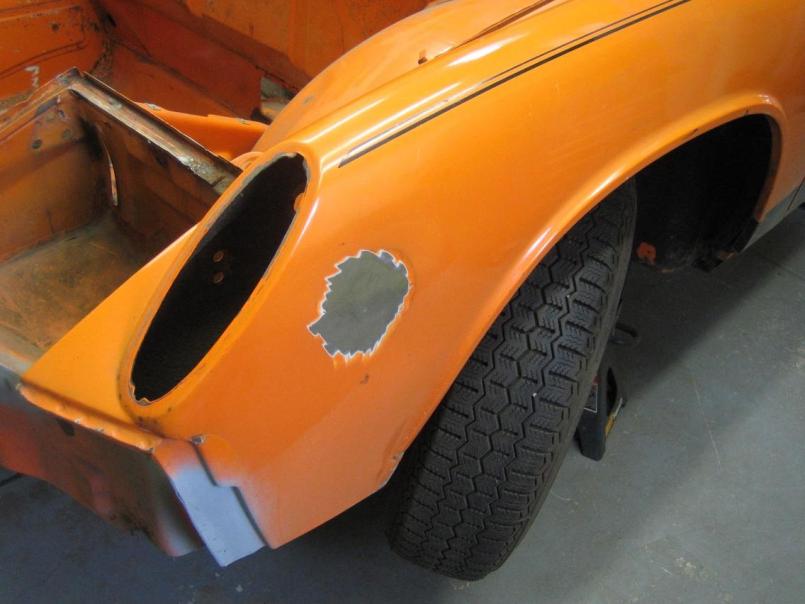 Passenger side 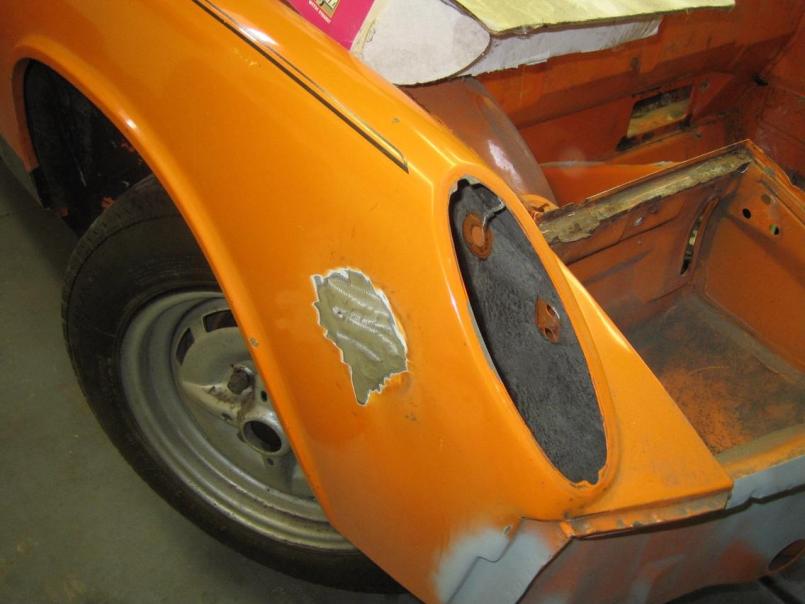 Pic of me concentrating hard, I picked up the helmet last week from Northern tools, auto darkening makes life a lot easier. 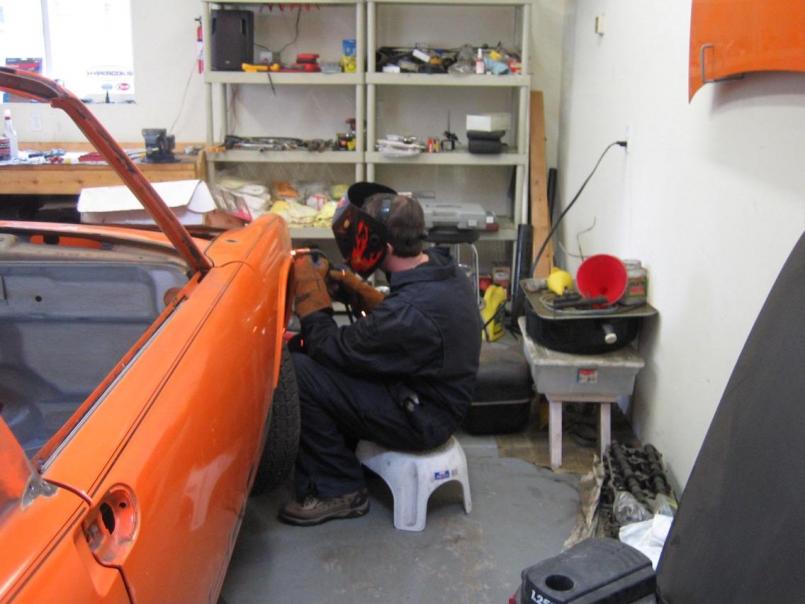 |
|
|
|
|
2 User(s) are reading this topic (2 Guests and 0 Anonymous Users)
0 Members:

|
Lo-Fi Version | Time is now: 28th July 2026 - 03:33 AM |
Invision Power Board
v9.1.4 © 2026 IPS, Inc.