|
|
|
Porsche, and the Porsche crest are registered trademarks of Dr. Ing. h.c. F. Porsche AG.
This site is not affiliated with Porsche in any way. Its only purpose is to provide an online forum for car enthusiasts. All other trademarks are property of their respective owners. |
|
|

  |

| my928s4 |
 Aug 24 2012, 02:48 PM Aug 24 2012, 02:48 PM
Post
#221
|
|
Member  Group: Members Posts: 349 Joined: 18-August 07 From: Spokane, WA Member No.: 8,018 Region Association: Pacific Northwest |
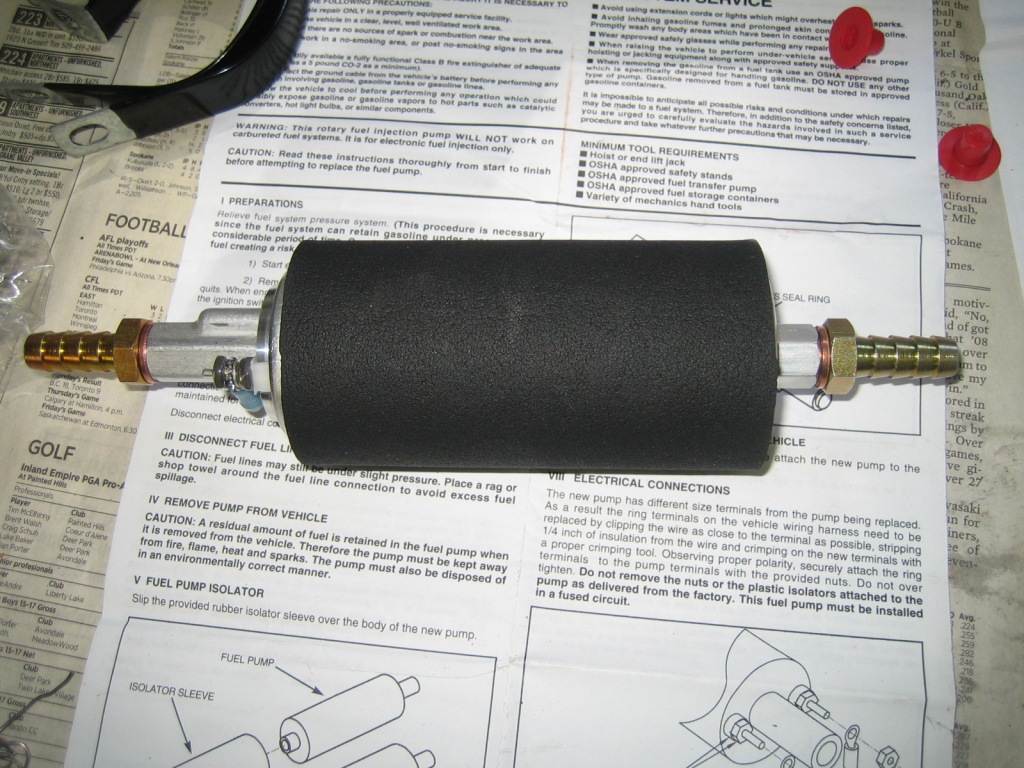
Got my fuel pump, a Walbro GSL-392, need to find a suitable filter and then I can plumb up the fuel tank. Going to put it in the stock pump location.
 Well the UPS truck came today with my Gauge package, Speedhut were great to deal with and the look is exactly what I was after. I had the 914-WRX logo in all 3 gauges but it made the quad and speedo cluttered so I just left it in the tach. Quad gauge has metric water temp and oil pressure, just like the German's would do it. Tach is 0.5" larger than the quad and speedo but it still slightly smaller than OEM, also added a redline in the tach. Was able to use the standard mount with a bit of fettling, now for some wiring. 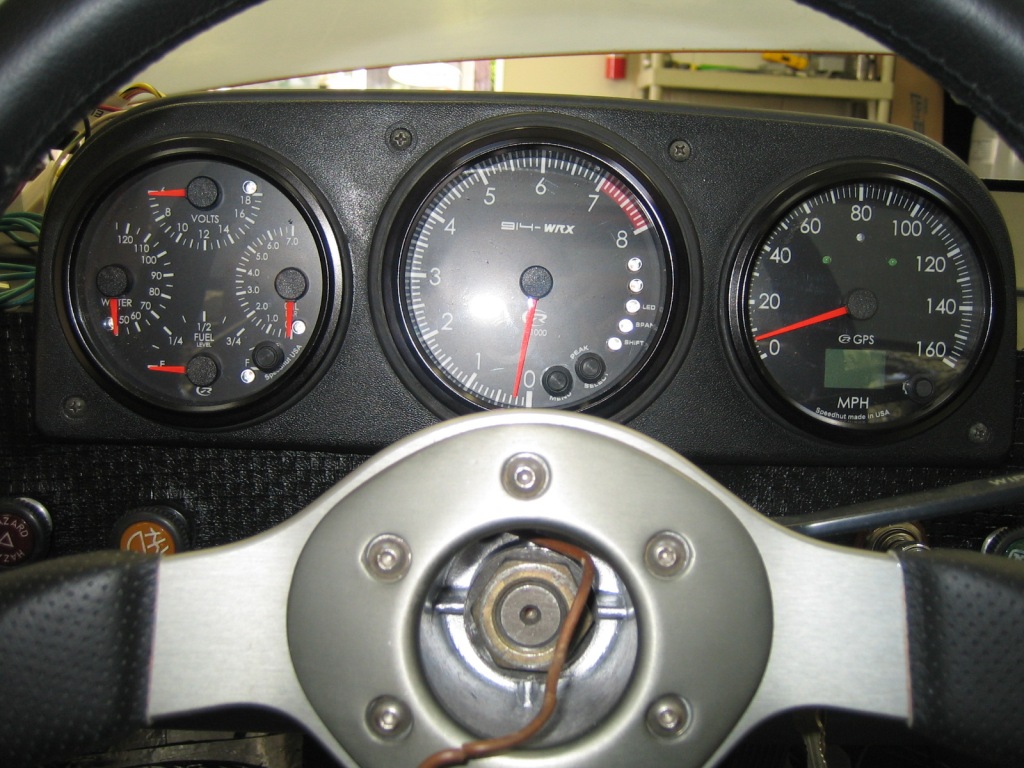 |
   |

 
|
| my928s4 |
Aug 24 2012, 10:52 PM
Post
#222
|
|
Member Group: Members Posts: 349 Joined: 18-August 07 From: Spokane, WA Member No.: 8,018 Region Association: Pacific Northwest |
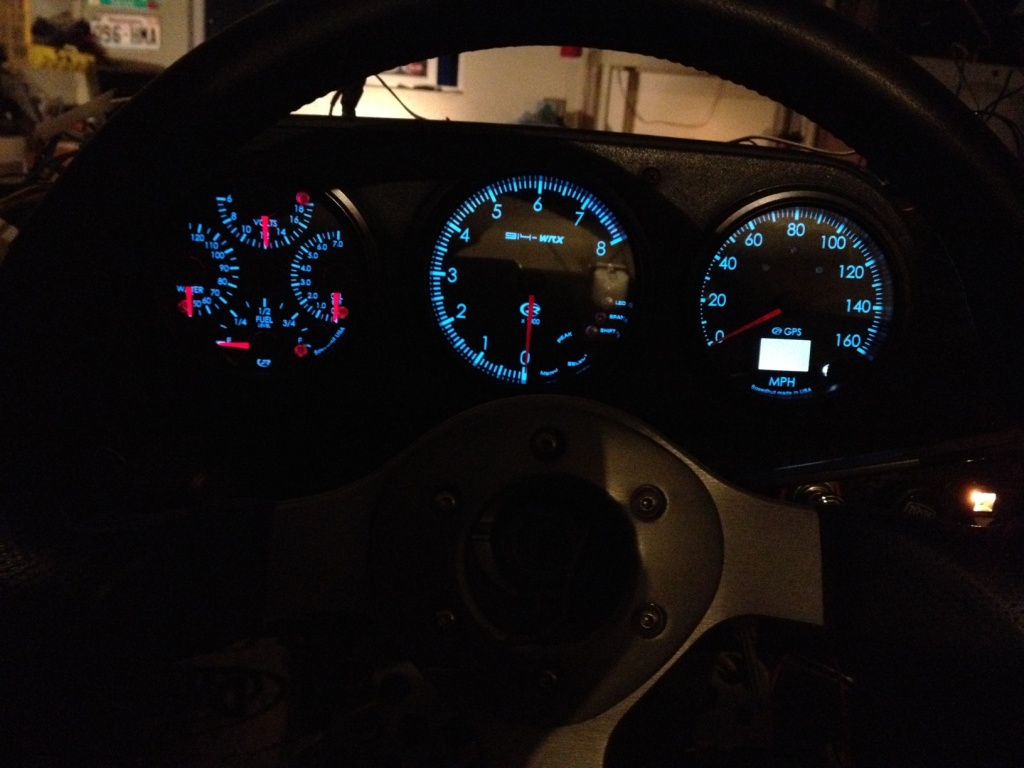
And here is a night time shot, actually not too bad to wire except for the water temp and oil pressure sensor all is done. Even calibrated the fuel gauge.
 |
|
|
|
| bembry |
Aug 25 2012, 07:44 AM
Post
#223
|
|
Senior Member Group: Members Posts: 529 Joined: 29-July 05 From: Bakersfield, CA Member No.: 4,499 Region Association: MidAtlantic Region |
Damn--I'm usually not a fan of aftermarket gauges folks stick in 914s, but those look terrific! Just a great project through and though.
|
|
|
|
| FourBlades |
Aug 25 2012, 11:32 AM
Post
#224
|
|
From Wreck to Rockin Group: Members Posts: 2,056 Joined: 3-December 07 From: Brevard, FL Member No.: 8,414 Region Association: South East States |
Like the gauges. That is a clean looking engine you found! Great project. John |
|
|
|
| mepstein |
Aug 25 2012, 01:53 PM
Post
#225
|
|
914-6 GT in waiting Group: Members Posts: 20,718 Joined: 19-September 09 From: Landenberg, PA/Wilmington, DE Member No.: 10,825 Region Association: MidAtlantic Region |
Really like the gps speedo.
|
|
|
|
| my928s4 |
Sep 5 2012, 09:19 PM
Post
#226
|
|
Member Group: Members Posts: 349 Joined: 18-August 07 From: Spokane, WA Member No.: 8,018 Region Association: Pacific Northwest |
So the package from Ian arrived today!
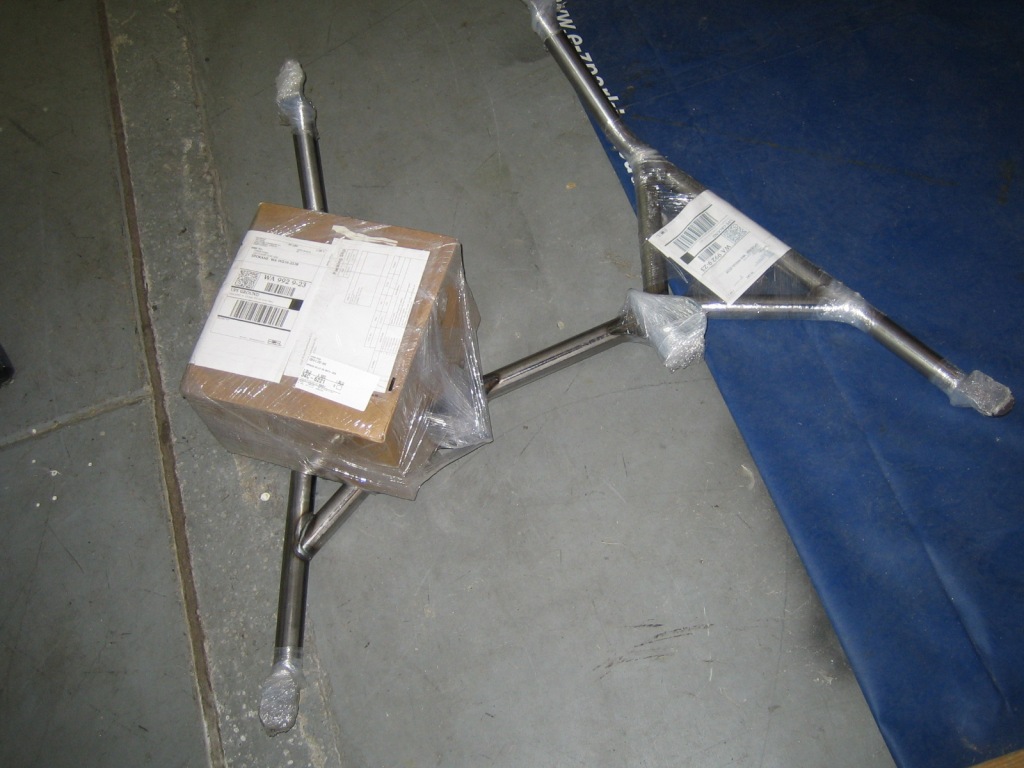 Parts inside the box 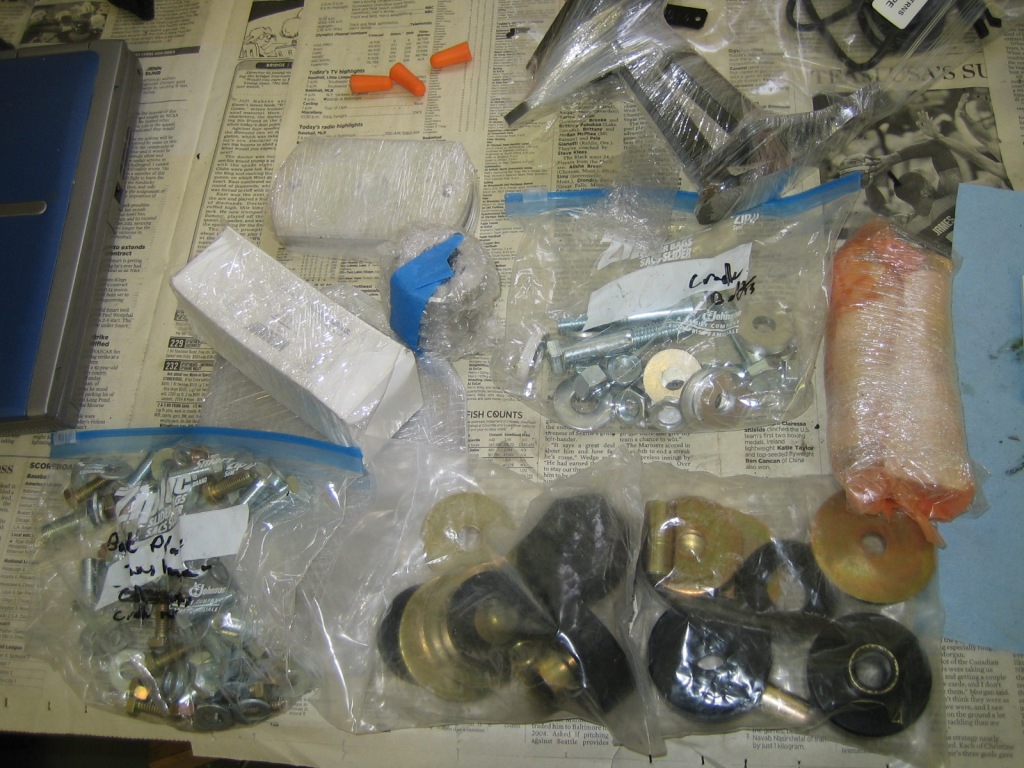 Placed the mounting plates on the old engine mount and transmission mount. 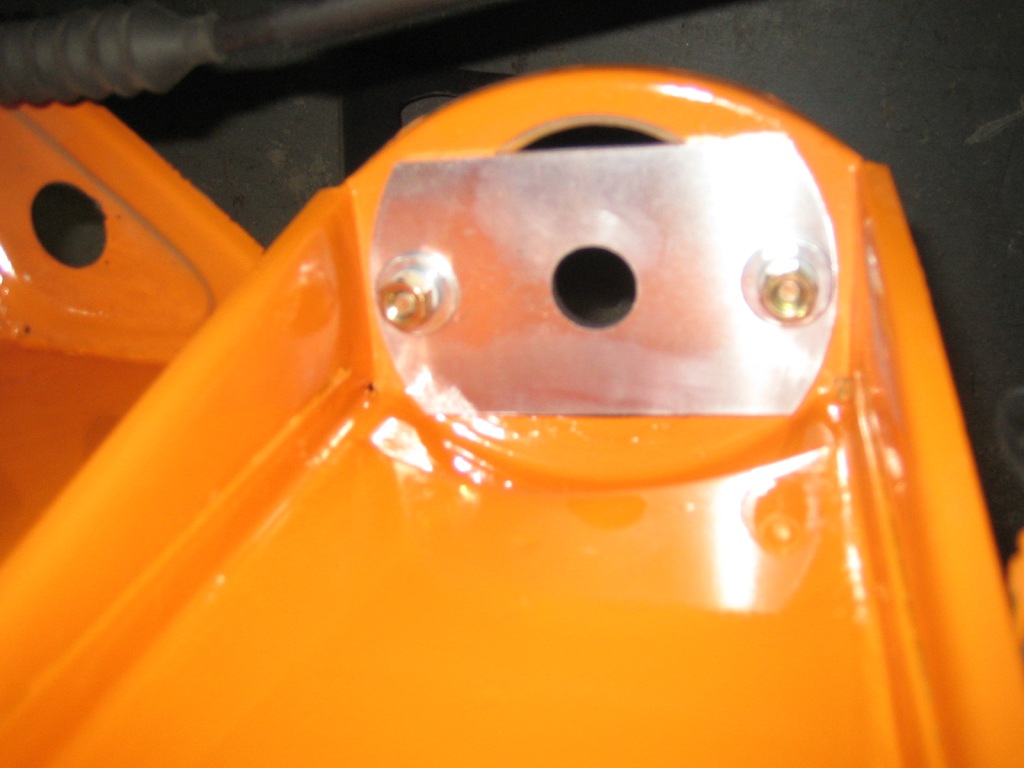 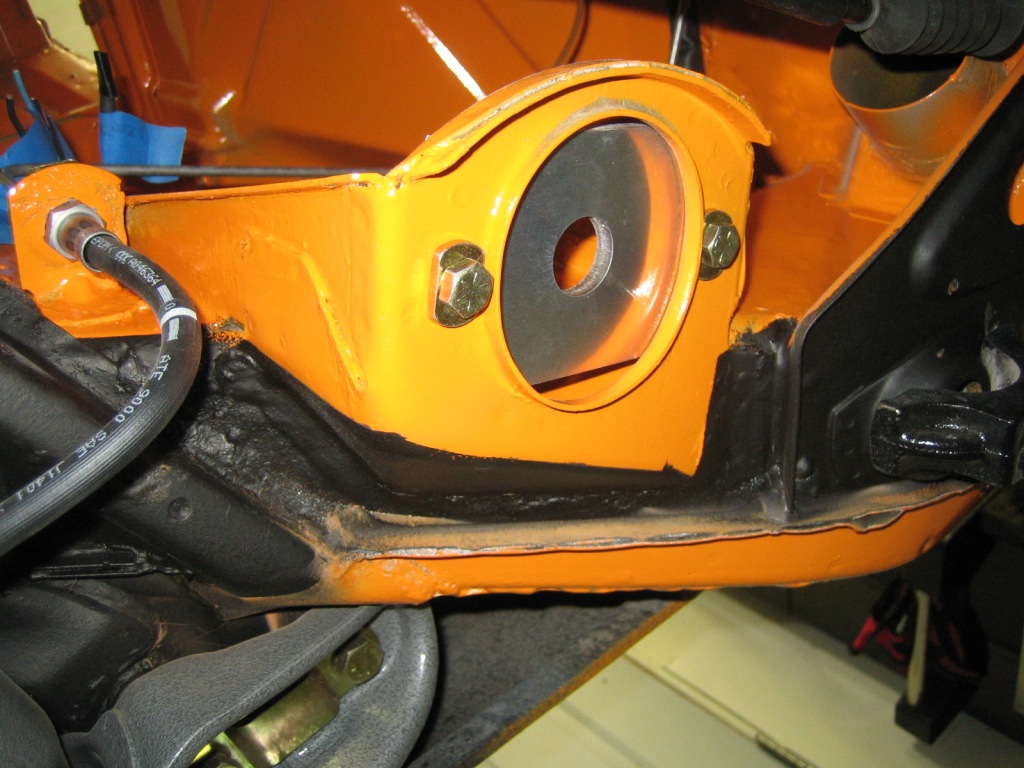 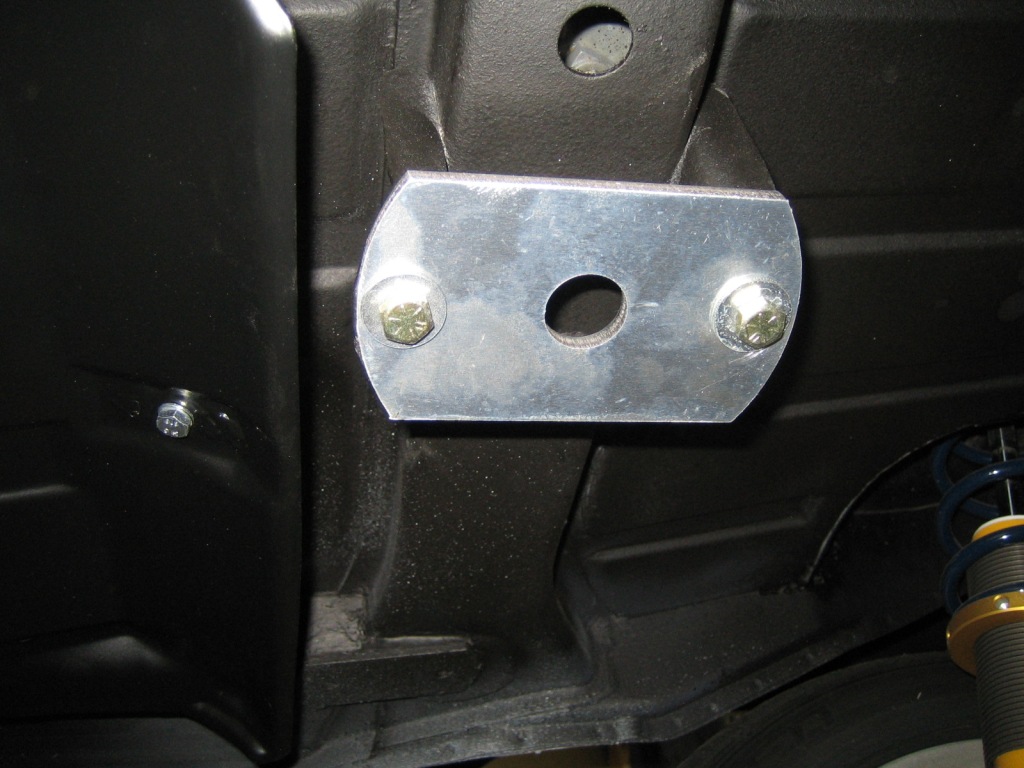 After much hassle with the engine hoist I got the engine on the dolly and the cradle mounted, encountered my first issue. I did not have the 10mm nuts for the Subaru Engine mount, I went through all my stash of parts but the nuts I found were the wrong thread pitch. At that point I was limited to how far I could get, will have another crack later in the week. 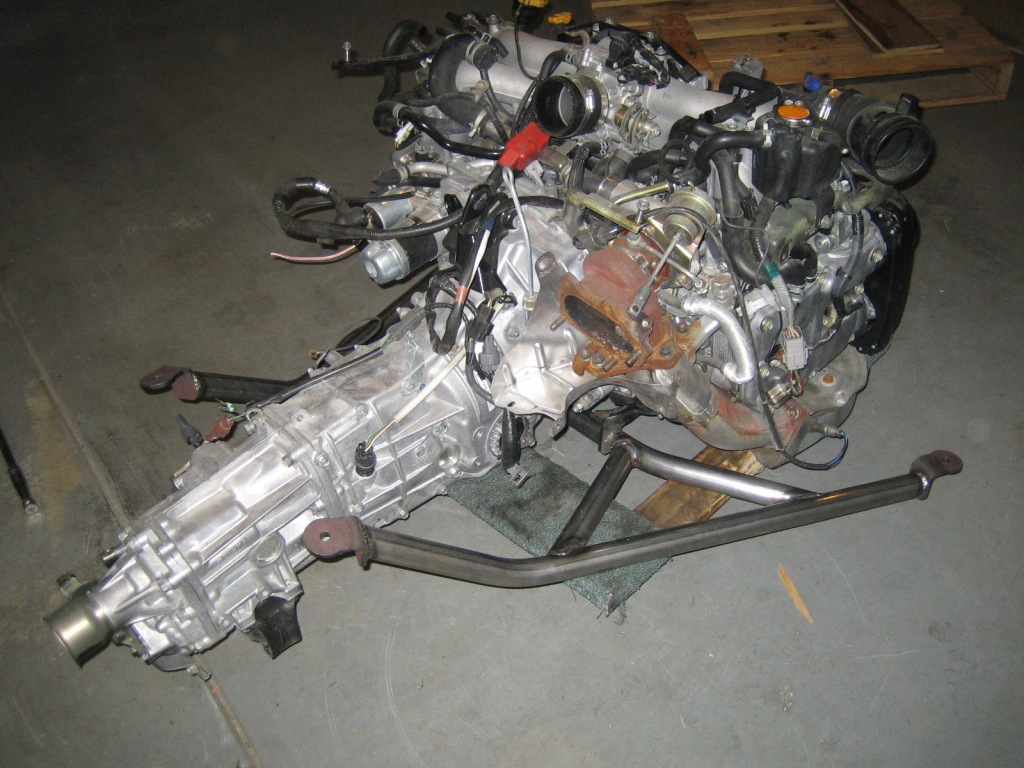 Transmission brackets on 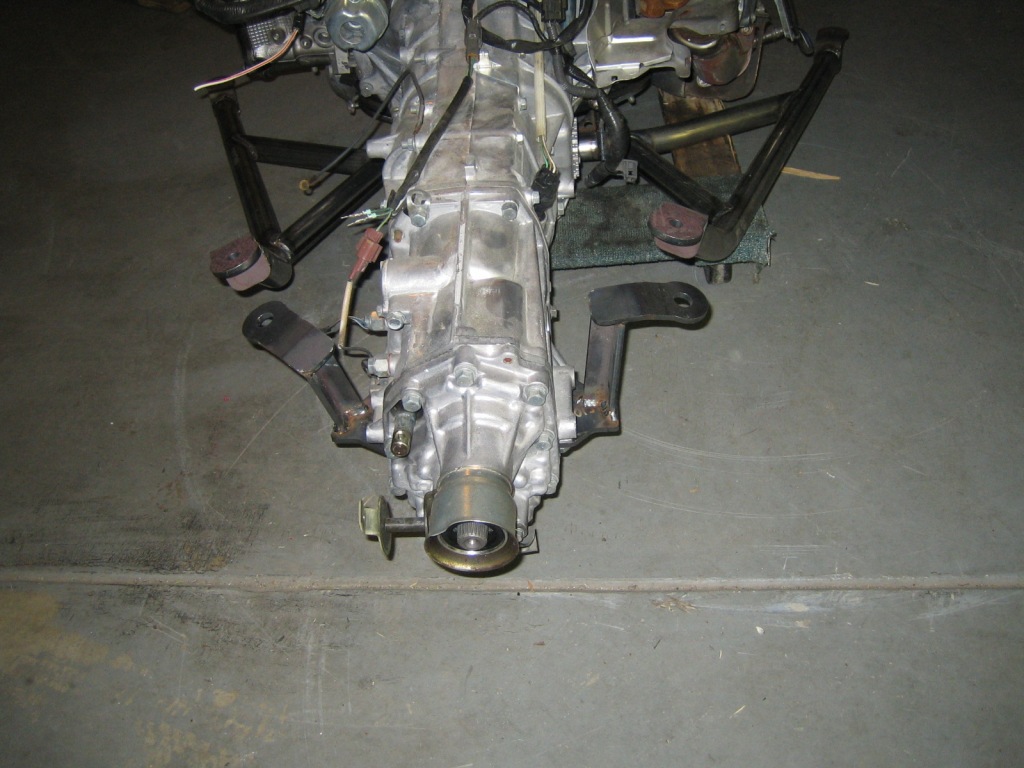 Took the rear of the transmission off, can see the nut that has to be removed to put in the adapter to lock into 2WD mode. 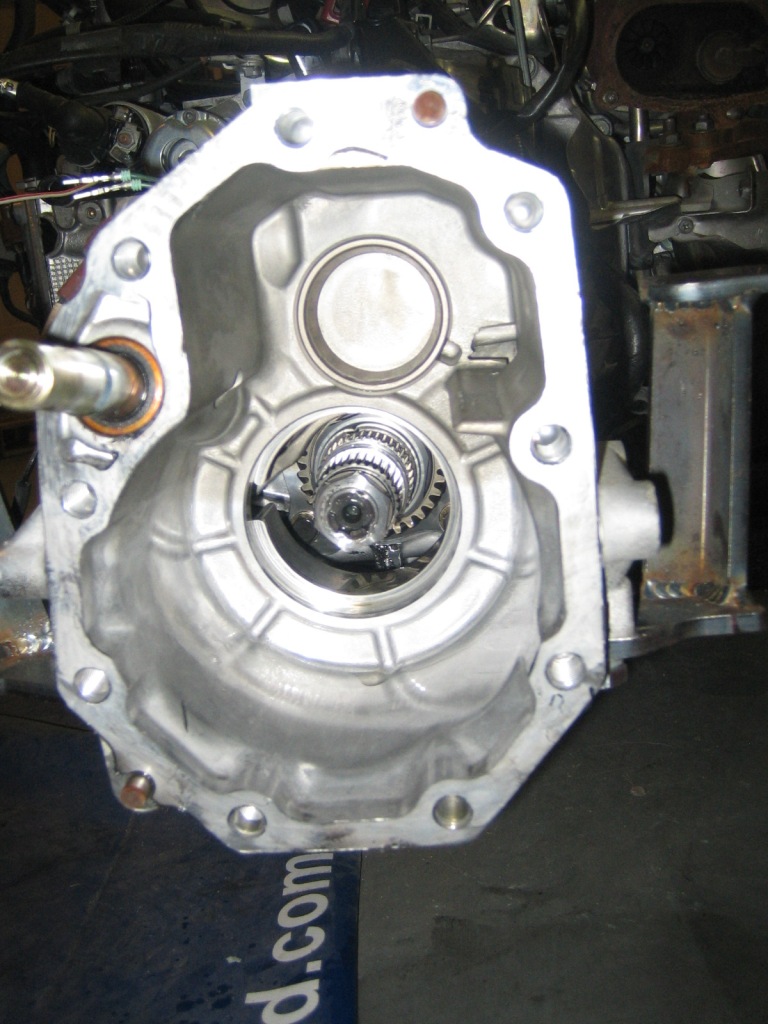 Here are the parts to be discarded. 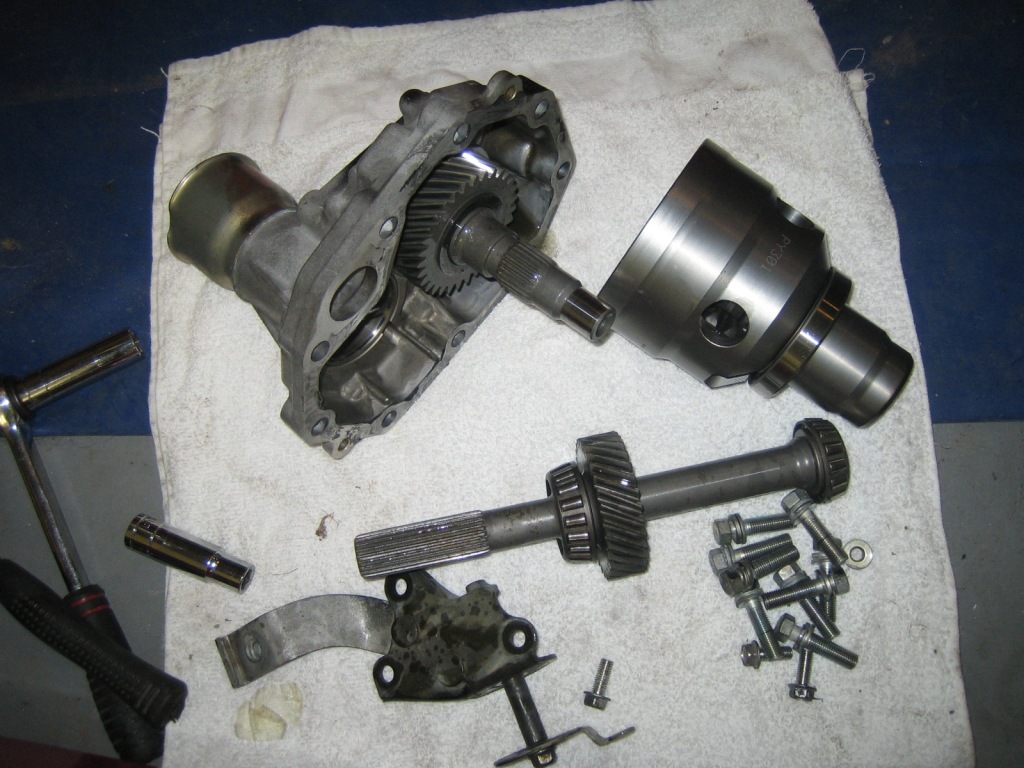 Looking forward to getting the engine/transmission in so I can mock up all the odds and ends. At the weekend I also managed to get the fuel pump/filter and lines hooked up at the front. 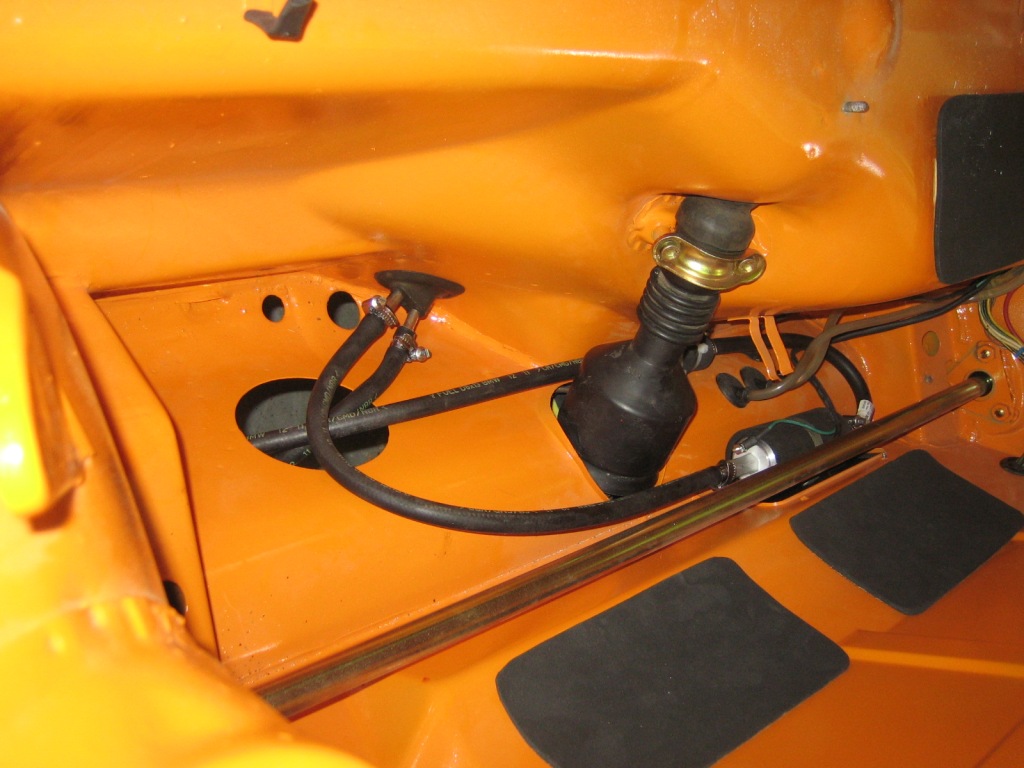 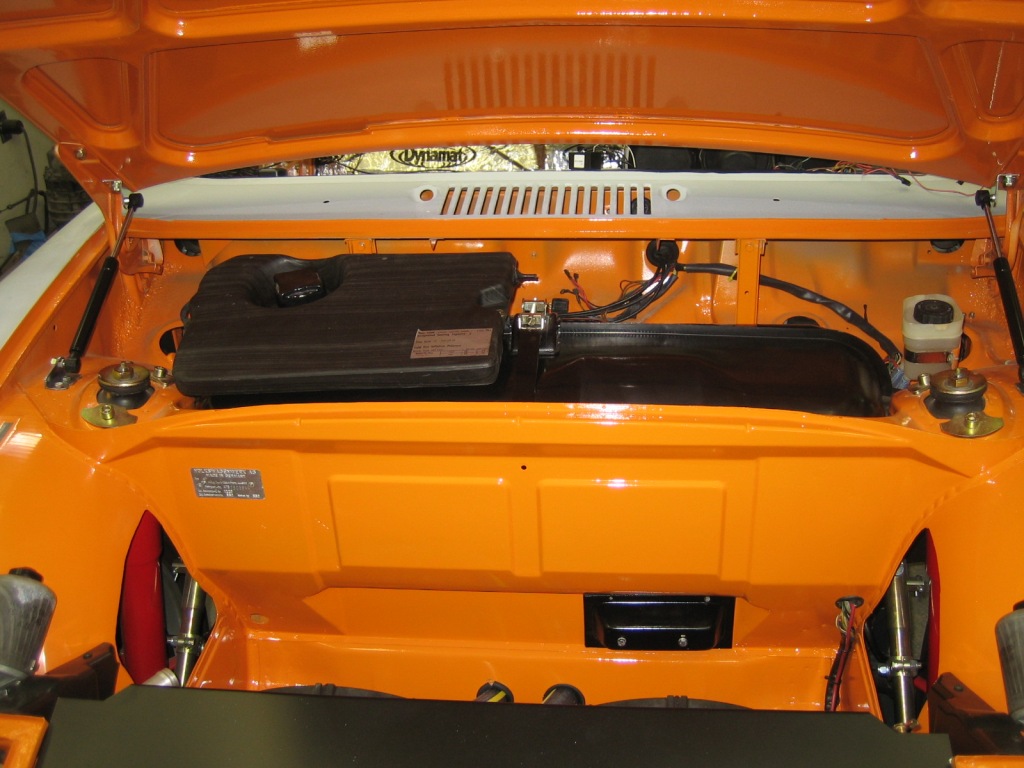 |
|
|
|
| IM101 |
Sep 6 2012, 02:25 AM
Post
#227
|
|
Member Group: Members Posts: 264 Joined: 9-November 10 From: Boise Idaho Member No.: 12,367 Region Association: Pacific Northwest |
WOW! this is the first time I've looked at this build, man impressive! hah, sorry to make you wait on the cradle, hope it'll be worth it.
Just another build that I'm proud to be a small part of. Again, I know i have not put any instructions up yet so please feel free to call me if you have anyquestions with the assembly. Ian PS. I think i will just make the 10mm nuts a part of the kit as it seems that may not always come with the stock mounts. |
|
|
|
| Cupomeat |
Sep 6 2012, 04:38 PM
Post
#228
|
|
missing my NY 914 in VA Group: Members Posts: 1,349 Joined: 26-November 07 From: Oakton VA Member No.: 8,376 Region Association: MidAtlantic Region |
Damn impressive! (IMG:style_emoticons/default/beerchug.gif)
I also found this thread for the first time and am really impressed and inspired! |
|
|
|
| Chris H. |
Sep 7 2012, 06:44 AM
Post
#229
|
|
Senior Member Group: Members Posts: 4,086 Joined: 2-January 03 From: Chicago 'burbs Member No.: 73 Region Association: Upper MidWest |
Looking really good Chris. What a top notch build.
That settles it, I gotta scrounge the cash for the subie kit from Ian. looks like high quality stuff. |
|
|
|
| my928s4 |
Sep 8 2012, 11:37 AM
Post
#230
|
|
Member Group: Members Posts: 349 Joined: 18-August 07 From: Spokane, WA Member No.: 8,018 Region Association: Pacific Northwest |
So classic case of when frustrated and tired leave it and come back later, worked for a few hours last night on cutting out the rear trunk and getting the engine in place. I got the engine of the pallet and on a dolley and was using the jacks and a hoist to place the engine. Well could not get it right, slept on it and in 30mins this morning it was all buttoned up.
Cutting the rear trunk was like taking a step back but will be worth it, I have seen someone else do a nice panel which looks stockish. Be nice to use the welder again! As you can see plenty of room up front. 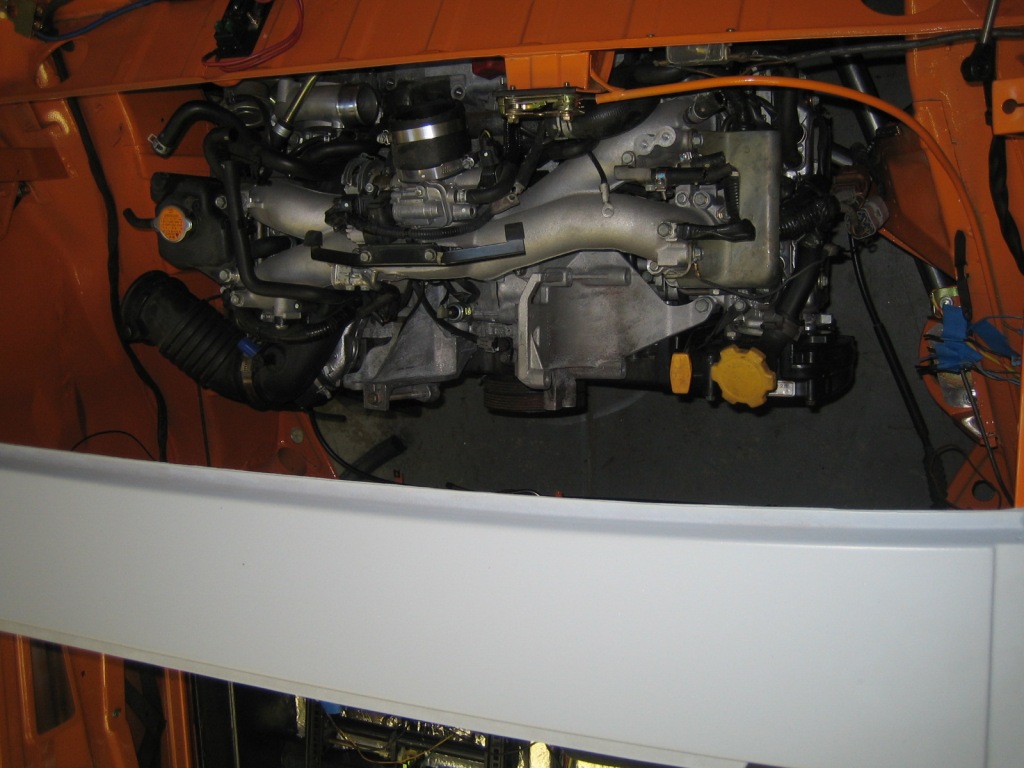 Nice big opening for access, at least for now. You can see the turbo is the biggest interference. 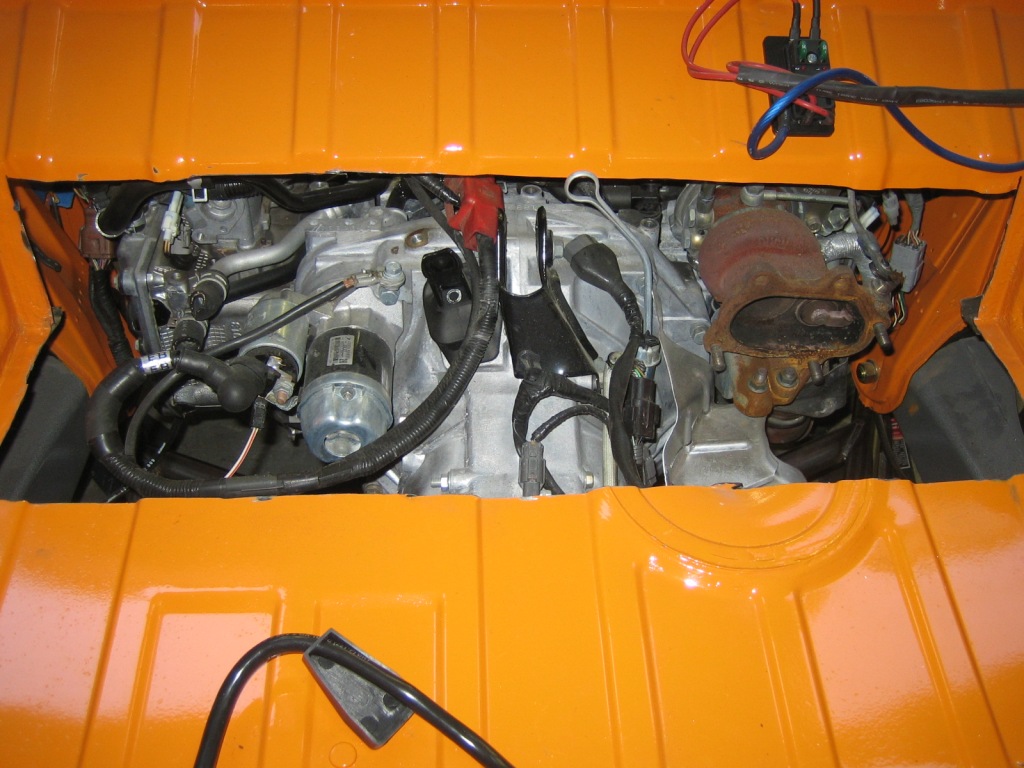 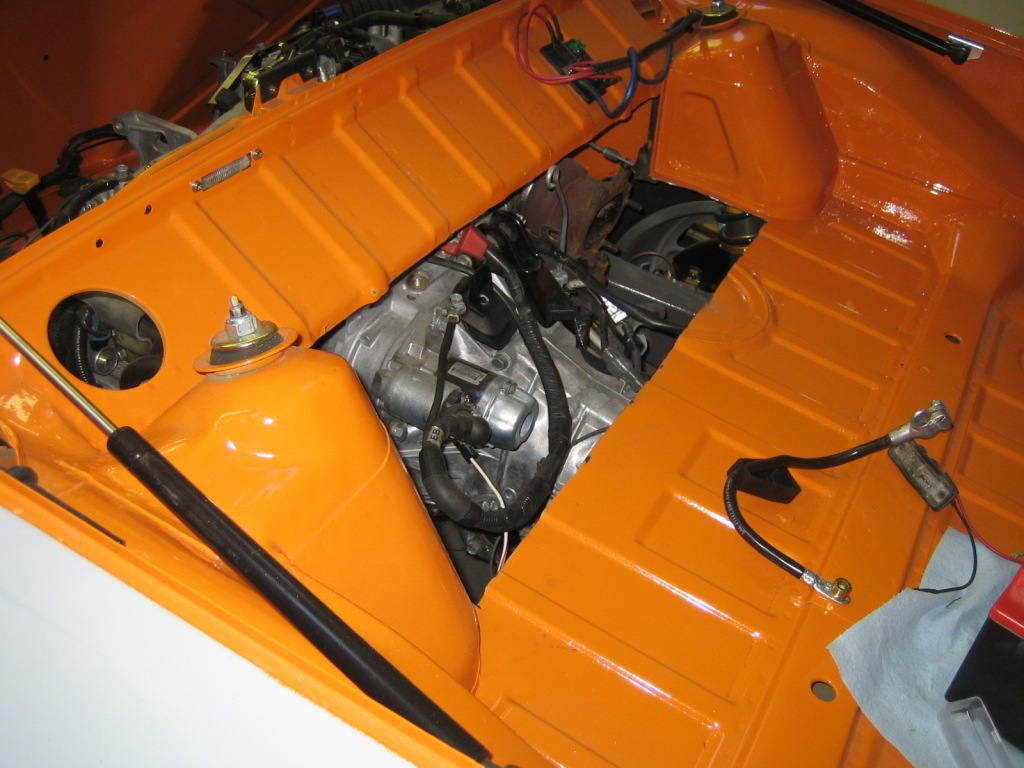 Underside shot, pretty tight at the back but it all fits, nice setup, kudos to Ian for that. 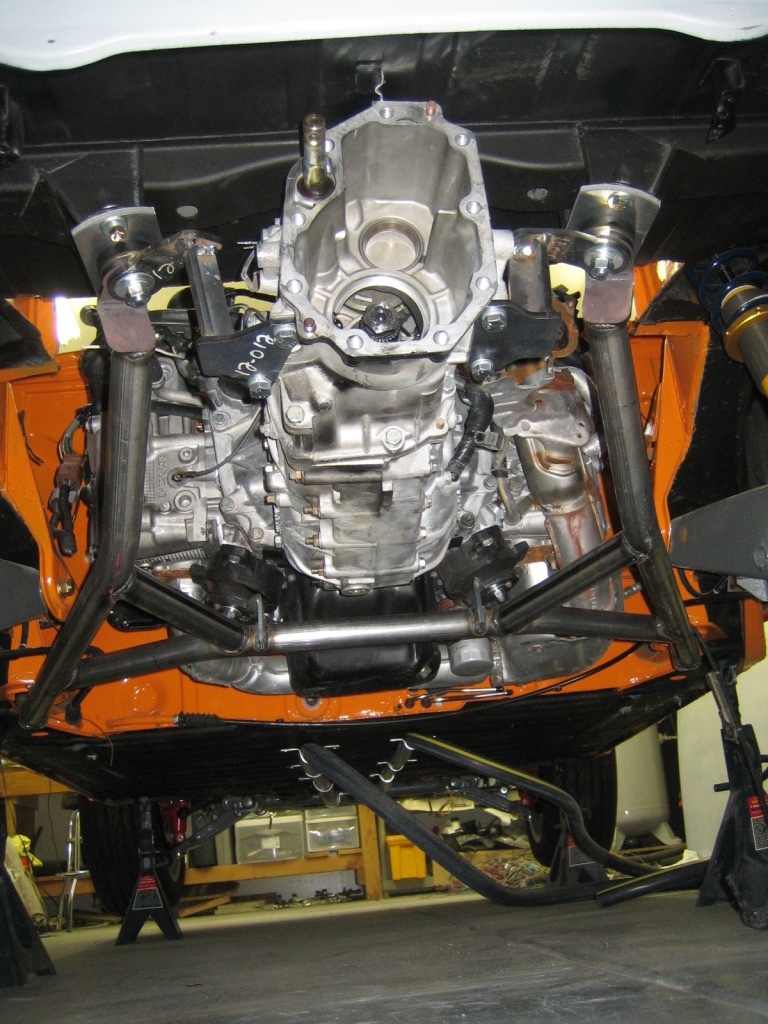 Coolant lines and routing is going to be one of the easier tasks. 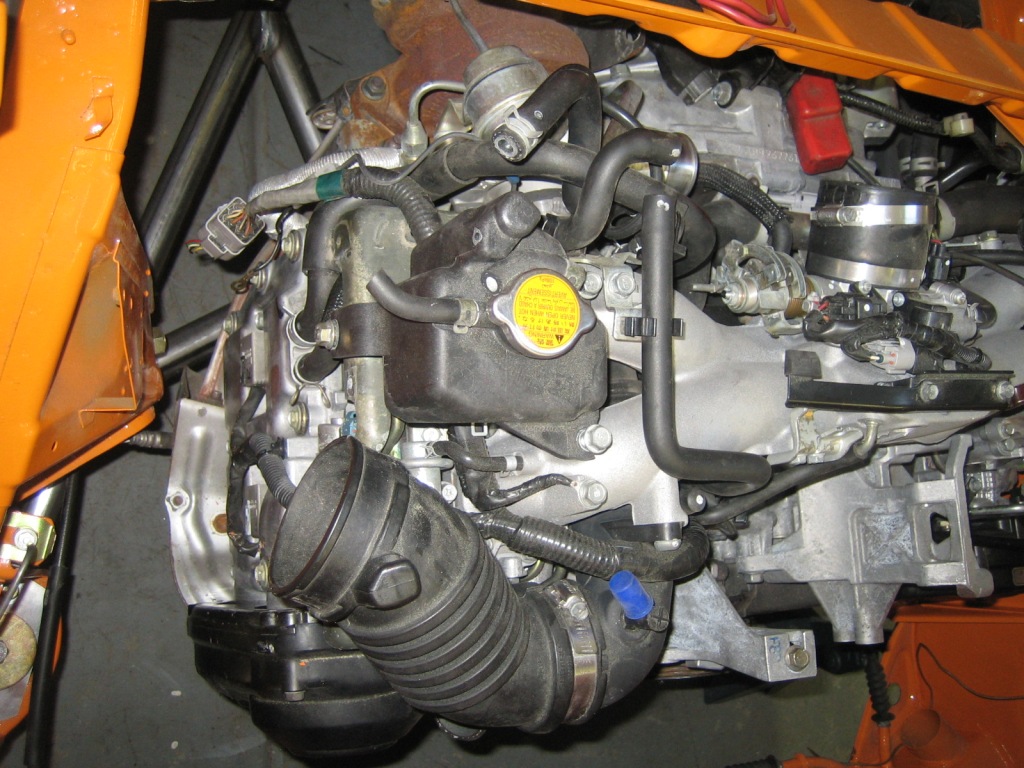 Noticed once I had the engine of the pallet that the sump is pretty dinged up, will need to fix that later. 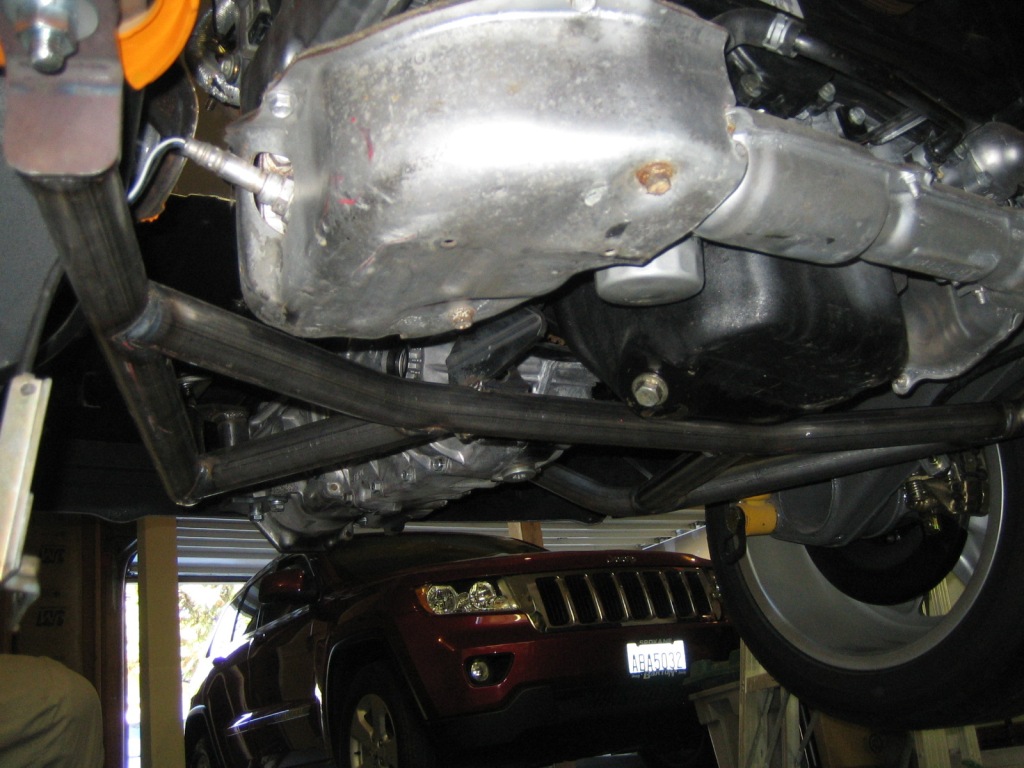 Heading out of town for a few days so going to take the time to work out the todo list and what parts I need to buy, would like to get everything mocked up and running without taking the engine out 5 times. Can but hope, that way it would only need to come out once to get everything powdercoated. |
|
|
|
| jimkelly |
Sep 10 2012, 05:09 AM
Post
#231
|
|
Delaware USA Group: Members Posts: 4,969 Joined: 5-August 04 From: Delaware, USA Member No.: 2,460 Region Association: MidAtlantic Region |
sweet (IMG:style_emoticons/default/drooley.gif)
here is a pic of dbcooper's rear trunk - seems like this will leave enough room for a spare tire? and his thread... http://www.914world.com/bbs2/index.php?showtopic=102887 Attached image(s) 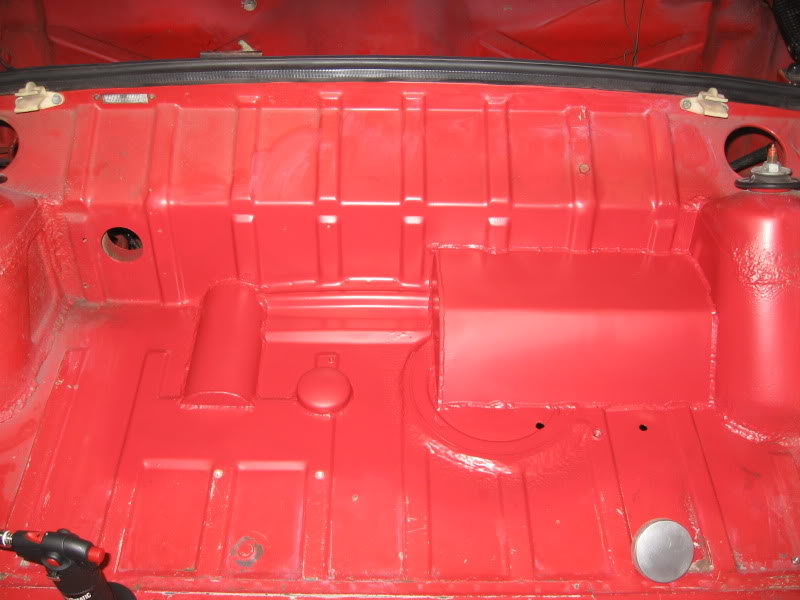
|
|
|
|
| my928s4 |
Sep 10 2012, 06:52 AM
Post
#232
|
|
Member Group: Members Posts: 349 Joined: 18-August 07 From: Spokane, WA Member No.: 8,018 Region Association: Pacific Northwest |
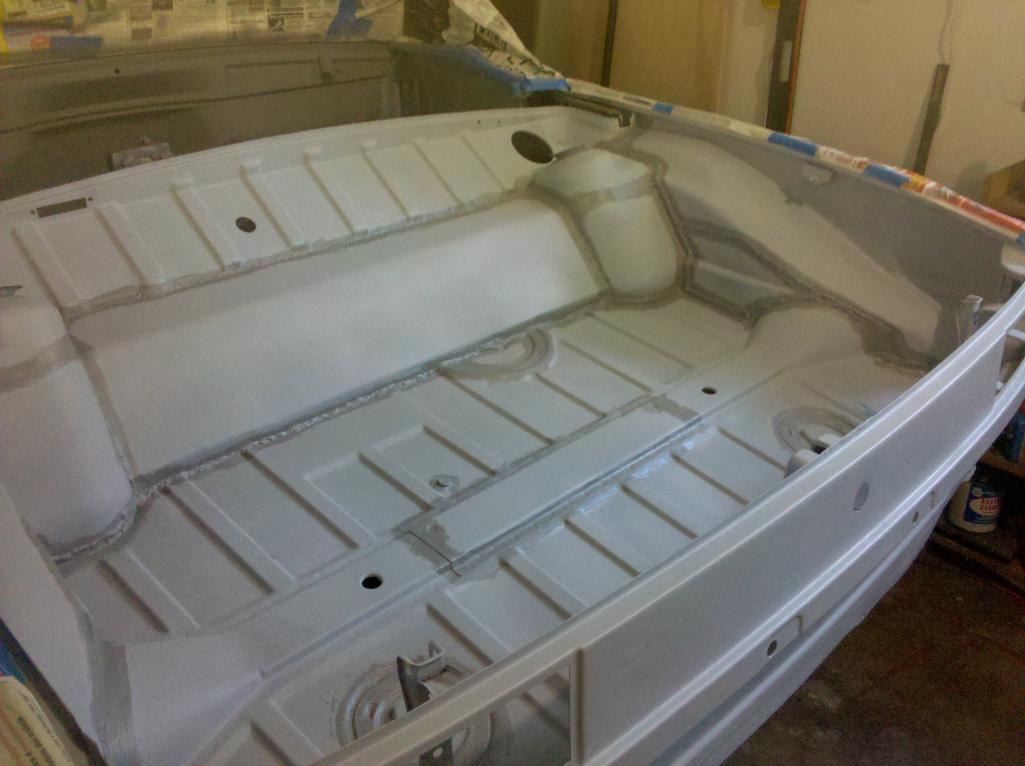
OK found the pic, here is the trunk modification I am going to try and implement. Might be a while though as having the improved access is big benefit until I get everything sorted.
 |
|
|
|
| my928s4 |
Sep 19 2012, 08:21 PM
Post
#233
|
|
Member Group: Members Posts: 349 Joined: 18-August 07 From: Spokane, WA Member No.: 8,018 Region Association: Pacific Northwest |
Managed to get qIan's 2WD adapter fitted to the transmission and the rear cover bolted on.
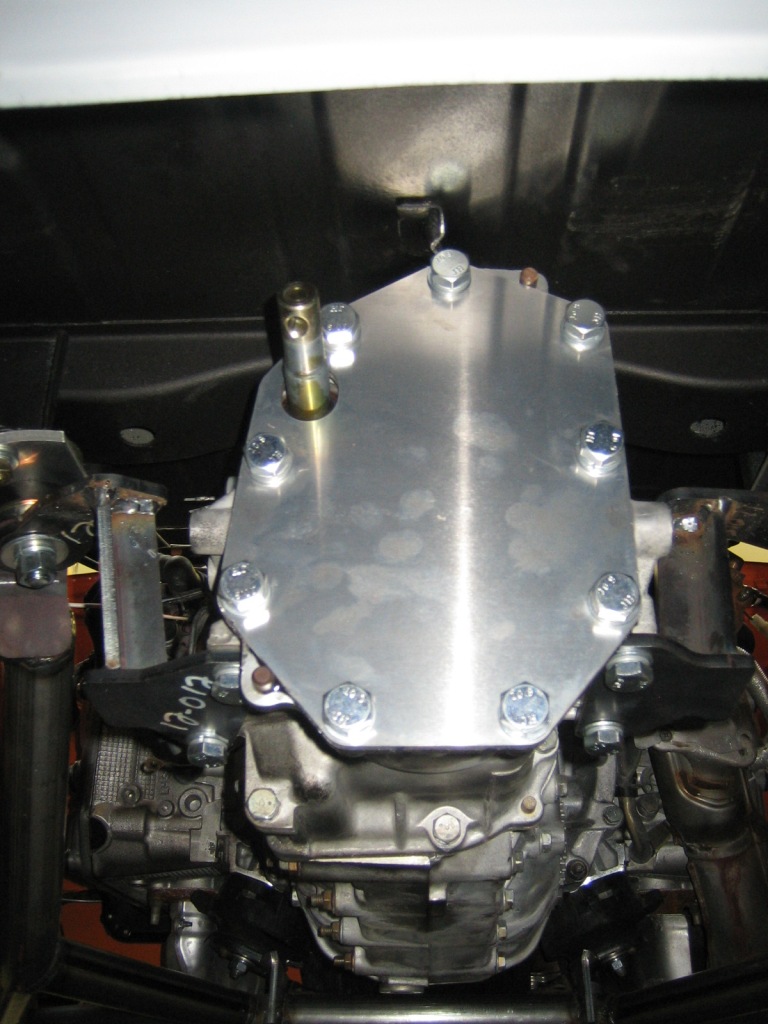 Next decided to get the harness on the car and start hooking all the connections up including the modifications to get the AVCS wired up. I liked the idea of having the ECU under the passenger seat so drilled hole in the firewall to allow that. 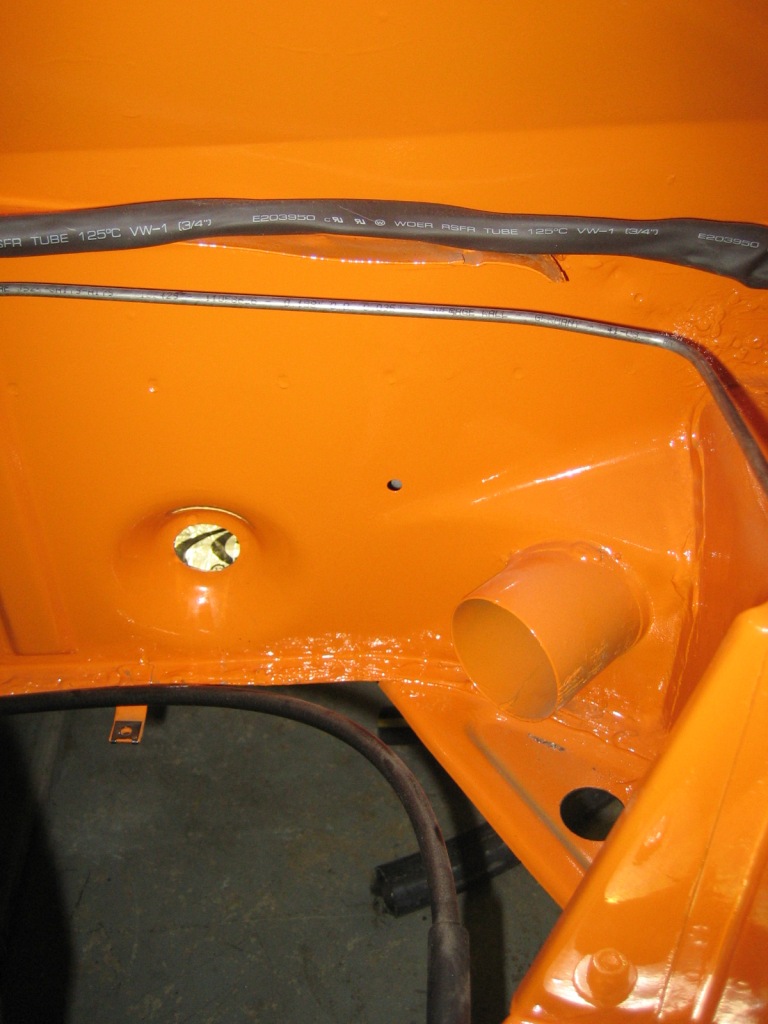 I thought I had completed a lot of the harness work but laying it out on the engine proved there was more to be done, seems to take forever. However, getting close. Can see where I added connectors to join to the 914 harness, for now just using cable ties, will wrap and protect once I know I have it all right ... 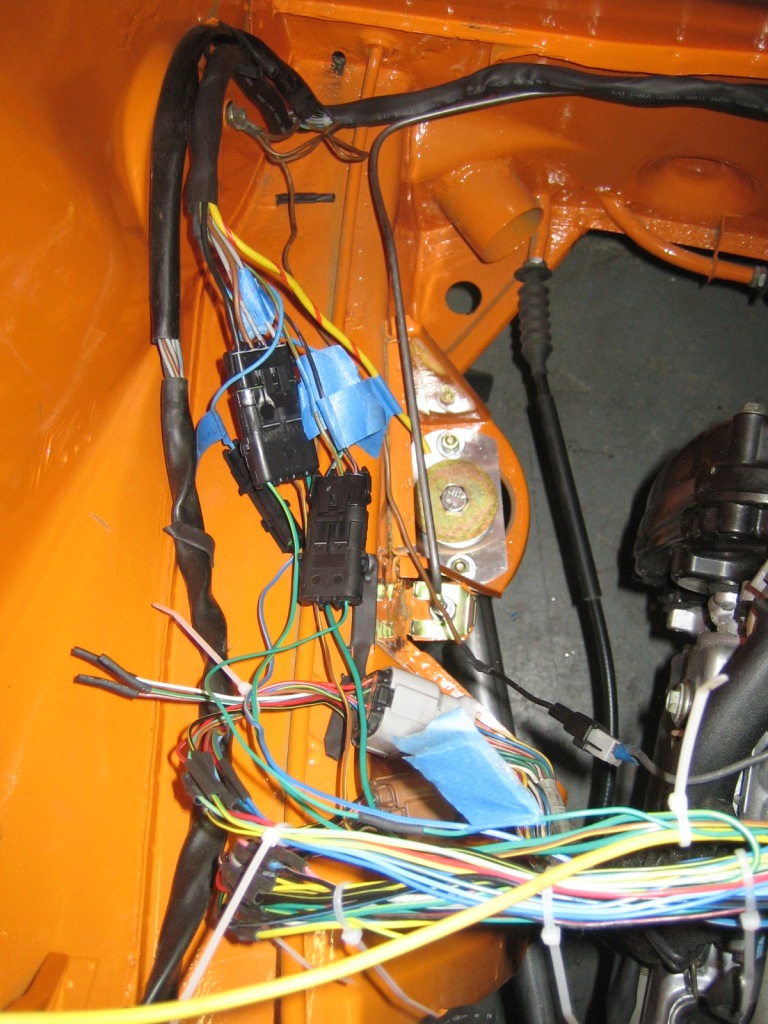 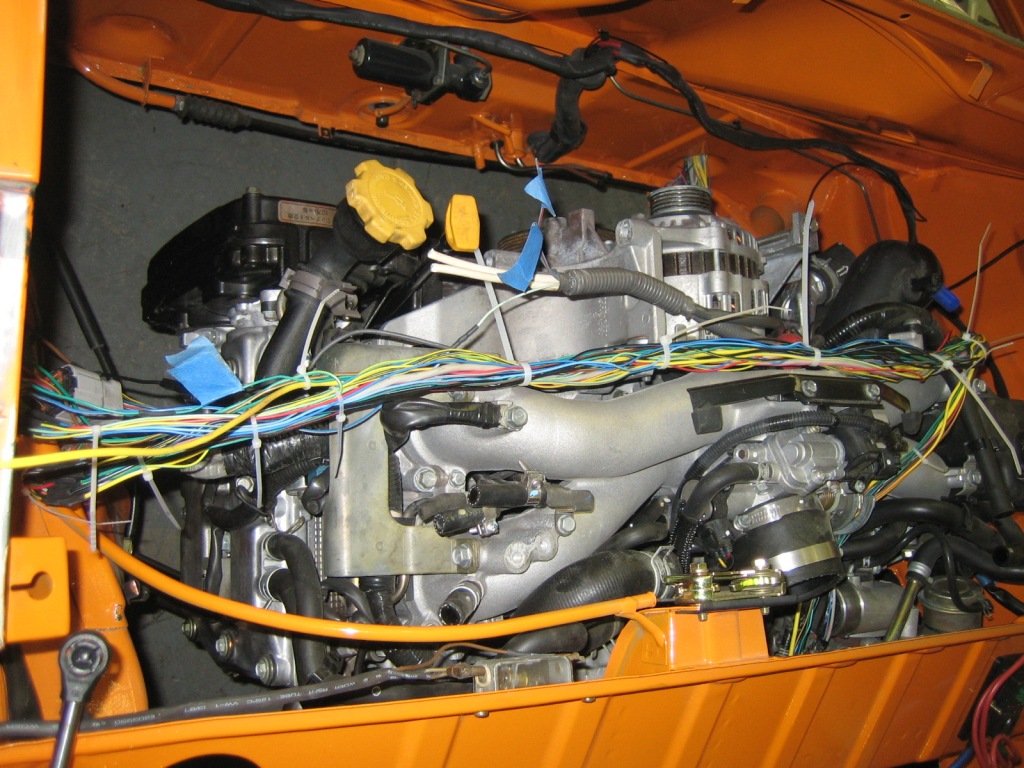 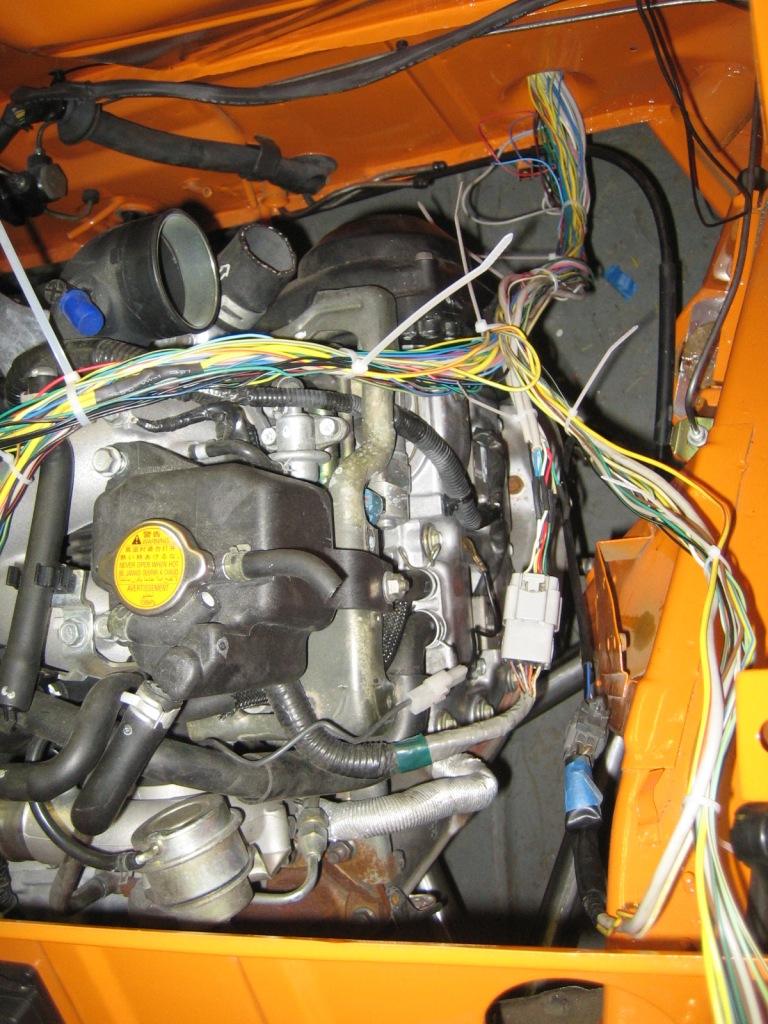 So once I tidy this lot up I will be ready for a power on test ...  |
|
|
|
| jimkelly |
Sep 23 2012, 06:38 PM
Post
#234
|
|
Delaware USA Group: Members Posts: 4,969 Joined: 5-August 04 From: Delaware, USA Member No.: 2,460 Region Association: MidAtlantic Region |
question and comment ...
does subaru need a return fuel line back to tank? since you are using a stock subaru ecu - i assume you will be faking some signals to the ecu? tony's thread says he planned to fake several signals to ecu... http://www.914world.com/bbs2/index.php?sho...1579&st=100 (see post #109) Fuel level sender (0.12 to 4.95 volts) Fuel Temp sender (2.5 to 3.8 volts) Fuel Tank Pressure sender (2.3 to 2.7 volts) Rear O2 sensor signal (0 - 0.9 volts) Neutral position sensor (+12 in neutral, 0 when in gear) Rear O2 heater sensor signal (0-1.0 volts) Power Steering oil pressure sender (open/close) thanks jim |
|
|
|
| my928s4 |
Sep 24 2012, 08:12 AM
Post
#235
|
|
Member Group: Members Posts: 349 Joined: 18-August 07 From: Spokane, WA Member No.: 8,018 Region Association: Pacific Northwest |
QUOTE(jimkelly @ Sep 23 2012, 05:38 PM)  question and comment ... does subaru need a return fuel line back to tank? since you are using a stock subaru ecu - i assume you will be faking some signals to the ecu? tony's thread says he planned to fake several signals to ecu... http://www.914world.com/bbs2/index.php?sho...1579&st=100 (see post #109) Fuel level sender (0.12 to 4.95 volts) Fuel Temp sender (2.5 to 3.8 volts) Fuel Tank Pressure sender (2.3 to 2.7 volts) Rear O2 sensor signal (0 - 0.9 volts) Neutral position sensor (+12 in neutral, 0 when in gear) Rear O2 heater sensor signal (0-1.0 volts) Power Steering oil pressure sender (open/close) thanks jim Hi Jim Yes the Subaru requires a return line, also has a vent line which I have not figured out yet. Hopefully just plug. As for sensors although I completed the wiring and powered it all up I have yet to start the engine so I am sure there will be sensor issues ahead but I bought the interface board from small car performance. It had inputs for the radiator fans, fuel tank level, pressure and temp + two more for valves (Iforge which). My engine and ECU are JDS and it seems they came without rear O2 sensor and exhaust gas temp sensor evidently. I bought a cheap OBII reader from HF just to see if the ECu was alive, I plan to invest in http://www.romraider.com/ as the engine will definitely need some tuning changes. Hope this helps. Chris |
|
|
|
| jimkelly |
Sep 24 2012, 04:55 PM
Post
#236
|
|
Delaware USA Group: Members Posts: 4,969 Joined: 5-August 04 From: Delaware, USA Member No.: 2,460 Region Association: MidAtlantic Region |
these guys seem to offer a way to fake 2 ecu sensor inputs?
Simulators for Subaru VSS Sensor and Rear Oxygen Sensor Signal... http://www.enginewiring.com/catalog.htm#Featured thanks! jim |
|
|
|
| Hydra. |
Sep 25 2012, 01:07 AM
Post
#237
|
|
Member Group: Members Posts: 59 Joined: 23-July 05 From: www.hydraperformance.com Member No.: 4,457 Region Association: None |
Car will run fine without a rear O2 signal, you can (permanently) turn off the resulting CEL with a software reflash. In fact you can turn off almost any CEL with a reflash...
|
|
|
|
| my928s4 |
Sep 29 2012, 05:12 PM
Post
#238
|
|
Member Group: Members Posts: 349 Joined: 18-August 07 From: Spokane, WA Member No.: 8,018 Region Association: Pacific Northwest |
Well the ECU is all hooked up, powered up and I can do some interrogation with the OBD II scanner so it is alive. I also turned the engine over from the ignition which was pretty cool. Still some tidy up to do with the wires but that can wait until we get this baby started and running.
 Decided to remove the intake, I need to add the oil pressure and water temp sensors so it made sense and I also wanted to find out which fuel port was in and out. Not too bad of a job once you know where all the connections are. 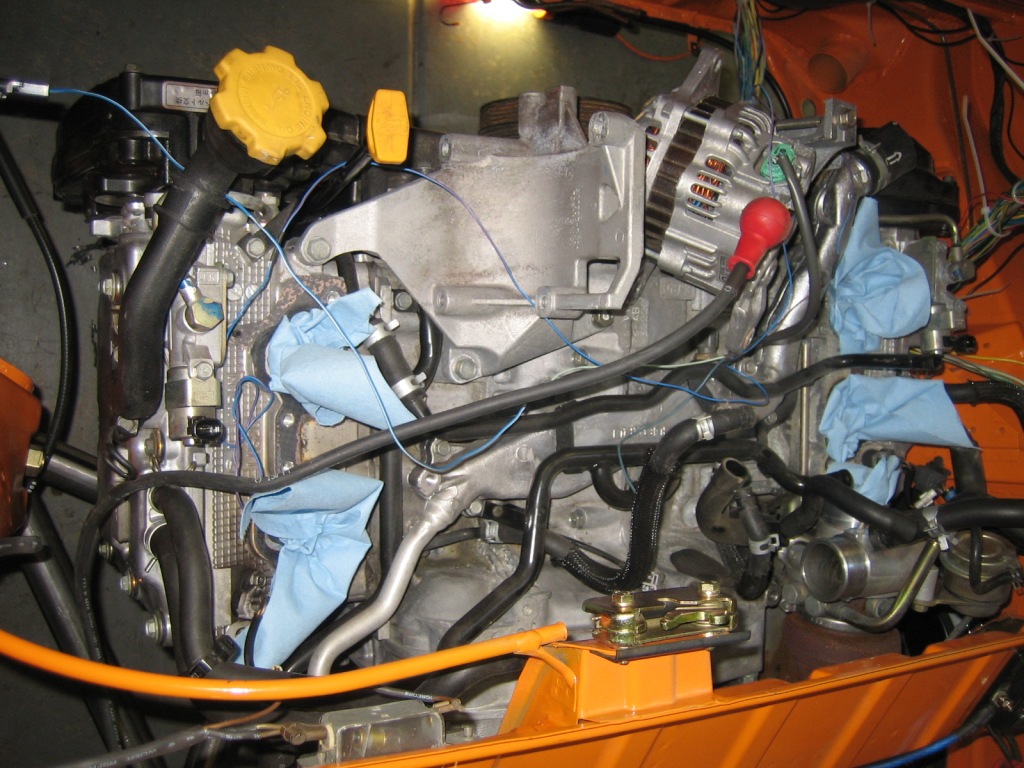 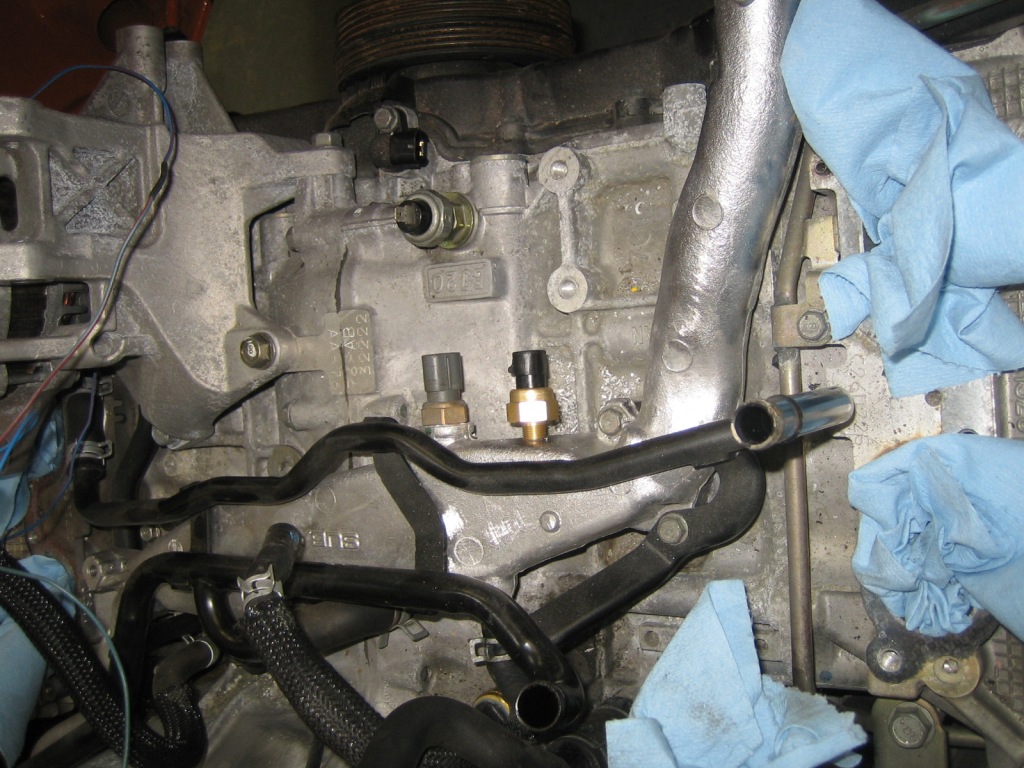 Unfortunately I need the old coolant sensor for the ECU and the gauge part of the sensor is not compatible with the new gauge. So I drilled a hole in the bridge and added the new sensor. 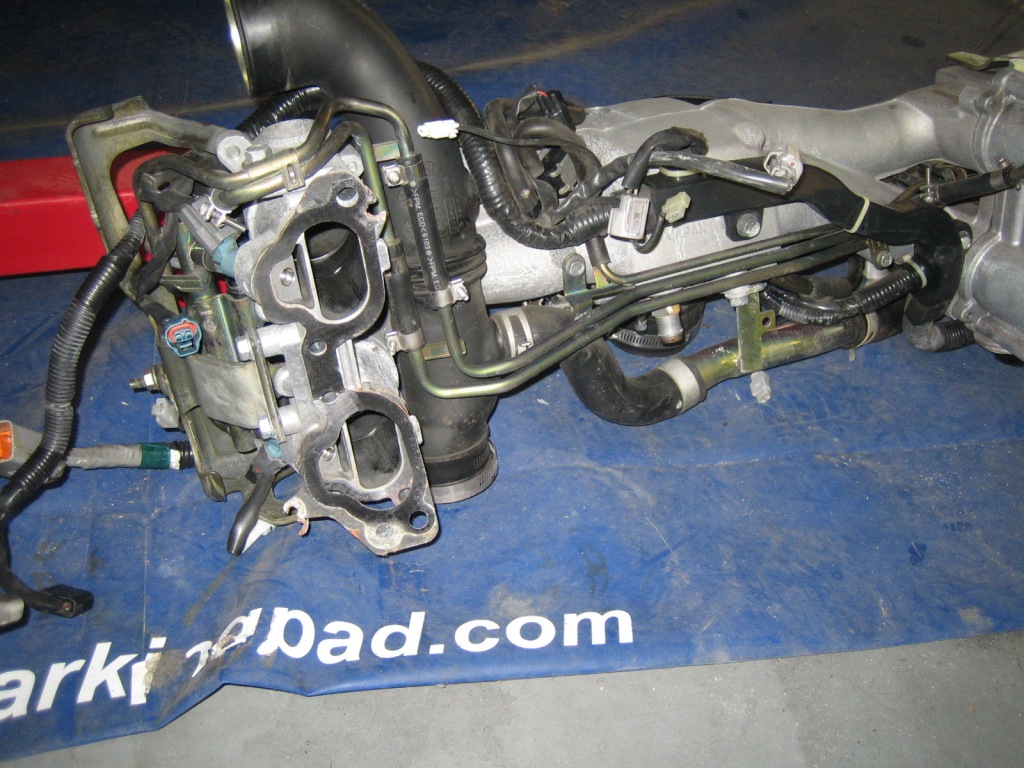 I was just going to replace the old oil pressure sender with the new one but there is limited height between it and the alternator. There is another port at the rear of the engine which has an alan keyed bung, I bought the Subaru adapter (cheap) to screw in where the bung was. 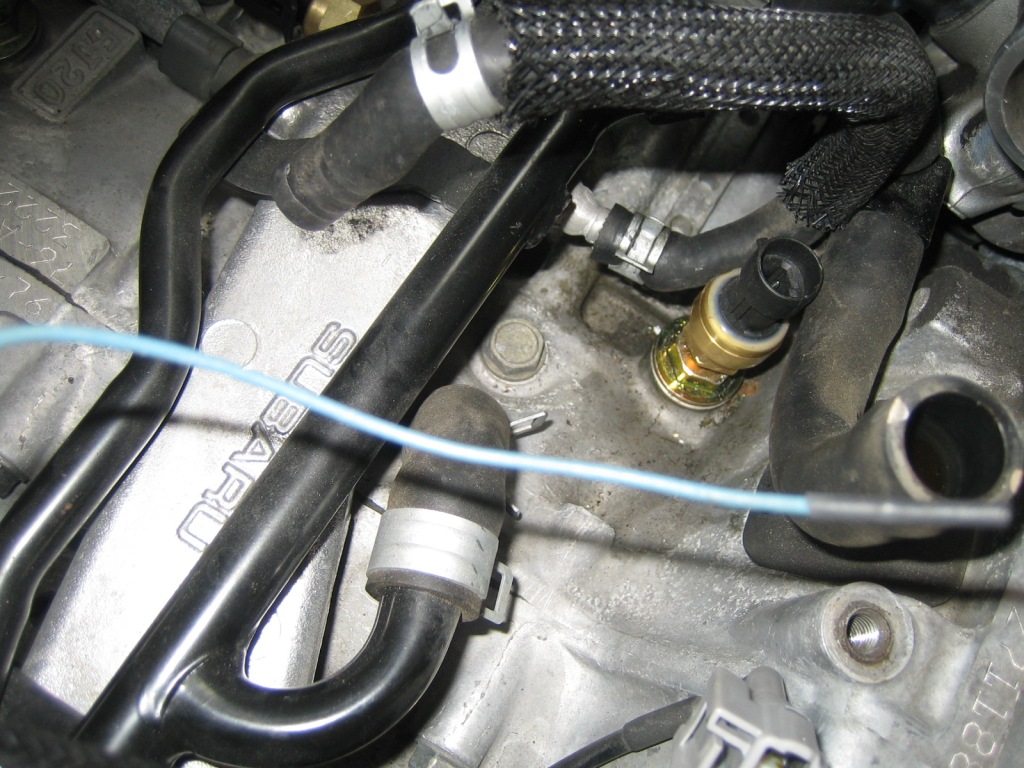 I thought removing the oil pan to fix the dent was going to be easy but someone had replaced the pan before and used a very effective liquid gasket. Took forever to prize the sump off AND clean both surfaces, removing all of the dent proved impossible because of the baffling but I did fix the area around the pickup with the aid of a press. Back on with a rubber gasket and also put on a new oil filter (makes me think I am getting close to the big day if nothing else) 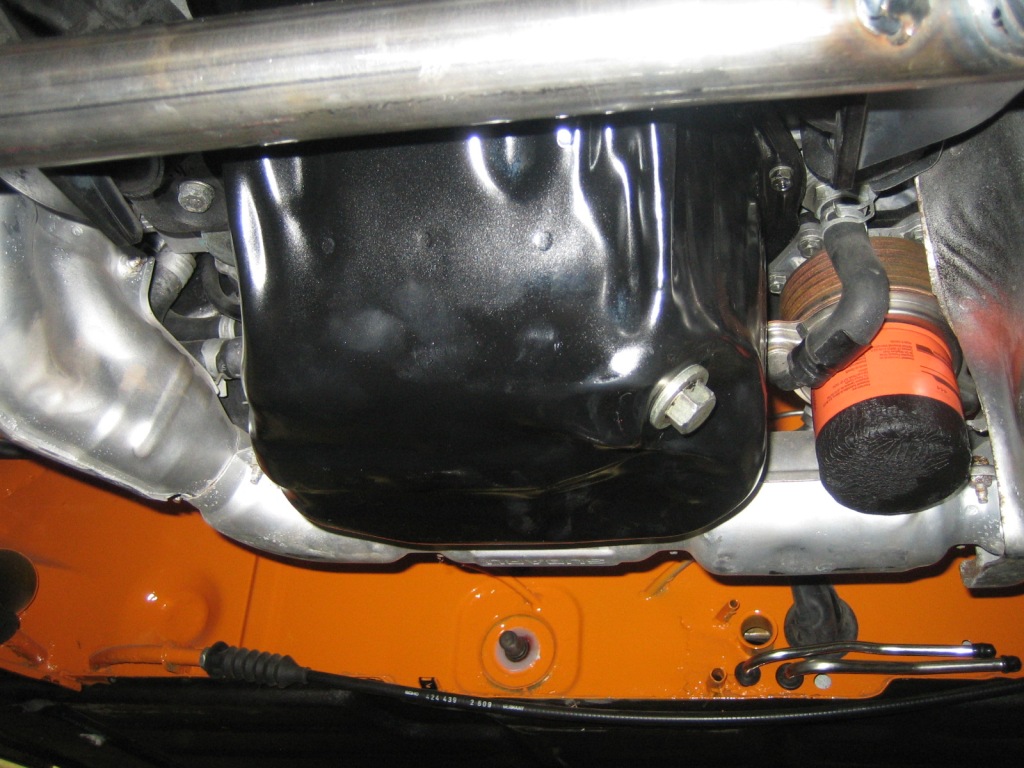 My Subaru drive shafts arrived, so already to modify once Ian get his shafts complete. 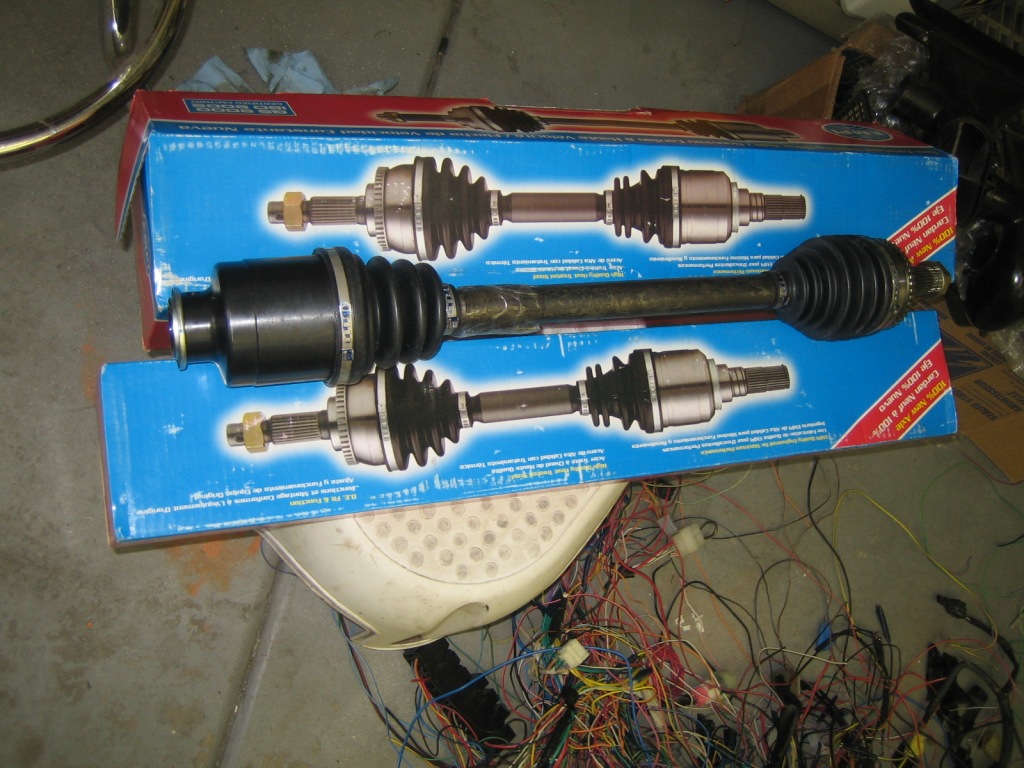 Also picked up the wastegate solenoid and it associated plumbing with the restrictor pill, not sure why this was removed from the engine but it was. 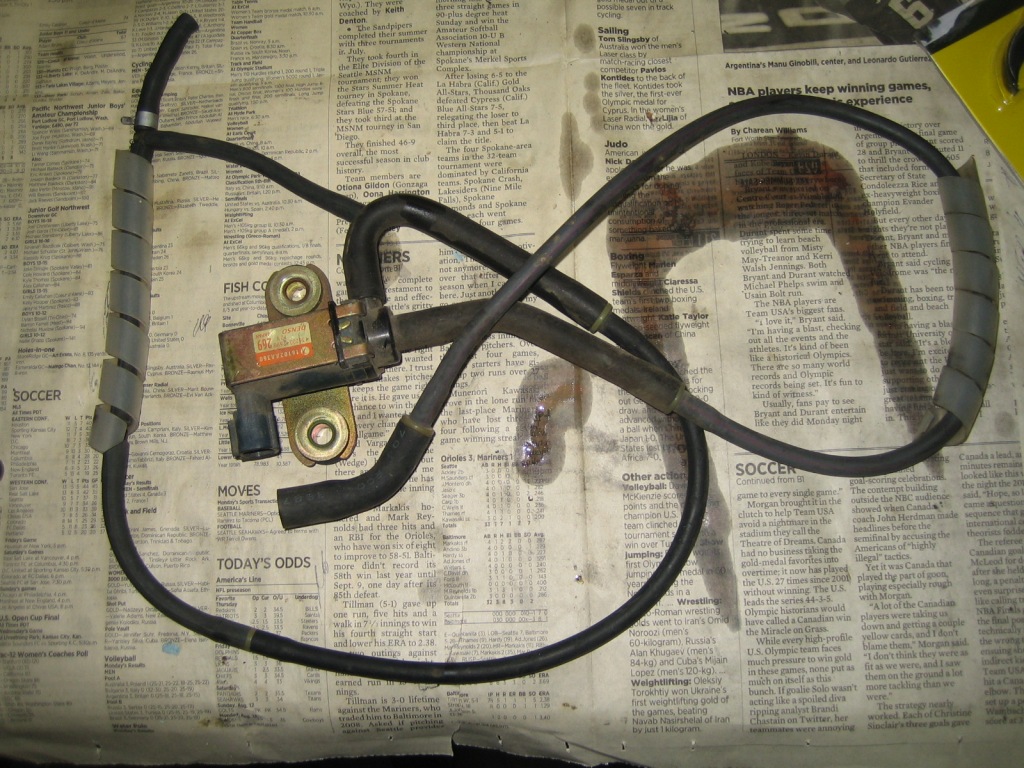 |
|
|
|
| Porcharu |
Sep 30 2012, 12:28 PM
Post
#239
|
|
Senior Member Group: Members Posts: 1,314 Joined: 27-January 05 From: Campbell, CA Member No.: 3,518 Region Association: Northern California |
How is the oil pan clearance? I spoke with Ian a few weeks ago and he said the pan hangs down about 1-1/2" below the floor (or the cradle - I forgot.)
BTW after talking to Ian for a while I am not only purchasing some of his parts I have offered him any help in any way I can to help him make this a success. Steve |
|
|
|
| my928s4 |
Oct 6 2012, 10:54 PM
Post
#240
|
|
Member Group: Members Posts: 349 Joined: 18-August 07 From: Spokane, WA Member No.: 8,018 Region Association: Pacific Northwest |
QUOTE(Porcharu @ Sep 30 2012, 11:28 AM) How is the oil pan clearance? I spoke with Ian a few weeks ago and he said the pan hangs down about 1-1/2" below the floor (or the cradle - I forgot.) Steve Hi Steve Yep about an inch below the cradle. |
|
|
|
|
1 User(s) are reading this topic (1 Guests and 0 Anonymous Users)
0 Members:

|
Lo-Fi Version | Time is now: 29th May 2026 - 09:56 PM |
Invision Power Board
v9.1.4 © 2026 IPS, Inc.