|
|
|
Porsche, and the Porsche crest are registered trademarks of Dr. Ing. h.c. F. Porsche AG.
This site is not affiliated with Porsche in any way. Its only purpose is to provide an online forum for car enthusiasts. All other trademarks are property of their respective owners. |
|
|

  |

| my928s4 |
 May 24 2008, 10:17 PM May 24 2008, 10:17 PM
Post
#41
|
|
Member  Group: Members Posts: 349 Joined: 18-August 07 From: Spokane, WA Member No.: 8,018 Region Association: Pacific Northwest |
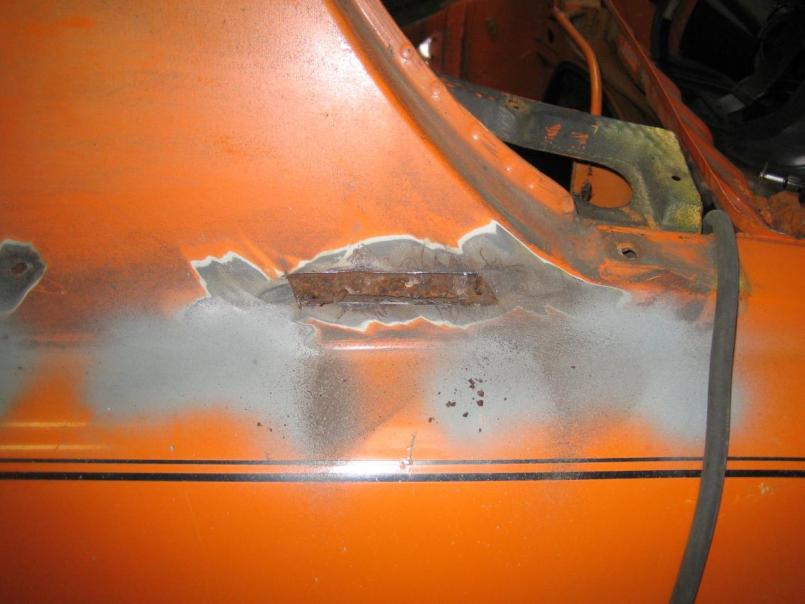
Antenna hole, this one did not come out as well ... I should have stopped for lunch, think blood sugar was low. Yeah I know excuses, excuses ...
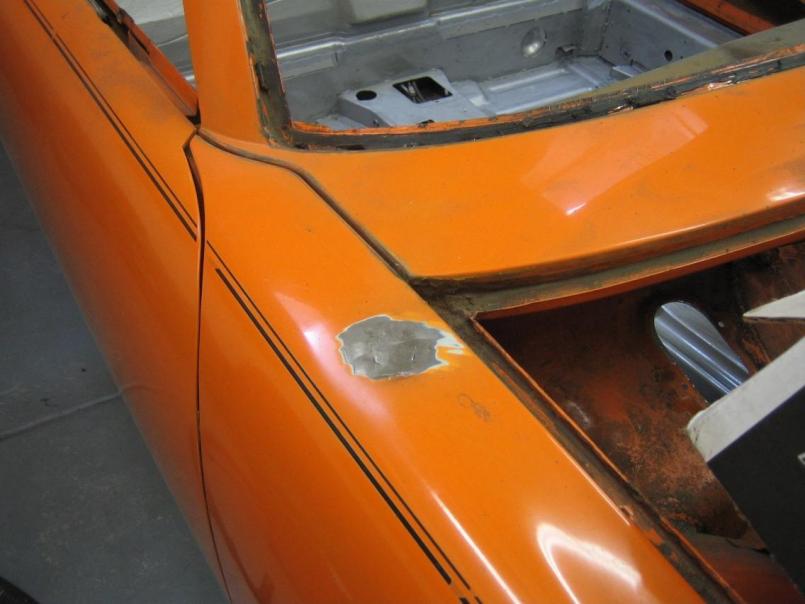 Next up the sail panels, found some rust holes by the passenger door, will do something with those later. 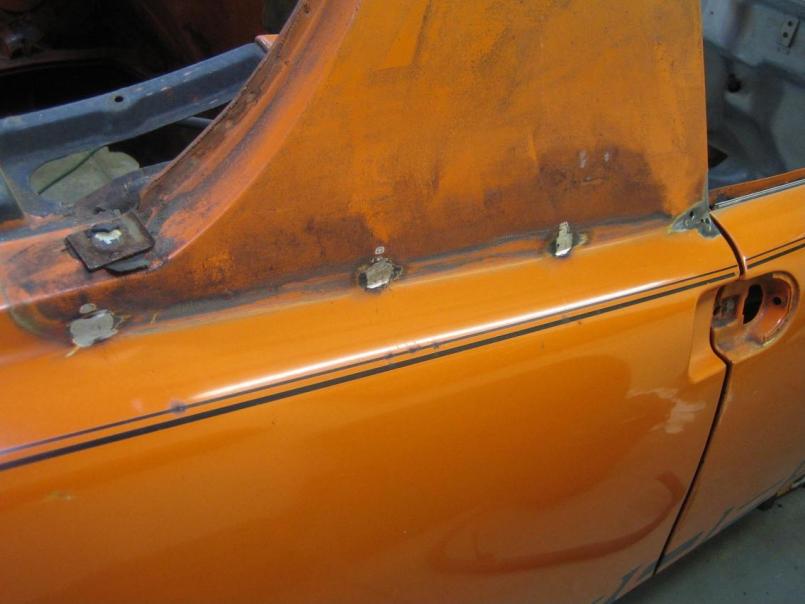 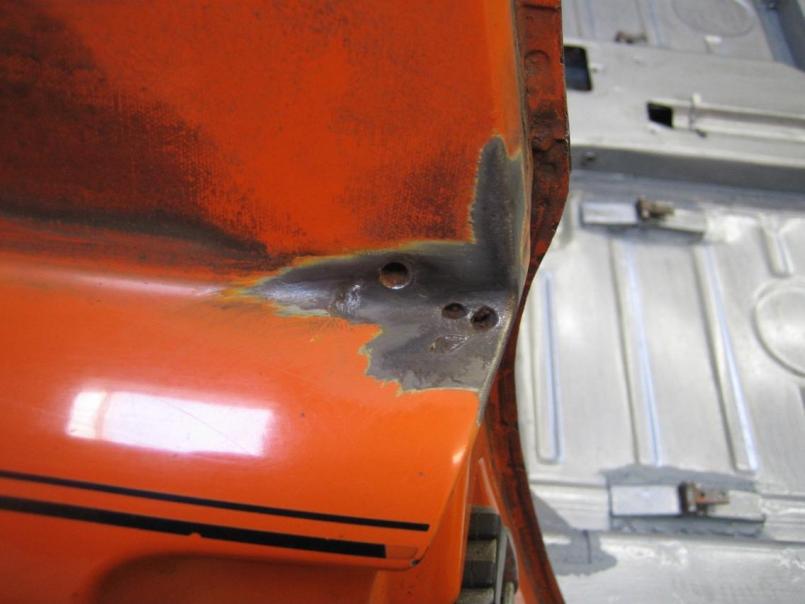 |
   |

 
|
| my928s4 |
May 24 2008, 10:20 PM
Post
#42
|
|
Member Group: Members Posts: 349 Joined: 18-August 07 From: Spokane, WA Member No.: 8,018 Region Association: Pacific Northwest |
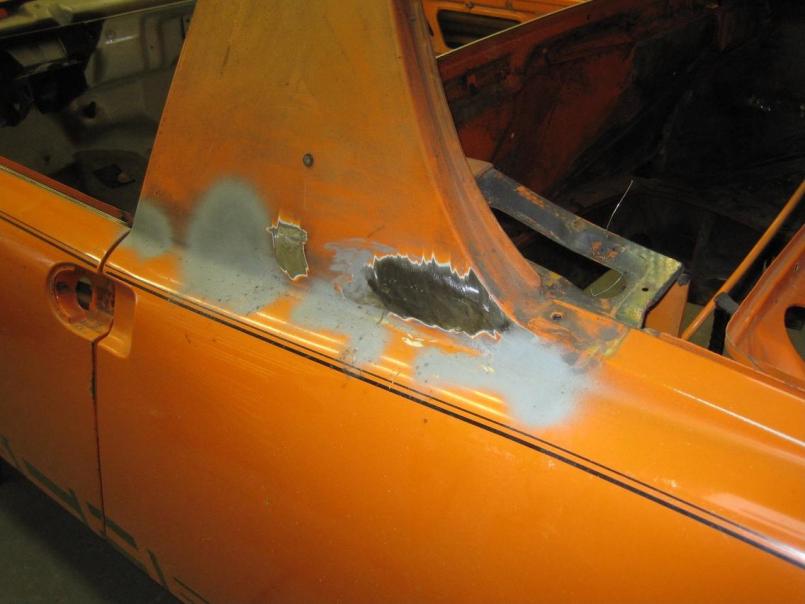
Finally the drivers side, I posted pics of the rust earlier in the thread, I cut out the offending areas and welded in new metal being careful with the heat so as not to warp the panels.
   Next up I need to attach the seat rail enforcements under the car on the new floor panel, need to buy that compressor too ..... |
|
|
|
| my928s4 |
Oct 26 2008, 11:05 AM
Post
#43
|
|
Member Group: Members Posts: 349 Joined: 18-August 07 From: Spokane, WA Member No.: 8,018 Region Association: Pacific Northwest |
It has been a while, this summer I spent doing other things outside and playing with my new toy, a Kawasaki Versys. I did purchase a 60gallon 220V compressor though which will be getting plenty of use this Winter.
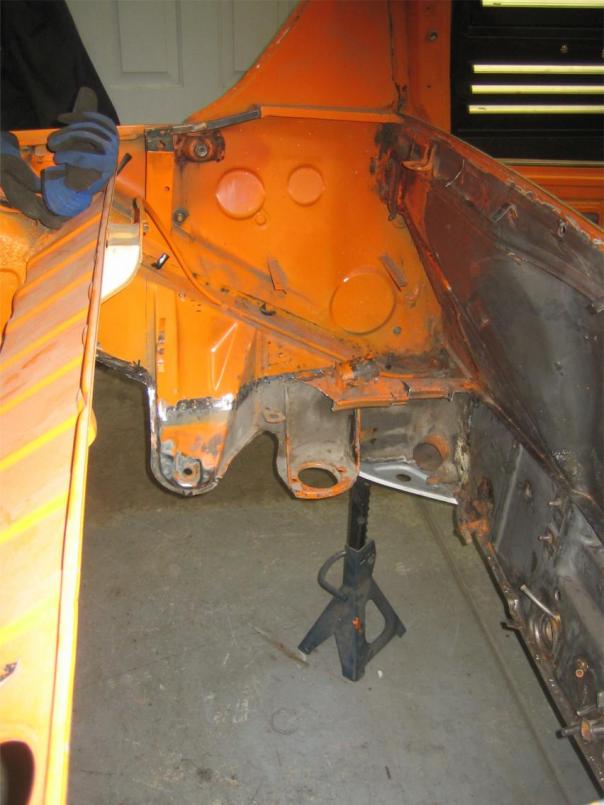
I bought the GT chassis kit of Ebay (Desert Hybrids) and have been making some progress, the pieces must have been made for earlier years because the fit on some pieces is terrible. I was planning on removing all the underseal but the stuff is so well adhered that I figure it can be left alone, after trying wire wheels and chemicals the best tool is the heat gun and a scraper. As you can see below the jacking posts were junk. 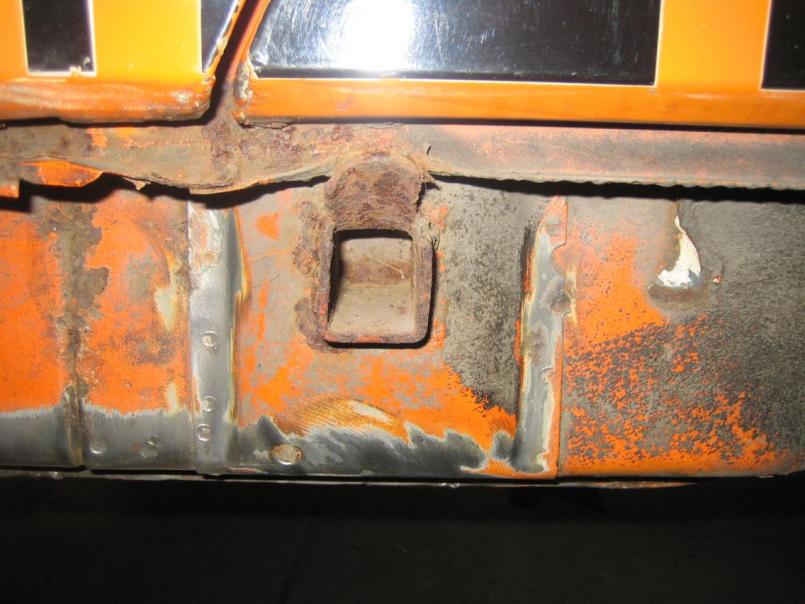 Here you can see the damage done, it had ripped and left holes in the long 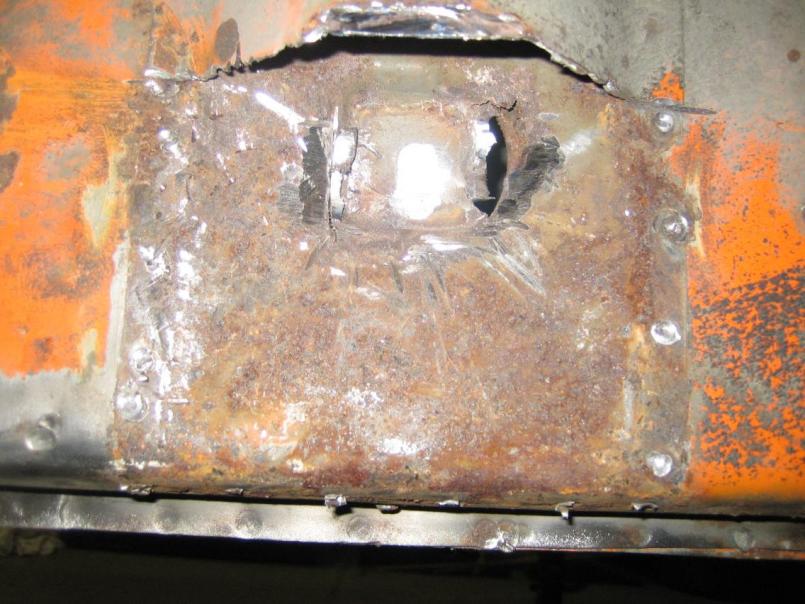 I actually bought the replacement parts but decided I would do the delete option instead. Here you can see I welded a plate over the old jack post area and the lower part of the GT kit fitted. 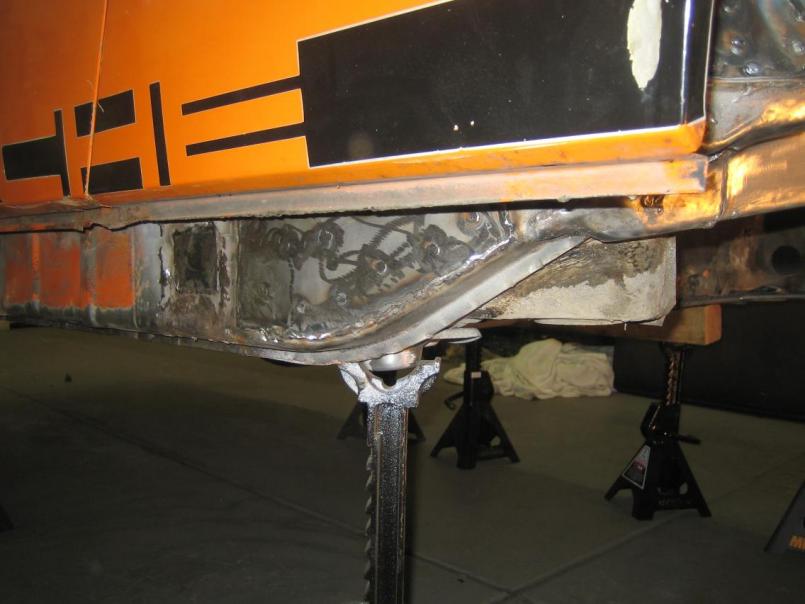 |
|
|
|
| my928s4 |
Oct 26 2008, 11:09 AM
Post
#44
|
|
Member Group: Members Posts: 349 Joined: 18-August 07 From: Spokane, WA Member No.: 8,018 Region Association: Pacific Northwest |
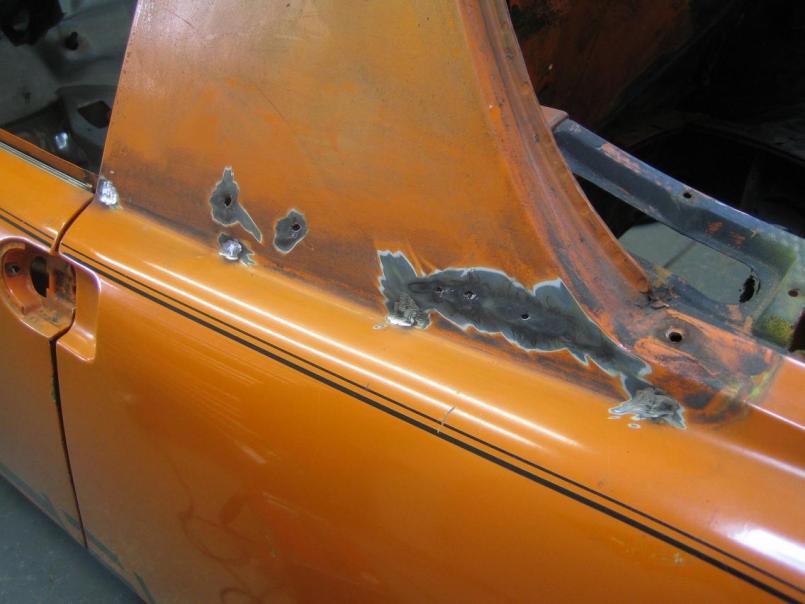
Two new rear jack points were welded in.
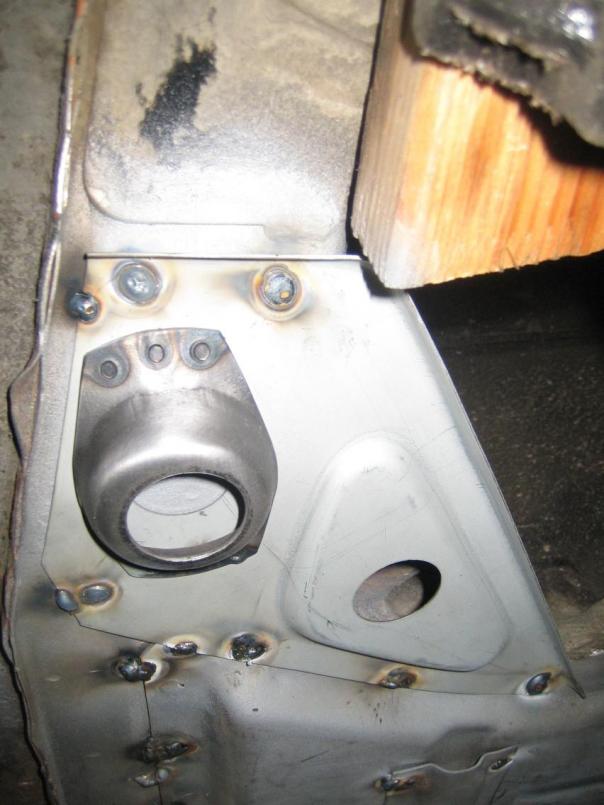 Here you can see prep for the passenger side for the GT stiffener kit, after scraping some citrus paint stripped does the rest.  Here is some welding complete on the drivers side. 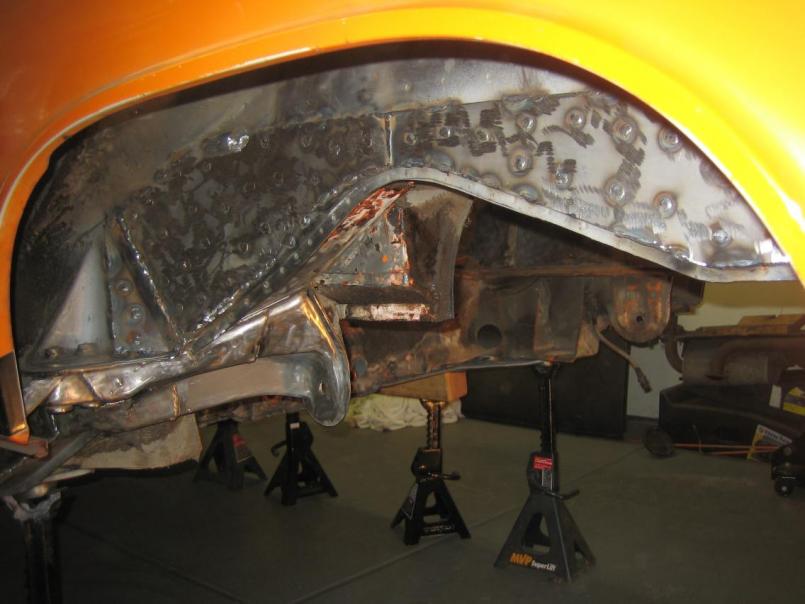 Next is the rear stablalizer mounts and front stablalizer brackets. |
|
|
|
| plymouth37 |
Oct 26 2008, 12:32 PM
Post
#45
|
|
Senior Member Group: Members Posts: 1,825 Joined: 24-May 05 From: Snoqualmie, WA Member No.: 4,138 Region Association: Pacific Northwest |
Nice project! You are well on your way to a great car. Keep up the good work!
|
|
|
|
| Gint |
Oct 26 2008, 12:51 PM
Post
#46
|
|
Mike Ginter Group: Admin Posts: 16,108 Joined: 26-December 02 From: Denver CO. Member No.: 20 Region Association: Rocky Mountains |
(IMG:style_emoticons/default/agree.gif)
You're doing some nice work there. Keep at it... (IMG:style_emoticons/default/welder.gif) |
|
|
|
| my928s4 |
Oct 27 2008, 11:08 PM
Post
#47
|
|
Member Group: Members Posts: 349 Joined: 18-August 07 From: Spokane, WA Member No.: 8,018 Region Association: Pacific Northwest |
Thanks for the words of encouragement, learning a lot here.
I thought I would add these photos of the passenger side of the GT kit, I put these two pieces on tonight and one thing I learnt from the drivers side is to use a few more screws to hold the pieces tight ... this made the whole process a lot easier. Paint stripper worked great and the environmentaly friendly citrus fumes are not bad at all (IMG:style_emoticons/default/w00t.gif) honest. 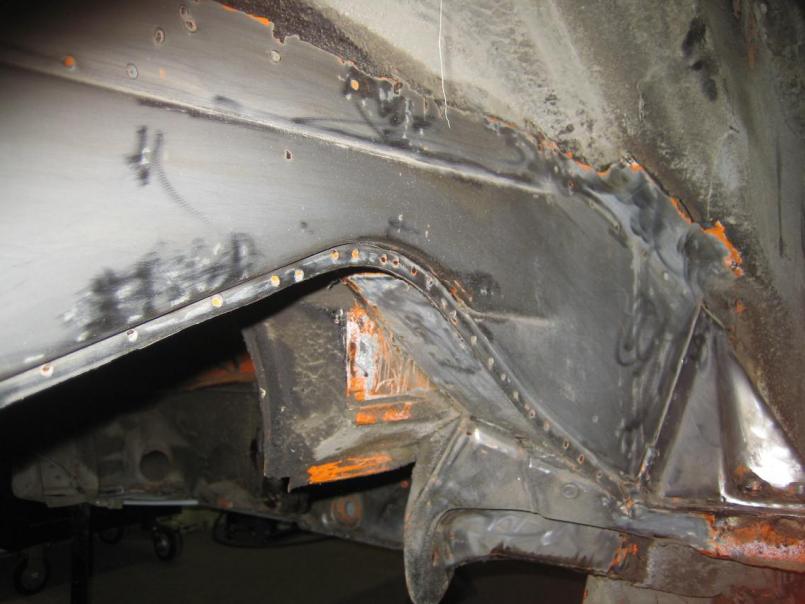 Pieces attached with screws and I trimmed these two parts while fitted. 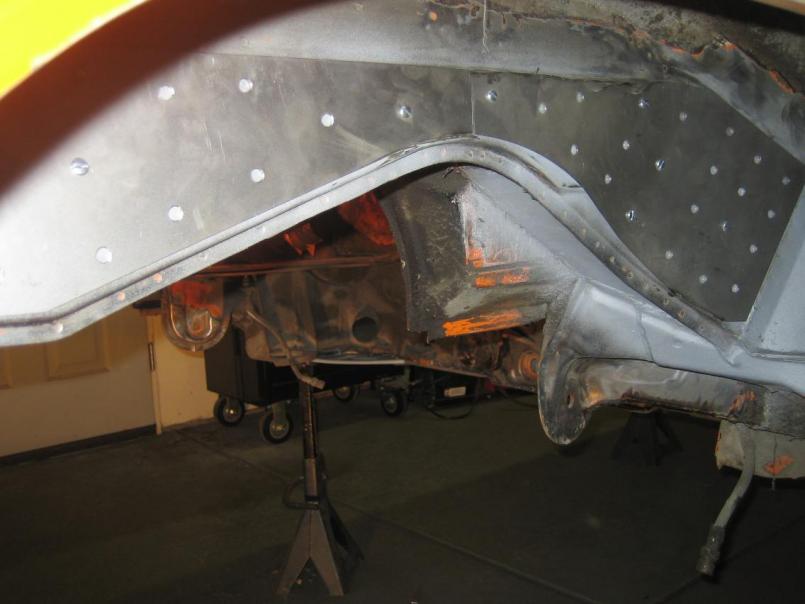 Would not have shown this pic when i started, my welds before use of the grinder, must have the welder dialed in about right for this job. Even the weld thru primer which sometimes gives me grief seemed to behave. There are a couple of ugly ones in there but its getting better ... honest. 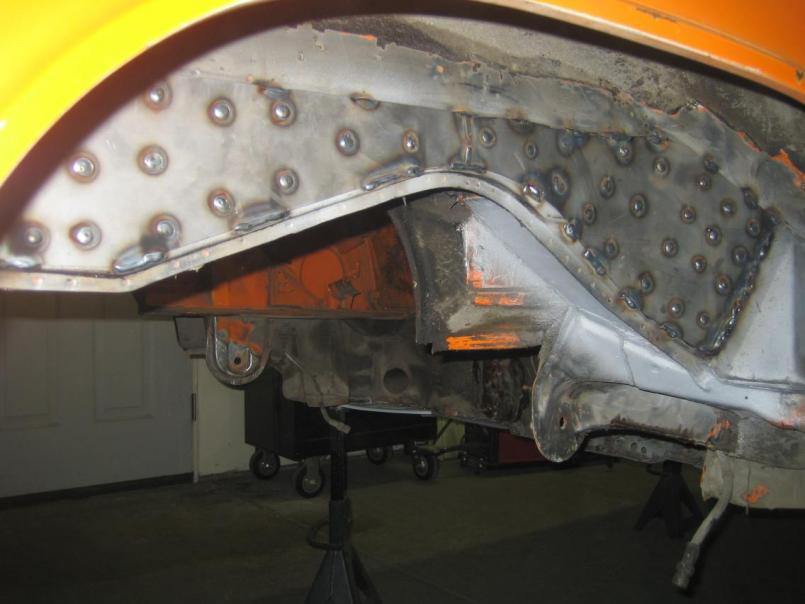 One thing I am still working on is akward and tight angles, burnt quite a few holes in my socks because I had dripping welds trying to weld the piece that supports the suspension ear. I will finish this side tomorrow and then onto the front sway bar mounts. |
|
|
|
| IronHillRestorations |
Oct 28 2008, 12:10 AM
Post
#48
|
|
I. I. R. C. Group: Members Posts: 6,950 Joined: 18-March 03 From: West TN Member No.: 439 Region Association: None |
After you tack the perimeter of the stiffening plate, you can use an awl to scratch the paint off in the holes. It helps.
|
 |
|
| charliew |
Oct 28 2008, 12:47 AM
Post
#49
|
|
Advanced Member Group: Members Posts: 2,363 Joined: 31-July 07 From: Crawford, TX. Member No.: 7,958 |
Your work looks really good for your experience level. Hot metal in the socks is tough. A pair of wolverines boots would help. Harbor Freight has a cheap leather apron. If you can find a metal salvage yard, you might look for some pieces of copper. I have some 3/8 thick 4x4 square copper plates that I put behind single wall panels and weld holes up against the copper plates. The wire won't stick to the copper and the back side is flat when you finnish. Eastwood has some expensive copper helpers that are magnetic. Some weld through primers can be removed with laquer thinner. You can use a qtip with laquer thinner to clean out the holes in the stiffeners, it dosen't take but a second for each hole. Also you may not think you need it but Eastwood has a long air powered 4 inch cutoff wheel tool that is real handy. I use the 1/16 thick wheels on everything from metal to fiberglass. It would be a good xmas present for your wife. A carbide burr on a air tool will get in the corners on the welds. Restomotive also sells a Tiecoat primer that will stick to the por15. It's babyblue so you might want to paint over it. It's hard to get normal paint and glue to stick to por15.
I am wondering if the Engman kit made the door gaps change any. I think it should be against the law to have that much fun by yourself. |
|
|
|
| Cheapsnake |
Oct 28 2008, 09:56 AM
Post
#50
|
|
Member Group: Members Posts: 419 Joined: 15-November 07 From: Door County, WI Member No.: 8,341 |
Very nice work there and an inspiration to those of us who are about to embark on the journey. A special thanks for the progress pictures and insights. Stuff like that is gold.
Tom |
|
|
|
| blabla914 |
Oct 28 2008, 12:02 PM
Post
#51
|
|
I like primer Group: Members Posts: 330 Joined: 1-March 04 From: Connecticut Member No.: 1,740 Region Association: None |
good looking work. Lots of hard, dirty work to make those picts. One bit of advice I will give is reconsider your decision to delete the stock jack points. If you plan to run the car low, they are VERY handy. My first 914 had them deleted and I'll never do another without the jack points. My current car runs about 5 3/4" under the rockers. Even my relatively low profile Lincoln jack will not get under. Forget about your average craftsman jack. I use one of those thingys you put in the stock jack point and jack off of that. The stock jack also works very well if you get a flat on the road.
Perhaps others will disagree, but if you have the parts put the jack points on. You should be able to trim the tube and weld it right to the plate you have put on and then put the cover on. That's how I did mine. Kelly |
|
|
|
| bandjoey |
Oct 28 2008, 10:53 PM
Post
#52
|
|
bandjoey Group: Members Posts: 4,935 Joined: 26-September 07 From: Bedford Tx Member No.: 8,156 Region Association: Southwest Region |
Now that it's many moons since the first coat of por15.....what's the scratch and dent hardness of the por in the pans and how's it holding up? Have you picked out a primer that's recommended with por?
Thanks for letting me pick your brain. You're doing a Great job. I'm about 60 days behind you on a car that should have been finished a year ago. Funny how these drag on when wife and kids interfere with real man's work! Thanks Bill |
|
|
|
| my928s4 |
Oct 29 2008, 07:59 AM
Post
#53
|
|
Member Group: Members Posts: 349 Joined: 18-August 07 From: Spokane, WA Member No.: 8,018 Region Association: Pacific Northwest |
QUOTE(9146986 @ Oct 27 2008, 11:10 PM)  After you tack the perimeter of the stiffening plate, you can use an awl to scratch the paint off in the holes. It helps. Never thought about removing the primer in the holes, makes sense now though!! I always thought 'weld thru' meant exactly that but sometimes I find it gives me more problems than I was expecting. QUOTE(charliew @ Oct 27 2008, 11:47 PM) Your work looks really good for your experience level. Hot metal in the socks is tough. A pair of wolverines boots would help. Harbor Freight has a cheap leather apron. If you can find a metal salvage yard, you might look for some pieces of copper. I have some 3/8 thick 4x4 square copper plates that I put behind single wall panels and weld holes up against the copper plates. The wire won't stick to the copper and the back side is flat when you finnish. Eastwood has some expensive copper helpers that are magnetic. Some weld through primers can be removed with laquer thinner. You can use a qtip with laquer thinner to clean out the holes in the stiffeners, it dosen't take but a second for each hole. Also you may not think you need it but Eastwood has a long air powered 4 inch cutoff wheel tool that is real handy. I use the 1/16 thick wheels on everything from metal to fiberglass. It would be a good xmas present for your wife. A carbide burr on a air tool will get in the corners on the welds. Restomotive also sells a Tiecoat primer that will stick to the por15. It's babyblue so you might want to paint over it. It's hard to get normal paint and glue to stick to por15. I am wondering if the Engman kit made the door gaps change any. I think it should be against the law to have that much fun by yourself. Great info. Looking back I wish I had used something like the copper spoon, I think one of these is mandatory for the GT fenders. I looked up the extended grinder and the carbide burr, thankyou, it is amazing what tools are out there to make life easier. QUOTE(Cheapsnake @ Oct 28 2008, 08:56 AM) Very nice work there and an inspiration to those of us who are about to embark on the journey. A special thanks for the progress pictures and insights. Stuff like that is gold. Tom Thanks Tom, messages like yours and others also help keep me motivated when things don't go so well! QUOTE(blabla914 @ Oct 28 2008, 11:02 AM) good looking work. Lots of hard, dirty work to make those picts. One bit of advice I will give is reconsider your decision to delete the stock jack points. If you plan to run the car low, they are VERY handy. My first 914 had them deleted and I'll never do another without the jack points. My current car runs about 5 3/4" under the rockers. Even my relatively low profile Lincoln jack will not get under. Forget about your average craftsman jack. I use one of those thingys you put in the stock jack point and jack off of that. The stock jack also works very well if you get a flat on the road. Perhaps others will disagree, but if you have the parts put the jack points on. You should be able to trim the tube and weld it right to the plate you have put on and then put the cover on. That's how I did mine. Kelly Good point on the jack post delete, will think about that one, if only they made the upper half of the jack point easier to access. QUOTE(bandjoey @ Oct 28 2008, 09:53 PM) Now that it's many moons since the first coat of por15.....what's the scratch and dent hardness of the por in the pans and how's it holding up? Have you picked out a primer that's recommended with por? Thanks for letting me pick your brain. You're doing a Great job. I'm about 60 days behind you on a car that should have been finished a year ago. Funny how these drag on when wife and kids interfere with real man's work! Thanks Bill The POR15 seems to be holding up fine and has adhered really well to the metal, there were lots of opinions on the stuff but I think like everything else prep is key. As Charlie mentioned above the people who make POR15 also make tricoat primer to use with it, I will be trying that out later, everywhere else will get epoxy primer. |
|
|
|
| watsonrx13 |
Oct 29 2008, 12:33 PM
Post
#54
|
|
Advanced Member Group: Members Posts: 2,735 Joined: 18-February 03 From: Plant City, FL Member No.: 312 Region Association: South East States |
BTW, if you can't find the copper plate, go to LOWES/HD and in the plumbing dept get the copper pipes. Go home and pound them flat. It's cheaper and quicker than trying to find the copper plates...
-- Rob |
|
|
|
| my928s4 |
Nov 2 2008, 06:36 PM
Post
#55
|
|
Member Group: Members Posts: 349 Joined: 18-August 07 From: Spokane, WA Member No.: 8,018 Region Association: Pacific Northwest |
After removing the undercoating I printed the template from the Pelican write up and placed it as best as I could. The second side was more accurate (i.e. more level) but not too different. I then drilled pilot holes and the larger holes with one of those step drills.
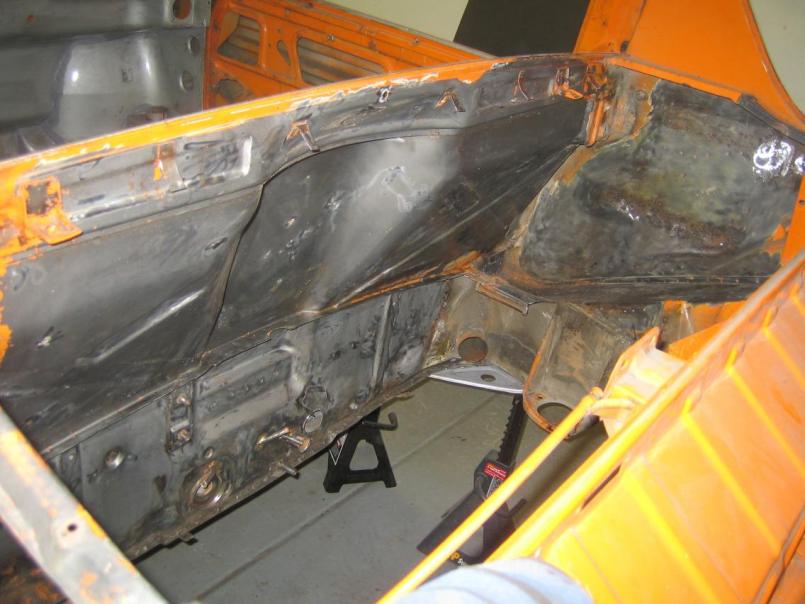
Inside I cut the metal parallel and then find I ran out of those small dremel blades to do the rest. I decided to wait on welding the brackets in place till I actually get the stabalizer just incase something needs adjusting. Nothing worse than removing welded parts after you have put them on. 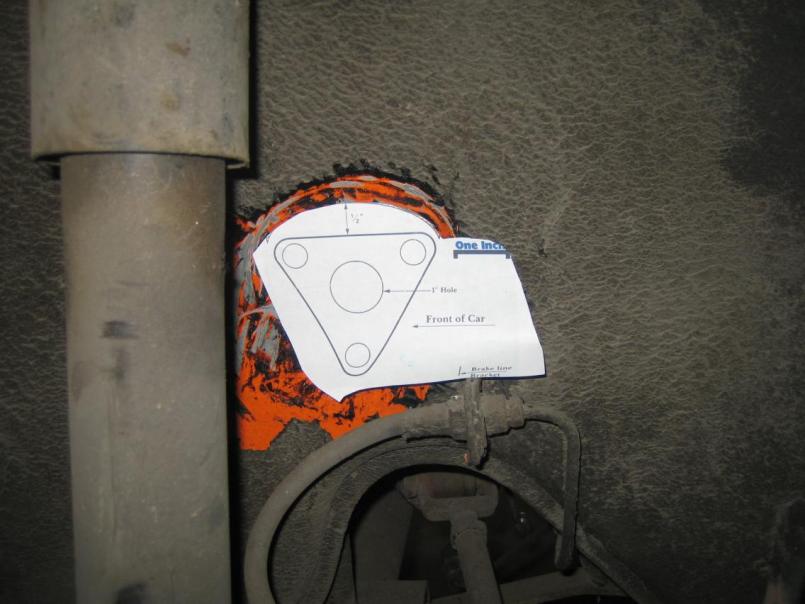 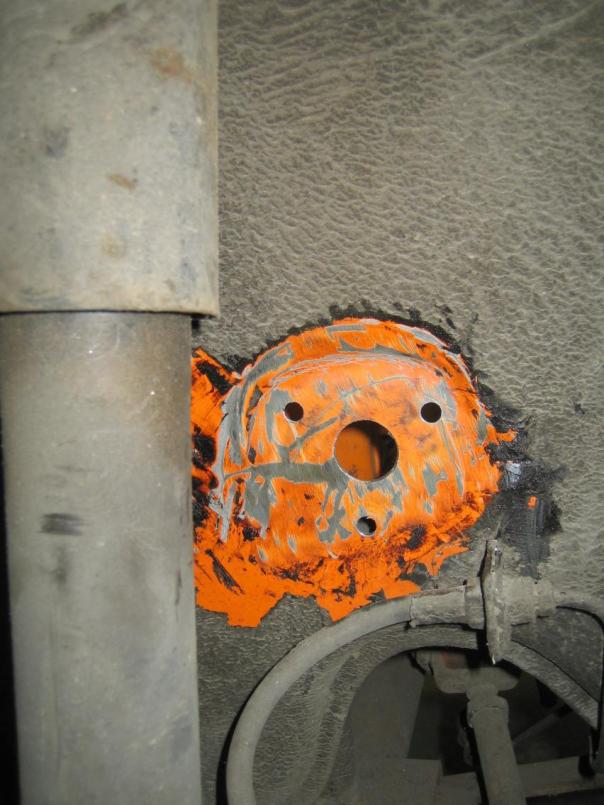 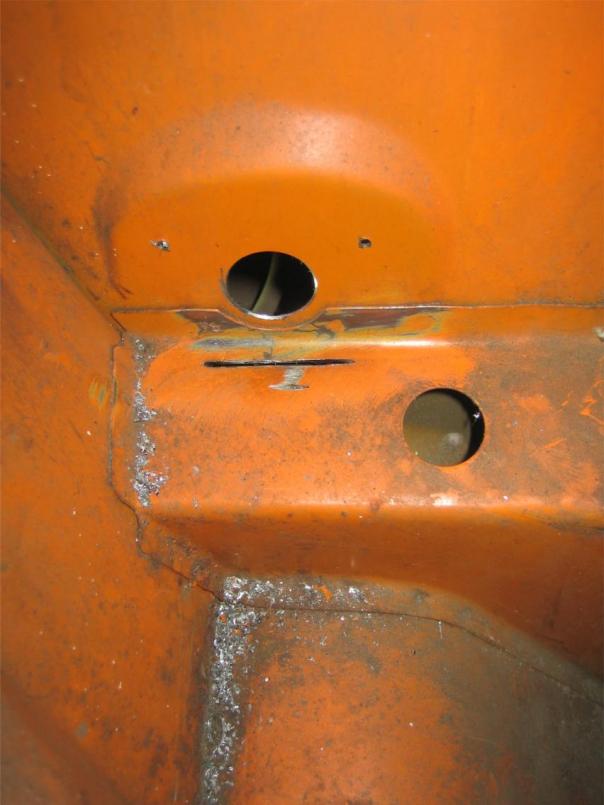 Next I started to remove some of the engine bay sheet metal which the Subie engine will not need, I was partly motivated to do this so I could get a better weld on part of the GT kit at the same time. While I was there I removed the underseal (getting better at it with the heat gun too) on the lower section and then got some paint stripper and cleaned it up. Attached thumbnail(s) 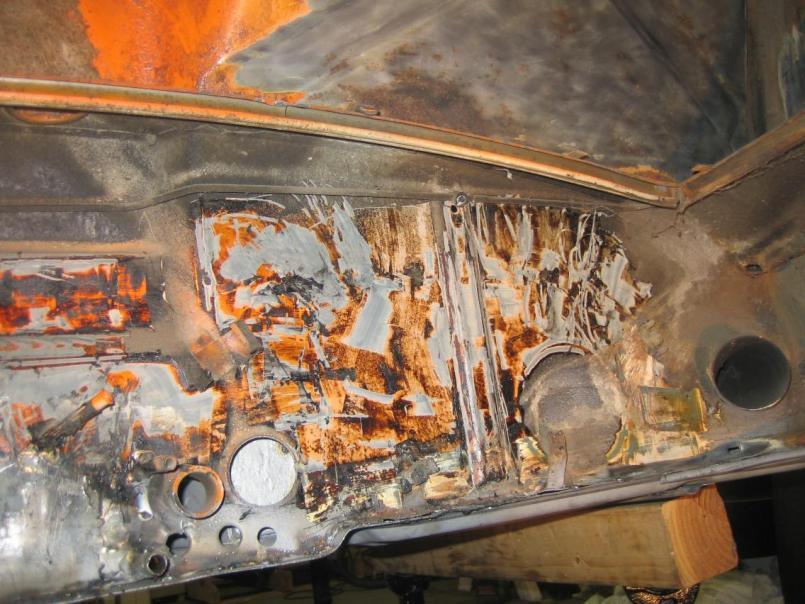
|
|
|
|
| my928s4 |
Nov 2 2008, 06:39 PM
Post
#56
|
|
Member Group: Members Posts: 349 Joined: 18-August 07 From: Spokane, WA Member No.: 8,018 Region Association: Pacific Northwest |
 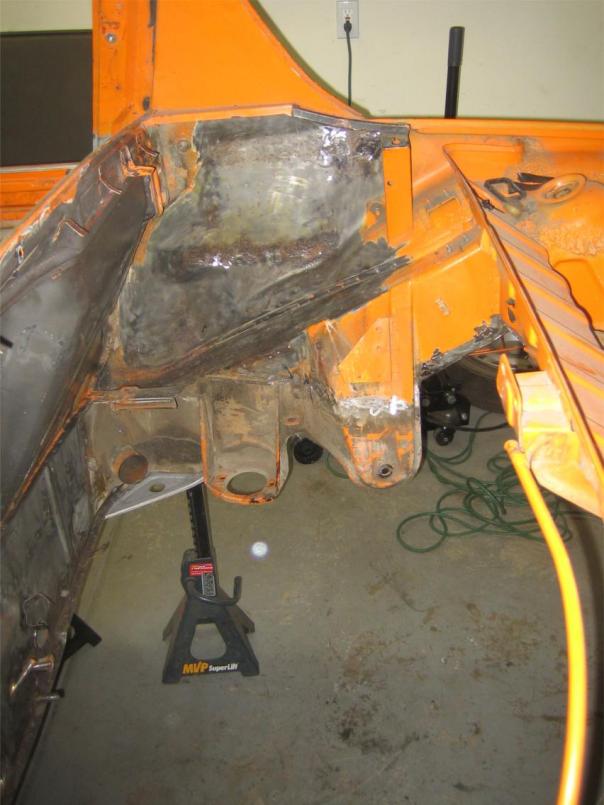  Last but not least I removed the front suspension, see where the bend on the control arm is? I think this was me (IMG:style_emoticons/default/headbang.gif) when I tied the car down on the trailer .... I think with the aid of a press I can straighten it out. Thoughts? 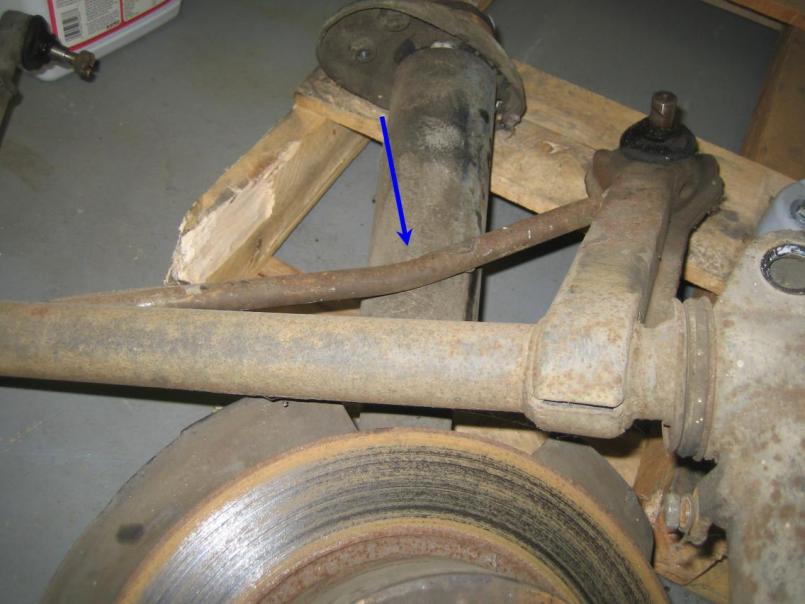 |
|
|
|
| bigkensteele |
Nov 2 2008, 11:02 PM
Post
#57
|
|
Major Member Group: Members Posts: 2,200 Joined: 30-August 04 From: Cincinnati, OH Member No.: 2,660 Region Association: South East States |
Please tell me that you are independently wealthy, unemployed, and without wife and kids. I have a '75 in similar condition (when you started) that I have had for almost 10 years. I probably had about 15 hours to work on it in that time.
Fantastic work - you are keeping my vision alive and the motivation building! Ken |
|
|
|
| my928s4 |
Nov 29 2008, 01:24 PM
Post
#58
|
|
Member Group: Members Posts: 349 Joined: 18-August 07 From: Spokane, WA Member No.: 8,018 Region Association: Pacific Northwest |
QUOTE(bigkensteele @ Nov 2 2008, 09:02 PM) Please tell me that you are independently wealthy, unemployed, and without wife and kids. I have a '75 in similar condition (when you started) that I have had for almost 10 years. I probably had about 15 hours to work on it in that time. Fantastic work - you are keeping my vision alive and the motivation building! Ken Pretty much no to all of the above, if you keep chipping away say an hour every evening when you can it is amazing what progress you can make. Tough when you leave it for a while ... well that is my story. Chris |
|
|
|
| my928s4 |
Nov 29 2008, 01:32 PM
Post
#59
|
|
Member Group: Members Posts: 349 Joined: 18-August 07 From: Spokane, WA Member No.: 8,018 Region Association: Pacific Northwest |
I was going to leave most of the underside which I had not touched, then I found that in a lot of places the underseal was pretty thin and just scraped off with little heat and in some cases just pealed away. So I got sidetracked from where I was at and started the messy and time consuming job of cleaning the underside.
For the moment I am thinking epoxy primer and then coat with some tintable bedliner, anyone have any experience with the bedliner? Here is the underside after I removed the underseal and ready for some stripper. 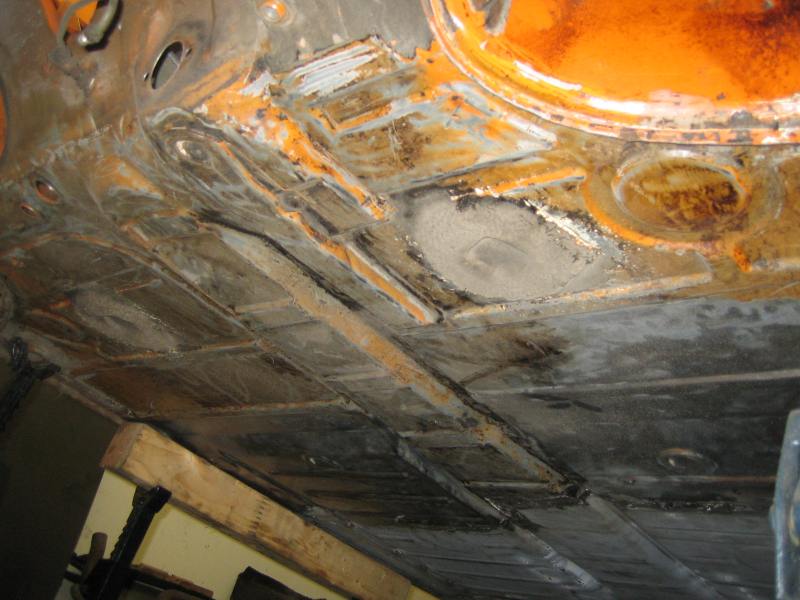 After final clean up, little bit more to do around the rear a-arm mount but apart from that, pretty much done. 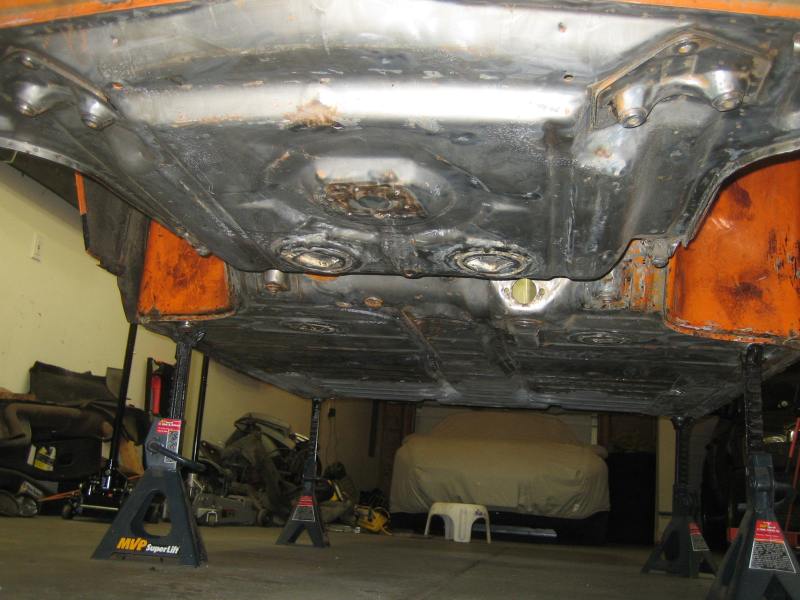 Now started on rear and this area is turning out to be more work as the underseal is in general thicker. Before: 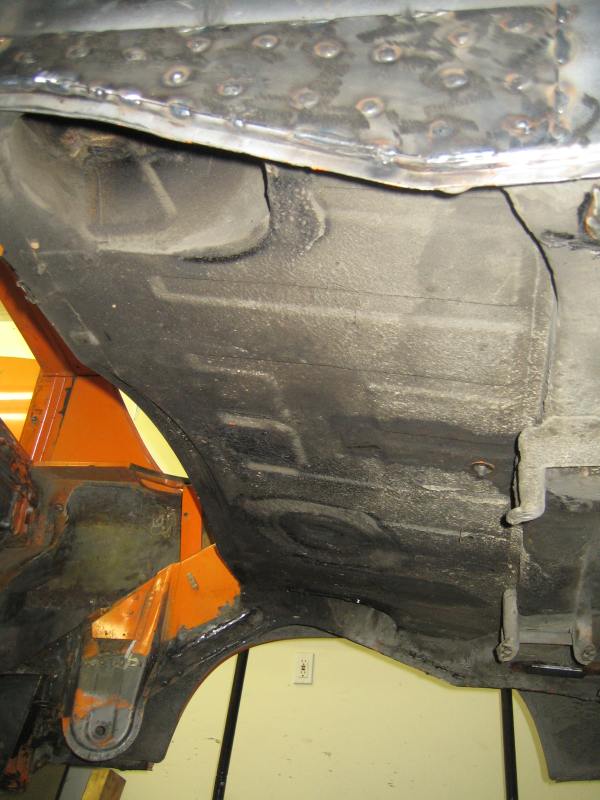 After removing some of the underseal, taking a break now to rally some more enthusiasm. 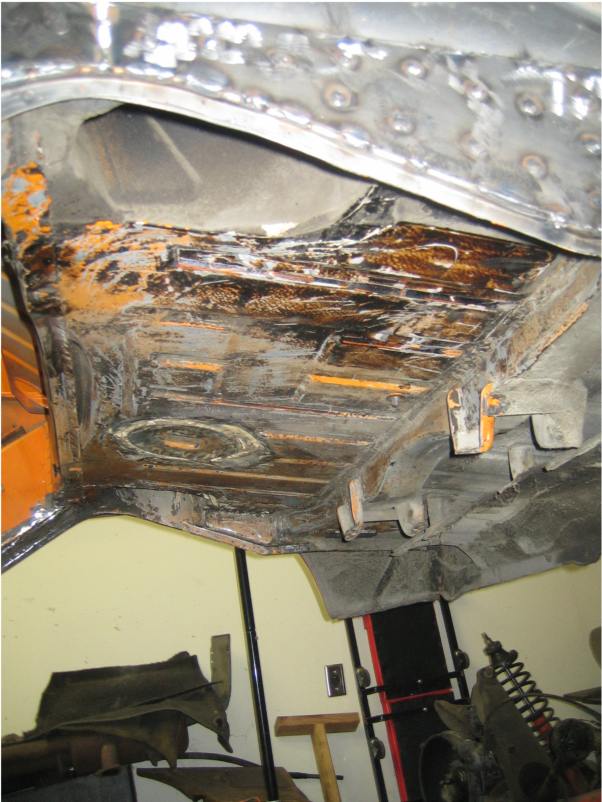 |
|
|
|
| Todd Enlund |
Nov 29 2008, 02:34 PM
Post
#60
|
|
Resident Photoshop Guru Group: Members Posts: 3,252 Joined: 24-August 07 From: Reed (Portland), Oregon Member No.: 8,032 Region Association: Pacific Northwest |
QUOTE(my928s4 @ Nov 2 2008, 04:39 PM) Last but not least I removed the front suspension, see where the bend on the control arm is? I think this was me (IMG:style_emoticons/default/headbang.gif) when I tied the car down on the trailer .... I think with the aid of a press I can straighten it out. Thoughts? Nice work! For peace of mind, I'd find another control arm. They are cheap when you consider how much work you've put into the rest of the car. There should be plenty of them around from guys that have parted cars installed 911 arms. I've got a welder and a pan on the way, so I'll be doing the same thing soon... |
|
|
|
|
1 User(s) are reading this topic (1 Guests and 0 Anonymous Users)
0 Members:

|
Lo-Fi Version | Time is now: 10th July 2026 - 09:03 AM |
Invision Power Board
v9.1.4 © 2026 IPS, Inc.