|
|
|
Porsche, and the Porsche crest are registered trademarks of Dr. Ing. h.c. F. Porsche AG.
This site is not affiliated with Porsche in any way. Its only purpose is to provide an online forum for car enthusiasts. All other trademarks are property of their respective owners. |
|
|

  |

| my928s4 |
 Nov 25 2007, 03:13 PM Nov 25 2007, 03:13 PM
Post
#1
|
|
Member  Group: Members Posts: 349 Joined: 18-August 07 From: Spokane, WA Member No.: 8,018 Region Association: Pacific Northwest |
So a couple months back I posted about getting a hold of the project candidate,
feel like I have moved on from that so thought it I would post some pics on progress and I will add to this thread as time (and progress) goes on. I did not get around to stripping the car down till earlier in the month as I drove my 928 down to Sharktoberfest in LA and I was performing last minute tinkering before the drive. Anyway back to 914 subject matter, the good news is I have not found too many issues which is a relief and I can start to order parts and make some investment in tools. It is a perfect time of year for indoor projects as it is below freezing all the time now and skiing does not start here till after xmas. Surface rust and dirt in the front trunk but that is about it, will need to repiar a couple of areas around the hood seal. 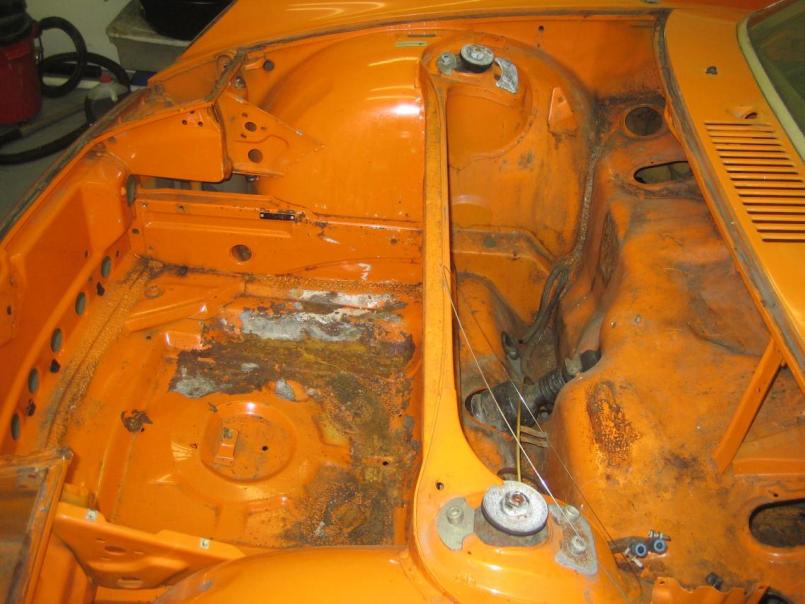 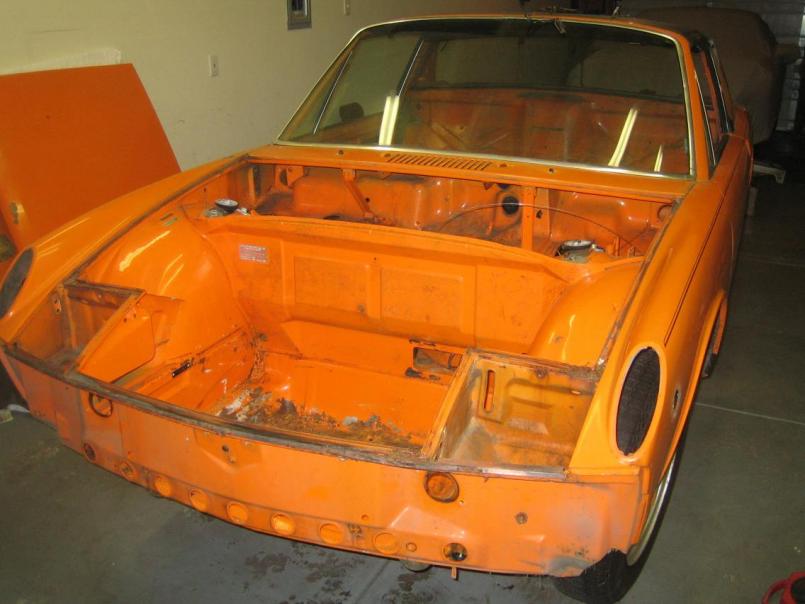  Chris |
   |

 
|
| my928s4 |
Nov 25 2007, 03:16 PM
Post
#2
|
|
Member Group: Members Posts: 349 Joined: 18-August 07 From: Spokane, WA Member No.: 8,018 Region Association: Pacific Northwest |
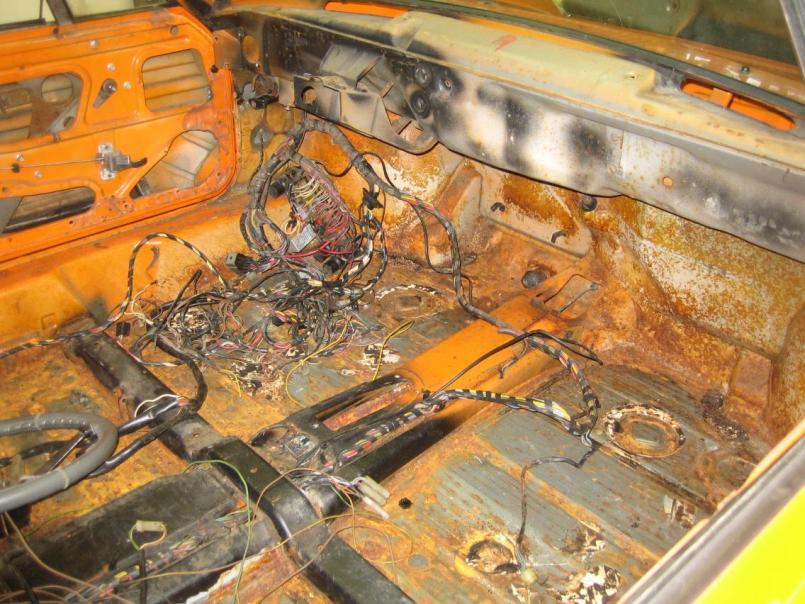
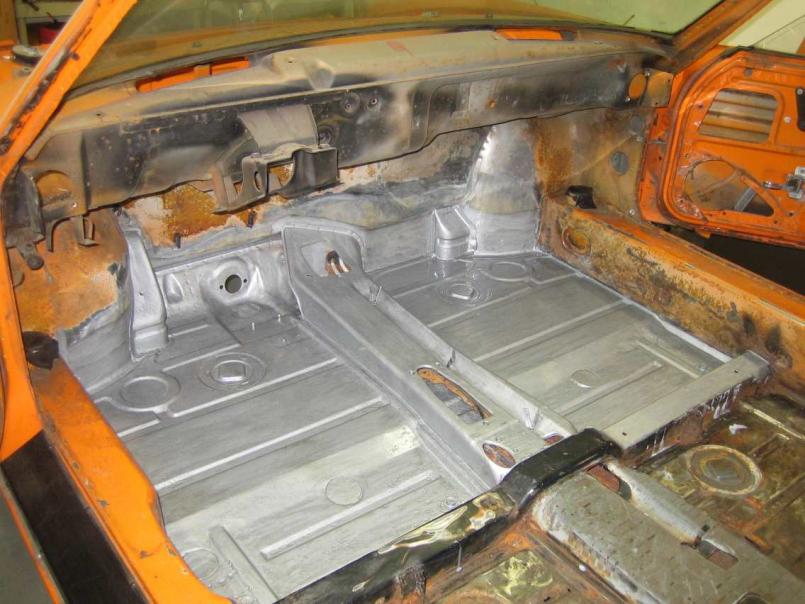
Interior needs a bit more work, car was in Seattle for some time in its life so water had found its way into the interior I guess. Rear pans will need patching, when I clean the area up will see how much good metal there is, right now just a couple of pin holes.
  Chris |
|
|
|
| my928s4 |
Nov 25 2007, 03:20 PM
Post
#3
|
|
Member Group: Members Posts: 349 Joined: 18-August 07 From: Spokane, WA Member No.: 8,018 Region Association: Pacific Northwest |
Some more surface rust around the pedals but everything else seems solid.
 I decided to remove the engine today, I was hoping for help but in the end decided to just do it myself. Could have done with another jack though, the universal joint on the gear shifter linkage could not be disassembled as the grub screw had been rounded by a PO. With the engine bar removed there was just enough room to pull out the whole assembly.  Chris |
|
|
|
| my928s4 |
Nov 25 2007, 03:24 PM
Post
#4
|
|
Member Group: Members Posts: 349 Joined: 18-August 07 From: Spokane, WA Member No.: 8,018 Region Association: Pacific Northwest |
Despite prodigous prodding with a large screwdriver I could not find any weak areas in the hell hole (IMG:style_emoticons/default/piratenanner.gif) .
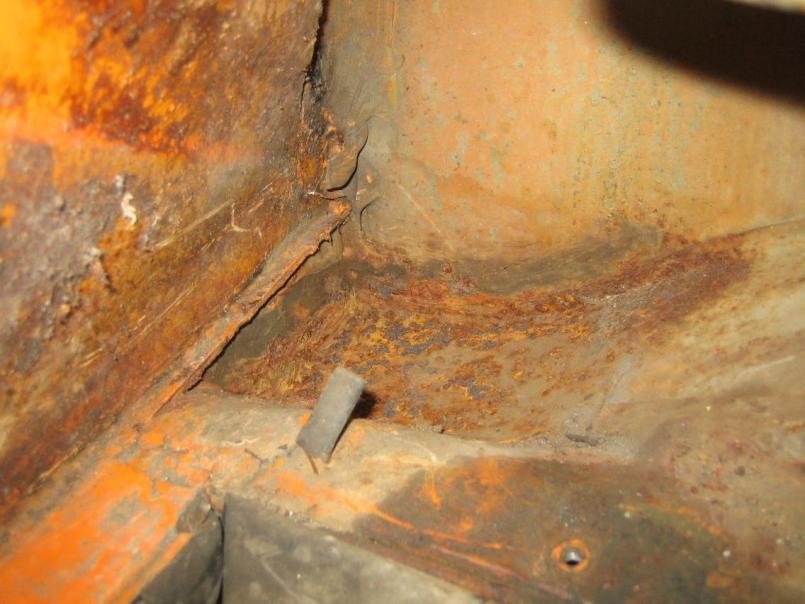 Someone has done a real nice bodge on the passenger side trunk pivot point. 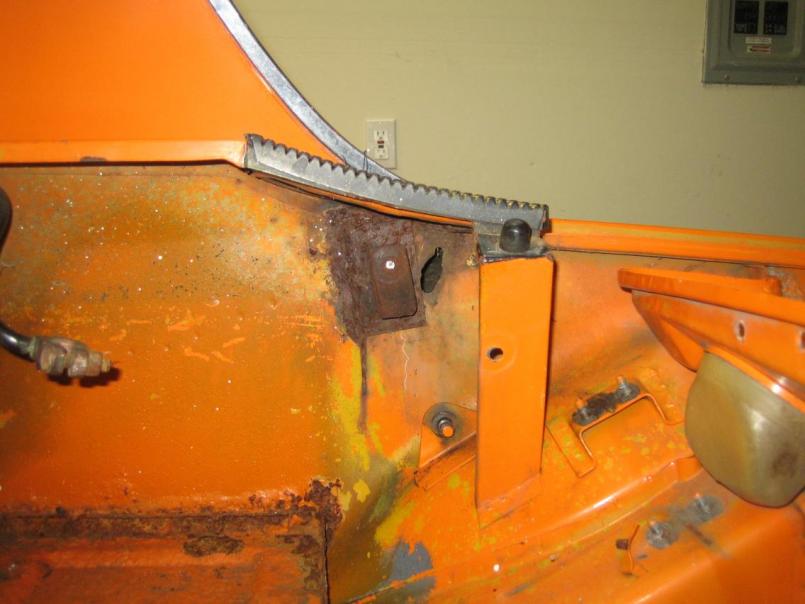 Need to do some more bagging and labelling of parts, remove the wiring harness and some small trim and then comes the messy stuff. Cleaning and metal work. Chris |
|
|
|
| orthobiz |
Nov 25 2007, 08:16 PM
Post
#5
|
|
Senior Member Group: Members Posts: 1,772 Joined: 8-January 07 From: Cadillac, Michigan Member No.: 7,438 Region Association: Upper MidWest |
I love orange! Keep posting progress and good luck!
Paul |
|
|
|
| DanT |
Nov 25 2007, 08:23 PM
Post
#6
|
|
Going back to the Dark Side! Group: Members Posts: 4,300 Joined: 4-October 04 From: Auburn, CA Member No.: 2,880 Region Association: None |
save the orange cars (IMG:style_emoticons/default/biggrin.gif)
keep up the good work...looks like you have a very solid project so far (IMG:style_emoticons/default/smile.gif) |
|
|
|
| 9146FAN |
Nov 25 2007, 10:04 PM
Post
#7
|
|
Member Group: Members Posts: 294 Joined: 20-July 04 From: ROSSMOOR, CA Member No.: 2,378 |
|
|
|
|
| my928s4 |
Dec 30 2007, 02:30 PM
Post
#8
|
|
Member Group: Members Posts: 349 Joined: 18-August 07 From: Spokane, WA Member No.: 8,018 Region Association: Pacific Northwest |
OK got a couple of hours in yesterday and today with my angle grinder and associated abrassive attachments, also made some progress in the engine bay but more on that tomorrow.
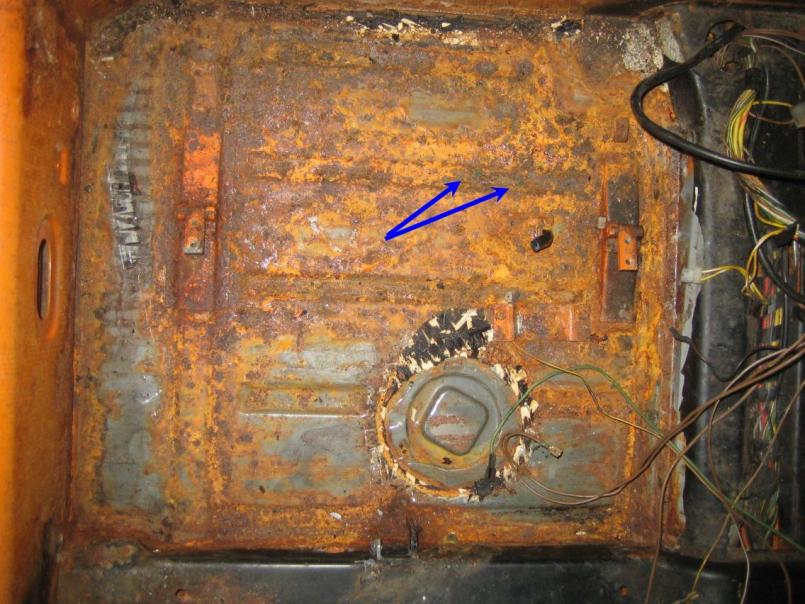
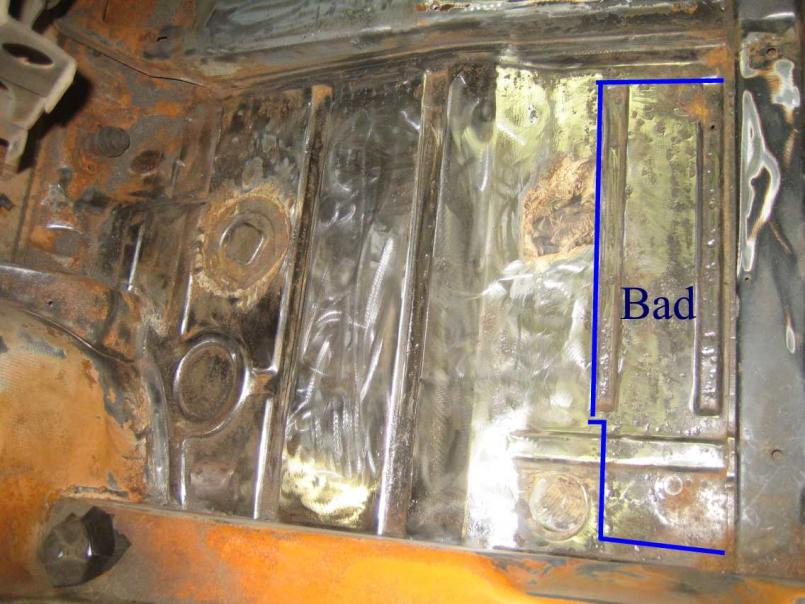
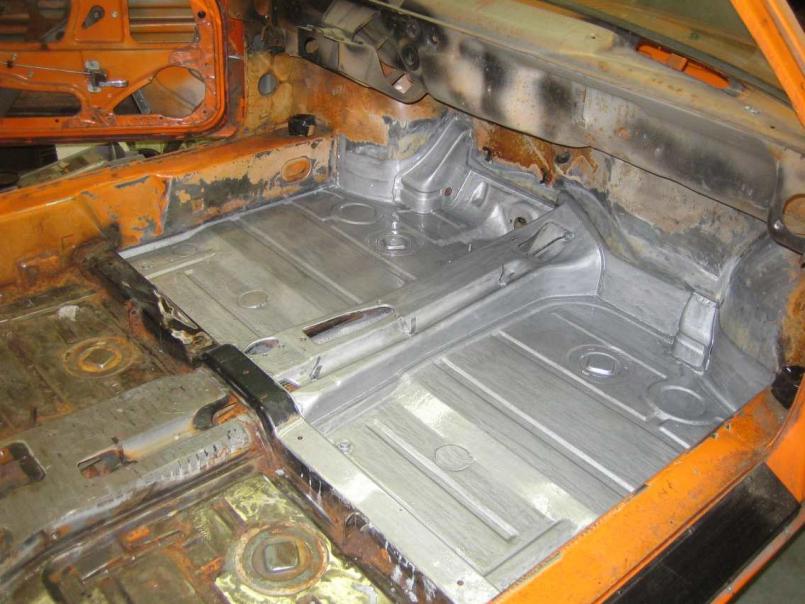
So after digging in deeper there are more holes than I thought, the metal in the rear pans is pretty thin although most of the metal around the edges is good except the passenger rear quarter. Some of the front of the drivers side pan is not so good but the majority is OK, front of the passenger is all good. Nice and shiny. All of this rot was from the inside, so a leaky cabin over the years was the culprit. Should I order front and back pans? Replace all of the rear and just the bit of the drivers side front that needs it? Just wondering what some of you have done. The ugly. 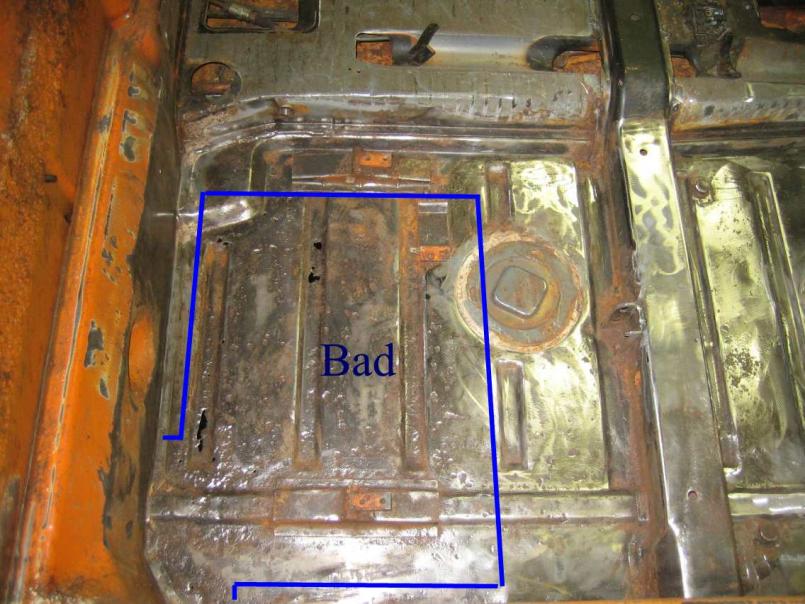 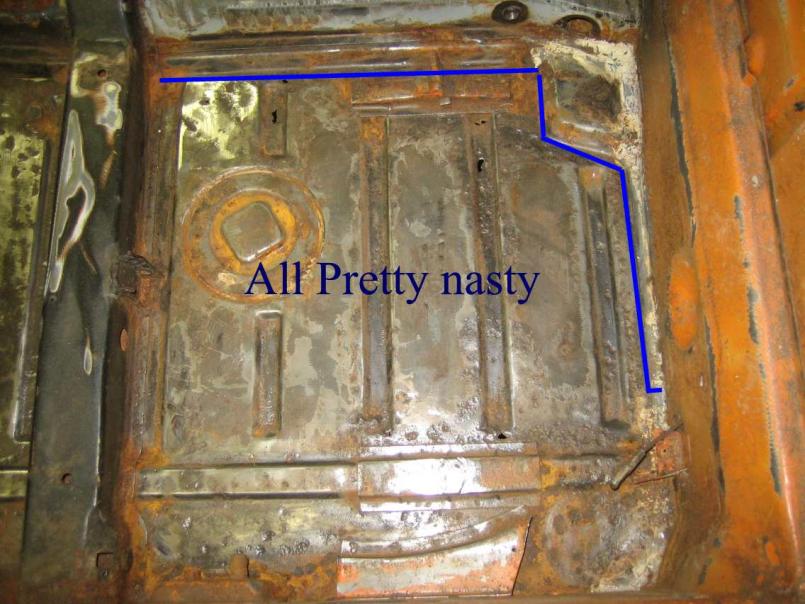 |
|
|
|
| my928s4 |
Dec 30 2007, 02:35 PM
Post
#9
|
|
Member Group: Members Posts: 349 Joined: 18-August 07 From: Spokane, WA Member No.: 8,018 Region Association: Pacific Northwest |
The bad
 The good 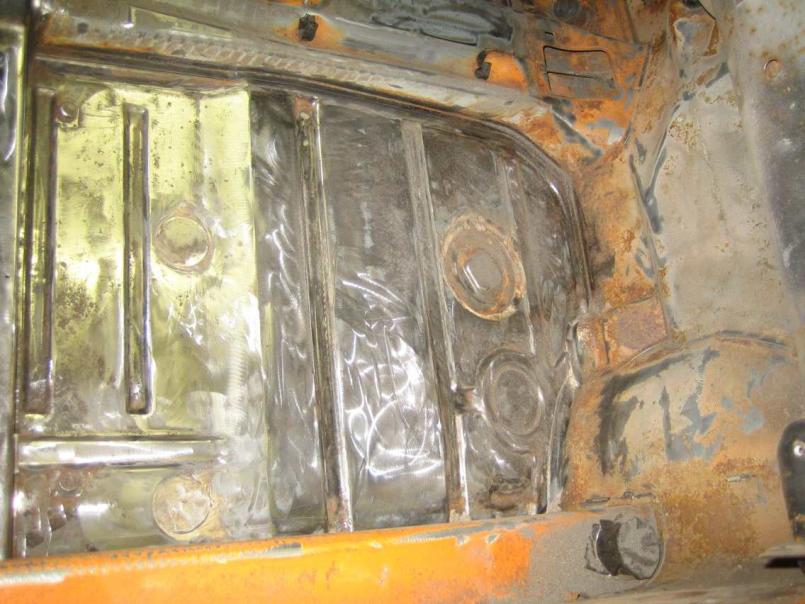 |
|
|
|
| my928s4 |
Dec 30 2007, 02:37 PM
Post
#10
|
|
Member Group: Members Posts: 349 Joined: 18-August 07 From: Spokane, WA Member No.: 8,018 Region Association: Pacific Northwest |
Messed up.
|
|
|
|
| scotty b |
Dec 30 2007, 05:18 PM
Post
#11
|
|
rust free you say ? Group: Members Posts: 16,375 Joined: 7-January 05 From: richmond, Va. Member No.: 3,419 Region Association: None |
rear pan section is definitely needed. IMHO that small area in front of the seat mount does not warrant a new pan section. You picture doesn't show any real damage there and I would recommend at the most making a small piece of metal to replace there instead of the cost and werk of a pan section.
|
|
|
|
| my928s4 |
Dec 30 2007, 07:13 PM
Post
#12
|
|
Member Group: Members Posts: 349 Joined: 18-August 07 From: Spokane, WA Member No.: 8,018 Region Association: Pacific Northwest |
QUOTE(scotty b @ Dec 30 2007, 03:18 PM)  rear pan section is definitely needed. IMHO that small area in front of the seat mount does not warrant a new pan section. You picture doesn't show any real damage there and I would recommend at the most making a small piece of metal to replace there instead of the cost and werk of a pan section. Thanks Scott, appreciate the input. There are two small pin holes in the front pan and the rest of the metal in the first indent is pretty thin but as you suggest it does seem a waste to get a new front pan for that small area. |
|
|
|
| my928s4 |
Dec 30 2007, 09:17 PM
Post
#13
|
|
Member Group: Members Posts: 349 Joined: 18-August 07 From: Spokane, WA Member No.: 8,018 Region Association: Pacific Northwest |
QUOTE(scotty b @ Dec 30 2007, 03:18 PM) rear pan section is definitely needed. IMHO that small area in front of the seat mount does not warrant a new pan section. You picture doesn't show any real damage there and I would recommend at the most making a small piece of metal to replace there instead of the cost and werk of a pan section. Thanks for the feedback, I tend to agree a complete front pan seems a little extreme for that small patch. Just wanted to check, there are a couple of small holes and the metal is pretty thin in that area. |
|
|
|
| McMark |
Dec 30 2007, 10:59 PM
Post
#14
|
|
914 Freak! Group: Retired Admin Posts: 20,180 Joined: 13-March 03 From: Grand Rapids, MI Member No.: 419 Region Association: None |
I would section in the rear pan, not do a complete job. Removal is a PITA and it would be better to just leave enough to butt weld the whole section.
|
|
|
|
| my928s4 |
Jan 13 2008, 05:51 PM
Post
#15
|
|
Member Group: Members Posts: 349 Joined: 18-August 07 From: Spokane, WA Member No.: 8,018 Region Association: Pacific Northwest |
So while making progress with the grinder and wire brush is the right thing to do it can sometimes get a bit depressing finding more areas that need work so I decided to do something that looked like forward progress.
I have been reading a lot of the archived threads on rust prevention and if I had the equipment I would use epoxy primer, but I don't (yet) so I bought a POR15 starter kit and thought I would try it out. I used the Marine Clean on the front pan area followed by the Metal Ready and that was fairly painless. Pan after Marine Clean and Metal Ready  I then followed with the first coat of POR-15 Silver. 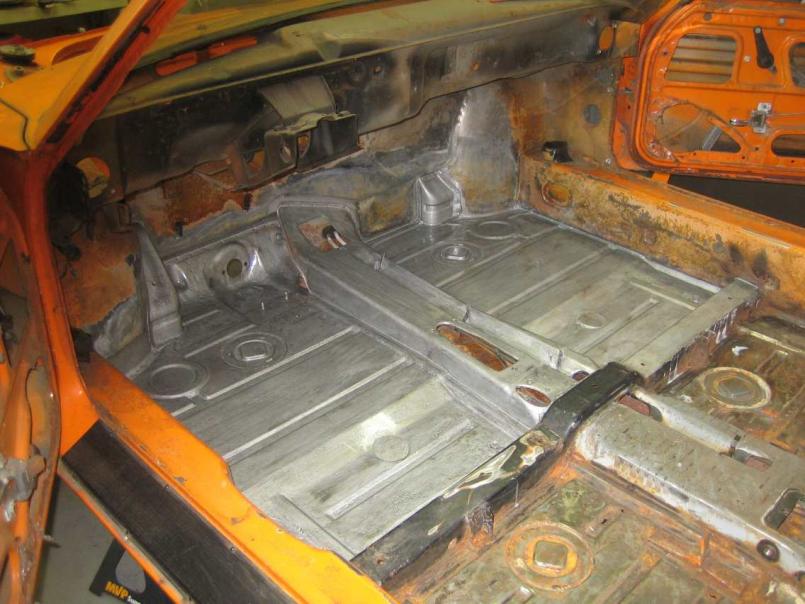 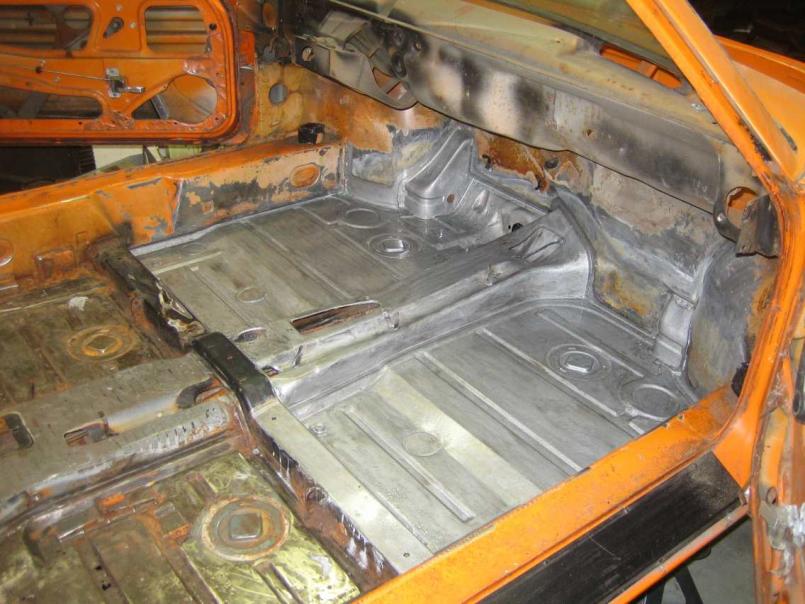 |
|
|
|
| my928s4 |
Jan 13 2008, 05:55 PM
Post
#16
|
|
Member Group: Members Posts: 349 Joined: 18-August 07 From: Spokane, WA Member No.: 8,018 Region Association: Pacific Northwest |
And then a 2nd coat, looked pretty good so I will finish of the interior with this followed by primer and color later.
  |
|
|
|
| my928s4 |
Jan 13 2008, 05:59 PM
Post
#17
|
|
Member Group: Members Posts: 349 Joined: 18-August 07 From: Spokane, WA Member No.: 8,018 Region Association: Pacific Northwest |
OK, couple of questions.
What should I do with the driver side jack post? This area looks to be lacking in rust but metal fatigue seems to be an issue, any suggestions? I searched the archives and there did not seem to be an easy way to gain access to the upper portion of the jack post to remove. Maybe I am missing something obvious. 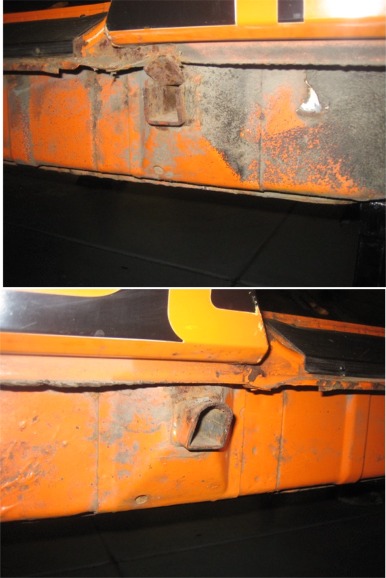 Drivers side sail panel, no doubt this looks a lot worse underneath, do I need to replace the whole part of just cut out the bit that needs replacing? 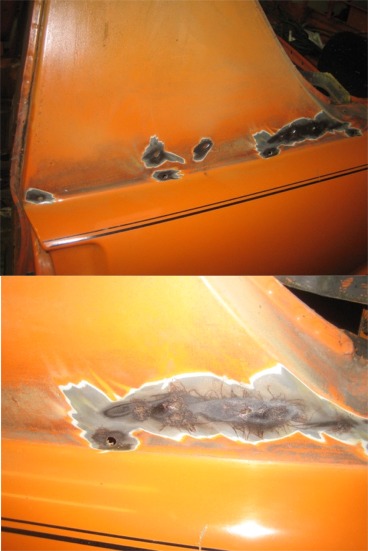 Next week I am going to pick up my welder, order the rear floor panel and Engman kit. Should keep me busy for a while. |
|
|
|
| scotty b |
Jan 13 2008, 06:48 PM
Post
#18
|
|
rust free you say ? Group: Members Posts: 16,375 Joined: 7-January 05 From: richmond, Va. Member No.: 3,419 Region Association: None |
IMO the jack post should ALWAYS be cut out as they tend to rust from the inside and you can't see what is going on until it is to late. Drill out the spot welds and if all is good, treat it and re-weld the metal back in using the original spot weld holes. Floor is looking good !! (IMG:style_emoticons/default/aktion035.gif)
|
|
|
|
| finstermojo |
Jan 13 2008, 08:12 PM
Post
#19
|
|
Newbie Group: Members Posts: 40 Joined: 10-November 07 From: new york Member No.: 8,314 |
When i did my resto and did the same thing you are doing i had mixed results with the POR15 and stopped using it sometimes it would peel right off like a sheet of paper and with more research i found it happed to others too. I found Rust Bullet and sprayed the entire underneath of my car with it and it was 100 times better it flowed better dried better and is so much more reliable without having to go through the process that you have to go through with POR15 I live on the ocean and everything rusts around here and i started using this on everything and it works great. Ive used them both and Rust bullet is simpler and better. I once had a can dry up on me and the paint was like steel . The other part about it is you can paint on top of it without the hassle
http://www.rustbullet.com/index.htm?source...KWID=4205382011 |
|
|
|
| my928s4 |
Jan 14 2008, 08:36 AM
Post
#20
|
|
Member Group: Members Posts: 349 Joined: 18-August 07 From: Spokane, WA Member No.: 8,018 Region Association: Pacific Northwest |
QUOTE(scotty b @ Jan 13 2008, 04:48 PM) IMO the jack post should ALWAYS be cut out as they tend to rust from the inside and you can't see what is going on until it is to late. Drill out the spot welds and if all is good, treat it and re-weld the metal back in using the original spot weld holes. Floor is looking good !! (IMG:style_emoticons/default/aktion035.gif) OK, I guess I can decide if I want to delete them permanently as well. So how do you get access to the spot weld at the top of the plate? |
|
|
|
|
1 User(s) are reading this topic (1 Guests and 0 Anonymous Users)
0 Members:

|
Lo-Fi Version | Time is now: 28th July 2026 - 03:31 AM |
Invision Power Board
v9.1.4 © 2026 IPS, Inc.