|
|
|
Porsche, and the Porsche crest are registered trademarks of Dr. Ing. h.c. F. Porsche AG.
This site is not affiliated with Porsche in any way. Its only purpose is to provide an online forum for car enthusiasts. All other trademarks are property of their respective owners. |
|
|

  |

| Spoke |
 Jun 21 2010, 09:13 PM Jun 21 2010, 09:13 PM
Post
#141
|
|
Jerry  Group: Members Posts: 6,983 Joined: 29-October 04 From: Allentown, PA Member No.: 3,031 Region Association: None |
Welded and ground down the 2 patches on the driver side.
Attached image(s) 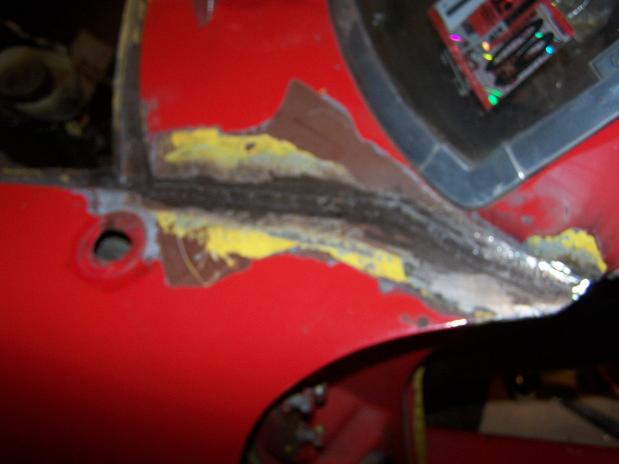 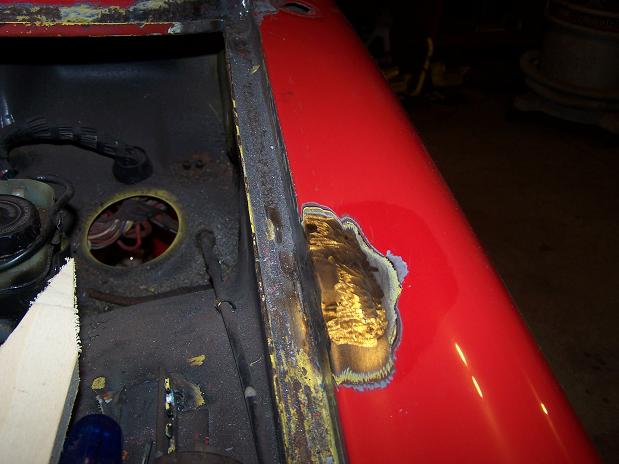
|
   |

 
|
| Spoke |
Jun 21 2010, 09:16 PM
Post
#142
|
|
Jerry Group: Members Posts: 6,983 Joined: 29-October 04 From: Allentown, PA Member No.: 3,031 Region Association: None |
Next project is the passenger side corner drip edge. This side was rusted more than the driver side and I had to remove a large chunk of the cowl.
Attached image(s) 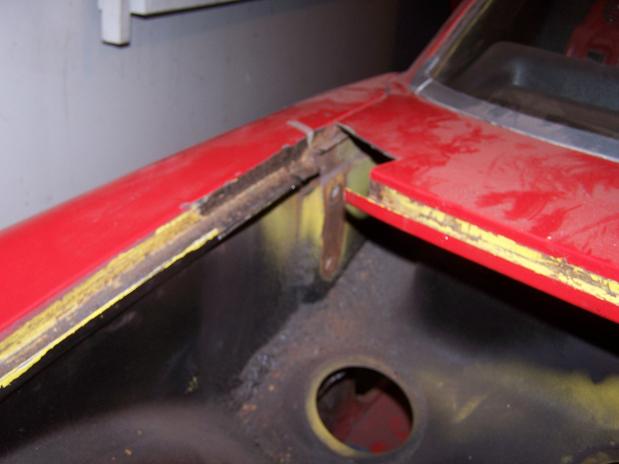
|
|
|
|
| Spoke |
Jun 21 2010, 09:30 PM
Post
#143
|
|
Jerry Group: Members Posts: 6,983 Joined: 29-October 04 From: Allentown, PA Member No.: 3,031 Region Association: None |
So after about 3 months of contemplation of how to make this one piece with its bends and arches and one failed mock up, I decided to make it out of 4 pieces of steel and weld it together.
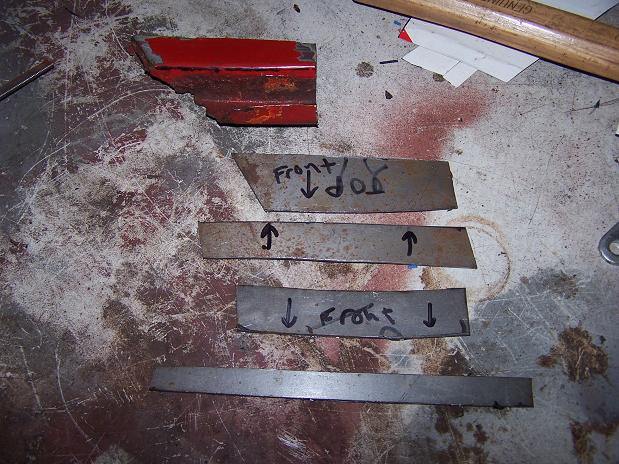 The fabrication time was probably about 2 hours and turned out great. I'll weld the inside lip after placing the main patch. 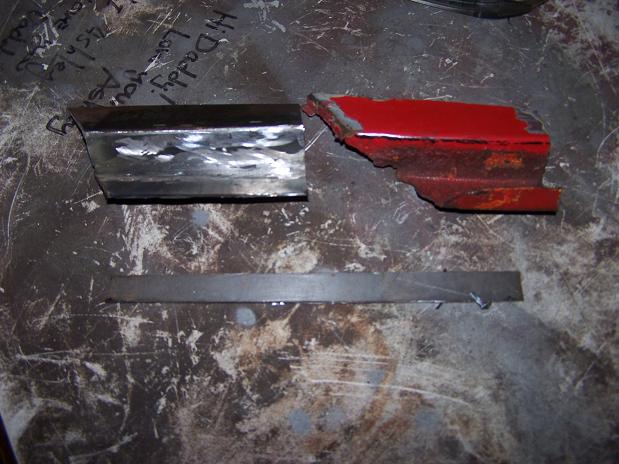 |
|
|
|
| Spoke |
Jun 28 2010, 08:15 PM
Post
#144
|
|
Jerry Group: Members Posts: 6,983 Joined: 29-October 04 From: Allentown, PA Member No.: 3,031 Region Association: None |
Welded the drip edge in. Not my best work but it will do.
Attached image(s)  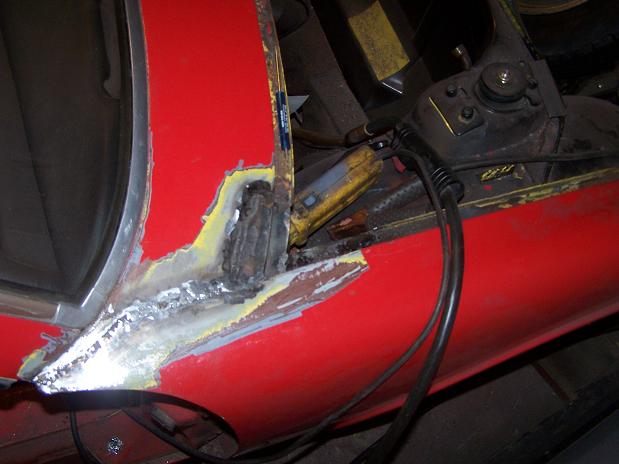 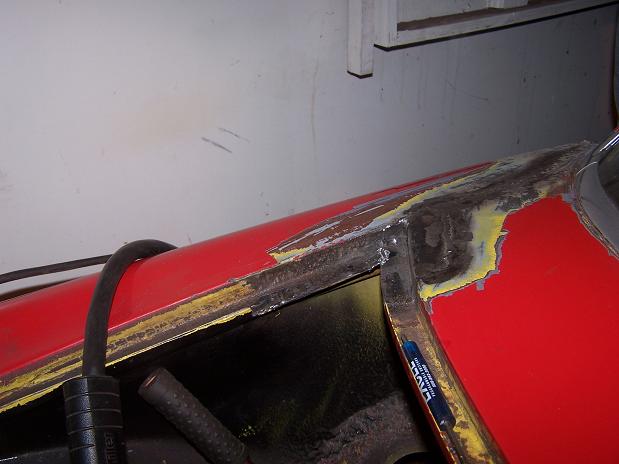
|
|
|
|
| Spoke |
Jun 28 2010, 10:08 PM
Post
#145
|
|
Jerry Group: Members Posts: 6,983 Joined: 29-October 04 From: Allentown, PA Member No.: 3,031 Region Association: None |
Welded the angle iron to stiffen the hood shock mount and welded the drip channel lip. Still need to clean up the welds.
Attached image(s) 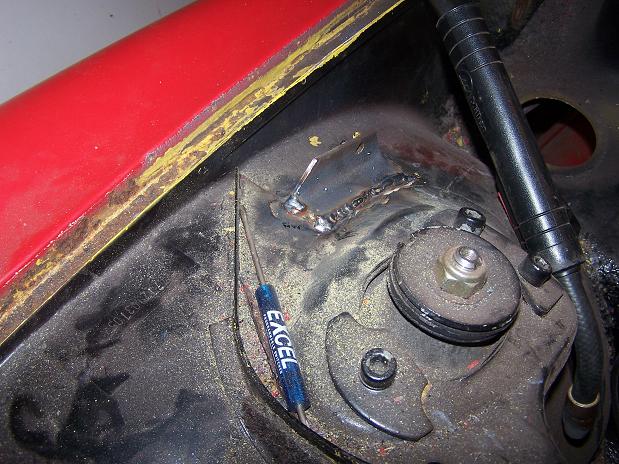 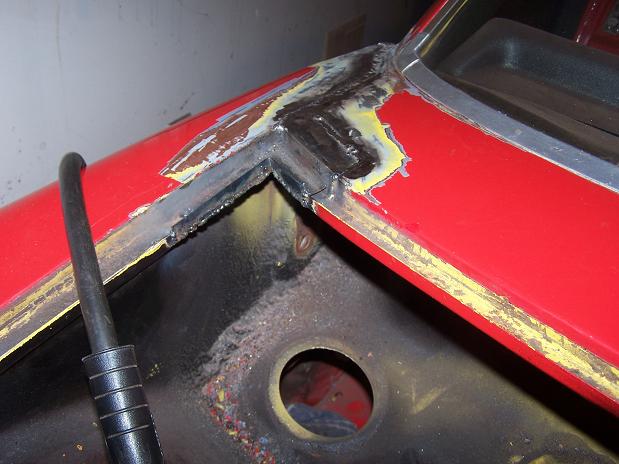
|
|
|
|
| Spoke |
Jul 1 2010, 04:33 AM
Post
#146
|
|
Jerry Group: Members Posts: 6,983 Joined: 29-October 04 From: Allentown, PA Member No.: 3,031 Region Association: None |
Cut out the trap door for the fuel pump. Since the inside of the trunk was painted black and my black magic marker doesn't show up, I cut out the correct size of the hole from card stock, taped in place, then sprayed silver paint to outline.
Once cut out, I used the piece from the hole and backed it up with a larger piece of 16ga steel. I'll drill 4 holes for bolts in the corners and weld nuts on the inside to secure the door. I thought seam welding the cutout to the new steel would be easy but I forgot to clean off the backside of the cutout and the paint that burned off during welding really made the job messy. What an ass. Attached image(s) 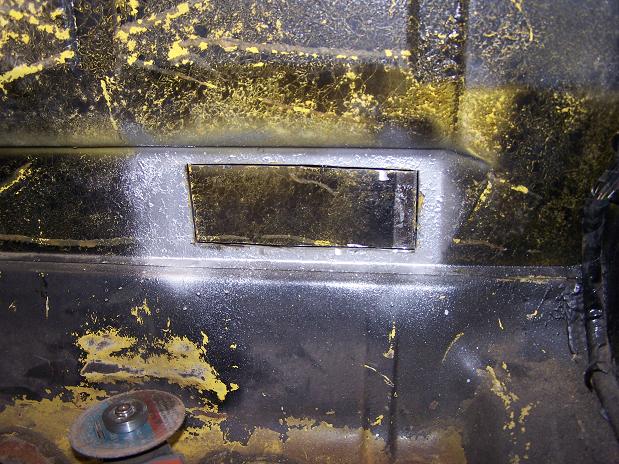 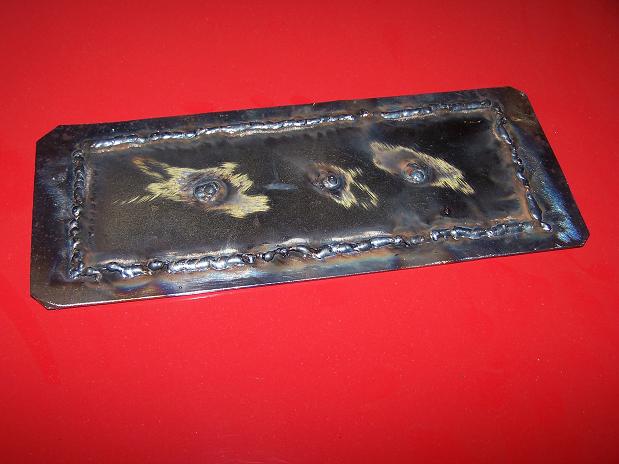
|
|
|
|
| FourBlades |
Jul 1 2010, 06:24 AM
Post
#147
|
|
From Wreck to Rockin Group: Members Posts: 2,054 Joined: 3-December 07 From: Brevard, FL Member No.: 8,414 Region Association: South East States |
Nice repair work man. (IMG:style_emoticons/default/smilie_pokal.gif) That cowl area is a real pain to fix. John |
|
|
|
| Spoke |
Jul 2 2010, 05:42 AM
Post
#148
|
|
Jerry Group: Members Posts: 6,983 Joined: 29-October 04 From: Allentown, PA Member No.: 3,031 Region Association: None |
Fuel pump door is in. Drilled 4 holes for bolts and welded the nuts on the inside of fuel tank area.
Now I need to source a mount for the fuel pump. Anyone have a rubber mount for the fuel pump that they want to sell? Next job is to run the wires for the fuel pump from the engine compartment to the front. Attached image(s) 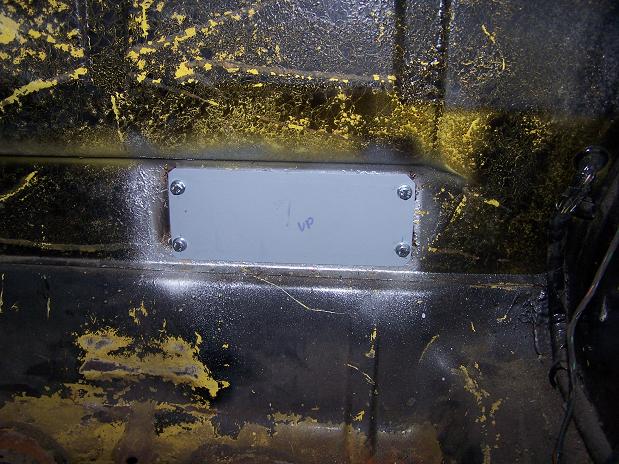 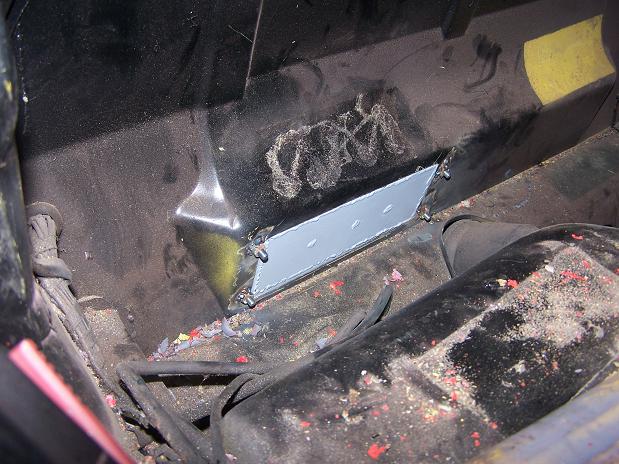
|
|
|
|
| Spoke |
Jul 4 2010, 12:46 PM
Post
#149
|
|
Jerry Group: Members Posts: 6,983 Joined: 29-October 04 From: Allentown, PA Member No.: 3,031 Region Association: None |
Ran new hard brake lines in the engine compartment. Replaced the prop valve as I plan to 5-lug at some time with 911 front end.
The PO's mechanic had cobbled together the hard lines to each swing arm from smaller pieces of tubing. The passenger hard line was actually 3 small pieces with connectors and the driver side had 2 pieces. Once the brake lines were connected, I was finally able to remove the stick holding the brake pedal in. The stick had been there for over a year... I did pull a damn PO move though with the T. I couldn't find a metric T locally so I used an SAE T with SAE threads. So the end of each line to the T has SAE connectors and the ends to the tunnel and each swing arm has metric. Damn PO! Attached image(s) 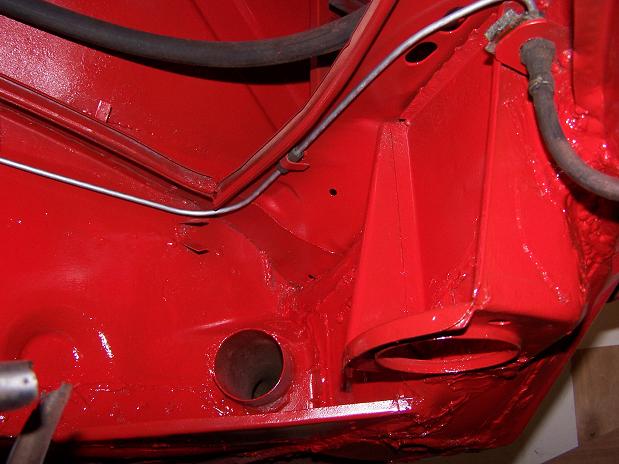 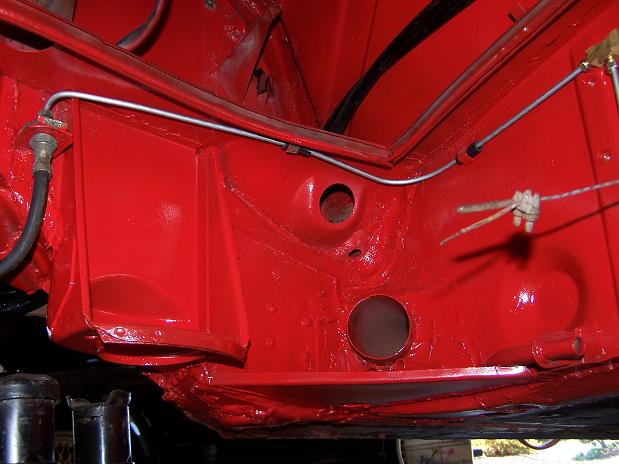 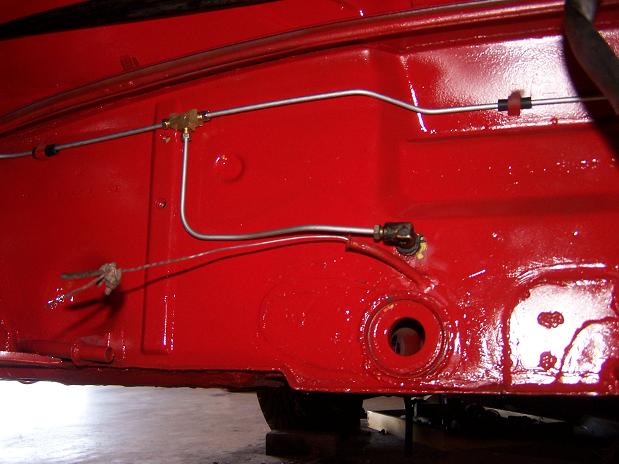
|
|
|
|
| Spoke |
Jul 4 2010, 02:18 PM
Post
#150
|
|
Jerry Group: Members Posts: 6,983 Joined: 29-October 04 From: Allentown, PA Member No.: 3,031 Region Association: None |
Hole, what hole? Since I will plumb the gas tank so that it can be lifted out without disconnecting fuel lines, the access hole is not needed.
Attached image(s) 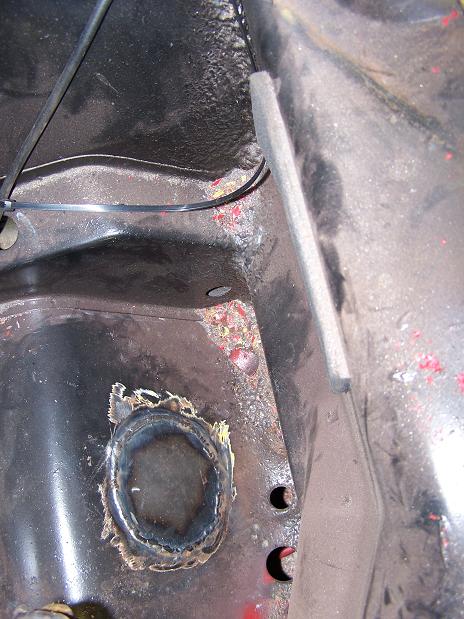
|
|
|
|
| Spoke |
Jul 8 2010, 11:38 PM
Post
#151
|
|
Jerry Group: Members Posts: 6,983 Joined: 29-October 04 From: Allentown, PA Member No.: 3,031 Region Association: None |
Done welding and paint stripping in the tank compartment. I didn't remove all the original yellow paint in the compartment but at least the nasty black paint is gone.
I'll continue sanding in the compartment and start bodywork to smooth over the welds and clean up the rain channels. It seems that inside the tank compartment there is no primer underneath the original yellow paint. Attached image(s) 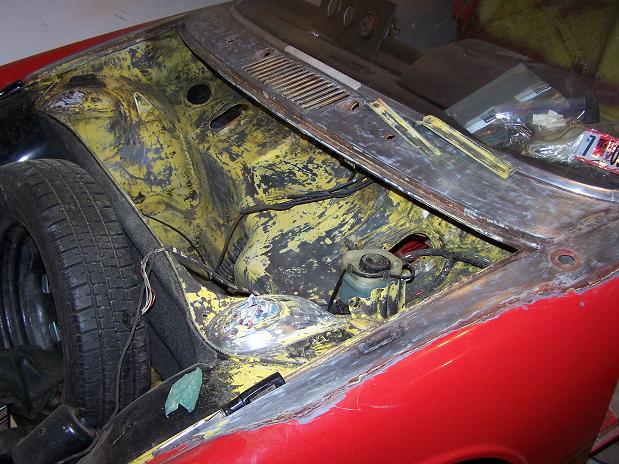 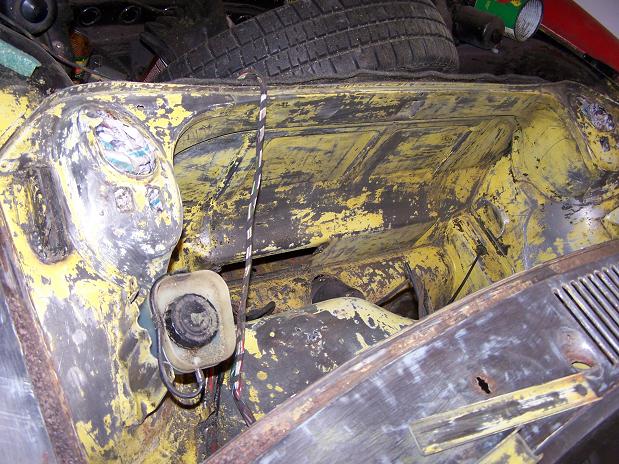 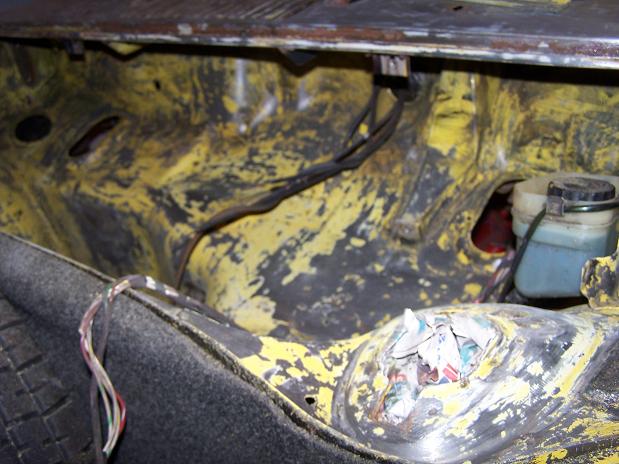
|
|
|
|
| Spoke |
Jul 10 2010, 01:01 PM
Post
#152
|
|
Jerry Group: Members Posts: 6,983 Joined: 29-October 04 From: Allentown, PA Member No.: 3,031 Region Association: None |
I thought I was done with the welding in the tank compartment until I started wirewheeling the channel and had several large holes in the channel floor.
The piece of wood sets the width of the channel since the outer lip is not supported by anything now. 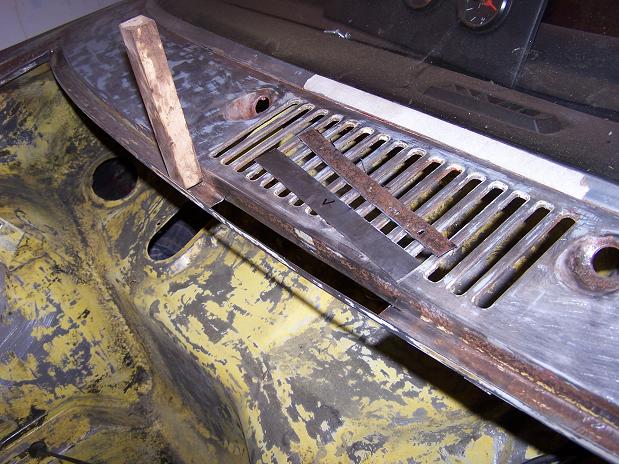 New floor welded in. 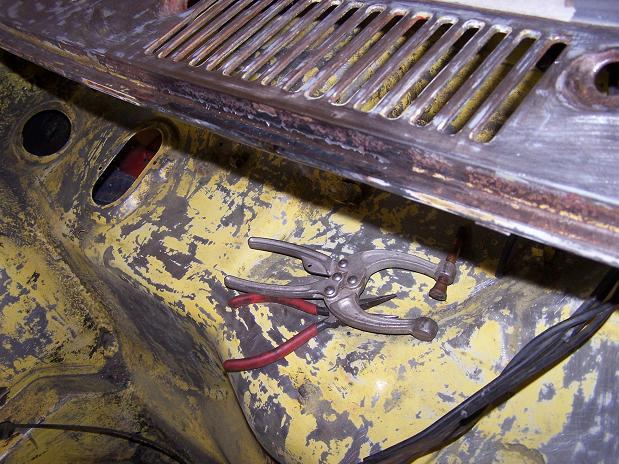 I decided to get rid of the antenna mast so antenna hole is welded closed. 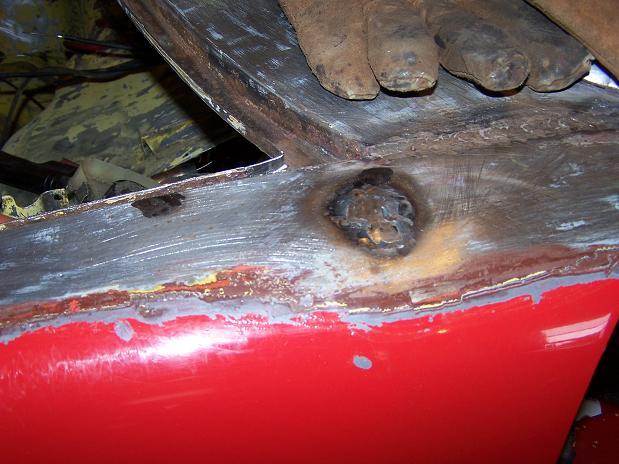 |
|
|
|
| Spoke |
Jul 11 2010, 08:27 PM
Post
#153
|
|
Jerry Group: Members Posts: 6,983 Joined: 29-October 04 From: Allentown, PA Member No.: 3,031 Region Association: None |
Closed up the hole for the antenna into the tank compartment.
Attached image(s) 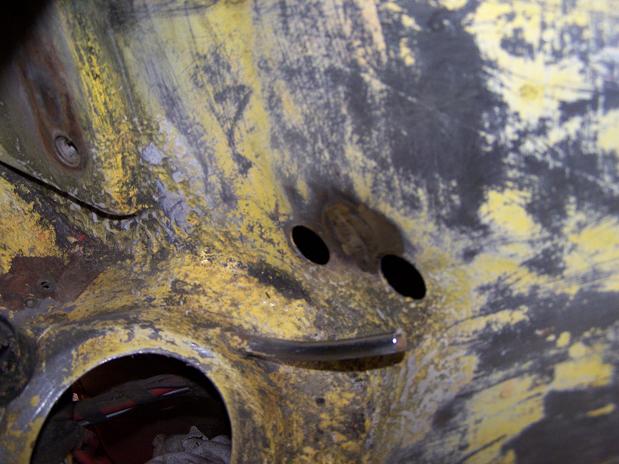
|
|
|
|
| Spoke |
Jul 11 2010, 10:58 PM
Post
#154
|
|
Jerry Group: Members Posts: 6,983 Joined: 29-October 04 From: Allentown, PA Member No.: 3,031 Region Association: None |
The e-brake cables were broken when I purchased the car. The adjustment ferrule for both cables had been snapped and the cables dangled a bit as they exited the firewall. Today's job is to weld the adjustment screw back together.
Since the adjustment point was right where the break was on each cable, I have to cut back the portion attached to the cable like the cable on the top in the photo.  To get the two pieces straight, I used an angle iron and some clamps to start the welding. 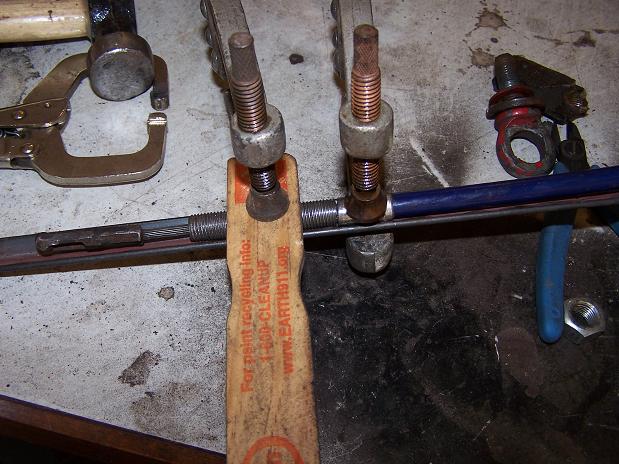 I welded each piece with just a little dot of weld then let the screw cool so I didn't overheat the steel and plastic sheath of the cable. Both cables came out good and are ready for reassembly. 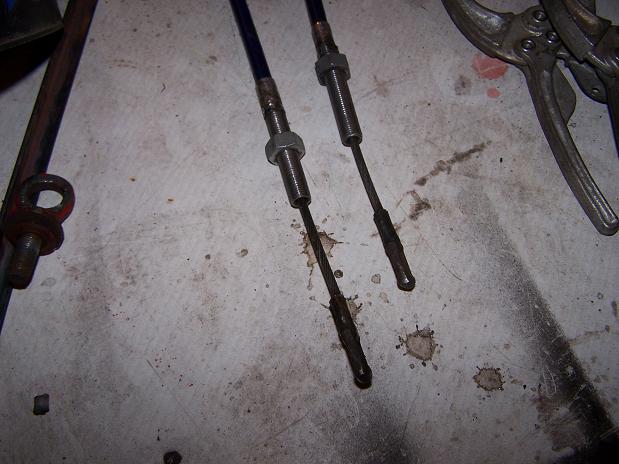 |
|
|
|
| Spoke |
Aug 1 2010, 08:04 PM
Post
#155
|
|
Jerry Group: Members Posts: 6,983 Joined: 29-October 04 From: Allentown, PA Member No.: 3,031 Region Association: None |
All the metal work is done around the gas tank. Now smoothing everything out with bondo. It doesn't bother me to use body filler as long as it's to smooth out solid metal.
Got it where I want now. Need to do a skim coat and some contrast primering to get it just right. Attached image(s) 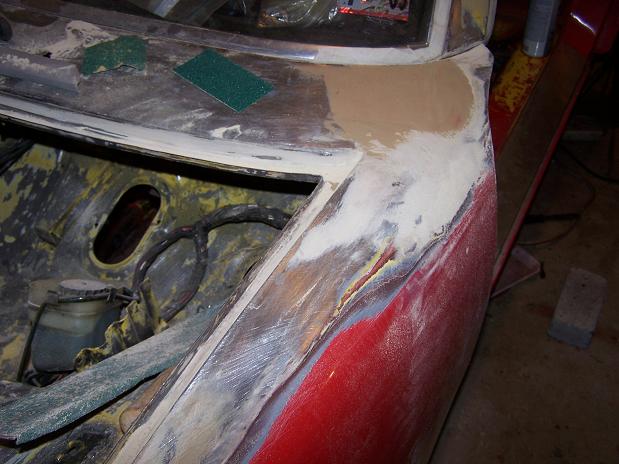 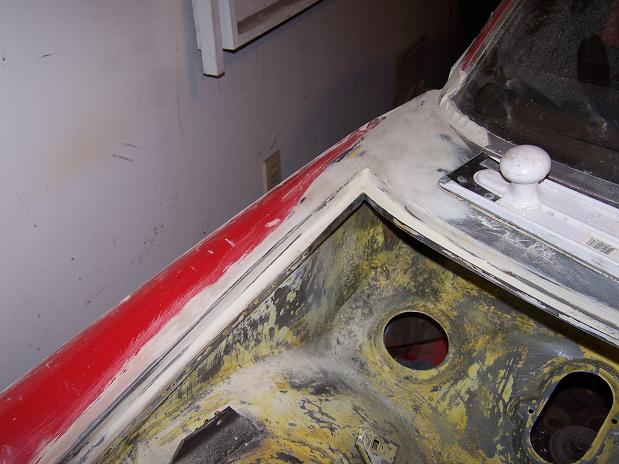
|
|
|
|
| Spoke |
Aug 1 2010, 08:07 PM
Post
#156
|
|
Jerry Group: Members Posts: 6,983 Joined: 29-October 04 From: Allentown, PA Member No.: 3,031 Region Association: None |
Mounted air deflectors. Now the engine cooling system will breath very smoothly.
Attached image(s) 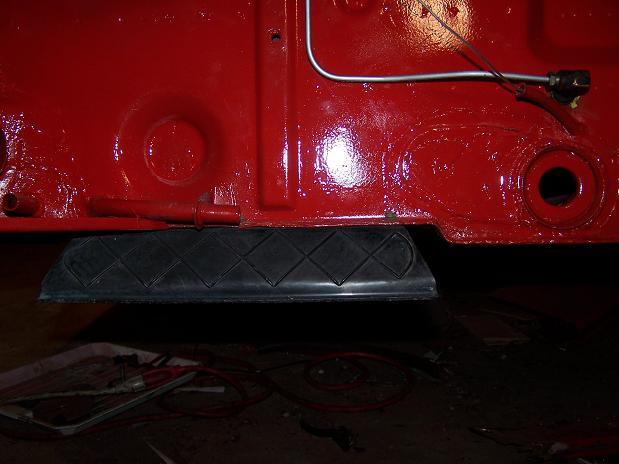 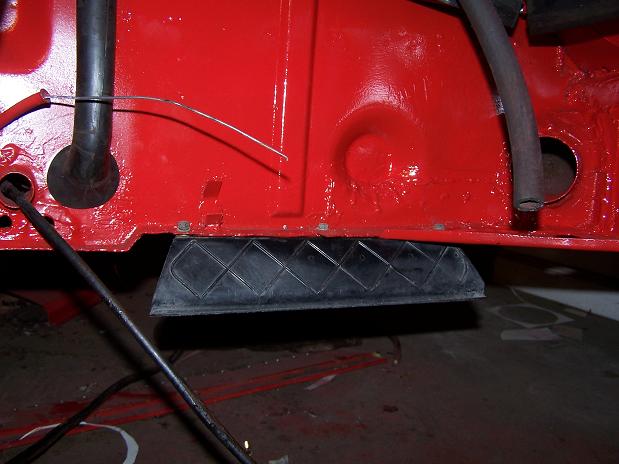
|
|
|
|
| Spoke |
Aug 1 2010, 08:14 PM
Post
#157
|
|
Jerry Group: Members Posts: 6,983 Joined: 29-October 04 From: Allentown, PA Member No.: 3,031 Region Association: None |
I decided instead of welding the pieces that I cut out of the tunnel to re-weld the clutch tube that I would make them removable.
I took the pieces cut out of the tunnel and traced and cut out larger pieces of 18ga steel. Then I cut off 1/4 inch off of each and welded them to the larger pieces. Since I'm using the original cut-out pieces, they fit like a glove... Attached image(s) 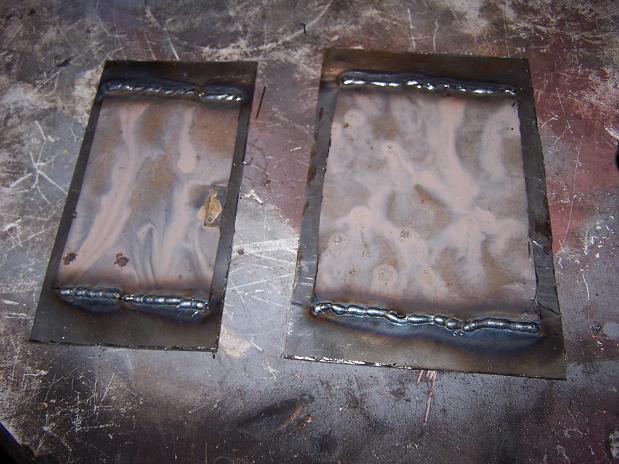  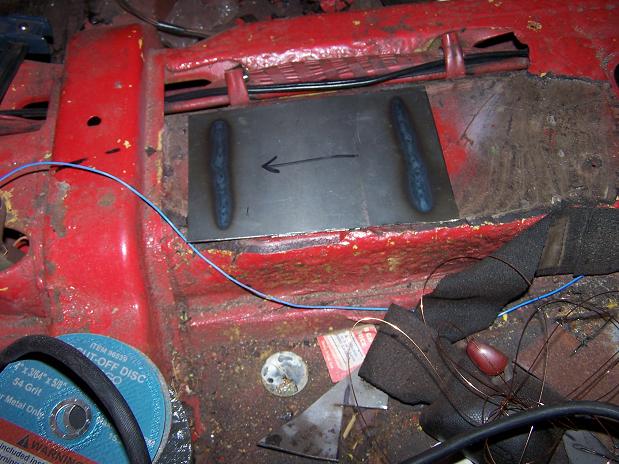
|
|
|
|
| Spoke |
Aug 9 2010, 09:37 PM
Post
#158
|
|
Jerry Group: Members Posts: 6,983 Joined: 29-October 04 From: Allentown, PA Member No.: 3,031 Region Association: None |
Finally getting ready to paint the tank area and cowl. Got everything masked off and now will start with primer.
Attached image(s) 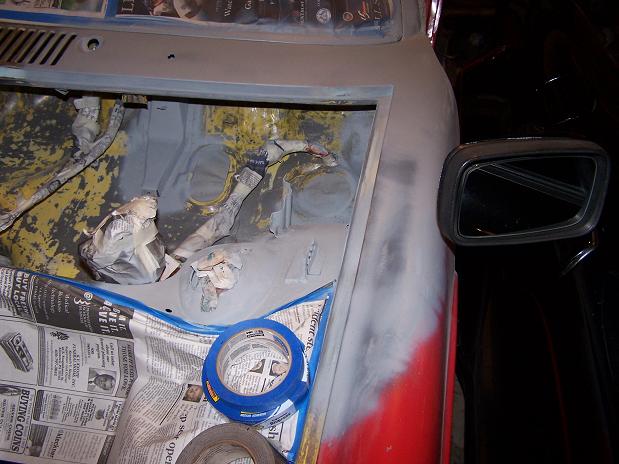 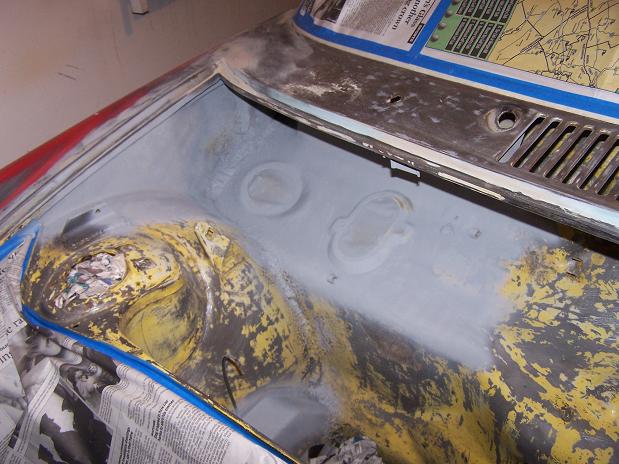
|
|
|
|
| Spoke |
Aug 14 2010, 11:46 AM
Post
#159
|
|
Jerry Group: Members Posts: 6,983 Joined: 29-October 04 From: Allentown, PA Member No.: 3,031 Region Association: None |
Finally, it's gas tank compartment and cowl paint day. Primer is on and all loose ends (minor deep scratches) are taken care of.
The master cylinder is wired to the ceiling to keep it out of the way as much as possible. The wire bundle is also suspended by the same wire. The wire is 24 ga welding wire that is wasted when you run out of weld wire in the MIG welder. Attached image(s) 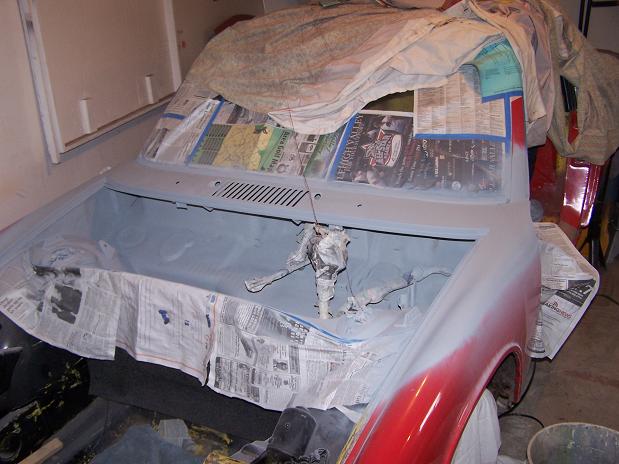 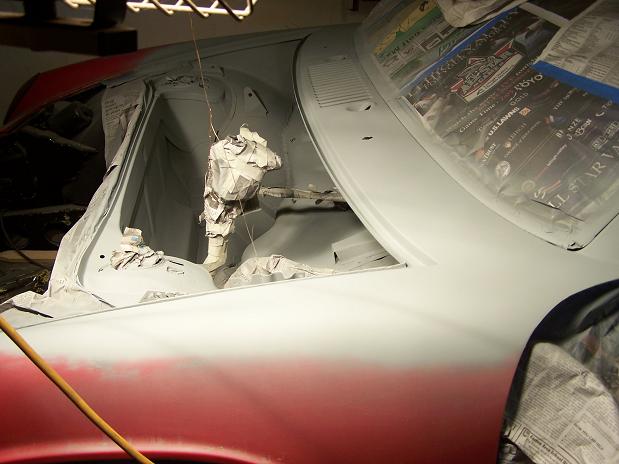
|
|
|
|
| Spoke |
Aug 15 2010, 03:12 AM
Post
#160
|
|
Jerry Group: Members Posts: 6,983 Joined: 29-October 04 From: Allentown, PA Member No.: 3,031 Region Association: None |
Paint is on.
Next tasks after paint cleanup is to run the steel fuel lines, reassemble all the components inside the fuel tank compartment: Windshield wipers, air handling flappers and cowl air fan. Install and wire the fuel pump, replace the tank and prepare to fire the engine using the tank, pump, and installed fuel lines. I'll run long fuel hoses to the engine so I can run the engine and test all the electrics before installing the engine. Attached image(s) 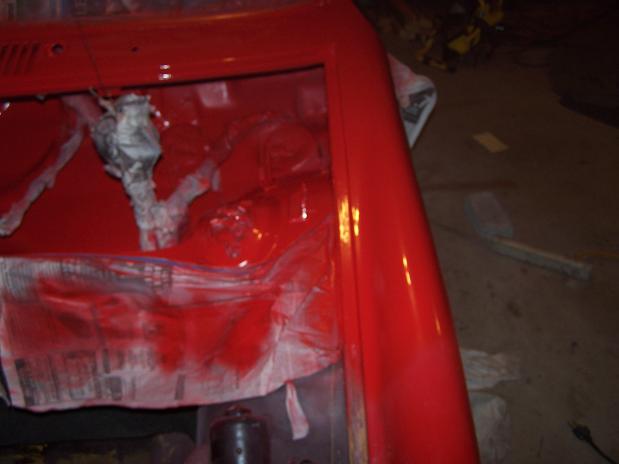 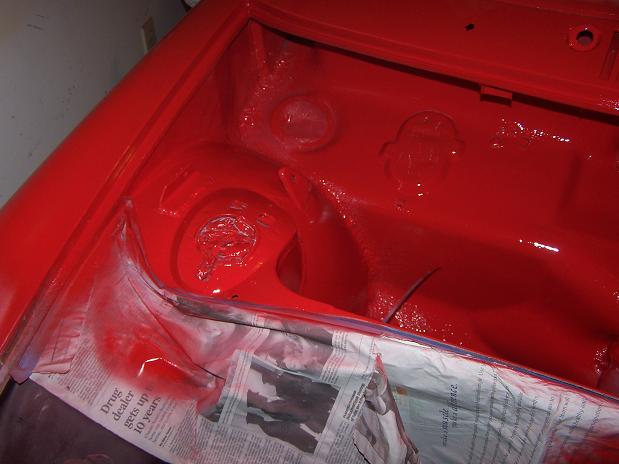 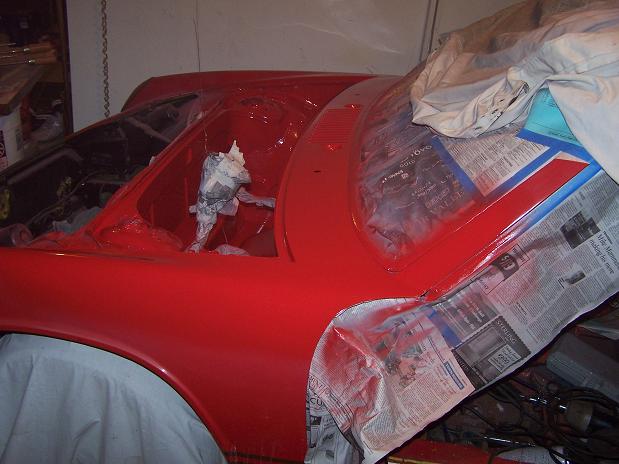 
|
|
|
|
|
1 User(s) are reading this topic (1 Guests and 0 Anonymous Users)
0 Members:

|
Lo-Fi Version | Time is now: 20th May 2024 - 07:23 PM |
Invision Power Board
v9.1.4 © 2024 IPS, Inc.