|
|
|
Porsche, and the Porsche crest are registered trademarks of Dr. Ing. h.c. F. Porsche AG.
This site is not affiliated with Porsche in any way. Its only purpose is to provide an online forum for car enthusiasts. All other trademarks are property of their respective owners. |
|
|

  |

| Spoke |
 Nov 23 2009, 05:41 AM Nov 23 2009, 05:41 AM
Post
#81
|
|
Jerry  Group: Members Posts: 6,984 Joined: 29-October 04 From: Allentown, PA Member No.: 3,031 Region Association: None |
Prepping for paint. I either have a red car or a yellow car painted red.
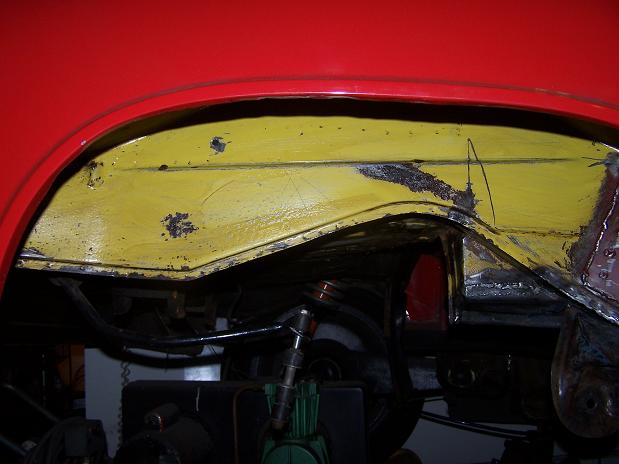  The wrinkled inner fender near the rear is where the damage was from the rear end accident. 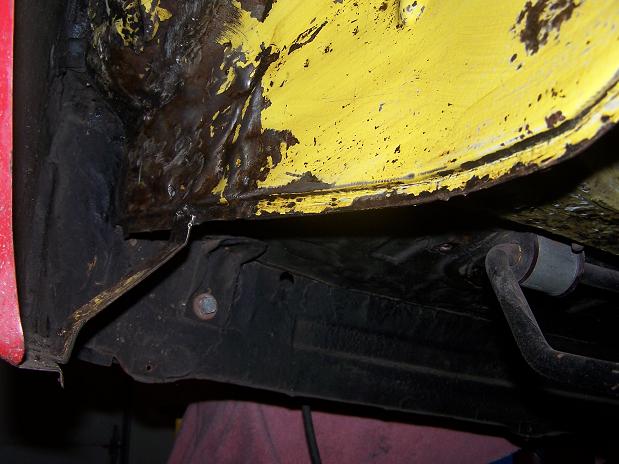 |
   |

 
|
| Spoke |
Nov 23 2009, 07:39 PM
Post
#82
|
|
Jerry Group: Members Posts: 6,984 Joined: 29-October 04 From: Allentown, PA Member No.: 3,031 Region Association: None |
Primer going on now. Just painting the inner fender and bottom of the trunk floor around the shock. I'm only painting the areas that I am working on. I'm trying to avoid the "While I'm in there" syndrom. At least this corner will look good...
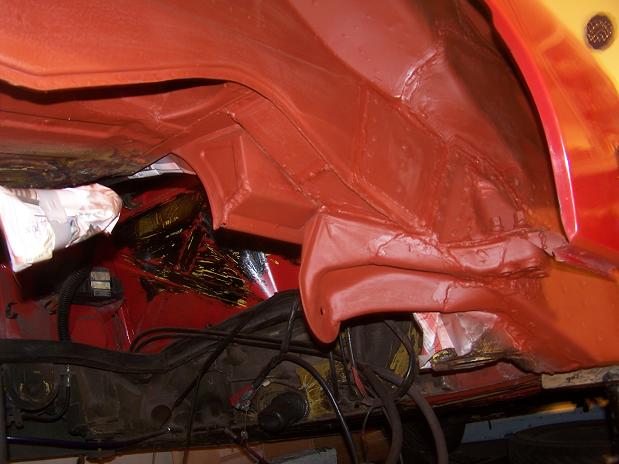 The wrinkles and surgery from the accident repair are noticible in this pic. 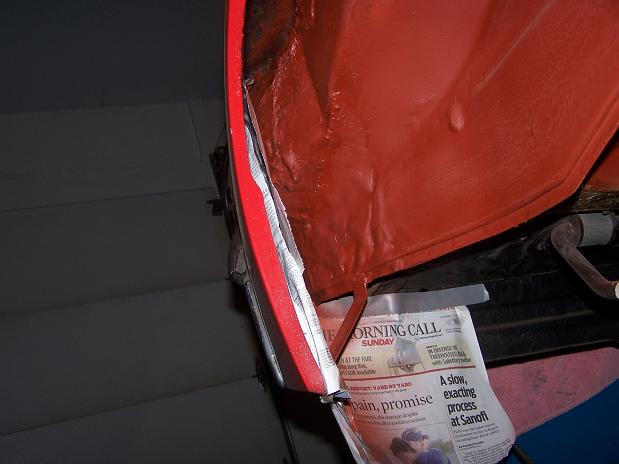 I'll paint the rest of the trunk floor when I turn the car around in the garage and work on the driver's side. 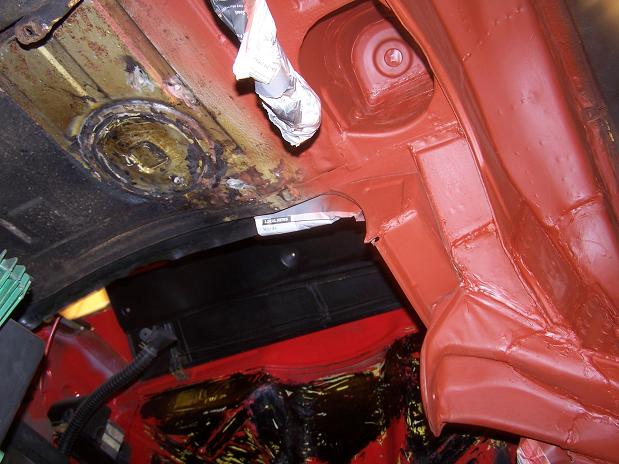 Compare this pic with the before where I stuck a putty knife through the rusted out metal. 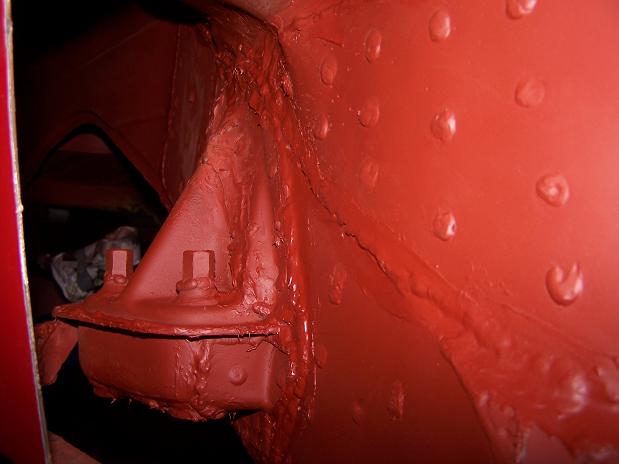 The area in question. Check out the jackstand party under the car. Only one is carrying weight right now. I usually have the floor jack under the long also. 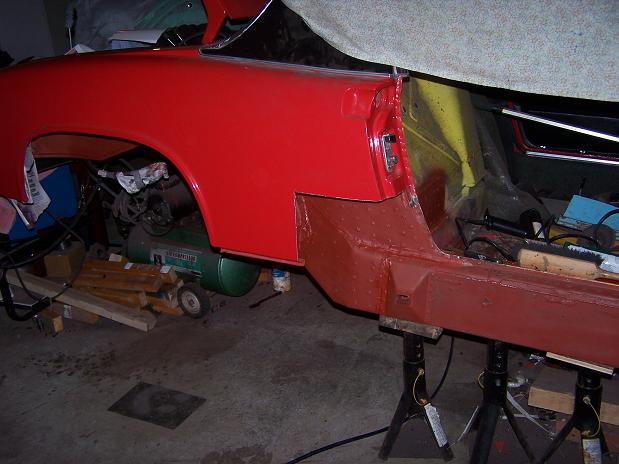 |
|
|
|
| Spoke |
Nov 25 2009, 11:38 PM
Post
#83
|
|
Jerry Group: Members Posts: 6,984 Joined: 29-October 04 From: Allentown, PA Member No.: 3,031 Region Association: None |
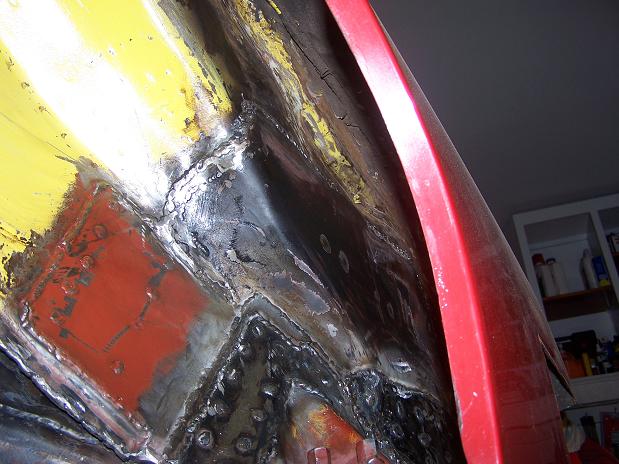
Had paint on then decided to fit the swing arm mount and had to make some clearance. This is the consequence of adding plate after plate onto the long.
Attached image(s) 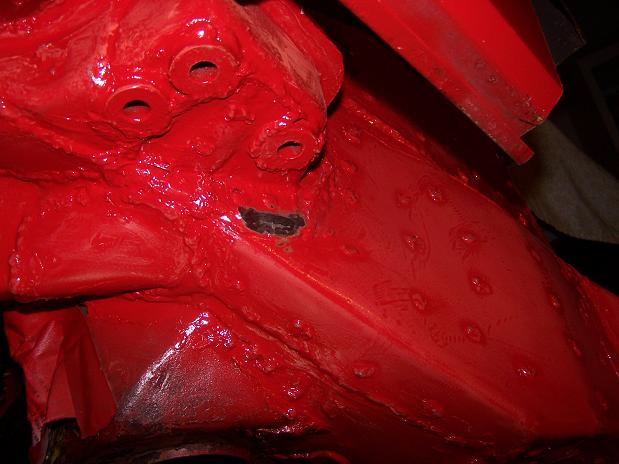
|
|
|
|
| Spoke |
Nov 25 2009, 11:44 PM
Post
#84
|
|
Jerry Group: Members Posts: 6,984 Joined: 29-October 04 From: Allentown, PA Member No.: 3,031 Region Association: None |
Got the paint finished tonight. Feels like I'm painting the outside of the car. Most of this work will never be seen once the fender is back together.
Attached image(s) 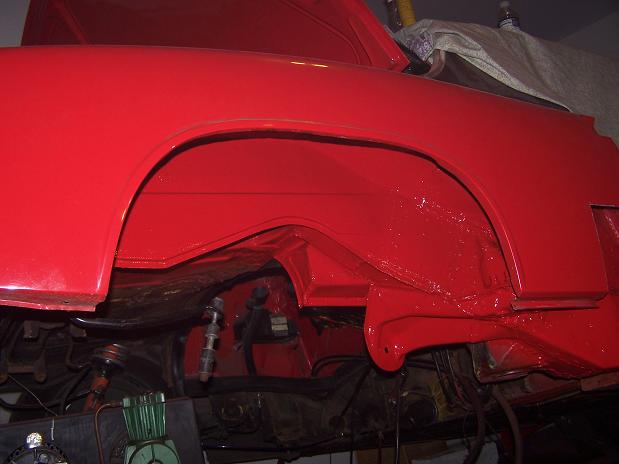 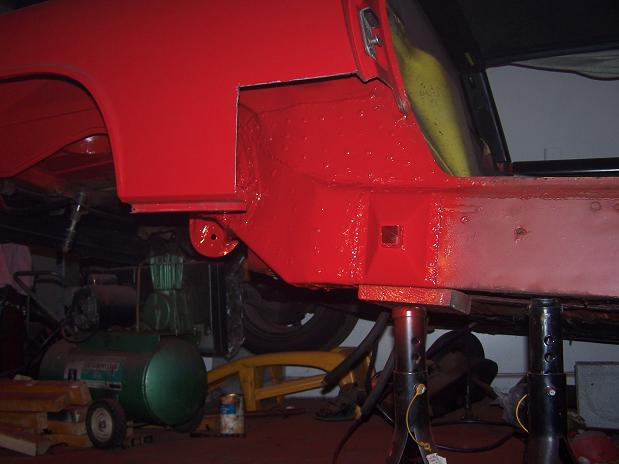 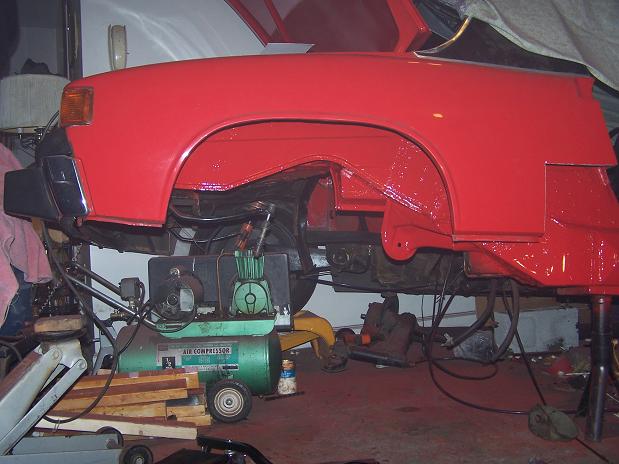 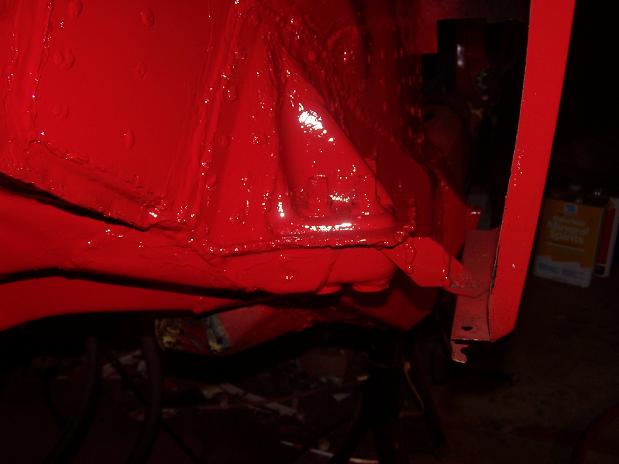 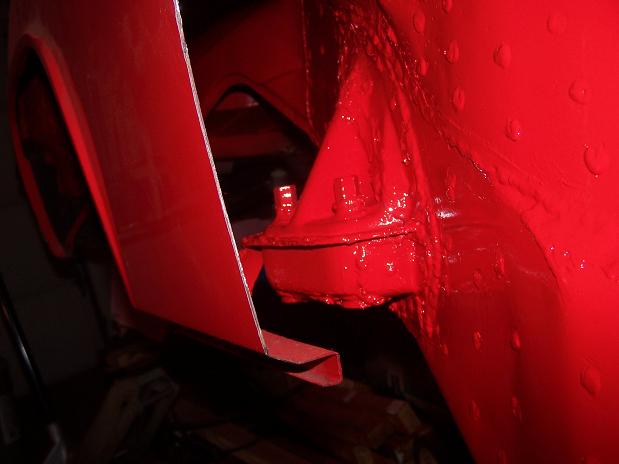 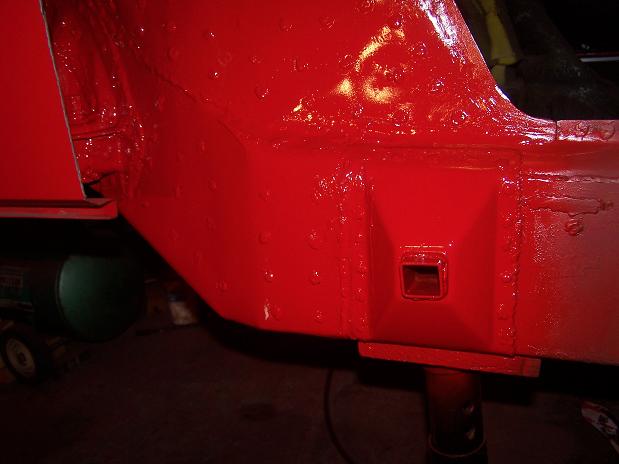
|
|
|
|
| Spoke |
Nov 30 2009, 12:05 AM
Post
#85
|
|
Jerry Group: Members Posts: 6,984 Joined: 29-October 04 From: Allentown, PA Member No.: 3,031 Region Association: None |
Putting the rear suspension back on. Had to spruce everything up with a coat of paint.
The garage must be relatively dry since the rotor is still shiny after sitting in the garage for over a year. 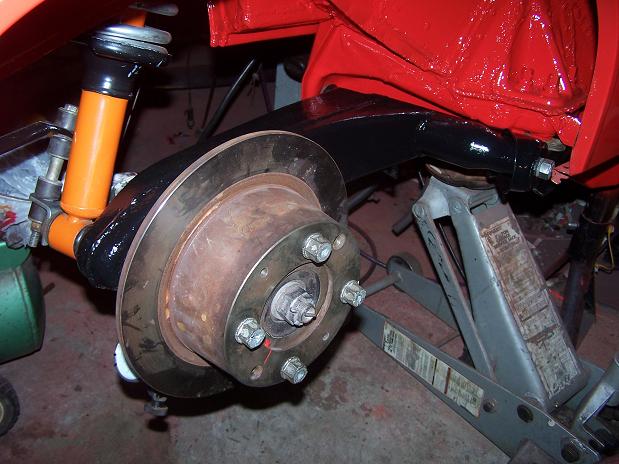 I checked the runout on the rotor. Not bad but not as good as I would like. The hub had a good bit of rust when I took off the original rotor and I never got the new rotor seated right and it always had some runout. I added a little 0.005 thick shim between the rotor and hub on the low side and it virtually cured all the runout. 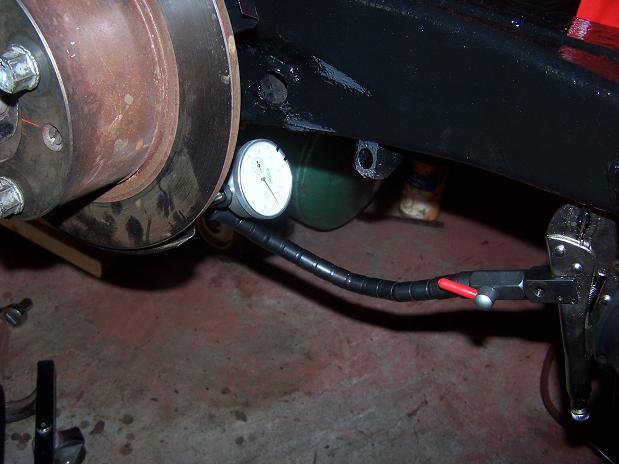 |
|
|
|
| Spoke |
Nov 30 2009, 12:10 AM
Post
#86
|
|
Jerry Group: Members Posts: 6,984 Joined: 29-October 04 From: Allentown, PA Member No.: 3,031 Region Association: None |
Caliper on.
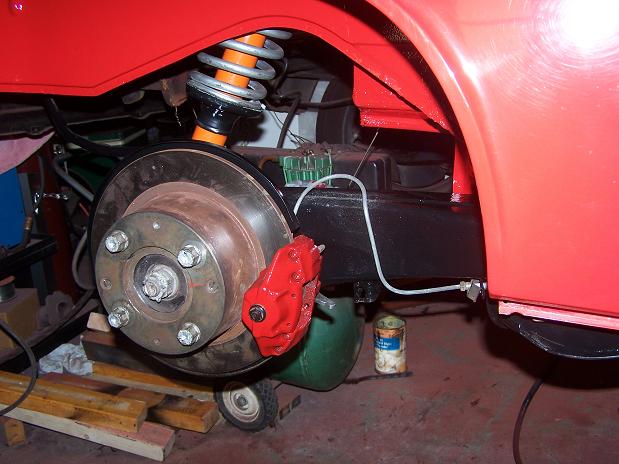 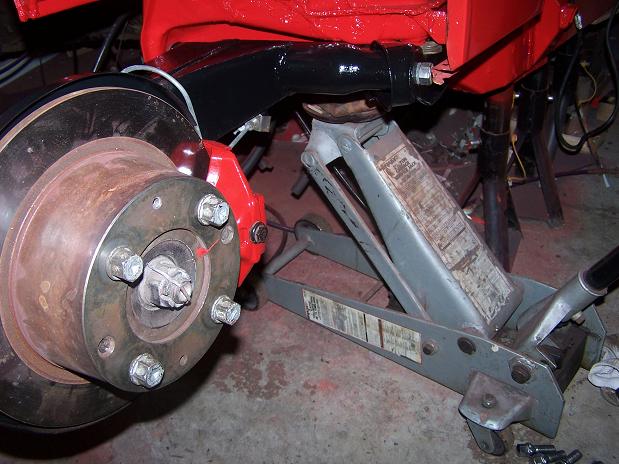 I had plenty of clearance between the suspension mount and the frame. 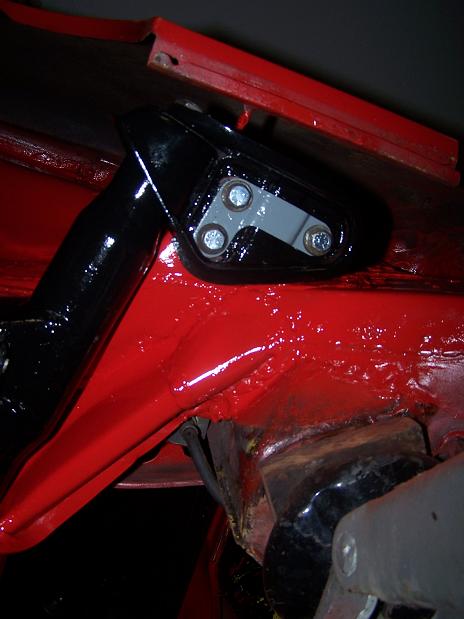 |
|
|
|
| Spoke |
Dec 2 2009, 08:19 PM
Post
#87
|
|
Jerry Group: Members Posts: 6,984 Joined: 29-October 04 From: Allentown, PA Member No.: 3,031 Region Association: None |
I finally got the car turned around in the garage so the driver's side is accessible.
Jobs in front of me right now: Pull all the carpeting out of the driver's side interior. Repair clutch tube and firewall. Remove and repair rust holes around the driver side triangle plate and floor. Clean up all the tar and undercoating in the engine compartment and paint Remove driver rear suspension for painting and check for rust on the suspension console. Repair driver side outer long (pictures coming) I bought the car in Oct 2003 and this is the first time I've removed the driver side rocker panel. There was about 5 LB of gravel hiding in the rocker panel. Attached image(s) 
|
|
|
|
| Spoke |
Dec 2 2009, 08:37 PM
Post
#88
|
|
Jerry Group: Members Posts: 6,984 Joined: 29-October 04 From: Allentown, PA Member No.: 3,031 Region Association: None |
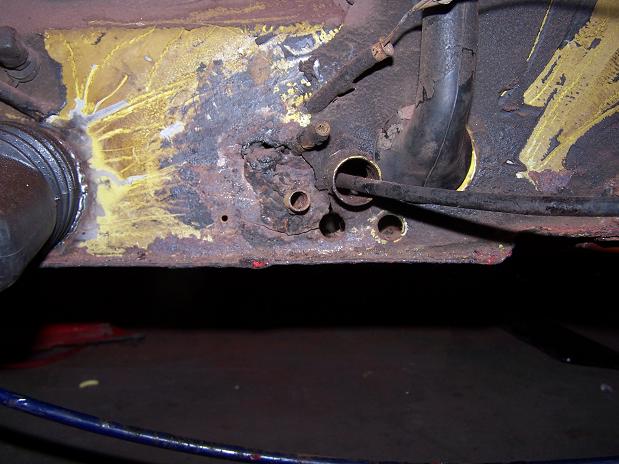
This side was also repaired like the passenger side with a big plate of steel and wrapped around the bottom of the long. That is a big hole in the long and just above it is a piece of tinfoil which I think was used to hold bondo on when the fender was repaired.
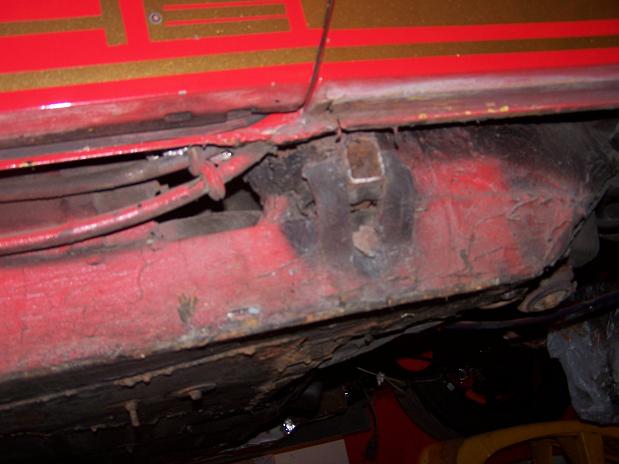 WTF half-assed repair is this on the jack point. It is very flexible and basically unusable. The top of the jack tube support plate is still there but the bottom has rusted away. The gas tank vent hoses have some sort of grommet on them. Where would these grommets go? 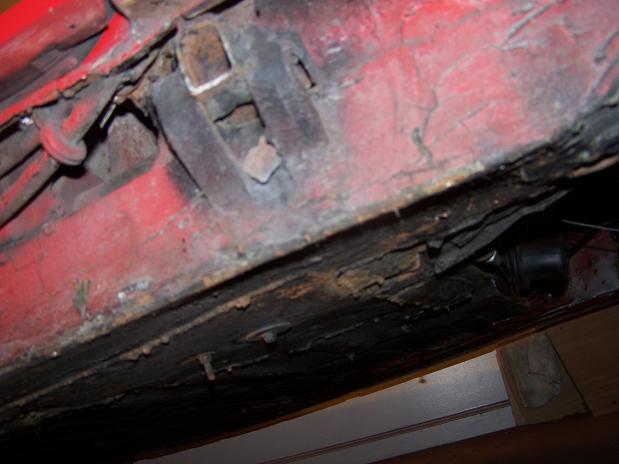 Close-up of the hole. Looks like I'll be taking off the sill plate and cutting the corner of the fender off to get access to the jack point. However, the long at this point is relatively rigid so I will postpone the long corrective surgery until after the engine is back in. This way I can get the car on the road and as the long is repaired, I will have the correct pressure on the long to make sure the body dimensions don't change. 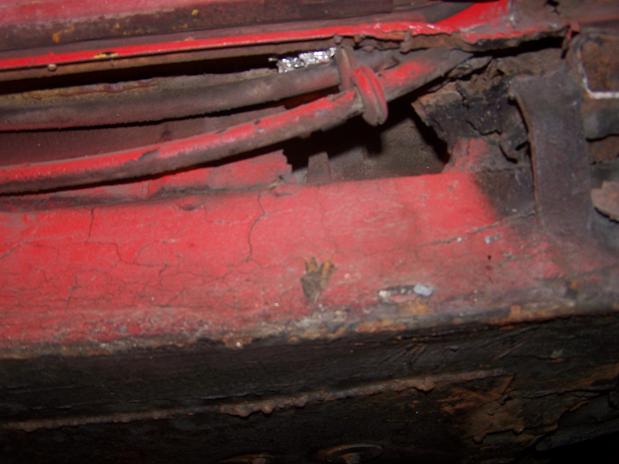 |
|
|
|
| watsonrx13 |
Dec 3 2009, 07:07 PM
Post
#89
|
|
Advanced Member Group: Members Posts: 2,734 Joined: 18-February 03 From: Plant City, FL Member No.: 312 Region Association: South East States |
|
|
|
|
| Spoke |
Dec 4 2009, 01:49 AM
Post
#90
|
|
Jerry Group: Members Posts: 6,984 Joined: 29-October 04 From: Allentown, PA Member No.: 3,031 Region Association: None |
Thanks for the photo Rob.
I think I'm missing part of the bulkhead behind the front wheels. Can I get replacement metal for this or must I fab it myself? Attached image(s) 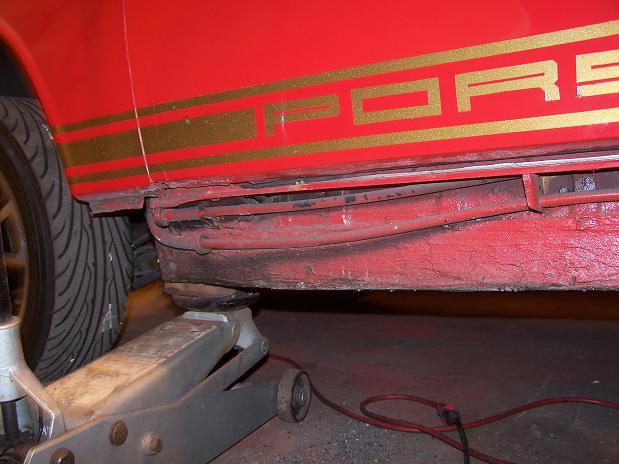
|
|
|
|
| Spoke |
Dec 5 2009, 11:06 AM
Post
#91
|
|
Jerry Group: Members Posts: 6,984 Joined: 29-October 04 From: Allentown, PA Member No.: 3,031 Region Association: None |
What! Another rust through hole on the drivers side? And rusted out inner long? The screwdriver is poking out the bottom of the car.
What a shock! It appears the entire inner long is rusted up to the driver's cross brace. 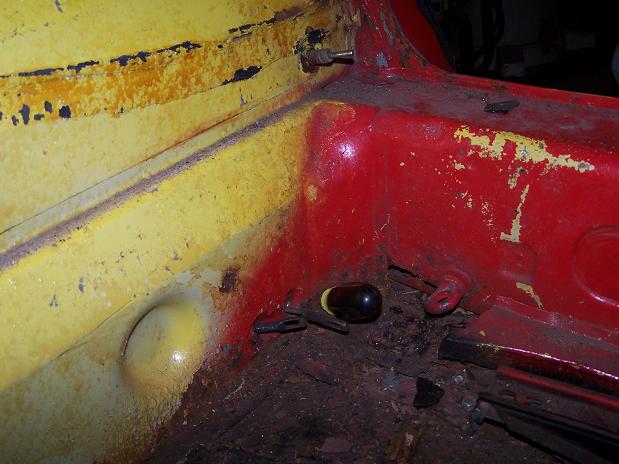 The corner of the floor has been replaced with a flat piece of metal. Note the Ace Hardware seat mounts... 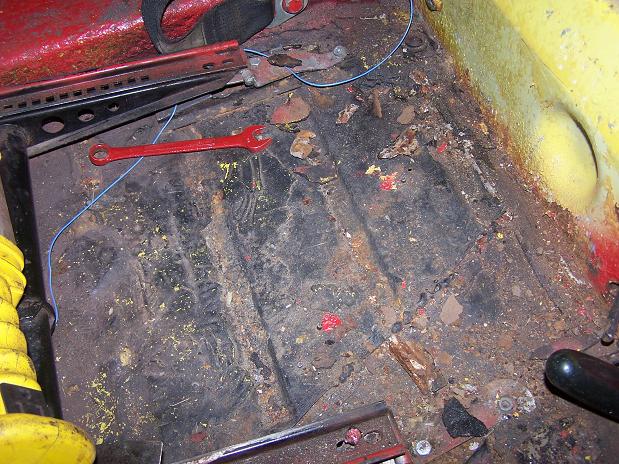 Found this piece of brown/white wire under the sound pad. Now that's my kind of electrical circuit. It comes from nowhere and goes nowhere. This may be difficult to get working again. (IMG:style_emoticons/default/smile.gif) 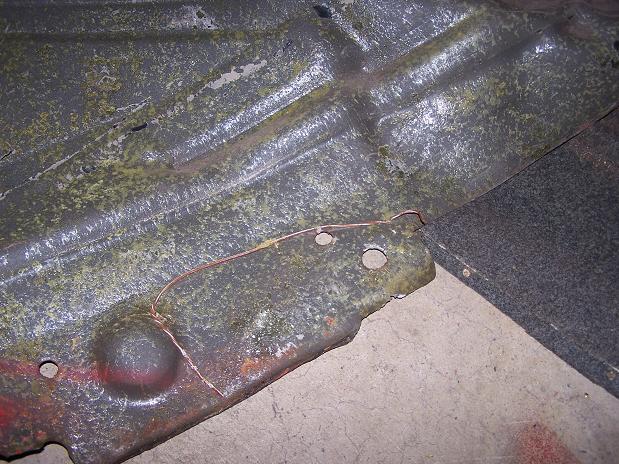 |
|
|
|
| Spoke |
Dec 5 2009, 11:15 AM
Post
#92
|
|
Jerry Group: Members Posts: 6,984 Joined: 29-October 04 From: Allentown, PA Member No.: 3,031 Region Association: None |
Post Whore.
The World timed out again and doubled my post. Sorry. |
|
|
|
| Spoke |
Dec 5 2009, 04:18 PM
Post
#93
|
|
Jerry Group: Members Posts: 6,984 Joined: 29-October 04 From: Allentown, PA Member No.: 3,031 Region Association: None |
Here's the Ace Hardware seat pivot repair. Not pretty but it works. I'm not planning on changing this.
BTW, can you tell where I park my 911? Attached image(s) 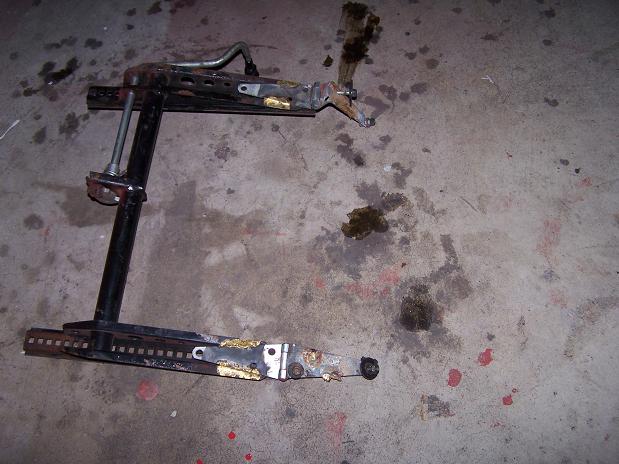
|
|
|
|
| Spoke |
Dec 5 2009, 04:22 PM
Post
#94
|
|
Jerry Group: Members Posts: 6,984 Joined: 29-October 04 From: Allentown, PA Member No.: 3,031 Region Association: None |
Here's the middle support. I guess the clutch tube goes where the red circle is, correct? There is a lot of stress if I put it where the circle is.
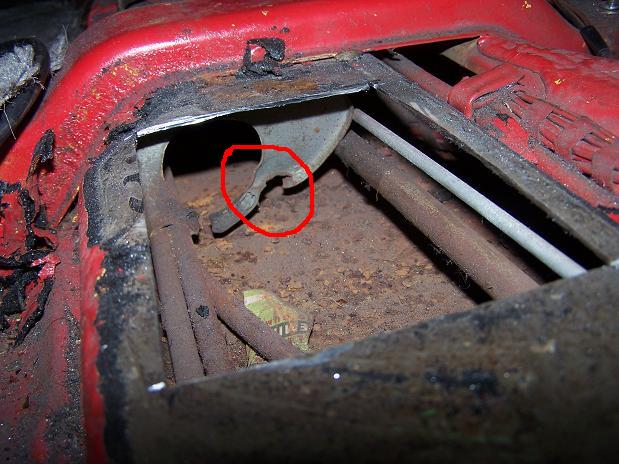 The original tab is still half attached to the side of the tunnel. Looks like someone tried to put a clamp on the tube. The extra clamp was not attached to anything although there are some holes in the side of the tunnel wall. 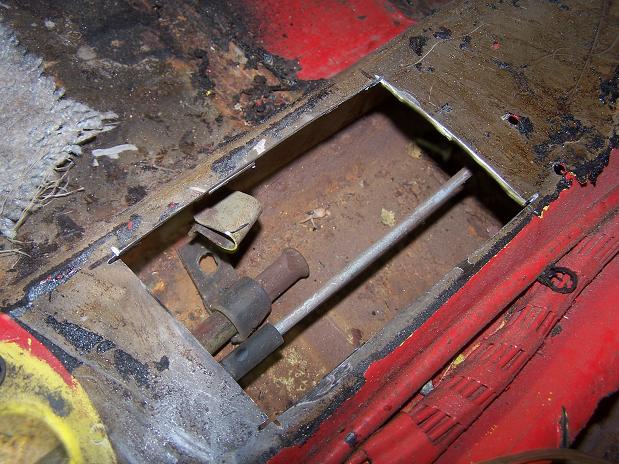 |
|
|
|
| jonferns |
Dec 5 2009, 09:19 PM
Post
#95
|
|
Advanced Member Group: Members Posts: 2,081 Joined: 29-March 07 From: New Jersey Member No.: 7,631 Region Association: North East States |
Hey man, did you use an airbrush when you painted inside the fender? What kind?
|
|
|
|
| my928s4 |
Dec 5 2009, 10:00 PM
Post
#96
|
|
Member Group: Members Posts: 349 Joined: 18-August 07 From: Spokane, WA Member No.: 8,018 Region Association: Pacific Northwest |
QUOTE(Spoke @ Dec 5 2009, 02:18 PM)  Here's the Ace Hardware seat pivot repair. Not pretty but it works. I'm not planning on changing this. OK that is pretty funny, I was thinking of the "build it on a budget" banner but "bodge it on a budget" is probably more appropriate. That driver side rocker looks scary. Nice work, great pics too ! |
|
|
|
| Spoke |
Dec 6 2009, 05:47 AM
Post
#97
|
|
Jerry Group: Members Posts: 6,984 Joined: 29-October 04 From: Allentown, PA Member No.: 3,031 Region Association: None |
QUOTE(sendjonathanmail @ Dec 5 2009, 10:19 PM) Hey man, did you use an airbrush when you painted inside the fender? What kind? I used the small gun. I picked this DeVilbiss kit up at Eastwood. Attached image(s) 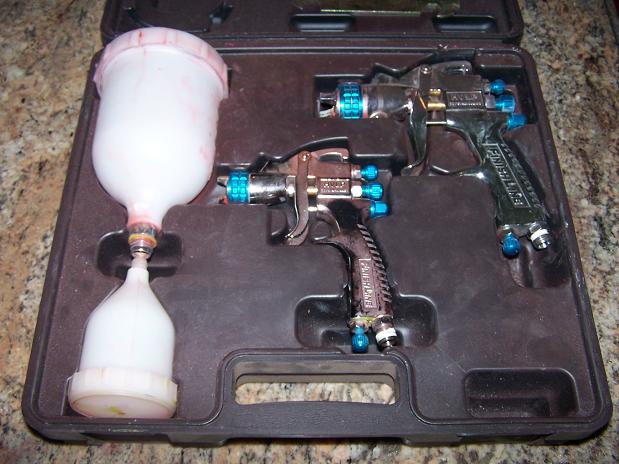
|
|
|
|
| Spoke |
Dec 6 2009, 08:51 AM
Post
#98
|
|
Jerry Group: Members Posts: 6,984 Joined: 29-October 04 From: Allentown, PA Member No.: 3,031 Region Association: None |
The clutch tube was repaired before as there is a bunch of weld material built up around the tube. The problem is the weaken-by-rust firewall around the tube ripped.
 Made a template for a replacement piece. This piece will be quite detailed as it will have 3 holes; one for the tube and 2 for the fuel lines. I'll make the piece out of 14 ga to be sure there is enough strength. I knew my "Stop Walmart" signs would come in handy. (IMG:style_emoticons/default/dry.gif) 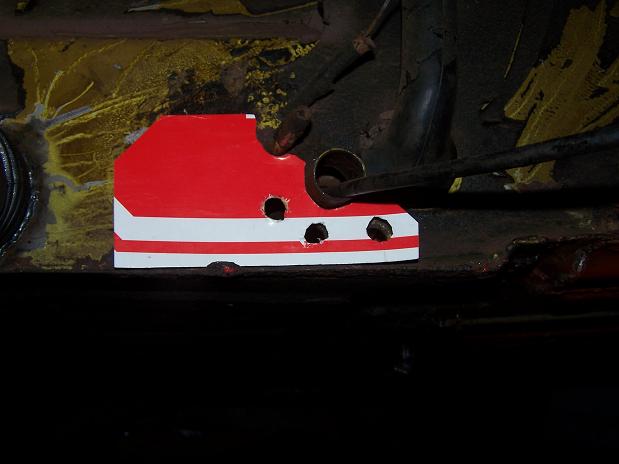 To remove the tube, I had to make only one vertical cut to the left of the tube as the rest of the metal had already ripped. 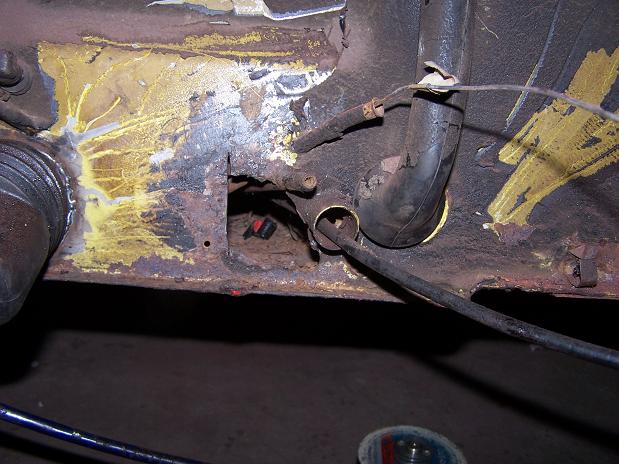 |
|
|
|
| Spoke |
Dec 6 2009, 10:13 AM
Post
#99
|
|
Jerry Group: Members Posts: 6,984 Joined: 29-October 04 From: Allentown, PA Member No.: 3,031 Region Association: None |
So what shape should the clutch tube have? This one looks like it has a jog around the shifter.
Attached image(s) 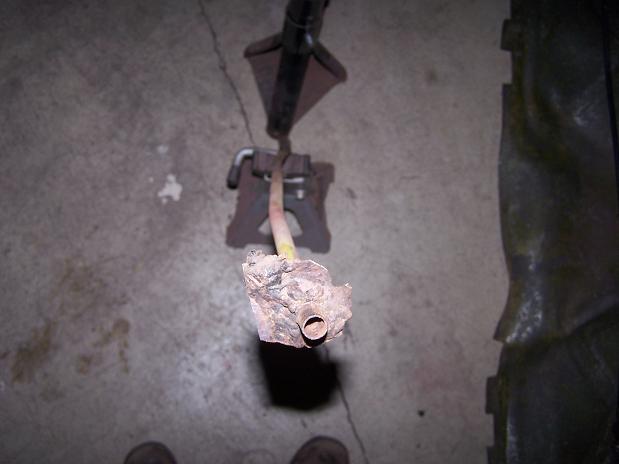
|
|
|
|
| Spoke |
Dec 6 2009, 07:36 PM
Post
#100
|
|
Jerry Group: Members Posts: 6,984 Joined: 29-October 04 From: Allentown, PA Member No.: 3,031 Region Association: None |
The plate for the firewall is completed and ready for welding. I will be overlaying the second piece on the first for more support. The 2 center holes are for the clutch tube. When doing a mock up with the side-shift engine bar, the top hole was too high and wasn't pointing towards the hole in the engine bar so I made a lower hole. See pics in the next post for different exit hole positions.
The little support plate will cover up the extra hole. I was too lazy to make another piece... 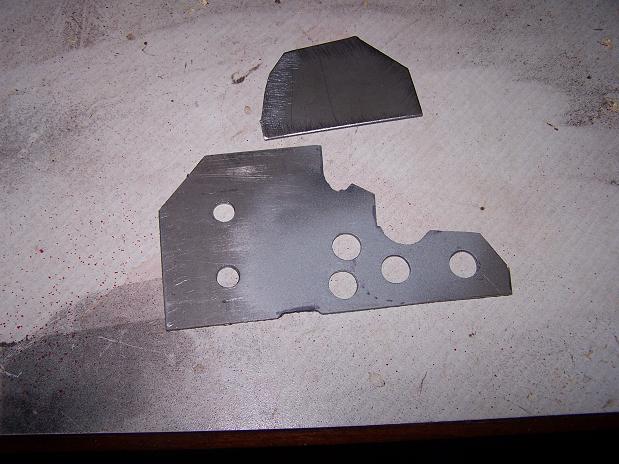 I straightened out the clutch tube and re-bent it to match the clutch tube shown in the classic clutch tube repair thread. 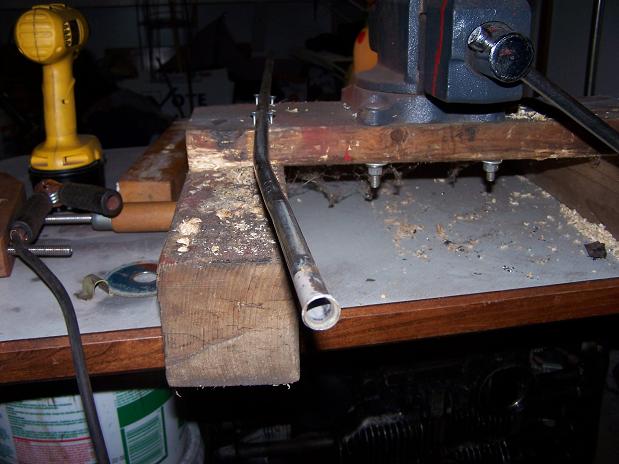 |
|
|
|
|
2 User(s) are reading this topic (2 Guests and 0 Anonymous Users)
0 Members:

|
Lo-Fi Version | Time is now: 22nd May 2024 - 10:59 AM |
Invision Power Board
v9.1.4 © 2024 IPS, Inc.