|
|
|
Porsche, and the Porsche crest are registered trademarks of Dr. Ing. h.c. F. Porsche AG.
This site is not affiliated with Porsche in any way. Its only purpose is to provide an online forum for car enthusiasts. All other trademarks are property of their respective owners. |
|
|


| Spoke |
 Dec 28 2007, 10:59 PM Dec 28 2007, 10:59 PM
Post
#41
|
|
Jerry  Group: Members Posts: 7,409 Joined: 29-October 04 From: Allentown, PA Member No.: 3,031 Region Association: None |
Like Zach said before, just what the World needs is another progress thread. So here it is for my 71 1.7L red ride.
I'm working on an engine swap for my leaky 1.7L with slipping clutch to a non-leaking, unknown GEX rebuilt 1.8L so I decided to concatenate several threads on this car into one progress thread. Eventually I will sell the red 71 and keep the green 74 as my only 914. For now the plan is to get the new 1.8L engine in the car. The 1.8L has SSHE where the 1.7L in the car has very much corroded stock HE's. Here's pics after last year's rear end accident that totaled the car and the finished product after many months of rehab. Attached image(s) 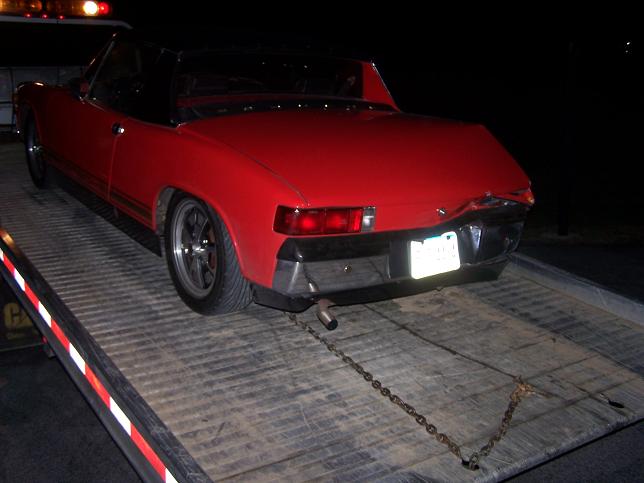 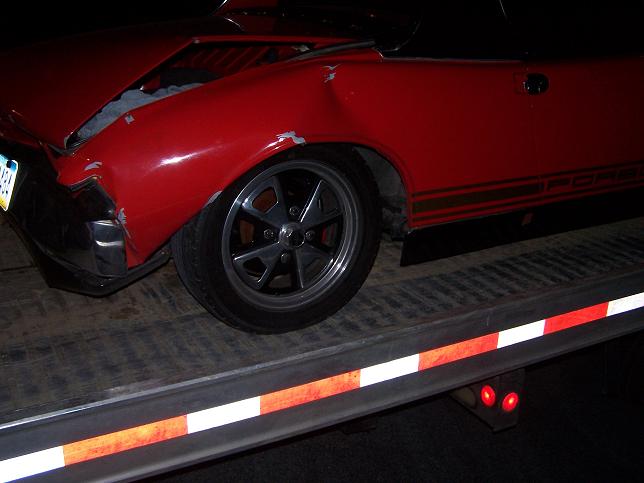 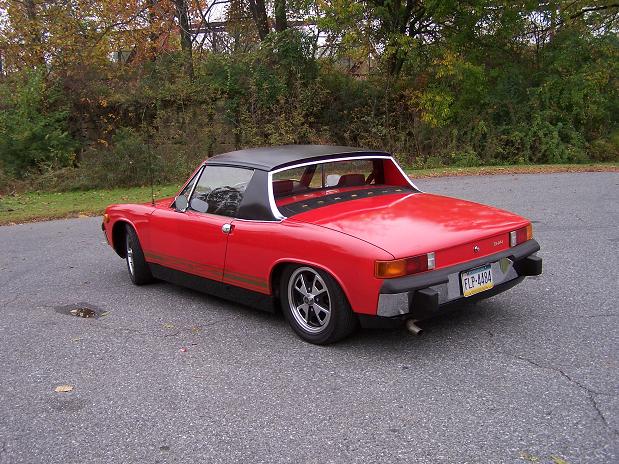 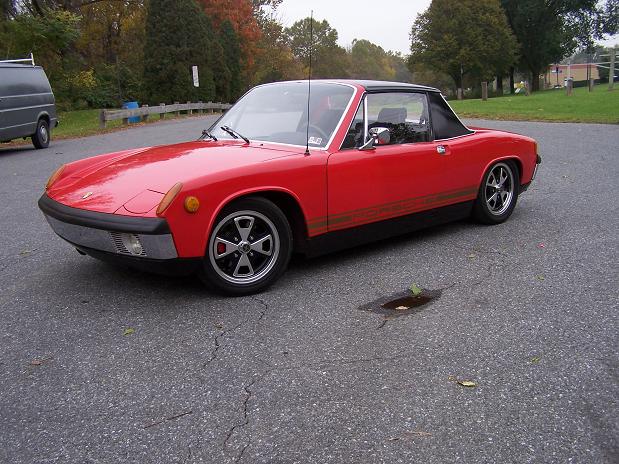 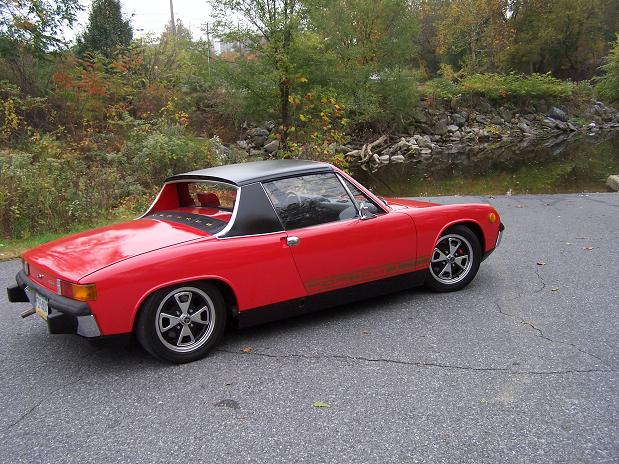
|
   |

 
|
Posts in this topic
 Spoke Spoke's 71 2.056L 914 Progress Thread Dec 28 2007, 10:59 PM
 KaptKaos Whoa! What did I miss??? When did that happ... Dec 28 2007, 11:11 PM Spoke One of the first threads I started on the 914club/... Dec 28 2007, 11:16 PM
 neo914-6
One of the first threads I started on the 914club... Aug 9 2008, 03:25 PM Spoke Threads about the rear ender and repairs:
Short T... Dec 28 2007, 11:23 PM Spoke Here's some pics of the donor engine with tin ... Dec 28 2007, 11:40 PM Spoke Besides cleaning up the engine and tin, I'll c... Dec 28 2007, 11:57 PM Twystd1 Is that a GEX tag on this engine...????????????
... Dec 29 2007, 12:09 AM Spoke
Is that a GEX tag on this engine...???????????
Y... Dec 29 2007, 03:33 AM Spoke I've decided to put the original D-Jet FI from... Jul 15 2008, 12:43 AM Spoke With the MPS connected to the brain and with the e... Jul 15 2008, 12:47 AM Spoke Finally got around to sandblasting the engine tin ... Jul 15 2008, 01:03 AM Spoke Putting the tin back on the engine. The CHT sensor... Aug 6 2008, 01:14 PM Spoke Question about #2 "Seal". This is the 1/... Aug 6 2008, 04:09 PM fitsbain Where are the pictures of that sheet metal I sent ... Aug 7 2008, 09:49 AM Spoke
Where are the pictures of that sheet metal I sent... Aug 7 2008, 10:36 AM watsonrx13 Man, I hope you used that 2-part expoy.... :woohoo... Aug 7 2008, 12:13 PM Spoke Got the plenum cleaned up and painted. Checked sup... Aug 8 2008, 11:45 AM Spoke Plenum is bolted on. Tin is mostly in place. Ready... Aug 9 2008, 05:28 AM Spoke Decided to make gaskets to put between the intake ... Aug 9 2008, 06:05 AM Spoke Started to reassemble the distributor and noticed ... Aug 11 2008, 10:16 PM Spoke When I installed the distributor, I noticed that w... Aug 11 2008, 10:25 PM Spoke Got all the FI stuff on the engine that is needed ... Aug 11 2008, 10:32 PM Spoke Woo Hoo! :Qarl:
it is alive. Running on FI ... Sep 6 2008, 11:22 AM Spoke Put the engine on a furniture dolly today. Now I c... Sep 8 2008, 11:20 PM Spoke Started removing stuff from the engine. These IDF4... Sep 8 2008, 11:22 PM Spoke My first engine drop. Piece of cake. Put my floor ... Sep 15 2008, 03:23 PM Spoke The while-I'm-in-there syndrom will include SS... Sep 15 2008, 03:26 PM Spoke Started work on reinforcing the longs. The repair ... Apr 7 2009, 06:10 PM Spoke Cut the lower part of the fender off. The door jam... Apr 7 2009, 06:34 PM barada
Cut the lower part of the fender off. The door ja... Apr 7 2009, 06:46 PM Spoke There is basically nothing left of the lower part ... Jun 1 2009, 09:45 PM Spoke Preparing to weld the steel plate to the existing ... Jun 1 2009, 09:57 PM Spoke I would make more progress on the 914 if I didn... Jun 1 2009, 11:01 PM Spoke The replacement plate is welded in. Like the steel... Jun 1 2009, 11:06 PM Spoke Here's a fix I did a while back when I was ref... Jun 4 2009, 09:36 PM Spoke Removed all the tar on the passenger side floor. I... Jun 7 2009, 08:59 AM Spoke The inside long has been patched from front to bac... Jun 7 2009, 09:03 AM charliew Where the door gaps still good before you started?... Jun 7 2009, 12:35 PM Spoke Got the gas tank and center fuel lines out today.
... Jul 18 2009, 08:43 AM Spoke This pic was supposed to show the rust around the ... Jul 18 2009, 08:47 AM Spoke A while back I repainted the trunk and relocated t... Jul 18 2009, 08:53 AM Spoke I ground down the flange for the tailshift boot. I... Jul 18 2009, 10:01 AM Spoke Ground off the previously added web and original w... Jul 18 2009, 10:06 AM Spoke This patch will join the bottom long plate to the ... Jul 20 2009, 10:38 PM Spoke The patch is now welded in place. Just the front t... Jul 20 2009, 10:44 PM Spoke Also got the sideshift cover flange welded on.
... Jul 20 2009, 10:48 PM Spoke Got the back of the passenger floor patch done ton... Jul 22 2009, 11:20 PM FourBlades Those are nice looking repairs. :Qarl:
Should ... Jul 23 2009, 09:48 AM Spoke Cleaned up the firewall around the heater tube. I... Jul 25 2009, 10:32 AM Spoke The 2nd piece around the heater tube is now in. I ... Jul 25 2009, 10:39 AM Spoke Patched the holes in the floor, inner firewall, an... Jul 25 2009, 07:46 PM Spoke Last of the patches for the passenger side seat ar... Jul 26 2009, 04:26 PM Spoke I'm ready to install new jack posts but it see... Sep 11 2009, 07:15 PM FourBlades Your car is really coming along. You jack tube st... Sep 11 2009, 09:09 PM Spoke
Your car is really coming along. You jack tube s... Sep 11 2009, 09:20 PM Spoke Here's one of the other things I've been t... Sep 11 2009, 09:15 PM Spoke Mock up of jack tube using Rich Towle's locati... Sep 12 2009, 01:16 AM Spoke Jack plate looks good.
Length of jack tube is ab... Sep 12 2009, 01:20 AM Spoke I used the little piece cut out from the long to s... Sep 12 2009, 05:34 AM Spoke One last hole in the longitudinal patched.
Engine... Sep 13 2009, 02:13 PM Spoke I have a metal bar sitting around so I thought I w... Sep 13 2009, 02:33 PM Spoke Put a couple more steel bar supports in the long.
... Sep 13 2009, 09:51 PM Spoke Jack support plate ready for welding.
Presto... Sep 14 2009, 05:57 AM Spoke After some deliberation, I decided to investigate ... Sep 21 2009, 08:54 PM Spoke Cleaned back to good metal and patched. That looks... Sep 22 2009, 05:44 AM Spoke The long is ready for the support plate. The gray ... Sep 24 2009, 10:08 PM Spoke The support plate is welded in. Gray weld-through ... Sep 24 2009, 10:12 PM Spoke What to do if your nuts are too small: weld 2 toge... Sep 24 2009, 10:51 PM Spoke The suspension pick-up will be seam welded, then t... Nov 16 2009, 04:05 AM Spoke The suspension pick-up is welded on including the ... Nov 16 2009, 04:17 AM Spoke Finally time to patch up the hole looking into the... Nov 16 2009, 04:23 AM Spoke Support plates between inner and outer suspension ... Nov 16 2009, 05:03 AM veltror Excellent thread, I thought mine was the only one ... Nov 16 2009, 09:17 AM FourBlades That is some great looking repair work! :tro... Nov 16 2009, 09:19 AM raw1298 Awesome job :welder: :headbanger: . Gets me pumpe... Nov 16 2009, 12:14 PM Spoke The original hell hole repair put that little patc... Nov 21 2009, 08:43 AM Spoke And Presto! The 2 plates may add a little bit ... Nov 21 2009, 08:48 AM my928s4 Nice work, that looks like it will last a looooong... Nov 21 2009, 08:57 AM Spoke The passenger side engine shelf is a replacement. ... Nov 21 2009, 10:32 PM Spoke Prepping for paint. I either have a red car or a y... Nov 23 2009, 05:41 AM Spoke Primer going on now. Just painting the inner fende... Nov 23 2009, 07:39 PM Spoke Had paint on then decided to fit the swing arm mou... Nov 25 2009, 11:38 PM Spoke Got the paint finished tonight. Feels like I'm... Nov 25 2009, 11:44 PM Spoke Putting the rear suspension back on. Had to spruce... Nov 30 2009, 12:05 AM Spoke Caliper on.
I had plenty of clearance betwee... Nov 30 2009, 12:10 AM Spoke I finally got the car turned around in the garage ... Dec 2 2009, 08:19 PM Spoke This side was also repaired like the passenger sid... Dec 2 2009, 08:37 PM watsonrx13 The grommets go on the missing triangle underneath... Dec 3 2009, 07:07 PM Spoke Thanks for the photo Rob.
I think I'm missing... Dec 4 2009, 01:49 AM Spoke What! Another rust through hole on the drivers... Dec 5 2009, 11:06 AM Spoke Post Whore.
The World timed out again and doubled... Dec 5 2009, 11:15 AM Spoke Here's the Ace Hardware seat pivot repair. Not... Dec 5 2009, 04:18 PM my928s4
Here's the Ace Hardware seat pivot repair. No... Dec 5 2009, 10:00 PM Spoke Here's the middle support. I guess the clutch ... Dec 5 2009, 04:22 PM sendjonathanmail Hey man, did you use an airbrush when you painted ... Dec 5 2009, 09:19 PM Spoke
Hey man, did you use an airbrush when you painted... Dec 6 2009, 05:47 AM Spoke The clutch tube was repaired before as there is a ... Dec 6 2009, 08:51 AM Spoke So what shape should the clutch tube have? This on... Dec 6 2009, 10:13 AM Spoke The plate for the firewall is completed and ready ... Dec 6 2009, 07:36 PM
neo914-6
One of the first threads I started on the 914club... Aug 9 2008, 03:25 PM Spoke Threads about the rear ender and repairs:
Short T... Dec 28 2007, 11:23 PM Spoke Here's some pics of the donor engine with tin ... Dec 28 2007, 11:40 PM Spoke Besides cleaning up the engine and tin, I'll c... Dec 28 2007, 11:57 PM Twystd1 Is that a GEX tag on this engine...????????????
... Dec 29 2007, 12:09 AM Spoke
Is that a GEX tag on this engine...???????????
Y... Dec 29 2007, 03:33 AM Spoke I've decided to put the original D-Jet FI from... Jul 15 2008, 12:43 AM Spoke With the MPS connected to the brain and with the e... Jul 15 2008, 12:47 AM Spoke Finally got around to sandblasting the engine tin ... Jul 15 2008, 01:03 AM Spoke Putting the tin back on the engine. The CHT sensor... Aug 6 2008, 01:14 PM Spoke Question about #2 "Seal". This is the 1/... Aug 6 2008, 04:09 PM fitsbain Where are the pictures of that sheet metal I sent ... Aug 7 2008, 09:49 AM Spoke
Where are the pictures of that sheet metal I sent... Aug 7 2008, 10:36 AM watsonrx13 Man, I hope you used that 2-part expoy.... :woohoo... Aug 7 2008, 12:13 PM Spoke Got the plenum cleaned up and painted. Checked sup... Aug 8 2008, 11:45 AM Spoke Plenum is bolted on. Tin is mostly in place. Ready... Aug 9 2008, 05:28 AM Spoke Decided to make gaskets to put between the intake ... Aug 9 2008, 06:05 AM Spoke Started to reassemble the distributor and noticed ... Aug 11 2008, 10:16 PM Spoke When I installed the distributor, I noticed that w... Aug 11 2008, 10:25 PM Spoke Got all the FI stuff on the engine that is needed ... Aug 11 2008, 10:32 PM Spoke Woo Hoo! :Qarl:
it is alive. Running on FI ... Sep 6 2008, 11:22 AM Spoke Put the engine on a furniture dolly today. Now I c... Sep 8 2008, 11:20 PM Spoke Started removing stuff from the engine. These IDF4... Sep 8 2008, 11:22 PM Spoke My first engine drop. Piece of cake. Put my floor ... Sep 15 2008, 03:23 PM Spoke The while-I'm-in-there syndrom will include SS... Sep 15 2008, 03:26 PM Spoke Started work on reinforcing the longs. The repair ... Apr 7 2009, 06:10 PM Spoke Cut the lower part of the fender off. The door jam... Apr 7 2009, 06:34 PM barada
Cut the lower part of the fender off. The door ja... Apr 7 2009, 06:46 PM Spoke There is basically nothing left of the lower part ... Jun 1 2009, 09:45 PM Spoke Preparing to weld the steel plate to the existing ... Jun 1 2009, 09:57 PM Spoke I would make more progress on the 914 if I didn... Jun 1 2009, 11:01 PM Spoke The replacement plate is welded in. Like the steel... Jun 1 2009, 11:06 PM Spoke Here's a fix I did a while back when I was ref... Jun 4 2009, 09:36 PM Spoke Removed all the tar on the passenger side floor. I... Jun 7 2009, 08:59 AM Spoke The inside long has been patched from front to bac... Jun 7 2009, 09:03 AM charliew Where the door gaps still good before you started?... Jun 7 2009, 12:35 PM Spoke Got the gas tank and center fuel lines out today.
... Jul 18 2009, 08:43 AM Spoke This pic was supposed to show the rust around the ... Jul 18 2009, 08:47 AM Spoke A while back I repainted the trunk and relocated t... Jul 18 2009, 08:53 AM Spoke I ground down the flange for the tailshift boot. I... Jul 18 2009, 10:01 AM Spoke Ground off the previously added web and original w... Jul 18 2009, 10:06 AM Spoke This patch will join the bottom long plate to the ... Jul 20 2009, 10:38 PM Spoke The patch is now welded in place. Just the front t... Jul 20 2009, 10:44 PM Spoke Also got the sideshift cover flange welded on.
... Jul 20 2009, 10:48 PM Spoke Got the back of the passenger floor patch done ton... Jul 22 2009, 11:20 PM FourBlades Those are nice looking repairs. :Qarl:
Should ... Jul 23 2009, 09:48 AM Spoke Cleaned up the firewall around the heater tube. I... Jul 25 2009, 10:32 AM Spoke The 2nd piece around the heater tube is now in. I ... Jul 25 2009, 10:39 AM Spoke Patched the holes in the floor, inner firewall, an... Jul 25 2009, 07:46 PM Spoke Last of the patches for the passenger side seat ar... Jul 26 2009, 04:26 PM Spoke I'm ready to install new jack posts but it see... Sep 11 2009, 07:15 PM FourBlades Your car is really coming along. You jack tube st... Sep 11 2009, 09:09 PM Spoke
Your car is really coming along. You jack tube s... Sep 11 2009, 09:20 PM Spoke Here's one of the other things I've been t... Sep 11 2009, 09:15 PM Spoke Mock up of jack tube using Rich Towle's locati... Sep 12 2009, 01:16 AM Spoke Jack plate looks good.
Length of jack tube is ab... Sep 12 2009, 01:20 AM Spoke I used the little piece cut out from the long to s... Sep 12 2009, 05:34 AM Spoke One last hole in the longitudinal patched.
Engine... Sep 13 2009, 02:13 PM Spoke I have a metal bar sitting around so I thought I w... Sep 13 2009, 02:33 PM Spoke Put a couple more steel bar supports in the long.
... Sep 13 2009, 09:51 PM Spoke Jack support plate ready for welding.
Presto... Sep 14 2009, 05:57 AM Spoke After some deliberation, I decided to investigate ... Sep 21 2009, 08:54 PM Spoke Cleaned back to good metal and patched. That looks... Sep 22 2009, 05:44 AM Spoke The long is ready for the support plate. The gray ... Sep 24 2009, 10:08 PM Spoke The support plate is welded in. Gray weld-through ... Sep 24 2009, 10:12 PM Spoke What to do if your nuts are too small: weld 2 toge... Sep 24 2009, 10:51 PM Spoke The suspension pick-up will be seam welded, then t... Nov 16 2009, 04:05 AM Spoke The suspension pick-up is welded on including the ... Nov 16 2009, 04:17 AM Spoke Finally time to patch up the hole looking into the... Nov 16 2009, 04:23 AM Spoke Support plates between inner and outer suspension ... Nov 16 2009, 05:03 AM veltror Excellent thread, I thought mine was the only one ... Nov 16 2009, 09:17 AM FourBlades That is some great looking repair work! :tro... Nov 16 2009, 09:19 AM raw1298 Awesome job :welder: :headbanger: . Gets me pumpe... Nov 16 2009, 12:14 PM Spoke The original hell hole repair put that little patc... Nov 21 2009, 08:43 AM Spoke And Presto! The 2 plates may add a little bit ... Nov 21 2009, 08:48 AM my928s4 Nice work, that looks like it will last a looooong... Nov 21 2009, 08:57 AM Spoke The passenger side engine shelf is a replacement. ... Nov 21 2009, 10:32 PM Spoke Prepping for paint. I either have a red car or a y... Nov 23 2009, 05:41 AM Spoke Primer going on now. Just painting the inner fende... Nov 23 2009, 07:39 PM Spoke Had paint on then decided to fit the swing arm mou... Nov 25 2009, 11:38 PM Spoke Got the paint finished tonight. Feels like I'm... Nov 25 2009, 11:44 PM Spoke Putting the rear suspension back on. Had to spruce... Nov 30 2009, 12:05 AM Spoke Caliper on.
I had plenty of clearance betwee... Nov 30 2009, 12:10 AM Spoke I finally got the car turned around in the garage ... Dec 2 2009, 08:19 PM Spoke This side was also repaired like the passenger sid... Dec 2 2009, 08:37 PM watsonrx13 The grommets go on the missing triangle underneath... Dec 3 2009, 07:07 PM Spoke Thanks for the photo Rob.
I think I'm missing... Dec 4 2009, 01:49 AM Spoke What! Another rust through hole on the drivers... Dec 5 2009, 11:06 AM Spoke Post Whore.
The World timed out again and doubled... Dec 5 2009, 11:15 AM Spoke Here's the Ace Hardware seat pivot repair. Not... Dec 5 2009, 04:18 PM my928s4
Here's the Ace Hardware seat pivot repair. No... Dec 5 2009, 10:00 PM Spoke Here's the middle support. I guess the clutch ... Dec 5 2009, 04:22 PM sendjonathanmail Hey man, did you use an airbrush when you painted ... Dec 5 2009, 09:19 PM Spoke
Hey man, did you use an airbrush when you painted... Dec 6 2009, 05:47 AM Spoke The clutch tube was repaired before as there is a ... Dec 6 2009, 08:51 AM Spoke So what shape should the clutch tube have? This on... Dec 6 2009, 10:13 AM Spoke The plate for the firewall is completed and ready ... Dec 6 2009, 07:36 PM  |
1 User(s) are reading this topic (1 Guests and 0 Anonymous Users)
0 Members:

|
Lo-Fi Version | Time is now: 23rd July 2026 - 04:28 AM |
Invision Power Board
v9.1.4 © 2026 IPS, Inc.