|
|
|
Porsche, and the Porsche crest are registered trademarks of Dr. Ing. h.c. F. Porsche AG.
This site is not affiliated with Porsche in any way. Its only purpose is to provide an online forum for car enthusiasts. All other trademarks are property of their respective owners. |
|
|

  |

| rick 918-S |
 Feb 6 2008, 07:59 PM Feb 6 2008, 07:59 PM
Post
#1
|
|
Hey nice rack! -Celette  Group: Members Posts: 20,458 Joined: 30-December 02 From: Now in Superior WI Member No.: 43 Region Association: Northstar Region |
I started out to help a friend with some rust repair on his Mercedes. Things got a little out of hand.
I started on this car last year but had to put it on hold. I worked all summer, fall and early winter out of town. Attached image(s) 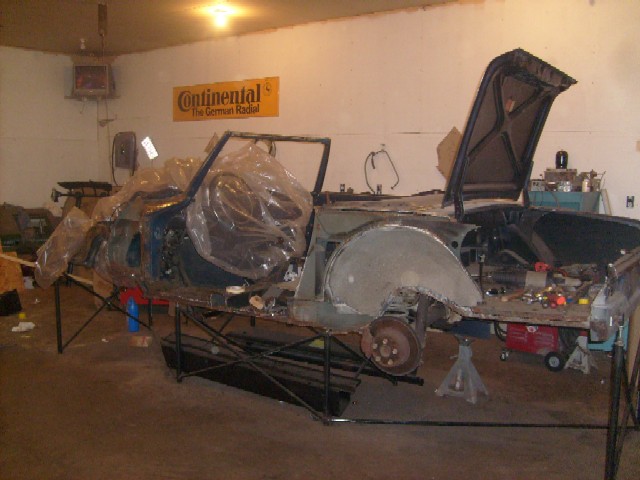
|
   |

 
|
| richardmosselman |
Feb 6 2008, 08:00 PM
Post
#2
|
|
slvr bullet Group: Members Posts: 390 Joined: 18-September 05 From: Victoria BC Member No.: 4,822 |
190 SL? R
|
|
|
|
| rick 918-S |
Feb 6 2008, 08:11 PM
Post
#3
|
|
Hey nice rack! -Celette Group: Members Posts: 20,458 Joined: 30-December 02 From: Now in Superior WI Member No.: 43 Region Association: Northstar Region |
So I'm back at it now.
Attached image(s) 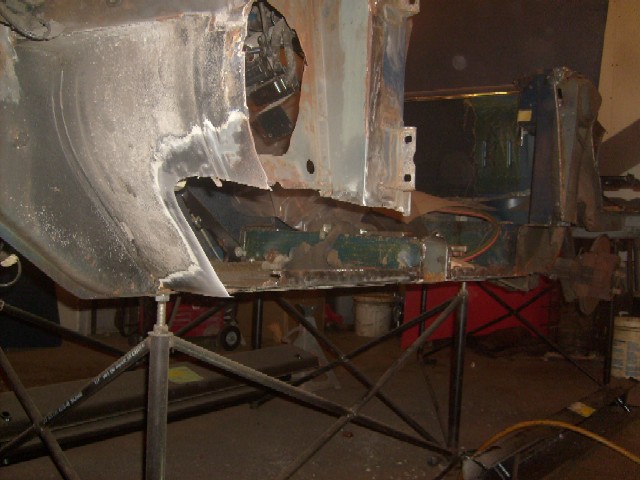 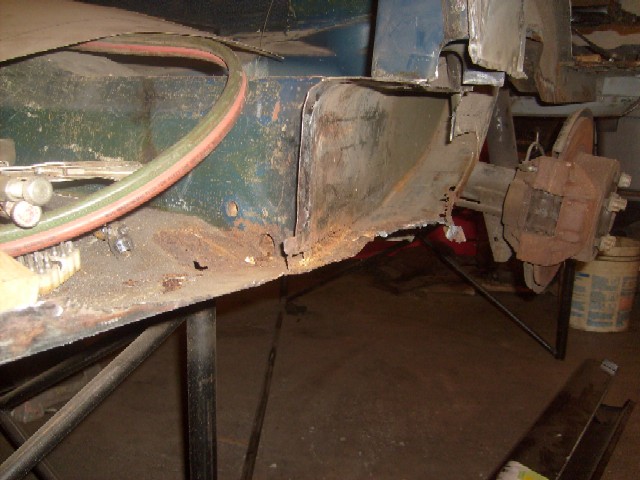 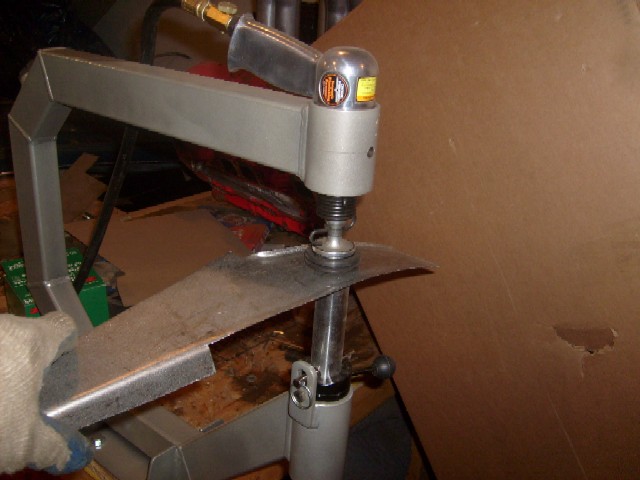
|
|
|
|
| rick 918-S |
Feb 6 2008, 08:12 PM
Post
#4
|
|
Hey nice rack! -Celette Group: Members Posts: 20,458 Joined: 30-December 02 From: Now in Superior WI Member No.: 43 Region Association: Northstar Region |
rear frame rail
Attached image(s) 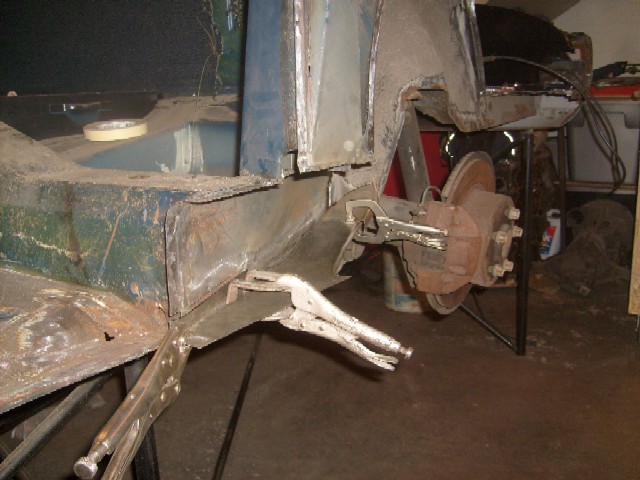 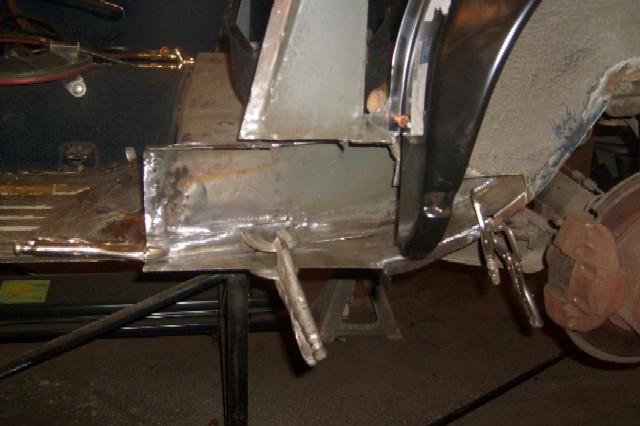
|
|
|
|
| ws91420 |
Feb 6 2008, 08:14 PM
Post
#5
|
|
Yes I have one a Lensley 914 Group: Members Posts: 2,063 Joined: 10-September 03 From: Ruther Glen,VA (halfway between sticks and civilization) Member No.: 1,137 Region Association: MidAtlantic Region |
Hey Rick did you finish the Healy w/ the Suzuki drivetrain?
|
|
|
|
| rick 918-S |
Feb 6 2008, 08:19 PM
Post
#6
|
|
Hey nice rack! -Celette Group: Members Posts: 20,458 Joined: 30-December 02 From: Now in Superior WI Member No.: 43 Region Association: Northstar Region |
QUOTE(ws91420 @ Feb 6 2008, 06:14 PM)  Hey Rick did you finish the Healy w/ the Suzuki drivetrain? Sadly, another project on hold for work. |
|
|
|
| rick 918-S |
Feb 6 2008, 08:27 PM
Post
#7
|
|
Hey nice rack! -Celette Group: Members Posts: 20,458 Joined: 30-December 02 From: Now in Superior WI Member No.: 43 Region Association: Northstar Region |
Repaired the lower inner wheel house put the spot welds back on the lower edge as they were.
Fit to the new outer wheel house ready for the frame rail install. Attached image(s) 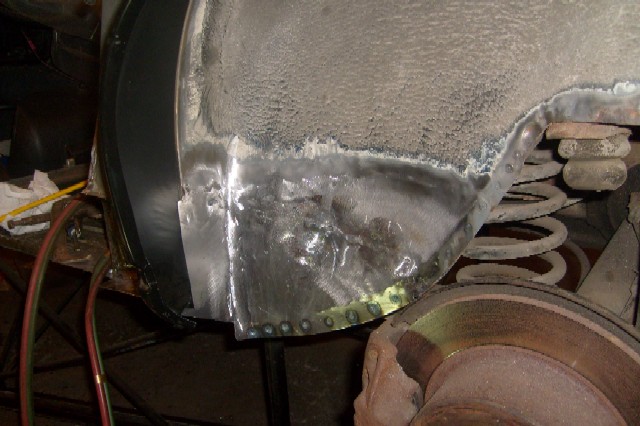 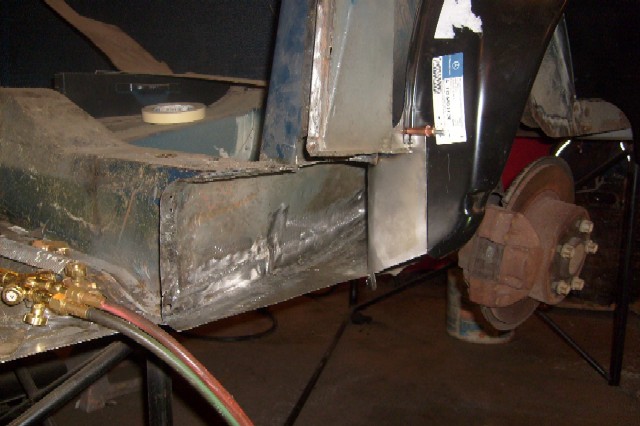
|
|
|
|
| rick 918-S |
Feb 6 2008, 08:30 PM
Post
#8
|
|
Hey nice rack! -Celette Group: Members Posts: 20,458 Joined: 30-December 02 From: Now in Superior WI Member No.: 43 Region Association: Northstar Region |
QUOTE(richardmosselman @ Feb 6 2008, 06:00 PM) 190 SL? R 1970 280 SL |
|
|
|
| r_towle |
Feb 6 2008, 08:44 PM
Post
#9
|
|
Custom Member Group: Members Posts: 24,574 Joined: 9-January 03 From: Taxachusetts Member No.: 124 Region Association: North East States |
did you make the hammer stand? If so, please explain.
And its use. IC you use a torch, why? I got more, but I will keep it short for now. Rich |
|
|
|
| iamchappy |
Feb 6 2008, 08:45 PM
Post
#10
|
|
It all happens so fast! Group: Members Posts: 4,893 Joined: 5-November 03 From: minnetonka, mn Member No.: 1,315 Region Association: Upper MidWest |
You are sick............
|
|
|
|
| rick 918-S |
Feb 6 2008, 09:36 PM
Post
#11
|
|
Hey nice rack! -Celette Group: Members Posts: 20,458 Joined: 30-December 02 From: Now in Superior WI Member No.: 43 Region Association: Northstar Region |
QUOTE(r_towle @ Feb 6 2008, 06:44 PM) did you make the hammer stand? If so, please explain. And its use. IC you use a torch, why? I got more, but I will keep it short for now. Rich The stand you are refering to is a planishing hammer sold by harbor frieght. The lower anvils that come with the unit have verying radius' for curving sheet metel. I also cut the head off a shrinking hammer and use it in the planisher to flatten stuff out. Torch is for shrinking, anniling and gas welding. Sometimes the metal will work harden so you need to soften it back up. Some of the panels on this car have obvious gas welds on them. I have to replicate the look. Ask away. BTW: once the rails (the rockers in this car are actually the structural rails) are back in the rest of the car comes apart to the shell for blasting. I have it set up on a jig now so I have to get the rails back in before it comes off the jig. This car had the front shroud (fenders,nose panel, and wiper panel) as well as both quarters replaced probably when it was near new. they were brazed back on. Every place where the brazing was done rusted real bad! This is the front... (IMG:style_emoticons/default/shades.gif) It's getting new inner structure. I had to assemble the inner panel and the upper boxed rail. I have a spot welder to replicate the factory welds. I transfered the shock mount from the old panel to the new. Notice the weld bead across the top like the factory and the spot welds on the verticals. Attached image(s) 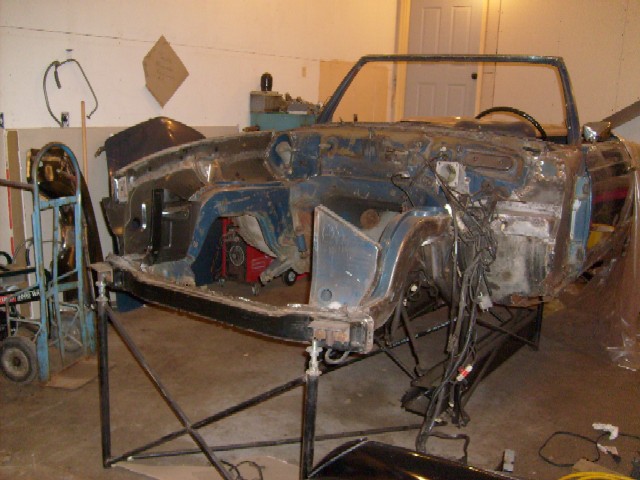 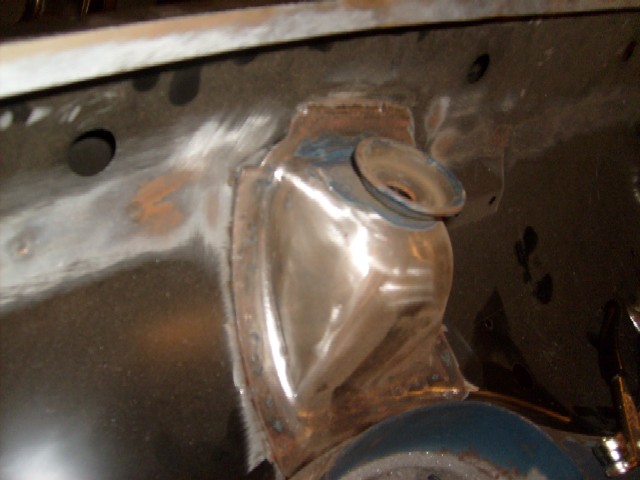 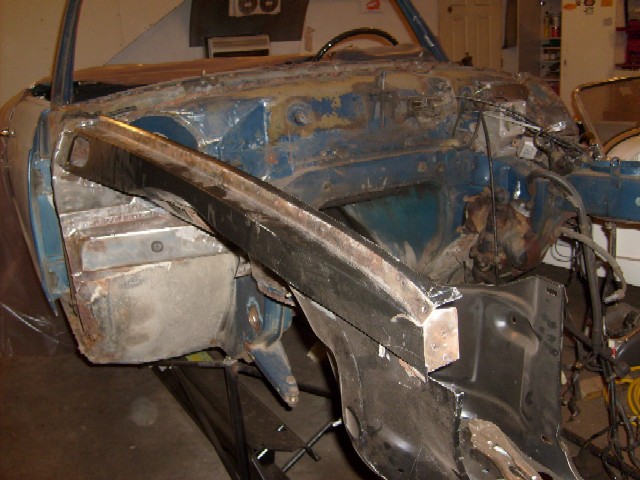
|
|
|
|
| JmuRiz |
Feb 7 2008, 09:02 AM
Post
#12
|
|
914 Guru Group: Members Posts: 5,426 Joined: 30-December 02 From: NoVA Member No.: 50 Region Association: MidAtlantic Region |
QUOTE(rick 918-S @ Feb 6 2008, 06:30 PM) QUOTE(richardmosselman @ Feb 6 2008, 06:00 PM) 190 SL? R 1970 280 SL OK now I'm scared to start digging into my '74 280C...thanks a lot for making me nervous, haha. |
|
|
|
| rick 918-S |
Feb 7 2008, 09:19 AM
Post
#13
|
|
Hey nice rack! -Celette Group: Members Posts: 20,458 Joined: 30-December 02 From: Now in Superior WI Member No.: 43 Region Association: Northstar Region |
QUOTE(JmuRiz @ Feb 7 2008, 07:02 AM) QUOTE(rick 918-S @ Feb 6 2008, 06:30 PM) QUOTE(richardmosselman @ Feb 6 2008, 06:00 PM) 190 SL? R 1970 280 SL OK now I'm scared to start digging into my '74 280C...thanks a lot for making me nervous, haha. These old Mercedes rust worse than any 914. And their method of assembly is less than friendly. In order to drop the engine out the bottom still bolted to the "K" member, you still need to dis-assemble the top end of the engine. You have to remove so many parts you may as well strip everything out and start from scratch. Even the transmission mounts have a certain way they need to be dis-assembled in order to access the shifter and drive shaft.... (IMG:style_emoticons/default/screwy.gif) Imagine Rube Goldberg building a ship in a bottle... (IMG:style_emoticons/default/confused24.gif) (IMG:style_emoticons/default/screwy.gif) |
|
|
|
| r_towle |
Feb 7 2008, 04:56 PM
Post
#14
|
|
Custom Member Group: Members Posts: 24,574 Joined: 9-January 03 From: Taxachusetts Member No.: 124 Region Association: North East States |
The jig that you built.
Is that custom built for that car, or is it a universal table that can be reset for different sizes? Here is my dilema. I have a 356 that the front suspension was cut out. The rear torsion tube was cut out. I have both parts and all the chassis measurements. I want to build a "jig" that I can pull down and push up the unibody with so I can get it and keep it square as I weld all the stuff back in. I like the use of threaded rod, same Idea I was going to use. At the end of the day, I would like it on rollers, so I will be building the lower portion of the jig similar to a steel truss to make it super rigid and strong enough to pull the car down and push it up...hopefully. I guess I would rather not build a jig that is specific for this car because as you know I have a few ideas and projects that are on deck and a decent universal jig would be a better investment of my time in the long run. So, any suggestions? Rich |
|
|
|
| neo914-6 |
Feb 7 2008, 05:39 PM
Post
#15
|
|
neo life Group: Members Posts: 5,086 Joined: 16-January 03 From: Willow Glen (San Jose) Member No.: 159 |
(IMG:style_emoticons/default/clap56.gif) great work Rick!
I wanted to buy an English Wheel (<$300) at HF but I have no room and limited funds... (IMG:style_emoticons/default/huh.gif) |
|
|
|
| rick 918-S |
Feb 7 2008, 07:22 PM
Post
#16
|
|
Hey nice rack! -Celette Group: Members Posts: 20,458 Joined: 30-December 02 From: Now in Superior WI Member No.: 43 Region Association: Northstar Region |
QUOTE(r_towle @ Feb 7 2008, 02:56 PM) The jig that you built. Is that custom built for that car, or is it a universal table that can be reset for different sizes? Here is my dilema. I have a 356 that the front suspension was cut out. The rear torsion tube was cut out. I have both parts and all the chassis measurements. I want to build a "jig" that I can pull down and push up the unibody with so I can get it and keep it square as I weld all the stuff back in. I like the use of threaded rod, same Idea I was going to use. At the end of the day, I would like it on rollers, so I will be building the lower portion of the jig similar to a steel truss to make it super rigid and strong enough to pull the car down and push it up...hopefully. I guess I would rather not build a jig that is specific for this car because as you know I have a few ideas and projects that are on deck and a decent universal jig would be a better investment of my time in the long run. So, any suggestions? Rich This jig is only for this car. It has very limited push/pull capability, really only a support system to prevent sag. You should see if anyone has an old Cellette bench collection dust near you. There is one here local to me but I don't have a barn.... (IMG:style_emoticons/default/idea.gif) ...yet. You could always build a simple chassis jig from a couple of salvage "I" beams. More than one way to skin a car. |
|
|
|
| scotty b |
Feb 7 2008, 07:25 PM
Post
#17
|
|
rust free you say ? Group: Members Posts: 16,375 Joined: 7-January 05 From: richmond, Va. Member No.: 3,419 Region Association: None |
You ain't kidding brother ! This is a customers 230 SEL I did a couple years ago. When I called him over to see what I fopund the look on his face was....well obvious. His wife had been driving on this for 25+ years.All the shiney is NEW metal. The whole frame rail was GONE and had been "repaired " with coat hanger and bondo in the 70's. First is the inside of the rear wheel well when I got started. Also note this car had already been smoothed and painted, so I had to do this plus replace front floor pans on a show winner that was otherwise DONE.
Attached image(s) 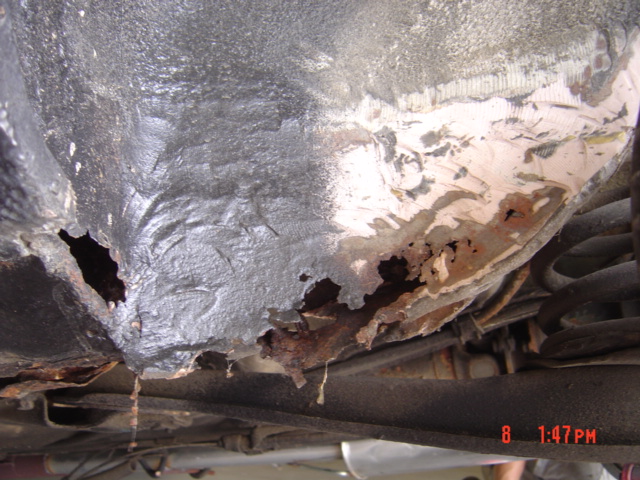 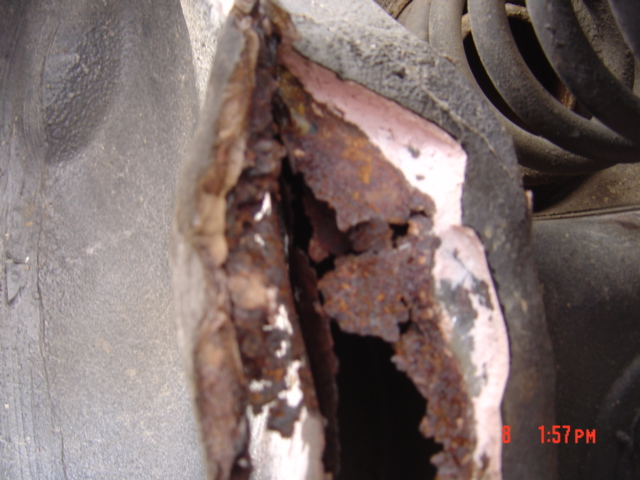
|
|
|
|
| scotty b |
Feb 7 2008, 07:28 PM
Post
#18
|
|
rust free you say ? Group: Members Posts: 16,375 Joined: 7-January 05 From: richmond, Va. Member No.: 3,419 Region Association: None |
Dr side cut out and etched and new piece in
Attached image(s) 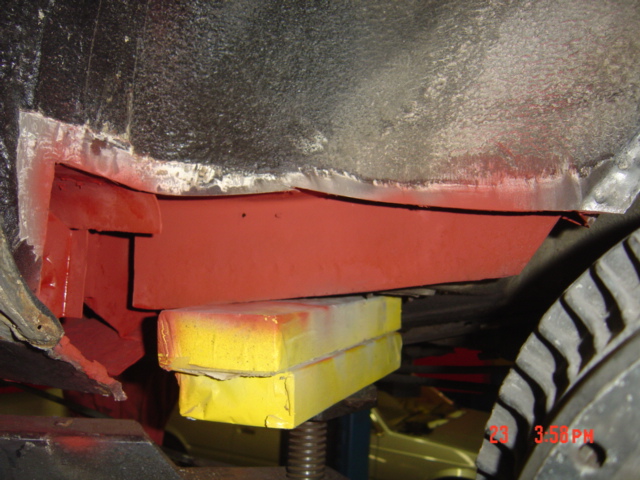 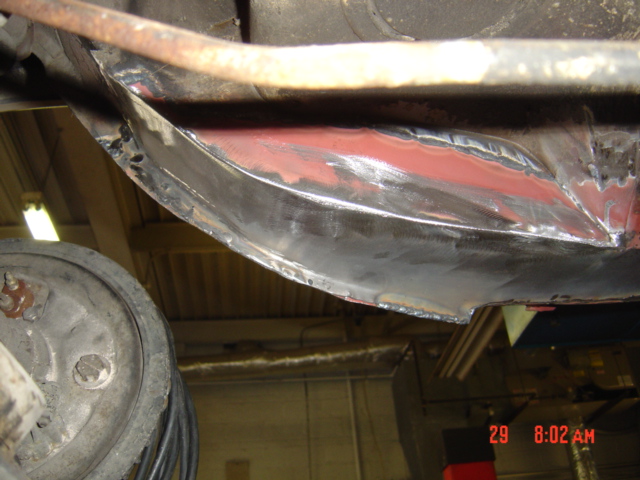
|
|
|
|
| scotty b |
Feb 7 2008, 07:29 PM
Post
#19
|
|
rust free you say ? Group: Members Posts: 16,375 Joined: 7-January 05 From: richmond, Va. Member No.: 3,419 Region Association: None |
Passenger side was not much better
Attached image(s) 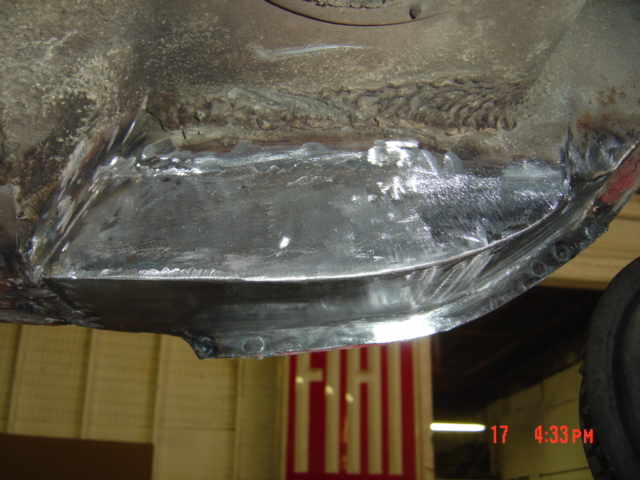 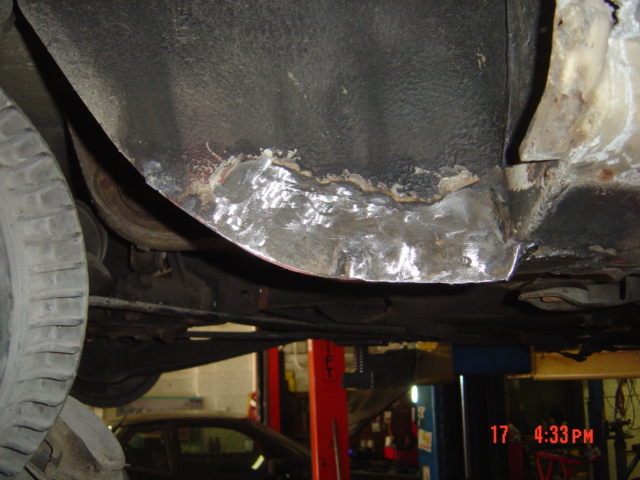
|
|
|
|
| scotty b |
Feb 7 2008, 07:32 PM
Post
#20
|
|
rust free you say ? Group: Members Posts: 16,375 Joined: 7-January 05 From: richmond, Va. Member No.: 3,419 Region Association: None |
This is the only pic I have of the top side, and this was BEFORE I started the repair. Sorry to hi-jack Rick. I thought it was appropriate though (IMG:style_emoticons/default/smile.gif)
Attached image(s) 
|
|
|
|
|
1 User(s) are reading this topic (1 Guests and 0 Anonymous Users)
0 Members:

|
Lo-Fi Version | Time is now: 16th May 2024 - 04:53 PM |
Invision Power Board
v9.1.4 © 2024 IPS, Inc.