|
|
|
Porsche, and the Porsche crest are registered trademarks of Dr. Ing. h.c. F. Porsche AG.
This site is not affiliated with Porsche in any way. Its only purpose is to provide an online forum for car enthusiasts. All other trademarks are property of their respective owners. |
|
|


| horizontally-opposed |
 Feb 8 2008, 03:03 PM Feb 8 2008, 03:03 PM
Post
#41
|
|
Advanced Member  Group: Members Posts: 3,456 Joined: 12-May 04 From: San Francisco Member No.: 2,058 Region Association: None |
So I've decided to confront a few rust bubbles on my car, before painting it (the car looked great, but I never liked the wavy sides due to poor prep and no blocking).
If you can't stomach this first photo, please don't continue... (IMG:style_emoticons/default/biggrin.gif) pete Attached thumbnail(s) 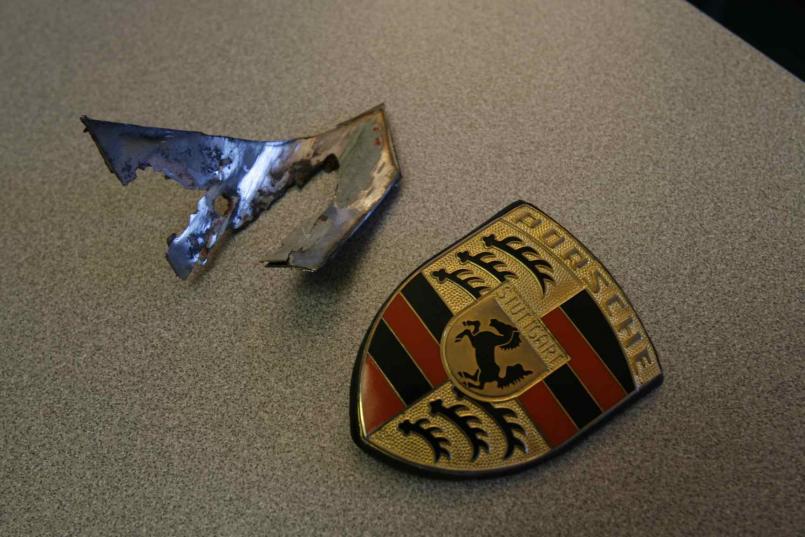
|
   |

 
|
Posts in this topic
horizontally-opposed The 25-year/250,000-mile refresh Feb 8 2008, 03:03 PM horizontally-opposed That came from here... Feb 8 2008, 03:04 PM rdauenhauer Where? :confused:
Let me Guess :idea: ...Sails Feb 8 2008, 03:13 PM horizontally-opposed Crap, I can't size some of the photos down sma... Feb 8 2008, 03:16 PM
horizontally-opposed That came from here... Feb 8 2008, 03:04 PM rdauenhauer Where? :confused:
Let me Guess :idea: ...Sails Feb 8 2008, 03:13 PM horizontally-opposed Crap, I can't size some of the photos down sma... Feb 8 2008, 03:16 PM
 SirAndy
This is the left rear corner, has been bothering ... Feb 14 2008, 11:57 AM John
you will have to remove *ALL* of the foam in th... Feb 14 2008, 12:38 PM horizontally-opposed Other sail panel....
Two pinholes + the factory h... Feb 8 2008, 03:18 PM horizontally-opposed Two more pinholes in the right front fender, appar... Feb 8 2008, 03:22 PM horizontally-opposed There's a wrong way to fill in the U.S. sidema... Feb 8 2008, 03:24 PM horizontally-opposed And then there's a right way to do it... :wel... Feb 8 2008, 03:25 PM horizontally-opposed Sorry for the sideways jpgs.... don't mean to ... Feb 8 2008, 03:28 PM horizontally-opposed Last small enough photo for now...
Taking the cha... Feb 8 2008, 03:35 PM McMark
I don't think so. B)
It looks... well... ... Feb 8 2008, 03:51 PM rick 918-S When you start to get discouraged be happy your no... Feb 8 2008, 04:35 PM horizontally-opposed
When you start to get discouraged be happy your n... Feb 8 2008, 04:39 PM horizontally-opposed Paint shop will make the final decision on what to... Feb 8 2008, 04:38 PM TINCAN914 I don't know how much truth there is to this, ... Feb 8 2008, 04:45 PM horizontally-opposed
I don't know how much truth there is to this,... Feb 8 2008, 04:47 PM McMark Yes it will if you paint over it. Make sure it... Feb 8 2008, 05:46 PM watsonrx13 BTW Pete, if you didn't already know, the firs... Feb 8 2008, 05:51 PM 1970 Neun vierzehn Pete,
Make sure that your shop does a thorough se... Feb 9 2008, 10:40 AM horizontally-opposed
Pete,
Make sure that your shop does a thorough s... Feb 11 2008, 02:50 PM 1970 Neun vierzehn
... Let me ask you this: Was the rust on the back... Feb 11 2008, 04:25 PM Rusty Dude... someone vandalized your car with a majik-m... Feb 11 2008, 01:41 PM championgt1 :rotfl: Feb 11 2008, 02:02 PM Jenny :) I was expecting to see "Remember to pick ... Feb 11 2008, 09:55 PM horizontally-opposed Hey Jenny, long time no see! :)
Here's... Feb 13 2008, 08:58 PM horizontally-opposed 'nuther Feb 13 2008, 08:59 PM horizontally-opposed "I *am* a Porsche reflector" holes remov... Feb 13 2008, 09:00 PM horizontally-opposed and, while we're at it, antenna be gone... Feb 13 2008, 09:02 PM horizontally-opposed ... Feb 13 2008, 09:03 PM horizontally-opposed but by far the worst damage is this.... I wish I... Feb 13 2008, 09:04 PM horizontally-opposed After melting the factory gunk (it is TOUGH stuff,... Feb 13 2008, 09:05 PM horizontally-opposed engine lid in trunk, ready to go to paint shop...
... Feb 13 2008, 09:10 PM SGB Mines time is coming one day. There are severalar... Feb 13 2008, 10:33 PM jd74914 What color is your car Pete? I really like it. Feb 13 2008, 10:42 PM horizontally-opposed
What color is your car Pete? I really like it.
... Feb 14 2008, 10:39 AM Porsche Rescue I too am a bit of a back to original purist. But s... Feb 14 2008, 11:23 AM Travis Neff Keep that Toranado red - it looks great on your ca... Feb 14 2008, 12:43 PM 1970 Neun vierzehn a pair wearing Bahia Red...... Feb 14 2008, 01:22 PM horizontally-opposed Thanks very much for posting that!!! I... Feb 14 2008, 02:17 PM Ferg I've owned both colors :D these shots were ... Feb 14 2008, 02:57 PM watsonrx13 Another sample of Bahia Red... I had this car pain... Feb 15 2008, 07:49 AM horizontally-opposed So some progress has been made...
First up are be... Mar 6 2008, 12:09 AM horizontally-opposed Next up... the targa bar and LR fender by the tail... Mar 6 2008, 12:11 AM horizontally-opposed Here's where things get interesting.
After sc... Mar 6 2008, 12:20 AM horizontally-opposed The two pinholes in the right front fender filled.... Mar 6 2008, 12:21 AM horizontally-opposed BUT, here's where the bummers begin.
Same are... Mar 6 2008, 12:24 AM McMark Looking good Pete! Glad to see the seam seale... Mar 6 2008, 12:26 AM horizontally-opposed
I stopped using canned primer/paint over my metal... Mar 6 2008, 01:31 AM stevesc_us
I stopped using canned primer/paint over my meta... Mar 6 2008, 03:46 PM McMark
I stopped using canned primer/paint over my met... Mar 6 2008, 04:43 PM horizontally-opposed
For sure. I've known that since it happened.... Mar 6 2008, 05:35 PM McMark
For sure. I've known that since it happened... Mar 6 2008, 09:40 PM horizontally-opposed While we were in there syndrome set in, so I decid... Mar 6 2008, 12:39 AM dw914er man
that stuff is scary
i just had a surface pai... Mar 6 2008, 12:42 AM horizontally-opposed As you can see, as soon as the Bahia-painted tar w... Mar 6 2008, 12:43 AM rick 918-S :popcorn: :wavebye: Mar 6 2008, 12:48 AM horizontally-opposed Get up close to things, and you can see where the ... Mar 6 2008, 12:49 AM horizontally-opposed The right side beam under the seat, which appears ... Mar 6 2008, 12:52 AM horizontally-opposed Unfortunately, here's where I got more than a ... Mar 6 2008, 01:02 AM SirAndy
If you drive your 914 in the rain, this matters.
... Mar 6 2008, 02:19 AM Richard Casto
Unfortunately, here's where I got more than a... Mar 6 2008, 08:07 AM McMark BTW, you saw you have The Crack®, right? Mar 6 2008, 12:56 PM horizontally-opposed
BTW, you saw you have The Crack®, right?
Did n... Mar 6 2008, 01:23 PM John
BTW, you saw you have The Crack®, right?
Did ... Mar 6 2008, 09:50 PM dw914er gotta love old cars (any old car, doesnt exactly m... Mar 6 2008, 03:53 PM Krieger914 You can do it man! Hang in there for pete... Mar 6 2008, 09:33 PM Engman
BTW, you saw you have The Crack®, right?
Did ... Mar 6 2008, 09:46 PM horizontally-opposed Thanks, guys.
Longitudinals look and sound good -... Mar 6 2008, 10:43 PM horizontally-opposed Unfortunately, the left box didn't appear to h... Mar 6 2008, 10:45 PM horizontally-opposed Moving along, here's what I took out of the vo... Apr 3 2008, 04:02 PM horizontally-opposed The good... (kinda) Apr 3 2008, 04:03 PM horizontally-opposed And the ugly... Apr 3 2008, 04:04 PM horizontally-opposed Now, onto the interior... Apr 3 2008, 04:06 PM horizontally-opposed closer in on the lowered driver's seat... Apr 3 2008, 04:07 PM horizontally-opposed And closer still... Apr 3 2008, 04:08 PM horizontally-opposed another angle...
Bolted the GTS seat in after thi... Apr 3 2008, 04:12 PM horizontally-opposed Now for the not so fun: Apr 3 2008, 04:15 PM horizontally-opposed "My" hell hole... Apr 3 2008, 04:16 PM horizontally-opposed Another angle of hell... Apr 3 2008, 04:17 PM horizontally-opposed Engman kit preparations. Very nice kit. Some holes... Apr 3 2008, 04:19 PM horizontally-opposed Another... Apr 3 2008, 04:20 PM horizontally-opposed And one more... of the seatbelt bolt hole. Both ha... Apr 3 2008, 04:28 PM horizontally-opposed After much discussion, reviews of all the installa... Apr 3 2008, 04:29 PM rick 918-S Nice to hear about the progress Pete. :welder: :s... Apr 3 2008, 10:18 PM McMark No doubt this thread is useful! Keep 'em ... Apr 4 2008, 12:19 AM Engman Thank you for posting the pics! I always ask f... Apr 4 2008, 11:48 AM Root_Werks I installed my kit last year. Went in like butter... Apr 4 2008, 04:08 PM horizontally-opposed Mark,
I too think your kit rocks! And I think... Apr 4 2008, 10:42 PM Engman Thanks - but I am always on the lookout to improve... Apr 4 2008, 11:52 PM horizontally-opposed Kit in place... Apr 7 2008, 01:55 PM horizontally-opposed closer... Apr 7 2008, 01:58 PM horizontally-opposed Bulk of sills are still Bahia thanks to the alumin... Apr 7 2008, 01:59 PM horizontally-opposed Once the jack-post boxes were cut away, we found s... Apr 7 2008, 02:02 PM horizontally-opposed and the left side... Apr 7 2008, 02:02 PM horizontally-opposed So this is where the car stands today. Just a litt... Apr 7 2008, 02:05 PM horizontally-opposed And from the rear. Man those 165s on steelies are ... Apr 7 2008, 02:06 PM horizontally-opposed In my ongoing struggle with Bahia vs. Toronado, I... Apr 7 2008, 03:40 PM 1970 Neun vierzehn
Anyway, out of respect for bandwidth, am I comm... Apr 7 2008, 04:23 PM
SirAndy
This is the left rear corner, has been bothering ... Feb 14 2008, 11:57 AM John
you will have to remove *ALL* of the foam in th... Feb 14 2008, 12:38 PM horizontally-opposed Other sail panel....
Two pinholes + the factory h... Feb 8 2008, 03:18 PM horizontally-opposed Two more pinholes in the right front fender, appar... Feb 8 2008, 03:22 PM horizontally-opposed There's a wrong way to fill in the U.S. sidema... Feb 8 2008, 03:24 PM horizontally-opposed And then there's a right way to do it... :wel... Feb 8 2008, 03:25 PM horizontally-opposed Sorry for the sideways jpgs.... don't mean to ... Feb 8 2008, 03:28 PM horizontally-opposed Last small enough photo for now...
Taking the cha... Feb 8 2008, 03:35 PM McMark
I don't think so. B)
It looks... well... ... Feb 8 2008, 03:51 PM rick 918-S When you start to get discouraged be happy your no... Feb 8 2008, 04:35 PM horizontally-opposed
When you start to get discouraged be happy your n... Feb 8 2008, 04:39 PM horizontally-opposed Paint shop will make the final decision on what to... Feb 8 2008, 04:38 PM TINCAN914 I don't know how much truth there is to this, ... Feb 8 2008, 04:45 PM horizontally-opposed
I don't know how much truth there is to this,... Feb 8 2008, 04:47 PM McMark Yes it will if you paint over it. Make sure it... Feb 8 2008, 05:46 PM watsonrx13 BTW Pete, if you didn't already know, the firs... Feb 8 2008, 05:51 PM 1970 Neun vierzehn Pete,
Make sure that your shop does a thorough se... Feb 9 2008, 10:40 AM horizontally-opposed
Pete,
Make sure that your shop does a thorough s... Feb 11 2008, 02:50 PM 1970 Neun vierzehn
... Let me ask you this: Was the rust on the back... Feb 11 2008, 04:25 PM Rusty Dude... someone vandalized your car with a majik-m... Feb 11 2008, 01:41 PM championgt1 :rotfl: Feb 11 2008, 02:02 PM Jenny :) I was expecting to see "Remember to pick ... Feb 11 2008, 09:55 PM horizontally-opposed Hey Jenny, long time no see! :)
Here's... Feb 13 2008, 08:58 PM horizontally-opposed 'nuther Feb 13 2008, 08:59 PM horizontally-opposed "I *am* a Porsche reflector" holes remov... Feb 13 2008, 09:00 PM horizontally-opposed and, while we're at it, antenna be gone... Feb 13 2008, 09:02 PM horizontally-opposed ... Feb 13 2008, 09:03 PM horizontally-opposed but by far the worst damage is this.... I wish I... Feb 13 2008, 09:04 PM horizontally-opposed After melting the factory gunk (it is TOUGH stuff,... Feb 13 2008, 09:05 PM horizontally-opposed engine lid in trunk, ready to go to paint shop...
... Feb 13 2008, 09:10 PM SGB Mines time is coming one day. There are severalar... Feb 13 2008, 10:33 PM jd74914 What color is your car Pete? I really like it. Feb 13 2008, 10:42 PM horizontally-opposed
What color is your car Pete? I really like it.
... Feb 14 2008, 10:39 AM Porsche Rescue I too am a bit of a back to original purist. But s... Feb 14 2008, 11:23 AM Travis Neff Keep that Toranado red - it looks great on your ca... Feb 14 2008, 12:43 PM 1970 Neun vierzehn a pair wearing Bahia Red...... Feb 14 2008, 01:22 PM horizontally-opposed Thanks very much for posting that!!! I... Feb 14 2008, 02:17 PM Ferg I've owned both colors :D these shots were ... Feb 14 2008, 02:57 PM watsonrx13 Another sample of Bahia Red... I had this car pain... Feb 15 2008, 07:49 AM horizontally-opposed So some progress has been made...
First up are be... Mar 6 2008, 12:09 AM horizontally-opposed Next up... the targa bar and LR fender by the tail... Mar 6 2008, 12:11 AM horizontally-opposed Here's where things get interesting.
After sc... Mar 6 2008, 12:20 AM horizontally-opposed The two pinholes in the right front fender filled.... Mar 6 2008, 12:21 AM horizontally-opposed BUT, here's where the bummers begin.
Same are... Mar 6 2008, 12:24 AM McMark Looking good Pete! Glad to see the seam seale... Mar 6 2008, 12:26 AM horizontally-opposed
I stopped using canned primer/paint over my metal... Mar 6 2008, 01:31 AM stevesc_us
I stopped using canned primer/paint over my meta... Mar 6 2008, 03:46 PM McMark
I stopped using canned primer/paint over my met... Mar 6 2008, 04:43 PM horizontally-opposed
For sure. I've known that since it happened.... Mar 6 2008, 05:35 PM McMark
For sure. I've known that since it happened... Mar 6 2008, 09:40 PM horizontally-opposed While we were in there syndrome set in, so I decid... Mar 6 2008, 12:39 AM dw914er man
that stuff is scary
i just had a surface pai... Mar 6 2008, 12:42 AM horizontally-opposed As you can see, as soon as the Bahia-painted tar w... Mar 6 2008, 12:43 AM rick 918-S :popcorn: :wavebye: Mar 6 2008, 12:48 AM horizontally-opposed Get up close to things, and you can see where the ... Mar 6 2008, 12:49 AM horizontally-opposed The right side beam under the seat, which appears ... Mar 6 2008, 12:52 AM horizontally-opposed Unfortunately, here's where I got more than a ... Mar 6 2008, 01:02 AM SirAndy
If you drive your 914 in the rain, this matters.
... Mar 6 2008, 02:19 AM Richard Casto
Unfortunately, here's where I got more than a... Mar 6 2008, 08:07 AM McMark BTW, you saw you have The Crack®, right? Mar 6 2008, 12:56 PM horizontally-opposed
BTW, you saw you have The Crack®, right?
Did n... Mar 6 2008, 01:23 PM John
BTW, you saw you have The Crack®, right?
Did ... Mar 6 2008, 09:50 PM dw914er gotta love old cars (any old car, doesnt exactly m... Mar 6 2008, 03:53 PM Krieger914 You can do it man! Hang in there for pete... Mar 6 2008, 09:33 PM Engman
BTW, you saw you have The Crack®, right?
Did ... Mar 6 2008, 09:46 PM horizontally-opposed Thanks, guys.
Longitudinals look and sound good -... Mar 6 2008, 10:43 PM horizontally-opposed Unfortunately, the left box didn't appear to h... Mar 6 2008, 10:45 PM horizontally-opposed Moving along, here's what I took out of the vo... Apr 3 2008, 04:02 PM horizontally-opposed The good... (kinda) Apr 3 2008, 04:03 PM horizontally-opposed And the ugly... Apr 3 2008, 04:04 PM horizontally-opposed Now, onto the interior... Apr 3 2008, 04:06 PM horizontally-opposed closer in on the lowered driver's seat... Apr 3 2008, 04:07 PM horizontally-opposed And closer still... Apr 3 2008, 04:08 PM horizontally-opposed another angle...
Bolted the GTS seat in after thi... Apr 3 2008, 04:12 PM horizontally-opposed Now for the not so fun: Apr 3 2008, 04:15 PM horizontally-opposed "My" hell hole... Apr 3 2008, 04:16 PM horizontally-opposed Another angle of hell... Apr 3 2008, 04:17 PM horizontally-opposed Engman kit preparations. Very nice kit. Some holes... Apr 3 2008, 04:19 PM horizontally-opposed Another... Apr 3 2008, 04:20 PM horizontally-opposed And one more... of the seatbelt bolt hole. Both ha... Apr 3 2008, 04:28 PM horizontally-opposed After much discussion, reviews of all the installa... Apr 3 2008, 04:29 PM rick 918-S Nice to hear about the progress Pete. :welder: :s... Apr 3 2008, 10:18 PM McMark No doubt this thread is useful! Keep 'em ... Apr 4 2008, 12:19 AM Engman Thank you for posting the pics! I always ask f... Apr 4 2008, 11:48 AM Root_Werks I installed my kit last year. Went in like butter... Apr 4 2008, 04:08 PM horizontally-opposed Mark,
I too think your kit rocks! And I think... Apr 4 2008, 10:42 PM Engman Thanks - but I am always on the lookout to improve... Apr 4 2008, 11:52 PM horizontally-opposed Kit in place... Apr 7 2008, 01:55 PM horizontally-opposed closer... Apr 7 2008, 01:58 PM horizontally-opposed Bulk of sills are still Bahia thanks to the alumin... Apr 7 2008, 01:59 PM horizontally-opposed Once the jack-post boxes were cut away, we found s... Apr 7 2008, 02:02 PM horizontally-opposed and the left side... Apr 7 2008, 02:02 PM horizontally-opposed So this is where the car stands today. Just a litt... Apr 7 2008, 02:05 PM horizontally-opposed And from the rear. Man those 165s on steelies are ... Apr 7 2008, 02:06 PM horizontally-opposed In my ongoing struggle with Bahia vs. Toronado, I... Apr 7 2008, 03:40 PM 1970 Neun vierzehn
Anyway, out of respect for bandwidth, am I comm... Apr 7 2008, 04:23 PM  |
3 User(s) are reading this topic (3 Guests and 0 Anonymous Users)
0 Members:

|
Lo-Fi Version | Time is now: 7th July 2026 - 09:30 PM |
Invision Power Board
v9.1.4 © 2026 IPS, Inc.