|
|
|
Porsche, and the Porsche crest are registered trademarks of Dr. Ing. h.c. F. Porsche AG.
This site is not affiliated with Porsche in any way. Its only purpose is to provide an online forum for car enthusiasts. All other trademarks are property of their respective owners. |
|
|


| racunniff |
 Feb 9 2008, 09:55 PM Feb 9 2008, 09:55 PM
Post
#1
|
|
volt914  Group: Members Posts: 172 Joined: 21-August 06 From: Fort Collins, CO Member No.: 6,705 Region Association: Rocky Mountains |
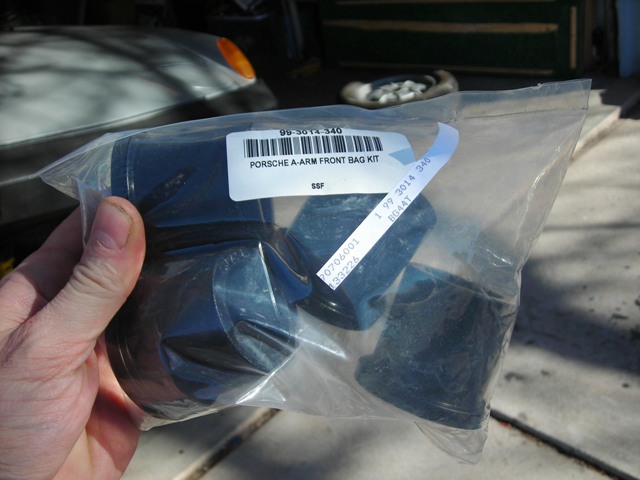
My car had the most annoying popping / grinding sound coming from the passenger's side front A-arm. It got to the point that I almost did not want to drive the car any more. So, I decided to do something about it. Once I had diagnosed that it was the A-arm bearings causing the sound, I went to the Pelican and ordered this part (part number 99-3014-340-M230):
 You'll need the following tools:
I jacked the car up, and removed the wheel, so I could access the suspension: 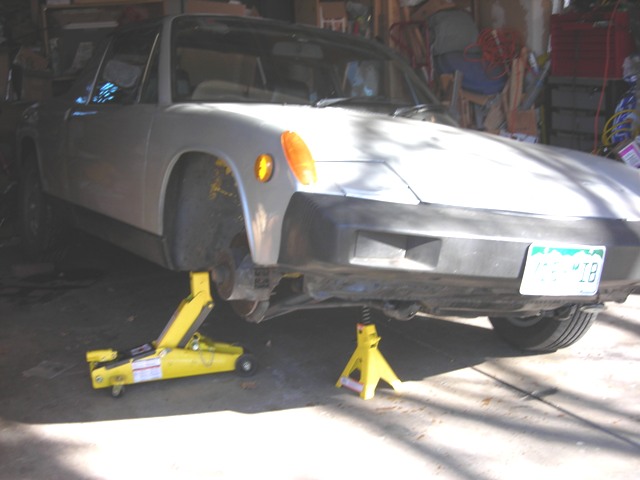 Here is what the A-arm looked like at the begnining of this whole process: 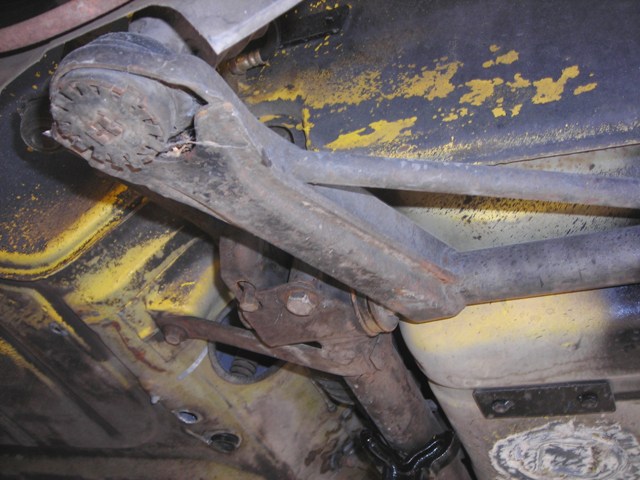 First step in removing the A-arm is to remove the torsion bar adjusting screw (using an 11mm socket) and then pry the adjusting arm off the torsion bar (I used an Allen wrench as a lever to push it from behind): 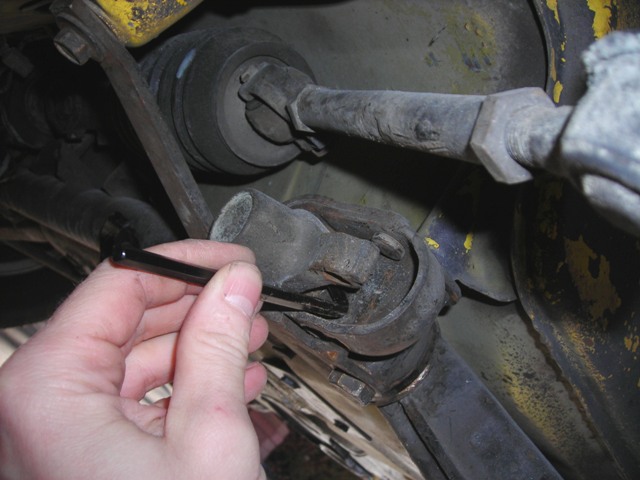 Next is to remove the tapered pin from the ball joint. You back the nut off so it's clear of the threads (using a 13mm socket) and then you *carefully* strike it with a hammer - here is my BFH about to strike the nut (which has been soaking for a bit in penetrating oil). You have to hit it pretty hard to loosen it, but eventually, it will pop forward: 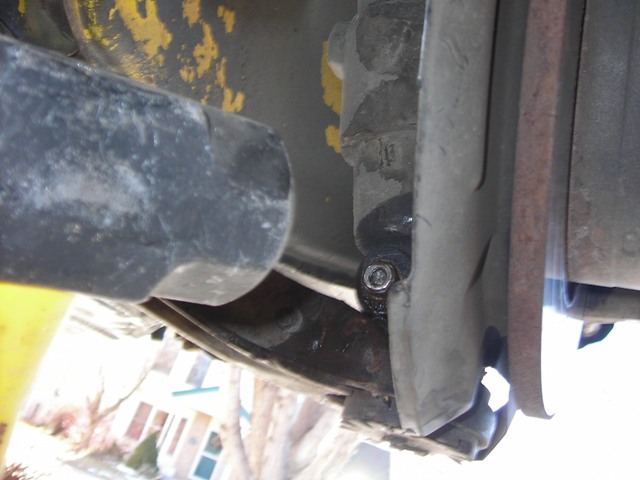 Once you get the initial "pop" you'll need to remove the nut and then use another bolt or something as a drift to push the pin far enough out so you can get at it with vice grips or something. Coming soon, Part II |
   |

 
|
  |
Replies
| racunniff |
Feb 9 2008, 10:13 PM
Post
#2
|
|
volt914 Group: Members Posts: 172 Joined: 21-August 06 From: Fort Collins, CO Member No.: 6,705 Region Association: Rocky Mountains |
Part III
The Haynes book says "push the control arm out" but I had to use a crowbar to free it from the rear mounting point: 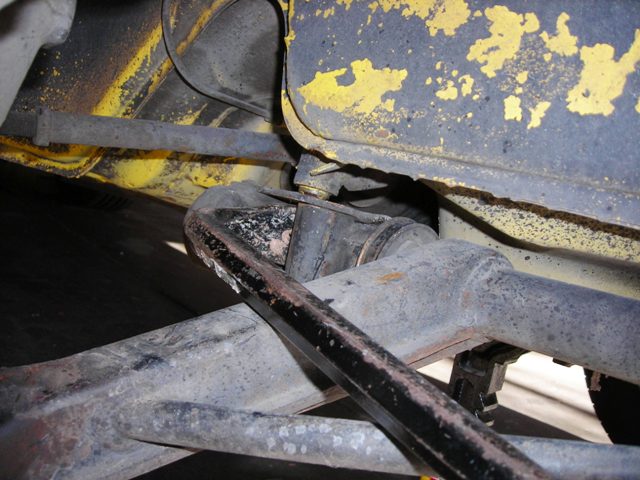 And that's it for removal from the car. Here is the whole assembly - note the rust and general "old" appearance of the part: 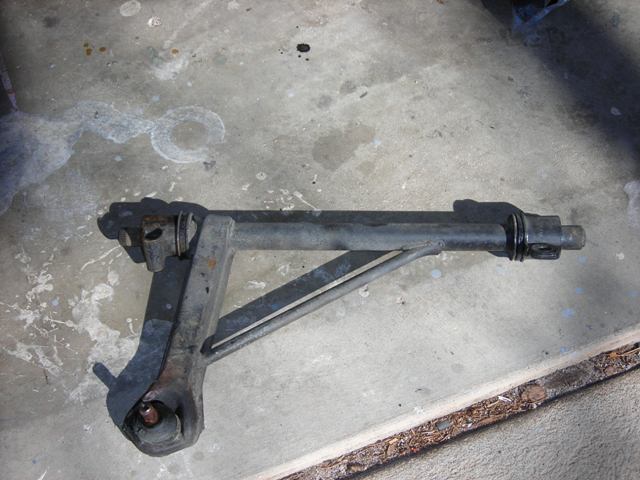 But the fun is just beginning. To replace the bushings, you need to get them off the A-arm. For me, the front popped off pretty easily: 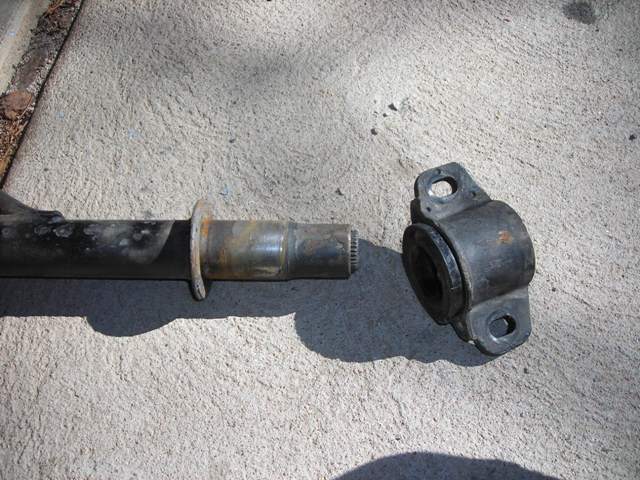 And this is where the cause of the "popping" or "grinding" becomes evident - there is surface rust on the bearing surface. You then need to get the old bushing out. I used two chisels on opposite sides of the "shoulder" of the bushing to pry it: 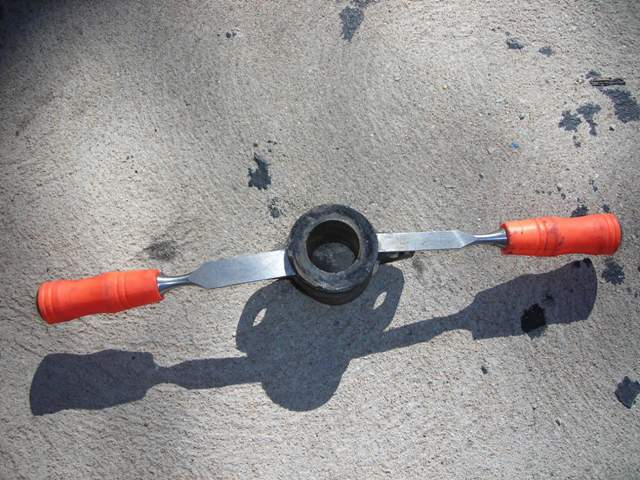 You can also push from the back with a very large socket or other such drift. But for me, once I got it most of the way out with the chisels, the old bushing just popped out. The bushing itself was not in terrible condition, but it's not going back in with those nice shiny new ones waiting... This is where it got nasty. The rear bushing / bearing would *not* come off. Using a hint from Pelican's tech article, I applied heat to it: 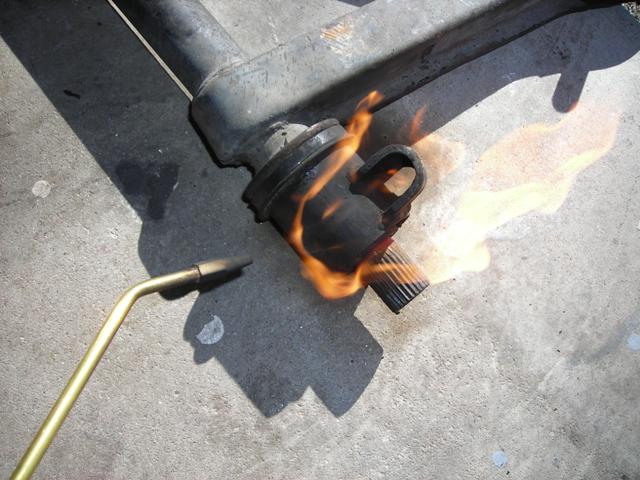 With enough heat, enough prying, and hitting it hard enough with my BFH, I finally got it off. Again, once it moved a couple of cm, it came off (hint: use a breaker bar in the bolt hole to lever it back and forth - it also gives you a place to hit it with your favorite BFH). Coming soon, Part IV |
|
|
|
Posts in this topic
 racunniff Front suspenion A-arm refurm Feb 9 2008, 09:55 PM
 racunniff Part II
Next, you need to pop the ball joint out ... Feb 9 2008, 10:03 PM racunniff Part IV
With the rear bushing off, I found more r... Feb 9 2008, 10:22 PM racunniff Part V
And now, for the whole point of this exer... Feb 9 2008, 10:31 PM racunniff Part VI
As the Haynes manual says - installation ... Feb 9 2008, 10:44 PM daveyboybadion Thanks for a very informative post. From your avat... Feb 10 2008, 12:12 AM
racunniff Part II
Next, you need to pop the ball joint out ... Feb 9 2008, 10:03 PM racunniff Part IV
With the rear bushing off, I found more r... Feb 9 2008, 10:22 PM racunniff Part V
And now, for the whole point of this exer... Feb 9 2008, 10:31 PM racunniff Part VI
As the Haynes manual says - installation ... Feb 9 2008, 10:44 PM daveyboybadion Thanks for a very informative post. From your avat... Feb 10 2008, 12:12 AM
 racunniff
Thanks for a very informative post. From your ava... Feb 10 2008, 08:24 AM Eric_Shea It looks as though this is the second go-round on ... Feb 10 2008, 08:36 AM crash914 OK, since no one else brought it up...
VOte for c... Feb 10 2008, 08:49 AM TeenerTim I did this exact same job yesterday. There is no n... Feb 10 2008, 08:56 AM rhodyguy not to argue the point, but that 47 ft lbs on the ... Feb 10 2008, 09:35 AM r_towle You need a front cap on the torsion tube to retain... Feb 10 2008, 10:30 AM rhodyguy the little felt ring gasket at the rear too.
k Feb 10 2008, 10:36 AM racunniff
the little felt ring gasket at the rear too.
k
... Feb 10 2008, 10:39 AM rhodyguy did you grease the length of the torsion bar? that... Feb 10 2008, 10:52 AM racunniff
did you grease the length of the torsion bar? tha... Feb 10 2008, 06:42 PM
racunniff
Thanks for a very informative post. From your ava... Feb 10 2008, 08:24 AM Eric_Shea It looks as though this is the second go-round on ... Feb 10 2008, 08:36 AM crash914 OK, since no one else brought it up...
VOte for c... Feb 10 2008, 08:49 AM TeenerTim I did this exact same job yesterday. There is no n... Feb 10 2008, 08:56 AM rhodyguy not to argue the point, but that 47 ft lbs on the ... Feb 10 2008, 09:35 AM r_towle You need a front cap on the torsion tube to retain... Feb 10 2008, 10:30 AM rhodyguy the little felt ring gasket at the rear too.
k Feb 10 2008, 10:36 AM racunniff
the little felt ring gasket at the rear too.
k
... Feb 10 2008, 10:39 AM rhodyguy did you grease the length of the torsion bar? that... Feb 10 2008, 10:52 AM racunniff
did you grease the length of the torsion bar? tha... Feb 10 2008, 06:42 PM |
1 User(s) are reading this topic (1 Guests and 0 Anonymous Users)
0 Members:

|
Lo-Fi Version | Time is now: 6th May 2024 - 07:07 AM |
Invision Power Board
v9.1.4 © 2024 IPS, Inc.