|
|
|
Porsche, and the Porsche crest are registered trademarks of Dr. Ing. h.c. F. Porsche AG.
This site is not affiliated with Porsche in any way. Its only purpose is to provide an online forum for car enthusiasts. All other trademarks are property of their respective owners. |
|
|

  |

| krk |
 Jan 10 2004, 05:20 PM Jan 10 2004, 05:20 PM
Post
#1
|
|
Senior Member  Group: Members Posts: 997 Joined: 27-December 02 From: San Jose Member No.: 22 |
Folks,
Today, I'm taking advantage of the weather and trying to get to the alternator in my /6 -- which is apparently dead. Anyway, i have shop manuals which, and this is unusual, are almost useless for this. The carbs and manifolds are out. All shroud bolts (that I can find) are out. The shop manual thinks I can remove the shroud -- but there are "issues". for example, there is a wiring thing that goes through roughly the center of the shroud. (hopefully there are detachable ends behind it somehow). Are there tricks at this stage that I should be aware of? I found the secret bold behind the distributor, and the other two secret bolts accessed under the car at the back. Did I miss something? Just taking a break -- almost time to go back at it. Any BTDT appreciated of course! kim. |
   |

 
|
| ArtechnikA |
Jan 10 2004, 05:31 PM
Post
#2
|
|
rich herzog Group: Members Posts: 7,390 Joined: 4-April 03 From: Salted Roads, PA Member No.: 513 Region Association: None |
QUOTE(krk @ Jan 10 2004, 03:20 PM) ...there is a wiring thing that goes through roughly the center of the shroud. (hopefully there are detachable ends behind it somehow). not BTDT yet - just about got all the parts i need to play mix-n-match-the-fan-and-pulley games (but evidently i need a new set of alternator pulley adjusting washers ...) anyway - the wires to the alternator have either push-on connectors, or you have to unbolt them from the alternator body once you get in there. the fan swapping article on the Pelican site strongly recommends disconnecting the POSITIVE cable from the battery (too) because one of those wires to the alternator connects DIRECTLY to the battery and will arc, spark, and weld itself to the body if it touches ... |
|
|
|
| krk |
Jan 10 2004, 05:46 PM
Post
#3
|
|
Senior Member Group: Members Posts: 997 Joined: 27-December 02 From: San Jose Member No.: 22 |
Ah -- the battery -- good reminder.
I'm a little further now -- but there is a fair chunk of wiring harness that goes in roughly about dead center behind the bulge of the fan. it's basically the last thing in the way right now. (I'm gonna go out and disconnect the battery now!) [edit: oh i've shot a few pics on the way -- i"ll post them if they seem to have info] kim. |
|
|
|
| krk |
Jan 10 2004, 06:38 PM
Post
#4
|
|
Senior Member Group: Members Posts: 997 Joined: 27-December 02 From: San Jose Member No.: 22 |
I must be fairly far off course by now.
(The battery is disconnected) The sticking point is the cabling that goes through the shroud. There is a baffle system immediately behind the fan (the alternator is in the center of the fan) and the cable goes through the back of the baffle and (from touch) splits into two). But how to get the cabling disconnected? The baffling system is held on by a myriad of bolts around its edge. It's conceivable that I could get to each bolt and remove it -- but reassembly would be a nightmare. I must be missing something. kim. |
|
|
|
| Jeroen |
Jan 10 2004, 07:06 PM
Post
#5
|
|
914 Guru Group: Members Posts: 7,887 Joined: 24-December 02 From: The Netherlands Member No.: 3 Region Association: Europe |
Hey Kim,
BTDT... but it's been almost 4 years, so the details are kinda blurry (IMG:style_emoticons/default/blink.gif) Can you slide the shroud over the wiring? The wires are bolt on and not push on for sure... cheers, Jeroen |
|
|
|
| bwilless |
Jan 10 2004, 09:16 PM
Post
#6
|
|
Member Group: Members Posts: 156 Joined: 24-January 03 From: Tempe, AZ Member No.: 192 |
I just did this on my 3.0, on an engine stand. There are ~8 bolts holding the baffle thing on. You have to remove these bolts, to slide the baffle back, to disconnect the wires. Mine had nuts on the wiring connections. It was not easy on the stand, I imagine in the car it will be difficult.
Have fun (IMG:style_emoticons/default/headbang.gif) |
|
|
|
| Gint |
Jan 10 2004, 11:51 PM
Post
#7
|
|
Mike Ginter Group: Admin Posts: 16,108 Joined: 26-December 02 From: Denver CO. Member No.: 20 Region Association: Rocky Mountains |
I tried once to pull of my shroud when the motor was in the car. No joy! I never did get it off. In fact, the motor is on a stand, and it still hasn't come off.
QUOTE [edit: oh i've shot a few pics on the way -- i"ll post them if they seem to have info] Please!?!?!?! |
|
|
|
| meursault |
Jan 11 2004, 12:28 AM
Post
#8
|
|
Idjit Savant Group: Members Posts: 290 Joined: 26-February 03 From: San Diego, CA Member No.: 355 |
Or you could just take off the fan belt, remove the bolt(s) from the wide steel strap that holds the fan housing on, and remove the nut from the ground strap where it attaches to the case half. Then, assuming all other electrical connections on the engine wiring harness are disconnected, you can carefully lift out the shroud and fan/alternator as an entire unit. Fun, eh, removing all that stuff just to get to the alternator?
On my original six, it looked like some yokel cut the fiberglass shroud to get to the alternator, then reglassed it back together when he'd finished the work. (IMG:style_emoticons/default/icon8.gif) |
|
|
|
| krk |
Jan 11 2004, 02:43 AM
Post
#9
|
|
Senior Member Group: Members Posts: 997 Joined: 27-December 02 From: San Jose Member No.: 22 |
Thx guys!
I shall be trying again in the morning. The shroud on mine does have a stress fracture that looks to me like a PO somewhere was trying what I'm trying now. I'm being gentle, of course, but I think it's close. I caught The Brad™ on the phone tonight -- I was talking about getting the fan belt off and he reminded me that there's a tool in my original tool kit that should help. (I'd not thought of the toolkit as having useful tools in it! (IMG:style_emoticons/default/laugh.gif)) Gint, I shall post pics on the morrow -- Carl and Meridith stopped by on a cruise in his beautiful /6 -- so there are actually gonna be pics of a running 914! Not mine, of course, but close enough for jazz. kim. |
|
|
|
| si2t3m |
Jan 11 2004, 07:42 AM
Post
#10
|
|
914 addict Group: Members Posts: 346 Joined: 9-January 03 From: Qc, Canada Member No.: 119 |
BTDT.
Replaced the alternator of my 3.0 while it was in the car. Only 3 wires go in the big hole in the shroud. When i took my alt out, i kinda puched the wires in to get me more room to pull the shroud away from the alt/fan housing. I then removed the small bolts for the air duct behind the alt (this was no fun). Removed the wires from the alt and finally got the shroud out of the way to remove the alt & fan housing. I did have the belt and housing strap removed so i could tilt the housing to get to the bolts behing de shroud. HTH Marc-André |
|
|
|
| seanery |
Jan 11 2004, 09:23 AM
Post
#11
|
|
waiting to rebuild whitey! Group: Retired Admin Posts: 15,857 Joined: 7-January 03 From: Indy Member No.: 100 Region Association: None |
I put the shroud on my 2.7 on on a stand, and took it off on a stand. There aint no way Id do that in the car PITA. (in my nextdoor neighbor's hillbilly voice)
|
|
|
|
| Joe Bob |
Jan 11 2004, 09:50 AM
Post
#12
|
|
Retired admin, banned a few times Group: Members Posts: 17,427 Joined: 24-December 02 From: Boulder CO Member No.: 5 Region Association: None |
On one of my /6 conversions....we had an access port cut in the firewall between the seats. For some reason that ride used to like to eat fan belts.....
|
|
|
|
| krk |
Jan 11 2004, 09:52 AM
Post
#13
|
|
Senior Member Group: Members Posts: 997 Joined: 27-December 02 From: San Jose Member No.: 22 |
QUOTE(si2t3m @ Jan 11 2004, 05:42 AM) BTDT. Replaced the alternator of my 3.0 while it was in the car. Only 3 wires go in the big hole in the shroud. When i took my alt out, i kinda puched the wires in to get me more room to pull the shroud away from the alt/fan housing. I then removed the small bolts for the air duct behind the alt (this was no fun). Removed the wires from the alt and finally got the shroud out of the way to remove the alt & fan housing. I did have the belt and housing strap removed so i could tilt the housing to get to the bolts behing de shroud. HTH Marc-André This is the approach I will take this morning. (thx, btw -- helps to know it's been successfully done before!) As an aside, why wouldn't I cut the wires and install quick connects? I'm not going to this time, but it just seems to me that there must be modern connectors with the right properties to use somewhere in the middle of these three lines..... Anyway, dawn is here and it should start warming up out there. Must get at 'er. kim. |
|
|
|
| Gint |
Jan 11 2004, 12:38 PM
Post
#14
|
|
Mike Ginter Group: Admin Posts: 16,108 Joined: 26-December 02 From: Denver CO. Member No.: 20 Region Association: Rocky Mountains |
QUOTE Gint, I shall post pics on the morrow -- Carl and Meridith stopped by on a cruise in his beautiful /6 -- so there are actually gonna be pics of a running 914! Not mine, of course, but close enough for jazz. I always like to see pics of Carl's car, but I want to see pics of your shroud/fan/alternator work. Please?!?! Check out Swenco Posi-Lock connectors. I absolutely love these things. |
|
|
|
| krk |
Jan 11 2004, 12:59 PM
Post
#15
|
|
Senior Member Group: Members Posts: 997 Joined: 27-December 02 From: San Jose Member No.: 22 |
QUOTE(Gint @ Jan 11 2004, 10:38 AM) QUOTE Gint, I shall post pics on the morrow -- Carl and Meridith stopped by on a cruise in his beautiful /6 -- so there are actually gonna be pics of a running 914! Not mine, of course, but close enough for jazz. I always like to see pics of Carl's car, but I want to see pics of your shroud/fan/alternator work. Please?!?! Check out Swenco Posi-Lock connectors. I absolutely love these things. I'm shootin' extra pics just for you, mon ami. A gorilla tightened fan belt nut. (IMG:style_emoticons/default/ar15.gif) This will be a mess to reassemble. Wonder who has an alternator on a Sunday afternoon.... kim. |
|
|
|
| Gint |
Jan 11 2004, 01:01 PM
Post
#16
|
|
Mike Ginter Group: Admin Posts: 16,108 Joined: 26-December 02 From: Denver CO. Member No.: 20 Region Association: Rocky Mountains |
QUOTE I'm shootin' extra pics just for you, mon ami. A gorilla tightened fan belt nut. Thanks! I knew I could count on you Kim. The factory tool actually works really well. |
|
|
|
| krk |
Jan 11 2004, 02:17 PM
Post
#17
|
|
Senior Member Group: Members Posts: 997 Joined: 27-December 02 From: San Jose Member No.: 22 |
QUOTE(Gint @ Jan 11 2004, 11:01 AM) QUOTE I'm shootin' extra pics just for you, mon ami. A gorilla tightened fan belt nut. Thanks! I knew I could count on you Kim. The factory tool actually works really well. It does indeed! (hm... do I have to admit that I didn't notice the correct 22m wrench is also in the factory kit? I was standing at the table reading two manuals and the kit was there with fan belts and the frikk'n wrench -- right under my nose -- and at some point I noticed it... duh...) The awkward part is getting the force on the wrench -- eventually I worked it out and it came loose. Ok, the alternator is out. Now we start with the pics. One at a time, of course. A couple of opening shots so I can remember what it looked like before I got DWD. kim. Attached thumbnail(s) 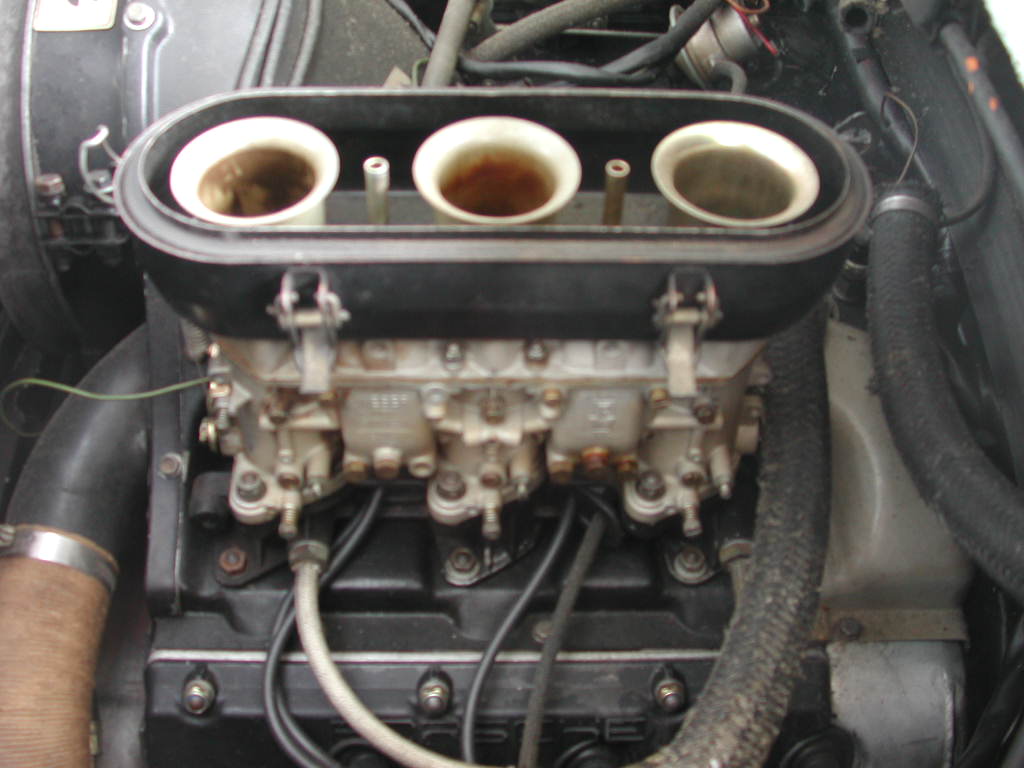
|
|
|
|
| krk |
Jan 11 2004, 02:18 PM
Post
#18
|
|
Senior Member Group: Members Posts: 997 Joined: 27-December 02 From: San Jose Member No.: 22 |
sdfg
Attached thumbnail(s) 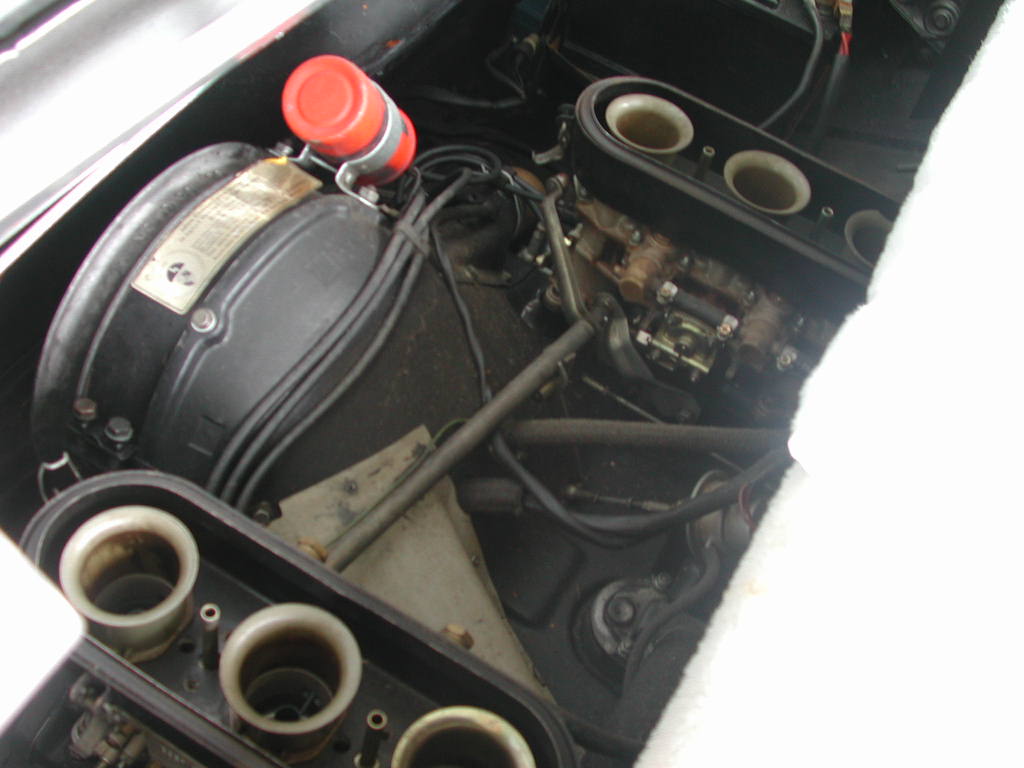
|
|
|
|
| krk |
Jan 11 2004, 02:19 PM
Post
#19
|
|
Senior Member Group: Members Posts: 997 Joined: 27-December 02 From: San Jose Member No.: 22 |
What's in that box from Brad?
Attached thumbnail(s) 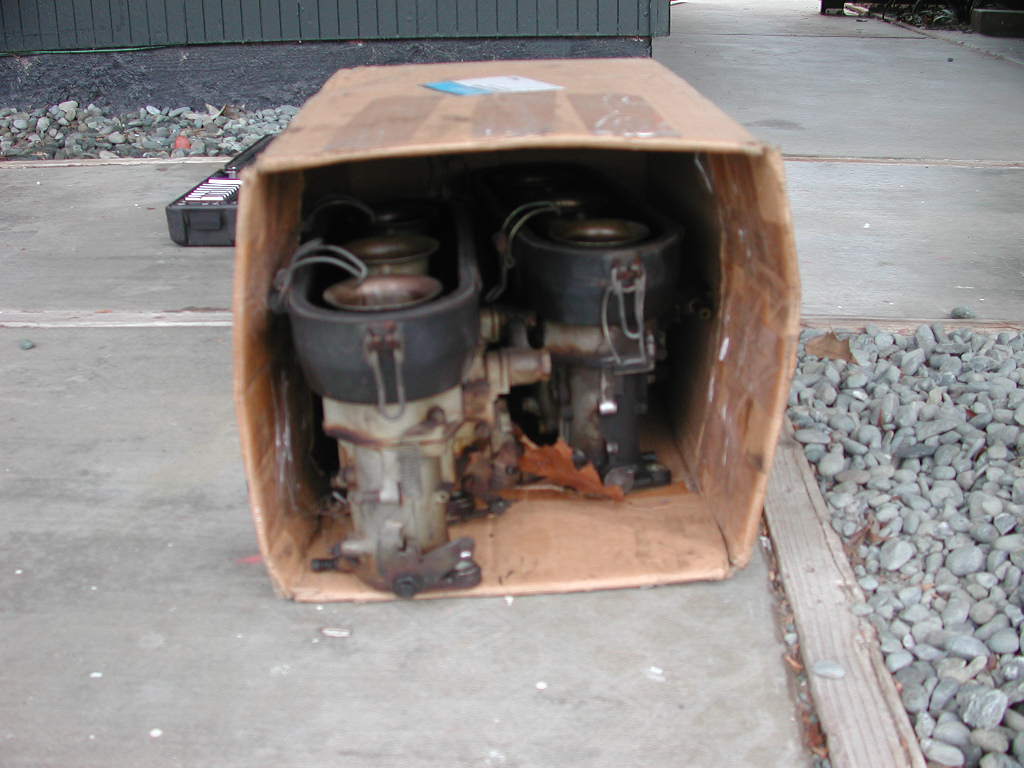
|
|
|
|
| krk |
Jan 11 2004, 02:20 PM
Post
#20
|
|
Senior Member Group: Members Posts: 997 Joined: 27-December 02 From: San Jose Member No.: 22 |
You need to see a flowering plant.
Attached thumbnail(s) 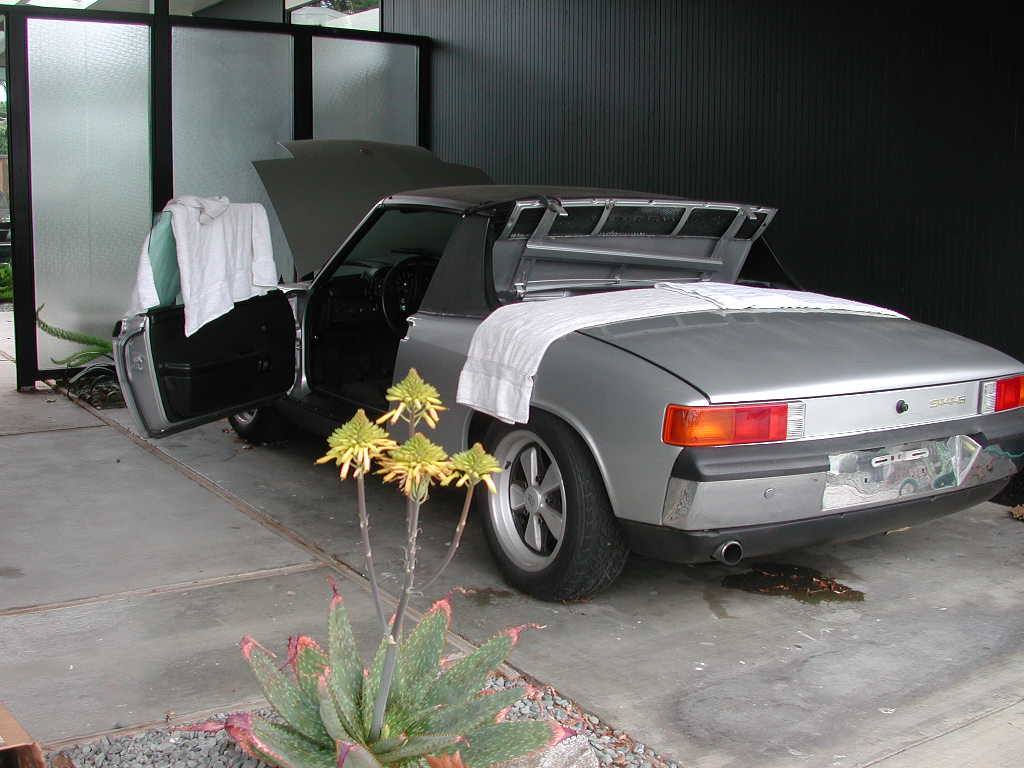
|
|
|
|
|
1 User(s) are reading this topic (1 Guests and 0 Anonymous Users)
0 Members:

|
Lo-Fi Version | Time is now: 8th June 2026 - 10:31 PM |
Invision Power Board
v9.1.4 © 2026 IPS, Inc.