|
|
|
Porsche, and the Porsche crest are registered trademarks of Dr. Ing. h.c. F. Porsche AG.
This site is not affiliated with Porsche in any way. Its only purpose is to provide an online forum for car enthusiasts. All other trademarks are property of their respective owners. |
|
|


| pjf |
 Mar 21 2008, 07:37 PM Mar 21 2008, 07:37 PM
Post
#1
|
|
Member  Group: Members Posts: 132 Joined: 27-September 04 From: Ipswich, MA Member No.: 2,840 |
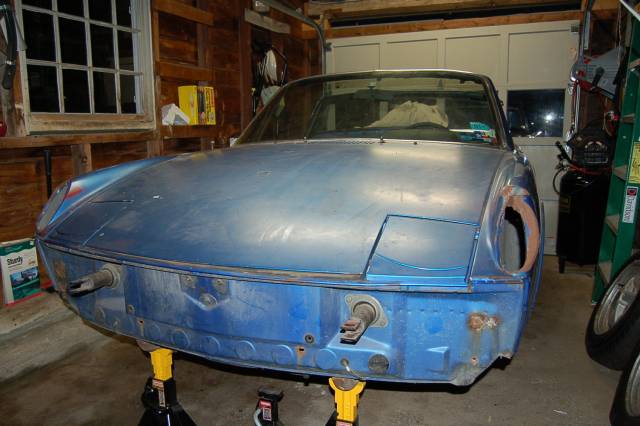
Hi All. I've been around for awhile and even made a few posts but I finally got around to starting this restoration thread. My only claim to fame I would say is I was the guy who loaned Willam Harris some beat up steel wheels to finish his paint job. Still don't know why he returned them in favor of his pristine Fuchs.... Anyway, more years back than I'd care to admit I got the idea to restore a 914 and convert it to electric. I've worked on cars on an off and even graduated from the Somerville High Adult Ed Welding Night Course so I figured I'd go for it. A fairly ignorant Ebay winning bid later and I found myself the owner of a 76 from Texas. When the owner said that the right side door had a "latch problem" and the door wouldn't open I figured simple door repair, right? This was before discovering 914World and all the great information here. Things like don't buy 914s that have doors that don't open and don’t get POR-15 on your hootus. The thread by Michelko particularly inspired me to tackle the right side long. You guys are great and I want to thank everyone for their very helpful posts. (I got a “rebate” from the seller by the way).
Anyway here’s the car stripped down. As you can see space is no problem. |
   |

 
|
  |
Replies(1 - 19)
| pjf |
Mar 21 2008, 07:52 PM
Post
#2
|
|
Member Group: Members Posts: 132 Joined: 27-September 04 From: Ipswich, MA Member No.: 2,840 |
 |
|
|
|
| pjf |
Mar 21 2008, 08:02 PM
Post
#3
|
|
Member Group: Members Posts: 132 Joined: 27-September 04 From: Ipswich, MA Member No.: 2,840 |
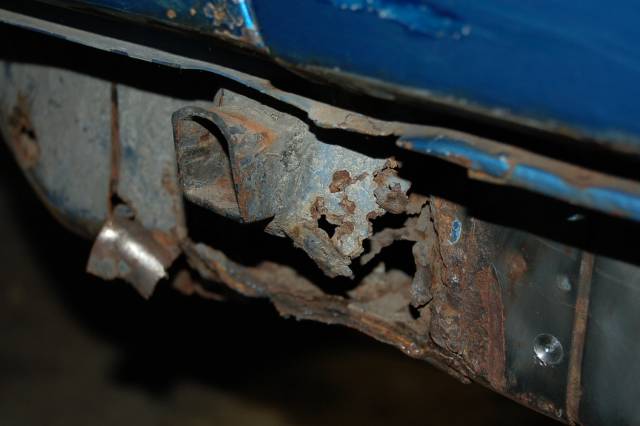
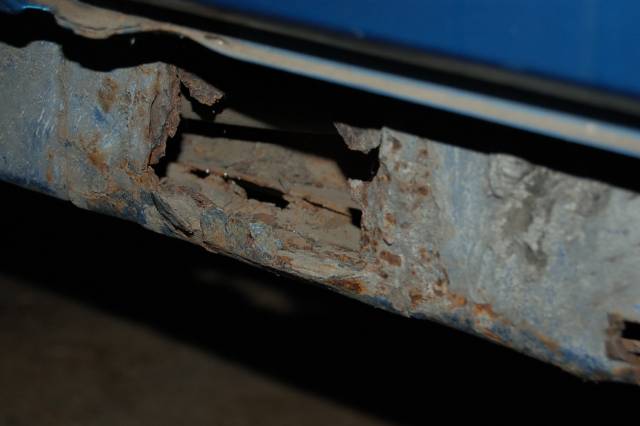
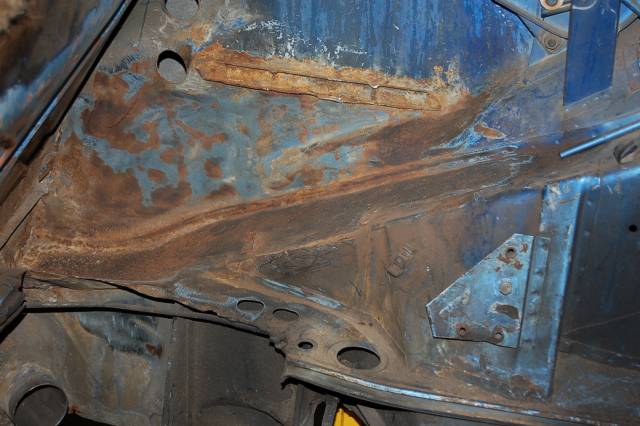
Here's the worst first. The right side long is in tough shape. I have pictures of it opened up so you can see the extent of the rust. As far as I can tell, a leaky rear window caused a lot of the damage here and in other areas. The good new is that the hell hole isn't that bad.
|
|
|
|
| pjf |
Mar 21 2008, 08:04 PM
Post
#4
|
|
Member Group: Members Posts: 132 Joined: 27-September 04 From: Ipswich, MA Member No.: 2,840 |
 |
|
|
|
| pjf |
Mar 21 2008, 08:07 PM
Post
#5
|
|
Member Group: Members Posts: 132 Joined: 27-September 04 From: Ipswich, MA Member No.: 2,840 |
The left side long. The jackpost is gone but this side is actually in better shape than the right believe it or not.
|
|
|
|
| pjf |
Mar 21 2008, 08:08 PM
Post
#6
|
|
Member Group: Members Posts: 132 Joined: 27-September 04 From: Ipswich, MA Member No.: 2,840 |
 |
|
|
|
| pjf |
Mar 21 2008, 08:12 PM
Post
#7
|
|
Member Group: Members Posts: 132 Joined: 27-September 04 From: Ipswich, MA Member No.: 2,840 |
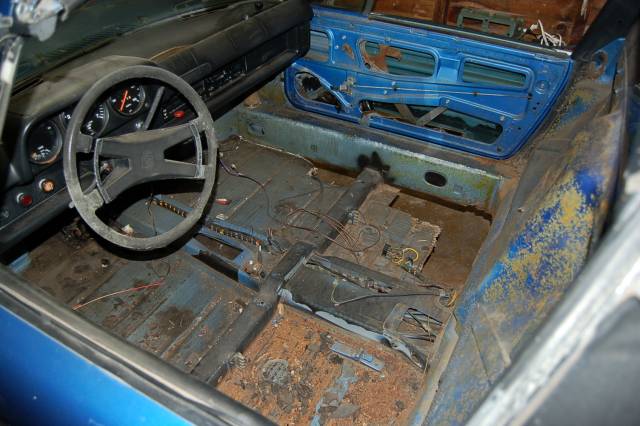
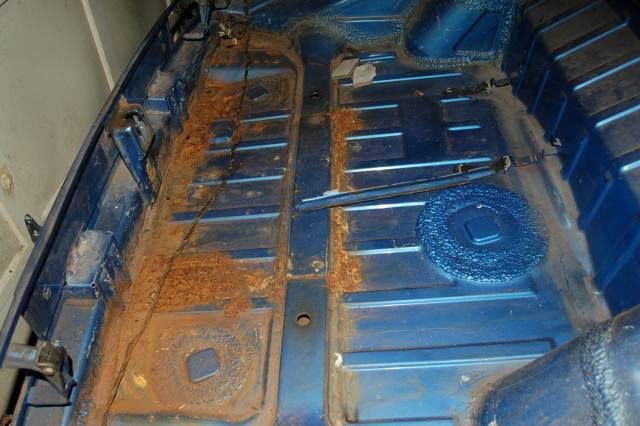
The floor looked great until the tar came up and then you could see the damage from the pooling of the water from the leaky rear window. The bottom edge of the longs and rear firewall are in pretty good shape considering.
|
|
|
|
| pjf |
Mar 21 2008, 08:13 PM
Post
#8
|
|
Member Group: Members Posts: 132 Joined: 27-September 04 From: Ipswich, MA Member No.: 2,840 |
 |
|
|
|
| pjf |
Mar 21 2008, 08:16 PM
Post
#9
|
|
Member Group: Members Posts: 132 Joined: 27-September 04 From: Ipswich, MA Member No.: 2,840 |
The hell hole has surface rust as you can see and there is some patching to do in the corner at the rear firewall but some decent metal here.
|
|
|
|
| pjf |
Mar 21 2008, 08:18 PM
Post
#10
|
|
Member Group: Members Posts: 132 Joined: 27-September 04 From: Ipswich, MA Member No.: 2,840 |
 |
|
|
|
| pjf |
Mar 21 2008, 08:19 PM
Post
#11
|
|
Member Group: Members Posts: 132 Joined: 27-September 04 From: Ipswich, MA Member No.: 2,840 |
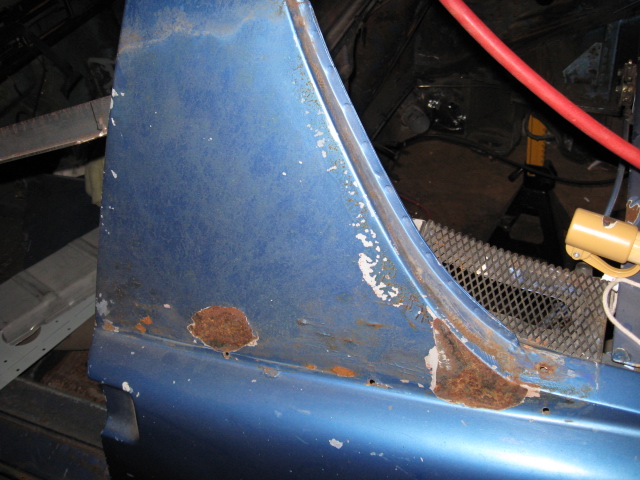
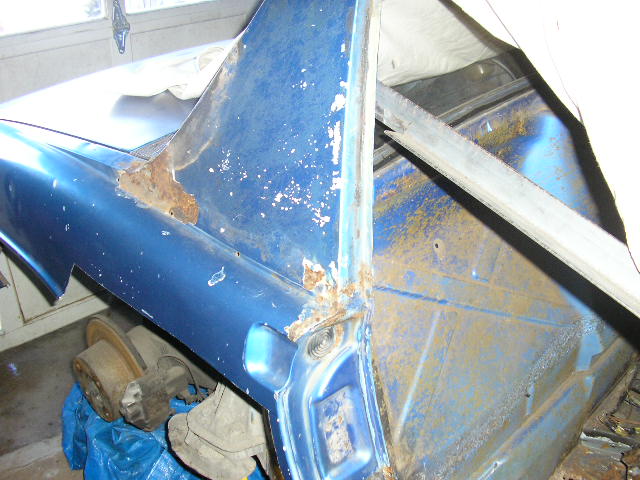
Sail panels need work as you can see.
|
|
|
|
| pjf |
Mar 21 2008, 08:21 PM
Post
#12
|
|
Member Group: Members Posts: 132 Joined: 27-September 04 From: Ipswich, MA Member No.: 2,840 |
 |
|
|
|
| pjf |
Mar 21 2008, 08:22 PM
Post
#13
|
|
Member Group: Members Posts: 132 Joined: 27-September 04 From: Ipswich, MA Member No.: 2,840 |
 |
|
|
|
| pjf |
Mar 21 2008, 08:26 PM
Post
#14
|
|
Member Group: Members Posts: 132 Joined: 27-September 04 From: Ipswich, MA Member No.: 2,840 |
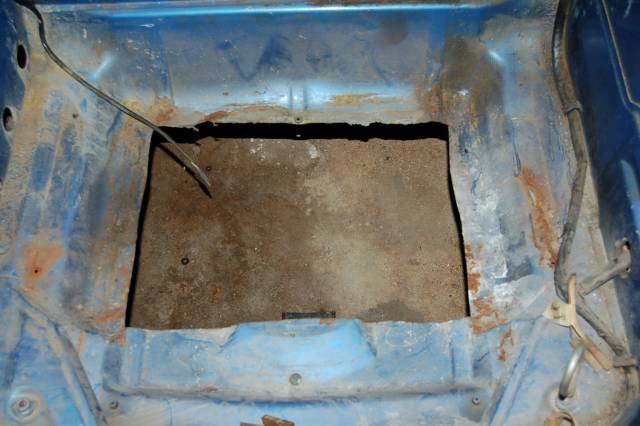
Last but not least are the trunks. The usual rusty rear and a decent hole in the front to fill.
|
|
|
|
| pjf |
Mar 21 2008, 08:28 PM
Post
#15
|
|
Member Group: Members Posts: 132 Joined: 27-September 04 From: Ipswich, MA Member No.: 2,840 |
 |
|
|
|
| pjf |
Mar 21 2008, 08:30 PM
Post
#16
|
|
Member Group: Members Posts: 132 Joined: 27-September 04 From: Ipswich, MA Member No.: 2,840 |
 |
|
|
|
| pjf |
Mar 21 2008, 08:34 PM
Post
#17
|
|
Member Group: Members Posts: 132 Joined: 27-September 04 From: Ipswich, MA Member No.: 2,840 |
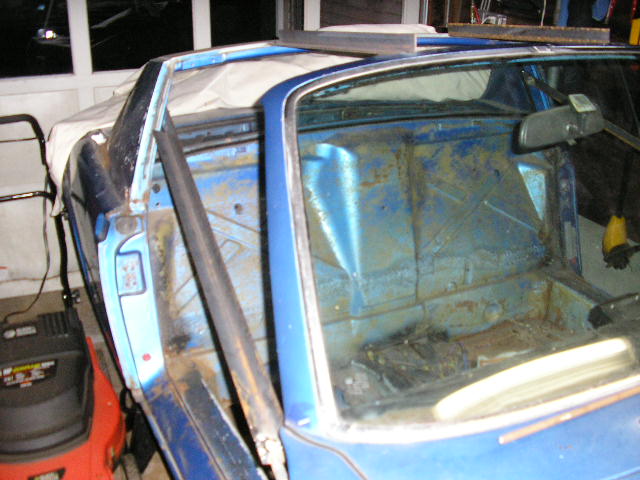
Before tearing into the longs I welded up some door braces and put two pieces bridging the windsheld and rear rollbar. Before doing this I was able to open up the right side door spacing a bit with jacks. The left was OK.
|
|
|
|
| pjf |
Mar 21 2008, 08:35 PM
Post
#18
|
|
Member Group: Members Posts: 132 Joined: 27-September 04 From: Ipswich, MA Member No.: 2,840 |
 |
|
|
|
| Van |
Mar 21 2008, 08:59 PM
Post
#19
|
|
Member Group: Members Posts: 199 Joined: 15-January 08 From: Hyde Park, NY Member No.: 8,571 |
Great idea to put those door hinge-to-seat belt braces in!
|
|
|
|
| pjf |
Mar 21 2008, 09:25 PM
Post
#20
|
|
Member Group: Members Posts: 132 Joined: 27-September 04 From: Ipswich, MA Member No.: 2,840 |
Thanks. Hopefully, the bracing will hold thing in position. I cut a metal rod that fits between two marked points so I can check the door opening. So far so good. The right side long was the first thing I worked on and its just about done. Tommorrow I'll try to post up to where I currently am with it.
|
|
|
|
|
1 User(s) are reading this topic (1 Guests and 0 Anonymous Users)
0 Members:

|
Lo-Fi Version | Time is now: 2nd April 2026 - 11:04 AM |
Invision Power Board
v9.1.4 © 2026 IPS, Inc.