|
|
|
Porsche, and the Porsche crest are registered trademarks of Dr. Ing. h.c. F. Porsche AG.
This site is not affiliated with Porsche in any way. Its only purpose is to provide an online forum for car enthusiasts. All other trademarks are property of their respective owners. |
|
|

  |

| 1FASTVW |
 Jul 2 2008, 05:31 AM Jul 2 2008, 05:31 AM
Post
#1
|
|
Newbie  Group: Members Posts: 12 Joined: 2-July 08 From: North Central Washington Member No.: 9,240 Region Association: Pacific Northwest |
Hello to everyone. I just recently found this forum and am impressed so far with the knowlege that exists here. I am sure that I will be calling on the collective wisdom frequently as I just started my resto/rebuild project today.
A little history; I purchased my 1973 914 2.0 about 15 years ago. I drove it for about 5 years until I had a small fire in the engine bay. I had removed the filter covers on my carburetors to do some adjusting and was driving around like that for a couple of days. Apparently there was a spark in the engine compartment, and with the venturis exposed like that, it went up quick. Hey, I was in my early 20's, so not the smartest in the world. But smart enough to have an extingisher on board. It only burned for about 20-30 seconds, and the only damage was the engine drip tray and one heater hose. And of course extingisher powder all over the engine and carbs. I towed it home and parked it in the garage with the idea that I would someday rebuild it. Shortly after that, I got a job that put me on the road, so I moved it to a storage unit, and ther it sat for almost 10 years. I recently decided to see if I could sell it, and I had a couple of good offers, but no-one came through with the money. So I started doing some research and decided to rebuild it for myself. Into the shop today, and I have removed most of the interior, engine and trans will be tomorrow. It is a slow process as I am bagging and labeling every item to come out of the car. I am not looking for a concourse vehicle, but I would like to keep it as correct as possible. So here are my first of what I am sure will be many questions. There is what I believe is sound deadening material on the floor of the car. Kind of like sticky tar paper, painted over. What is the best way to remove this, and is there a factory style replacement, or is something like DynaMat a suitable substitute? Secondly, there appears so far to be very little rust on the car. The battery tray is gone, but the support and suspension mount areas are all intact, and they even still have paint on them. My question is this, how do you check the laterals for interior damage without cutting into the car? They sound very solid when I rap on them. Any and all help is appreciated, and I thank everyone in advance. I will post some work pictures tomorrow, as my camera had a dead battery when I went out to the shop tonight. Michael Attached image(s) 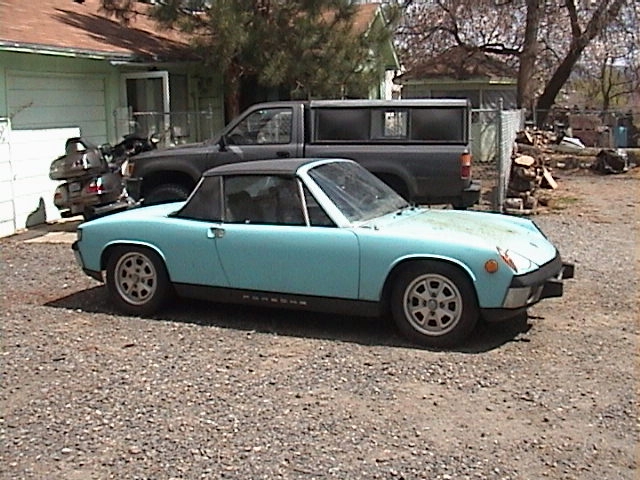
|
   |

 
|
| AvalonFal |
Jul 2 2008, 06:35 AM
Post
#2
|
|
Member Group: Members Posts: 483 Joined: 3-July 05 From: Southern New Jersey Coast Member No.: 4,367 Region Association: MidAtlantic Region |
QUOTE(1FASTVW @ Jul 2 2008, 07:31 AM)  There is what I believe is sound deadening material on the floor of the car. Kind of like sticky tar paper, painted over. What is the best way to remove this, and is there a factory style replacement, or is something like DynaMat a suitable substitute? Michael I used a heat gun just to soften the tar a little and then a scraper to scrape it off. A little at a time and probably best in a well ventilated area, just in case. Don't be surprised by what you might find under the tar! I believe AA sells tar replacement panels, but there is a whole variety of sound deadening products that others have used (Dynamat, Fatmat, etc.) Do a search. Paul |
|
|
|
| carr914 |
Jul 2 2008, 06:55 AM
Post
#3
|
|
Racer from Birth Group: Members Posts: 118,804 Joined: 2-February 04 From: Tampa,FL Member No.: 1,623 Region Association: South East States |
(IMG:style_emoticons/default/welcome.png) I will be looking forward to your progress. Good choice to keep and restore the car. It will put grins on your face, just like 15 years ago before the fire, I used to have an 1973 Olympic Blue 2.0 that was destoyed in a fire. Maybe the fire gods don't like the color, even though I did.
T.C.  |
|
|
|
| 914Sixer |
Jul 2 2008, 07:00 AM
Post
#4
|
|
914 Guru Group: Members Posts: 8,892 Joined: 17-January 05 From: San Angelo Texas Member No.: 3,457 Region Association: Southwest Region |
(IMG:style_emoticons/default/welcome.png) You will soon be imersed in lots of fun.
|
|
|
|
| Gustl |
Jul 2 2008, 07:32 AM
Post
#5
|
|
914 enthusiast & historian Group: Members Posts: 11,512 Joined: 16-June 04 From: TIROL / Austria Member No.: 2,212 Region Association: Austria |
(IMG:style_emoticons/default/welcome.png) ... from far, far away (IMG:style_emoticons/default/biggrin.gif)
|
|
|
|
| Phoenix914 |
Jul 2 2008, 08:23 AM
Post
#6
|
|
Member Group: Members Posts: 389 Joined: 6-December 06 From: Oviedo, FL Member No.: 7,322 Region Association: South East States |
If the floor doesn't need to be repaired for any reason, removing the tar might be a waste of time. You could just clean it up and paint over it again. I removed and replaced the tar on the driver side of my car because it was a bit rusty, but left the passenger side alone. You might find, if you do remove the tar, that the cleanest part of your floor is under it.
|
|
|
|
| Gint |
Jul 2 2008, 10:41 AM
Post
#7
|
|
Mike Ginter Group: Admin Posts: 16,076 Joined: 26-December 02 From: Denver CO. Member No.: 20 Region Association: Rocky Mountains |
(IMG:style_emoticons/default/welcome.png)
Try using the search function of the site. Search page link Many of the questions you're going to ask over the next year or so have been asked an answered with pics and everything over the years. There is a wealth of information on this site. But don't misunderstand please, feel free to post questions and by all means pics of your progress. We love pictures around here. I use a heat gun and a putty knife to remove the tar. Works great. I'm planning on using some form of dynamat type product on my car when I get to that point. |
|
|
|
| james2 |
Jul 2 2008, 04:10 PM
Post
#8
|
|
Member Group: Members Posts: 97 Joined: 28-June 08 From: Georgia Member No.: 9,225 Region Association: None |
Fast VW...what an oxymoron..................... (IMG:style_emoticons/default/biggrin.gif)
|
|
|
|
| messix |
Jul 2 2008, 04:21 PM
Post
#9
|
|
AKA "CLUTCH KILLER"! Group: Members Posts: 6,995 Joined: 14-April 05 From: between shit kickers and pinky lifters/ puget sound wa.north of Seattle south of Canada Member No.: 3,931 Region Association: Pacific Northwest |
what town do live in?
you should try to get to one of the teener tuesdays, plenty of guys up here have done what yer gonna do. and one of our locals had a much worse event and you otta see how his car is turning out now! click on this over here.... to the right.... yup the tenner tuesady thingy down there. |
|
|
|
| Joe Bob |
Jul 2 2008, 04:22 PM
Post
#10
|
|
Retired admin, banned a few times Group: Members Posts: 17,427 Joined: 24-December 02 From: Boulder CO Member No.: 5 Region Association: None |
Welcome to the insanity.....
|
|
|
|
| rhodyguy |
Jul 3 2008, 09:13 AM
Post
#11
|
|
Chimp Sanctuary NW. Check it out. Group: Members Posts: 22,082 Joined: 2-March 03 From: Orion's Bell. The BELL! Member No.: 378 Region Association: Galt's Gulch |
north central wa. my guess is omak. what do i win?
|
|
|
|
| Dave_Darling |
Jul 3 2008, 10:06 AM
Post
#12
|
|
914 Idiot Group: Members Posts: 14,990 Joined: 9-January 03 From: Silicon Valley / Kailua-Kona Member No.: 121 Region Association: Northern California |
Before you do anything to the motor, check the crankcase. And the wiring. Depending on what kind of extinguisher you used, the case and the wiring may be history. Some of the dry-chem types of extinguisher material will eat aluminum and wiring...
--DD |
|
|
|
| sww914 |
Jul 3 2008, 12:00 PM
Post
#13
|
|
Advanced Member Group: Members Posts: 2,439 Joined: 4-June 06 Member No.: 6,146 Region Association: None |
An easy way to remove the tar on the floor is dry ice. You smash a couple of bags of it on the floor so that it covers all of the tar and let it sit for a few minutes. Now hit it firmly with a hammer all over the tar and it will break off quite easily.
|
|
|
|
| 1FASTVW |
Jul 18 2008, 03:28 AM
Post
#14
|
|
Newbie Group: Members Posts: 12 Joined: 2-July 08 From: North Central Washington Member No.: 9,240 Region Association: Pacific Northwest |
Thought I would post some updates on the progress I have made so far.
A couple of weeks ago I took out the interior, minus dash, and things look pretty good so far in there. (IMG:http://i329.photobucket.com/albums/l389/1FASTVW/Pic003.jpg) (IMG:http://i329.photobucket.com/albums/l389/1FASTVW/Pic004.jpg) |
|
|
|
| 1FASTVW |
Jul 18 2008, 04:32 AM
Post
#15
|
|
Newbie Group: Members Posts: 12 Joined: 2-July 08 From: North Central Washington Member No.: 9,240 Region Association: Pacific Northwest |
I pulled out the motor and trans. last week. No big surprises in there.
Hell hole. (IMG:http://i329.photobucket.com/albums/l389/1FASTVW/Pic023.jpg) Oddly enough, this hole is from moisture in the insulation pad, not from battery corrosion. (IMG:http://i329.photobucket.com/albums/l389/1FASTVW/SANY0257-1.jpg) |
|
|
|
| 1FASTVW |
Jul 18 2008, 04:35 AM
Post
#16
|
|
Newbie Group: Members Posts: 12 Joined: 2-July 08 From: North Central Washington Member No.: 9,240 Region Association: Pacific Northwest |
And tonight, I pulled the headlights and wiring harness out of the front trunk to remove the rust in there.
Before (IMG:http://i329.photobucket.com/albums/l389/1FASTVW/Pic053.jpg) After (IMG:http://i329.photobucket.com/albums/l389/1FASTVW/SANY0249-1.jpg) |
|
|
|
| 1FASTVW |
Jul 18 2008, 04:37 AM
Post
#17
|
|
Newbie Group: Members Posts: 12 Joined: 2-July 08 From: North Central Washington Member No.: 9,240 Region Association: Pacific Northwest |
I used this in the engine bay tonight. Never tried it before. Has anyone else. My paint supplier swears by it.
(IMG:http://i329.photobucket.com/albums/l389/1FASTVW/SANY0250-1.jpg) (IMG:http://i329.photobucket.com/albums/l389/1FASTVW/SANY0251-1.jpg) |
|
|
|
| 1FASTVW |
Jul 18 2008, 04:43 AM
Post
#18
|
|
Newbie Group: Members Posts: 12 Joined: 2-July 08 From: North Central Washington Member No.: 9,240 Region Association: Pacific Northwest |
I have been taking alot of pictures.
I have them posted here: http://s329.photobucket.com/albums/l389/1FASTVW/ If you care to check them out. If you see anything that I should take note of please let me know. After seeing some of the cars that others have resurected, I feel that I am in pretty good shape. There are some pictures from the WCR last weekend in there as well. |
|
|
|
| PanelBilly |
Jul 18 2008, 09:35 AM
Post
#19
|
|
914 Guru Group: Members Posts: 5,808 Joined: 23-July 06 From: Kent, Wa Member No.: 6,488 Region Association: Pacific Northwest |
I remember when I was at this stage of the project. Its fun to tear the car apart and investigate the condition of each area. It doesn't look all that bad from the photos, but you have a big project ahead of you.
Keep sending us updates and asking questions |
 |
|
| 1FASTVW |
Jul 18 2008, 11:42 AM
Post
#20
|
|
Newbie Group: Members Posts: 12 Joined: 2-July 08 From: North Central Washington Member No.: 9,240 Region Association: Pacific Northwest |
Thanks for the encouragement Billy. By the way, it was great to meet you last weekend. Seeing your project up on the rotisserie was inspiring. I noticed on your thread that you rolled your inner fenders like we were talking about when I was there. Shouldn't have any tire clearance issues now.
AvalonFal and Gint, thanks for the advice on the heat gun. Borrowed one yesterday to start the floor. James2; I always found it interesting how people would say, "oh, it's just a Volkswagen", like that is supposed to be a bad thing. I really happen to like Volkswagens. rhodyguy; Oh, sorry! So very close, just about 100 miles off. I am in Wenatchee, the apple capitol of the world. Dave Darling; Thanks for the heads up. I have removed the tins and done a thorough exterior inspection and there does not appear to be any pitting on any of the aluminum anywhere, so it looks like I survived that one. Wiring looks okay too. sww914 Posted Jul 3 2008, 11:00 AM An easy way to remove the tar on the floor is dry ice. You smash a couple of bags of it on the floor so that it covers all of the tar and let it sit for a few minutes. Now hit it firmly with a hammer all over the tar and it will break off quite easily. sww914; Cool idea (get it?) If I get burned out (again!) on the heat gun approach, I will definitely try that method. |
|
|
|
|
1 User(s) are reading this topic (1 Guests and 0 Anonymous Users)
0 Members:

|
Lo-Fi Version | Time is now: 26th May 2024 - 11:10 PM |
Invision Power Board
v9.1.4 © 2024 IPS, Inc.