|
|
|
Porsche, and the Porsche crest are registered trademarks of Dr. Ing. h.c. F. Porsche AG.
This site is not affiliated with Porsche in any way. Its only purpose is to provide an online forum for car enthusiasts. All other trademarks are property of their respective owners. |
|
|

  |

| jmill |
 Sep 15 2008, 09:28 PM Sep 15 2008, 09:28 PM
Post
#1
|
|
Green Hornet  Group: Members Posts: 2,449 Joined: 9-May 08 From: Racine, Wisconsin Member No.: 9,038 Region Association: Upper MidWest |
This is my new pride and joy. Well, it's not very new but I had to have it once I saw it. I first saw it on Craigs List down in Az. It was sold before I could even reach for the phone. I figured it was long gone. As luck would have it Budman decided to flip it and this baby now sits in my garage. It needs some serious love, but what 914 doesn't.
Attached image(s) 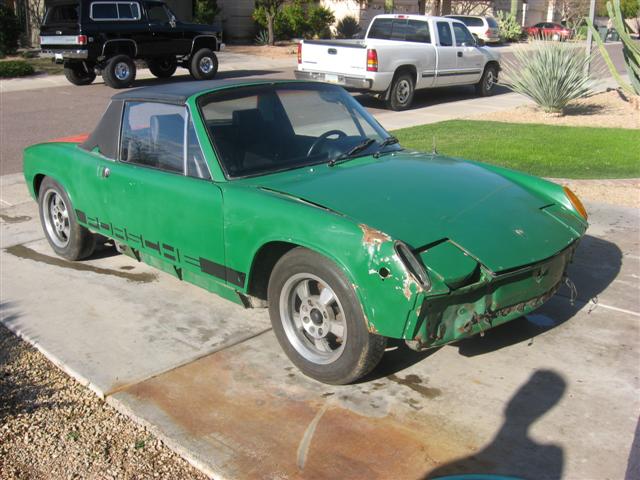
|
   |

 
|
| jmill |
Sep 15 2008, 09:38 PM
Post
#2
|
|
Green Hornet Group: Members Posts: 2,449 Joined: 9-May 08 From: Racine, Wisconsin Member No.: 9,038 Region Association: Upper MidWest |
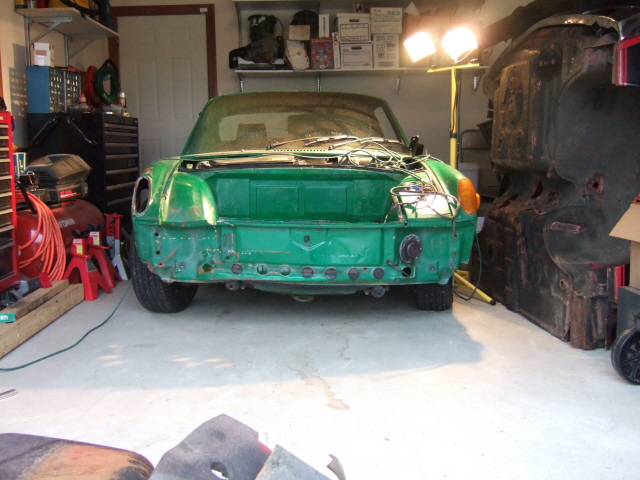
I'm pealing apart that bent passenger front corner. It's tweaked pretty good but the damage doesn't go that far back.
 |
|
|
|
| jmill |
Sep 15 2008, 09:42 PM
Post
#3
|
|
Green Hornet Group: Members Posts: 2,449 Joined: 9-May 08 From: Racine, Wisconsin Member No.: 9,038 Region Association: Upper MidWest |
As you can see from the picture above the front A arm mount is bent up about 1 1/2". Here's what it looks like from the inside after I pealed some stuff apart.
Attached thumbnail(s) 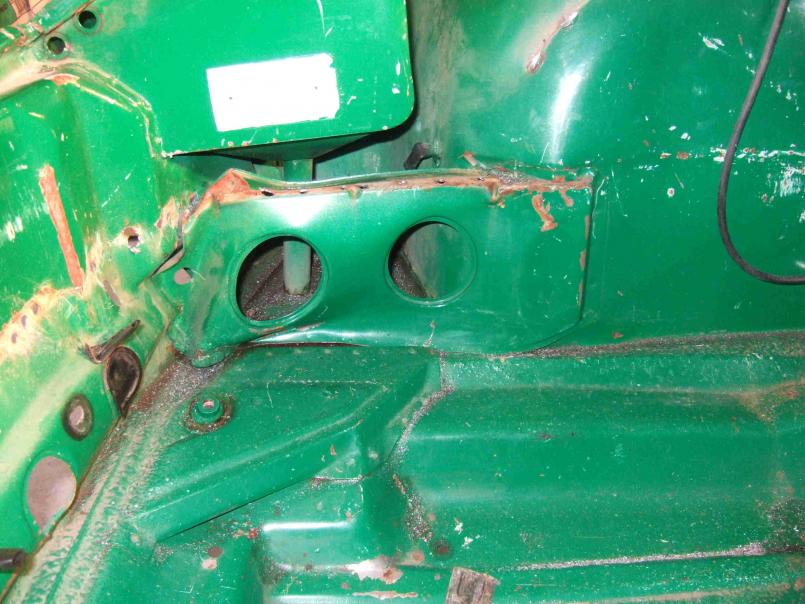
|
|
|
|
| jmill |
Sep 15 2008, 09:45 PM
Post
#4
|
|
Green Hornet Group: Members Posts: 2,449 Joined: 9-May 08 From: Racine, Wisconsin Member No.: 9,038 Region Association: Upper MidWest |
Now it looks much better with most of the bent stuff removed.
Attached thumbnail(s) 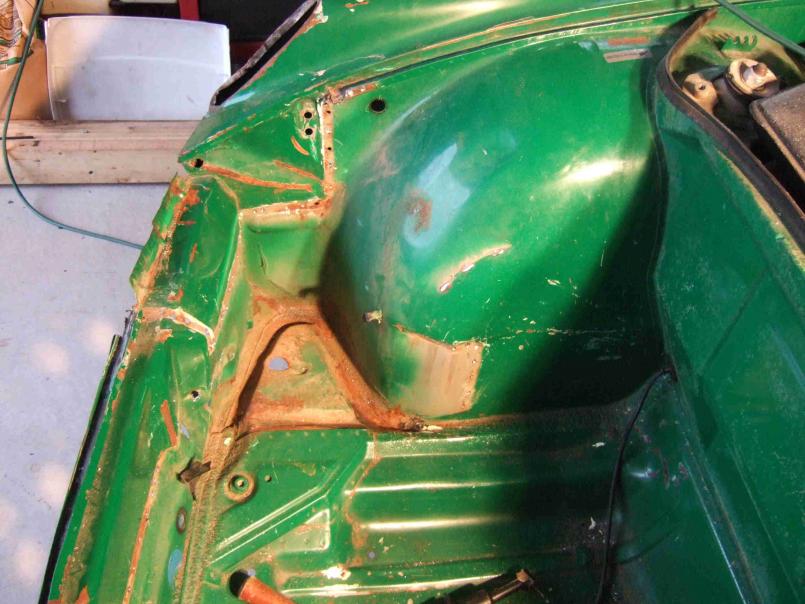
|
|
|
|
| jmill |
Sep 15 2008, 10:00 PM
Post
#5
|
|
Green Hornet Group: Members Posts: 2,449 Joined: 9-May 08 From: Racine, Wisconsin Member No.: 9,038 Region Association: Upper MidWest |
At first I figured I'd be cutting and pasting in a new inner fender. When it's all apart I can see there actually isn't any major damage to it. A dent here or there but all the damage was to the headlight bucket and the front A arm mount. You can see in the picture how it's tweaked up a bit.
Attached thumbnail(s) 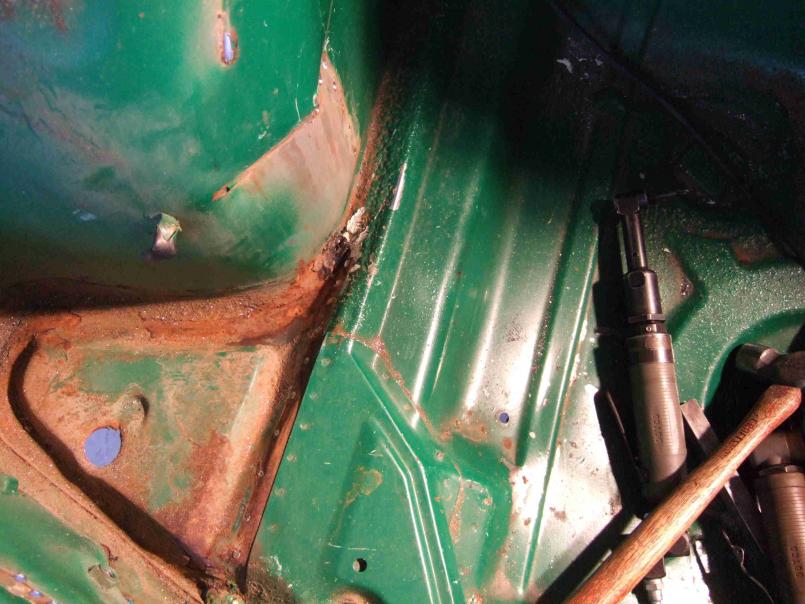
|
|
|
|
| jmill |
Sep 15 2008, 10:08 PM
Post
#6
|
|
Green Hornet Group: Members Posts: 2,449 Joined: 9-May 08 From: Racine, Wisconsin Member No.: 9,038 Region Association: Upper MidWest |
Here's a little better picture of the damaged area.
Attached thumbnail(s) 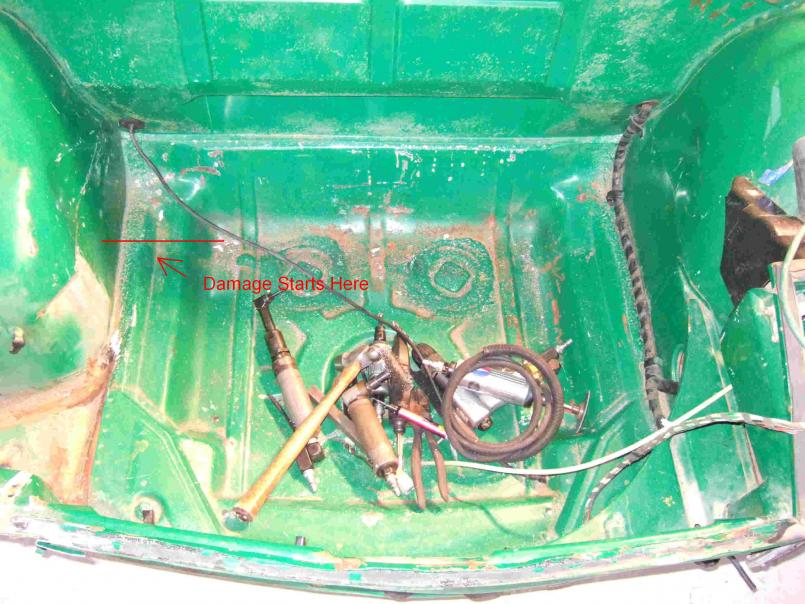
|
|
|
|
| jmill |
Sep 15 2008, 10:18 PM
Post
#7
|
|
Green Hornet Group: Members Posts: 2,449 Joined: 9-May 08 From: Racine, Wisconsin Member No.: 9,038 Region Association: Upper MidWest |
Once I get it up on the stands I can get a lot deeper into it. I plan to make a jig from the complete front clip I have. That way I can be sure I get it back together straight. I also have a fairly clean passenger front corner to get the needed parts.
Attached thumbnail(s) 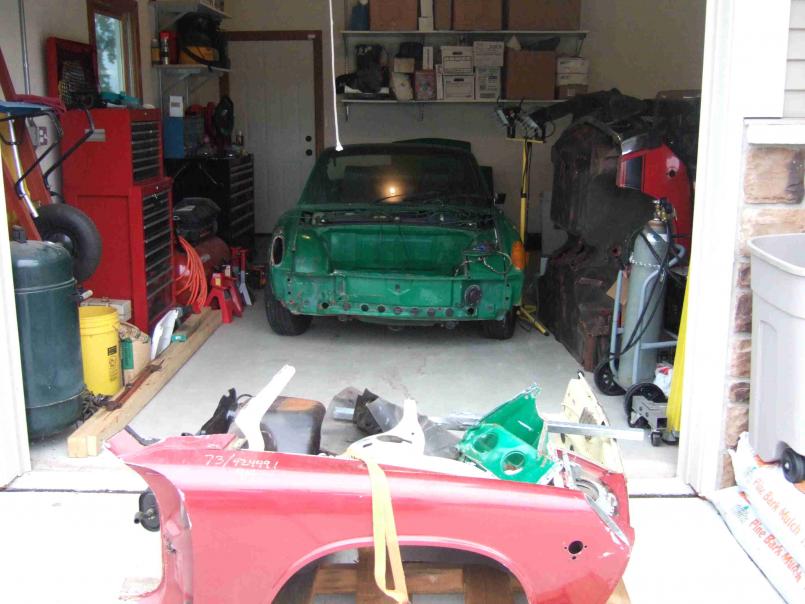
|
|
|
|
| jmill |
Sep 15 2008, 10:27 PM
Post
#8
|
|
Green Hornet Group: Members Posts: 2,449 Joined: 9-May 08 From: Racine, Wisconsin Member No.: 9,038 Region Association: Upper MidWest |
Any of you 914 body repair experts feel free to pipe in with some advice. The plan right now is to fab up a long piece of steel with the passenger suspension mounting points incorporated. When I get everything loosened up I was going to tweak it back into place, bolt in the jig and then weld everything up. Any other ideas?
|
|
|
|
| jmill |
Sep 18 2008, 09:25 PM
Post
#9
|
|
Green Hornet Group: Members Posts: 2,449 Joined: 9-May 08 From: Racine, Wisconsin Member No.: 9,038 Region Association: Upper MidWest |
I was hoping an expert would step up. I'm still wondering if I should cut and paste or bend and massage. I suppose I'll bend and massage first. If that doesn't work out I can always cut and paste. I got a little more work done today. This weekend I'm hoping to have the jig fabbed up and I'll start to put it back together.
Attached thumbnail(s) 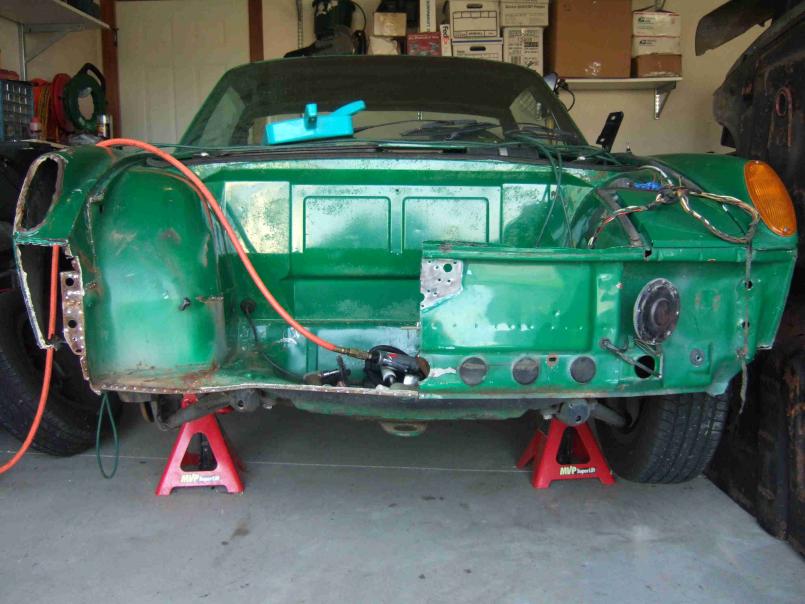
|
|
|
|
| jmill |
Sep 18 2008, 09:28 PM
Post
#10
|
|
Green Hornet Group: Members Posts: 2,449 Joined: 9-May 08 From: Racine, Wisconsin Member No.: 9,038 Region Association: Upper MidWest |
What the heck, another picture.
Attached thumbnail(s) 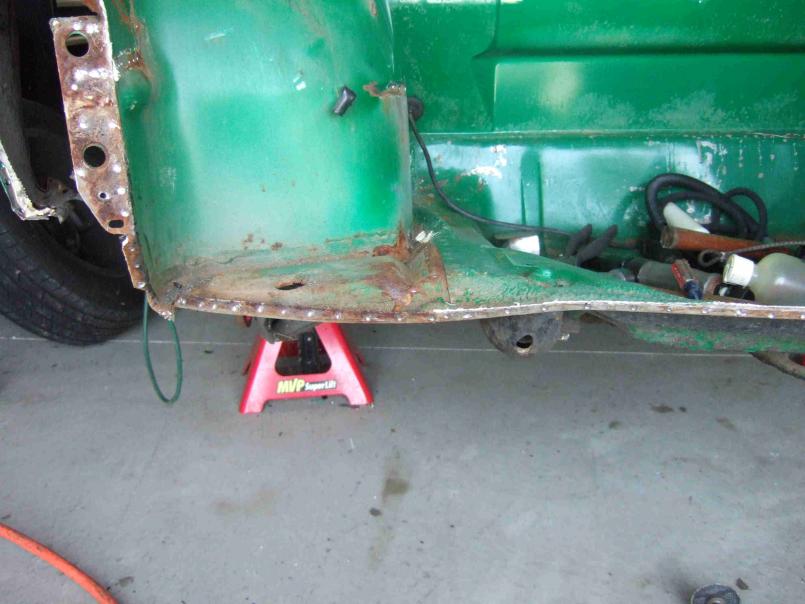
|
|
|
|
| 74914LE |
Sep 18 2008, 11:10 PM
Post
#11
|
|
Member Group: Members Posts: 136 Joined: 6-April 04 From: Fort Worth, TX Member No.: 1,895 |
My advice, for the $.02 it is worth, would be to do a "cut-n-past" as you call it.
Recently, I had a similar issue, and rather than spend the time and agony trying to straighen and pray that everything lined up, I just put a whole new front finder/front panel section on the car. I took the finder and finder well off the doner car in one piece, with the cut along the floor section. This way, I was able to keep the complete headlight bucket in place. Could not be more pleased with the end result. Everything lined up perfect. Based on the front clips you have in the picture, if I were you, I would use as much of those in complete sections as possible. Just depends on how much time you have to put into getting it correct. Good luck. |
|
|
|
| jmill |
Sep 25 2008, 05:35 PM
Post
#12
|
|
Green Hornet Group: Members Posts: 2,449 Joined: 9-May 08 From: Racine, Wisconsin Member No.: 9,038 Region Association: Upper MidWest |
Finally got some time to work on it today. I finished up fabbing the jig and pulled the front suspension off the car.
Attached thumbnail(s) 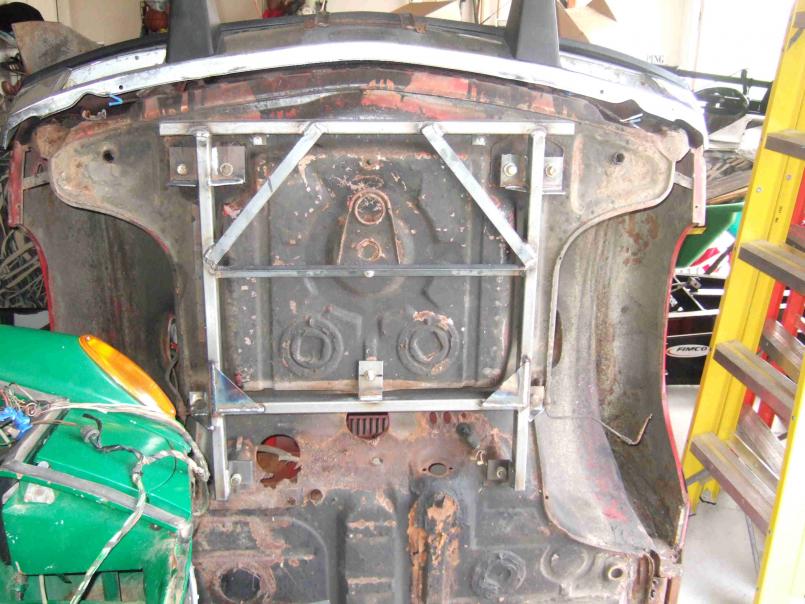
|
|
|
|
| jmill |
Sep 25 2008, 05:39 PM
Post
#13
|
|
Green Hornet Group: Members Posts: 2,449 Joined: 9-May 08 From: Racine, Wisconsin Member No.: 9,038 Region Association: Upper MidWest |
Here's the jig bolted up to the green car. As you can see there is some major gappage on the passenger side.
Attached thumbnail(s)  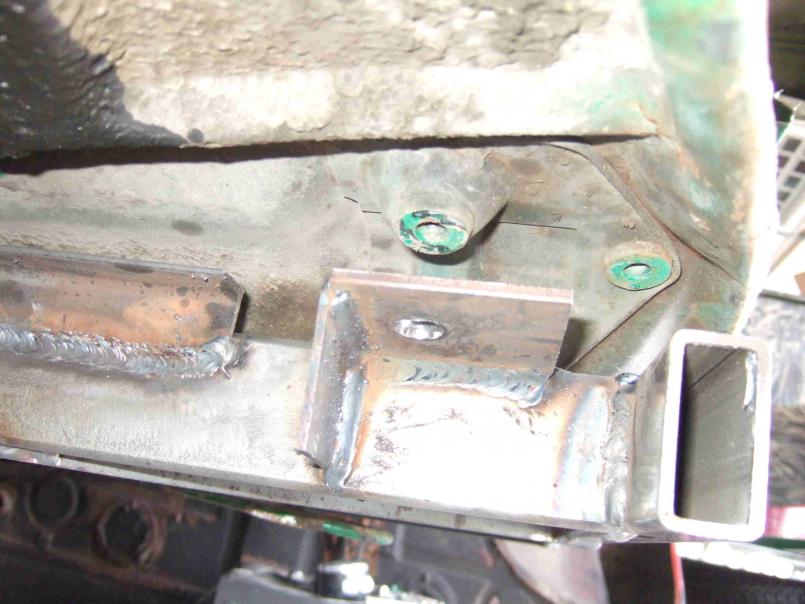
|
|
|
|
| Root_Werks |
Sep 25 2008, 05:39 PM
Post
#14
|
|
Village Idiot Group: Members Posts: 8,849 Joined: 25-May 04 From: About 5NM from Canada Member No.: 2,105 Region Association: Pacific Northwest |
I like the jig! Looks like you have plenty of donor parts to do things right.
|
|
|
|
| jmill |
Sep 25 2008, 05:44 PM
Post
#15
|
|
Green Hornet Group: Members Posts: 2,449 Joined: 9-May 08 From: Racine, Wisconsin Member No.: 9,038 Region Association: Upper MidWest |
I wish that the passenger side was the only problem. Unfortunately, the drivers front A-arm mount was pushed over a bit. It looks like I dig in this one a little deeper to straighten it out. (IMG:style_emoticons/default/headbang.gif)
Attached thumbnail(s) 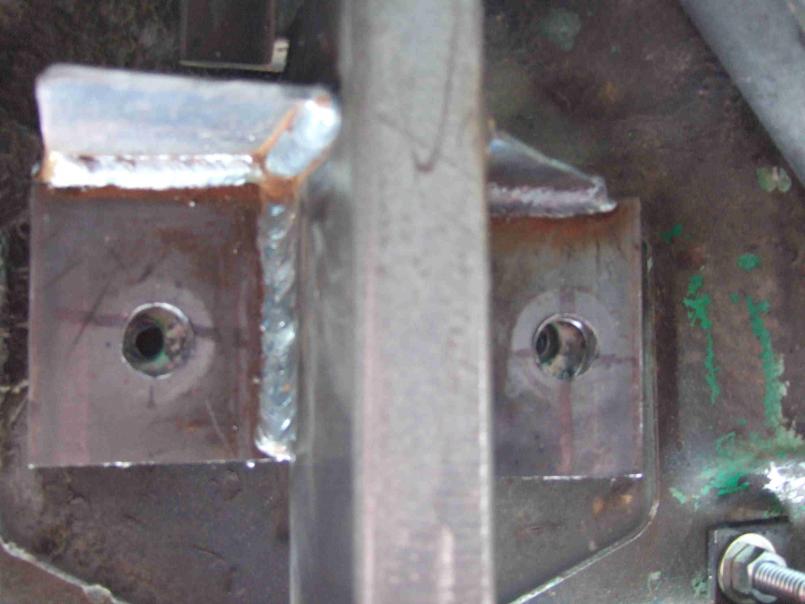
|
|
|
|
| FourBlades |
Sep 25 2008, 06:12 PM
Post
#16
|
|
From Wreck to Rockin Group: Members Posts: 2,056 Joined: 3-December 07 From: Brevard, FL Member No.: 8,414 Region Association: South East States |
I have a spare driver's side front suspension mount set, both the front and rear mounts. They look in fine shape. You can have them for free if you need them. There is actually a picture of them at the end of my "starting a 1973 restoration" thread. John |
|
|
|
| jmill |
Sep 25 2008, 08:13 PM
Post
#17
|
|
Green Hornet Group: Members Posts: 2,449 Joined: 9-May 08 From: Racine, Wisconsin Member No.: 9,038 Region Association: Upper MidWest |
Thanks for the offer John. My mounts are actually in great shape. Unfortunately, the front is about 3/16 too far to the left. It looks like when it was hit, the floor of the front trunk was moved over a bit. I'll have to drill out the spotwelds of the floor and then line it up to the jig. Then I'll weld it back up straight. I'm thankful that the rear mounts of the front suspension are straight. The jig lined up perfect to them. If they were jazzed up I'd be looking for a bench. Without 2 good reference points my jig is useless.
Thanks for the comments on the jig. I measured up all the mounting holes and they all line up square. I didn't spend much time making it fancy. It's kinda ugly looking but it works. It got me back into the swing of welding too. It's been awhile. |
|
|
|
| Richard Casto |
Sep 26 2008, 08:02 AM
Post
#18
|
|
Blue Sky Motorsports, LLC Group: Members Posts: 1,465 Joined: 2-August 05 From: Durham, NC Member No.: 4,523 Region Association: South East States |
Looks like you are doing a good job. Nice welds on the jig by the way. (IMG:style_emoticons/default/wink.gif)
|
|
|
|
| rick 918-S |
Sep 26 2008, 09:32 AM
Post
#19
|
|
Hey nice rack! -Celette Group: Members Posts: 21,122 Joined: 30-December 02 From: Now in Superior WI Member No.: 43 Region Association: Northstar Region |
You should have done your pulls before removing the front panel. Even with the damage as it was, the connecting panels would help bring the remote damage that traveled around the box back in line. Think about the uni-body as a box shaped bird cage. If you pull on one corner the other corner move. If you cut the bird cage and repete the pull only the section your working moves. Not the worse think in your case as the damage looks minor. It just makes it a little harder to get both right and left pick up points to move as one and not spread apart from one an other. Make a cross bar to maintain the space between your front right and left suspension pick up points. Bolt it in when you pull the chassis.
You need a way to do a down pull. You could drill some holes in your concrete floor and install 1/2 anchor bolts. Then make a bolt on bracket for the pickup points. Then attach chains to the bolts and brackets in a circle shape. This is called a Vector pull. Build a spreader like a turn buckle (or if you have a port-o-power use that) and install it between the looped chain. Then use the turn buckle to take the slack out of the chain. you will likely need 4 bolts in your floor. This will hold the chassis to the floor. Use the same method on the high corner only use the turn buckle to spread the chain til the corner starts coming down. Use a wood block and a BFH to relieve the stress. You will probably notice you will need to add stands to stop the chassis from doing what you don't want it to do. You may also notice once the right corner starts coming down the left corn may start to move over. Nice fixture BTW. Stay at it. You'll get it. I've done lots and lots of uni-body repairs. I even had a Cellette. You just have to think about how to reverse the impact. And don't go crazy with a BFH (IMG:style_emoticons/default/smash.gif) Light hits. use Wood blocking to span a larger area when using the BFH. |
 |
|
| jmill |
Sep 26 2008, 11:06 AM
Post
#20
|
|
Green Hornet Group: Members Posts: 2,449 Joined: 9-May 08 From: Racine, Wisconsin Member No.: 9,038 Region Association: Upper MidWest |
Thanks for the tips Rick. I was hoping an experienced body work type guy would pipe in. I don't have much unibody experience. I used to work on cars and trucks of the 40's and 50's. A big hammer and torch was about all I needed. I should have tried the jig before I pealed stuff apart. I think your right in thinking that the drivers side mount will slide into place when I pull down the passenger corner. I'll rig up a way to do the pull this weekend.
|
|
|
|
|
9 User(s) are reading this topic (8 Guests and 0 Anonymous Users)
1 Members: Lockwodo

|
Lo-Fi Version | Time is now: 21st November 2025 - 03:48 PM |
Invision Power Board
v9.1.4 © 2025 IPS, Inc.