|
|
|
Porsche, and the Porsche crest are registered trademarks of Dr. Ing. h.c. F. Porsche AG.
This site is not affiliated with Porsche in any way. Its only purpose is to provide an online forum for car enthusiasts. All other trademarks are property of their respective owners. |
|
|


| Mikey914 |
 Nov 9 2008, 09:46 PM Nov 9 2008, 09:46 PM
Post
#1
|
|
The rubber man  Group: Members Posts: 12,660 Joined: 27-December 04 From: Hillsboro, OR Member No.: 3,348 Region Association: None |
Well as many of you have been asking and for another option to the expensive 3 part seal I've got the answer. This thing really kept me banging my head for awhile. My intention was to create a seal that could work as a repair and then could be used as a base for the construction of the 3 part seal at a later date. The problem was to make a good repair, I couldn't use the same on intended for production. I may be able to tweak back in a future date with some minor tooling adjustments, but for now I've got a solution that's pretty inexpensive and will stop the water from coming in.
The problem lies in co-extruding the two parts together. The internal clip can't go all the way to the end. I should have figured this out from my dissection of several old seals. there's a "tube" that integrates in to block. The installation goes like this- 1-The old seal is partially removed - this is accomplished by removing the retaining screws in the inside corner of each corner block. Removal is only required far enough to make a clean cut. In theory you may not need to remove, but I did to see what I was doing better. Make as clean of a cut as you can at the joint. A PVC pipe cutter works well, or just a sharp razor blade and a steady hand. 2-The new smaller internal clip is attached to the seam and pressed on. I did from inside drain vent to inside drain vent. Make sure the "barb" is on the bottom. This is important later. 3- Place the new seal on the internal clip pushing toward the first edge installed except for the last 8" or so. Then cut the other end slightly longer than required. to fit into onto the cut you made on the other side. You will find that the seal will not fit onto the track initially. You will make small cuts until it fits. You may need to trim some of the bottom of the seal to get the contour around the bend. This is the step that the longer you take to trim just right will pay off, don't be in a rush. Before going to next step you will need to select the glue you are going to use. You will see some pros and cons at the end. 4- After you are satisfied with the fitment you can glue the first end (I used ply-bond for this installation ). After this has set up for about a hour ( I used painters tape to hold in position, and removed after an hour), with the seal in place run a small bead on the internal seal by pulling up and slightly back the main seal This is the one that runs drain vent to drain vent. This also leaves about 4" on the end that can be moved around later to glue the other end You will need to make sure you have read step 5 if you are using super glue). 5-Here's why you don't just glue the two together. The new rubber needs to be slightly off center. The lip that is exposed when the roof is together needs to be pushed forward as to close the gap, this means it's actually angled forward. This is easy to see this is necessary when doing the dry fitting. I used 1" wide painter tape to keep the seal angled forward after I positioned it cocked slightly forward. 6 finally glue the other end and your done ( I used the painters blue tape here also for an hour) Glues - Ply-bond is very good for this type of work, I prefer it, but it takes about 5 minutes to start to set and is pretty much dry in a hour. In 24 hours it's fully cured. Available at ace hardware. Cleans up with acetone. Shoe Goo - is not bad from a sealing standpoint, it's harder to work with as it sets up faster, and is more of a gel. You can get this at Home dept and drug stores. Super glue - This glue is brittle, which is good an bad. The good part is that it bonds very quickly, I did a trial with the Gel in a small squeeze bottle and it worked well. The problem is working time on the inner seal. It set up so fast that it was hard to get it to sit where I wanted it. This is where the good part comes in. I was able to remove the seal and strip out the old inner and re-glue with Ply-bond. This would work if you can get the position correct before it bonds. So now the bugs are worked out let me know who wants these. These will be ready to start shipping this next weekend Nov 14th. The other window to roof seals are about 10 days behind. PM me or add to this list. Attached thumbnail(s) 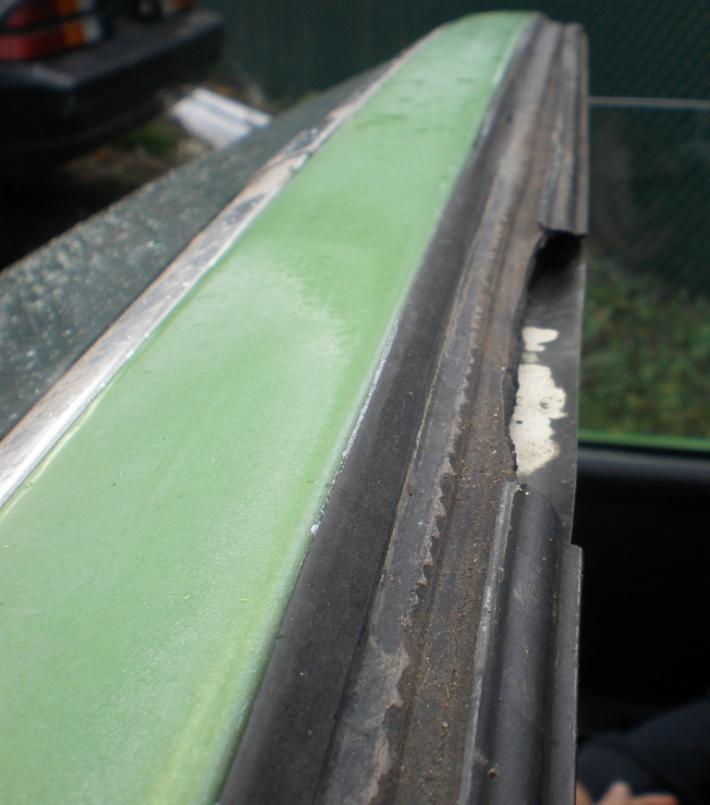 Attached image(s) 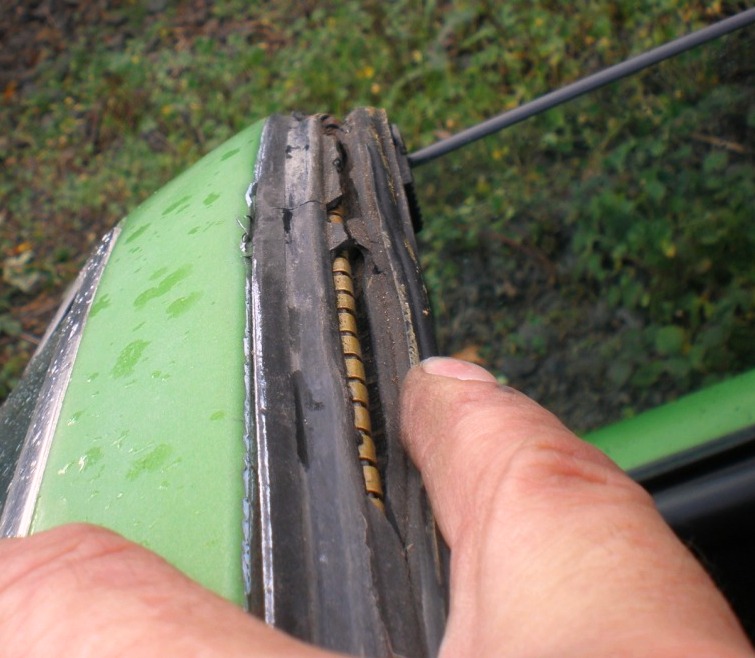 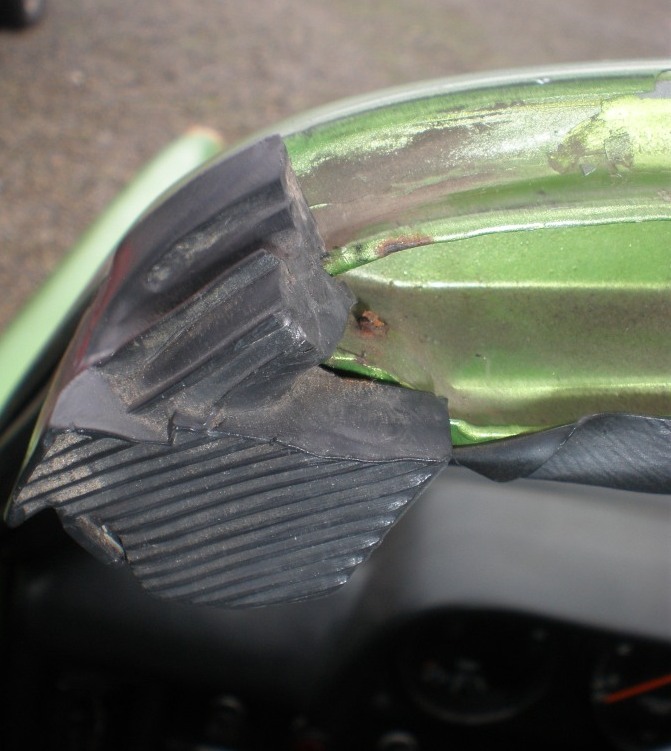
|
   |

 
|
Posts in this topic
 Mikey914 Repair seal for the main 3 part targa seal Nov 9 2008, 09:46 PM
 Mikey914 Installed Nov 9 2008, 09:47 PM Mikey914 SO as you can see these are not perfect, and the q... Nov 9 2008, 09:48 PM paroxysm I would like to try one, can you send it together ... Nov 12 2008, 06:44 PM
 Mikey914
I would like to try one, can you send it together... Nov 12 2008, 09:27 PM westgl
I would like to try one, can you send it togethe... Nov 18 2008, 09:17 AM justme Hi Mikey Mark
do you have a list of all the sea... Nov 12 2008, 09:12 PM ericread I just replied over in then "garage" for... Nov 24 2008, 08:41 AM charliew I also need this in addition to the window seals. ... Dec 5 2008, 01:58 PM
Mikey914
I would like to try one, can you send it together... Nov 12 2008, 09:27 PM westgl
I would like to try one, can you send it togethe... Nov 18 2008, 09:17 AM justme Hi Mikey Mark
do you have a list of all the sea... Nov 12 2008, 09:12 PM ericread I just replied over in then "garage" for... Nov 24 2008, 08:41 AM charliew I also need this in addition to the window seals. ... Dec 5 2008, 01:58 PM  |
1 User(s) are reading this topic (1 Guests and 0 Anonymous Users)
0 Members:

|
Lo-Fi Version | Time is now: 12th May 2024 - 04:27 PM |
Invision Power Board
v9.1.4 © 2024 IPS, Inc.