|
|
|
Porsche, and the Porsche crest are registered trademarks of Dr. Ing. h.c. F. Porsche AG.
This site is not affiliated with Porsche in any way. Its only purpose is to provide an online forum for car enthusiasts. All other trademarks are property of their respective owners. |
|
|

  |

| 749142 |
 Nov 24 2008, 10:13 PM Nov 24 2008, 10:13 PM
Post
#1
|
|
Member  Group: Members Posts: 254 Joined: 8-January 08 From: Bakersfield, Ca Member No.: 8,545 |
Just this last saturday i rear ended a ford in my teener. so ive decided to do a thread on the rebuild process. so heres the goal, i want to rebuild the front, but not to stock appereance. i want to get rid of the pop up headlights, since the car is not original, this is at least the 2nd time its been hit on the front right fender, you may have seen my bad news thread, so i want to build the front up to be a cross between something 356ish and the new 911 oval style lights. i'll see how it goes. i dont want to install GT flares but i want to widen the fenders still. ok after that i want to do a subie conversion, possibly. ive been working on the suspension, i just installed a sway bar on the front. i need to replace the stock springs in the rear and then put in a sway bar in the back. after that interior and paint.
until i can afford the subie conversion, a 2056 will do. ok so its gonna be slow but its still progress so enjoy the resurection! |
   |

 
|
| 749142 |
Nov 24 2008, 10:21 PM
Post
#2
|
|
Member Group: Members Posts: 254 Joined: 8-January 08 From: Bakersfield, Ca Member No.: 8,545 |
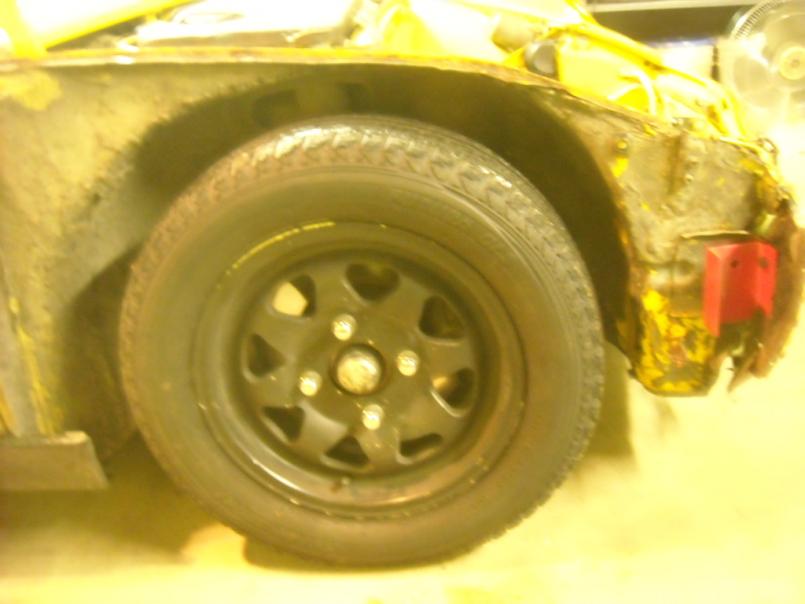
ok so heres the damage and progress so far.
so here i removed the 916 bumper 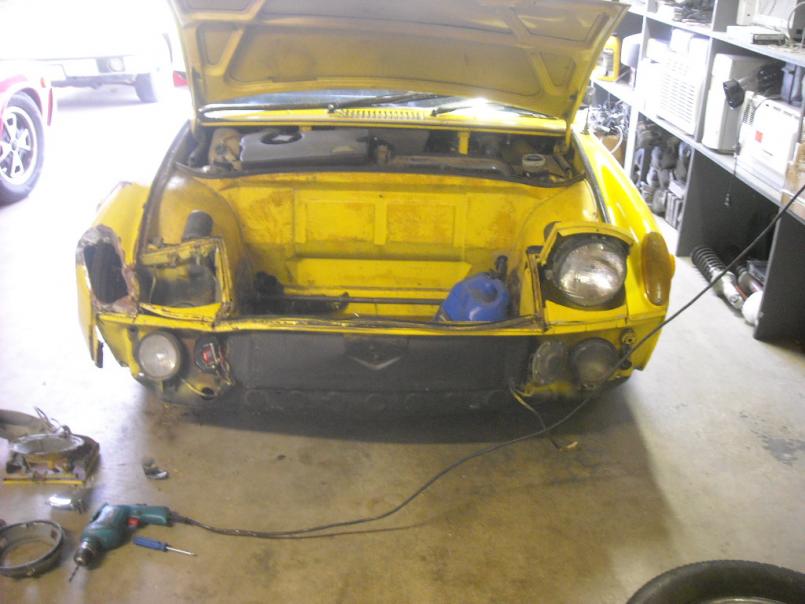 i mentioned on the bad news thread that the fender was screwed on, well the prev owner brazed it in about every 5 inches as well 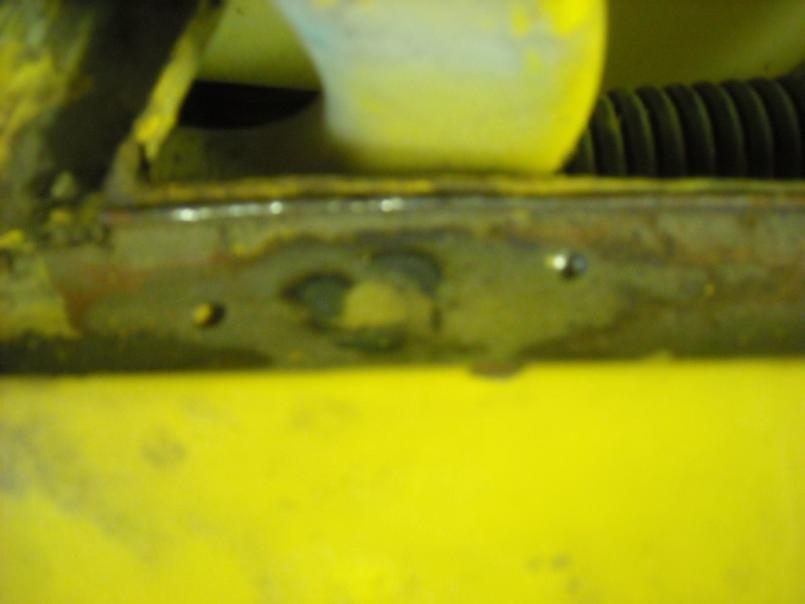 |
|
|
|
| 749142 |
Nov 24 2008, 10:24 PM
Post
#3
|
|
Member Group: Members Posts: 254 Joined: 8-January 08 From: Bakersfield, Ca Member No.: 8,545 |
ok so got the fender off
 this is where the fender was brazed in at the front before.  |
|
|
|
| 749142 |
Nov 24 2008, 10:28 PM
Post
#4
|
|
Member Group: Members Posts: 254 Joined: 8-January 08 From: Bakersfield, Ca Member No.: 8,545 |
so this is where im at right now. i mentioned that i may want to do a subie conversion, i want to ask those who have done a subie conversion what the upsides and the down sides are? and was it worth it?
|
|
|
|
| 914helo |
Nov 25 2008, 08:23 AM
Post
#5
|
|
Member Group: Members Posts: 235 Joined: 29-September 04 From: Southern Utah Member No.: 2,859 Region Association: None |
Steven, I'm just finishing up my Subie conversion so I'm not the most qualified person to answer yet. However, I love it and would do it again. When I finish sorting out all the details (like my starter just died) we can go for a ride. I'm not too far away. The engine maintanance is almost nothing, with great longevity. If I blow the engine I'll buy another for under a grand easy. I'll be back in the area in another week to finish mine off. I say go for it. (IMG:style_emoticons/default/piratenanner.gif) Best of luck and keep posting pictures.
|
|
|
|
| Root_Werks |
Nov 25 2008, 10:30 AM
Post
#6
|
|
Village Idiot Group: Members Posts: 8,321 Joined: 25-May 04 From: About 5NM from Canada Member No.: 2,105 Region Association: Pacific Northwest |
Good progress! Keep the work going. (IMG:style_emoticons/default/welder.gif)
|
|
|
|
| 749142 |
Nov 26 2008, 09:09 PM
Post
#7
|
|
Member Group: Members Posts: 254 Joined: 8-January 08 From: Bakersfield, Ca Member No.: 8,545 |
Ok so i welded up a little bracket to bolt to the bumper mounts, i was able to take the chain and wrap it around the tree stump at the side of my house and pull ou the front where it was hit. i may have to pull it out some more, i also have to straighten out the top of the front wall of the trunk.
heres the bracket 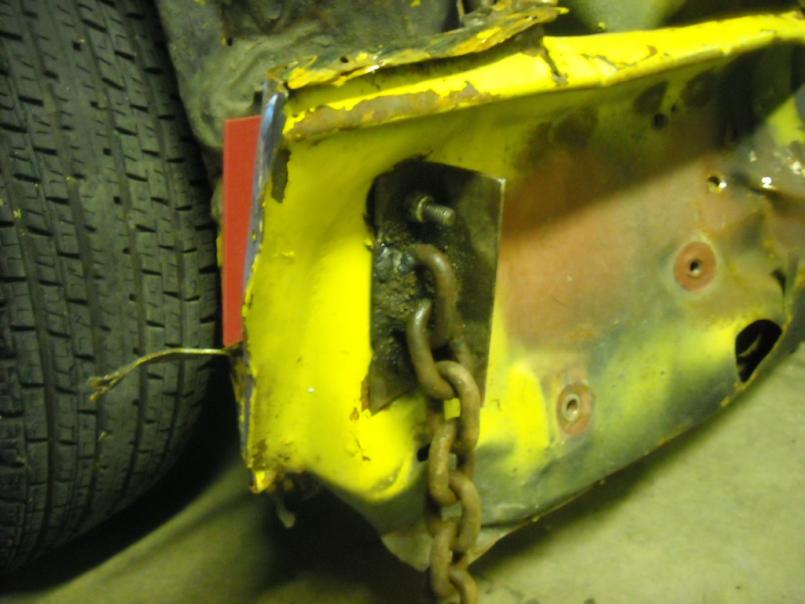 heres where it was before i pulled it out  |
|
|
|
| 749142 |
Nov 26 2008, 09:14 PM
Post
#8
|
|
Member Group: Members Posts: 254 Joined: 8-January 08 From: Bakersfield, Ca Member No.: 8,545 |
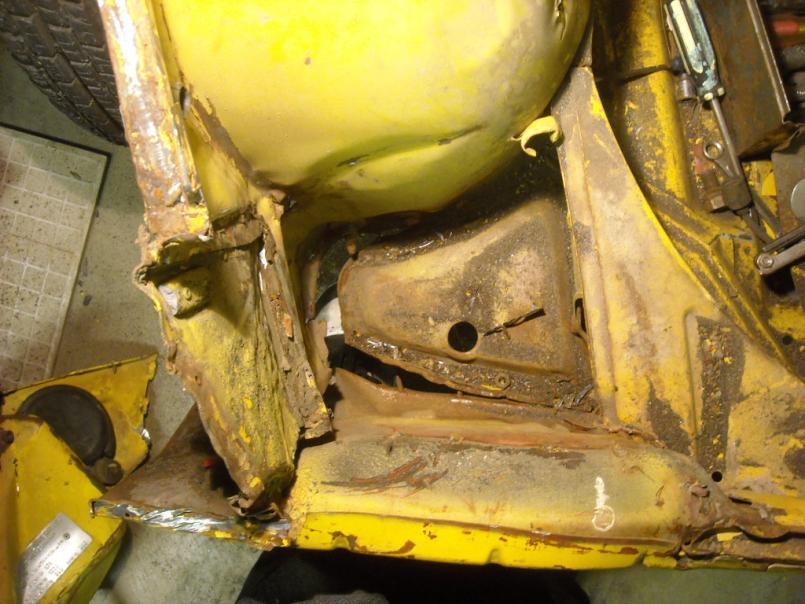
heres where it is after i pulled it out
 now here is where im removing the pop up light bucket. i know i may get grilled for this but im getting rid of the pop up lights, ill be widening out the tops of the ovals where the turns signals are stock and ill be putting headlights in there, i may not be stating that as clear as i could so you may just have to wait and see to know what im trying to say. (IMG:style_emoticons/default/sawzall-smiley.gif) 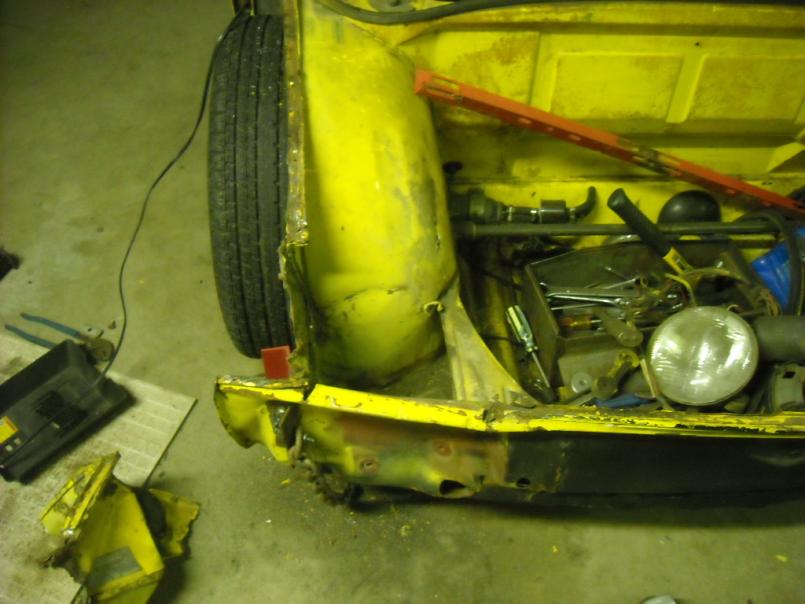 |
|
|
|
| 749142 |
Nov 26 2008, 09:17 PM
Post
#9
|
|
Member Group: Members Posts: 254 Joined: 8-January 08 From: Bakersfield, Ca Member No.: 8,545 |
you cant really see what the gap was like in the before pic becuz the wheel was turned, but there was only about an inche of clearance, but now its about where it should be
|
|
|
|
| 749142 |
Nov 26 2008, 09:24 PM
Post
#10
|
|
Member Group: Members Posts: 254 Joined: 8-January 08 From: Bakersfield, Ca Member No.: 8,545 |
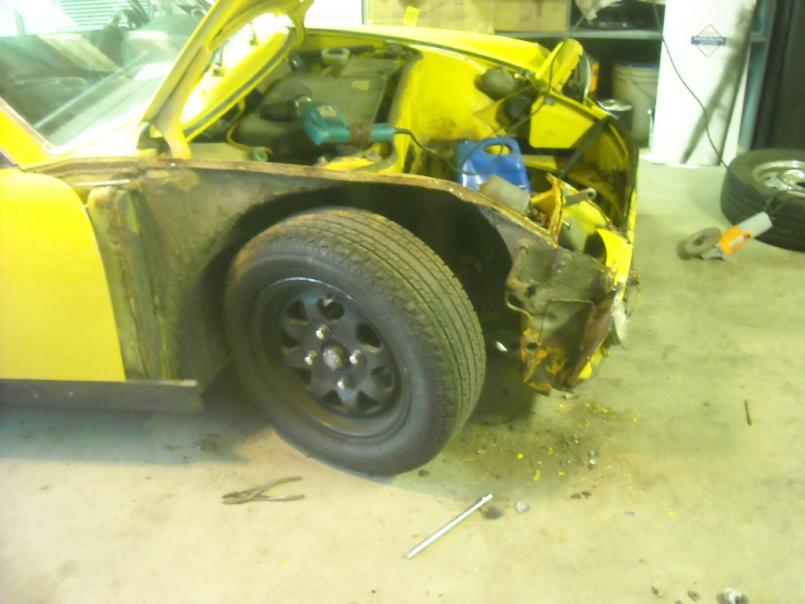
here you can see i still have some rebuilding to do up underneather where the pop-up bucket should be on the passenger's side. next is to rebuild that and then to take out the other bucket.
 |
|
|
|
| 749142 |
Dec 2 2008, 01:09 PM
Post
#11
|
|
Member Group: Members Posts: 254 Joined: 8-January 08 From: Bakersfield, Ca Member No.: 8,545 |
Progress!!!
Ok ive straightened out the front right corner and welded it all back to where it should be, ill post pictures tommorow. i plan on cutting off the fender of the parts car and to start on that tommorow afternoon. anyone got any good suggestions on how to cut the fender of a car without damaging the fender or the part of the car its welded to or is that impossible? |
|
|
|
| 749142 |
Feb 10 2009, 11:45 AM
Post
#12
|
|
Member Group: Members Posts: 254 Joined: 8-January 08 From: Bakersfield, Ca Member No.: 8,545 |
ok i havent posted in a while but i have been busy. so i have made some progress.
enjoy the pics to come |
|
|
|
| 749142 |
Feb 21 2009, 09:45 PM
Post
#13
|
|
Member Group: Members Posts: 254 Joined: 8-January 08 From: Bakersfield, Ca Member No.: 8,545 |
ok now im going to post some pics. ive just been too busy with school and working on the car to be snooping around the site.
|
|
|
|
| 749142 |
Feb 21 2009, 09:51 PM
Post
#14
|
|
Member Group: Members Posts: 254 Joined: 8-January 08 From: Bakersfield, Ca Member No.: 8,545 |
here we go
so this is where i cut that whole section out that was mangled from the accident. 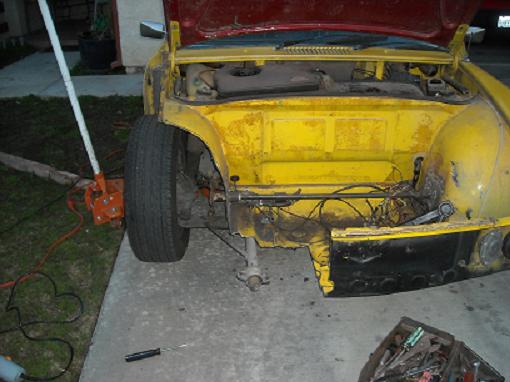 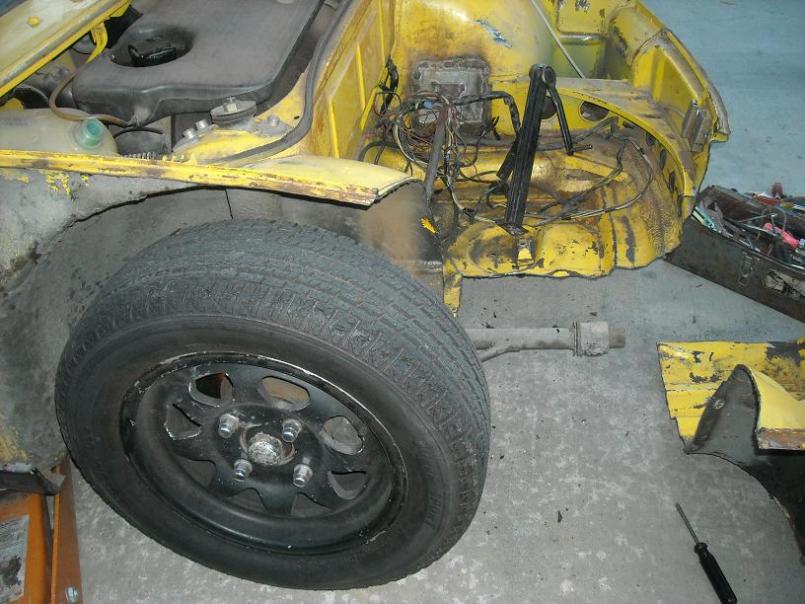 |
|
|
|
| 749142 |
Feb 22 2009, 12:17 AM
Post
#15
|
|
Member Group: Members Posts: 254 Joined: 8-January 08 From: Bakersfield, Ca Member No.: 8,545 |
these pics here were taken at night because im too busy working on it during the day time.
  |
|
|
|
| 749142 |
Feb 22 2009, 12:21 AM
Post
#16
|
|
Member Group: Members Posts: 254 Joined: 8-January 08 From: Bakersfield, Ca Member No.: 8,545 |
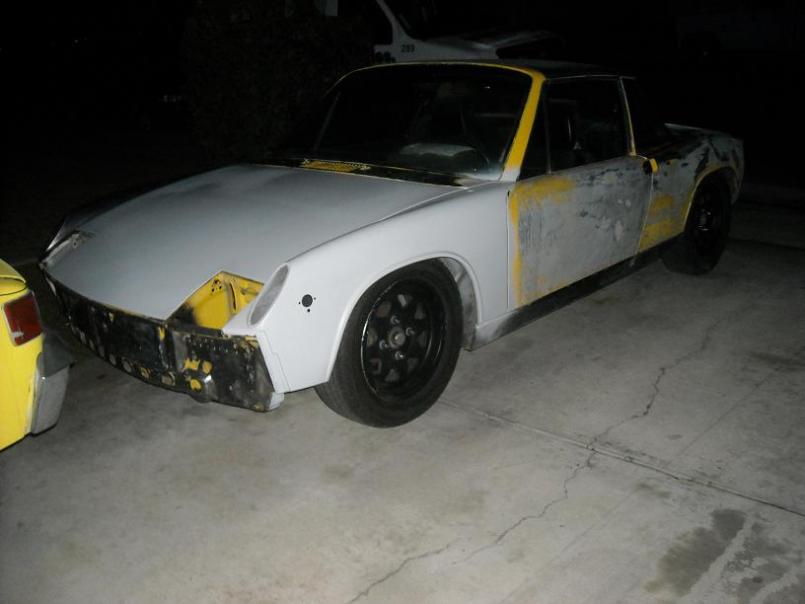
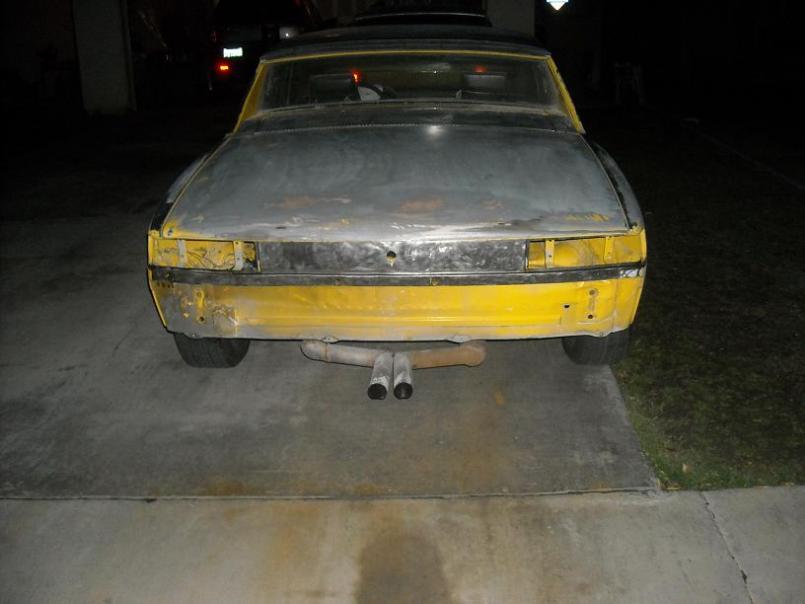
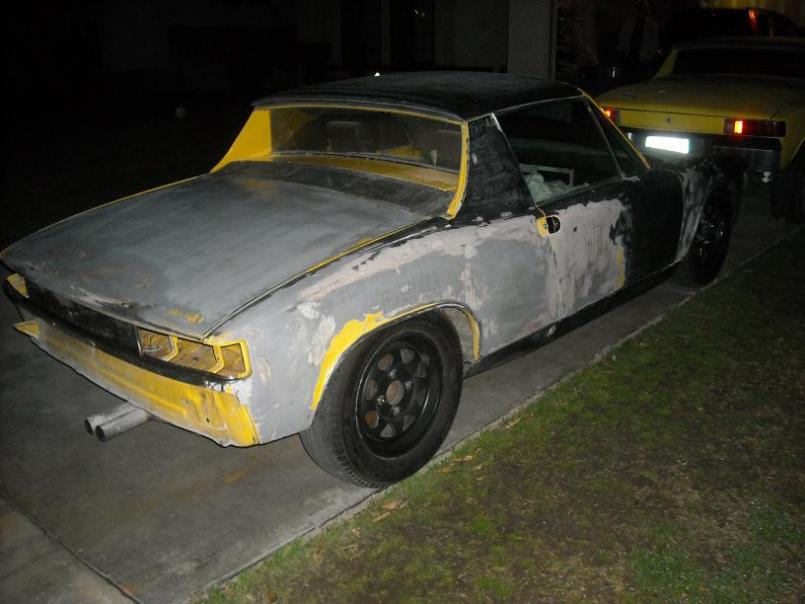
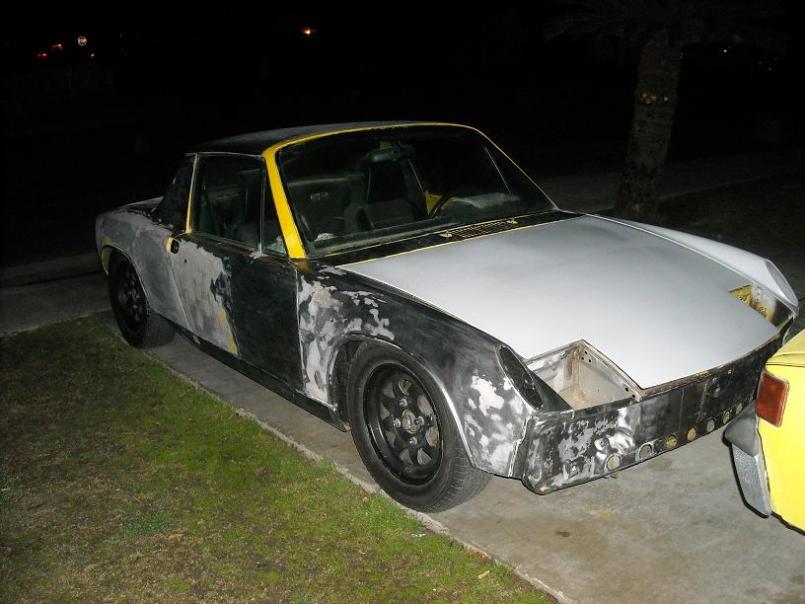
its still a rough project right now but it will look good when me and my dad are finished with
 so this is the right front. where the car was hit before. 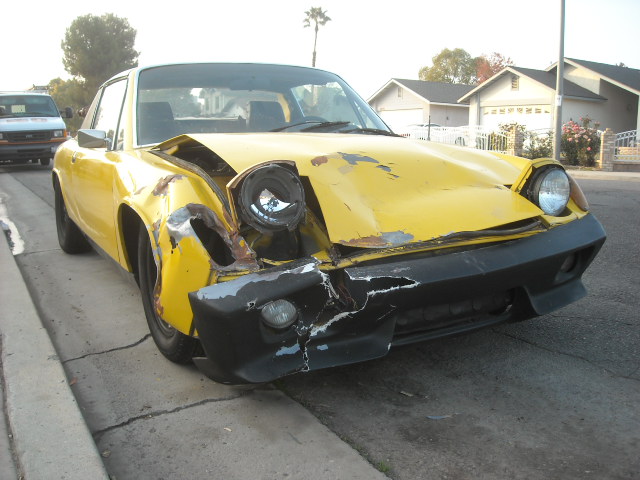 |
|
|
|
| JRust |
Feb 22 2009, 12:22 AM
Post
#17
|
|
914 Guru Group: Members Posts: 6,307 Joined: 10-January 03 From: Corvallis Oregon Member No.: 129 Region Association: Pacific Northwest |
Looking good. Keep up the good work
|
|
|
|
| 749142 |
Feb 22 2009, 12:22 AM
Post
#18
|
|
Member Group: Members Posts: 254 Joined: 8-January 08 From: Bakersfield, Ca Member No.: 8,545 |
and this is the car in its current state now
 |
|
|
|
| mein_tag |
Feb 22 2009, 12:30 AM
Post
#19
|
|
Member Group: Members Posts: 66 Joined: 9-April 08 From: sunny Phoenix Member No.: 8,905 Region Association: Southwest Region |
Did you get that whole section from a donor car?
|
|
|
|
| zambezi |
Feb 22 2009, 12:30 AM
Post
#20
|
|
Senior Member Group: Members Posts: 711 Joined: 14-April 08 From: Lafayette, LA Member No.: 8,920 Region Association: South East States |
lookin' good. Are you going back with the same fiberglass front bumper?
JIM |
|
|
|
|
1 User(s) are reading this topic (1 Guests and 0 Anonymous Users)
0 Members:

|
Lo-Fi Version | Time is now: 17th May 2024 - 02:27 PM |
Invision Power Board
v9.1.4 © 2024 IPS, Inc.