|
|
|
Porsche, and the Porsche crest are registered trademarks of Dr. Ing. h.c. F. Porsche AG.
This site is not affiliated with Porsche in any way. Its only purpose is to provide an online forum for car enthusiasts. All other trademarks are property of their respective owners. |
|
|

  |

| FourBlades |
 Jan 20 2014, 06:14 PM Jan 20 2014, 06:14 PM
Post
#401
|
|
From Wreck to Rockin  Group: Members Posts: 2,056 Joined: 3-December 07 From: Brevard, FL Member No.: 8,414 Region Association: South East States |
Moving on to the turn signal bucket area. Notice how there is a raised ring around
the whole turn signal on this good fender that BD Stone sent me. This is what I will try to replicate.  The bottom edge of the fender should be even with the top edge of the front valence panel as you can see on the yellow piece that Garold Shaffer sent me. 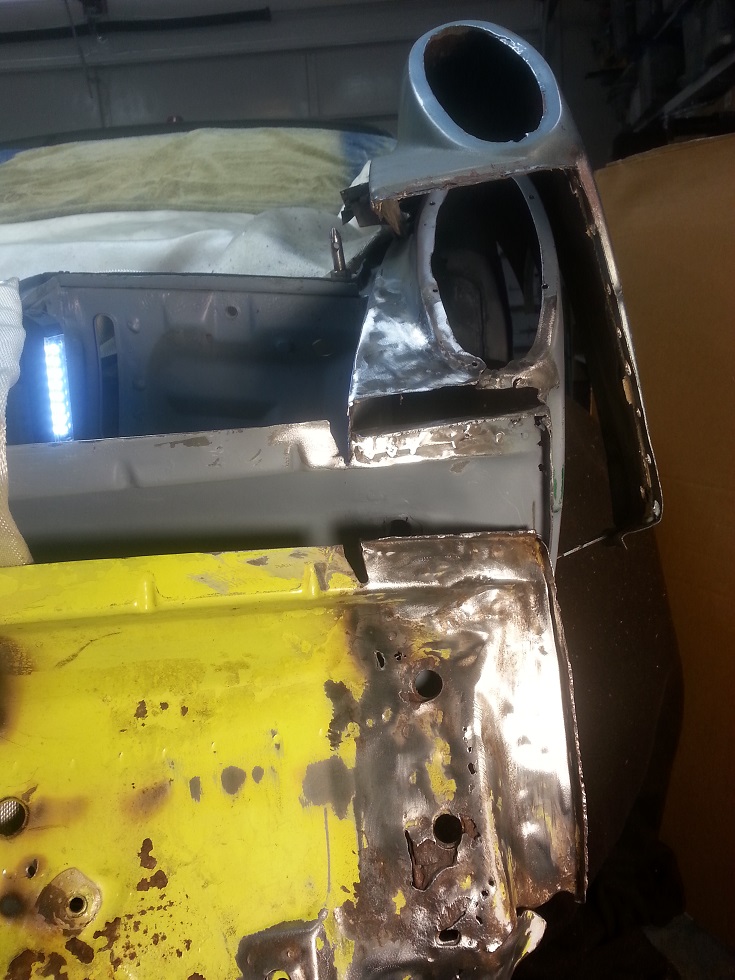 Here is another view of the correct body line. Having screwed up both sides in this area it makes me really sensitive to getting these things right in the future. 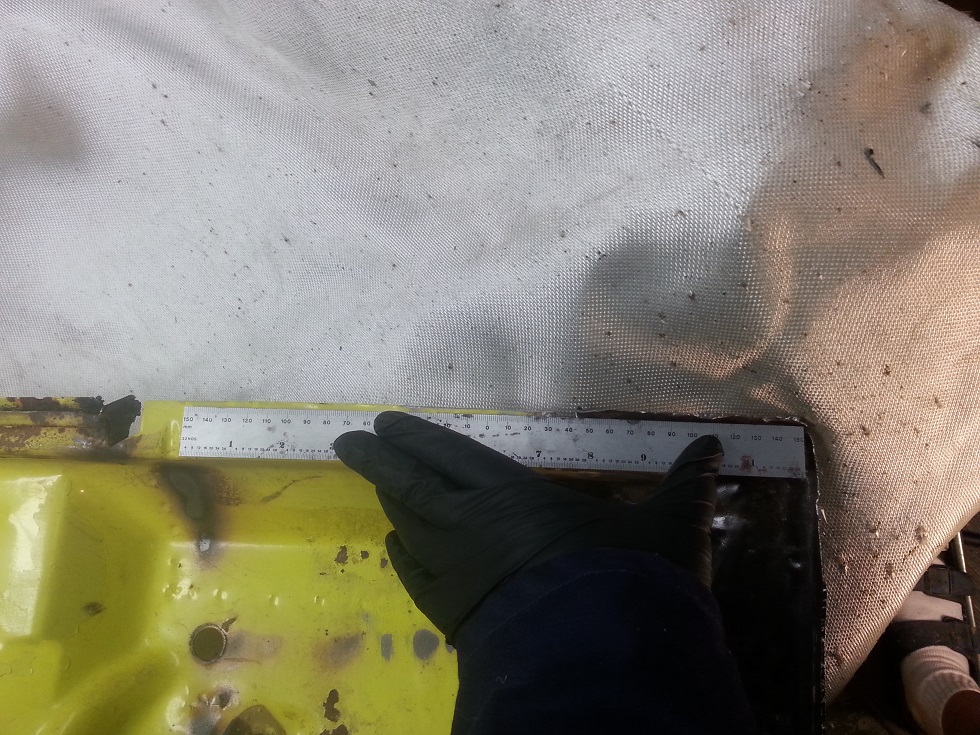 My plan of attack it to make this up in several pieces and then weld them all together. I thought about making a hammer form for this but the piece is just too curved for this to work. Spent an hour playing with various templates. 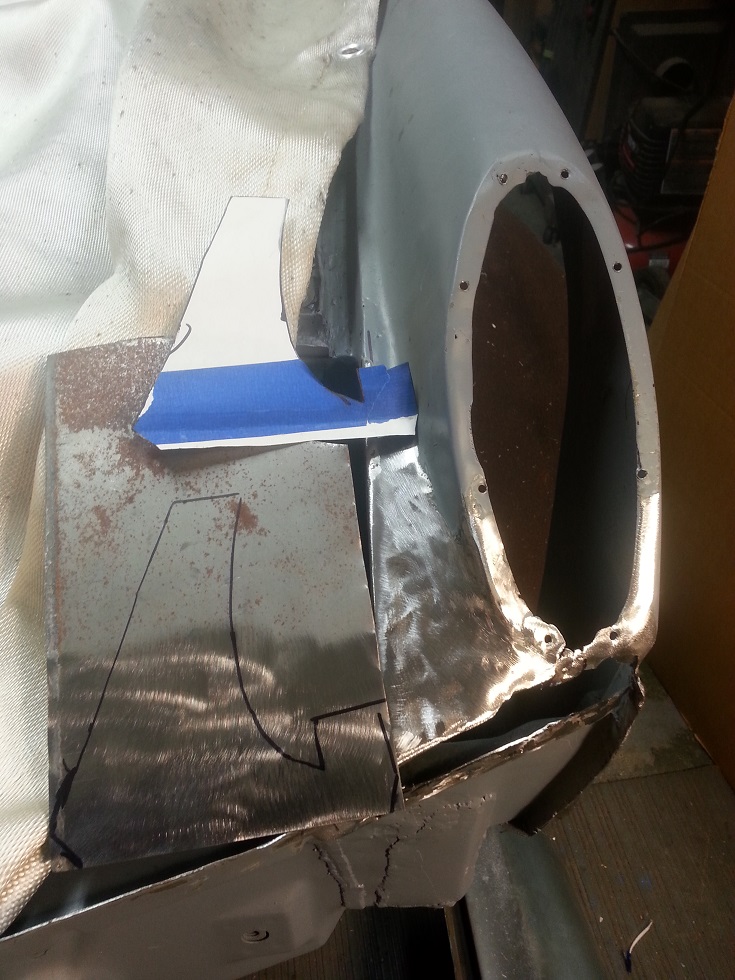 Putting in the double bend at the front. 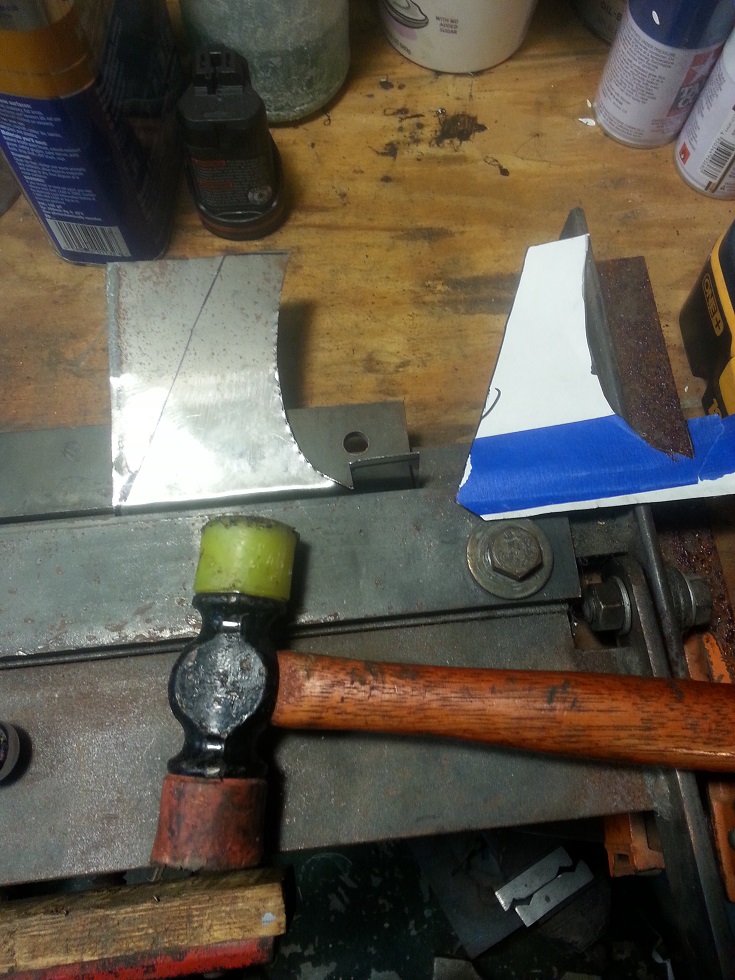 Measured the bend carefully so that the front edge ends up in the right place vertically and front to back. 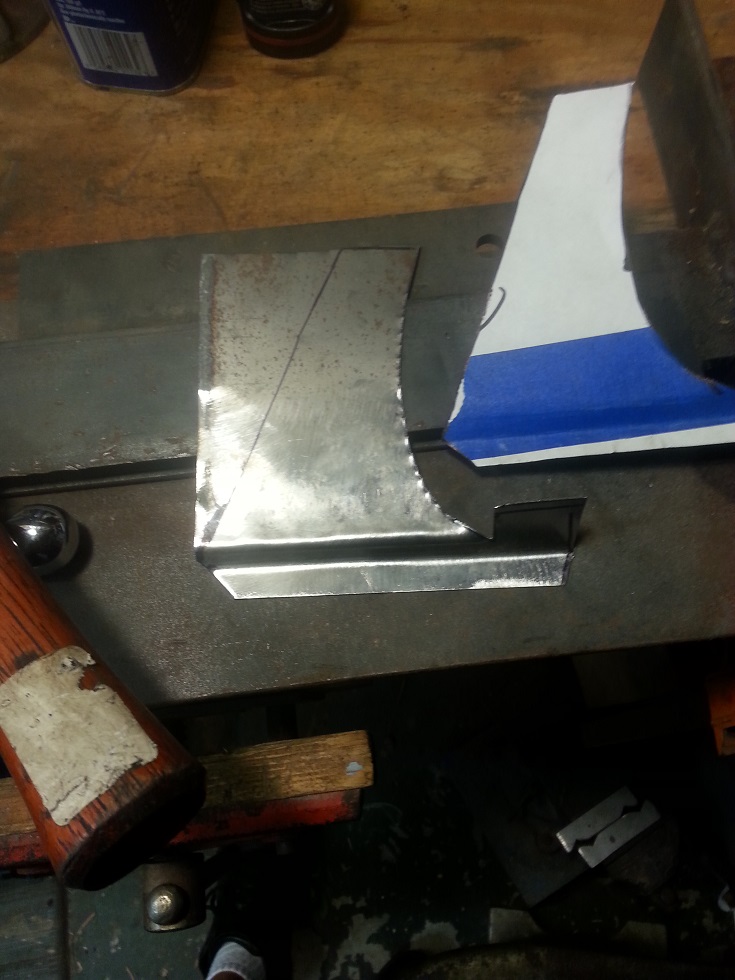 Clamp on my trusty ruler as a reference line.  Try a test fit. 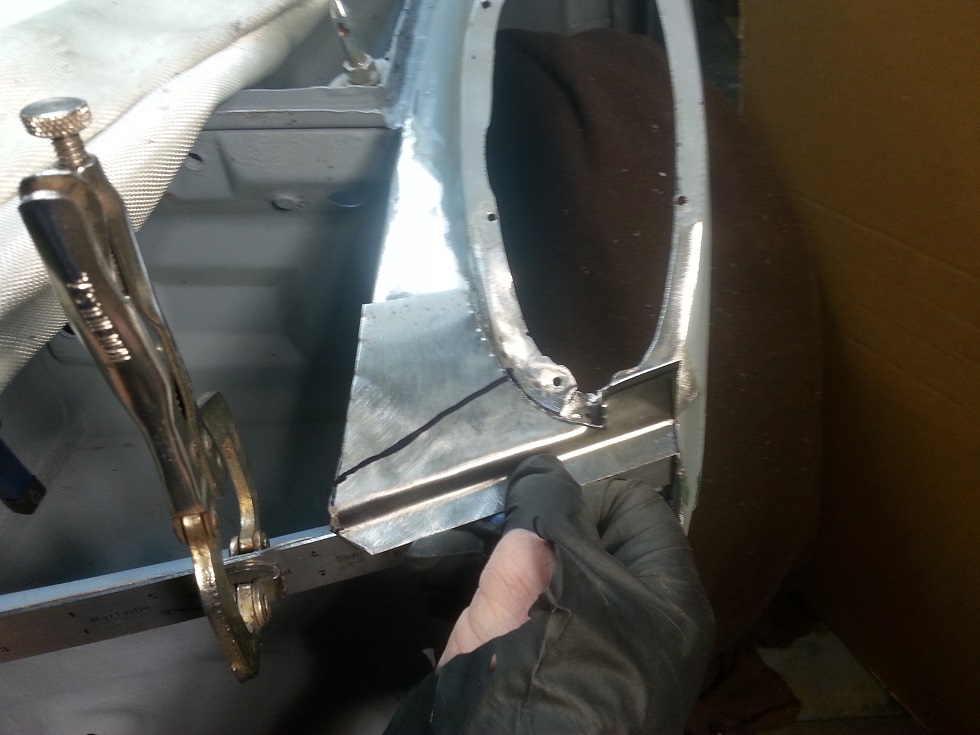 The piece needs to be curved slightly so take a few small bites with the shrinker. 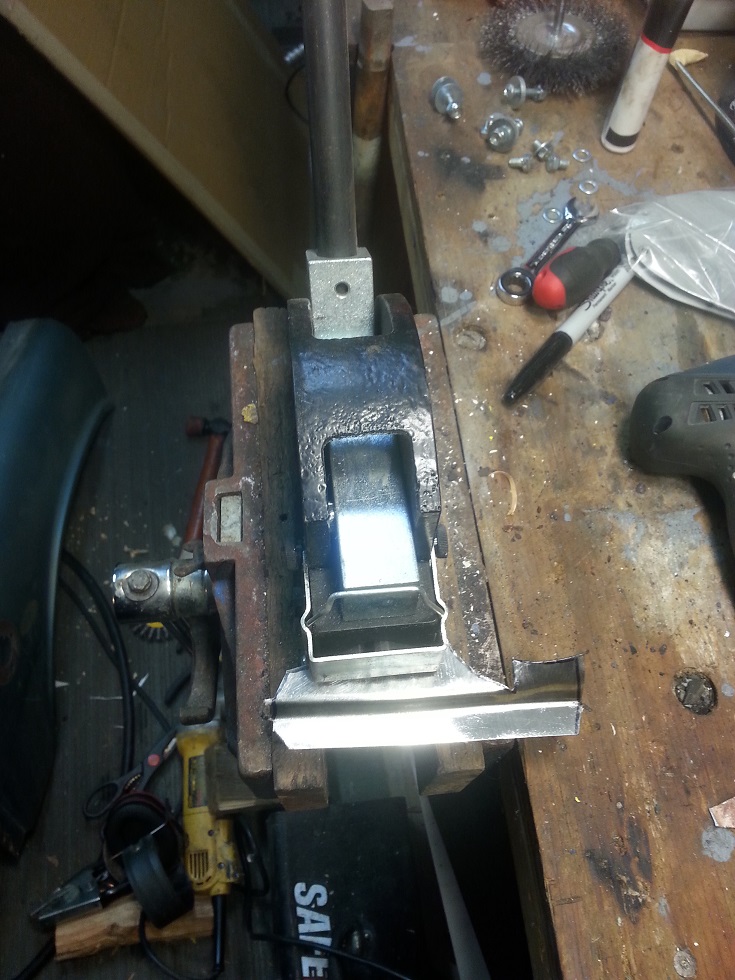 I am not sure how this will turn out... John |
   |

 
|
| FourBlades |
Jan 20 2014, 06:31 PM
Post
#402
|
|
From Wreck to Rockin Group: Members Posts: 2,056 Joined: 3-December 07 From: Brevard, FL Member No.: 8,414 Region Association: South East States |
Actually I know exactly how it turns out, I just don't want the site to crash and lose
all that typing and uploading. Here is what happened: The fit is looking good. 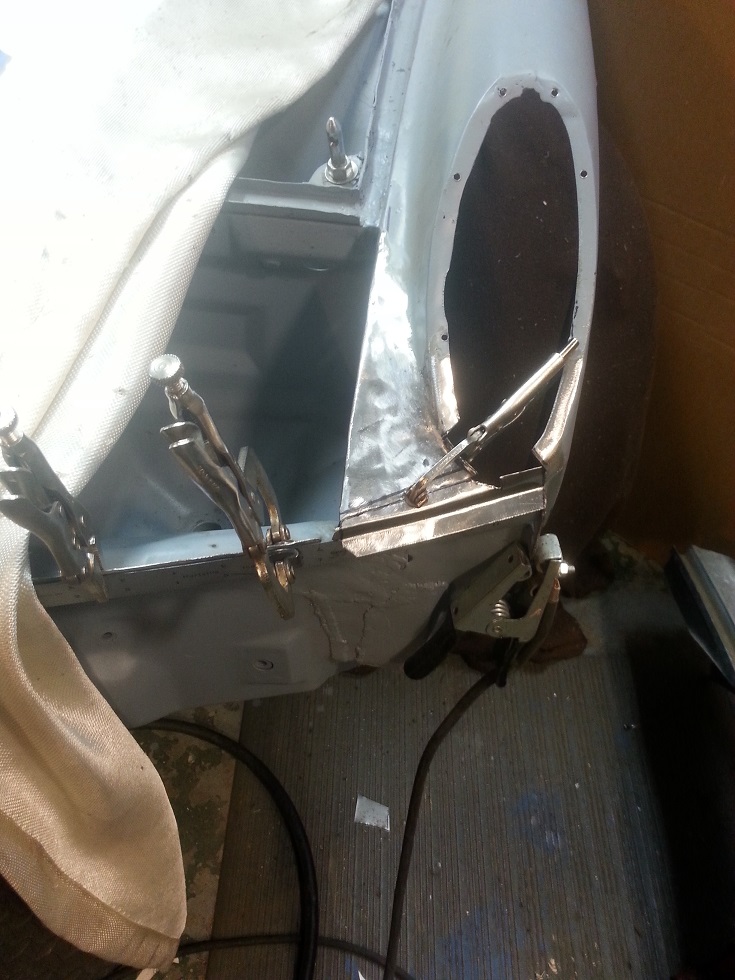 Clamp it up and weld it. 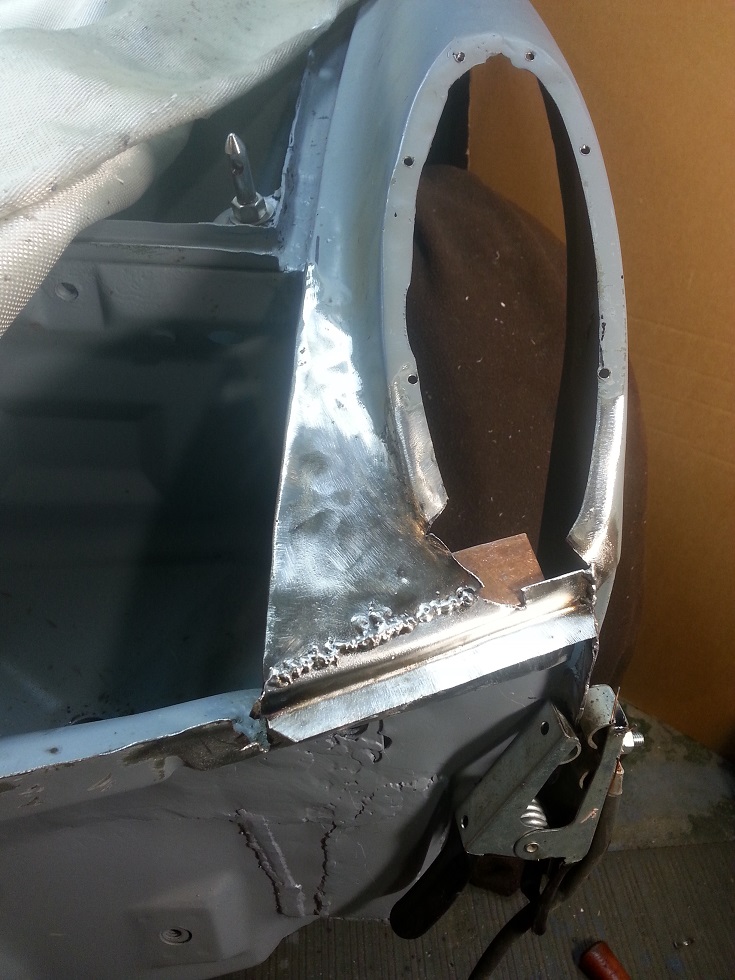 Weld on the second piece. 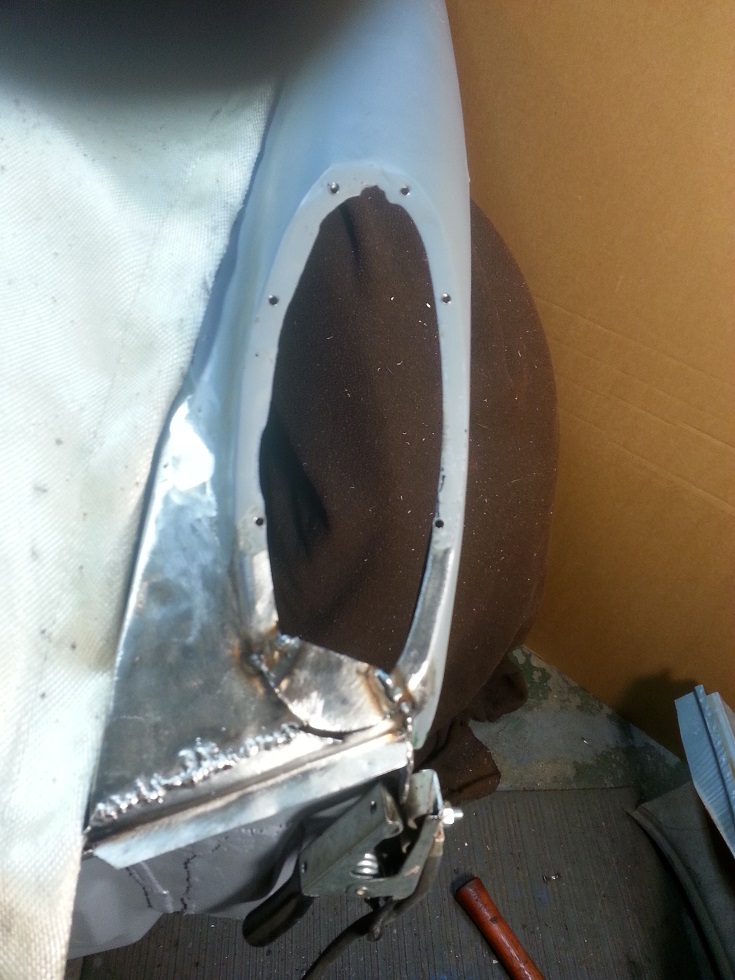 Check the fit of the bumper before going any further. The bumper was shaped to fit the old nasty metal so it will need work, but it basically looks good. 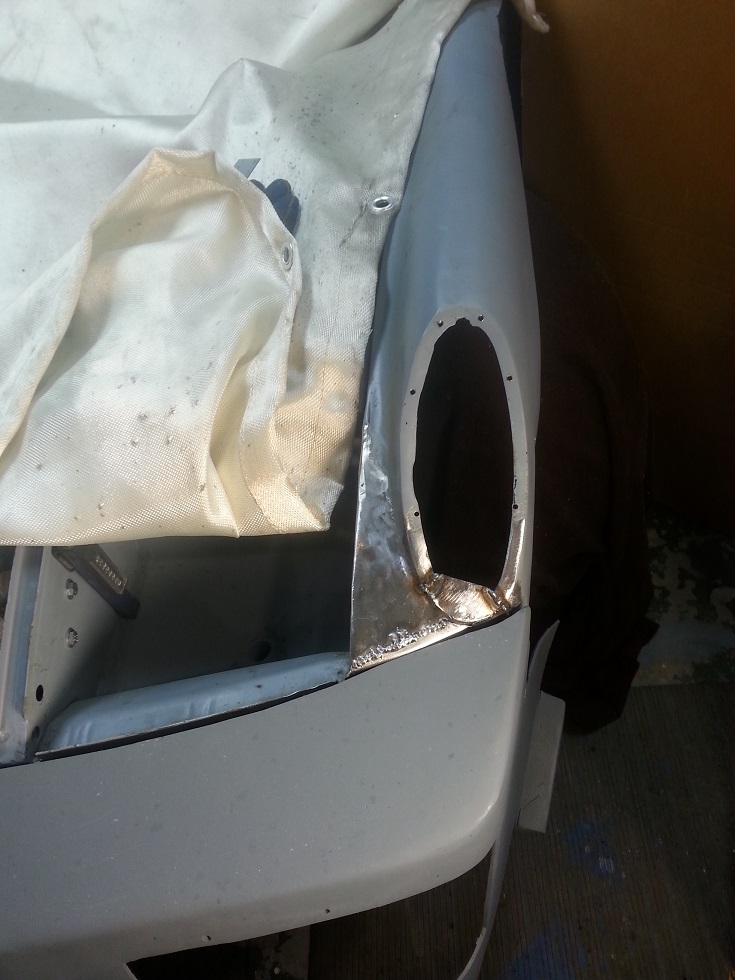 All tools down for a beer time out. 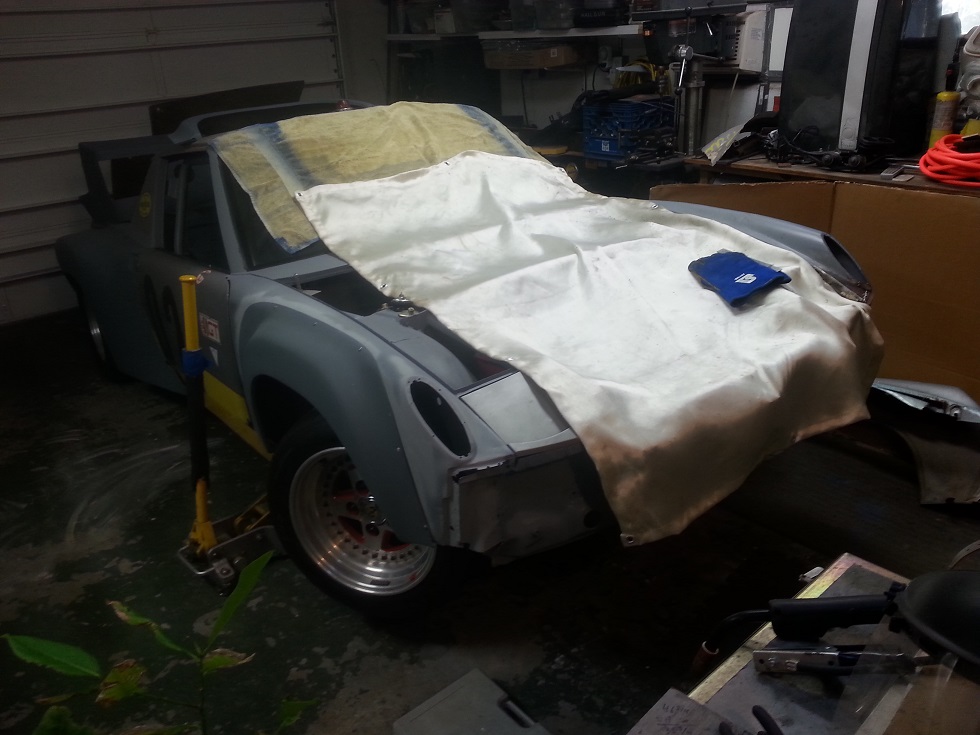 Fit the last piece of the puzzle. The tape holds it in place just long enough to get a couple tacks on it. 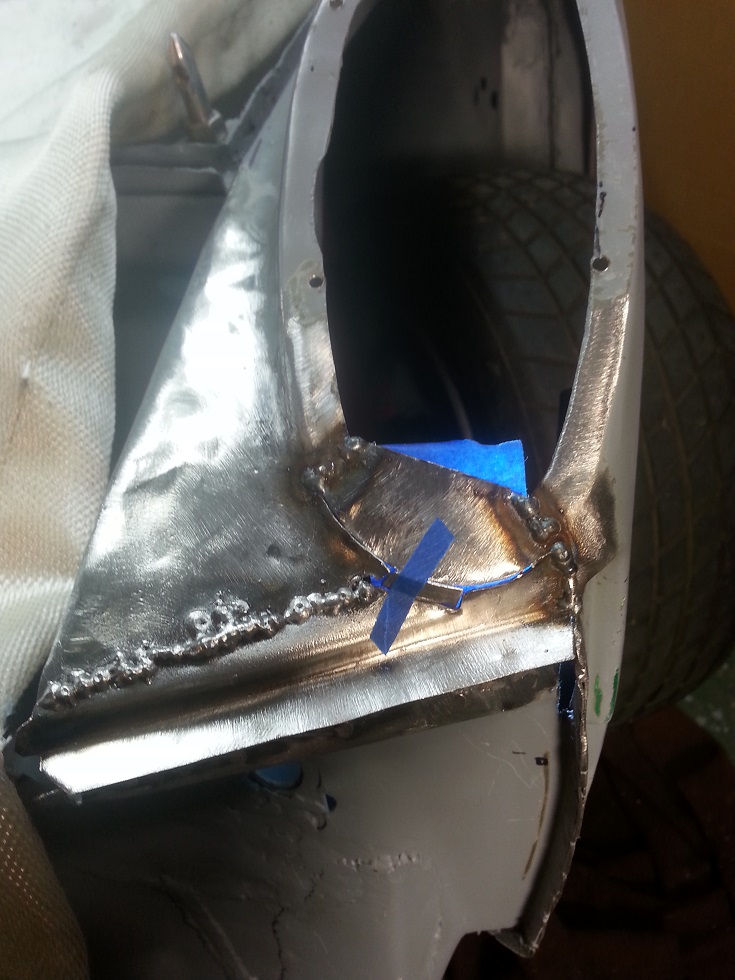 Use all the tricks to avoid blowing holes in this 20 gauge metal. Copper strip shaped to fit and clamped in back. Some extra clamps thrown on to act as heat sinks. Welder turned down very low for the first tacks. 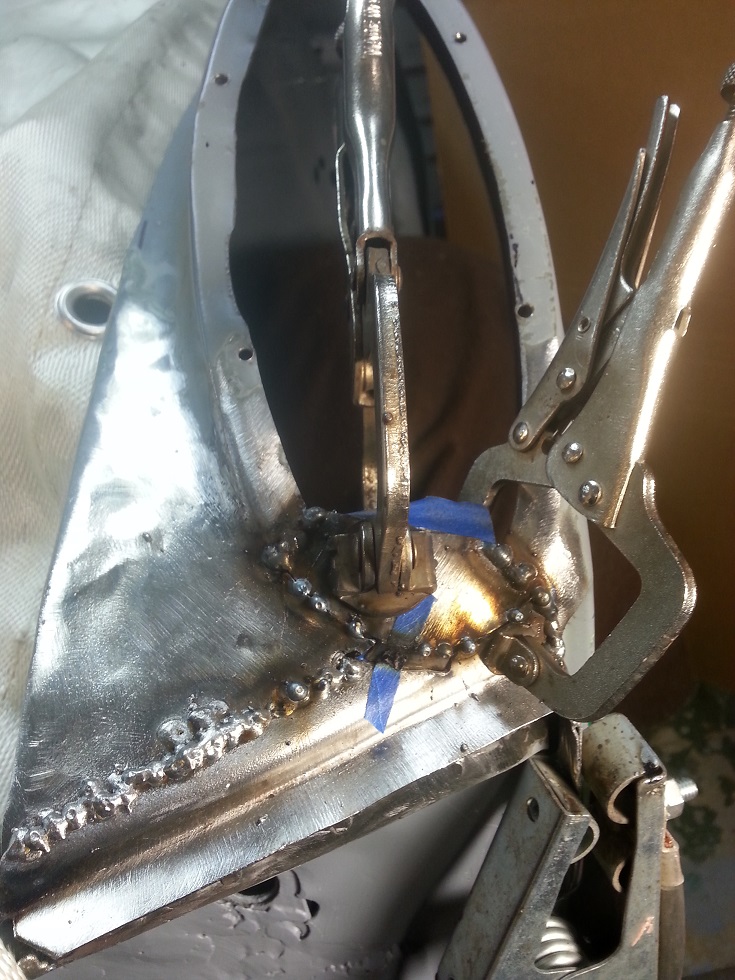 Now turn up the welder to make sure it burns through. Otherwise there will be a lot of holes open up when grinding the weld (very annoying). I place each new weld right on the edge of one of the small tacks to act as a heat sink. Still blew a couple holes. 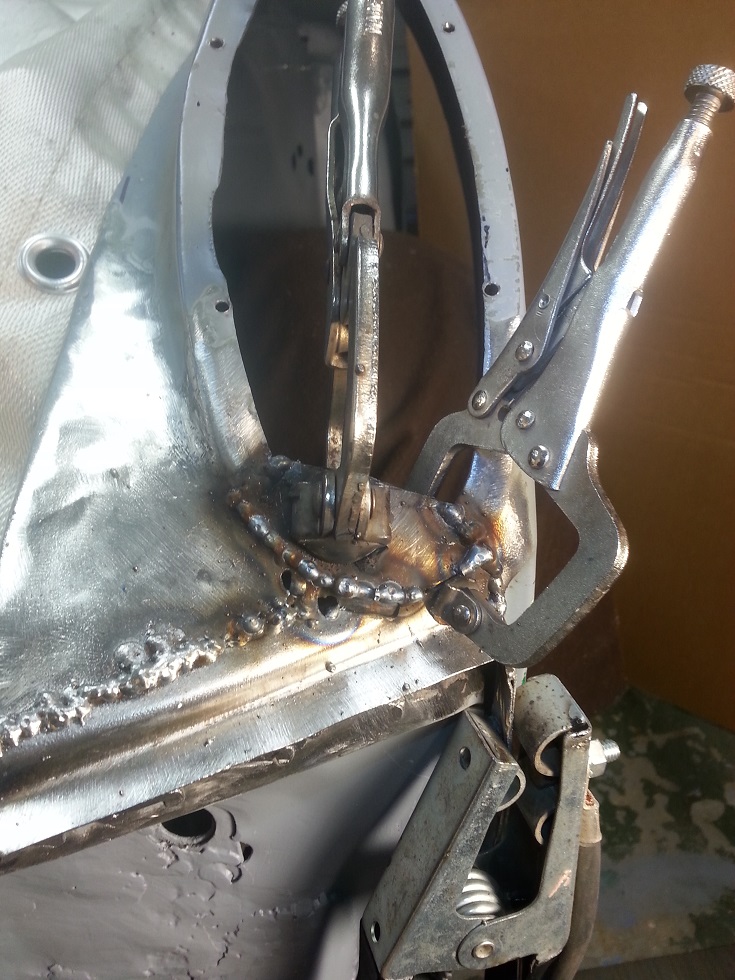 Fill it all in. Also welded all the seams from the back to provide more metal for the shaping needed. This also helps stop annoying pin holes from opening up during grinding.  Looking good. John |
|
|
|
| FourBlades |
Jan 20 2014, 06:45 PM
Post
#403
|
|
From Wreck to Rockin Group: Members Posts: 2,056 Joined: 3-December 07 From: Brevard, FL Member No.: 8,414 Region Association: South East States |
Used a flap disk to sand the weld down close to final shape.
Then I pulled out a big round file for the final shaping. Area 51 welding jacket to boost confidence. 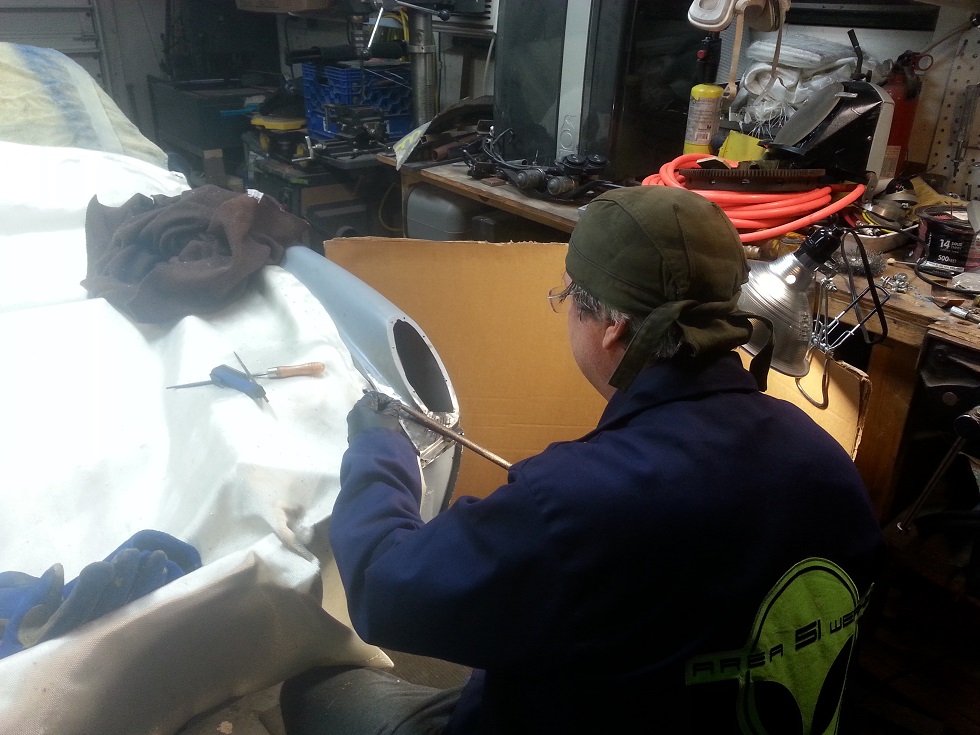 Hand files worked slow and steady for no screw ups.  Check it with the ruler. I'd like to be buried with this ruler when the time comes, and my MillerMatic.  Nearly done filing. 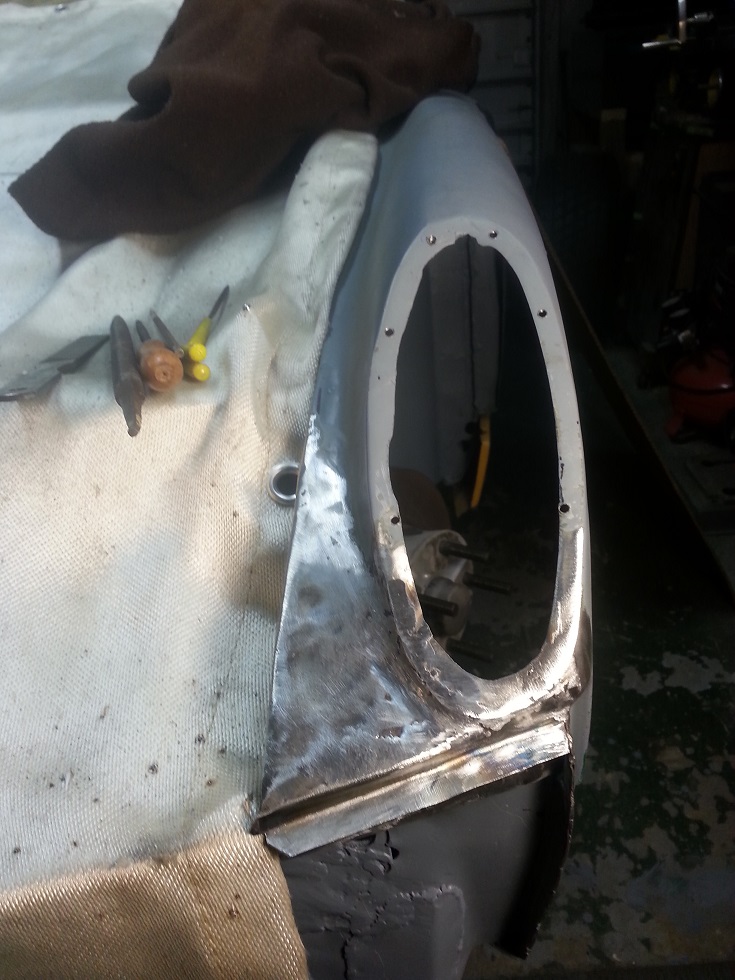 Comparing to the stock fender. 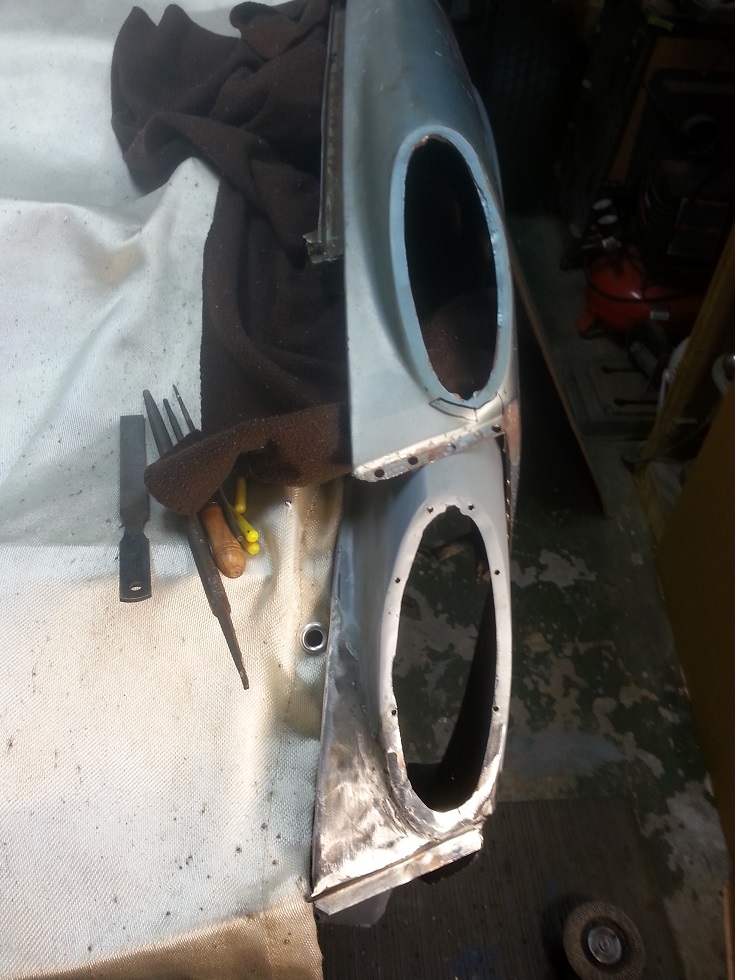 Primed it looks even better. 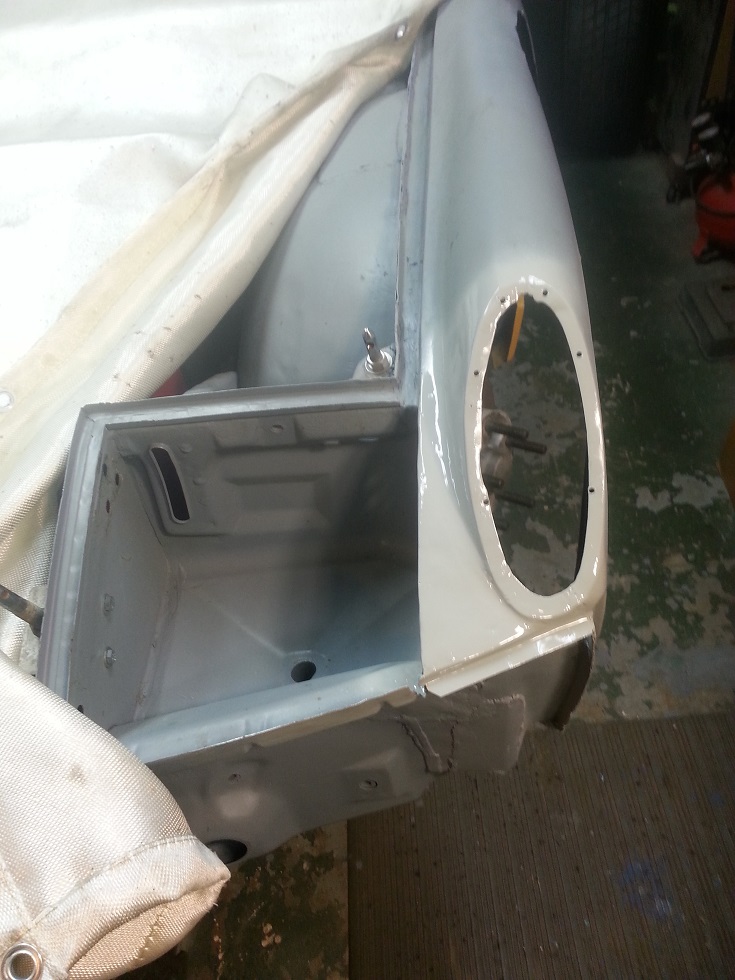 Put it all back together for a check. The bumper will need some work but everything else lines up nicely. 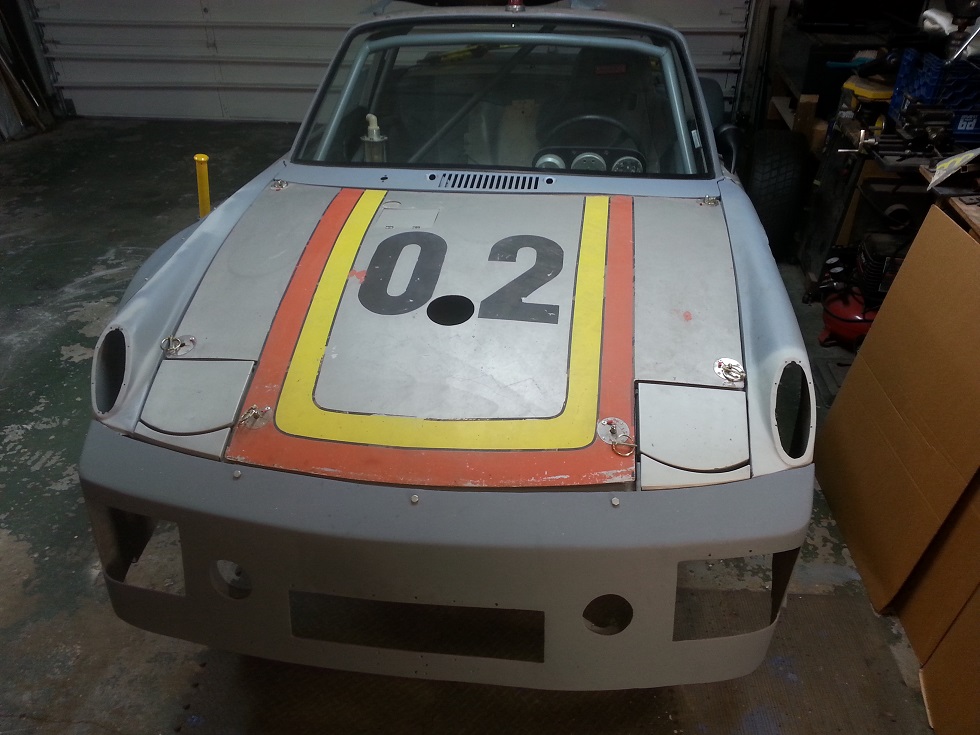 Side view looks good. 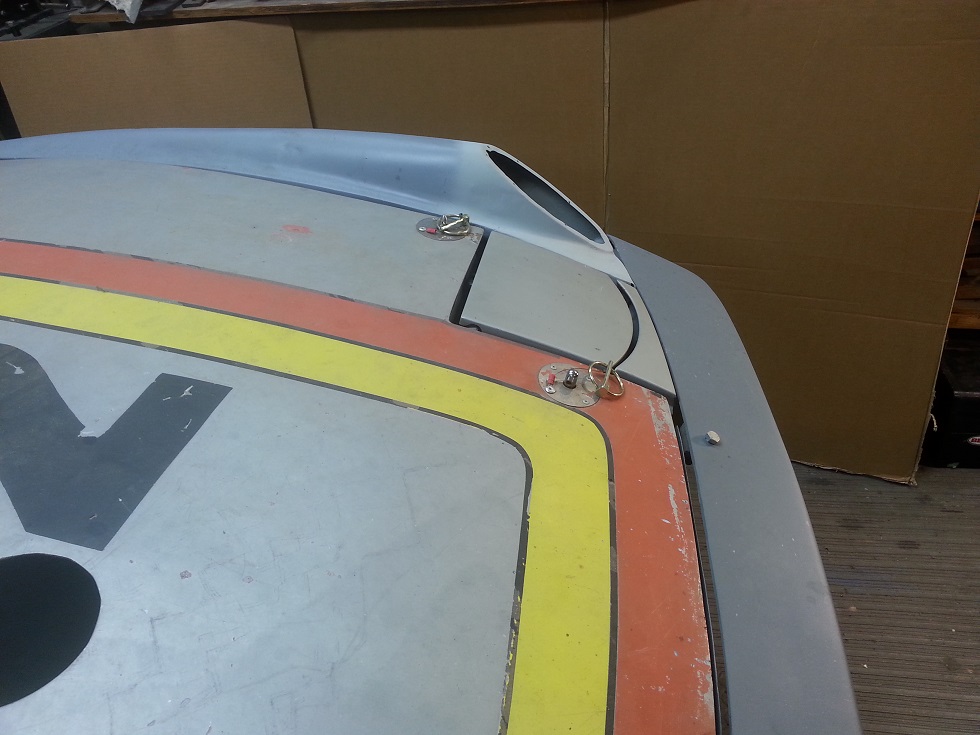 Really pleased to have this fixed up. A little bondo sculpting later on and it will be ready for Amelia Island. John Attached thumbnail(s) 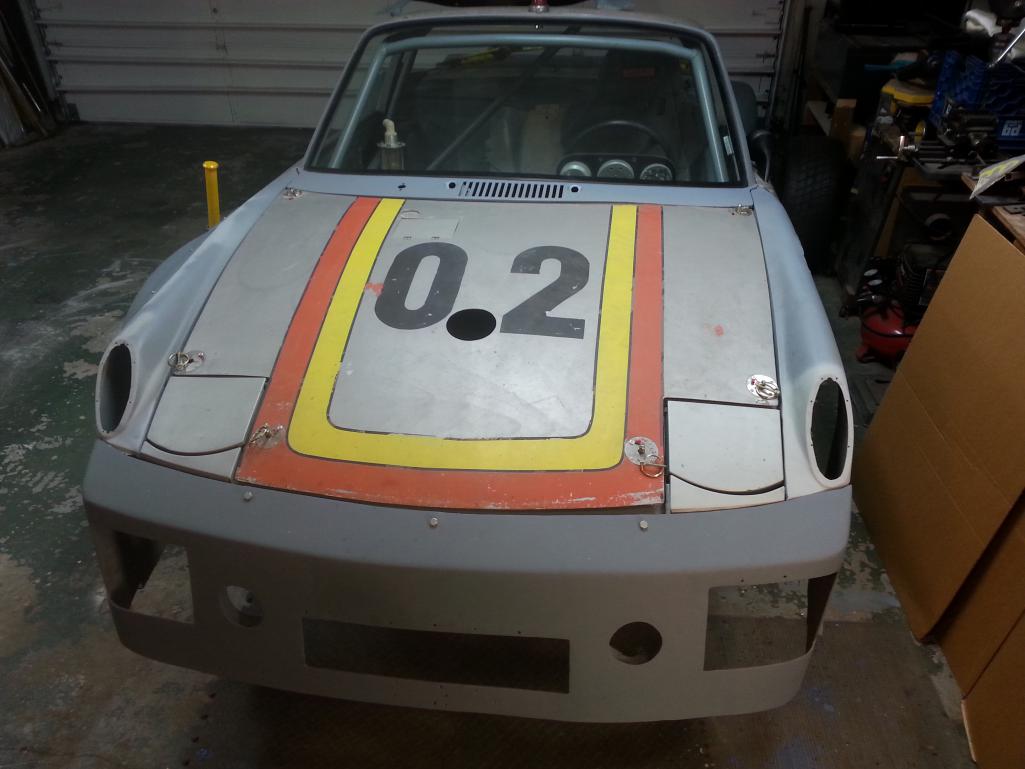
|
|
|
|
| bandjoey |
Jan 20 2014, 08:41 PM
Post
#404
|
|
bandjoey Group: Members Posts: 4,935 Joined: 26-September 07 From: Bedford Tx Member No.: 8,156 Region Association: Southwest Region |
U R A Genuus of Metal Work! (IMG:style_emoticons/default/biggrin.gif)
|
|
|
|
| FourBlades |
Feb 1 2014, 09:58 PM
Post
#405
|
|
From Wreck to Rockin Group: Members Posts: 2,056 Joined: 3-December 07 From: Brevard, FL Member No.: 8,414 Region Association: South East States |
Thanks Bill. I still have a lot to learn and to practice. I would not have had to go to
all this trouble to fix the turn signals if I had not screwed them up in the first place. (IMG:style_emoticons/default/biggrin.gif) Started working on fitting the rocker panels. Got out the originals for reference. 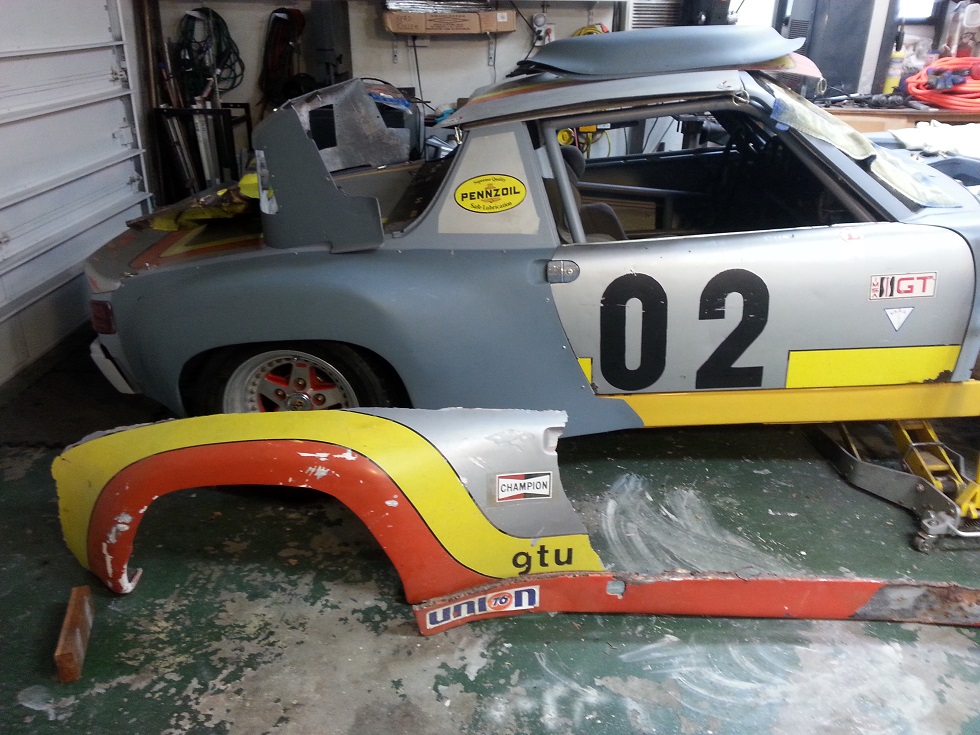 Notice that the rocker panel is not covered by the fender flare. This is a different look than fenders I have now. 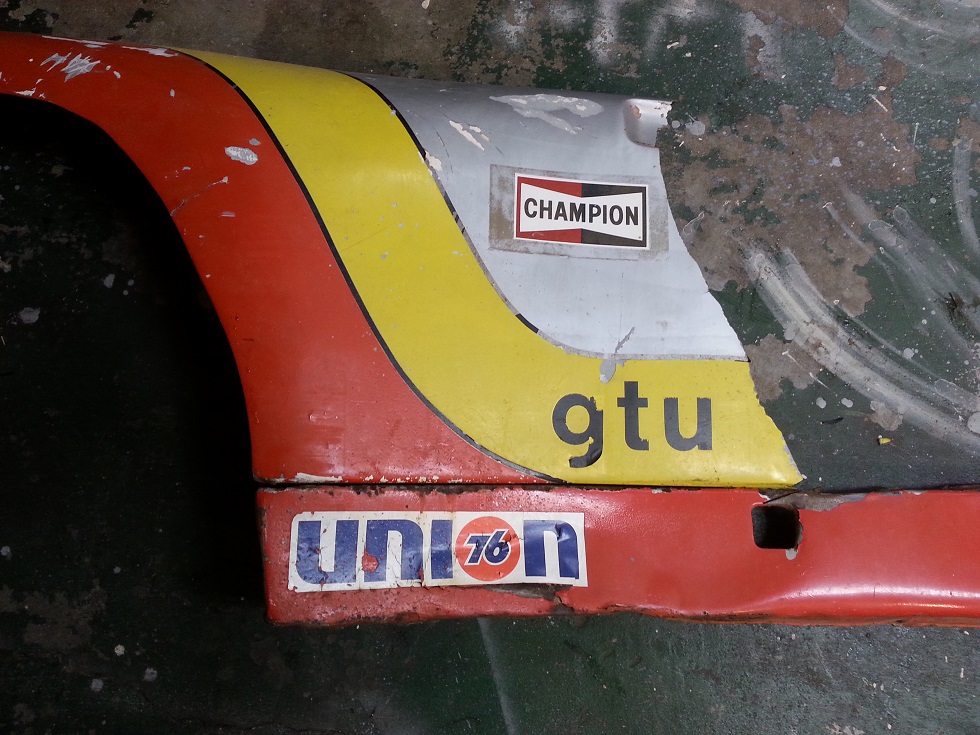 Use the laser level to draw a cutting line. Plan is to cut off the bottom of the fender and glass a new return edge on to it. Then curve the rocker to match. This is part of the distinctive look the car has. 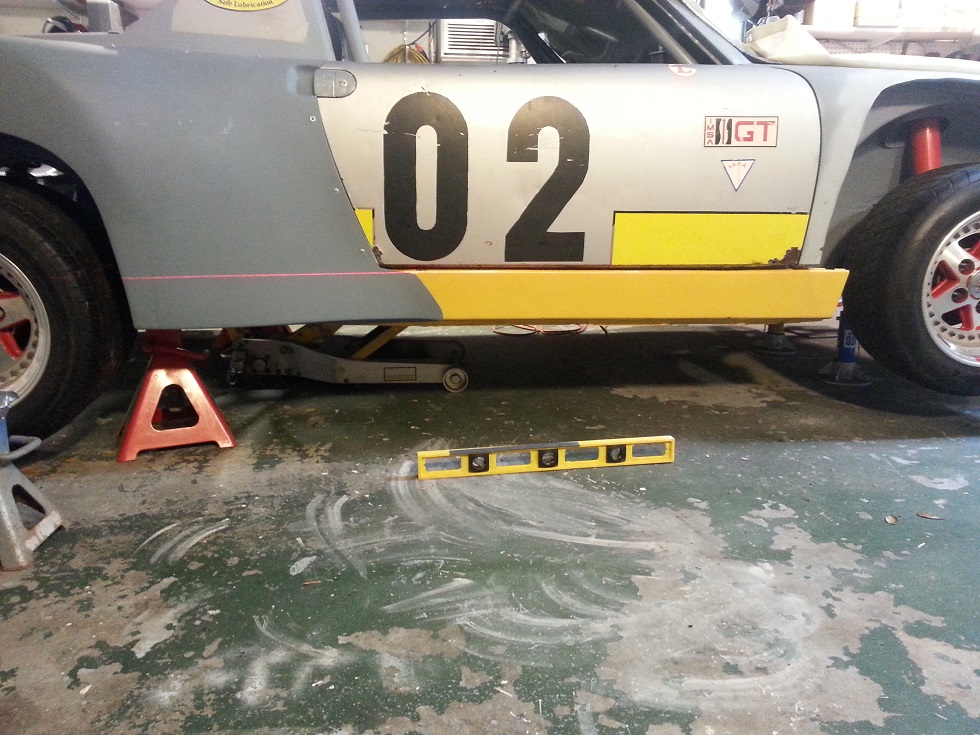 Comparing the original and new rockers. I used the stretcher on the top edge and had to notch the bottom edge to get the right curve. Also did the same to match the curve of the front fender flares. 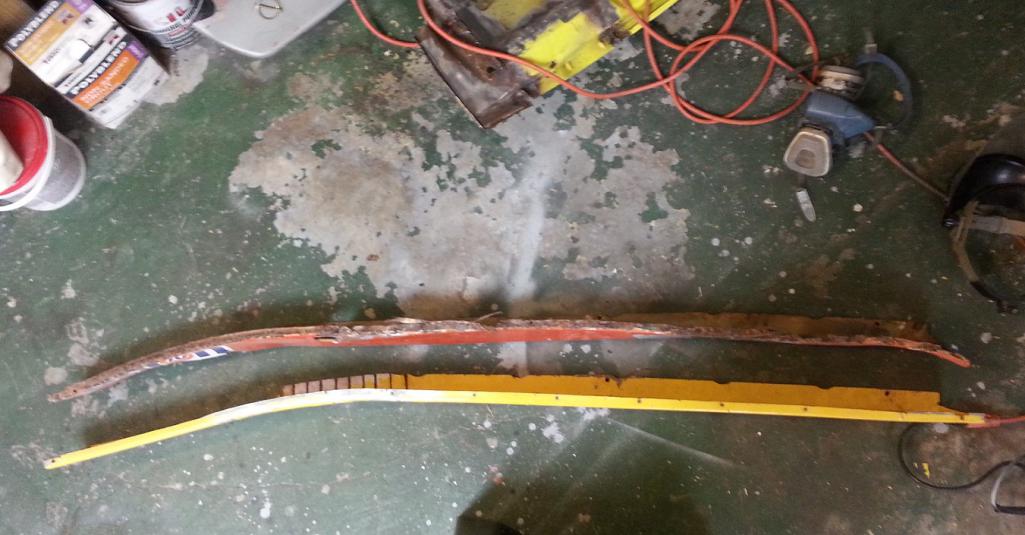 Took a lot of fiddling around to get it right. Still some fiberglass work left to do. 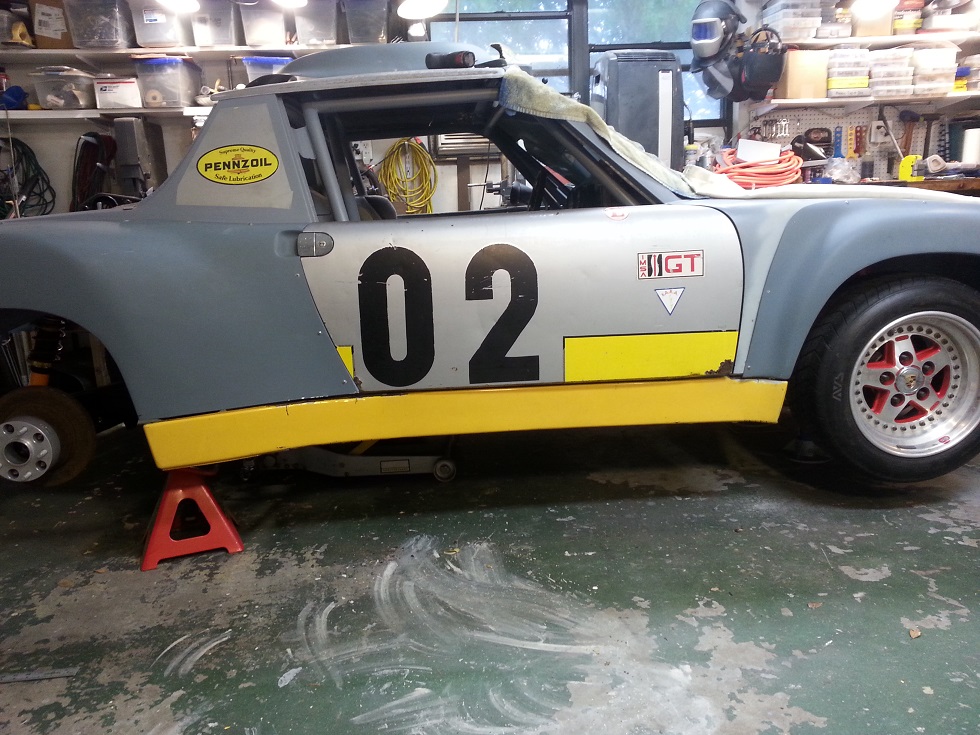 Getting there a little at a time. John |
|
|
|
| FourBlades |
Feb 1 2014, 10:21 PM
Post
#406
|
|
From Wreck to Rockin Group: Members Posts: 2,056 Joined: 3-December 07 From: Brevard, FL Member No.: 8,414 Region Association: South East States |
Some pictures of the transmission cooler and fluid pump.
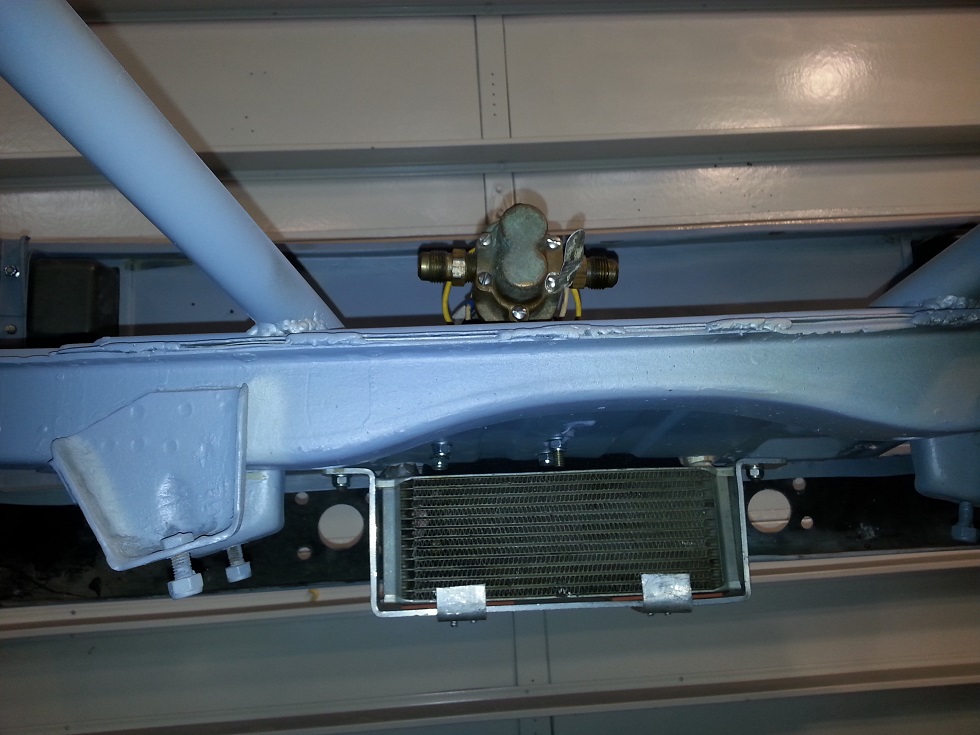 The motor still operates. The pump has the letters "OBERDORFER" on it. 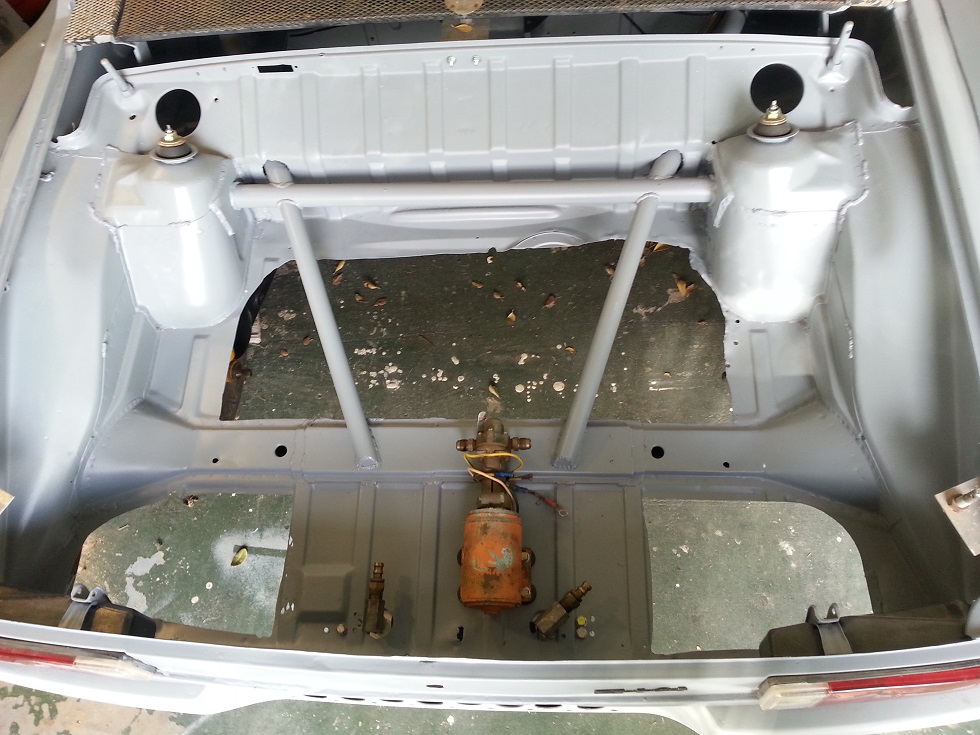 You can see the cooler through the holes they drilled in the bumper. 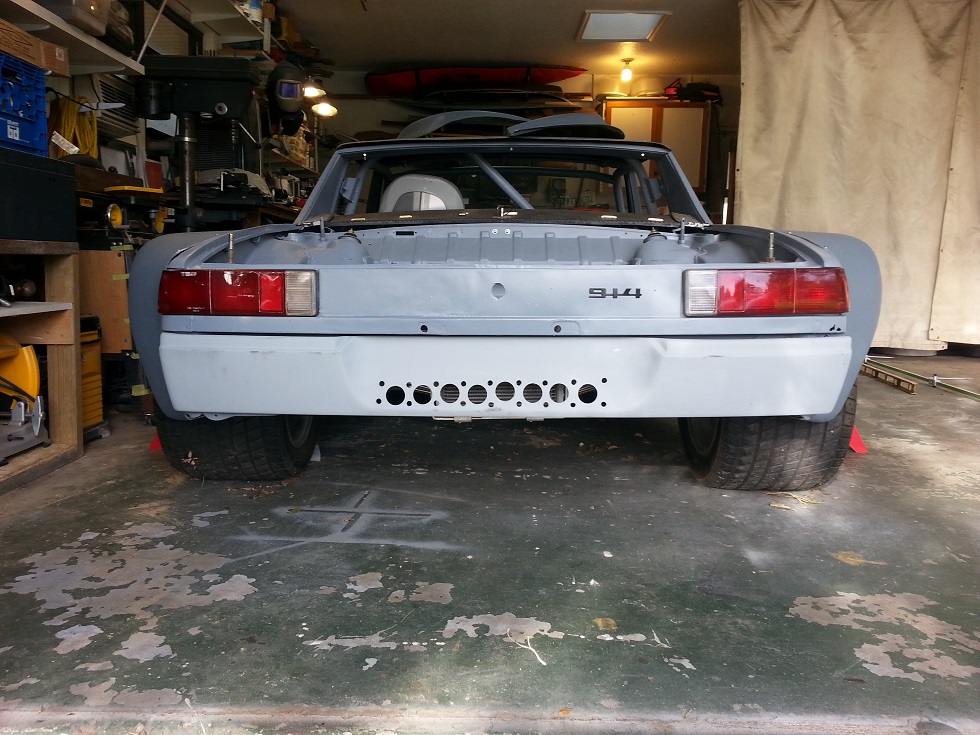 This is not a wide angle shot, the rear of this car is that wide. John |
|
|
|
| Cairo94507 |
Feb 2 2014, 08:43 AM
Post
#407
|
|
Michael Group: Members Posts: 10,670 Joined: 1-November 08 From: Auburn, CA Member No.: 9,712 Region Association: Northern California |
Stunning level of detail and beautiful metal work. When I originally saw the pictures of this car I had my doubts, but it is really taking shape nicely. So glad this car is being saved.
|
 |
|
| wndsrfr |
Feb 2 2014, 09:04 AM
Post
#408
|
|
Senior Member Group: Members Posts: 1,463 Joined: 30-April 09 From: Rescue, Virginia Member No.: 10,318 Region Association: MidAtlantic Region |
QUOTE(FourBlades @ Feb 1 2014, 08:21 PM)  Some pictures of the transmission cooler and fluid pump. The motor still operates. The pump has the letters oberdorfer on it. John I have that pump....bought it back in the 70's for a solar water rig....then put it into use to transfer fuel oil....now sitting in my garage... |
|
|
|
| rick 918-S |
Feb 2 2014, 12:29 PM
Post
#409
|
|
Hey nice rack! -Celette Group: Members Posts: 21,284 Joined: 30-December 02 From: Now in Superior WI Member No.: 43 Region Association: Northstar Region |
Your moving along now! Nice to see (IMG:style_emoticons/default/assimilate.gif) the jacket is in use! (IMG:style_emoticons/default/biggrin.gif)
|
|
|
|
| FourBlades |
Feb 4 2014, 08:39 PM
Post
#410
|
|
From Wreck to Rockin Group: Members Posts: 2,056 Joined: 3-December 07 From: Brevard, FL Member No.: 8,414 Region Association: South East States |
QUOTE(wndsrfr @ Feb 2 2014, 08:04 AM) QUOTE(FourBlades @ Feb 1 2014, 08:21 PM) Some pictures of the transmission cooler and fluid pump. The motor still operates. The pump has the letters oberdorfer on it. John I have that pump....bought it back in the 70's for a solar water rig....then put it into use to transfer fuel oil....now sitting in my garage... Someone doing a vintage restore might be able to use that pump. Anyone else ever see this used for transmission cooling? John |
|
|
|
| FourBlades |
Feb 4 2014, 08:45 PM
Post
#411
|
|
From Wreck to Rockin Group: Members Posts: 2,056 Joined: 3-December 07 From: Brevard, FL Member No.: 8,414 Region Association: South East States |
QUOTE(rick 918-S @ Feb 2 2014, 11:29 AM) Your moving along now! Nice to see (IMG:style_emoticons/default/assimilate.gif) the jacket is in use! (IMG:style_emoticons/default/biggrin.gif) Love the jacket Rick! You should make some more alien swag. (IMG:style_emoticons/default/piratenanner.gif) I was stalled for a long time worrying about warpage. Now I am resolved to be track ready in 2014. (IMG:style_emoticons/default/beerchug.gif) John |
|
|
|
| FourBlades |
Mar 7 2014, 10:02 PM
Post
#412
|
|
From Wreck to Rockin Group: Members Posts: 2,056 Joined: 3-December 07 From: Brevard, FL Member No.: 8,414 Region Association: South East States |
After bolting the rocker panel to the bottom of the car I realized I need to cut some
pie sections out to keep it lined up. The original rocker was brazed to the car at the top and bottom and stretched somehow to fit. 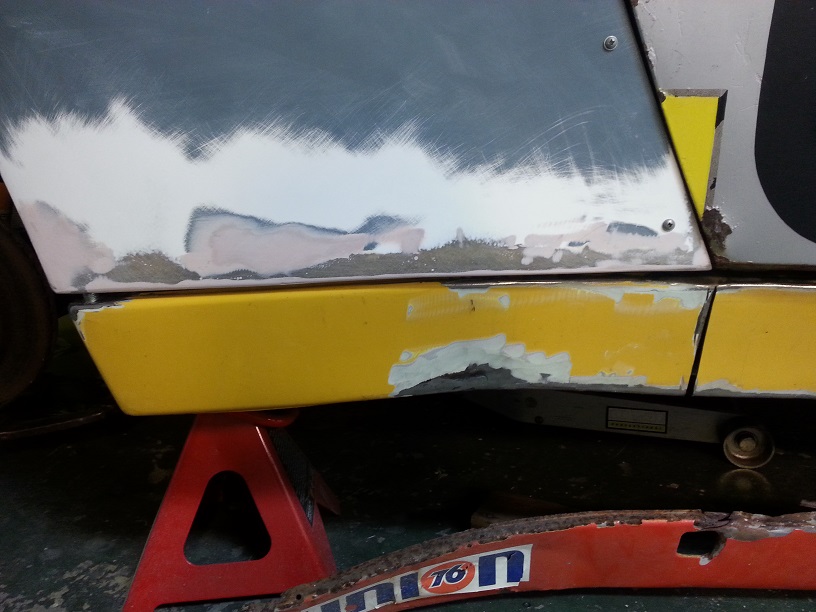 Front section. Folded over a piece of metal and tacked it to keep it in place for patching and welding up.  Now I think it is done. The rocker panel has lots of bondo and was a pain to get to fit right. I also determined that the orange color they used was "Chevy Orange" or very close to it. 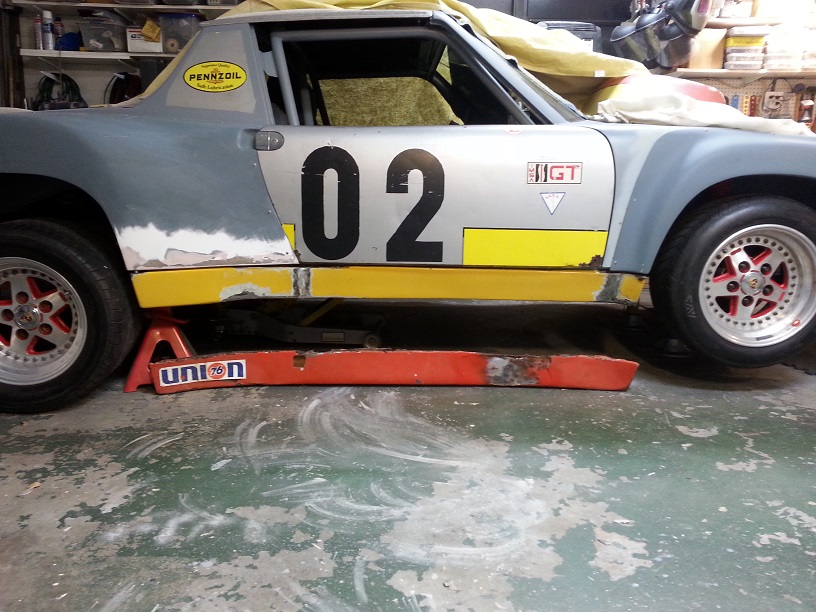 Still have to do the other side. (IMG:style_emoticons/default/rolleyes.gif) John |
|
|
|
| carr914 |
Mar 14 2014, 06:52 AM
Post
#413
|
|
Racer from Birth Group: Members Posts: 133,237 Joined: 2-February 04 From: Tampa,FL Member No.: 1,623 Region Association: South East States |
Possible Car Sighting in Vintage Picture!
Look to the Left (in the Pit Stall) 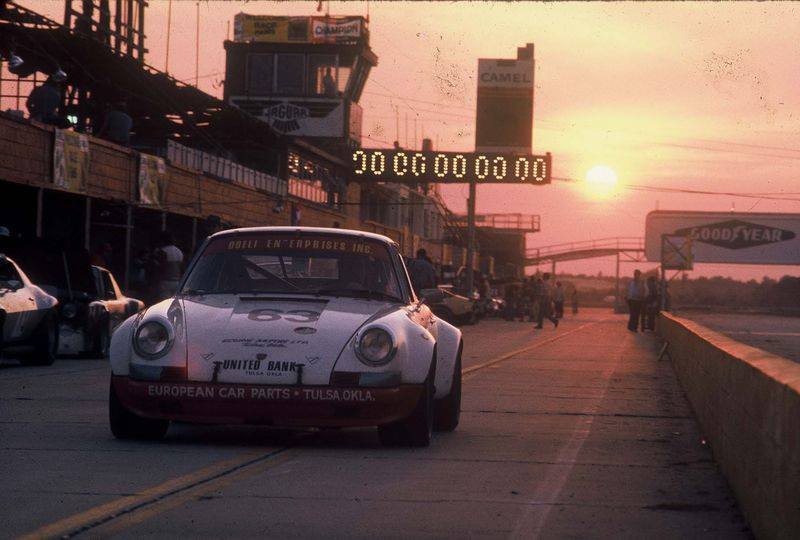 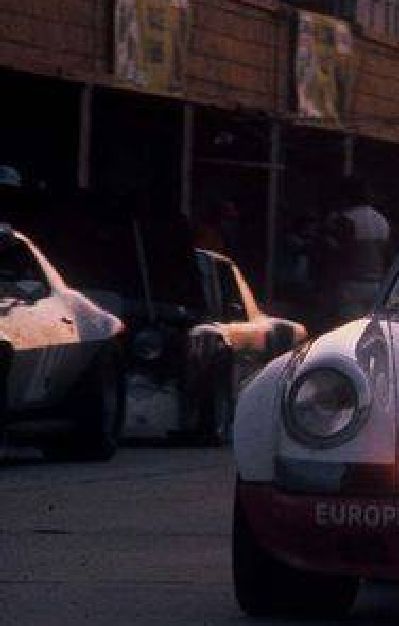 |
|
|
|
| gms |
Mar 14 2014, 07:29 AM
Post
#414
|
|
Advanced Member Group: Members Posts: 2,750 Joined: 12-March 04 From: Chicagoland Member No.: 1,785 Region Association: Upper MidWest |
QUOTE(carr914 @ Mar 14 2014, 07:52 AM) Possible Car Sighting in Vintage Picture! That would be the 1975 Doell Enterprises 911s entry at Sebring. Three 914s ran at that race, it looks to be the yellow Hulen 914/6 |
|
|
|
| ThePaintedMan |
Mar 14 2014, 07:47 AM
Post
#415
|
|
Advanced Member Group: Members Posts: 3,887 Joined: 6-September 11 From: St. Petersburg, FL Member No.: 13,527 Region Association: South East States |
This looks MUCH better John! So glad you're doing it right. Hoping to be able to come over for a weekend soon to help.
|
|
|
|
| FourBlades |
Sep 25 2014, 05:06 PM
Post
#416
|
|
From Wreck to Rockin Group: Members Posts: 2,056 Joined: 3-December 07 From: Brevard, FL Member No.: 8,414 Region Association: South East States |
QUOTE(FourBlades @ Jan 20 2014, 05:45 PM) Side view looks good. Really pleased to have this fixed up. A little bondo sculpting later on and it will be ready for Amelia Island. John Funny how ironic life is...I wrote this as a joke, and now I expect "the call" anytime from the Amelia concours committee. I know they are dying to have my car front and center. (IMG:style_emoticons/default/rolleyes.gif) John |
|
|
|
| Cairo94507 |
Sep 25 2014, 07:46 PM
Post
#417
|
|
Michael Group: Members Posts: 10,670 Joined: 1-November 08 From: Auburn, CA Member No.: 9,712 Region Association: Northern California |
Wow!!!!!!
|
|
|
|
| ThePaintedMan |
Sep 25 2014, 08:36 PM
Post
#418
|
|
Advanced Member Group: Members Posts: 3,887 Joined: 6-September 11 From: St. Petersburg, FL Member No.: 13,527 Region Association: South East States |
So now that John is a real, honest-to-goodness RACER, I expect this project to be done and on the track real soon. I think two weeks is more than adequate... (IMG:style_emoticons/default/poke.gif)
|
|
|
|
| Larmo63 |
Sep 25 2014, 10:41 PM
Post
#419
|
|
Advanced Member Group: Members Posts: 4,267 Joined: 3-March 14 From: San Clemente, Ca Member No.: 17,068 Region Association: Southern California |
Such a great build and good thread. A real inspiration to us "new guys.' Thank you.
|
|
|
|
| FourBlades |
Sep 26 2014, 09:43 AM
Post
#420
|
|
From Wreck to Rockin Group: Members Posts: 2,056 Joined: 3-December 07 From: Brevard, FL Member No.: 8,414 Region Association: South East States |
George, I think if you, Marc, Shane, Keith and Joe all showed up we could be done in two weeks. (IMG:style_emoticons/default/piratenanner.gif) (IMG:style_emoticons/default/piratenanner.gif) (IMG:style_emoticons/default/piratenanner.gif) Glad people enjoy my warped sense of humor. John |
|
|
|
|
2 User(s) are reading this topic (2 Guests and 0 Anonymous Users)
0 Members:

|
Lo-Fi Version | Time is now: 14th June 2026 - 03:04 PM |
Invision Power Board
v9.1.4 © 2026 IPS, Inc.