|
|

|
Porsche, and the Porsche crest are registered trademarks of Dr. Ing. h.c. F. Porsche AG.
This site is not affiliated with Porsche in any way. Its only purpose is to provide an online forum for car enthusiasts. All other trademarks are property of their respective owners. |
|
|
  |
| FourBlades |
 Jul 11 2021, 10:05 AM Jul 11 2021, 10:05 AM
Post
#581
|
|
From Wreck to Rockin     Group: Members Posts: 2,056 Joined: 3-December 07 From: Brevard, FL Member No.: 8,414 Region Association: South East States 
|
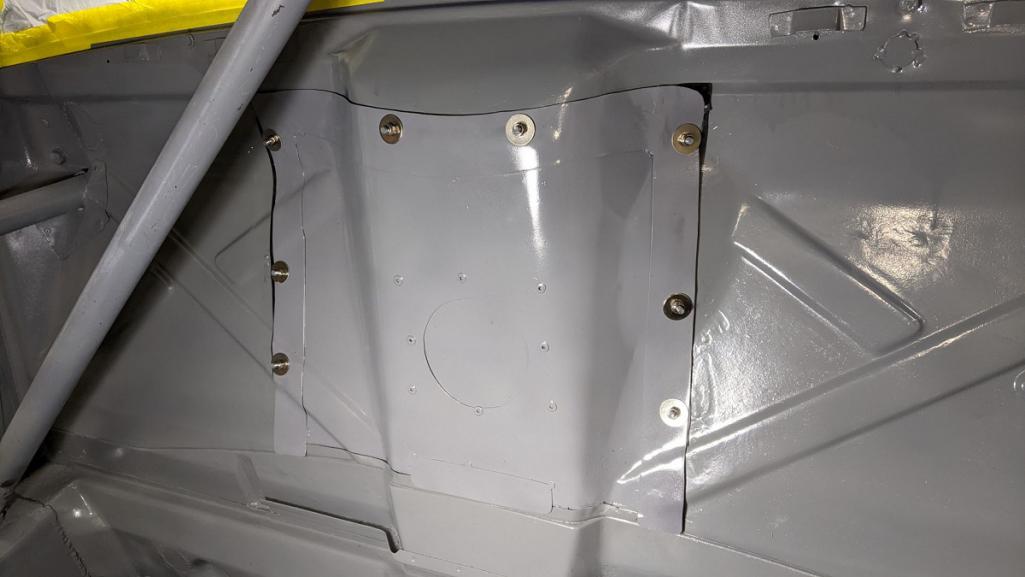
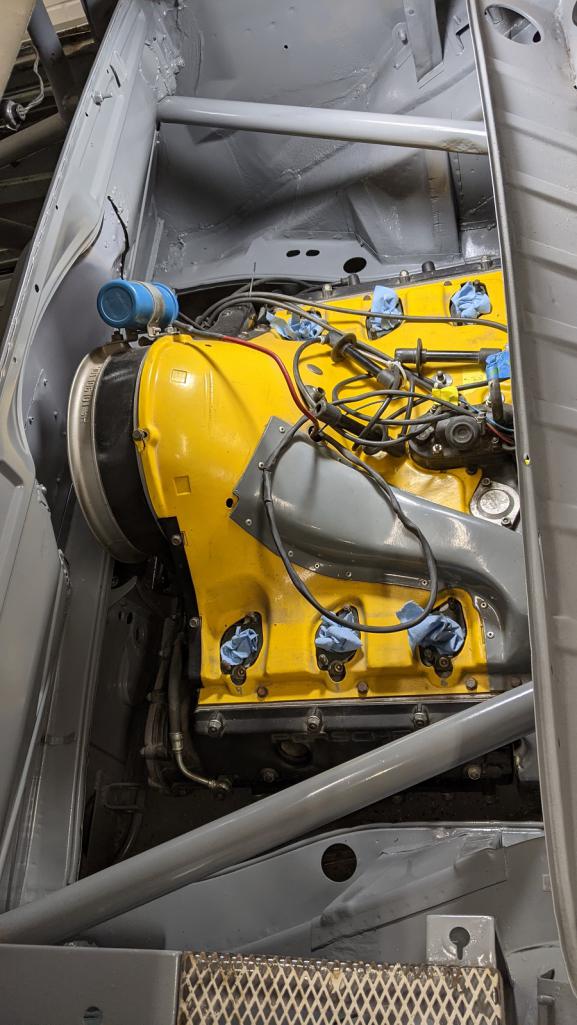
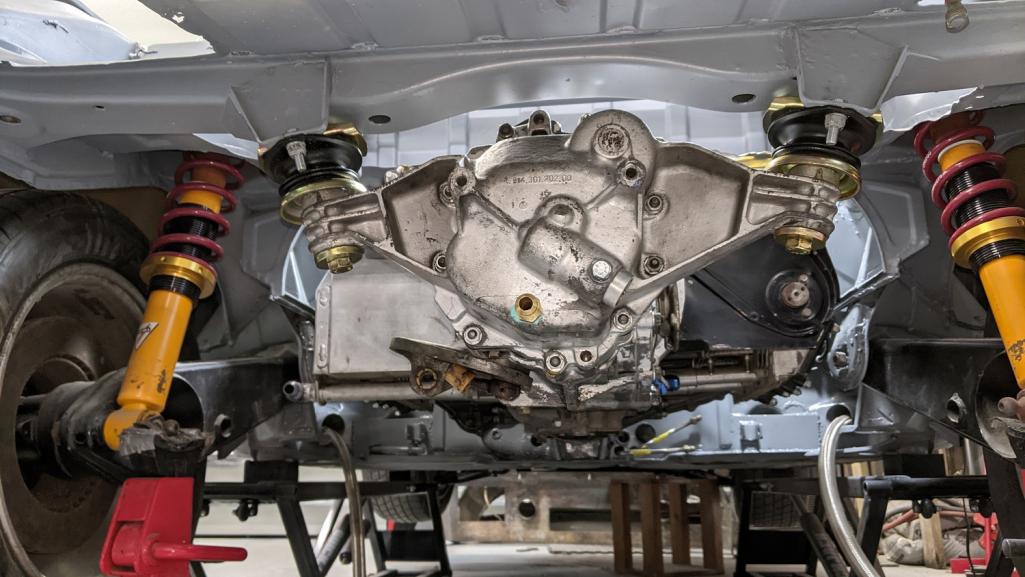
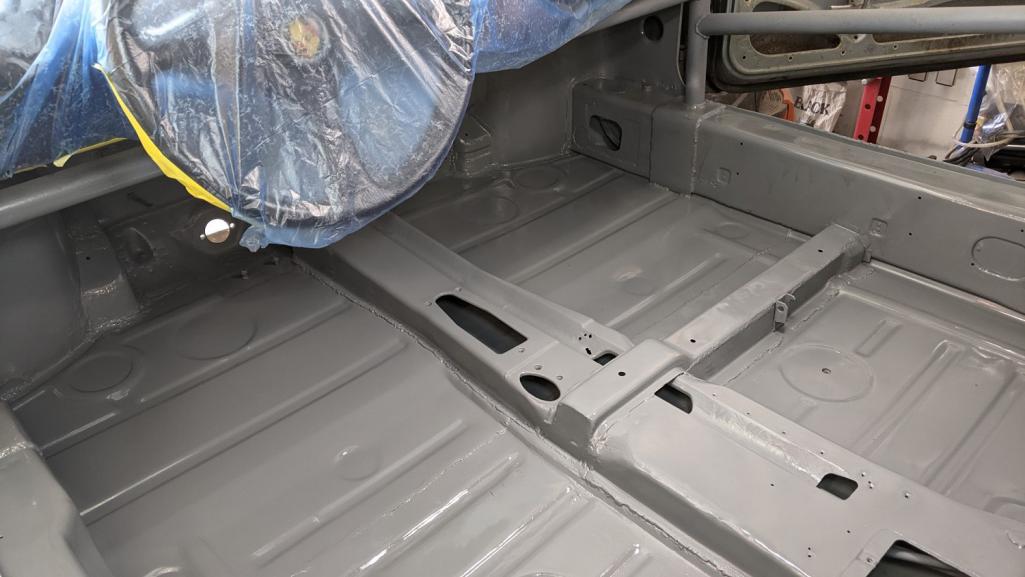
Painted the cockpit. Glad to be done welding and grinding in here. (IMG:style_emoticons/default/smile.gif)
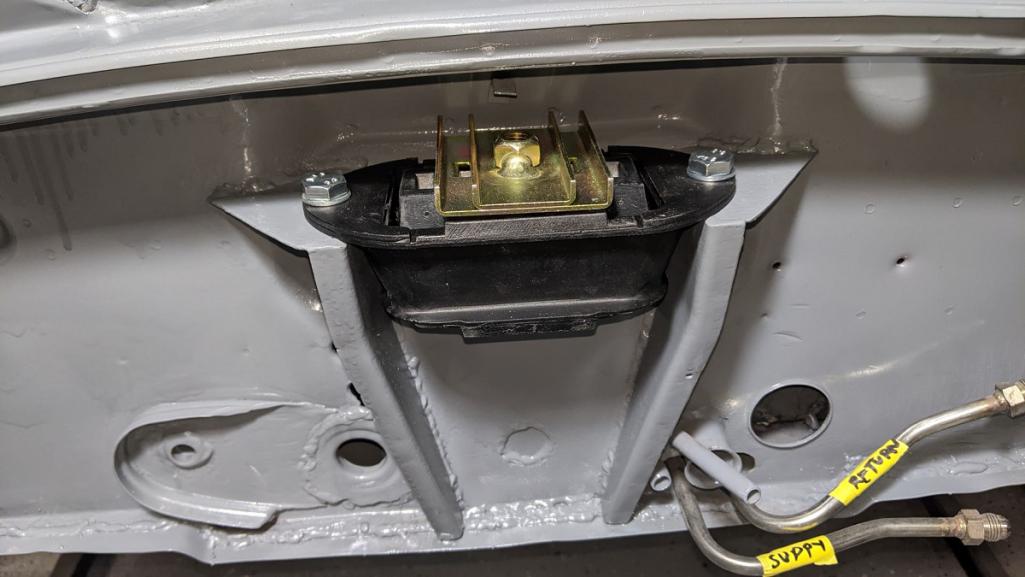
 Starting to reassemble the front end. 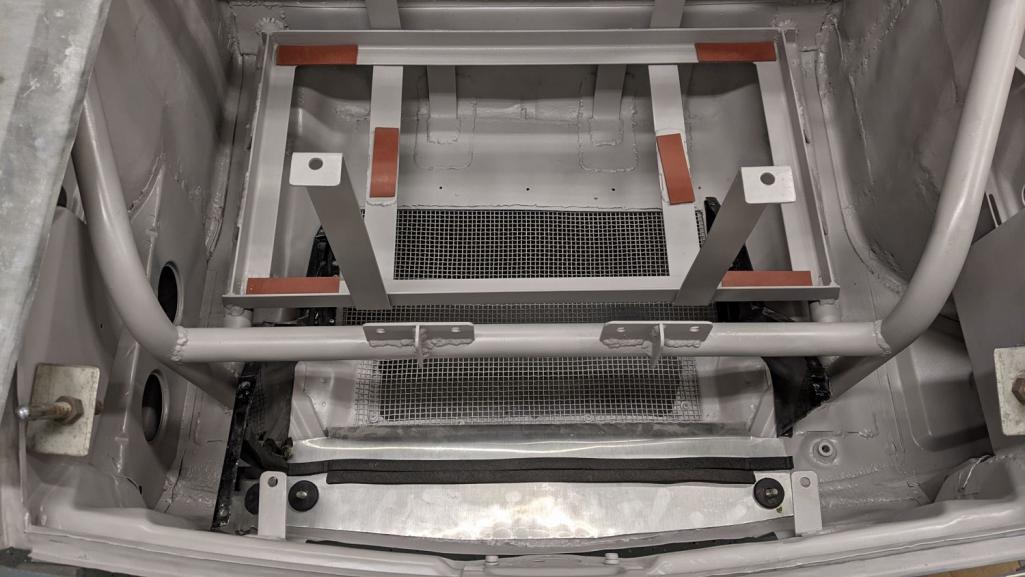 Mostly back together. 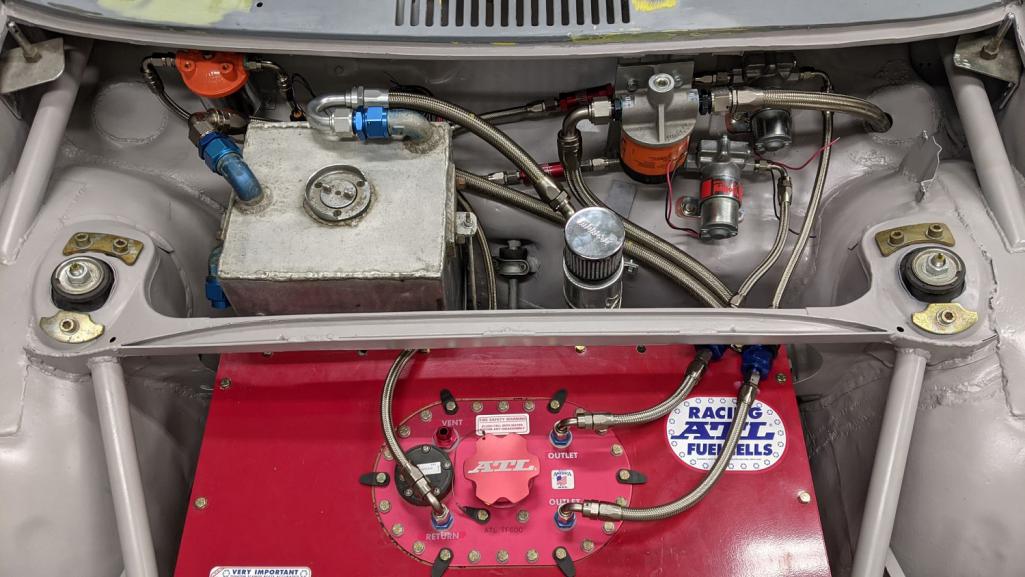 Added a fuel shut off valve and fuel pressure sensor. These are located after the final fuel filter and before the line going into the tunnel line. 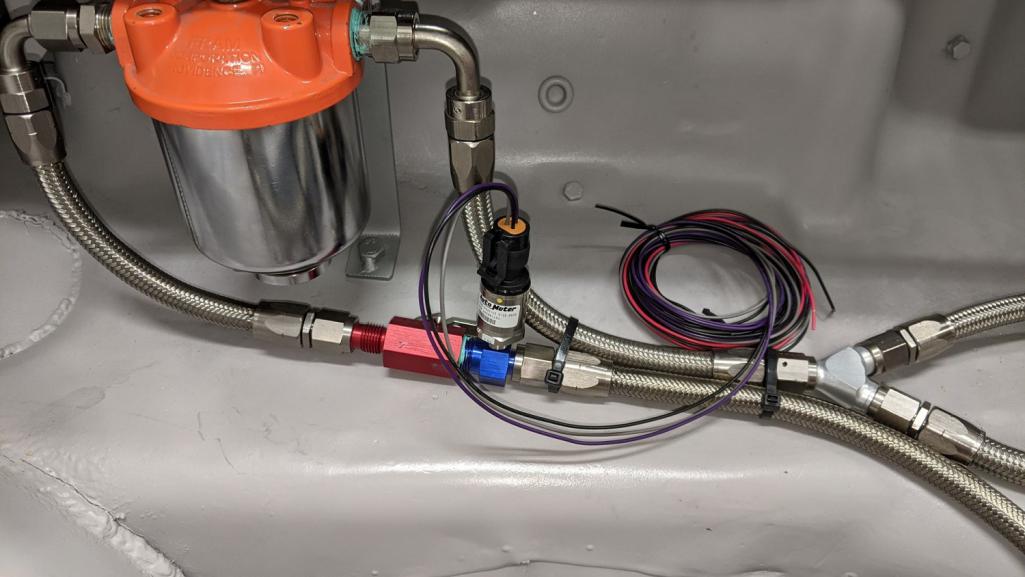 More to come. John |
| FourBlades |
 Jul 11 2021, 10:17 AM Jul 11 2021, 10:17 AM
Post
#582
|
|
From Wreck to Rockin     Group: Members Posts: 2,056 Joined: 3-December 07 From: Brevard, FL Member No.: 8,414 Region Association: South East States 
|
With the cockpit painted, I can button up a few things. The oil supply fitting on the bottom of the tank is pretty scarred up. I used a Koul tools hone to clean it up.
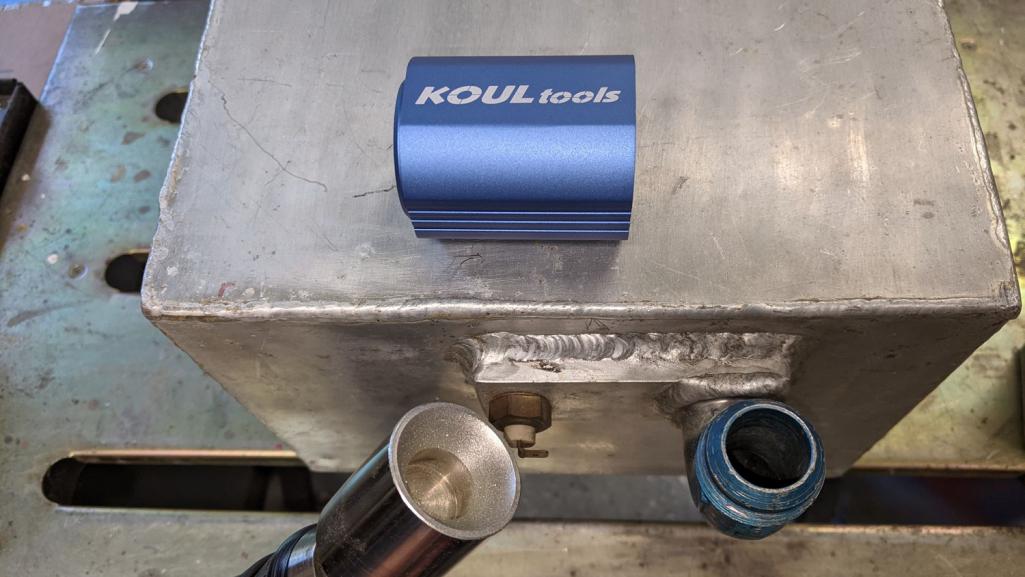 This is a 37 degree diamond hone for resurfacing AN fittings. It looks like it did a nice job, I hope it does not leak. 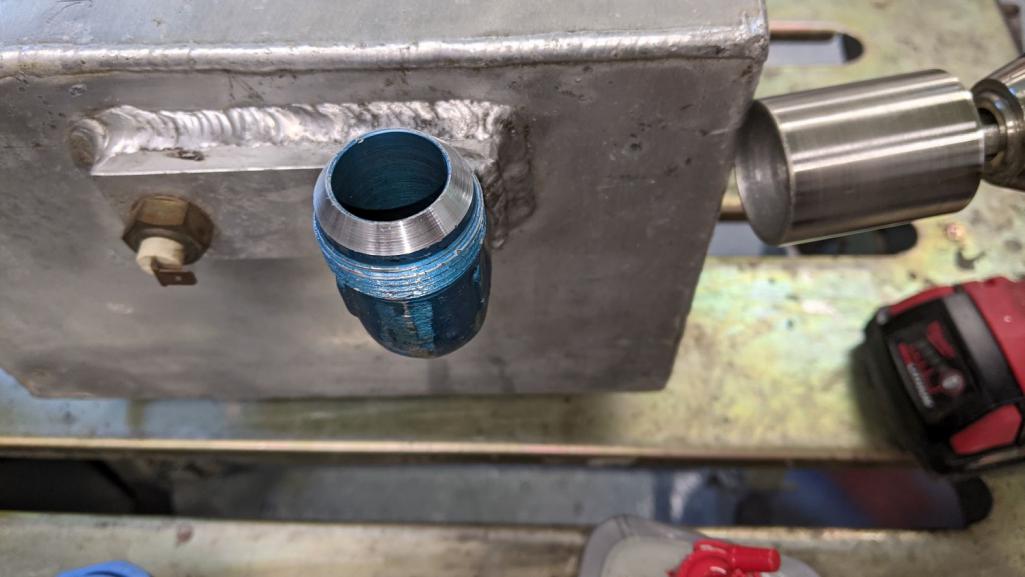 Cut a hole in the very flexible rubber on the firewall sealing grommet and slide it down the -16 oil supply hose. 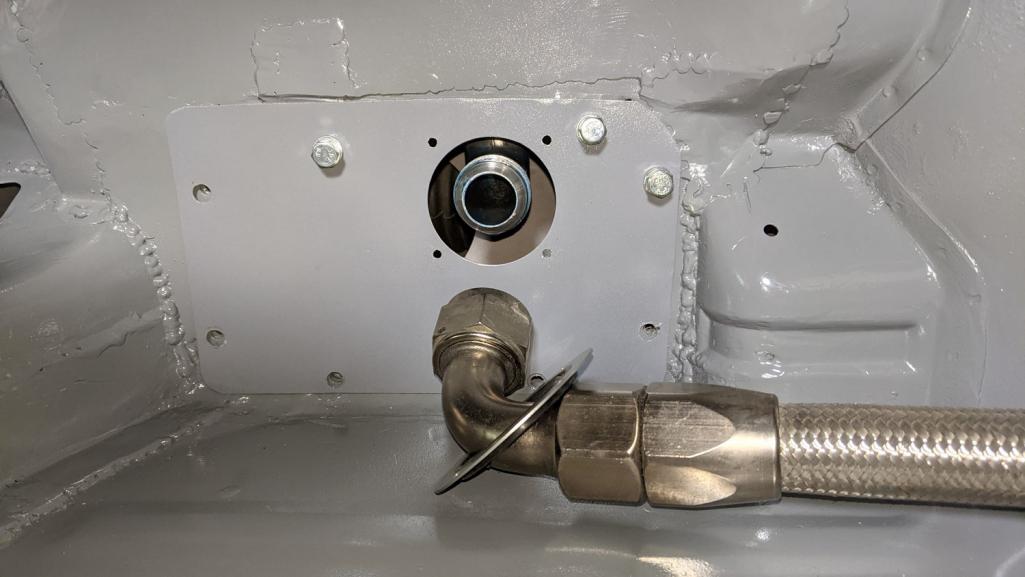 Attach the oil line, slide down the grommet, drill and rivet it in place. 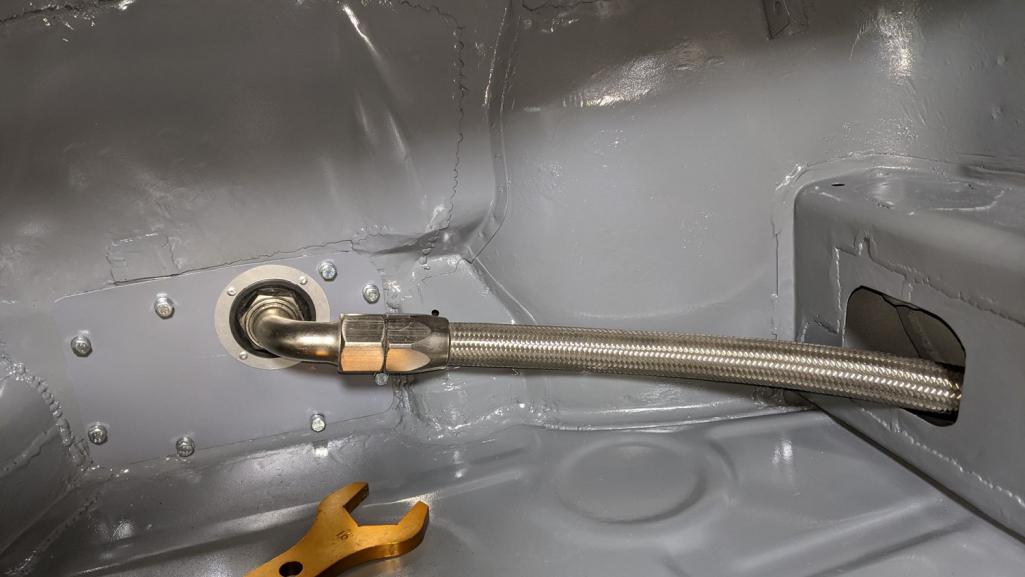 I will add some edging where the oil line goes into the heater tube. Now the firewall is pretty much closed up. Taking off this service plate to connect to the AN fuel lines in the tunnel was a big help, and I think it was worth the effort. Very satisfying to get this done. John |
| FourBlades |
 Aug 6 2021, 05:56 AM Aug 6 2021, 05:56 AM
Post
#583
|
|
From Wreck to Rockin     Group: Members Posts: 2,056 Joined: 3-December 07 From: Brevard, FL Member No.: 8,414 Region Association: South East States 
|
|
| FourBlades |
 Aug 6 2021, 06:03 AM Aug 6 2021, 06:03 AM
Post
#584
|
|
From Wreck to Rockin     Group: Members Posts: 2,056 Joined: 3-December 07 From: Brevard, FL Member No.: 8,414 Region Association: South East States 
|
|
| jd74914 |
 Aug 6 2021, 08:40 AM Aug 6 2021, 08:40 AM
Post
#585
|
|
Its alive     Group: Members Posts: 4,864 Joined: 16-February 04 From: CT Member No.: 1,659 Region Association: North East States |
With the cockpit painted, I can button up a few things. The oil supply fitting on the bottom of the tank is pretty scarred up. I used a Koul tools hone to clean it up.  This is a 37 degree diamond hone for resurfacing AN fittings. It looks like it did a nice job, I hope it does not leak. If you do have issues, there are soft seals which can be used on the face of the taper to fill small imperfections. They are called conical fitting seals (usually) and are made by a number of companies (Parker/SECO/Del/Voishon). https://www.aircraftspruce.com/catalog/hapa...l37fittings.php I haven't used this brand, but they are safe to use. Actually, a lot of 37/45 degree fittings on the Space Shuttle Oribiter used the Voishon version for added safety. (IMG:style_emoticons/default/sunglasses.gif) Car is looking great BTW! (IMG:style_emoticons/default/beerchug.gif) |
| FourBlades |
 Aug 6 2021, 09:19 AM Aug 6 2021, 09:19 AM
Post
#586
|
|
From Wreck to Rockin     Group: Members Posts: 2,056 Joined: 3-December 07 From: Brevard, FL Member No.: 8,414 Region Association: South East States 
|
OK thanks, that is a great tip, Jim. I think I will order some in the sizes I have just in case. Are they considered a permanent fix, or a temporary solution? John |
| FourBlades |
 Aug 6 2021, 09:28 AM Aug 6 2021, 09:28 AM
Post
#587
|
|
From Wreck to Rockin     Group: Members Posts: 2,056 Joined: 3-December 07 From: Brevard, FL Member No.: 8,414 Region Association: South East States 
|
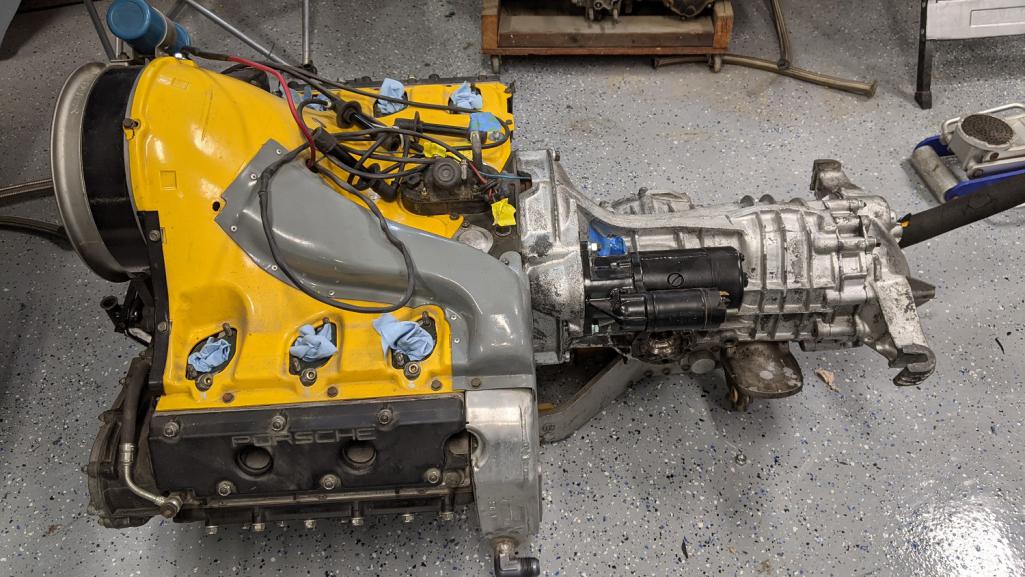
Time to refresh this core transmission.
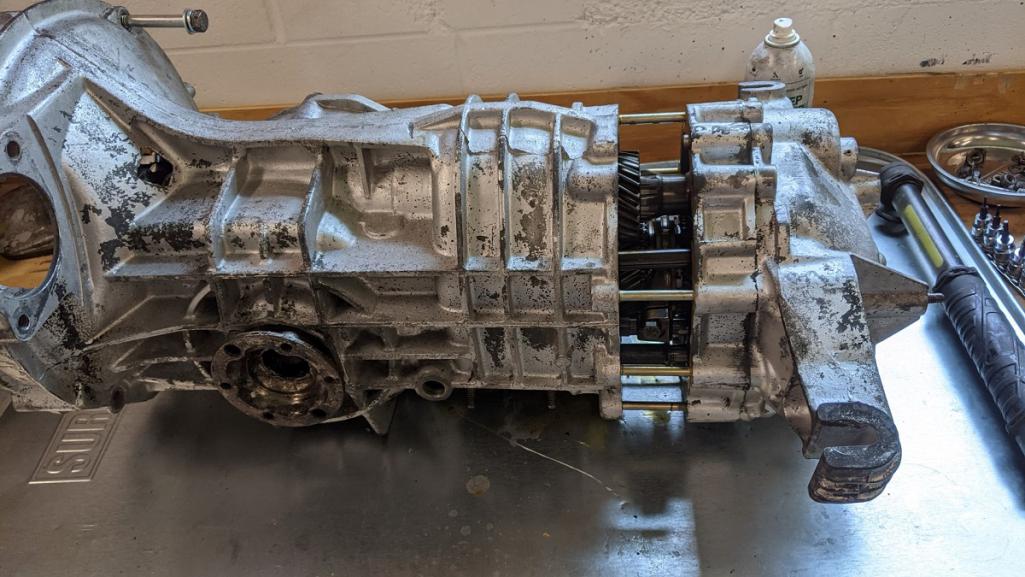 The synchros and dog teeth are pretty worn out everywhere except 5th gear. 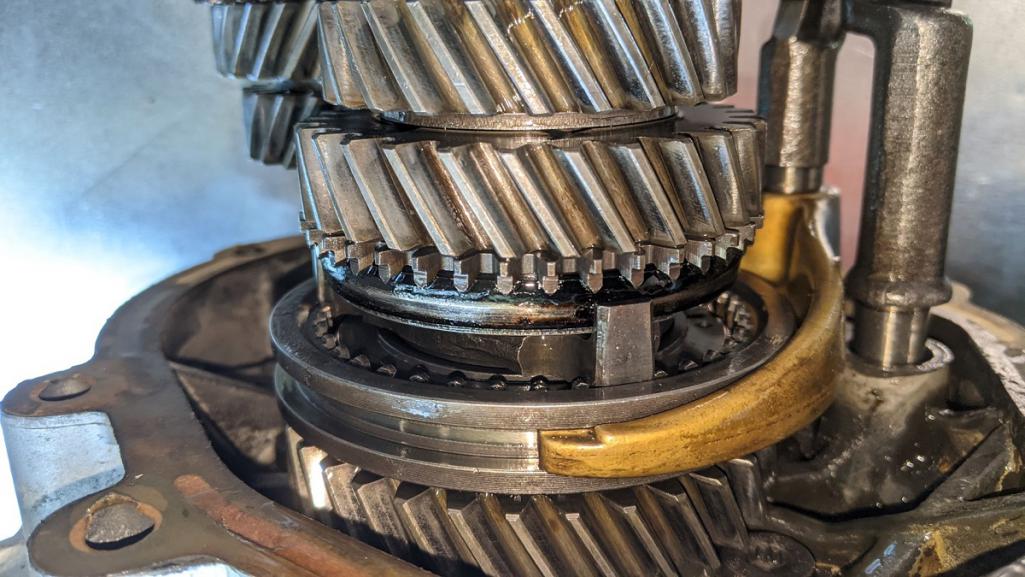 Pulled it apart and replaced all the synchros and dog teeth. I also replaced the first/reverse slider and 2nd/3rd slider. The mainshaft bearing race was broken so that got replaced as well. I bought the chromoly bearing retainer, hoping it will keep the new bearing in one piece. 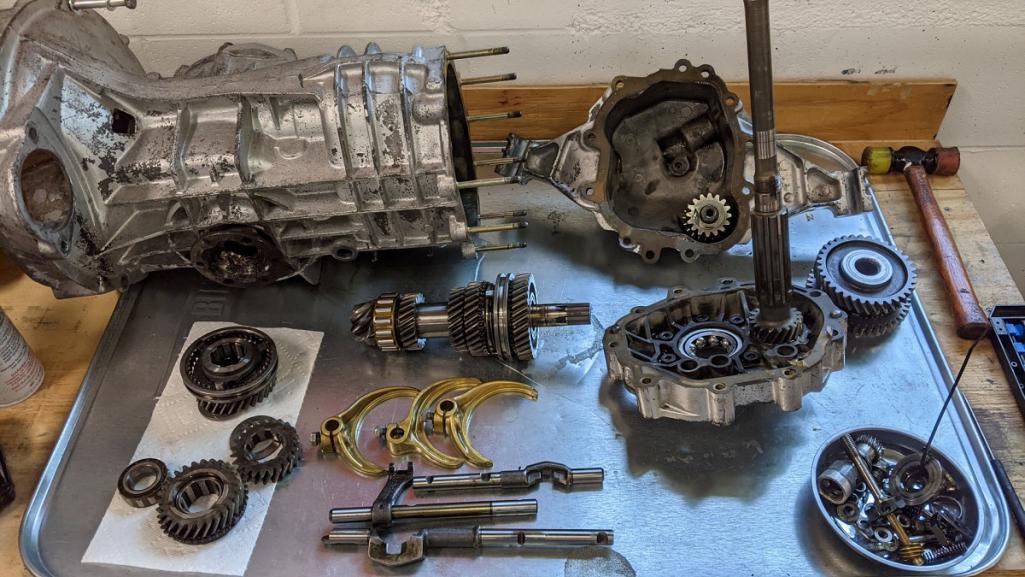 John |
| FourBlades |
 Aug 6 2021, 09:35 AM Aug 6 2021, 09:35 AM
Post
#588
|
|
From Wreck to Rockin     Group: Members Posts: 2,056 Joined: 3-December 07 From: Brevard, FL Member No.: 8,414 Region Association: South East States 
|
Now I have 2 big decisions to make and I could use some input.
First, I have a set of 930 stub axles, CVs and the corresponding sway-away axles for a 914. They are stronger and the CVs are available for $80 from pelican. Downside is I have to destroy the existing rear bearings in my axles to use them, which were rebuilt by PMB. If I have 200 HP to the wheels are the 930 CVs a necessary or worthwhile upgrade? Second, should I upgrade to the billet intermediate plate at this HP level? If I do, will I have to reset the pinion depth? That is something I can't do myself and would need to find a shop here in Florida that can do it. I know this is overkill for a typical 914, but with 12 inch rear tires and a 2.5L six, is this when the upgrade is worth while? I am not adverse to starting with the 914 axles and upgrading down the road. Pulling the engine and transmission is not that time consuming. I would hate to break the smaller axles or CVs the first time at the track though. What do you guys think? Cross posting this in the paddock. John |
| jd74914 |
 Aug 6 2021, 09:55 AM Aug 6 2021, 09:55 AM
Post
#589
|
|
Its alive     Group: Members Posts: 4,864 Joined: 16-February 04 From: CT Member No.: 1,659 Region Association: North East States |
OK thanks, that is a great tip, Jim. I think I will order some in the sizes I have just in case. Are they considered a permanent fix, or a temporary solution? Permanent (IMG:style_emoticons/default/smile.gif) Well, they are single use as you'd expect so they do require replacement when opening up the fitting. |
| Root_Werks |
 Aug 6 2021, 10:04 AM Aug 6 2021, 10:04 AM
Post
#590
|
|
Village Idiot      Group: Members Posts: 8,877 Joined: 25-May 04 From: About 5NM from Canada Member No.: 2,105 Region Association: Pacific Northwest 
|
If this 914 will see track time, overbuild where you can. My .02. (IMG:style_emoticons/default/wink.gif)
|
| Dion |
 Aug 6 2021, 10:09 AM Aug 6 2021, 10:09 AM
Post
#591
|
|
RN     Group: Members Posts: 2,922 Joined: 16-September 04 From: Audubon,PA Member No.: 2,766 Region Association: MidAtlantic Region 

|
I imagine with the kind of grip those tyres can generate with the combo of 200HP , I’d say do the upgrade if at all possible. It won’t be detrimental except to the wallet (IMG:style_emoticons/default/biggrin.gif)
It’s looking great John. Lots of nice work. |
| FourBlades |
 Aug 7 2021, 10:38 AM Aug 7 2021, 10:38 AM
Post
#592
|
|
From Wreck to Rockin     Group: Members Posts: 2,056 Joined: 3-December 07 From: Brevard, FL Member No.: 8,414 Region Association: South East States 
|
OK, having discussed this with various people I think I will start out with the 94mm CVs and then upgrade to 100s down the road if I need to. It seems like the 108s are totally overkill for the engine I have. I think I will just hold on to those parts for now in case I do ever need them, or maybe trade them to someone with a set of 100mm stub axles and matching bits.
It seems like the consensus is good cooling is the key to keeping your transmission alive, so I will focus on that for now. I will try running the cooler and pump that came with the car because these are probably the race parts used at Sebring and Daytona, etc. 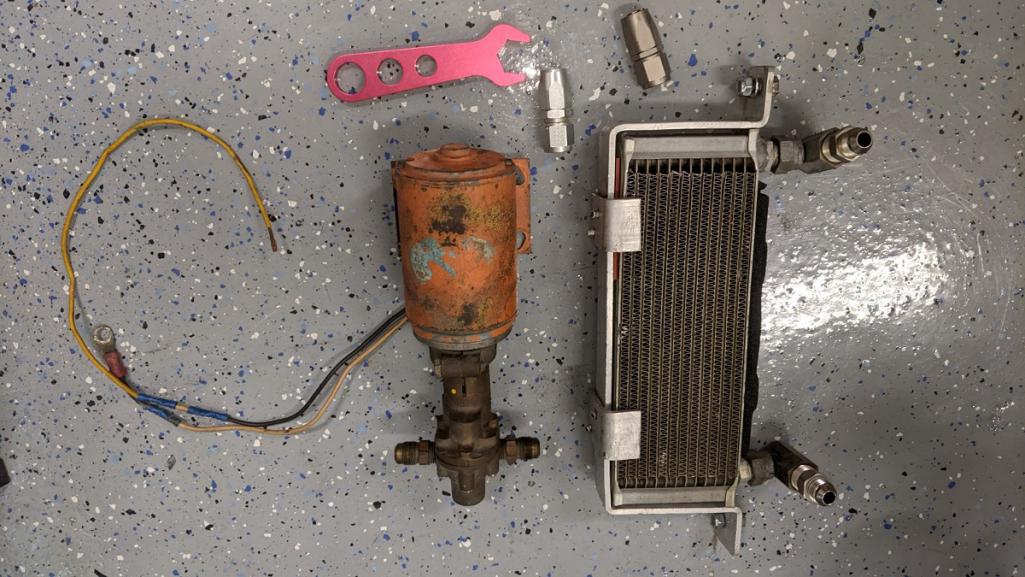 The original adapters are all -8 AN so that is what I will use. John |
| FourBlades |
 Aug 28 2021, 03:38 PM Aug 28 2021, 03:38 PM
Post
#593
|
|
From Wreck to Rockin     Group: Members Posts: 2,056 Joined: 3-December 07 From: Brevard, FL Member No.: 8,414 Region Association: South East States 
|
Shane really helped me out by donating most of a set of axles and CVs he got from a salvaged 914. (IMG:style_emoticons/default/first.gif) They were missing the CVs on one end so I bought the machined
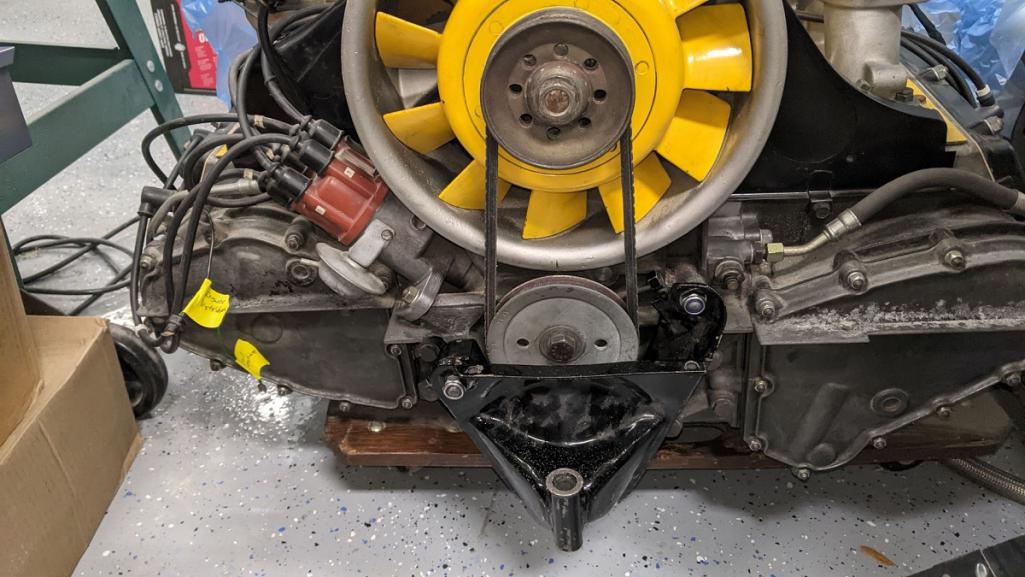
type I style from PMB performance, who also helped me out with a lot of the fixings needed. I have no idea what vehicle those CV gaskets are for but I realized they are way too small to fit. Ordered a set of the 94mm ones. Using the 94mm CVs and axles until I get a lot of the other issues with the car ironed out, like getting the engine to run and not leak oil and fuel. (IMG:style_emoticons/default/biggrin.gif) I also like the idea of breaking the CV joint instead of my ring or pinion gears. 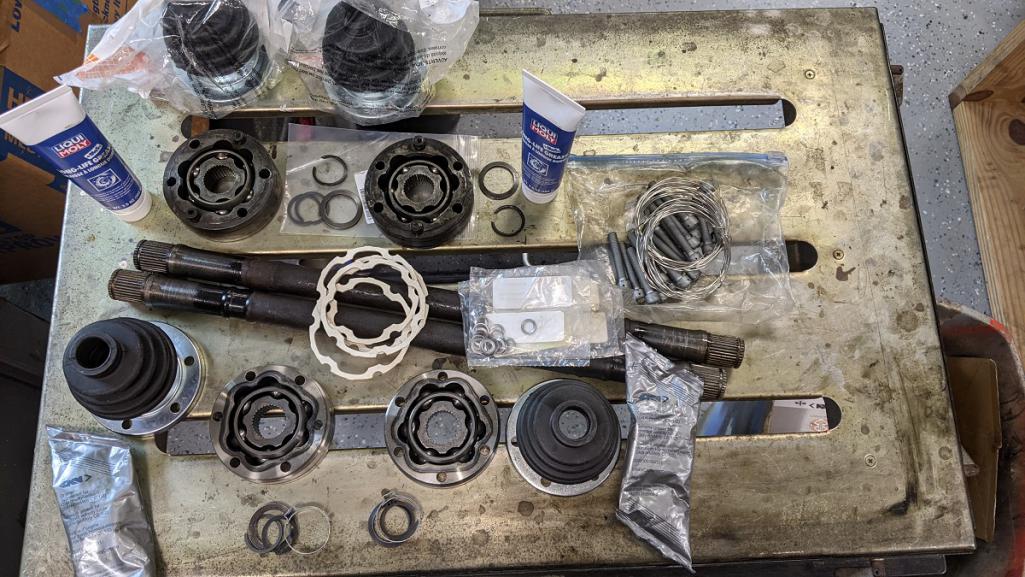 Finished up the transmission refurb. Added an oil inlet fitting at front for cool oil returning from the transmission radiator. Copying the approach Shane used for his race box. (IMG:style_emoticons/default/smile.gif) This should bring cool oil to the ring and pinion gears, then flow towards the back cooling the other gears. 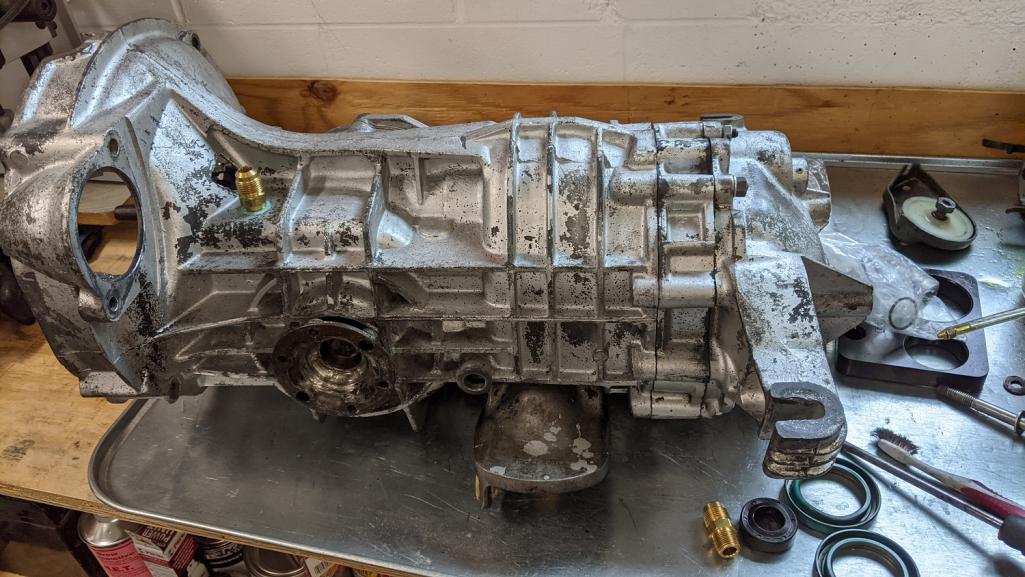 Added another fitting at the back end to extract oil to go to the pump. If this leaks I will add some JB weld to the inside and outside. 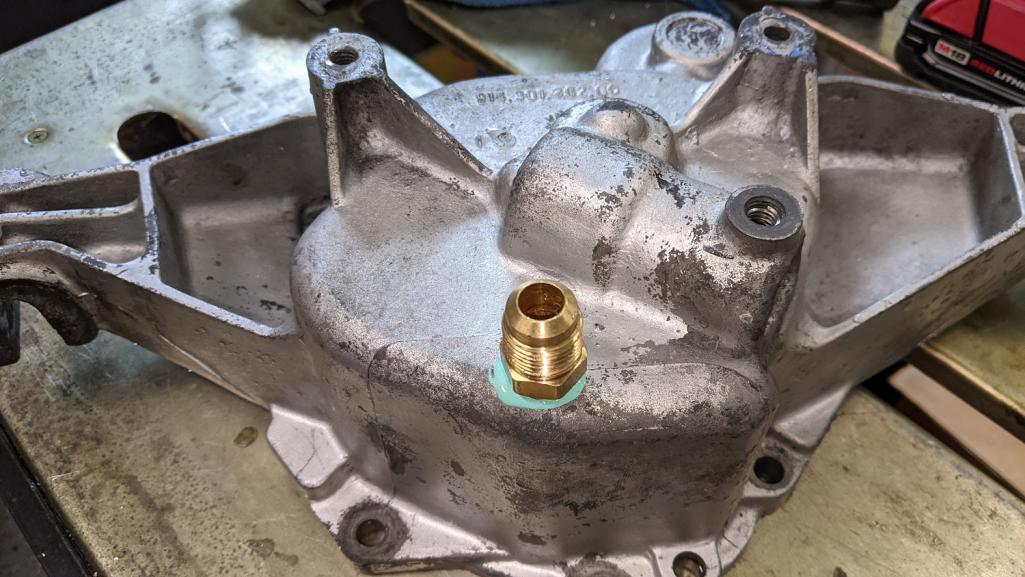 John |
| FourBlades |
 Aug 28 2021, 03:44 PM Aug 28 2021, 03:44 PM
Post
#594
|
|
From Wreck to Rockin     Group: Members Posts: 2,056 Joined: 3-December 07 From: Brevard, FL Member No.: 8,414 Region Association: South East States 
|
|
| krazykonrad |
 Aug 28 2021, 04:48 PM Aug 28 2021, 04:48 PM
Post
#595
|
|
Senior Member    Group: Members Posts: 1,161 Joined: 21-February 06 From: Canton, GA Member No.: 5,610 |
|
| sixnotfour |
 Aug 28 2021, 08:48 PM Aug 28 2021, 08:48 PM
Post
#596
|
|
914 Wizard           Group: Members Posts: 11,092 Joined: 12-September 04 From: Life Elevated..planet UT. Member No.: 2,744 Region Association: Rocky Mountains 

|
|
| carr914 |
 Aug 29 2021, 06:09 AM Aug 29 2021, 06:09 AM
Post
#597
|
|
Racer from Birth                                                                                                     Group: Members Posts: 130,305 Joined: 2-February 04 From: Tampa,FL Member No.: 1,623 Region Association: South East States  |
Nice Work John
|
| tscrihfield |
 Aug 29 2021, 10:35 AM Aug 29 2021, 10:35 AM
Post
#598
|
|
Drive Fast and Take Chances    Group: Members Posts: 643 Joined: 8-September 10 From: Amelia Ohio Member No.: 12,156 Region Association: None 
|
Loving all of this progress John! Nice work!
|
| racerbvd |
 Aug 29 2021, 05:12 PM Aug 29 2021, 05:12 PM
Post
#599
|
|
Advanced Member     Group: Members Posts: 2,375 Joined: 3-February 03 From: Sunny FL. Member No.: 226 Region Association: None |
|
| FourBlades |
 Aug 29 2021, 07:54 PM Aug 29 2021, 07:54 PM
Post
#600
|
|
From Wreck to Rockin     Group: Members Posts: 2,056 Joined: 3-December 07 From: Brevard, FL Member No.: 8,414 Region Association: South East States 
|
Thanks guys, this thread is keeping me motivated!
Mocking up the exhaust. I will add gaskets and lock nuts when I am satisfied with everything. I want to get all the various engine bay lines and parts in place to make sure everything will work together before finalizing anything. Need to add the axles, shift rod, clutch cable, etc. to complete the mock up. Want to make sure the oil lines are not touching the exhaust. Getting everything to fit and not interfere in the space available is one of the bigger challenges of building a customized car like this. 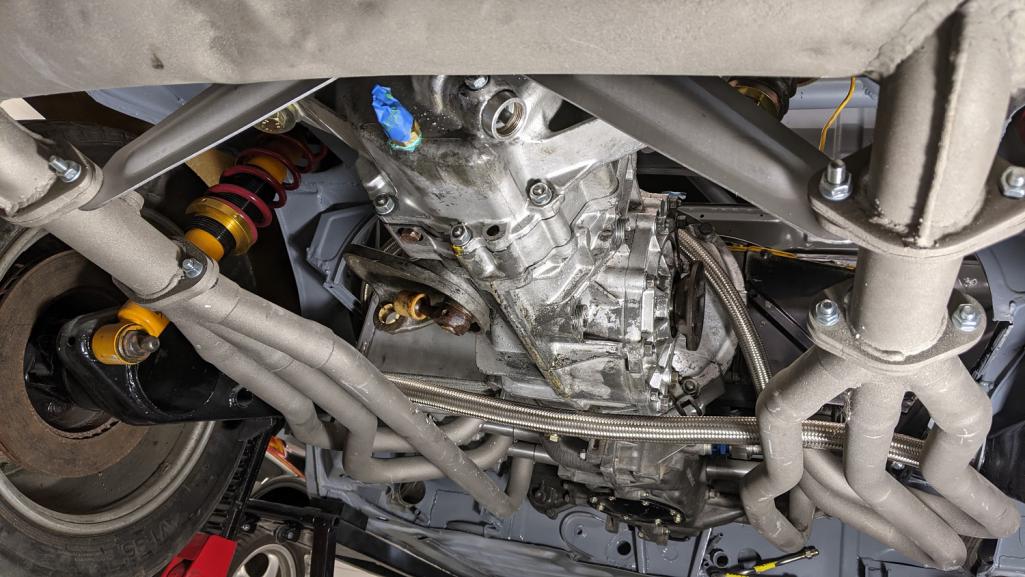 Adding a muffler for the initial testing. There is no way I can run open exhaust in the neighborhood where I live without people calling the national guard. (IMG:style_emoticons/default/smile.gif) The muffler occupies the same central space where the original builders placed the transmission cooler, so I will have to figure out another location for it until I can install megaphones or some other kind of split exhaust system. 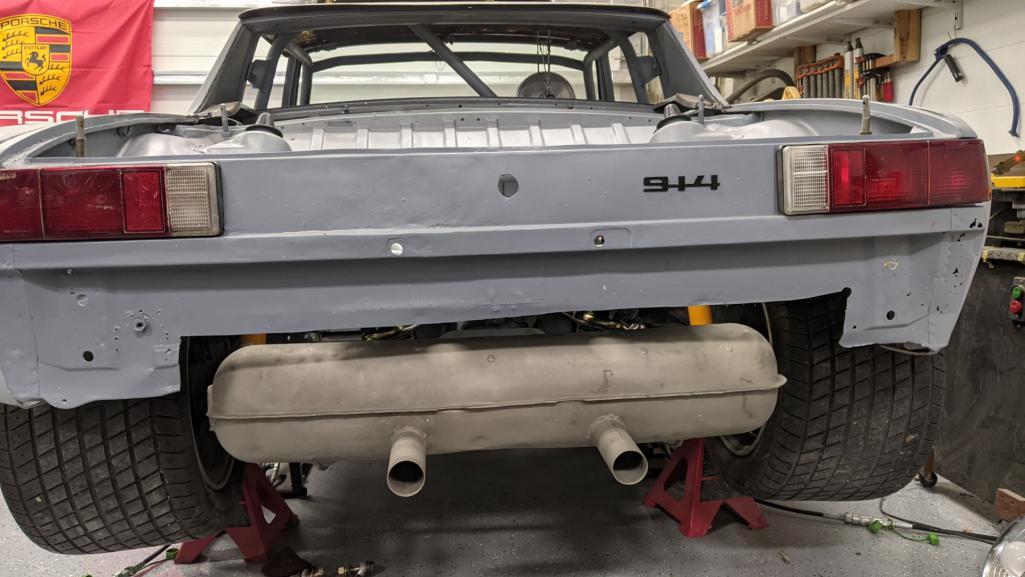 At this point, I just want to get the car running and start debugging the various systems. Next steps are completing the oil lines. I want to keep the oil supply line at the same level all the way to the engine so that gravity will ensure there is oil waiting at the pickup point. I will make sure the oil line is not the lowest part of the car and is as protected as possible. The return line I may loop over the transmission on its way back to the front of the car. I think this will work because the oil is being actively pumped out of the engine into the return line. Does anyone see any problems with that approach? John |
  |
2 User(s) are reading this topic (2 Guests and 0 Anonymous Users)
0 Members:

|
Lo-Fi Version | Time is now: 15th January 2026 - 07:29 AM |
Invision Power Board
v9.1.4 © 2026 IPS, Inc.


