|
|

|
Porsche, and the Porsche crest are registered trademarks of Dr. Ing. h.c. F. Porsche AG.
This site is not affiliated with Porsche in any way. Its only purpose is to provide an online forum for car enthusiasts. All other trademarks are property of their respective owners. |
|
|
  |
| RoadGlue |
 Aug 11 2009, 10:09 AM Aug 11 2009, 10:09 AM
Post
#41
|
|
Sonoma County Gear Head     Group: Admin Posts: 2,033 Joined: 8-January 03 From: Santa Rosa, CA Member No.: 108 Region Association: Northern California 
|
Your progress thread makes my progress thread look totally pathetic in comparison. I demand you stop immediately! (IMG:style_emoticons/default/smile.gif)
Nice work. It's really motivating to see enthusiastic people like yourself tackle such large projects. Really does make the work I need to do seem rather trivial. Keep it up! |
| dlee6204 |
 Aug 18 2009, 01:14 PM Aug 18 2009, 01:14 PM
Post
#42
|
|
Howdy     Group: Members Posts: 2,162 Joined: 30-April 06 From: Burnsville, NC Member No.: 5,956 |
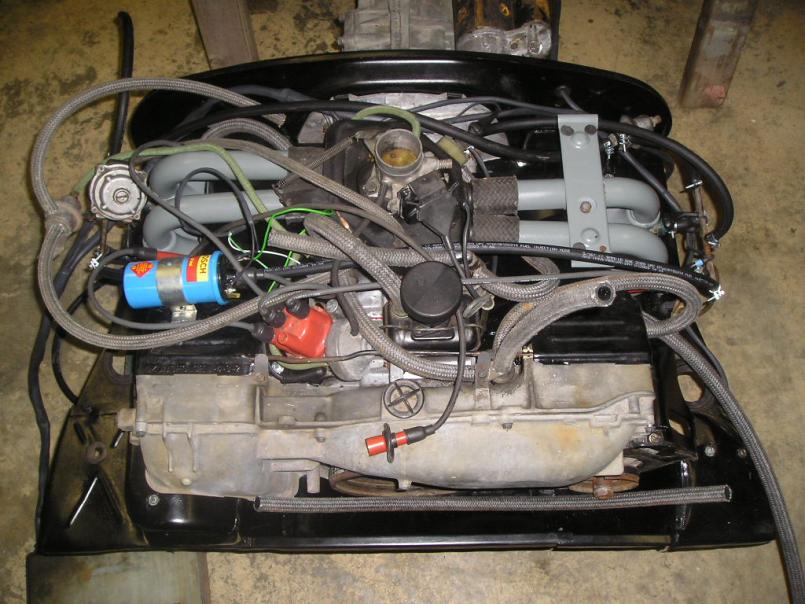
I finally got the motor all done. I ended up buying an ignition harness and oil temp wire from Jeff Bowlby as well. I just couldn't bring myself to putting the old ignition harness on along with the new engine harness. I also replaced all the fuel and vacuum lines as well as many other little things. Hopefully when I get the engine in, I won't have too many troubles and if I do, they will be easy to track down. Here is a picture of the engine...
 Now I just have to force myself to get working on the actual car again... |
| trojanhorsepower |
 Aug 18 2009, 05:47 PM Aug 18 2009, 05:47 PM
Post
#43
|
|
Senior Member    Group: Members Posts: 1,024 Joined: 21-September 03 From: Marion, NC Member No.: 1,179 Region Association: None |
Hi Doug,
Great to hear of another Teener in NC! Looks like you are doing a great job. I have lots of family in Winston, I would love to see how you fabricated the parts you used. What gauge metal did you use. What is the name of the rust encapsulater that you used? My car needs much of the same stuff you used and I have been struggling to fabricate even relatively simple parts. Thanks -Peter |
| dlee6204 |
 Sep 4 2009, 10:50 PM Sep 4 2009, 10:50 PM
Post
#44
|
|
Howdy     Group: Members Posts: 2,162 Joined: 30-April 06 From: Burnsville, NC Member No.: 5,956 |
Wow. I am pretty bad at updating this. I've made some progress over the past few weeks. School started again so I have only been able to work on the car on the weekends.
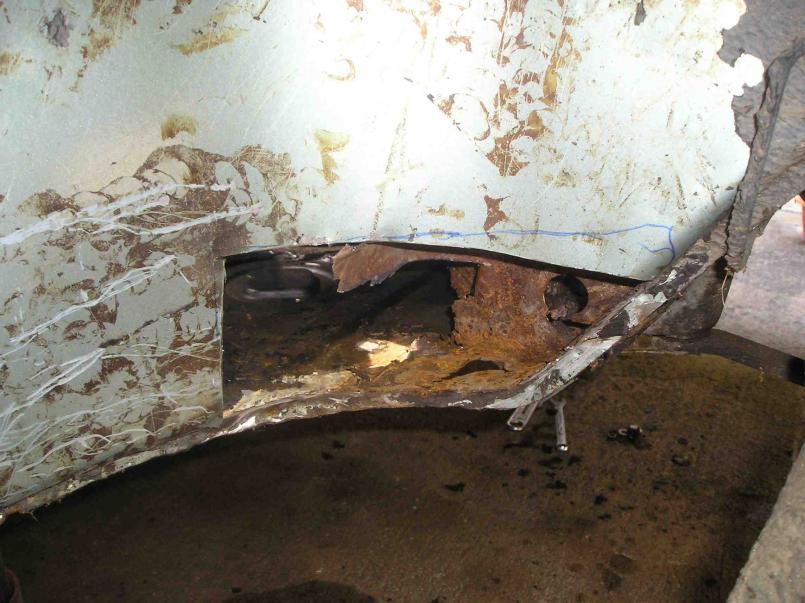
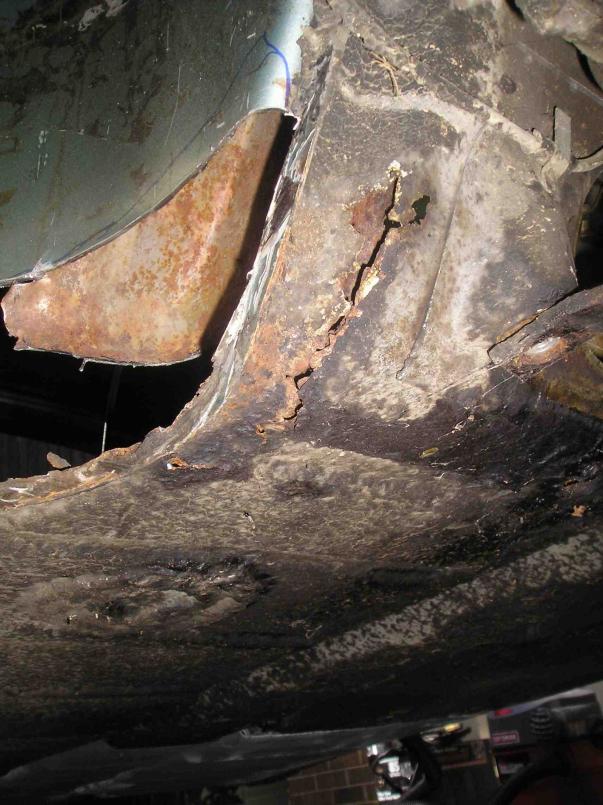
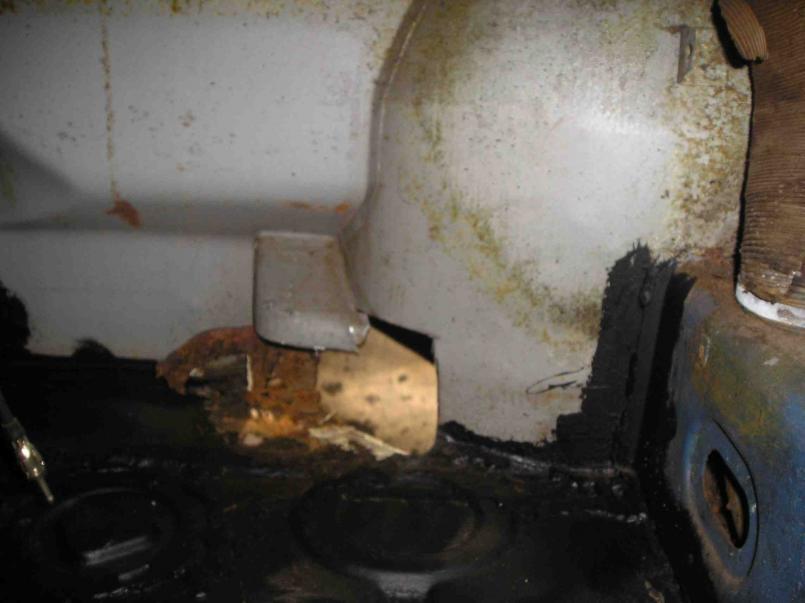
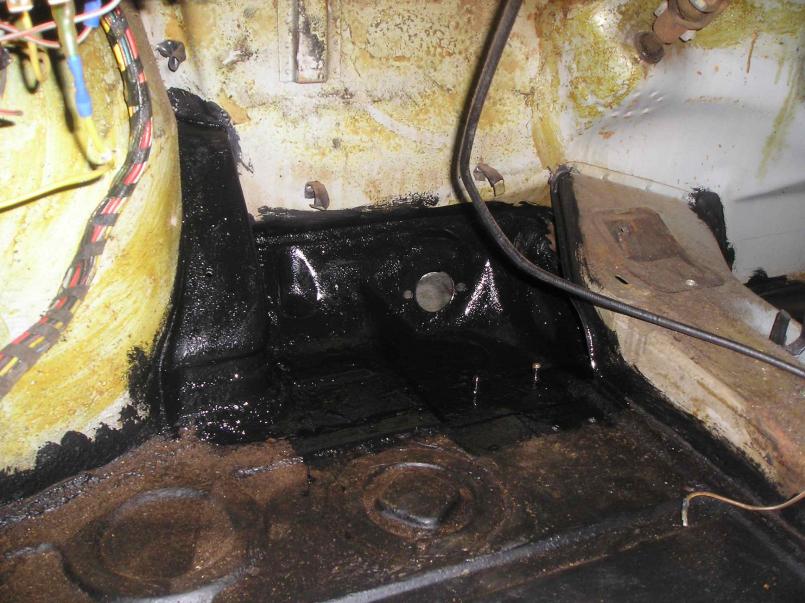
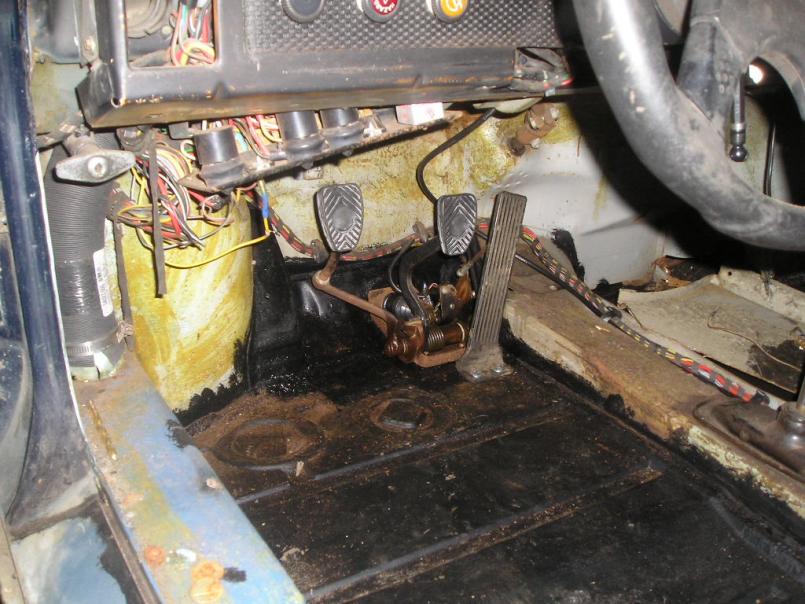
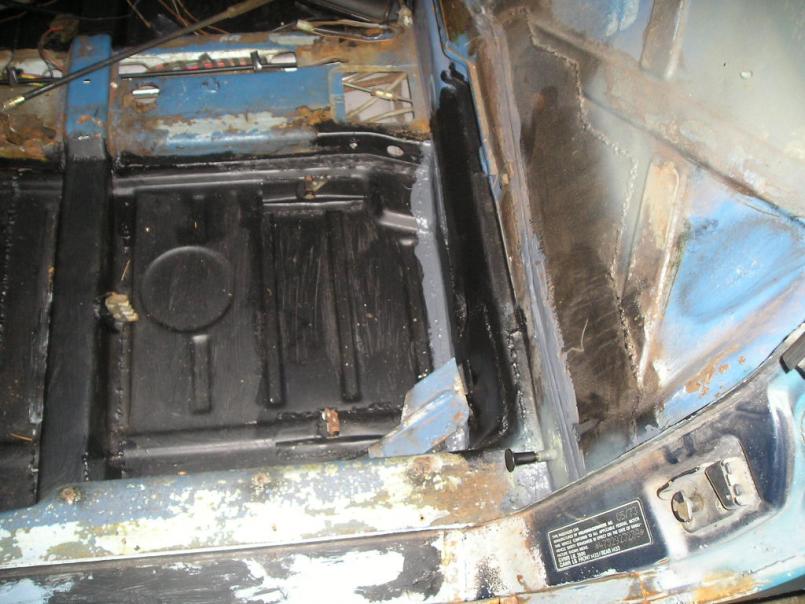
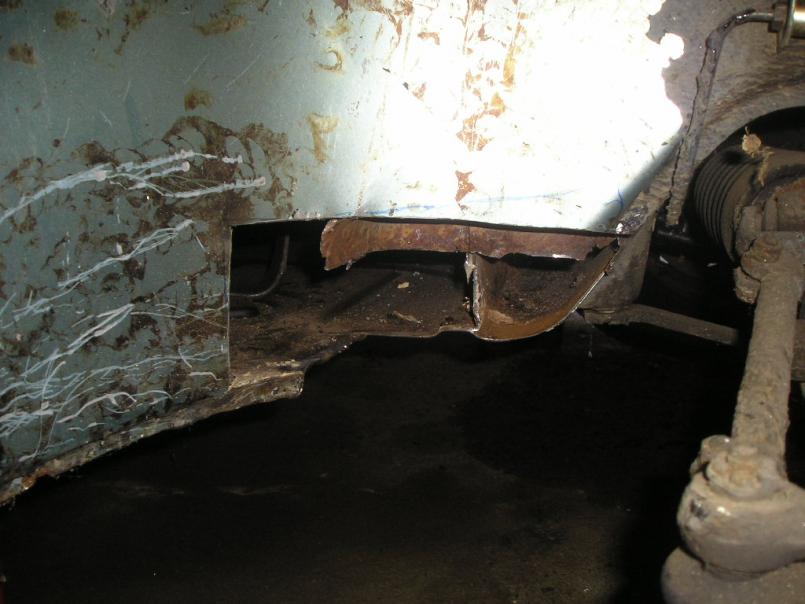
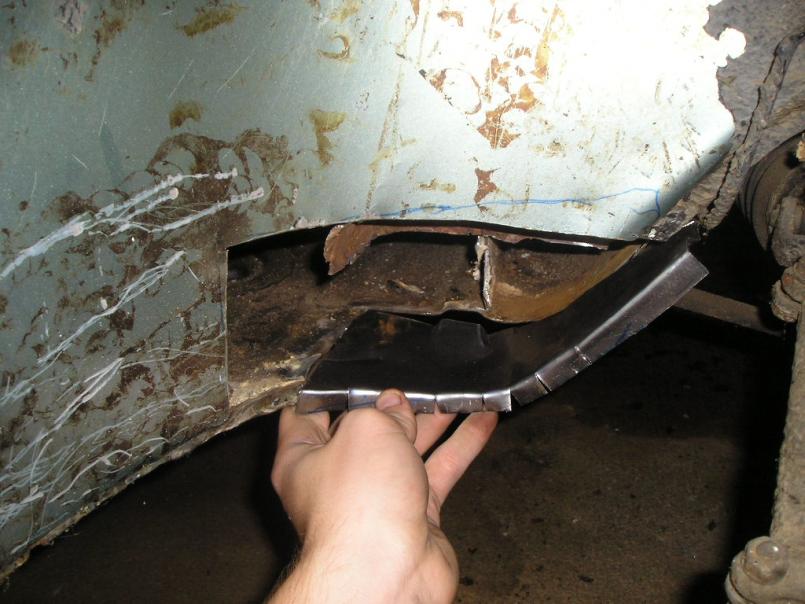
For those who are interested, I used 18 gauge sheet metal for most of the structural areas such as the longs. I used 19 gauge for other areas such as the firewall and center tunnel. Finally I think I used 20 gauge for the engine shelves. I was able to get most of my metal from a local guy that I found on TheSamba. The rust encapsulator that I use is Eastwood's product. I just make sure to clean the metal real well before applying and it has held up pretty well for me in the past. I also use Eastwood's seam sealer as well. As far as the car goes, I finished welding in the passenger side firewall piece and seat mounts. Today I welded in the driver's side firewall, the seat mounts, and the e-brake mount and cover. I wrote out a list of everything else that I need to do to the car so I will just work my way through the list over this holiday weekend. Next up on the list is to fix the rust under the gas tank/wheel-well/front passenger floorpan. Driver's side 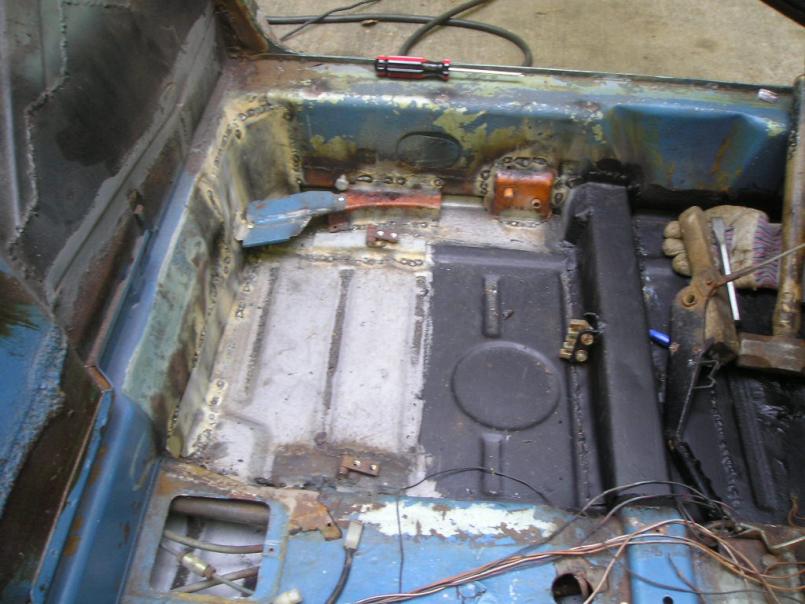 Passenger side 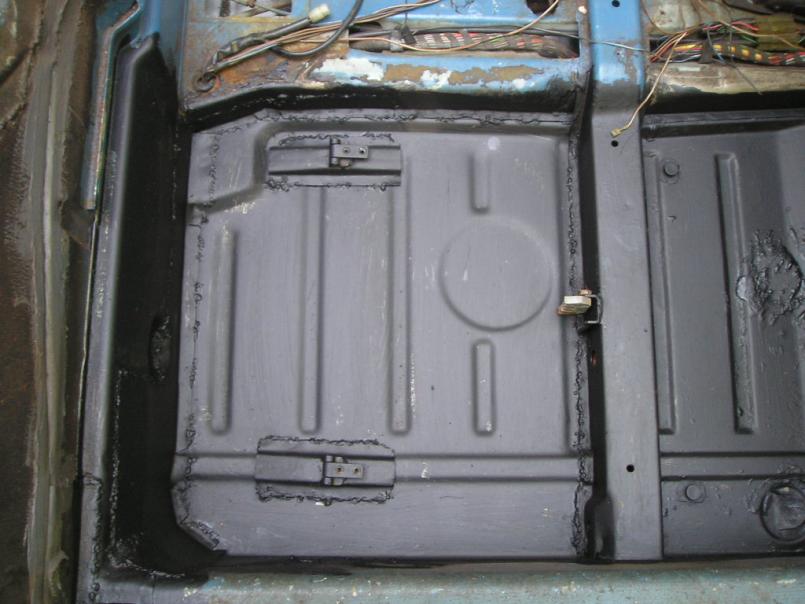 Rust in the wheel well 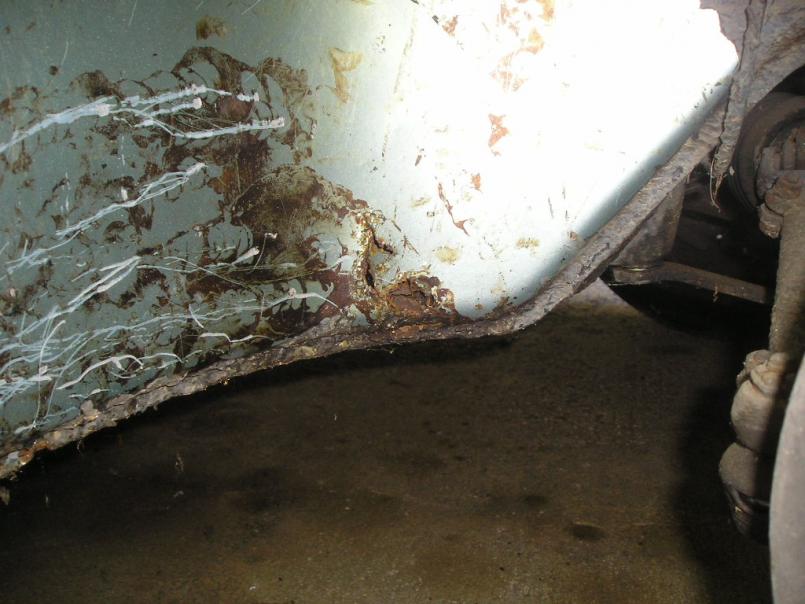 |
| dlee6204 |
 Sep 5 2009, 11:59 AM Sep 5 2009, 11:59 AM
Post
#45
|
|
Howdy     Group: Members Posts: 2,162 Joined: 30-April 06 From: Burnsville, NC Member No.: 5,956 |
|
| dlee6204 |
 Sep 5 2009, 12:05 PM Sep 5 2009, 12:05 PM
Post
#46
|
|
Howdy     Group: Members Posts: 2,162 Joined: 30-April 06 From: Burnsville, NC Member No.: 5,956 |
|
| dlee6204 |
 Sep 6 2009, 12:22 AM Sep 6 2009, 12:22 AM
Post
#47
|
|
Howdy     Group: Members Posts: 2,162 Joined: 30-April 06 From: Burnsville, NC Member No.: 5,956 |
|
| dlee6204 |
 Sep 6 2009, 12:23 AM Sep 6 2009, 12:23 AM
Post
#48
|
|
Howdy     Group: Members Posts: 2,162 Joined: 30-April 06 From: Burnsville, NC Member No.: 5,956 |
|
| dlee6204 |
 Sep 8 2009, 03:53 PM Sep 8 2009, 03:53 PM
Post
#49
|
|
Howdy     Group: Members Posts: 2,162 Joined: 30-April 06 From: Burnsville, NC Member No.: 5,956 |
|
| dlee6204 |
 Sep 8 2009, 04:02 PM Sep 8 2009, 04:02 PM
Post
#50
|
|
Howdy     Group: Members Posts: 2,162 Joined: 30-April 06 From: Burnsville, NC Member No.: 5,956 |
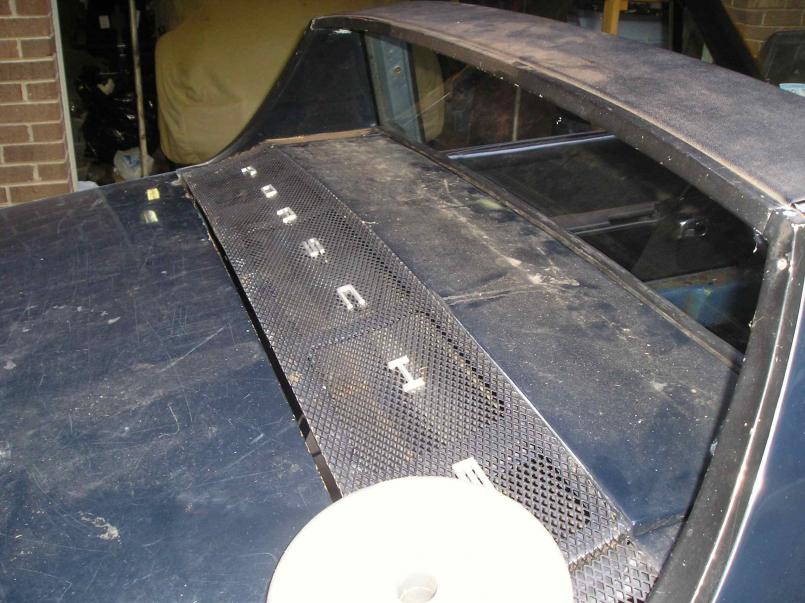
I also welded in a new engine lid pull tube from a spare car. It's hard to see in the picture but I purposely cut it about two inches short and attached the two ends together with a rubber piece of hose. In case dirt or anything gets down in that corner, I can remove the lower portion of the steel tubing and clean everything out. I already routed the cable and hooked it to the latch and it works perfectly. (IMG:style_emoticons/default/smile.gif)
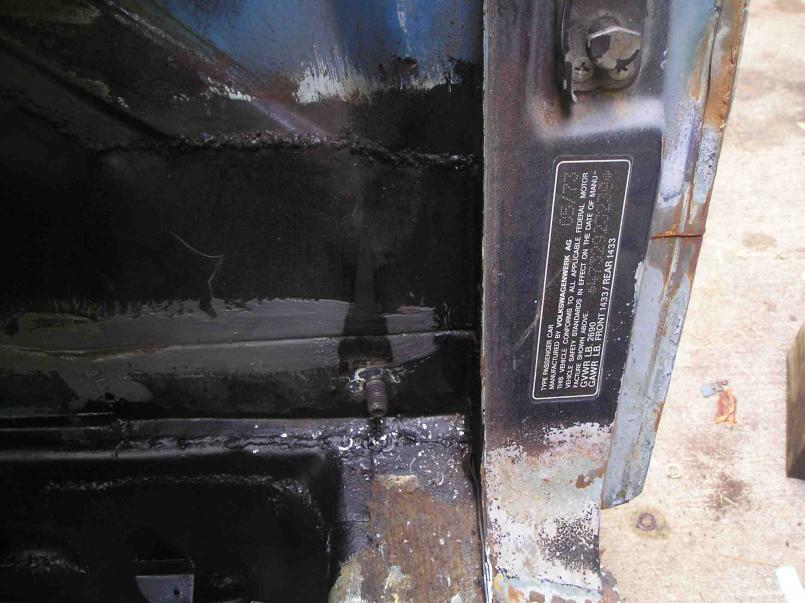 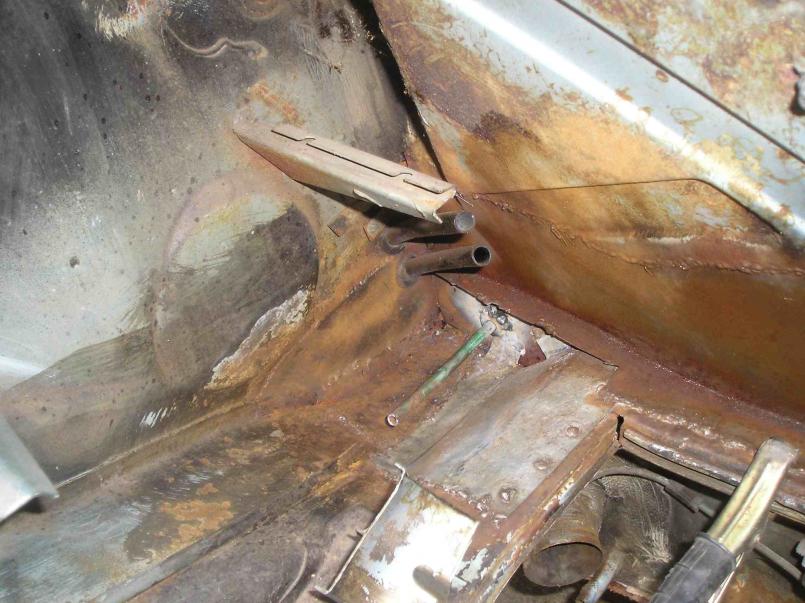 |
| dlee6204 |
 Sep 8 2009, 04:07 PM Sep 8 2009, 04:07 PM
Post
#51
|
|
Howdy     Group: Members Posts: 2,162 Joined: 30-April 06 From: Burnsville, NC Member No.: 5,956 |
|
| dlee6204 |
 Sep 8 2009, 04:32 PM Sep 8 2009, 04:32 PM
Post
#52
|
|
Howdy     Group: Members Posts: 2,162 Joined: 30-April 06 From: Burnsville, NC Member No.: 5,956 |
Oh and the fun doesn't stop there! I went ahead and finished any welding or repairs needed in the engine compartment, coated it, and sealed all the seams up. I then installed steel gas lines through the center tunnel, the fuel pump, and any gas lines underneath. I installed new engine bay seals, relay board and routed the wiring harness in order to get ready for engine installation...
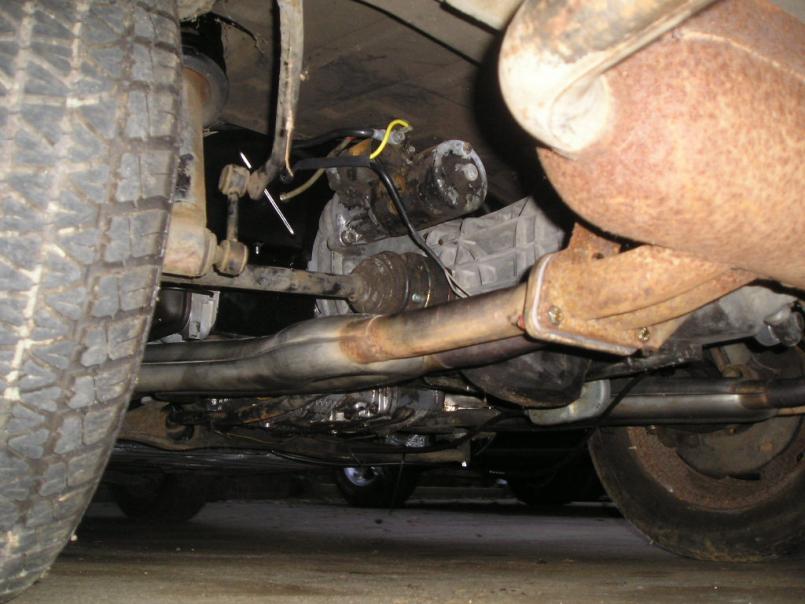
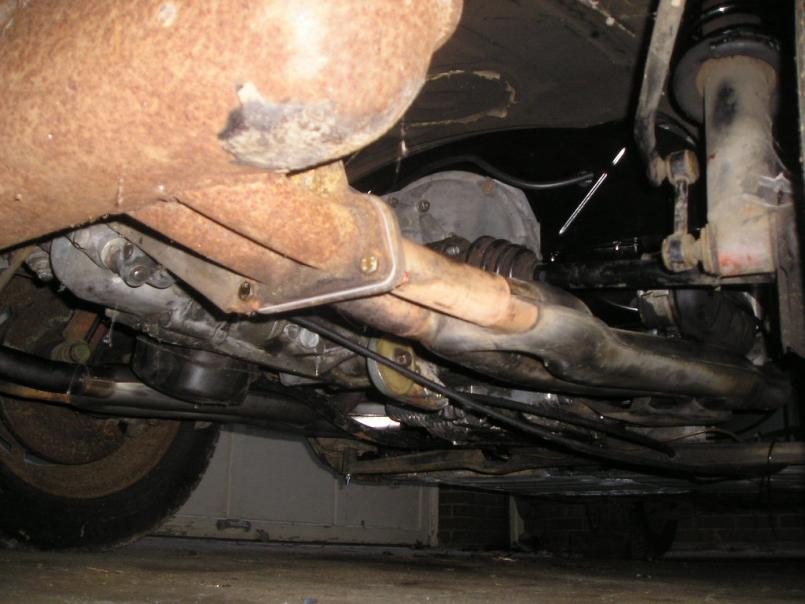
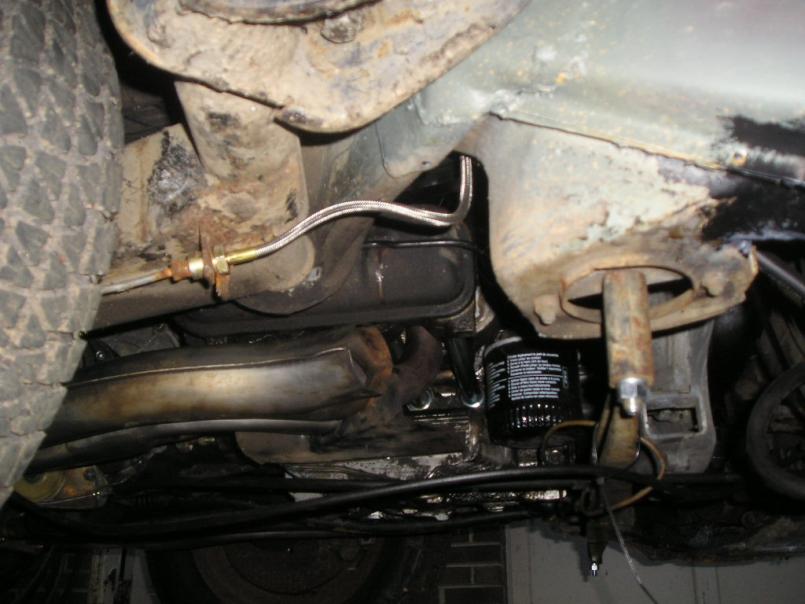
Oh and by the way, I got the engine in too! (IMG:style_emoticons/default/smilie_pokal.gif) The engine was ready to go so I just went ahead and did it. I actually got more done than I expected. I was able to bolt the engine in place, install the exhaust system, bolt up the cv joints, connect the clutch, accelerator, and speedo cables and connect the engine harness up. I think I finished connecting things up from underneath so now I just have to bolt the computer up and make a few more connections up top before she will be ready to go. 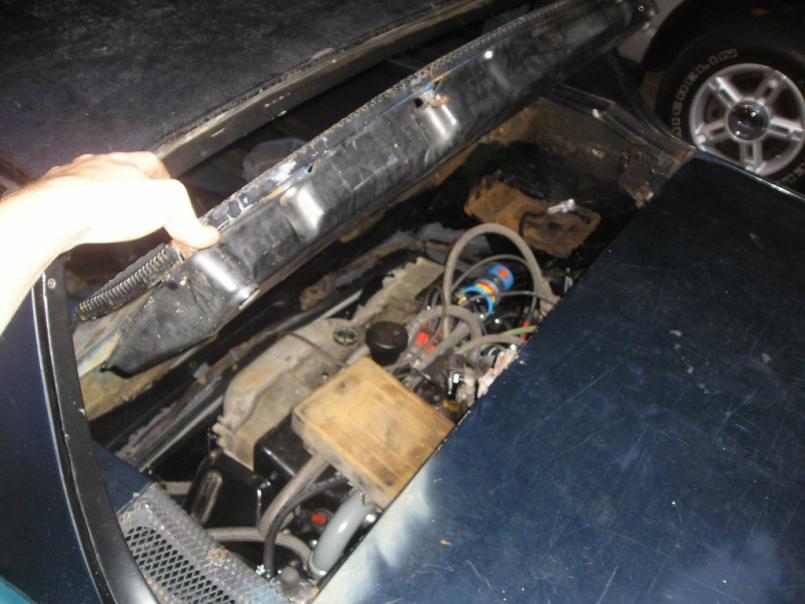 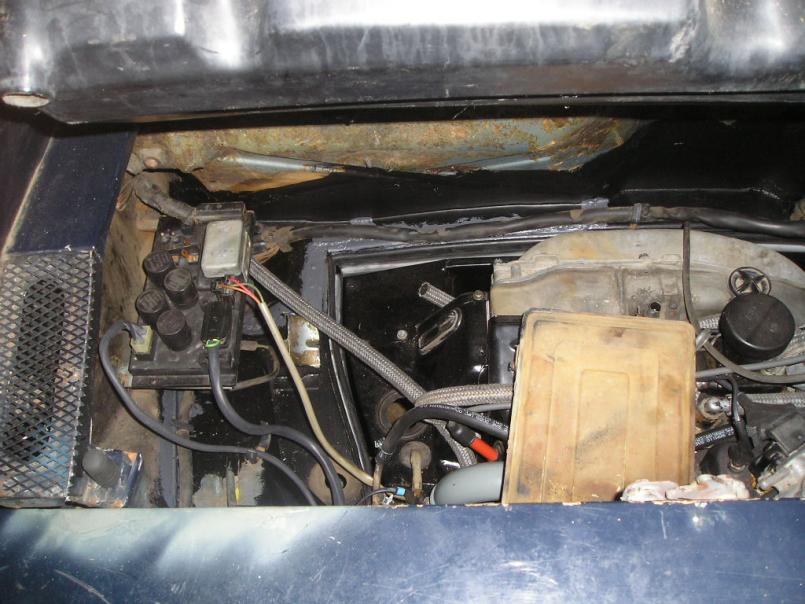 |
| dlee6204 |
 Sep 8 2009, 04:40 PM Sep 8 2009, 04:40 PM
Post
#53
|
|
Howdy     Group: Members Posts: 2,162 Joined: 30-April 06 From: Burnsville, NC Member No.: 5,956 |
Here are a few more shots of the engine. You can see my SS heat exchangers that I had for the car. The car came to me with an old rusty bursch muffler so I replaced that with an original old rusty 2.0L muffler (which will get painted sometime). I also used an exhaust hardware kit that I got from AA to install everything. And before installing the engine I regreased the CV joints.
   |
| dlee6204 |
 Sep 8 2009, 04:52 PM Sep 8 2009, 04:52 PM
Post
#54
|
|
Howdy     Group: Members Posts: 2,162 Joined: 30-April 06 From: Burnsville, NC Member No.: 5,956 |
|
| dlee6204 |
 Sep 8 2009, 05:14 PM Sep 8 2009, 05:14 PM
Post
#55
|
|
Howdy     Group: Members Posts: 2,162 Joined: 30-April 06 From: Burnsville, NC Member No.: 5,956 |
That's all for now. The things left on my to-do list are...
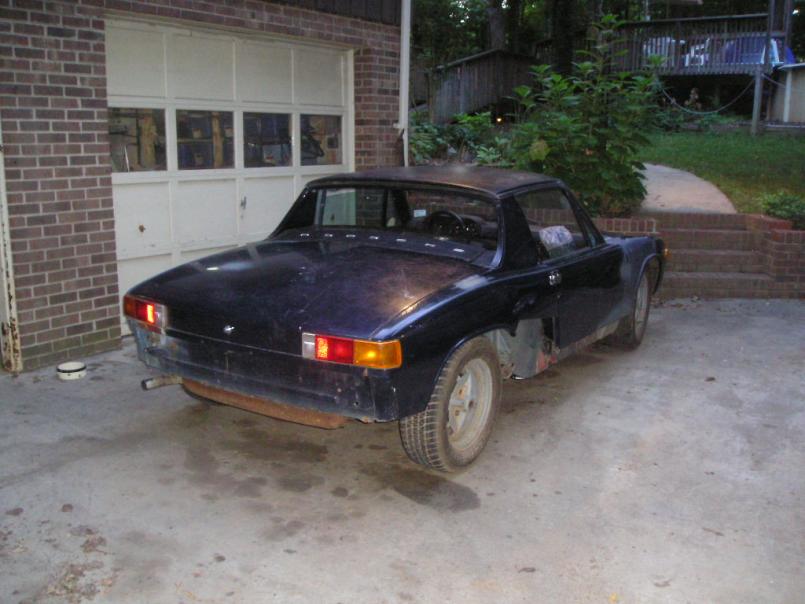
-Finish connecting up the engine -Repair the rust in the front floorpan on the passenger side -Install the fuel tank -Install the emergency brake cables -Install the interior -Bleed the brakes -Finish up the driver's side front fender -Install the headlight -Paint and assemble the bumpers Hopefully most of these things will get done next weekend and I can work on getting the tags and insurance for it. It might not be pretty right now but it is a good feeling knowing the car will be drivable soon (fingers crossed). Here is a picture from the day I brought it home. 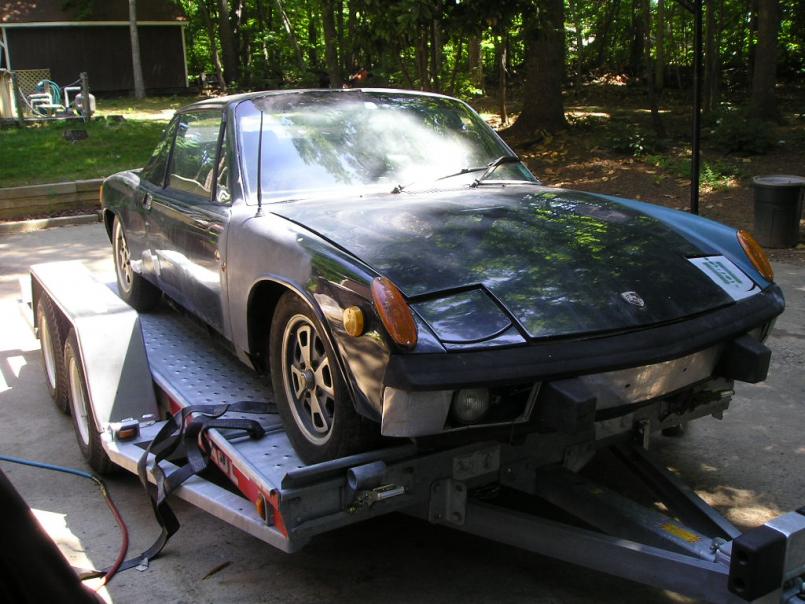 |
| trojanhorsepower |
 Sep 9 2009, 12:17 PM Sep 9 2009, 12:17 PM
Post
#56
|
|
Senior Member    Group: Members Posts: 1,024 Joined: 21-September 03 From: Marion, NC Member No.: 1,179 Region Association: None |
Man, your smoke'n.
That all looks great. I think part of my trouble was I have been using 16 gauge for the longs and it has been hard to work with. You have inspired me to try again! -Peter |
| bigkensteele |
 Sep 9 2009, 10:46 PM Sep 9 2009, 10:46 PM
Post
#57
|
|
Major Member     Group: Members Posts: 2,200 Joined: 30-August 04 From: Cincinnati, OH Member No.: 2,660 Region Association: South East States 
|
Doug, I am trying to figure out if you don't sleep or have no significant others in your life or both. I am amazed at what you acomplish in such short periods of time. With 2 kids and a wife, I am lucky to sandblast two wheels over a long weekend.
Great work! You keep a lot of people motivated. Ken |
| dlee6204 |
 Sep 13 2009, 07:51 PM Sep 13 2009, 07:51 PM
Post
#58
|
|
Howdy     Group: Members Posts: 2,162 Joined: 30-April 06 From: Burnsville, NC Member No.: 5,956 |
Doug, I am trying to figure out if you don't sleep or have no significant others in your life or both. I am amazed at what you acomplish in such short periods of time. With 2 kids and a wife, I am lucky to sandblast two wheels over a long weekend. Great work! You keep a lot of people motivated. Ken Thanks Ken. I just try to stay focused as much as possible since time available working on the car is limited. I have also found that making lists really helps. |
| dlee6204 |
 Sep 13 2009, 07:58 PM Sep 13 2009, 07:58 PM
Post
#59
|
|
Howdy     Group: Members Posts: 2,162 Joined: 30-April 06 From: Burnsville, NC Member No.: 5,956 |
|
| dlee6204 |
 Sep 13 2009, 08:03 PM Sep 13 2009, 08:03 PM
Post
#60
|
|
Howdy     Group: Members Posts: 2,162 Joined: 30-April 06 From: Burnsville, NC Member No.: 5,956 |
After I finished with the rust, I worked on the gas tank. The one that was in the car was pretty rusty on the inside and at one point it had even been repaired. I decided to switch it out with another one I had in storage. I painted the tanked and I also cleaned the sender unit before installing it.
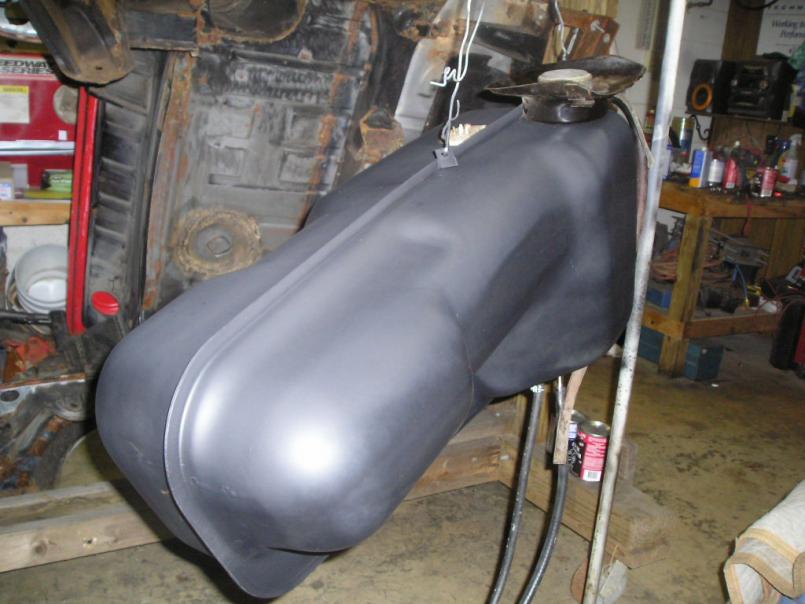 Here it is installed 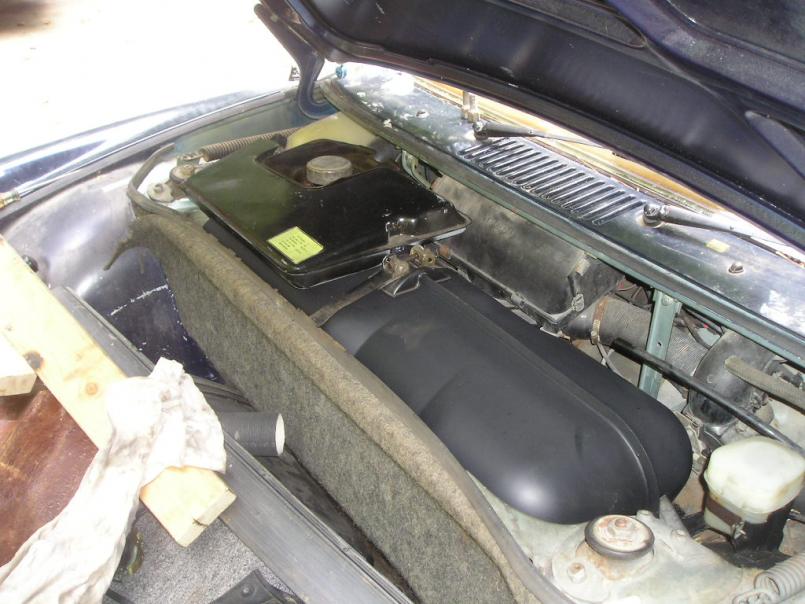 |
  |
2 User(s) are reading this topic (2 Guests and 0 Anonymous Users)
0 Members:

|
Lo-Fi Version | Time is now: 19th January 2026 - 12:37 AM |
Invision Power Board
v9.1.4 © 2026 IPS, Inc.


