raw1298
Jun 28 2010, 03:31 PM
I bought this as a stripped down rolling chassis. The sller put wheels on it to get it on the trailer. That was 4 long years ago. I also had a son at the same time so working on the car has been a second priority. Now the engine is in and the brakes are on, I should be able to get some work done more quickly. I plan on firing this up within the next couple of weeks and taking on a drve by the end of July. I got the 3m adhesive today to get the fenders bonded on and then the fun stuff begins. Hope to get it completed in time for next years West Coast Ramble. Thanks to the support and motivation of the 914World.
 Click to view attachment
EdwardBlume
Jun 28 2010, 03:33 PM
markb
Jun 28 2010, 03:34 PM
WooHoo!

raw1298
Jun 28 2010, 03:34 PM
I forgot to add the picture

raw1298
Jun 28 2010, 03:52 PM
Another view. I love the look of the 17" wheels.
markb
Jun 28 2010, 03:54 PM
Wow, you have a harlequin car.
wallys914
Jun 28 2010, 03:56 PM
Glad the adapters worked for ya! have fun

raw1298
Jun 28 2010, 03:59 PM
I couldn't find all the parts in the right color.
It wasn't too long ago that Conedodger set me up with the blue hood. The original color is on the longs. I am not sure what it will end up as, but my 4 year old(in the avatar) wants to paint it yellow.
BigDBass
Jun 28 2010, 04:01 PM
Very unique color scheme.

Now keep goin'!
ConeDodger
Jun 28 2010, 04:02 PM
I thought the decklid I gave you was Signal Orange or Phoenix Red???
Glad to hear it's coming along!
raw1298
Jun 28 2010, 05:03 PM
Just for the record, 17" wheels do fit with the AA wheel adapters. They are 17x7.5 up front and 17x9 in the rear with 205/40 and 225/45 tires. There is only about 7mm of clearance on the inside of both. First drive will tell for sure if they work.
FourBlades
Jun 28 2010, 05:10 PM
That will be a killer looking car whatever color you paint it.
Keep posting pictures and progress.
John
raw1298
Jun 28 2010, 07:34 PM
I am leaning toward a color I saw on a scion. It is a blueish gray color. It is kinda a pastel color. If I see another one I,ll post a pic to see what ya'll think.
Jerry
Jun 28 2010, 10:56 PM
..Are you going to take any photos of how you are putting the glass fenders on and stuff ?? Please do!!
raw1298
Jun 29 2010, 03:21 PM
Yes I will be taking pictures of the flares as they go on. I will be using the 3M 8115 panel bond adhesive and filling the gaps with body filler with the fiberglass strand in it. Then I will put on a smooth coat of regular filler to finish. I havent done any body work since 79 so this should be fun.
raw1298
Jul 7 2010, 10:01 PM
I was looking at an old set of axles I have and I noticed the papergasket in the cv joint to hub. Where do you get these? Also, the throttle cable I got on ebay 3years ago separated in the middle at the steel peice that attaches to the firewall tube. Is there a fix or do I buy a new one?

I thought about using shrink tubing to hold it in place, but if the throttle sticks I am in trouble.
bandjoey
Jul 7 2010, 10:42 PM
Careful. Yellow is a very slow color for 914's
Looks like it's a hot car though.
Signal Orange or Tangerine. 
charliew
Jul 8 2010, 03:28 PM
Dang it's amazing how many different 17 wheels sizes there are for boxters. My boxter wheels were sold to me by a dealer as winter wheels. They are 7x17 et 55 with 205-50-17 and 8.5x17 et50 with 255-40-17. what thickness spacers did you use? what width are the flares?
scotty b
Jul 8 2010, 04:52 PM
Maybe you should dare to be different
I know that Scion color you talk about very well. I really like it. Reminds me a lot of the splitty panel bus's
scotty b
Jul 8 2010, 04:58 PM

The more I think about it that blue would look pretty damn good on your car

Someone needs to photoshop that for you
raw1298
Jul 8 2010, 05:21 PM
Yes Scotty! That is the color!

You would not happen to know the #'s for that would ya? It would be cool to photo shop that to see what it could look like.
Lennies914
Jul 8 2010, 07:28 PM
I agree, that color would look sharp on your car.
Keep us up to date!
scotty b
Jul 9 2010, 03:03 PM
QUOTE(raw1298 @ Jul 8 2010, 03:21 PM)

Yes Scotty! That is the color!
You would not happen to know the #'s for that would ya? It would be cool to photo shop that to see what it could look like.
Not off hand, but a quick trip to the paint supplier ( or Scion dealer ) could tell you. They have chip books broken down by manufacturer and by year for paint colors. I'll check and see if I have any books new enough for Scions to be in.
FWIW try p.m. to Todd Enlund and kiss his ass a little. Offer him some cookies, beef

and beer

. He might do that photoshop for ya

raw1298
Jul 11 2010, 05:42 PM
wooohooo!!!! After some help finding a thread from Andy the car is running!!
Now we can start on the shift linkage. I still need to fine tune and adjust the carbs, But it is real close to where it should be. Starts on the first try every time! My wife was even amazed.

raw1298
Jul 12 2010, 06:10 AM
QUOTE(charliew @ Jul 8 2010, 02:28 PM)
Dang it's amazing how many different 17 wheels sizes there are for boxters. My boxter wheels were sold to me by a dealer as winter wheels. They are 7x17 et 55 with 205-50-17 and 8.5x17 et50 with 255-40-17. what thickness spacers did you use? what width are the flares?
These are Italian made( do not say Porsche anywhere) 7.5x17 et? and 9x17 et 47. I am using the AA wheel adapters which are 1" thick. The flares are the ones from QRS Fiberglass in Hemet, Ca.. They are supposed to be made for 7" and 9" wheels, but I could easily squeeze 8's up front and 10's in the rear with the right offset.
raw1298
Oct 3 2010, 09:53 AM
Ok, more progress after regress. The mentioned defective throttle cable is being replaced today. The biggest setback was the rear paasenger caliper aftersitting too long seized. I am glad I double checked these things before my first drive around the block. I now have the rear calipers rebuilt and have read the thread on how to adjust them. I was unclear on which direction to turn the adjusters to move the pistons. I know the inner one is the opposite of the outer. To extend the piston out, do I turn the adjuster clock wise or counter clockwise (on the outer piston)??
raw1298
Oct 3 2010, 04:07 PM
I figured it out on my own. The outer you turn counter clockwise and the inner is turned clockwise. seems too simple once you do it. The Haynes manuel did not specify turning direction either.?.
nsr-jamie
Oct 3 2010, 08:45 PM
Looking good, that would be nice to see the car done in the same as the picture of the bus.
raw1298
Oct 9 2010, 06:05 PM
After a final check this past week. The car was driven under its own power for the first time in over 11 years. Since there are no lights or seat belts, among many other parts still missing, I only drove it out of the garage and down to the street and back in the garage. I did this several times
. What an awsome feeling! And it feels real smooth. I can't wait to get it ready for the real drive. Now it is on to body work.
raw1298
Dec 13 2010, 09:57 AM
I decided I would get some of the pics up of the progress I have made the past few weeks. I will do a more detailed "how to" later and cover the steps better. Not hard to do if you follow instruction well. Solid as a rock!!! Should be easy to fill gaps. Last pic is after the edges were smoothed out. Next will be the kitty hair filler.
raw1298
Dec 13 2010, 10:03 AM
Couple of different angles. It takes about a tube of adhesive per flare. I left a huge area in front and in rear of opening to bond to. You could use less if you cut down flare more than I did.
raw1298
Dec 13 2010, 11:36 AM
The drivers side before taking off excess glue. Fronts are next!!
raw1298
Dec 13 2010, 06:22 PM
Just a couple more angles. The flares from QRS seem to fit well. It made the final bonding easier by spending many hours getting the fitting correct. I also took everything down to bare metal and then cleaned all parts with a degreaser and wax remover. A thin layer of adhesive to cover bonding area on both surfaces making sure to cover completely. Then used self tapping screws to secure. I let each flare sit a minimum 24 hours before removing screws.
raw1298
Dec 29 2010, 04:43 PM
Since it has been raining I decided to test fit the rear bumper I have. The question I have for those of you with fiberglass bumpers, is this supposed to be notched out to fit the area below the tail lights? It has the notch to fit the side, but the metal has two notches.
raw1298
Dec 29 2010, 05:49 PM
I guess I should say that I will not be bonding this on. I also will be glassing the outer pieces to match the flares. It looks like I need to trim the entire top edge about 3/8" to get a better fit??
raw1298
Feb 9 2011, 11:15 AM
Had some nice weather and a few spare hours so I made a little progress. The kitty hair is great stuff! It applied easily and was easy to sand. The final thickness is about an eighth inch.
charliew
Feb 9 2011, 11:31 AM
I don't use kitty hair for the final skim coat because it is so porous. Rage goes on a lot smoother and doesn't show as much shrinkage over time as the strands in the kittyhair. Shrinkage is your main enemy on fg work. It is good stuff though and is waterproof they say.
raw1298
Feb 9 2011, 11:43 AM
I am using a final coat of a thin putty, cant remember the name, but it is a 3m product. I will post more pics after final coat of the glaze, putty, whatever it is called.
nathansnathan
Feb 9 2011, 11:44 AM
QUOTE(scotty b @ Jul 8 2010, 02:58 PM)
The more I think about it that blue would look pretty damn good on your car
Someone needs to photoshop that for you
That color on the bus is dove blue (hovering over the image, the filename comes up confirming this
). The scion seems a bit more on the green side. It looks more along the lines of Neptune blue, which is more a 70's bay window color than the dove split color. They do look very much the same, Neptune is less saturated and more aqua.
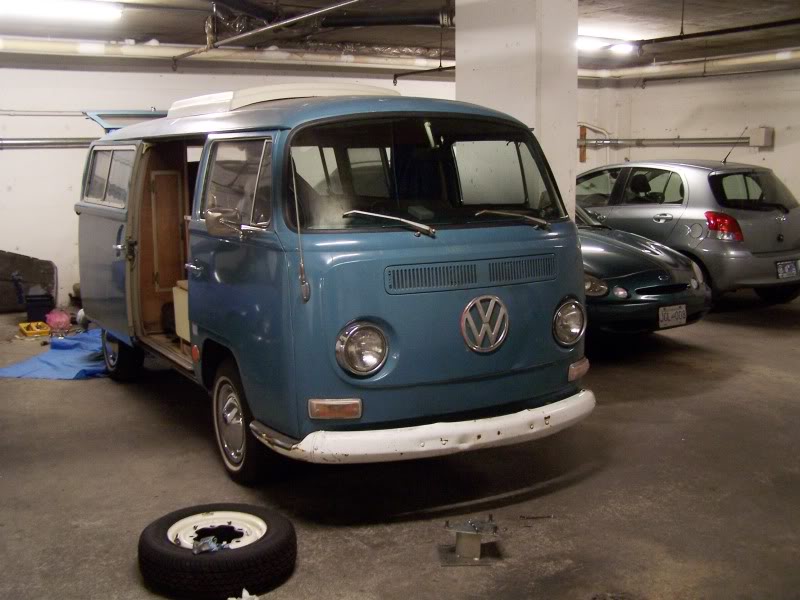
edit, forgot to post the valuable link to the codes
http://www.thesamba.com/vw/archives/info/colorstype2.php
charliew
Feb 9 2011, 11:57 AM
Don't try to use the scratch filler to replace a good regular filler though. Most of the scratch fillers are really thick paint and if the product is put in too deep of a spot it will shrink later.
nsyr
Feb 9 2011, 01:07 PM
make sure you seal up the underside of the fenders so water can't get in there. i had fiberglass gt flares on my car before going to metal. i never sealed up the underside and water made it's way in and caused rust induced seperation.
raw1298
Feb 9 2011, 02:10 PM
QUOTE(charliew @ Feb 9 2011, 09:57 AM)
Don't try to use the scratch filler to replace a good regular filler though. Most of the scratch fillers are really thick paint and if the product is put in too deep of a spot it will shrink later.
I got the stuff from the local paint supply store. They said it was the best to use on top of the kitty hair. The instructions say to go no thicker than 3/16". I wont be even close to that.
raw1298
Apr 7 2011, 01:56 PM
Dodging rain today long enough to bond front fender on.
raw1298
Apr 7 2011, 02:00 PM
One side left.
raw1298
May 3 2011, 05:09 PM
Last fender bonded on!! The car is starting to look like I wanted it to. Unfortunately a piece of metal got past my safety glasses and scratched my cornia
. I will have to wait a few days to get more done.
nsr-jamie
May 4 2011, 08:39 AM
Cool to see some more progress. Are you going to match the contours of the rear 916 bumper to fit the flares? What kind of rocker panels you going to use? Keep it up.
Cheers
raw1298
May 4 2011, 03:16 PM
QUOTE(nsr-jamie @ May 4 2011, 07:39 AM)
Cool to see some more progress. Are you going to match the contours of the rear 916 bumper to fit the flares? What kind of rocker panels you going to use? Keep it up.
Cheers
I will be using the gt rocker panels from QRS that match the flares. I am not sure on the rear bumper. I don't like the lower portion. I will most likely alter it to match the contours of the flares. How are things going over there? With the recent events I havent heard much about Japan. Hope all is well.
raw1298
May 5 2011, 08:57 AM
After smoothing down the edges there is very little filler work to do. My eye is healing well, maybe I can sneak in some work today!
charliew
May 5 2011, 02:55 PM
I'm betting that will need to be filled all the way to the door jamb edge to look right. Also don't let the eye get infected or the eye might cost what you will pay someone else to do the work, be careful and keep it up it looks good.
raw1298
May 5 2011, 06:00 PM
QUOTE(charliew @ May 5 2011, 01:55 PM)
I'm betting that will need to be filled all the way to the door jamb edge to look right. Also don't let the eye get infected or the eye might cost what you will pay someone else to do the work, be careful and keep it up it looks good.
Yeah, after I posted I decided to wait until next week before I break into this again. I do have a slight infection and the antibiotic seems to be working well. I am still sensitive to light so I am not going to take any chances. I did however find time to pick up a stock rear deck lid just in case I decide to go that route.
Got it from a guy named Larry in Rio Linda who is working on a 75 2.0. I told him about the site. He may chime in here some day.
This is a "lo-fi" version of our main content. To view the full version with more information, formatting and images, please
click here.

