Help - Search - Members - Calendar
Full Version: Progress/Build Thread - 1972 2.0
914World.com > The 914 Forums > 914World Garage
texag09
Purchased via the Samba website. These are the add photos.

COST: $2000 plus trade of roughly $1000 dollars of VW Type 1 parts (free to me).

IPB Image

IPB Image

IPB Image

IPB Image

IPB Image
texag09
The car arrives at the house.

IPB Image

IPB Image

IPB Image

IPB Image
texag09
Inital Teardown, a rusty 914? - side markers and antenna removed to be filled in.

IPB Image

IPB Image

IPB Image

IPB Image

IPB Image

IPB Image

IPB Image
Tom_T
welcome.png

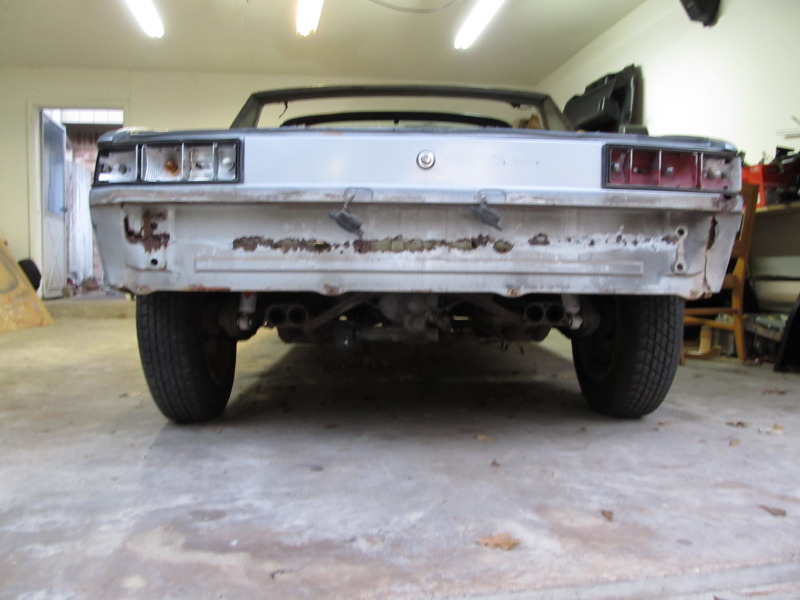
Look on the driver side front door jamb for the Chassis plate, & the number stamped in the bottom box will be the color code, which you can look up in the 914 info section at the top of the page, & at p914.com for sample cars in the color.

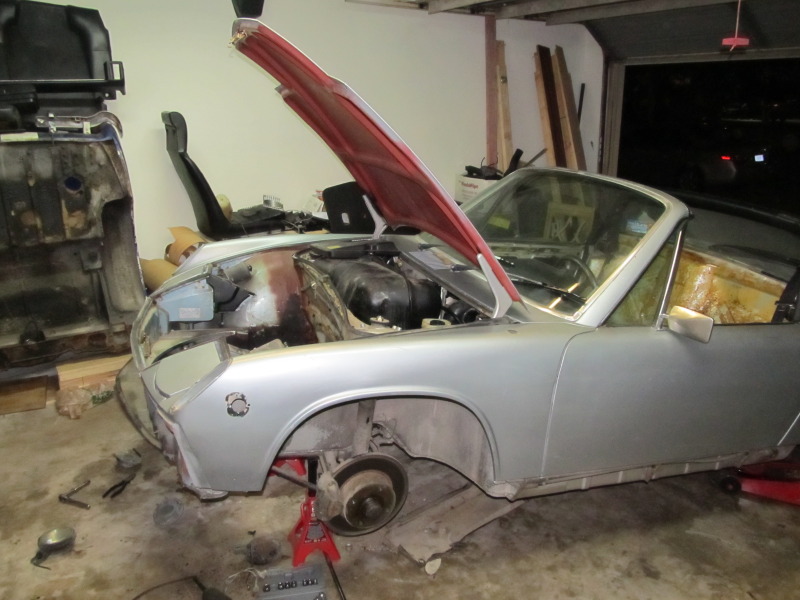
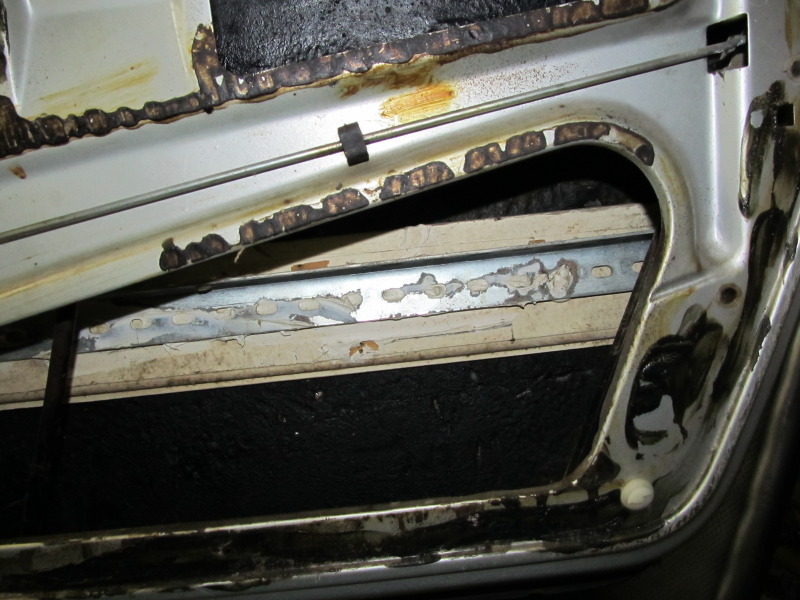
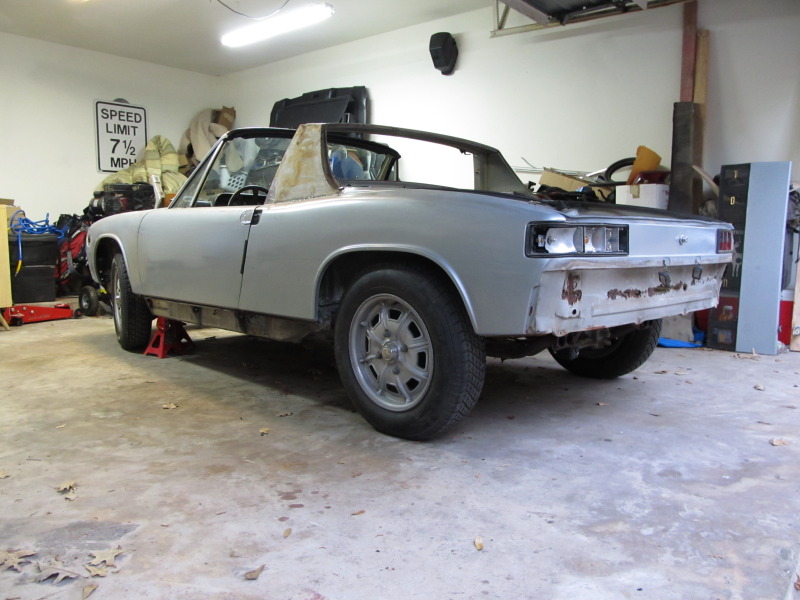
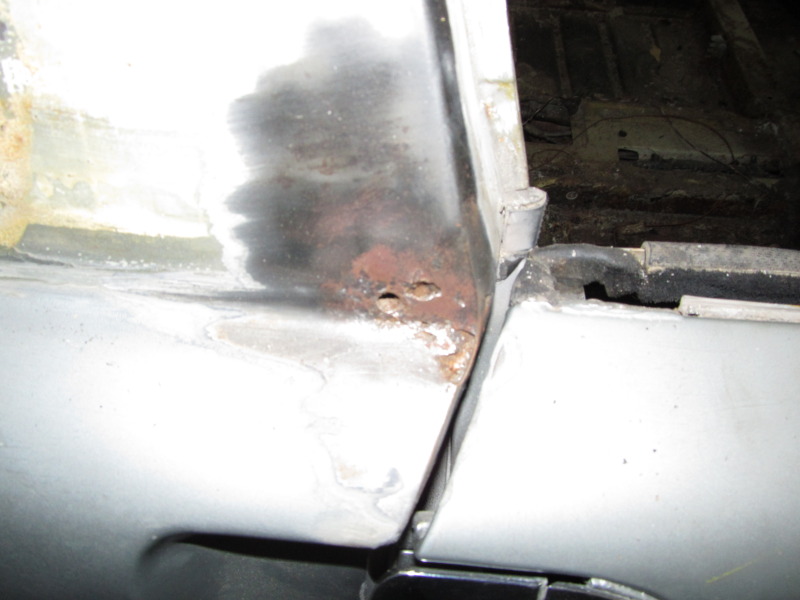
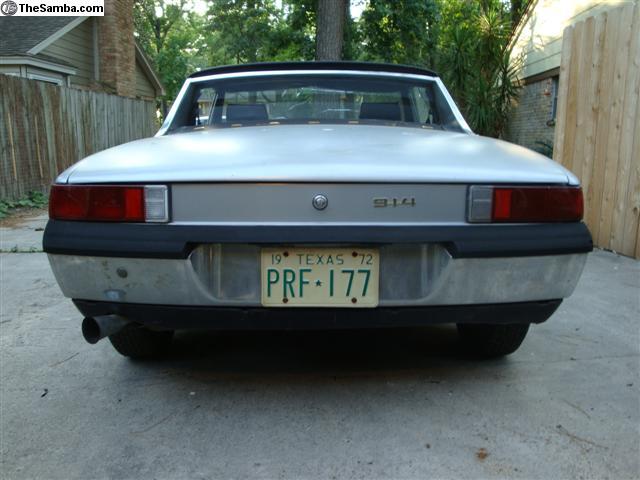
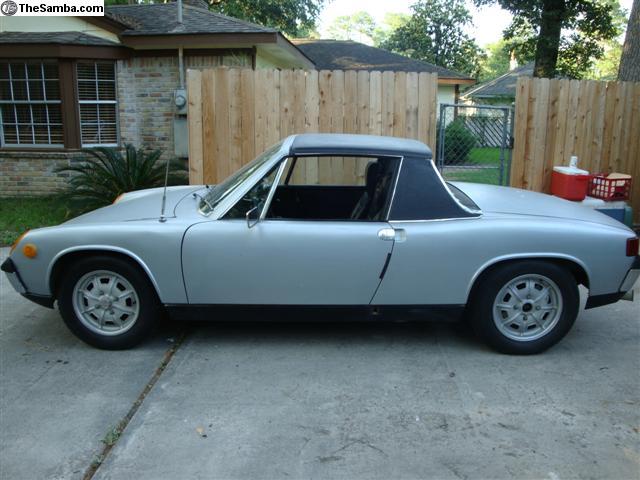
If the repaint after the 73 clip was added to the original 72, then that "silver/blue" is possibly the OE Marathon Blue metallic L96M - if not some other aftermarket similar color close to that look.

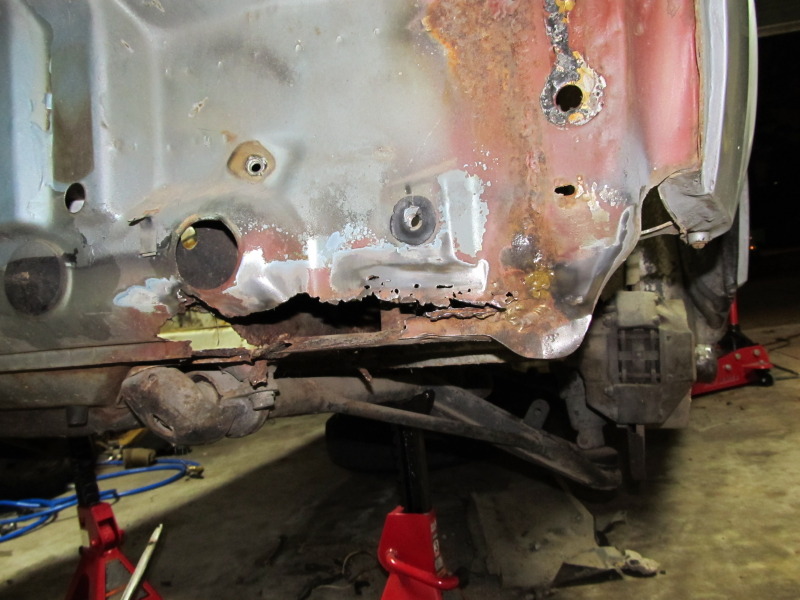
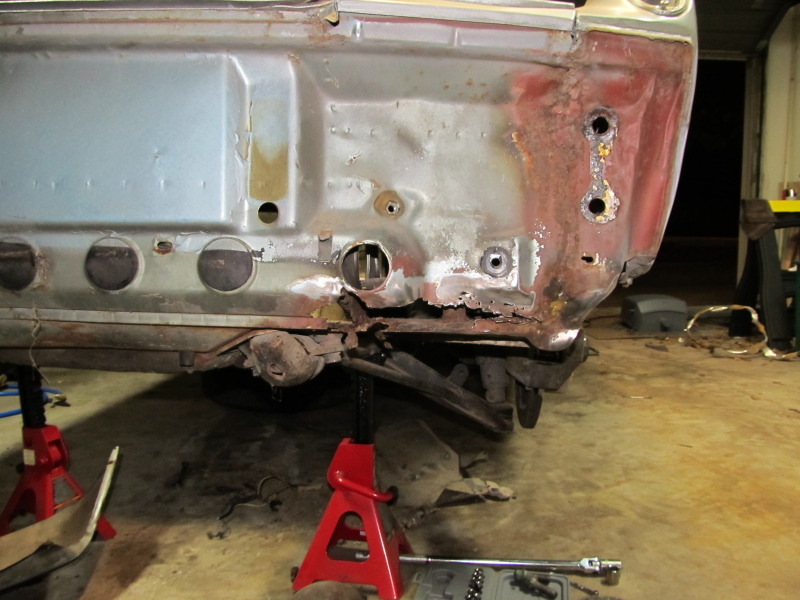
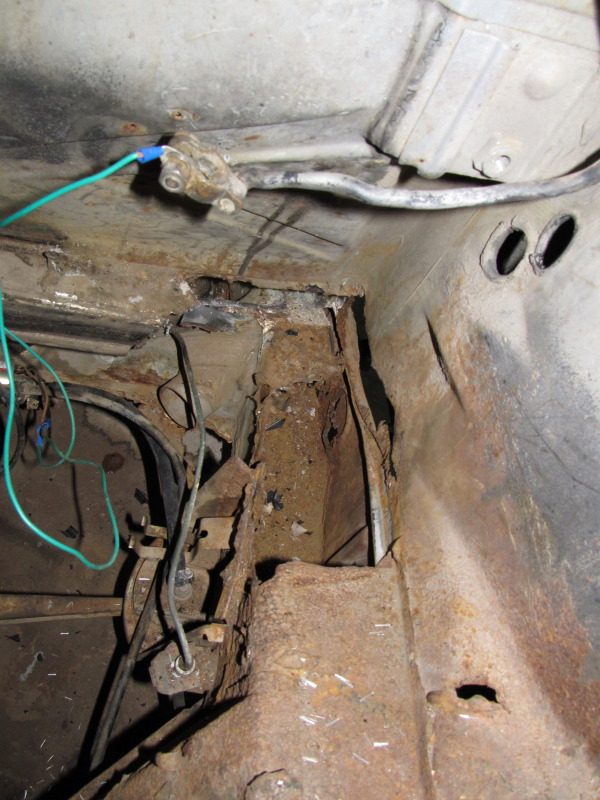
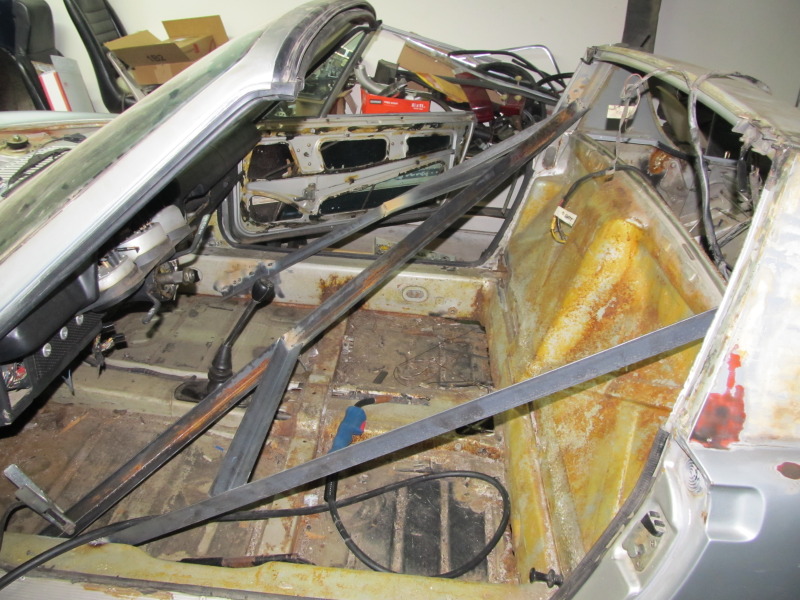
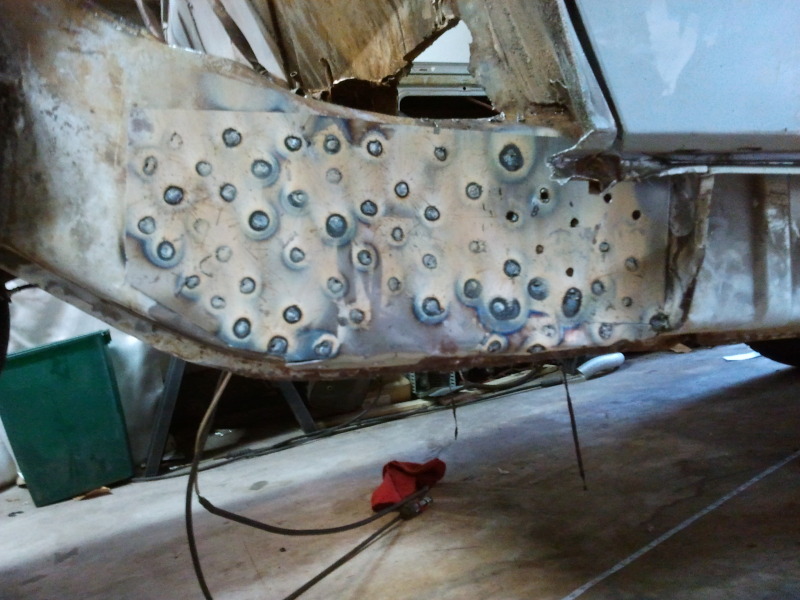
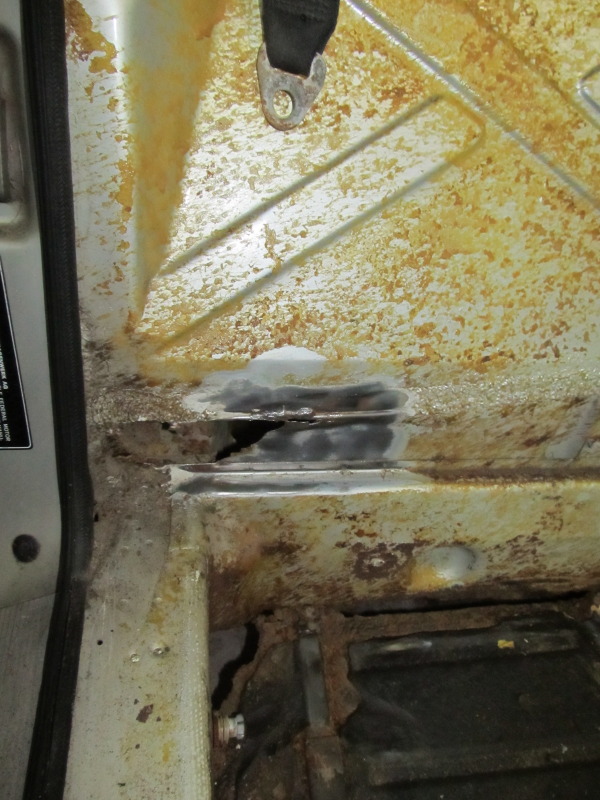
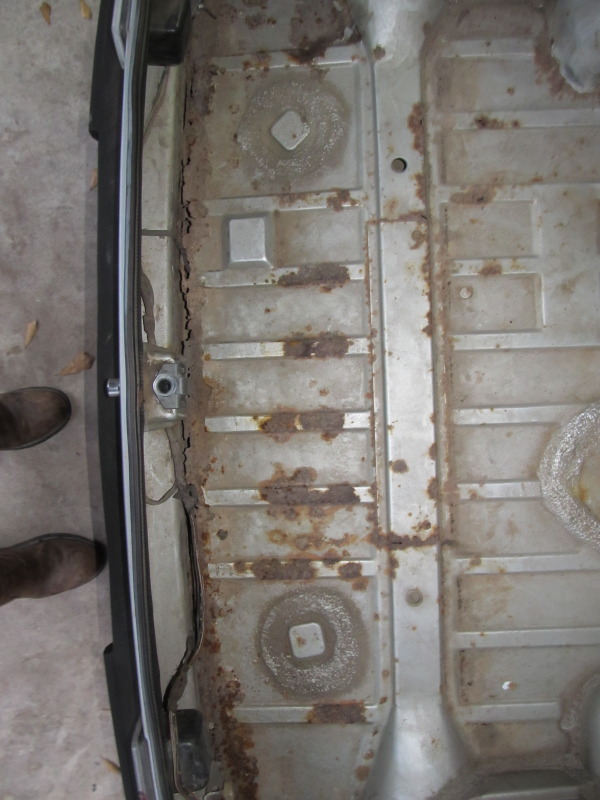
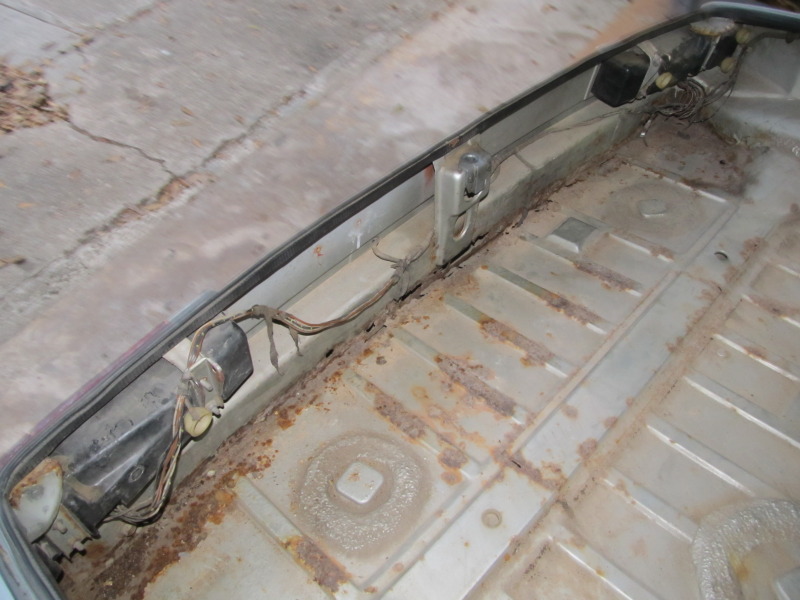
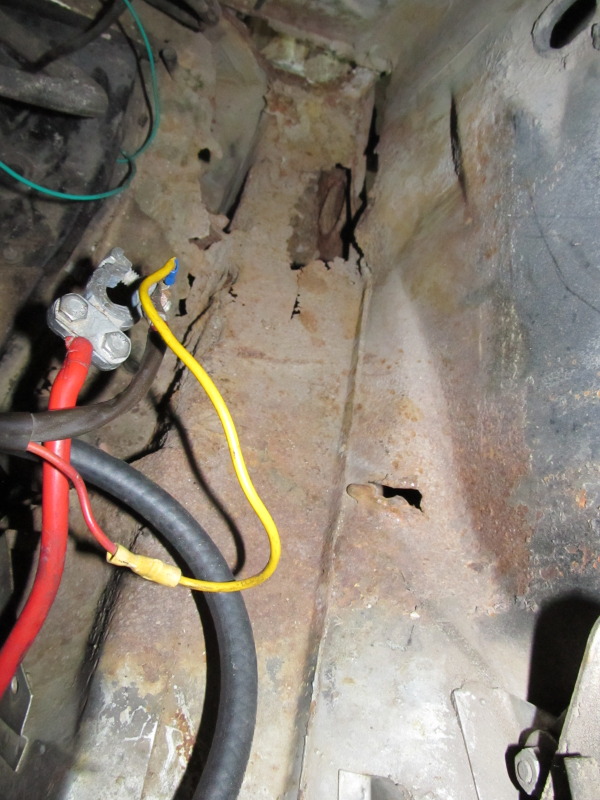
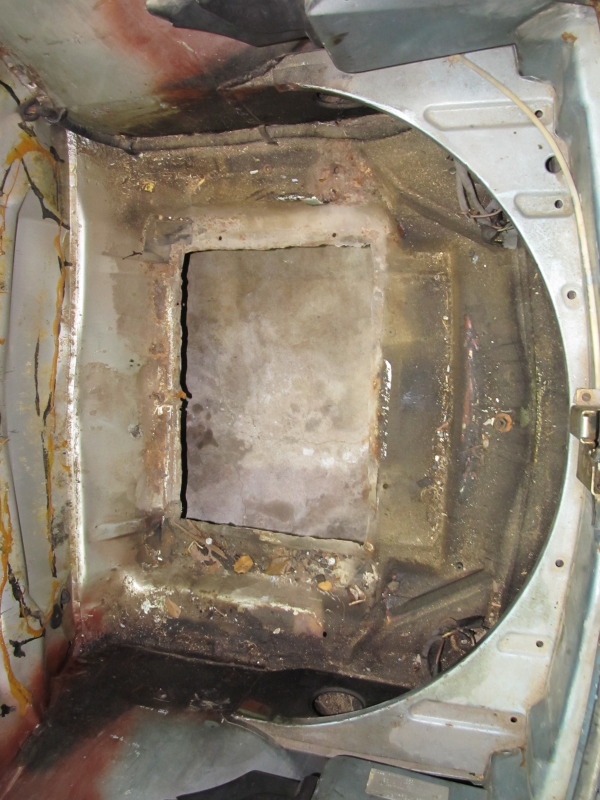
FYI - you can also use the top number on that Karmann plate in the L-F door jamb to decipher which week in 71 or 72 yours was built by using the year stamped on the VIN sticker on the rear door jamb - assuming that plate wasn't changed with the 73 clip. If it was, then use the Chassis no. stamped in the rear floor of the back trunk. Similarly, you can get the 73 VIN for the front clip on the stamping on top of the pass/R wheel well inside the F trunk. Maybe then you could get 2 COAs from PCNA! lol-2.gif

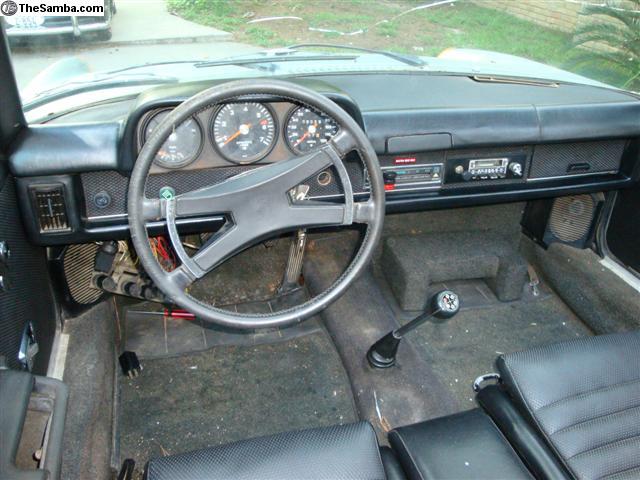
BTW - unless you like the footrest on the pass. side, your 72 has an adjustable pass seat & doesn't need it - so you could sell it off to someone on here with a 70-71 MY 914 or 914-6 that needs one, and make back at least part of your evil-bay fee! biggrin.gif

As a Trojan I won't say "Go Aggies", but Cheers! beerchug.gif
Tom
///////
Tom_T
Whew! ... finally someone with more rust than me to deal with! ... well, maybe more? dry.gif
texag09
Thanks for the kind replies.

Tom T - if you are a football fan one only need to wait till 2014 and 2015. I am a season ticket holder here so not sure what year is here and there but You are welcome at the tailgate when the time comes for some cold beer. beerchug.gif

"The Texas A&M Aggies have announced future football series with the USC Trojans and the Oregon Ducks, both of the PAC-10. The Aggies will play USC in 2015 and 2016 and Oregon in 2018 and 2019." - Fox Sports


Dot these look like new floor pans, fire wall and frame rails? welder.gif 
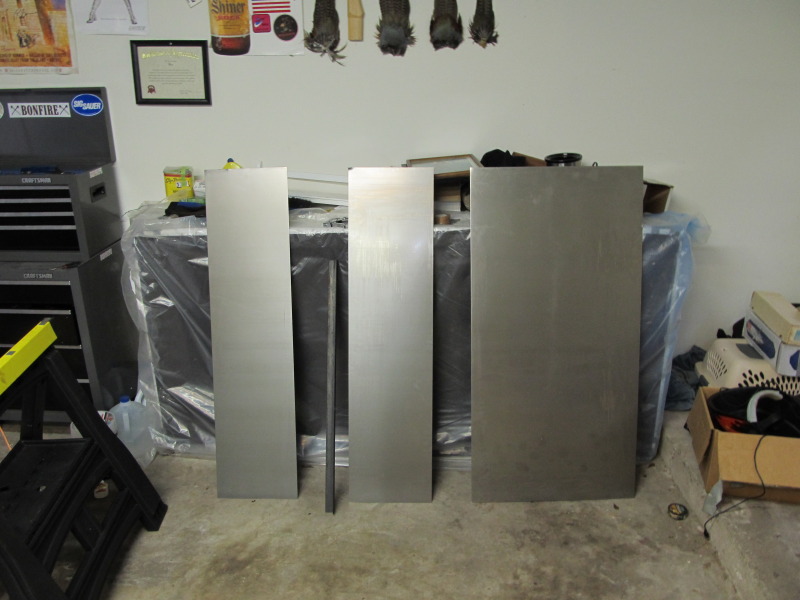
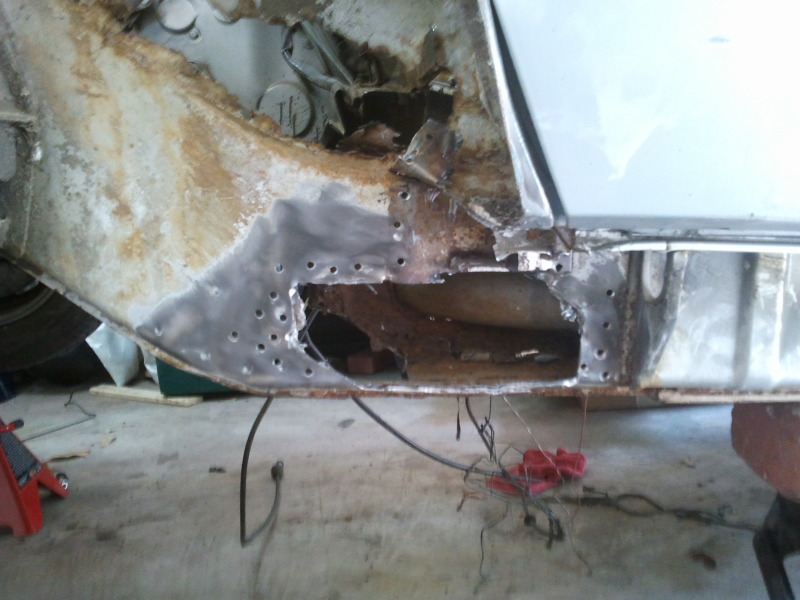
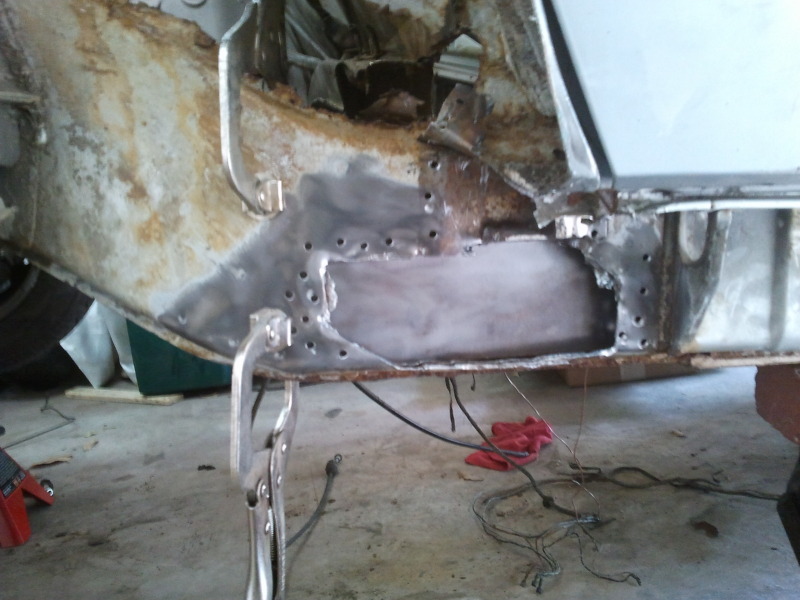
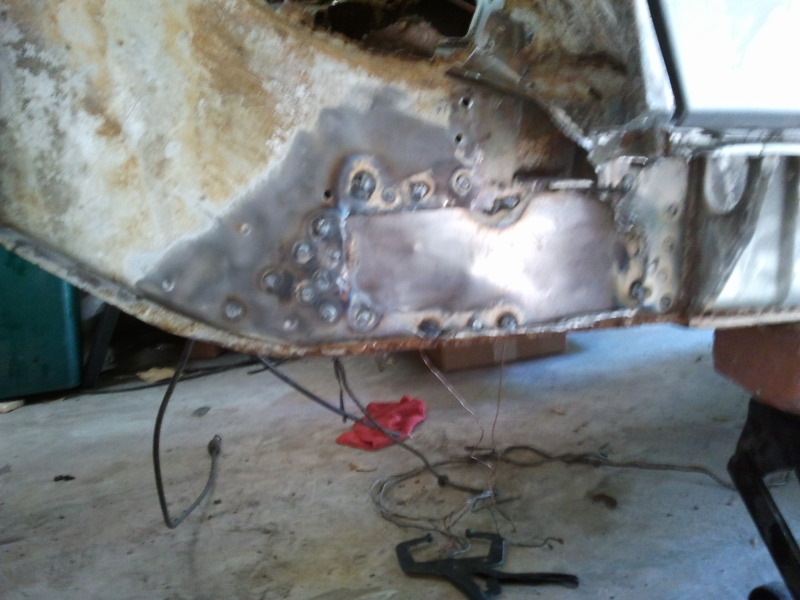
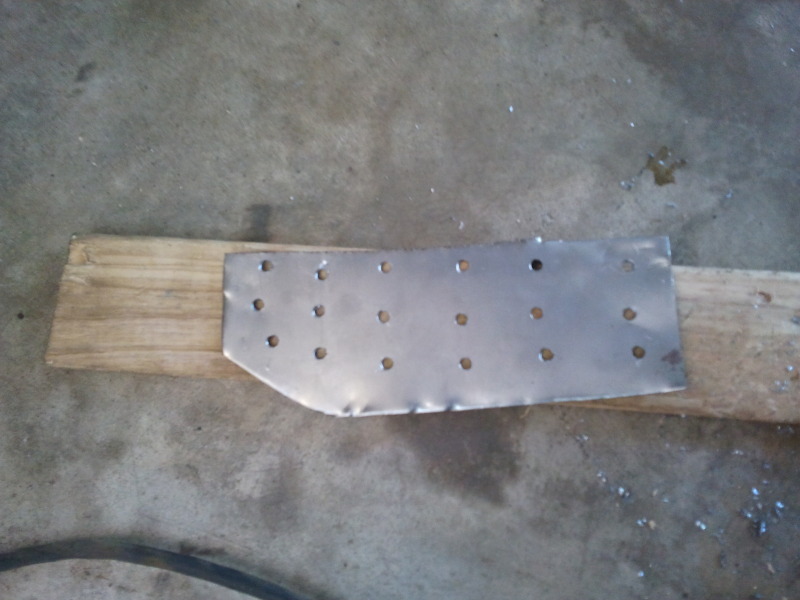
They should in a few days barring how much of my real job I have to do first. Work really gets in the way of the hobby.

COST: $72.84 Total so far: $2072.84

IPB Image
texag09
Pulled the front end apart today. Guess what found More Rust!!!

IPB Image

IPB Image

IPB Image


confused24.gif

Also pulled the door panels and now I have a question for the Restorers and Porsche History Buff.


What size baseboard is standard in the passenger side door?


IPB Image

IPB Image

IPB Image
pete000
Don't feel bad I think 914's rolled out of the factory rusting... sawzall-smiley.gif
Krieger
Have you figured out how your going to ween your antenna off Viagra?
texag09
Yes the antena will disapear and be replaced with a mr gasket invisible antenna.
texag09
Made some more progress over the last few days. Ground down on some of the rust areas. Pulled the gas tank, removed all the blowers under the dash. Removed all the engine tin, intakes, and carbs for painting.

IPB Image
IPB Image
IPB Image
IPB Image
IPB Image
IPB Image
IPB Image
IPB Image
IPB Image
cary
I thought I was taking on a rustbucket .....................
texag09
Fixed the door gaps heated up the longs, and the welded the car the cross brace to begin cutting out the rust and fixing the hell hole. Hopefully the door gaps stay when i cut out

Might have got a little crazy with welder but its been a while. welder.gif

Cost: Angle Iron $32 To date: $2104.84

IPB Image
IPB Image
IPB Image
IPB Image
DrifterJay
I don't normally comment on people's build threads....but....please remove your motor! You will thank yourself in the end when you discover how easy it is to reinstall all your tin and clean everything up. Also, I couldn't imagine repairing a hell hole without being able to sit-down in the engine bay.

-Jared

beer.gif
texag09
I plan on removing it. I did not want to remove it prior to bracing the car, because so much of the long is missing, the motor bar provides some support to keep the car from walking in on its self. Also I dont have my cv joint tool yet and dont want to strip them bad boys out.
FourBlades

Looks like you are doing a great job. piratenanner.gif

That will be a nice car.

John
Andyrew
Get some gas for your welder. NO reason to be welding 18ga or thinner metal with flux core...

You'll thank me.

(Unless thats a harbor freight welder, then you cant add gas to it..)
texag09
QUOTE(Andyrew @ Mar 29 2011, 10:25 AM) *

Get some gas for your welder. NO reason to be welding 18ga or thinner metal with flux core...

You'll thank me.

(Unless thats a harbor freight welder, then you cant add gas to it..)


Its a Lincoln Electric I have regulators but no gas yet.
texag09
More progress, began cutting on the fender around the hole for the side marker to patch it and found bondo. A lot of bondo. In fact I beieve it was almost all bondo, the fender metal had nothing resembling the orginal shape left to it.

IPB Image

IPB Image

IPB Image

IPB Image

IPB Image
texag09
Thanks to a donation from 914sixer I have a fairly clean front clip to patch it up.

IPB Image

IPB Image

IPB Image

IPB Image
texag09
Got it weleded on, not bad for my first body work, so filler and lots of grinding and sanding are in the works.

Cost: $FREEEE! (thanks to 914sixer) So Far: $2104.84

IPB Image

IPB Image

IPB Image
texag09
Also got the antenna hole welded up and the back half of the floor removed, ready for the RD replacement.

IPB Image

IPB Image
Krieger
Nice work!
sawtooth
Great job, keep it up! Fixing all those problem areas will be so rewarding when it's finished. smilie_pokal.gif
texag09
Well more updates, my CV Joint tool arrived so I have now pulled the motor and trans. Yay, I can no longer fire it up to move it arround however, but now i can really get to the hell hole.
IPB Image

IPB Image
pktzygt
You weld better with flux wire that I ever did.

Here's where I got my gas bottle if you're interested. It was a heck of alot cheaper the Airgas.
H#H03" target="_blank">Welding supply
texag09
Need to repair this area of the bondo queen, anyone know of a sorce for a cheap patch panel?


IPB Image
texag09
Figured for people who are looking at starting a project or perspective 914 owners it might be nice to list the cost of the project as it takes place.

I have added the bold lines to reflect the price of the repairs/upgrades as they are completed.

Here is a list of the total spent to date (excluding the car).

As you can see I have spent $1202.73 in parts and $2000+trade for the car.

Should have more progress later in the week, as well as some more cost.

IPB Image
texag09
Got the lower headlight area behind the bumper welded in tonight.

Cost: Free Total to date: $2104.84

IPB Image

IPB Image

IPB Image

IPB Image

IPB Image
texag09
Well I dug in to hell today. Got one side cut and patched (the easy side).

First, the Hell - Hole lots of Hole there not much left. Holes drilled to allow for spot welding in the patch.

IPB Image

IPB Image
texag09
First (back up layer) placed inside the long to be plugged welded through the first holes

IPB Image

IPB Image


Once that was in I cut and drilled the middle pannel.

IPB Image

IPB Image

IPB Image
texag09
Once the middle pannel was in, i did weld the seem up to just didnt have a picture of it.

Then the final pannel to tie it in and make it stronger.


IPB Image

texag09
Got the final section of the outer long drilled and welded in, should spread the area and be close to like the stiffening kit.

Lots of holes, lots of spot welds. As you can see it is bent down and welded on the bottom as well.

IPB Image

Almost done spot welding, cant rush it, do not want to heat up the car and have it move.

IPB Image


Removed all the metal on the inside that was infected including a section of the firewall. Will be installing this section of angle iron to act as a form for making the new sides and bottom, should also allow for more strenght, it is cut to extedn 6" inside the long in each direction. Might require some work on the factory motor mount I have on the way, but it is saving me lots of money not having to buy the overpriced patch pannels.

IPB Image

Andyrew
Your quite good with a flux core.


Those patches will be plenty strong (16ga I assume?) But I am not sure of the longevity due to the fact that you didnt do any post prep. AKA you have raw metal under that has been welded, and that is much more prone to rust.
texag09
QUOTE(Andyrew @ May 9 2011, 10:32 AM) *

Your quite good with a flux core.


Those patches will be plenty strong (16ga I assume?) But I am not sure of the longevity due to the fact that you didnt do any post prep. AKA you have raw metal under that has been welded, and that is much more prone to rust.


It is 16ga, and I made the executive decision after doing test with weld through primer and my welding skills, i did not feel I got as much penitration.

If it last 10 years as I am 23 now that should allow me to be in a financal situation to re do it correctly, with proper stampings. For now just trying to get back on the road.

Once all the welding is finished it will get a generous coat of POR-15 Inside and out. This and it being a fairweather car hopefully should prolong it.

Thanks for your comment.
sawtooth
QUOTE(texag09 @ May 9 2011, 09:56 AM) *

Once all the welding is finished it will get a generous coat of POR-15 Inside and out. This and it being a fairweather car hopefully should prolong it.

Thanks for your comment.


Looking great, keep it up it'll be worth it! Consider using Zero-Rust instead of POR15.
texag09
QUOTE(sawtooth @ May 9 2011, 11:11 AM) *

QUOTE(texag09 @ May 9 2011, 09:56 AM) *

Once all the welding is finished it will get a generous coat of POR-15 Inside and out. This and it being a fairweather car hopefully should prolong it.

Thanks for your comment.


Looking great, keep it up it'll be worth it! Consider using Zero-Rust instead of POR15.


I am actually going to use Eastwoods product, anyone have experence with it?
saigon71
QUOTE(texag09 @ May 9 2011, 01:26 PM) *

QUOTE(sawtooth @ May 9 2011, 11:11 AM) *

QUOTE(texag09 @ May 9 2011, 09:56 AM) *

Once all the welding is finished it will get a generous coat of POR-15 Inside and out. This and it being a fairweather car hopefully should prolong it.

Thanks for your comment.


Looking great, keep it up it'll be worth it! Consider using Zero-Rust instead of POR15.


I am actually going to use Eastwoods product, anyone have experence with it?


Good work on this...especially considering your budget! I am using mostly Eastwood products on my build...but won't know for a few years how they hold up. I do know that I expereinced some "lifting" after applying a topcoat of acrylic enamel over rust converter and rust encapsulator...in defense of the Eastwood products, I put some really thick coats of the stuff on prior to topcoating.

Good luck with your teener!
veltror
Well here is one as bad a s mine ... nearly
porsche_dreamer
Looks good, and good progress. It never seems to amaze me how they always look like a decent car. Until you tear em down. Good luck man, your doing great.
enderw88
QUOTE(texag09 @ May 9 2011, 10:26 AM) *


I am actually going to use Eastwoods product, anyone have experence with it?


Used Eastwood Rust Encapsulator on my SuperStalker frame. I feel I did a very good job prepping the metal but it chipped like crazy after a year or so. I was very disappointed in it. I have never used POR-15 so I don't really have anything to compare it to.
charliew
My son is a aggie me. Class of 04. He will be helping me on my 914 if I ever start. He has a 04 sti and we have lots of suby parts to work with. You are doing pretty good. Everybody needs to learn on something. You will learn where to look on the next one. If you can get it real clean on the inside por 15 will be ok. If it isn't as clean as you need you can use a wax body cavity spray and it will help. The por 15, if it comes loose it will help corrosion more than the wax which will say in place. Measure the door gaps after each big job to see if it changes. Also check for twist as it doesn't look like it is very well supported.

Have you crossed paths with agpete139? he has a original 914-6 from his dad he is sorta working on. He said he moved but he may still be in houston, he just updated his thread recently.

When you use weldthrough primer it helps to clean the holes out to get the arc started.
texag09
QUOTE(charliew @ May 10 2011, 12:19 PM) *

Also check for twist as it doesn't look like it is very well supported.


The tub was a little tweaked prior to the repair. I started buy cutting out the floor board and pulling it back to spec from the firewall forward. Then braced it, its not moving now. From the firewall forward all dimension are correct however when i check for squarness from thes points this is what I get (see picture) Any ideas would be appreciated.

Measured from the center of the inner swing arm bolt to the center of the torsion bar on the front. Car was leveled and then I droped a plumbbob and measure the actual distance not the tangental distance.

Is this big enought to worry about?

IPB Image
charliew
No more than .125 would not be a concern to me, although the difference seems to be from the firewall to the susp hole . Others might dissagree though. I really doubt a new one was better than that. What does it measure from a centerline? To me twist is the hardest to measure.
texag09
QUOTE(charliew @ May 10 2011, 12:54 PM) *

No more than .125 would not be a concern to me, although the difference seems to be from the firewall to the susp hole . Others might dissagree though. I really doubt a new one was better than that. What does it measure from a centerline? To me twist is the hardest to measure.


What would be the optimal way to measure centerline?

The door gaps and floor pan (dims) are correct, however a 6" section of the firewall is missing around the hell hole so I need a good point of measure.
AgPete139
Subscribed. I see you're on the SW side, Sugarland perhaps? I'm on the NW, outside of 610. Oh, and nice Chilifest shirt. biggrin.gif


And +1. 1/16" is not so much to cause concern regarding alignment. There are still variations to these cars that came come from the factory. Door massaging and patient alignment is necessary later though.
texag09
Due to the discovery of more bondo and rust issues on the reat quarters I am thinking I will go with a full fiberglass fender package, possibly a sheridan kit.

If anyone has fenders for sale let me know, or recomendations on the best, I hear sheridan and qrs are great, and you cant beat qrs prices.

Thanks
This is a "lo-fi" version of our main content. To view the full version with more information, formatting and images, please click here.
Invision Power Board © 2001-2024 Invision Power Services, Inc.