914itis
Jun 22 2011, 09:28 PM
Click to view attachmentClick to view attachment 
I will start a resto thread soon.
The flare are staying,
will keep it the original color. ( maybe not, The car is rust free, all the floors were replaced. just ruff body. got it as a roller.
What are you guys using as rims without doing a 5 lug conversion? meaning i need some nice 4 lugs rims that will stand out.
Haudiosolutions
Jun 22 2011, 09:30 PM
looks like a fun project!
campbellcj
Jun 22 2011, 09:59 PM
Congrats!
For wheels, Panaports are one good option for 4-lug. You'd probably want 7's and 8's or 8's and 9's, if they make em that wide.
jonferns
Jun 23 2011, 07:31 AM
Hey Paul, glad I could hook you up with that roller, im sure you'll make her look good again!

nsr-jamie
Jun 23 2011, 07:43 AM
Looks to be like a fun project already off to a good start with flares too....those are steel right?
PanelBilly
Jun 23 2011, 08:27 AM
Post more photos! What'sa the story?
tod914
Jun 23 2011, 08:55 AM
Ditto on the flares like Jamie said. Nice find!
914itis
Jun 23 2011, 09:00 AM
QUOTE(nsr-jamie @ Jun 23 2011, 09:43 AM)

Looks to be like a fun project already off to a good start with flares too....those are steel right?
No they are fiber .
914itis
Jun 23 2011, 09:03 AM
QUOTE(Jon Fernandes @ Jun 23 2011, 09:31 AM)
Hey Paul, glad I could hook you up with that roller, im sure you'll make her look good again!
Thanks again Jon. I started riveted the drivers side flares and applied fiber bondo to the front last night... Looking good
rmital
Jun 23 2011, 09:35 AM
QUOTE(PanelBilly @ Jun 23 2011, 10:27 AM)
Post more photos! What'sa the story?
that teener's been around the tri-state area for a while.
I_Love_Porsche, Aaron was restoring it about 6 or 7 years ago. His hobby's changed from 914s to biking, college and girl friend. He was a great guy to have around. Always helped with wrenching sessions and other acitvites...hated seeing him let the car go.
Sold it to Jon or Pegasus down in Linden NJ...I'm sure the owner is happy to free up the space in his garage!!
and now Paul will finally bring life back to this clean shell.
Aaron had it soda blasted and primed. He might have done all the welding repairs himself. he really had great expectations for autoXing it. He raced his 924...I think that died a slow painful death....
Paul is relentless...I'm sure he'll have it on the road in a couple weeks....

jonferns
Jun 23 2011, 09:59 AM
Paul, what I forgot to mention is that you may want to use a panel adhesive between the flare and the body, then rivet it, then glass it or do whatever bodywork it needs.
914itis
Jun 23 2011, 11:47 AM
QUOTE(Jon Fernandes @ Jun 23 2011, 11:59 AM)
Paul, what I forgot to mention is that you may want to use a panel adhesive between the flare and the body, then rivet it, then glass it or do whatever bodywork it needs.
I didnt and I don't think that II can remove these flares again . They may become unusable if removed. What is my option here.can I try to use something from underneath?
914itis
Jun 24 2011, 10:39 PM
QUOTE(tod914 @ Jun 23 2011, 10:55 AM)
Ditto on the flares like Jamie said. Nice find!
Thanks,
914itis
Jun 24 2011, 10:45 PM
Day 1
Begin to rivet the flares and bond them using fiberglass bondo. I had two of them done.. Pica will follow
Day 2 patched the remaining flares, removed drivers's side door
Day 3 removed winshield and other moldings, sanded the flares and other damadged spots around the body. replaced and sanded rear trunk hood.I will post the pics in the motning.. I am planing to do some small weldings on day 4.
jonferns
Jun 24 2011, 10:53 PM
Moving right along!

914itis
Jun 26 2011, 07:53 PM
Hm! I was doing my homework, search the VIN, found the PO and another search took me the his resto thread. its amazing how much efforts he puts into this car, then gave up. That makes me appreciates it more.,, Good to know that there is some great to know how much quality work he put on that roller.
here is the thread. Have fun
http://www.914world.com/bbs2/index.php?sho...c=13319&hl=
914itis
Jul 6 2011, 01:58 AM
Click to view attachmentClick to view attachmentClick to view attachmentThe project is moving alone right, the passenger side is 90% done and primed. looking foward on completing the driver's side so I can move to the hood and trunk. did I mention tat i cracked the winshield on the part car? now i need a new winshield. can be pretty hard to find one onn the east coast.
jonferns
Jul 6 2011, 08:56 AM
Looking good Paul! Keep the pics coming, can't wait to see it when its finished. Wish I would've been able to build it myself.
914itis
Jul 8 2011, 10:25 PM
I didn't have a chance to do anything today with the rain all day, and work. I did a bit of work yesterday, on the other side, sanded, primed, etc....
Click to view attachmentClick to view attachmentThis is my first time doing this with no guidance. I hope I am doing this right.
both sides are almost complete, just gotta go over them with glass, then I will attact the rear/ front hood and engine lid.
I got my boxter 16 rims today and they look great, .. looking for a 911 front suspension now, or I will be using a 4 to 5 lug adapter.
rick 918-S
Jul 9 2011, 12:51 AM
Keep up the good work!
![popcorn[1].gif](http://www.914world.com/bbs2/style_emoticons/default/popcorn[1].gif)
SirAndy
Jul 9 2011, 04:29 PM
QUOTE(ppetion @ Jun 22 2011, 08:28 PM)
What are you guys using as rims without doing a 5 lug conversion?
Centerline used to have 4-lug rims that were wider than stock and the perfect offset for flared cars!
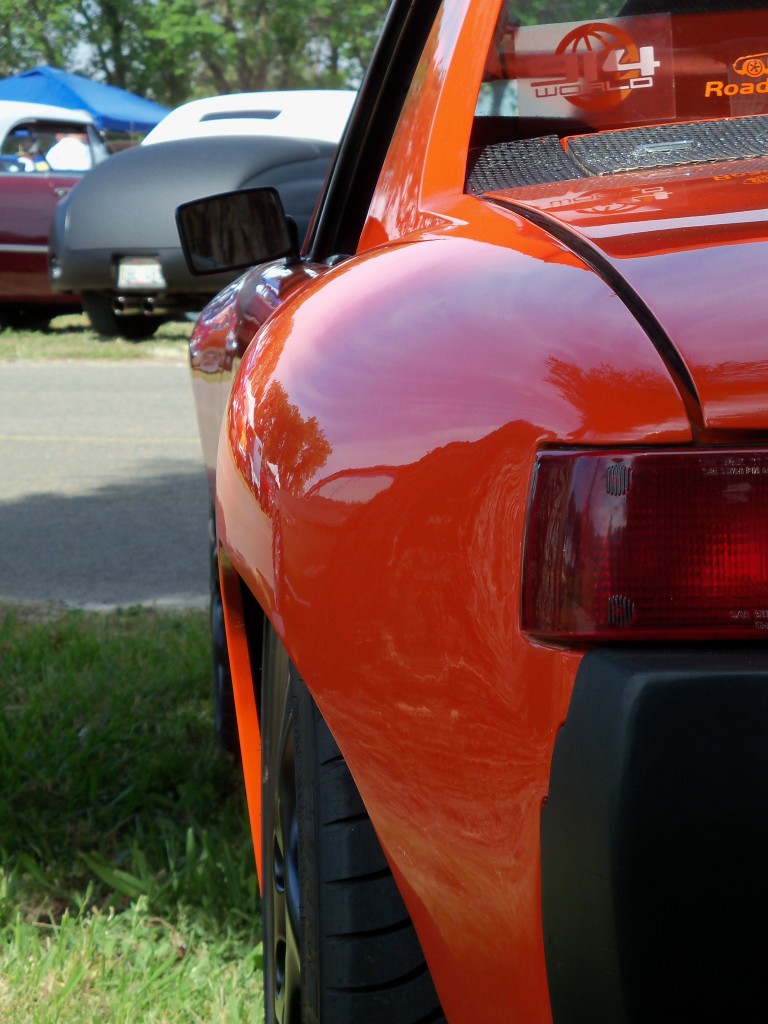
Here's my car when i bought it with 7x15 running 225 tires.
Eric_Shea
Jul 9 2011, 05:09 PM
Look at you go! Dig in!
914itis
Jul 10 2011, 11:07 PM
Click to view attachmentClick to view attachmentClick to view attachmentThis weekend I was able to get the drivers side ready for a send coat of primer, hopefuly that will be the last. I also started on the front and rear hood. Sometines this week I will prime the ehole car inside and out.
Eric_Shea
Jul 10 2011, 11:09 PM
Slow down... what... are ya going for the Dean Mikel Award?
914itis
Jul 10 2011, 11:16 PM
I also noticed the door gap on the pasenger side pillar is different than the driver's, However they are both nicely lined up by the fender area. the doors came from my donnor/ parts car and it seems like they came off 2 different cars, the inside paint didnt match. is it possible that they were from another year and they are slightly different?
 Click to view attachmentClick to view attachment
914itis
Jul 10 2011, 11:18 PM
QUOTE(Eric_Shea @ Jul 11 2011, 01:09 AM)
Slow down... what... are ya going for the Dean Mikel Award?
just gotta get moving while I have the time..I may not have too much play time in the coming weeks. just taking advantage of my free time. + I want that award
jimkelly
Jul 11 2011, 05:55 AM
that gap - especially on the pass side - looks suspect.
does it get tigher with you standing in car and trying to open door with you standing inside car?
i can't imagine doors can have a 1/2 inch range of difference?
previous owner may have already fixed rust but may have tweaked the car while welding in new metal?
any way - nice progress.
jim
914itis
Jul 11 2011, 06:51 AM
QUOTE(jimkelly @ Jul 11 2011, 07:55 AM)
that gap - especially on the pass side - looks suspect.
does it get tigher with you standing in car and trying to open door with you standing inside car? Will post pics of the inside later.
i can't imagine doors can have a 1/2 inch range of difference?
previous owner may have already fixed rust but may have tweaked the car while welding in new metal?
any way - nice progress.
jim
The gap is actually on the drivers side. And no it does not get smaller as I stand I. The car. The PO did a great job fixing the rust. He doses all floors trays and installed the egmankit the work looks pretty nice and the whole car is strong. But I guest he screwed up on this one. The doors closes fine. I guest I will have go close Mh eyes and live with it.
914itis
Jul 11 2011, 03:47 PM
Question for the Pros. Do I have to use a primer sealer, if not, what are the pros and cons of using one?
Andyrew
Jul 11 2011, 03:58 PM
Are you going to be laying any primer after this before paint? Are you going to be sanding this down to see where your at body wise, then fixing any imperfections and laying another coat of primer after?
If your using bondo at this stage, you should go with a high fill primer, you dont have to use a sealer, however there are many that do both functions (read the label, if they dont say "sealer" they are not a sealing primer). Then later when the car is block sanded and all imperfections fixed, you can spray a primer sealer.
A high fill primer(typically says "high fill 2k") when sprayed at full strength is almost like spraying on a thin layer of bondo. And typically a non sealing primer will be cheaper than a sealing primer.
Sidenote: Your primer sealer, or the primer prior to spraying paint, should be as close (on a greyscale) to the paint color as you can be (aka if you are spraying a bright yellow, it should be a white primer, if you are spraying a black, it should be a black primer)
914itis
Jul 11 2011, 04:12 PM
QUOTE(Andyrew @ Jul 11 2011, 05:58 PM)
Are you going to be laying any primer after this before paint? Are you going to be sanding this down to see where your at body wise, then fixing any imperfections and laying another coat of primer after?
If your using bondo at this stage, you should go with a high fill primer, you dont have to use a sealer, however there are many that do both functions (read the label, if they dont say "sealer" they are not a sealing primer). Then later when the car is block sanded and all imperfections fixed, you can spray a primer sealer.
A high fill primer(typically says "high fill 2k") when sprayed at full strength is almost like spraying on a thin layer of bondo. And typically a non sealing primer will be cheaper than a sealing primer.
Sidenote: Your primer sealer, or the primer prior to spraying paint, should be as close (on a greyscale) to the paint color as you can be (aka if you are spraying a bright yellow, it should be a white primer, if you are spraying a black, it should be a black primer)
Andyrew
if i get this right, at this stage i can symply use a primer sealer that will help taken away the inperfections.
I was using the glass filler to do so, most of them are out. I have very litle dots left here and there. I was about to use the same primer then go over the body again. a primer sealer will do the rest, if used, all i will heve to do is wet sand before painting. is that correct?
Andyrew
Jul 11 2011, 04:44 PM
If you can use the primer sealer and dont break through to the previous primer you used, then yes you can paint right over that. HOWEVER if you are wet sanding, the issue is that you could wet sand right through to the regular primer you used before, which is BAD because that primer absorbs water and will do bad things after some time when you have painted over it (unknowingly). This is why I dont wetsand, I only sand dry with primer unless I have already done all the bodywork and laid a sealer down in multiple coats. On my last paintjob I didnt wetsand my car at all, Only a colorsand and a buff on the paint.
Unless you buy a gallon of primer that doubles as a sealer and sand till you find low spots then spray more primer at full strength in that area to act as filler (and one coat in the general area that you'll be sanding to build the primer back up), then its probably best to continue using your regular high build primer and drysanding only.
914itis
Jul 11 2011, 04:52 PM
QUOTE(Andyrew @ Jul 11 2011, 06:44 PM)
If you can use the primer sealer and dont break through to the previous primer you used, then yes you can paint right over that. HOWEVER if you are wet sanding, the issue is that you could wet sand right through to the regular primer you used before, which is BAD because that primer absorbs water and will do bad things after some time when you have painted over it (unknowingly). This is why I dont wetsand, I only sand dry with primer unless I have already done all the bodywork and laid a sealer down in multiple coats. On my last paintjob I didnt wetsand my car at all, Only a colorsand and a buff on the paint.
Unless you buy a gallon of primer that doubles as a sealer and sand till you find low spots then spray more primer at full strength in that area to act as filler (and one coat in the general area that you'll be sanding to build the primer back up), then its probably best to continue using your regular high build primer and drysanding only.
Thanks. Very informative. I will keep using the same primer, drysand and paint without sealer as you suggested. . What grit do you recommend to do the final drysand?
Andyrew
Jul 11 2011, 06:06 PM
Just to clarify, I DO recommend sealing, but as the final layer just prior to shooting paint.
If you shoot the primer sealer wet on wet (check the primer to ensure that it can be sprayed wet on wet), which is shooting the primer sealer on the car with your primer gun then waiting the flash time (check the primer tech) then spraying your color right over the primer however your going to spray. I Suggest testing this on the engine lid first to ensure you dont have any chemical reaction between the primer and paint, unless you get it all from one paint store and the guy behind the counter says its ok. ALso be sure to reduce the primer sealer ~ 10-15%
If you do the above then you can sand down to say 220 grit (Thats what I did on my car). If not, 300-400 would be fine.
This is assuming a solid colors. Metalics or pearls or anything like that would be 600 grit.
914itis
Jul 11 2011, 09:23 PM
QUOTE(Andyrew @ Jul 11 2011, 08:06 PM)
Just to clarify, I DO recommend sealing, but as the final layer just prior to shooting paint.
If you shoot the primer sealer wet on wet (check the primer to ensure that it can be sprayed wet on wet), which is shooting the primer sealer on the car with your primer gun then waiting the flash time (check the primer tech) then spraying your color right over the primer however your going to spray. I Suggest testing this on the engine lid first to ensure you dont have any chemical reaction between the primer and paint, unless you get it all from one paint store and the guy behind the counter says its ok. ALso be sure to reduce the primer sealer ~ 10-15%
If you do the above then you can sand down to say 220 grit (Thats what I did on my car). If not, 300-400 would be fine.
This is assuming a solid colors. Metalics or pearls or anything like that would be 600 grit.
Call me dumb, but I want to make sure i do this right.
1st lets start with wet on wet,does that mean that you are sprayng the sealer over the primer without waiting for it to get dry?
from what I understand, this is what I will do step by step and correct me if i am wrong. keep in ,ind that I have no intention to apply the sealer the same day as primer. it will be at least a 24 Hr waiting period.
1- I will apply one more coat of the same primer over the whole car to cover the patching areas.
2- I will wait and make sure to check with the supplier that he sells me a sealer that is compatible with the primer to prevent chemical reactions.
3 I will spray the sealer after 24 hr at least
4 I will dry sand the sealer with the appropriate sand paper grit.
5- ready to paint with at least 2 coats of paint
6 - wet sand paint in 24 hours
7 aply clear coat after wet sand and I am done.
jonferns
Jul 11 2011, 09:33 PM
When I painted my orange car, I used a Dupont 2K urethane primer, and did my bodywork on that, then re-primed, sanded, etc until it was all smooth and perfect. When I was ready to paint, I sprayed my sealer (Dupont Velvaseal) then, as Andyrew said, waited the flash time and sprayed my color coat on top, wet on wet after the flash time, as per the directions of the products. From my understanding, based on the extensive reading ive done on this subject, the sealer coat is to be done within a few hours of your color coat.
914itis
Jul 11 2011, 09:40 PM
QUOTE(Jon Fernandes @ Jul 11 2011, 11:33 PM)
When I painted my orange car, I used a Dupont 2K urethane primer, and did my bodywork on that, then re-primed, sanded, etc until it was all smooth and perfect. When I was ready to paint, I sprayed my sealer (Dupont Velvaseal) then, as Andyrew said, waited the flash time and sprayed my color coat on top, wet on wet after the flash time, as per the directions of the products. From my understanding, based on the extensive reading ive done on this subject, the sealer coat is to be done within a few hours of your color coat.
thanks Jon, now my only question is whats wet on wet?
Andyrew
Jul 11 2011, 10:55 PM
Wet on wet is
Spray primer sealer, Wait 15 mins (or so), while waiting mix your color coat and have it in your color gun. They start spraying your color gun while the primer is still wet. AKA wet paint on top of wet paint.
Your timeframe is wrong. Here is my suggestion.
1. Spray your same primer, wait at least 24 hours (probably longer, I like to wait like 3 days for primer).
2. Sand down primer to at least 220.
3. Spray your primer sealer Wait flash time, aka 15 mins or so.
4. Spray your color waiting flash time between coats with different gun.
5. Wait flash time and spray clear coat with different gun. (Yes this is a long day filled with a lot of ~15 minute waiting times)
You need to read the labels clearly as all paints have different flash times.
914itis
Jul 11 2011, 11:33 PM
QUOTE(Andyrew @ Jul 12 2011, 12:55 AM)
Wet on wet is
Spray primer sealer, Wait 15 mins (or so), while waiting mix your color coat and have it in your color gun. They start spraying your color gun while the primer is still wet. AKA wet paint on top of wet paint.
Your timeframe is wrong. Here is my suggestion.
1. Spray your same primer, wait at least 24 hours (probably longer, I like to wait like 3 days for primer).
2. Sand down primer to at least 220.
3. Spray your primer sealer Wait flash time, aka 15 mins or so.
4. Spray your color waiting flash time between coats with different gun.
5. Wait flash time and spray clear coat with different gun. (Yes this is a long day filled with a lot of ~15 minute waiting times)
You need to read the labels clearly as all paints have different flash times.
Thank you sooo much....I owe you a couple beers.
Andyrew
Jul 11 2011, 11:36 PM
Sounds good
Make friends with your paint shop and run everything by them. Most have their own techniques that work well with their house paint or specific materials they know work well.
Good luck! I'll be watchin! Your moving pretty damn quick!
914itis
Jul 11 2011, 11:48 PM
QUOTE(Andyrew @ Jul 12 2011, 01:36 AM)
Sounds good
Make friends with your paint shop and run everything by them. Most have their own techniques that work well with their house paint or specific materials they know work well.
Good luck! I'll be watchin! Your moving pretty damn quick!
yeah, I will be moving slower after primed the whole car.
I am also watching your thread. I am still debating on he color, I a, not inlove with the original L20e
Andyrew
Jul 12 2011, 12:03 AM
If you go with signal orange you can go with a single stage paint AKA the clear is mixed in with the basecoat. Single stage is a lot more forgiving because you can just sand down the imperfections and buff them out if they are in the first couple of layers.
You can still get a really nice gloss out of a single stage, and you dont have to buy clearcoat so the overall cost is less.
Just another thing to confuse you with
Oh and heres my paint thread.. I sorted through paint issues through it so its a good read for newbies.
http://www.914world.com/bbs2/index.php?sho...4780&st=220
914itis
Jul 12 2011, 06:30 AM
QUOTE(Andyrew @ Jul 12 2011, 02:03 AM)
If you go with signal orange you can go with a single stage paint AKA the clear is mixed in with the basecoat. Single stage is a lot more forgiving because you can just sand down the imperfections and buff them out if they are in the first couple of layers.
You can still get a really nice gloss out of a single stage, and you dont have to buy clearcoat so the overall cost is less.
Just another thing to confuse you with
Oh and heres my paint thread.. I sorted through paint issues through it so its a good read for newbies.
http://www.914world.com/bbs2/index.php?sho...4780&st=220Not confused at all . And thanks for the education here . You are giving me paint 101 and 102 at the same time . Hope to graduate soon .
Now the question is, what are the advantages and disadvantages of the single stage? How many layers does it require? Is it More vulnerable to cracks ships, and dings? Also why do you suggest that on certain colors?
Andyrew
Jul 12 2011, 08:14 AM
On solid colors single stage is really easy and you wont notice much difference.
On basecoat/ clearcoat (bc/cc) you really NEED to use this on metalics or pearls or similar, because if you have dirt or orangepeal or maybe a small run, you can sand down the clear, but if you sand down metalics or pearls then it causes differences in the finish and it looks horrible.
Overall there is not much difference in the finish of clearcoat vs singlestage. The main advantage is cost. You dont have to buy a clear gun (harbor freight will work for spray guns, just get their HVLP guns with 1.3 tip if you can find it, 1.4 will spray a lot of material and you'll have to move very fast with clear) , and you dont have to buy the clear, So its an overall cost savings of well over $100 in materials.
914itis
Jul 12 2011, 08:23 AM
QUOTE(Andyrew @ Jul 12 2011, 10:14 AM)
On solid colors single stage is really easy and you wont notice much difference.
On basecoat/ clearcoat (bc/cc) you really NEED to use this on metalics or pearls or similar, because if you have dirt or orangepeal or maybe a small run, you can sand down the clear, but if you sand down metalics or pearls then it causes differences in the finish and it looks horrible.
Overall there is not much difference in the finish of clearcoat vs singlestage. The main advantage is cost. You dont have to buy a clear gun (harbor freight will work for spray guns, just get their HVLP guns with 1.3 tip if you can find it, 1.4 will spray a lot of material and you'll have to move very fast with clear) , and you dont have to buy the clear, So its an overall cost savings of well over $100 in materials.
Thanks . Is that a signal orange? Is there a special finish on it. It looks different then the ones I've seen .
Andyrew
Jul 12 2011, 08:58 AM
Its actually Hugger Orange, which is a chevy color I bought from here.
http://www.tcpglobal.com/RestorationShop/Hugger orange is almost an exact color match to Phoenix red, which is my factory color.
A couple of other things to note about bc/cc paint, It typically gives a deeper gloss, and it also sands better/earlier when your cutting and buffing it to get rid of orange peal or dirt in the finish, which is the main reason why most shops use it now for 90% of their work, because they can turn around the next day after baking in the booth or outside and cut and buff it, Where a single stage paint needs 2 weeks to harden to the point that you can cut and buff it.
I waited 2 weeks with my single stage paint and then I had a couple chips (Stupid me dropped a screw driver) So when I was spraying something else for the car I had some drips leftover in the mixing cup and I just dabbed a tooth pick and dropped a drop in the crack, Since its so thick im going to wait til the end of summer then sand down and buff those area's down and you'll never be able to notice the chips. This is is one of the pro's to single stage, as you cant do that with clear.
914itis
Jul 12 2011, 11:23 AM
QUOTE(Andyrew @ Jul 12 2011, 10:58 AM)
Its actually Hugger Orange, which is a chevy color I bought from here.
http://www.tcpglobal.com/RestorationShop/Hugger orange is almost an exact color match to Phoenix red, which is my factory color.
A couple of other things to note about bc/cc paint, It typically gives a deeper gloss, and it also sands better/earlier when your cutting and buffing it to get rid of orange peal or dirt in the finish, which is the main reason why most shops use it now for 90% of their work, because they can turn around the next day after baking in the booth or outside and cut and buff it, Where a single stage paint needs 2 weeks to harden to the point that you can cut and buff it.
I waited 2 weeks with my single stage paint and then I had a couple chips (Stupid me dropped a screw driver) So when I was spraying something else for the car I had some drips leftover in the mixing cup and I just dabbed a tooth pick and dropped a drop in the crack, Since its so thick im going to wait til the end of summer then sand down and buff those area's down and you'll never be able to notice the chips. This is is one of the pro's to single stage, as you cant do that with clear.
i love that color, I may go with that as it is the closest to my l20e. I am not sure how it would look with my boxter silver rims.
on the other note, do I still need 2 guns for a single stage? what should i set the psi on my compressor?
Andyrew
Jul 12 2011, 11:26 AM
You shouldnt use your primer gun. I did, but I found out later that that was a bad idea.
If you have a harbor freight by you, they typically sell a 1.4 tip purple HVLP gun for 20 and sometimes its on sale for 15. Good guns to use for a couple of jobs then toss.
914itis
Jul 12 2011, 12:13 PM
QUOTE(Andyrew @ Jul 12 2011, 01:26 PM)
You shouldnt use your primer gun. I did, but I found out later that that was a bad idea.
If you have a harbor freight by you, they typically sell a 1.4 tip purple HVLP gun for 20 and sometimes its on sale for 15. Good guns to use for a couple of jobs then toss.
what about psi?
Andyrew
Jul 12 2011, 12:36 PM
HVLP guns typically spray ~ 30-40. You should test your settings on a test pannel first. I like 35 with the paint I use. Check your paint to see what it says to spray it at the cap.
Read the attached.
http://www.purplesagetradingpost.com/sumne...LPspraygun.html
This is a "lo-fi" version of our main content. To view the full version with more information, formatting and images, please
click here.